
Do you know where the game clips and screenshots go when you use the Xbox Game Bar recording on Windows 10 or 11 PC? Do you want to move this game footage to another location? This article explains everything about Xbox Game Bar file location so you can quickly find out.
Where Does Xbox Game Bar Save Videos?
As a free and built-in Windows screen recorder, the Xbox Game Bar is frequently used to record gameplay and other apps. However, many users don’t know where Xbox game files are stored.
Actually, if you have not changed the file location, when you record gameplay on Xbox Series X, S, One, and others, all the Xbox recording videos and screenshots will be saved on C:\Users\username\Videos\Captures by default.
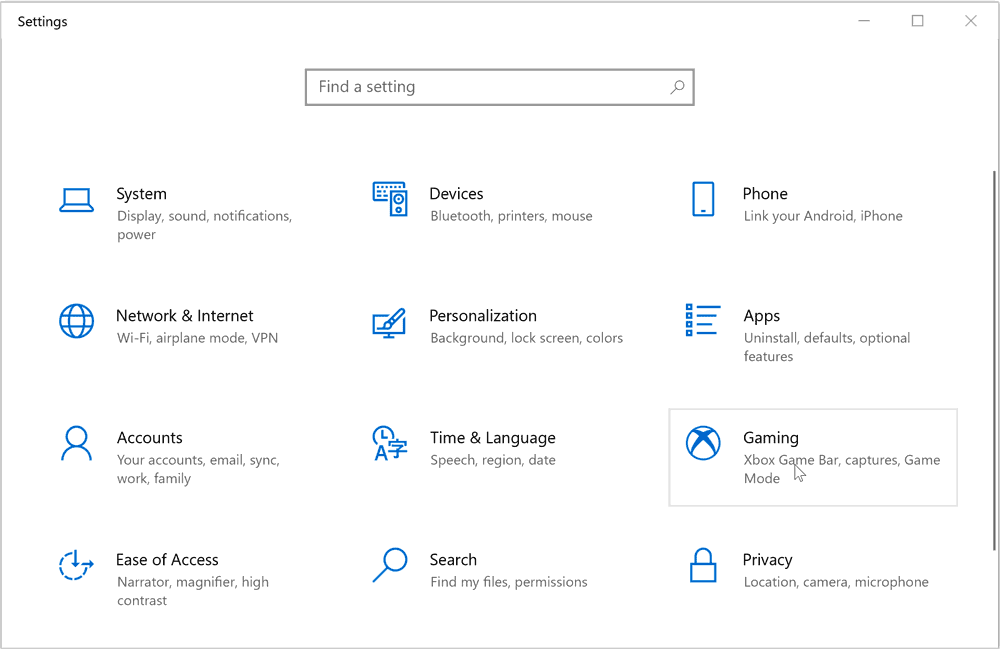
Go to Start > Settings > Gaming > Captures, and you will see the specific file location under Captures Location. You can click Open folder to see Xbox captures on pc.
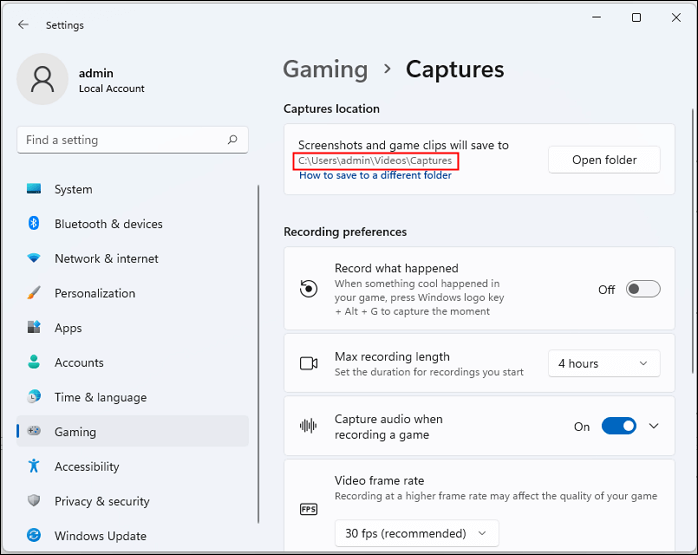
- Tips
- If you record Xbox gameplay using Xbox One, you will see Game DVR instead of Captures.
- Specific steps may vary between different devices and versions.
Share this article on your social media to help more users!
How to Change File Location on Xbox Game Bar
Since all Xbox gaming clips are stored on the C drive, the longer you use Xbox to record videos or take screenshots, the larger the file folder size is. If this goes on, the memory on the C drive is used less and less, and it will slow down your computer.
To tackle the storage problem, the best solution is to move these Windows clips to another drive. However, you may find that you cannot change the storage location directly from the Xbox gaming console.
So, how to change the Xbox Game Bar file location? Use File Explorer to relocate the Captures/DVR folder anywhere on your computer. To do so:
Step 1. Go to This PC > Videos > Captures.
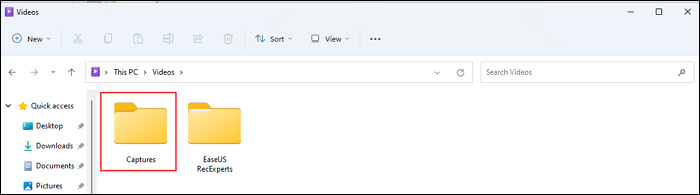
Step 2. Right-click on the Captures folder and click Properties.
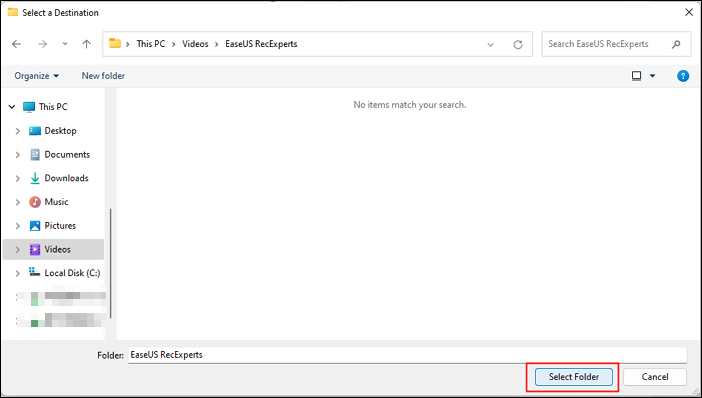
Step 3. Switch the tab to Location and click Move….
Step 4. Select a destination path and click Select Folder.
Step 5. You will come back to the Captures Properties window. In the window, click Apply.
Step 6. In the Move Folder popup, click Yes to confirm the change.
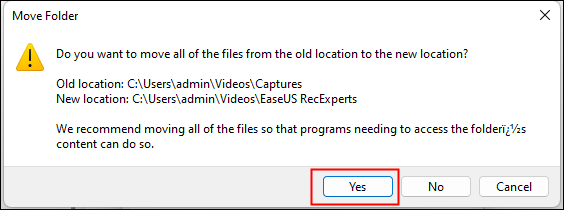
Game clips and screenshots will be saved automatically in the selected path, no matter where you place them.
Share this article on your social media to help more users!
The Best Screen Recording Alternative to Xbox Game Bar
However, after changing the Xbox Game Bar file location, some users report that all Xbox clips go to C:\Users\username\AppData\Local\Temp, and sometimes, the Xbox game bar not working.
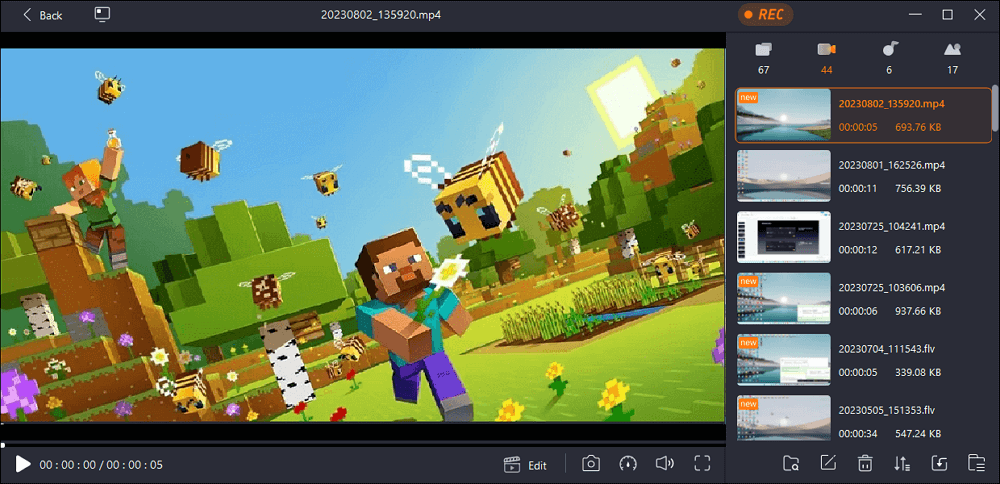
You can use a Microsoft game bar alternative, EaseUS RecExperts. It also lets you clip on Xbox Series X, S, One, and 360 easily. You can change the Xbox capture location in the app directly and save Xbox clips wherever you want.
This versatile screen recording software has a Game Mode, which enables you to record game chat on Xbox, capture gameplay for unlimited hours, and even record yourself playing video games.
Download, install, and launch EaseUS RecExperts. Let’s see how to record an Xbox screen with voice.
- ⭐Notice: In step 2, you can change the Xbox Game Bar file location from the File path.
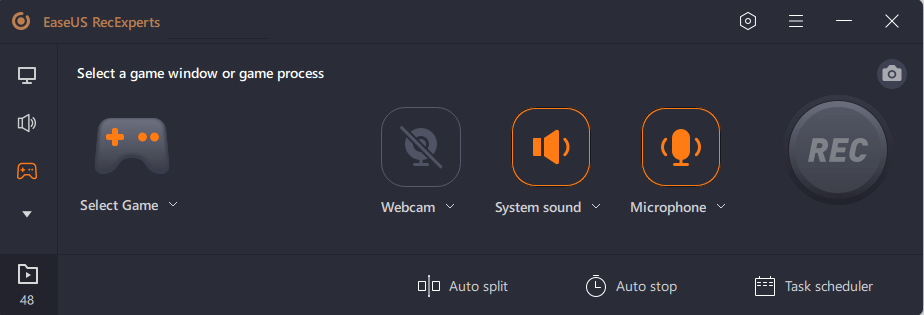
Step 1. Start the gameplay you want to record and launch EaseUS game recorder. Next, select the Game mode.
Step 2. Click the nut icon to open the Settings window, and then click on «Video» to adjust the frame rate (from 1 to 144), video quality, format, etc.
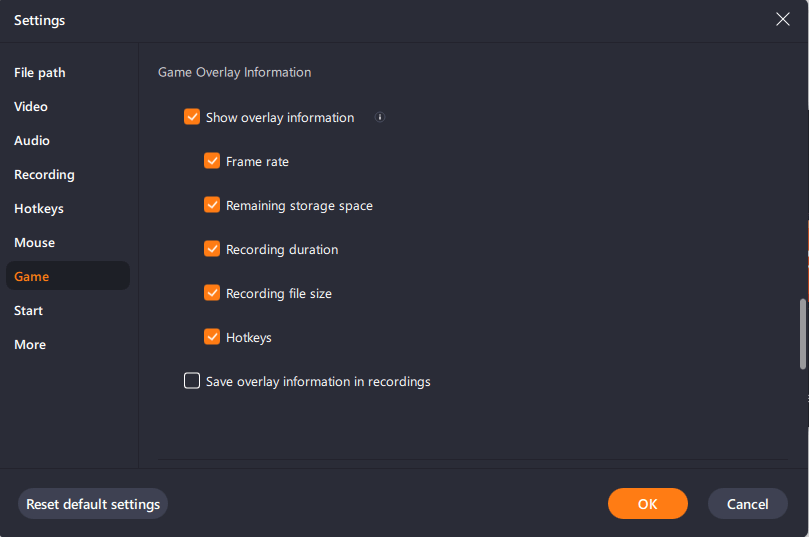
In addition, you can click on the «Game» button to change some game overlay options. Once done, click «OK».
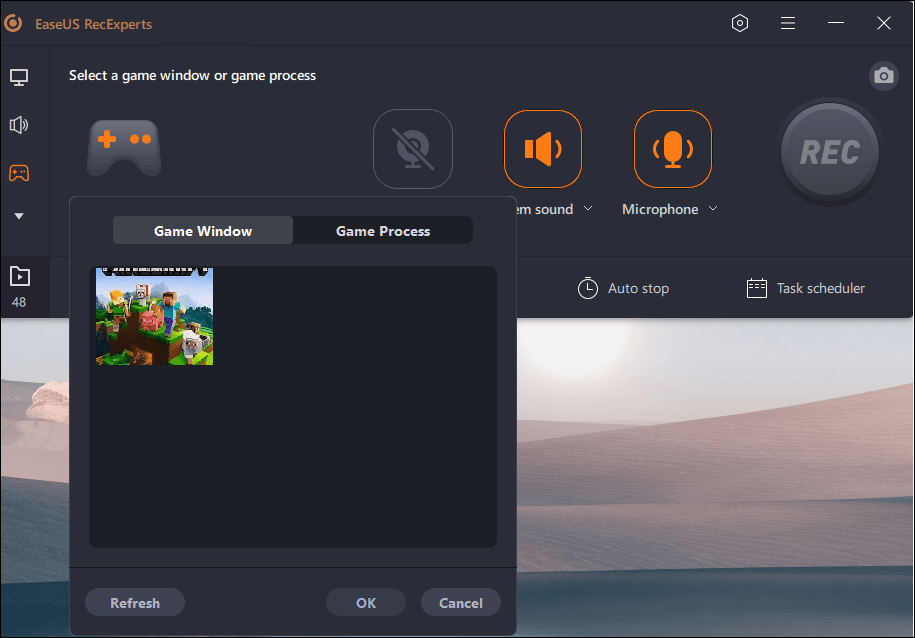
Step 3. Go back to the Game mode interface and click «Select Game» to choose the gameplay you want to capture. Next, click REC to start your game recording.
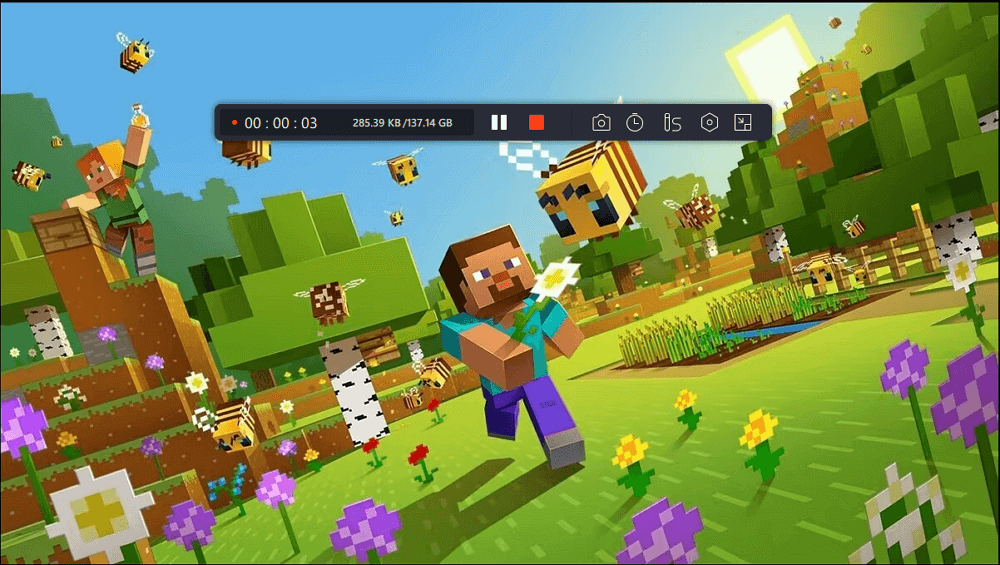
Step 4. You will see a small bar showing the time of your record. If needed, you can take screenshots in recording, or set the specific time to stop the recording by clicking the «Clock» icon on the toolbar.
Step 5. Once done, you can watch and edit the recorded footage with the built-in video editor. On the recorded video, you can trim the recordings as you want.
Conclusion
After reading this ultimate on Xbox Game Bar file location, I hope you get the answer you want.
Although Xbox Game Bar is a useful game recording tool for Windows 11 and 10, you may want an easier-to-use alternative. If you are willing to install a third-party game recording tool, please give EaseUS RecExperts a shot.
This robust screen recorder supports both high-end and low-end PCs. Download it to your computer, and you will have a smooth recording experience on Windows 11, 10, 8, or 7.
Xbox Game Bar Recording File Location FAQs
Learn more frequently asked questions on the Xbox Game Bar video file location in this part.
1. Where are the Xbox game bar settings?
Press the Windows button, then click Settings > Gaming > Captures. Here, you can customize your recording preferences, such as the Record what happened shortcut, max recording length, audio capture settings, video frame rate, video quality, and so on.
2. How to get rid of Xbox Game Bar in Windows 11?
To get rid of the Xbox Game Bar in Windows 11, you need to uninstall the game bar from Windows PowerShell. To do so,
Step 1. Click the Windows button, type powershell, and then choose Run as Administrator.
Step 2. Run the command «Get-AppxPackage Microsoft.XboxGamingOverlay | Remove-AppxPackage». Press Enter.
Step 3. Wait for the progress meter to finish, then check to see if the Xbox bar is disabled and shut the PowerShell window.
3. Should I delete the Xbox game Bar?
There are some dimensions to help you decide whether to delete the Xbox Game Bar.
- Consider how frequently you use the Game Bar and whether it enhances your gaming experience.
- Monitor how it affects your system’s performance while gaming.
- Consider whether you have other recording alternatives (like EaseUS RecExperts) that can perform the same functions as the Game Bar.
If you have decided to disable the Xbox Game Bar, you can turn it off from the Gaming settings. To do so:
Step 1. Press the Windows + I keys together to access Windows Settings.
Step 2. Navigate to Gaming > Game Mode. Toggle off Game Mode.
Step 3. Close Settings.
4. How do I stop the Xbox game bar from running in the background?
To stop the Xbox Game Bar from running in the background on your Windows PC, you can disable it by following these steps:
Step 1. Click on the Start menu (Windows icon) and select the Settings gear icon.
Step 2. In the Settings window, select Gaming.
Step 3. Click on the Xbox Game Bar from the left sidebar.
Step 4. Toggle off the «Record game clips, screenshots, and broadcast using Xbox Game Bar» option.
Share this article on your social media to help more users!
How to take screenshots and video on Xbox Series and Xbox One, and where to find your footage.
Xbox Series X / S has the easiest capture settings of any Xbox console yet, thanks to the latest controller revision offering a dedicated share button.
However, you don’t need that to take screenshots or video, as any supported Xbox controller can capture with a couple of extra steps, and from there, you have a number of options on how to share your capture.
This page explains how to capture on Xbox Series X / S (and Xbox One, on the latest dashboard update), where to find captures, and change capture settings.
On this page:
- How to capture screenshots and video on Xbox Series X / S and Xbox One
- Where to find captures on Xbox Series X / S and Xbox One
- How to change capture settings on Xbox Series X / S and Xbox One
- How to change what the capture button does on Xbox Series X or S
If you’re looking for more Xbox help, we have pages on how to appear offline on Xbox, adding and removing Xbox accounts and how to connect an Xbox controller.
How to capture screenshots and video on Xbox Series X / S and Xbox One
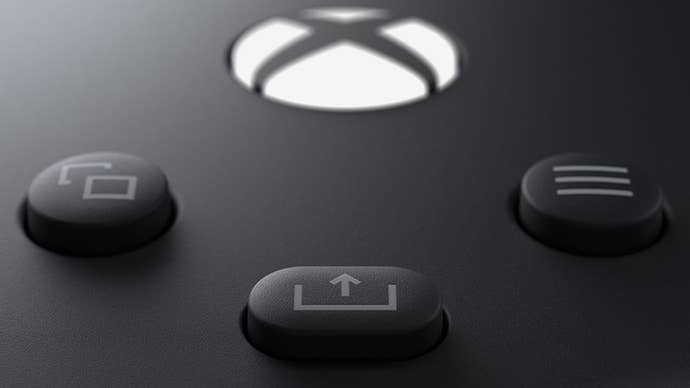
How to capture depends on the Xbox controller currently in use. On Xbox Series X / S devices, they will come with a dedicated capture button, housed in the middle of the front of the controller, with an ‘upload’ style icon.
By default, pressing this will capture a screenshot, and holding will capture a video.
If you don’t have a dedicated capture button on your Xbox controller, then press the Guide button during the game, then press the Y button to capture a screenshot, or the X button to record what happened.

In either of the above cases, you’ll receive a notification showing the capture has been successful (by default, anyway; you can switch off these notifications if you like.)
Remember you can customise how capturing works, from the buttons required to how long it captures for, and whether they are uploaded to Xbox Live right away. More on this towards the end of this page. Before that — let’s find out where those captures are located.
Where to find captures on Xbox Series X / S and Xbox One
To locate where captures on Xbox Series X / S are stored, press the Guide button (the glowing Xbox logo) on your controller. This will overlay a menu on the left side of the screen.
Now go to the second to last option on the right, which is Capture and Share.

This gives you a list of pretty much everything you need to capture on an Xbox, from recording what just or is about to happen, recording a screenshot, through to sharing.
If you want to view captures in particular, then the second to last option, Recent Captures, is the one to go for.

This then brings up a list of your recent captures. Selecting one will give you a range of further options to share and edit if you like.


However, if you want to see all your captures, then select the Show All option at the bottom of this menu.
This then allows you to see everything tied to your online account or on the Xbox with the drop down box on the upper left, as well as filter by other settings, such as by screenshot, video or by game.


How to change capture settings on Xbox Series X / S and Xbox One
Within Settings, go down to Preferences on the left side, then select Capture and Share.

Alternatively, press the Guide button (the glowing Xbox logo) on your controller. This will overlay a menu on the left side of the screen, then go to Capture and Share, then Capture settings at the bottom.
This then brings up a number of options — including which apps are allowed to capture automatically, what happens when they are uploaded, and so on.

These include:
- Allow game captures (Captures by me or games, Captures by me, Don’t capture)
- Record what happened (from 15 seconds to several minutes *)
- Automatically upload (Captures by me or games, Captures by me, Don’t upload)
- Game clip resolution *
- Capture location **
* This will differ according to the Xbox console you are using, and the games you are playing (options for Xbox Series optimised games will be different to backwards compatible ones, for example).
** If you don’t have any external devices, only internal will be listed.
How to change what the capture button does on Xbox Series X or S
The Xbox Series X or S will come with the latest model of Xbox controller, complete with a specific button for capture, right in the middle of the console.
By default, pressing will capture a screenshot, while holding will capture a video.

You can change this by going into Settings, then Preferences, Capture and Share, then Button Mapping.
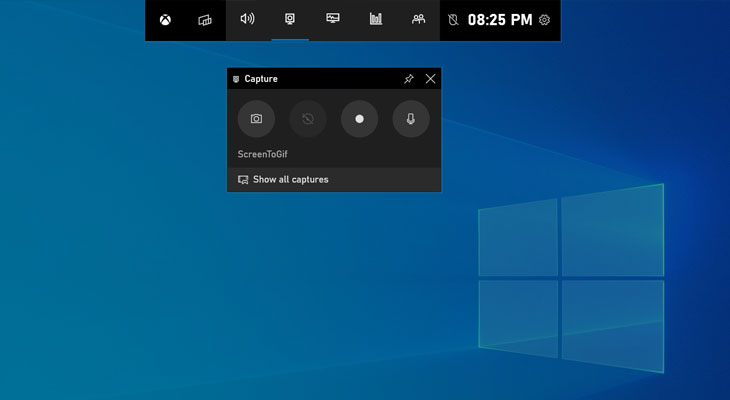
Xbox Gamebar is an inbuilt app in Windows 10 and 11 operating systems that allows you to capture screenshots and record videos while you’re playing any PC game. It can be accessed by pressing the Windows + G shortcut keys on your keyboard while you are playing a PC game in full screen mode.
You can either record your screen or take a screenshot by using the Capture Widget of the Gamebar. The recorded videos are saved in MP4 format in your default Videos folder which is usually present at the following location.
C:\Users\username\Videos\CapturesThe Captures folder can be moved to another location on your PC and Windows would continue saving your videos in that location. However some users may delete this folder by mistake or move it to a location which is not available, such as an external hard drive. In such a situation Windows would either stop saving your videos or would save it in a temporary location. This would also break the Gallery feature in Gamebar.
How to fix this and find your saved videos?
If you have a missing Captures folder and are looking for a video you just captured using the Gamebar Captures Widget, then it’s most probably saved in your Temp folder.
To find the exact location, you can do the following,
Step 1: Go to Start > Settings > Gaming.
Step 2: Select Captures in the left pane. The Captures settings page would show the exact location of the folder where your videos and screenshots are being saved by Gamebar.
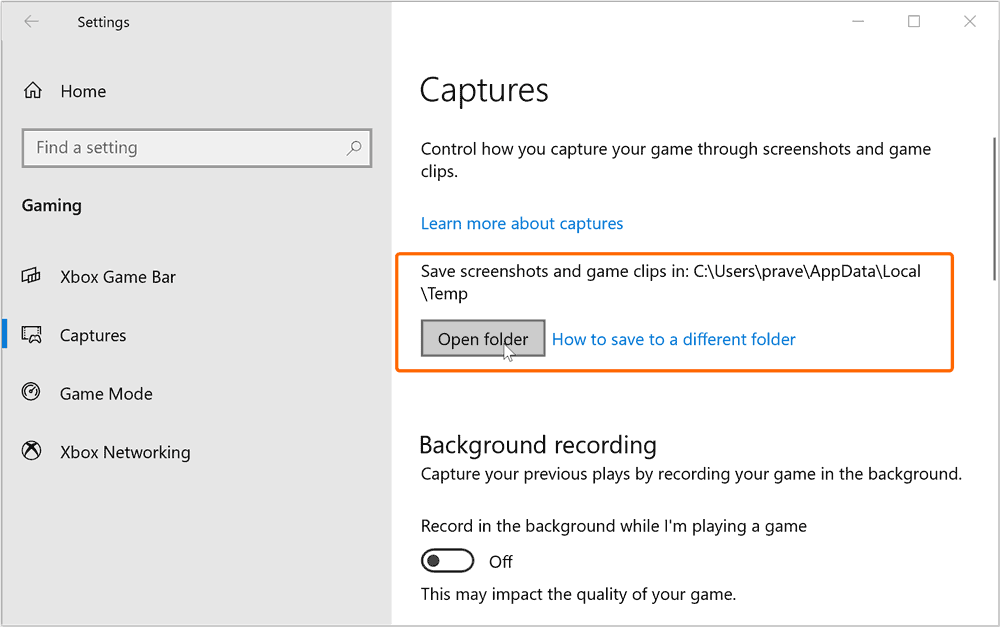
Most probably, it’s saving your video at the following location.
C:\Users\*username*\AppData\Local\TempYou can click on the Open Folder button to open that folder in File explorer to locate your videos.
Reset the Capture Folder Location
To reset the Gamebar Captures folder back to its original location, use the following steps.
Note: The steps given below involve registry editing. Make sure that you are the administrator and registry editing is enabled. Also making changes to the wrong registry keys can break your apps or settings.
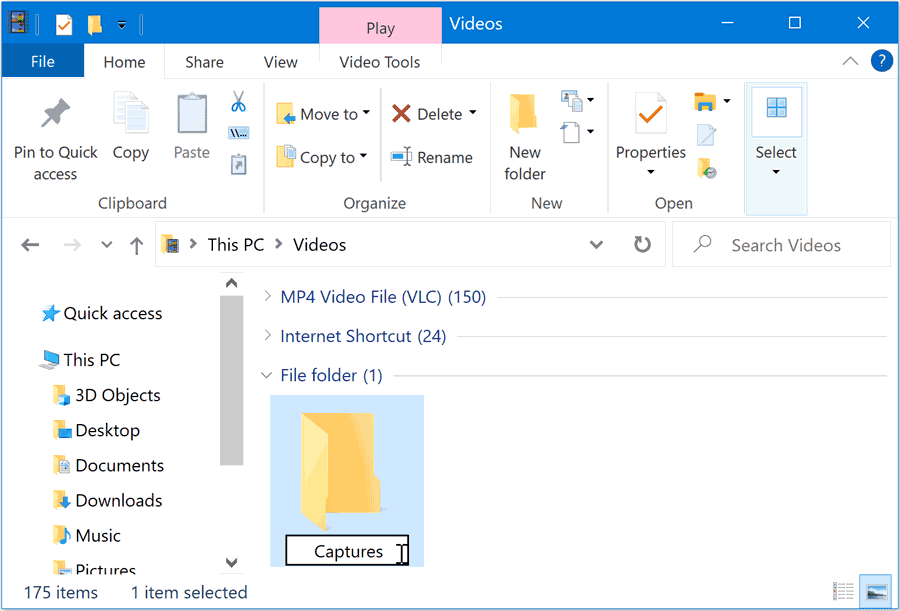
Step 1: Open File Explorer and navigate to your default Videos folder. Alternatively, you can also open it by typing the following command in the File Explorer’s address bar.
%USERPROFILE%\Videos\In the Video folder create a new folder and name it Captures
Step 2: Now, press Windows + S shortcut key to open windows search and type Registry editor. Double Click on the Registry Editor app to open it. Click on Yes if you get the User Accounts Control message.
Now, Copy-paste the following path in the Registry Editor’s address bar and press Enter.
HKEY_CURRENT_USER\SOFTWARE\Microsoft\Windows\CurrentVersion\Explorer\User Shell Folders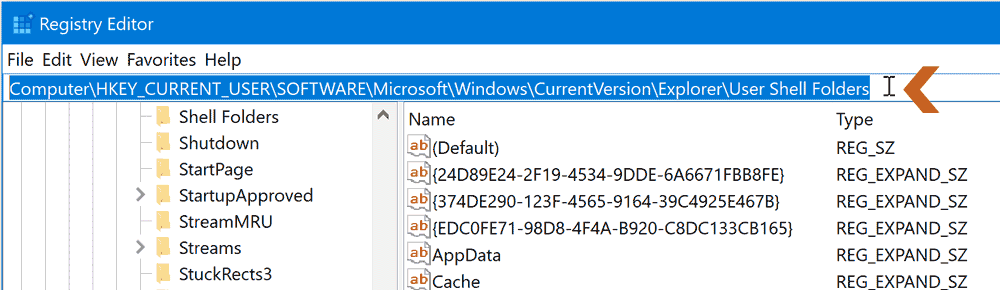
You should see the following Registry editor page, shown in the screenshot below. Here, look for the registry key showing the location of your Captures Folder, next to it. In our case its location is D:/Captures, set to an external drive which is disconnected from the PC thus forcing Windows to save the video captures to the temporary folder.
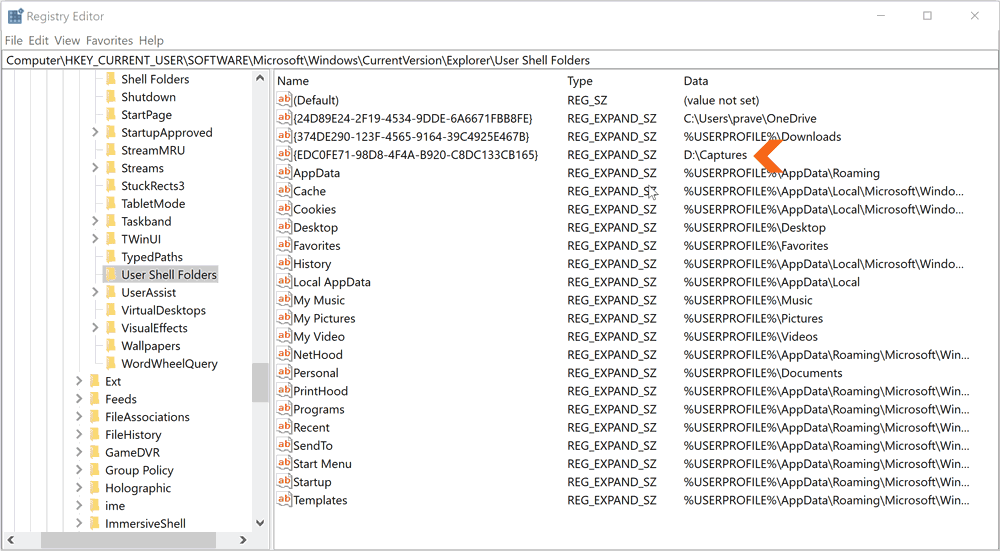
To reset it, double click on the name of the registry key associated with your current Captures folder.
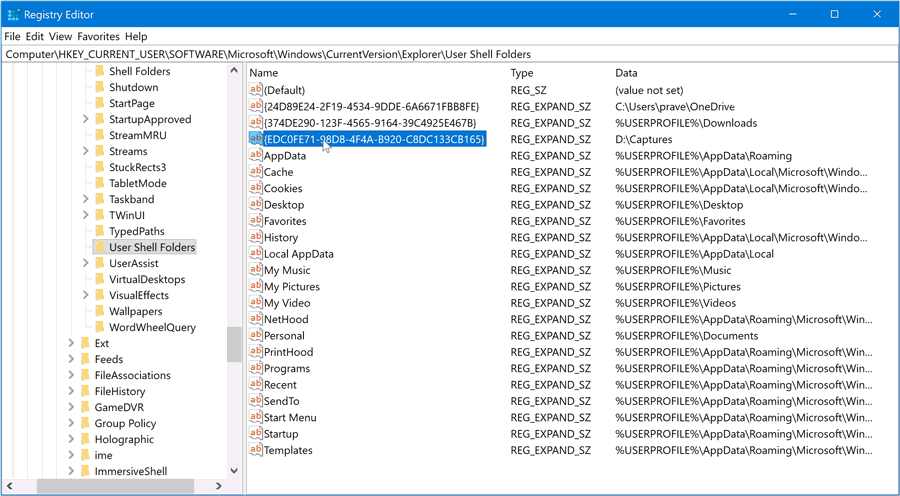
This will open the Edit String dialog box. Now enter the following address in the text box labeled “Value Data:”
%USERPROFILE%\Videos\Captures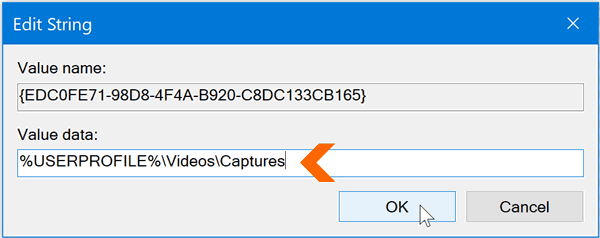
Click on OK and close Registry Editor.
Restart your computer and Open Gamebar by pressing Windows + G.
Record any video using the Captures Widget and make sure that the video is being saved to the C:\Users\username\Videos\Captures folder.
You can move this folder to another location if you want to save your videos and screenshots elsewhere. However, make sure that the location is always accessible when you are using Gamebar to record any video or screenshots else it would be saved in your Temp folder.
Written By
published
October 24, 2016
Did you know that with the Game Bar on your Windows 10 PC and tablet, you can capture screenshots and record game clips? You can even record with your microphone while capturing video, and share all of it through the Xbox app to your Xbox Live activity feed, messages, showcase and even Twitter.
Here’s how to record and capture screenshots with the Game Bar:
Simply tap the Xbox button if you’re using an Xbox controller – or press Windows Key + G on your keyboard – to bring up the Game Bar. You can easily find and share all your recordings and screenshots in the Xbox app under the GameDVR tab on the left navigation, or in the Video folder on your PC under “Captures.” What’s cool here is that any GameDVR clips you capture on your Xbox One will also appear on your PC for editing and sharing.

The Xbox app is also great for downloading your free Games with Gold every month, using Party for free voice chat with your friends on Xbox One and Windows 10, comparing Achievements, launching PC games and streaming your Xbox One games to your PC to play when you’re away from your television.
Stay tuned for the updates coming to the app in November: you’ll be able to browse Xbox Live Clubs you belong to and find gamers looking to accomplish similar goals with Looking for Group.
If you don’t already have the Xbox app, you can download it here, and check out last week’s Windows 10 Tip: Four ways to get the most out of Microsoft Edge. Have a great week!
Куда сохраняются скриншоты на компьютере
Вопрос о том, куда сохраняются скриншоты, сделанные различными способами средствами Windows 11 и Windows 10 или в сторонних программах может показаться элементарным для большинства пользователей, но задают его очень часто.
В этой простой инструкции для начинающих подробно о том, где найти скриншоты на компьютере, сделанные различными способами.
Место сохранения скриншотов при нажатии клавиши Print Screen
В Windows доступны многие сочетания клавиш и дополнительные способы сделать скриншот. Самый часто используемый — простое нажатие клавиши Print Screen (PrtScn) на клавиатуре.
Если вы нажимаете клавишу Print Screen для создания снимка всего экрана, либо сочетание клавиш Alt + Print Screen для создания скриншота активного окна в Windows, место сохранения скриншотов может отличаться:
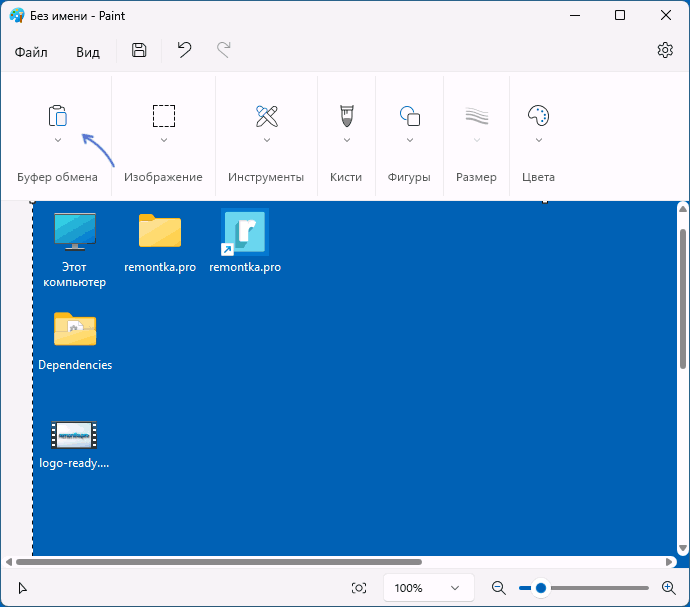
- Стандартным «расположением» скриншотов для этого метода является буфер обмена: то есть изображение хранится в оперативной памяти компьютера, и вы можете использовать опцию «Вставить» в любом графическом редакторе (в том числе Paint), некоторых редакторах документов и некоторых мессенджерах, чтобы вставить скриншот в текущий документ или сообщение.

- Последние версии Windows 11 и 10 при нажатии клавиши Print Screen по умолчанию открывают встроенное приложение «Ножницы» и для них будет актуальным место сохранения из следующего раздела инструкции. При желании вы можете сделать так, чтобы Ножницы при нажатии Print Screen не открывались, а скриншот сохранялся в буфере обмена.
Более подробно о том, какими способами можно сделать скриншоты с помощью клавиши Print Screen и её сочетаний вы можете в отдельных инструкциях:
- Как сделать скриншот в Windows 11
- Как сделать скриншот в Windows 10
Клавиши Win+Shift+S или приложение Ножницы
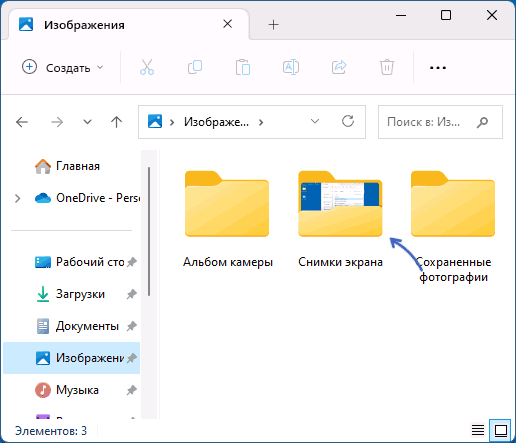
При использовании сочетания клавиш Win+Shift+S (в этом случае будет использовано приложение «Ножницы») для создания снимка экрана или приложения «Ножницы», запущенного вручную, скриншот автоматически сохраняется в папку текущего пользователя
C:\Пользователи\Имя_пользователя\Изображения\Снимки экрана
которую вы можете найти в Проводнике, просто зайдя в папку «Изображения»:
Одновременно, скриншот сохраняется и в буфере обмена, откуда его можно вставить в нужном приложении.
Несмотря на то, что в Проводнике в русскоязычной версии Windows папка отображается по-русски, реальный путь к папке (например, для доступа из командной строки) выглядит следующим образом:
C:\Users\Имя_пользователя\Pictures\Screenshots
Учитывайте: если вы меняли пути к пользовательским папкам (сделать это можно в их свойствах на вкладке «Расположение»), путь будет другим. Подробнее на эту тему: Как изменить папку скриншотов в Windows.
Сочетание клавиш Windows + Print Screen
Сочетание клавиш Windows + Print Screen автоматически сохраняет скриншот в виде файла в папке текущего пользователя
C:\Пользователи\Имя_пользователя\Изображения\Снимки экрана
Место сохранения снимка экрана аналогично предыдущему случаю, но приложение «Ножницы» не используется.
Xbox Game Bar
Если вы используете Xbox Game Bar для создания скриншотов в играх и других расположениях (сочетание клавиш по умолчанию — Windows + Alt + Print Screen), файл скриншота будет сохранен в пользовательскую папку
C:\Пользователи\Имя_пользователя\Видео\Запись
или, реальный путь —
C:\Users\Имя_пользователя\Videos\Captures
То есть Xbox Game Bar сохраняет и записи экрана (видео), и скриншоты (изображения) в одном расположении. Подробнее про функции записи в этом приложении в статье: Запись видео с экрана встроенными средствами Windows.
Сторонние программы
В зависимости от конкретной сторонней программы, используемой для создания скриншотов, расположение сохраняемых файлов может отличаться. Следующая информация может пригодиться, чтобы их найти:
- Помимо сохранения файла, большинство программ помещают скриншот в буфер обмена, откуда его можно вставить в нужном приложении.
- Современные программы создания скриншотов обычно выполняют сохранение либо в собственную папку в пользовательской папке «Документы», либо в папку «Изображения» (иногда — в какой-либо вложенной папке).
- Почти в любой программе для создания скриншотов место их сохранения можно настроить и в тех же настройках посмотреть текущее расположение папки скриншотов.
Сохранение скриншотов в Яндекс.Браузере
Так как значительная часть вопросов на тему «куда сохраняются скриншоты» имеет отношение к браузеру от Яндекс, вынесу информацию про присутствующий в нём инструмент для создания скриншотов отдельным разделом.

Когда вы, после создания снимка страницы или экрана средствами Яндекс.Браузере, нажимаете кнопку «Сохранить», скриншот сохраняется в виде файла PNG в вашу пользовательскую папку «Загрузки»:
C:\Пользователи\Имя_пользователя\Загрузки
или, что то же самое
C:\Users\Имя_пользователя\Downloads

Одновременно, снимок экрана помещается в буфер обмена.
Если вы так и не нашли, куда сохранились сделанные вами скриншоты, можно использовать поиск на компьютере по типу файла (быстрее всего — в поиске Everything) или поиск по дате создания файла, чтобы найти все файлы, которые были созданы в то время, когда вы делали скриншот и определить их расположение.