
Applies ToWindows 10 Windows 11
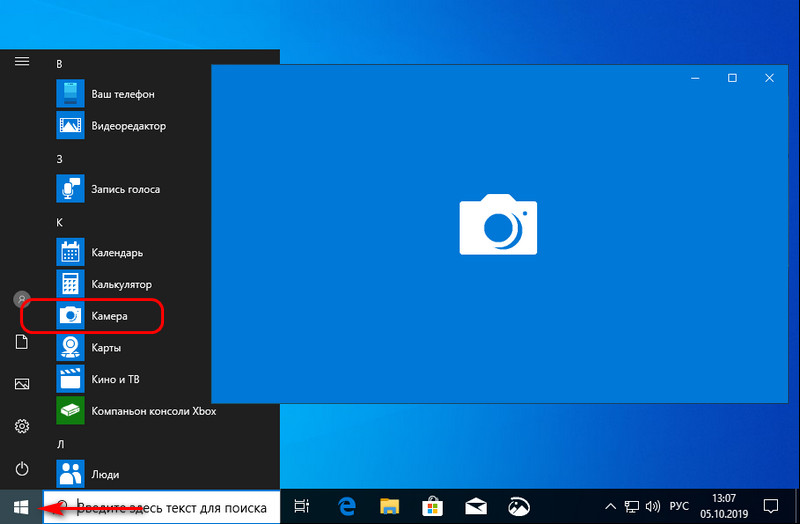
Фотографии и видео, снятые с помощью встроенной камеры или веб-камеры, по умолчанию сохраняются в папке «Альбом камеры». Если при попытке сделать снимок или видео с помощью приложения «Камера» в Windows появляется сообщение об ошибке о том, что ваш альбом камеры отсутствует (0xA00F4275), попробуйте следующие решения в указанном порядке.
Примечание: При превышении объема хранилища Майкрософт вы не сможете отправлять, редактировать или синхронизировать новые файлы (например, альбом камеры) в OneDrive. Дополнительные сведения.
Измените место, куда сохраняются новые фото и видео
-
Выберите Пуск > Параметры > Параметры системы > хранилища Открыть хранилище
-
Для Windows 11 выберите Дополнительные параметры хранилища, а затем — Где сохраняется новое содержимое.
-
Для Windows 10 выберите Изменить место сохранения нового содержимого.
-
-
Посмотрите, что указано в разделе Новые фотографии и видео будут сохраняться здесь. Обычно это имя с буквой диска, например Этот компьютер (C:), или надпись Это устройство на мобильных устройствах. Если фотографии и видео сохраняются на внешнее устройство, убедитесь, что устройство подключено.
-
В разделе Новые фотографии и видео будут сохраняться здесь выберите текущее место для сохранения. Затем, если в раскрывающемся меню доступны другие варианты, выберите другое место, нажмите кнопку Применить, выберите исходное место или раздел Этот компьютер (C:) и нажмите кнопку Применить снова.
-
Попробуйте сделать снимок. Если появляется то же сообщение об ошибке, попробуйте следующее решение.
Создайте папку «Альбом камеры»
-
В меню Пуск выберите Проводник.
-
В проводнике выберите Этот компьютер, а затем диск операционной системы, который обычно называется OSDisk (C:).
-
Для Windows 11 выберите Создать > папку, а затем введите Camera Roll в качестве имени новой папки.
-
Для Windows 10 в разделе Главная выберите Создать папку и введите Альбом камеры в качестве имени новой папки.
-
-
Нажмите и удерживайте (или щелкните правой кнопкой мыши) только что созданную папку Альбом камеры, а затем выберите Добавить в библиотеку > Пленка. (В Windows 11 сначала необходимо выбрать Показать дополнительные параметры.)
-
Попробуйте сделать снимок. Если появляется то же сообщение об ошибке, попробуйте следующее решение.
Проверьте разрешения для файлов в папке «Альбом камеры»
-
В проводнике выберите Изображения, а затем нажмите и удерживайте (или щелкните правой кнопкой мыши) папку Альбом камеры и выберите элемент Свойства.
-
На вкладке Безопасность в разделе Группы или пользователи выберите имя пользователя, под которым вы вошли в систему. Убедитесь, что в поле разрешений рядом с пунктом Запись установлен флажок Разрешить.
-
Попробуйте сделать снимок. Если появляется то же сообщение об ошибке, поищите ответы на форумах Microsoft Community.
Дополнительные сведения
Следующие статьи могут содержать необходимую информацию.
-
Справка по приложению «Камера» и веб-камерам
-
Камера не работает
-
Импорт фотографий и видео с телефона на компьютер
Нужна дополнительная помощь?
Нужны дополнительные параметры?
Изучите преимущества подписки, просмотрите учебные курсы, узнайте, как защитить свое устройство и т. д.
,
Sometimes it is useful to change the default storage location of camera photos and videos in Windows 10, especially if the C drive does not have enough free space.
In Windows 10/11, photos and videos taken with the Camera app are saved by default in the Camera Roll folder under the Pictures folder. More specifically, all images and videos captured by the Camera app are stored at the following location on your PC: «C:\Users\<username>\Pictures\Camera Roll».
However, if you have run out of disk space on your drive C: and you own a second disk with enough free space, then you can easily change the default storage location of Photos and Videos by following the instructions below.
This guide contains three (3) different ways to set a different storage location for the Camera’s Videos and Photos.
How to Change the Store Location of Camera’s Photos and Videos in Windows 11/10.
Method 1. Change Default Location for Photos and Videos in Windows 10 Storage Settings.
To specify a different location to save the Camera’s videos and photos in Settings:
1. Go to Start > Settings > System.
2. Select Storage on the left and on the right click Change where new content is saved. *
* Note: In Windows 11, click Storage > Advanced Storage settings > Where new content is saved.

3. Expand the New photos and videos will save to and select the preferred drive for the Photos and Videos. Click on Apply to save the settings.

Method 2. Change Default Camera Roll Store Folder in Picture Properties.
Another way to modify the default store location for your Photos and Videos taken with your camera, is by changing the Properties of the Camera Roll folder. To do that:
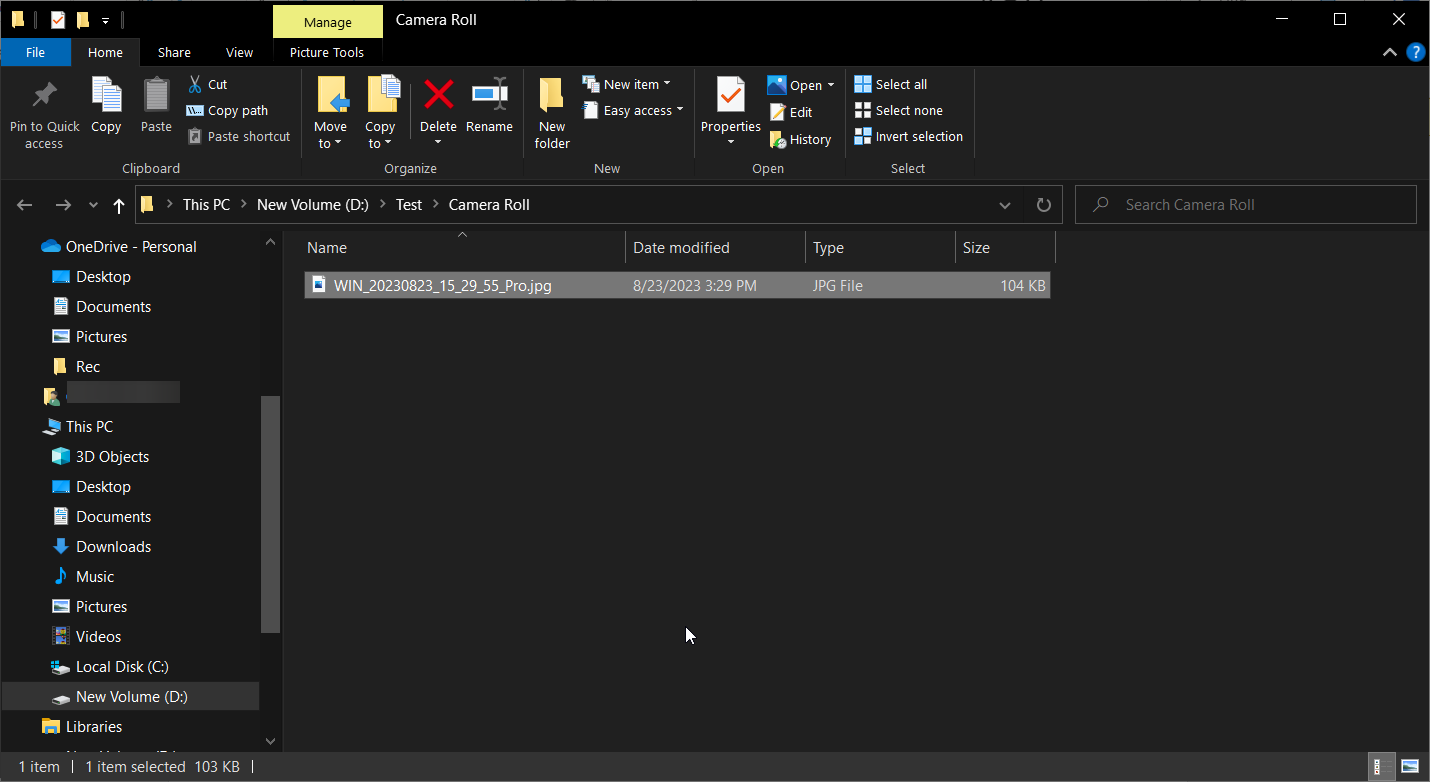
1. Open the Pictures folder, and then right-click at Camera Roll folder and select Properties.

2. At Location tab, click the Move button.

3. Now, choose the new folder to store your photos and videos from your Camera and click Select Folder.*
* Note: For this example, I have created a new folder named «Camera Roll» in disk E:

4. Click on Apply, then OK to save the change.

5. Finally click Yes on ‘Move Folder’ prompt to confirm the change and to move all the photos an videos from the old location to the new one.

Method 3. Move Camera Roll folder to another location (disk) via Registry.
Another method to change the save location for camera’s photos and videos, is via Registry:
1. Open Registry Editor. To do that:
1. Simultaneously press the Win + R keys to open the run command box.
2. Type regedit and press Enter to open Registry Editor.
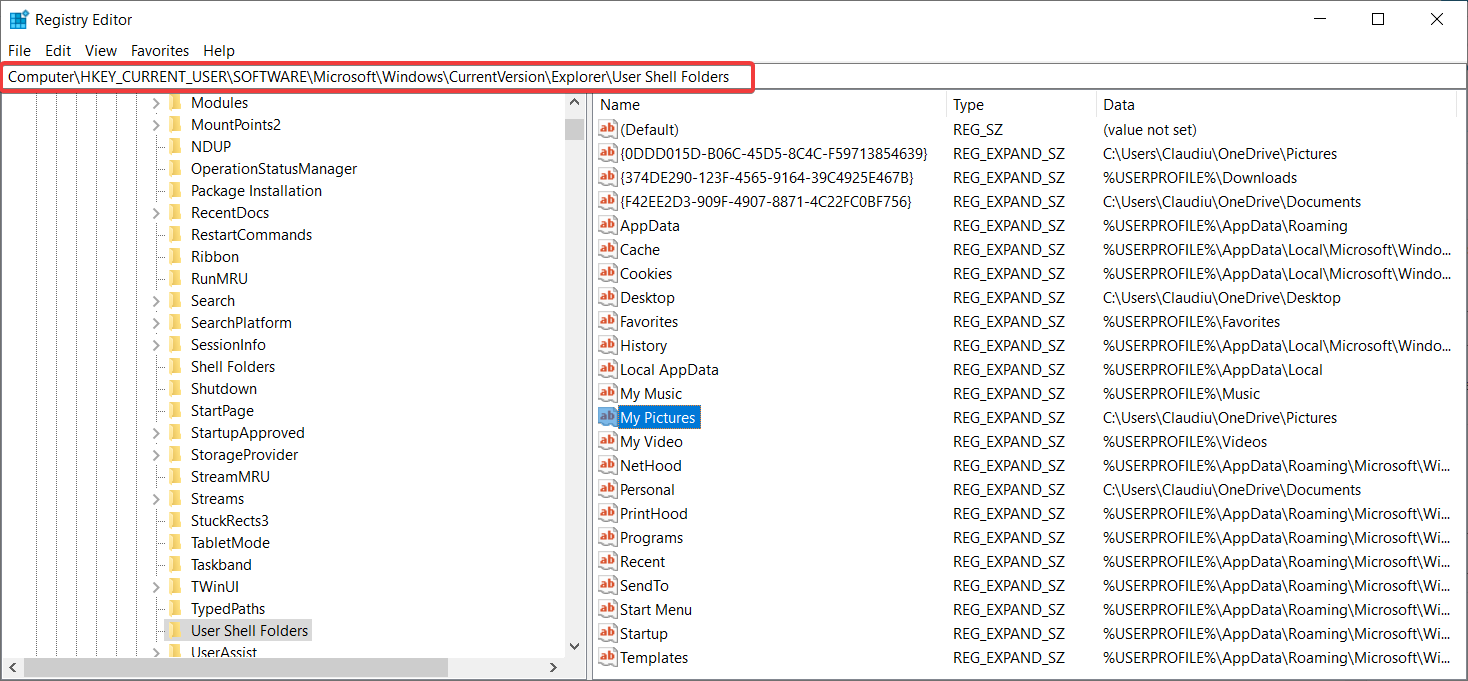
2. Navigate to this key at left pane:
HKEY_CURRENT_USER\SOFTWARE\Microsoft\Windows\CurrentVersion\Explorer\User Shell Folders
3. On the right pane double-click to open the My Pictures registry value.

4. At value data, type the new path (location), to save your photos and the captured images and videos from your Camera and choose OK.

5. Close the Registry Editor.
6. Navigate to the new location (e.g. in «D:\Pictures»), and create a new folder with name Camera Roll.

7. Finally, restart your computer and you’re done! From now on all the new photos and videos from your camera will be stored inside the ‘Camera Roll’ folder at the new location (e.g.:»E:\Pictures\Camera Roll»)
That’s it! Which method worked for you?
Let me know if this guide has helped you by leaving your comment about your experience. Please like and share this guide to help others.
If this article was useful for you, please consider supporting us by making a donation. Even $1 can a make a huge difference for us in our effort to continue to help others while keeping this site free:
- Author
- Recent Posts
Konstantinos is the founder and administrator of Wintips.org. Since 1995 he works and provides IT support as a computer and network expert to individuals and large companies. He is specialized in solving problems related to Windows or other Microsoft products (Windows Server, Office, Microsoft 365, etc.).
Readers help support Windows Report. We may get a commission if you buy through our links.
Read our disclosure page to find out how can you help Windows Report sustain the editorial team. Read more
If you have ever used the Camera app on your PC, you probably wondered how to change the Windows Camera save location.
We have a great guide on Windows 10 Camera save location that will answer some of your questions.
If you aren’t pleased with the current save location, be sure to keep reading to learn how to change it.
What is the Camera Roll folder in Windows 10?
Camera Roll directory is the default directory for all images created by the Camera app. The location of this folder is the following: C:\Users\your_username\Pictures\Camera Roll
Now that you know the default location, let’s see how we can change it.
How can I change the Windows Camera save location?
1. Change the storage drive of Camera Roll
- Click the Start button and select Settings.
- Choose System and then go to Storage.
- Click on the Change where new content is saved hyperlink.

- Expand the New photos and videos will save to section and choose the preferred drive.


In our case, since we have two HDD partitions (system and data partitions), we can choose between one of them. If you make changes, the system will recreate the whole directory path in the alternative partition.
So, the original location will be mirrored to an alternative partition or external drive. Creating redundant folder tree in the process.
However, this only specifies the drive where you save the images, not the actual folder. It will still be the Camera Roll folder but on another drive.
2. Change the folder location of the camera photos from the Registry
- Press the Windows + R keys to start Run console.
- Type regedit and press Enter or click OK.
- Now, navigate to the following location in Regedit:
HKEY_CURRENT_USER\SOFTWARE\Microsoft\Windows\CurrentVersion\Explorer\User Shell Folders
- Double-click My Pictures and change the path of the folder you want to store the images to the one you want to use. We have changed it to D:\Test.
- Now, when you take a picture with Windows Camera, it will be automatically stored in the new folder D:Test\Camera Roll. Yes, the Camera Roll folder is created automatically.


- Fix: An Error Occurred While Loading a Higher Quality Version of This Video
- iTunesMobileDevice.dll is Missing From Your Computer [Solved]
- SYNSOACC.DLL Could Not Be Located: How to Fix in Cubase
- Fix: Omen Gaming Hub Undervolting Not Working
In case you’re having problems, we also have a great guide on what to do if Camera app is not working, so we encourage you to visit it.
Finally, if you have any issues with the procedure, give us a shout in the comments. We’ll be glad to provide additional information.
Aleksandar Ognjanovic
Aleksandar’s main passion is technology. With a solid writing background, he is determined to bring the bleeding edge to the common user. With a keen eye, he always spots the next big thing surrounding Microsoft and the Windows OS.
Focused on Windows errors and how to solve them, he also writes about the OS’s latest features as well as its interface.
In his free time, he likes to read, listen to music, and enjoy the nature. Hiking is one of his newly found passions.
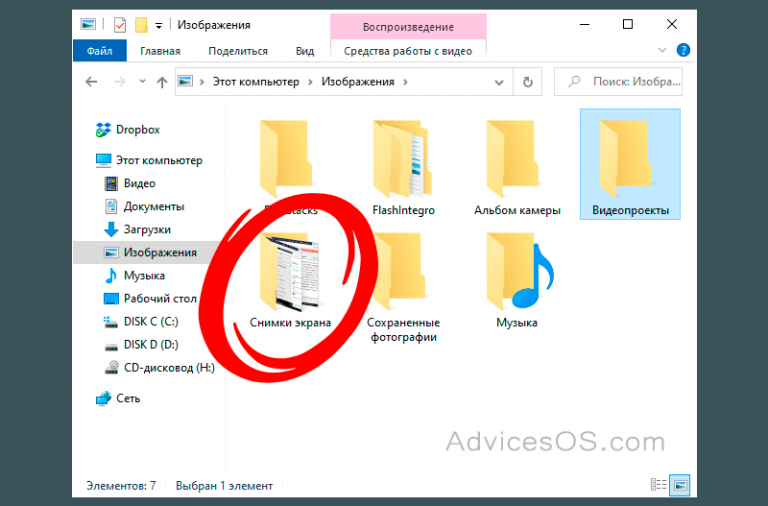
Libraries in Windows are a long standing feature, and they’re pretty useful. The libraries have mostly been left untouched as Windows went from one version to the next. In Windows 10, the Pictures library has three new folders; Camera roll, Saved Pictures, and Screenshots. The Screenshots folder is self-explanatory and ties right in with the screenshot feature added in Windows 10. The screenshots you capture via the Win+Prnt Screen short are saved to this Screenshots folder. The ‘Camera Roll’ folder is something you can expect to find if you’ve connected a digital camera, or an smartphone to your PC but that’s not where it comes from. The ‘Saved Photos’ folder and what it’s for is anyone’s guess. These two folders are created by the Camera and Photos apps respectively. Here’s what they’re for and how you can move them to a different location.
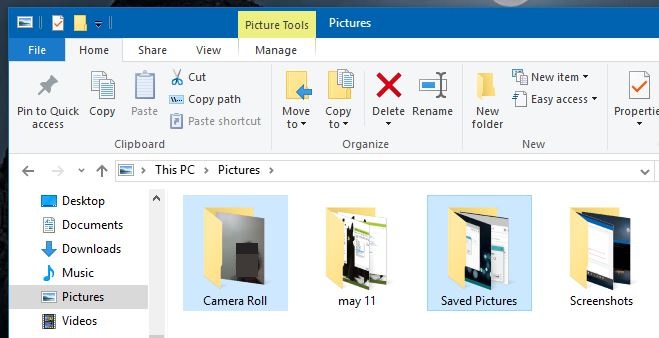
The Camera Roll folder is created by the Camera app. Windows previously didn’t have a dedicated Camera app but as of Windows 10 that’s changed. All photos you capture via the Camera app are saved to this folder. You can’t delete it because the app will add it right back. What you can do is you can move it to a different location.
The Saved Pictures folder is created by the Photos app though it doesn’t save photos to it when you edit them. By default, it saves edited photos to the same directory the original photo is in.
You can’t delete these folders unless you also delete the Camera and Photos app. Deleting the folders otherwise will simply bring them back. What you can do is move the folders to a different location. To do so, simply cut and paste them elsewhere. The Camera and Photos apps will not create them again in the Pictures library. The apps will automatically detect the new location for these folders and save photos to it whenever they need to.

Fatima Wahab
Fatima has been writing for AddictiveTips for six years. She began as a junior writer and has been working as the Editor in Chief since 2014.
Fatima gets an adrenaline rush from figuring out how technology works, and how to manipulate it. A well-designed app, something that solves a common everyday problem and looks
Узнайте, как найти и управлять видеозаписями с камеры в операционной системе Windows 10 с помощью наших практичных советов.

Используйте встроенный поиск в Windows для быстрого поиска видеофайлов.
Запись экрана Windows 10 бесплатно ► БЕЗ ПРОГРАММ!
Проверьте папку Видео в вашем пользовательском каталоге для возможного местонахождения записей с камеры.
Вся ПРАВДА о том, Куда сохраняются скриншоты на виндовс 10
Проверьте папку Камера в вашем пользовательском каталоге, где могут быть сохранены видеозаписи по умолчанию.
15 горячих клавиш, о которых вы не догадываетесь
Используйте специальные программы для организации и поиска мультимедийных файлов, такие как Windows Media Player или VLC.
Как записать видео с web камеры в Windows 10

Проверьте облако или другие устройства хранения, если вы настроили автоматическую загрузку в облачное хранилище.
Как проверить веб камеру на Windows 10. Как включить.
Периодически резервируйте важные видеозаписи на внешние устройства хранения, чтобы избежать потери данных.
Как найти фото на компьютере Windows если не помнишь, [куда сохранил]?
Ознакомьтесь с настройками камеры и файлового хранения на вашем устройстве, чтобы узнать, куда обычно сохраняются видео.
Как записать видео с web камеры в Windows 10
Убедитесь, что ваша операционная система и все программы обновлены, чтобы избежать проблем с записью или воспроизведением видео.
WhatsApp куда сохраняются видео на ПК версии
Используйте функцию Поиск в файловом менеджере для быстрого поиска видеофайлов по ключевым словам или расширениям.
Zoom. Куда сохраняются записи видео в Zoom
Не забывайте регулярно освобождать место на диске, удаляя старые и ненужные видеозаписи, чтобы предотвратить переполнение диска.
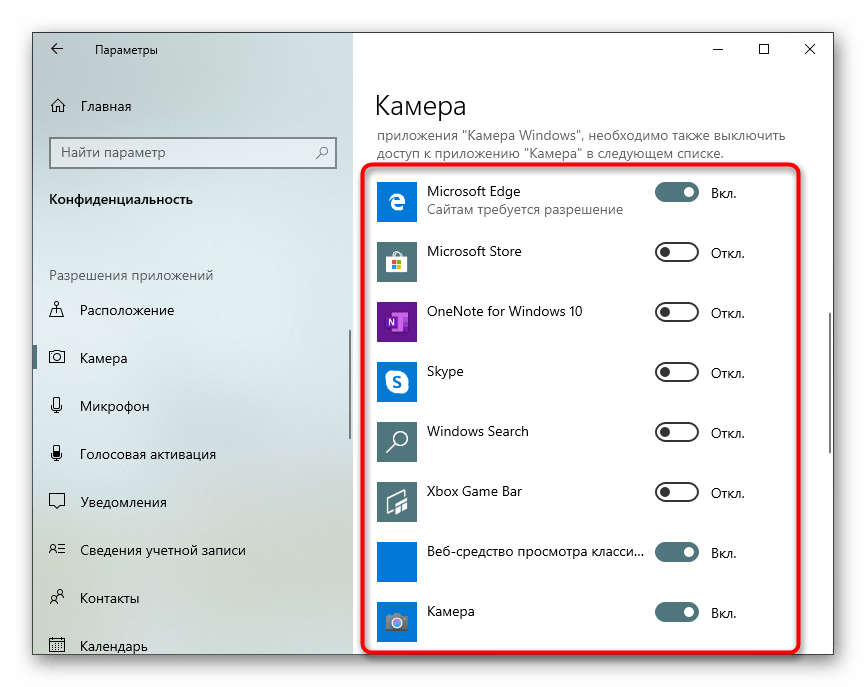
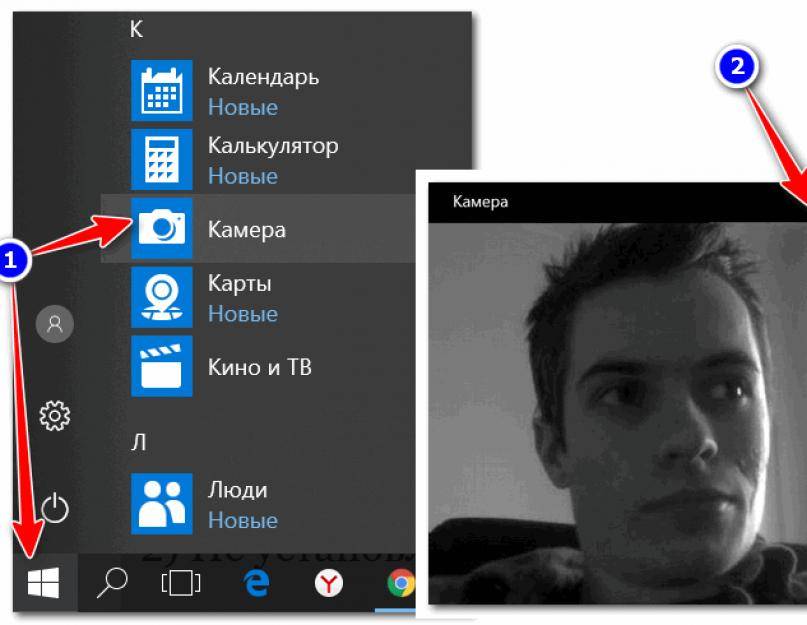
Как настроить приложение камера в Windows 10 ?
