
Все способы:
- Способ 1: Использование других методов открытия
- Способ 2: Исправление или сброс приложения
- Способ 3: Установка недостающих пакетов через «PowerShell»
- Способ 4: Восстановление и переустановка через «PowerShell»
- Способ 5: Проверка системных обновлений
- Способ 6: Проверка целостности системных файлов
- Способ 7: Возвращение Windows 11 к исходному состоянию
- Вопросы и ответы: 1
Способ 1: Использование других методов открытия
Перед тем как вы перейдете к реализации более сложных методов, позволяющих восстанавливать работу «Защитника Windows» в Виндовс 11, советуем попробовать один из других вариантов открытия классического приложения. Возможно, у вас возникли проблемы только с конкретным методом или не удается найти нужную кнопку, поэтому альтернативные варианты могут оказаться полезными. Детальнее о них читайте в материале по следующей ссылке.
Подробнее: Как открыть Windows Defender в Windows 11
Способ 2: Исправление или сброс приложения
«Защитник Windows» является классическим приложением и представлен в ОС точно так же, как и другие стандартные программы. Для него тоже поддерживаются настройки и дополнительные параметры, среди которых можно отыскать сброс и исправление. Мы рекомендуем использовать эти инструменты в первую очередь, поскольку от вас требуется просто их запустить.
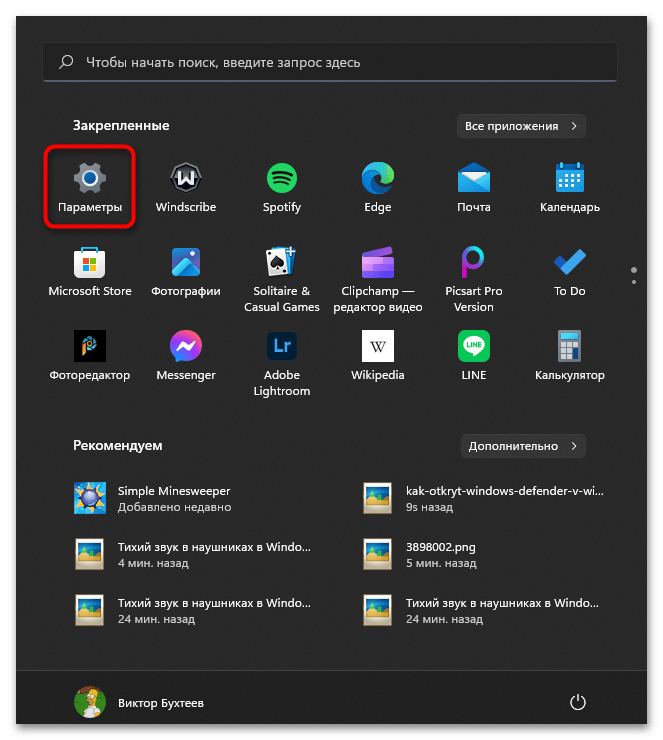
- Откройте «Пуск» и перейдите в «Параметры», кликнув по значку с изображением шестеренки.
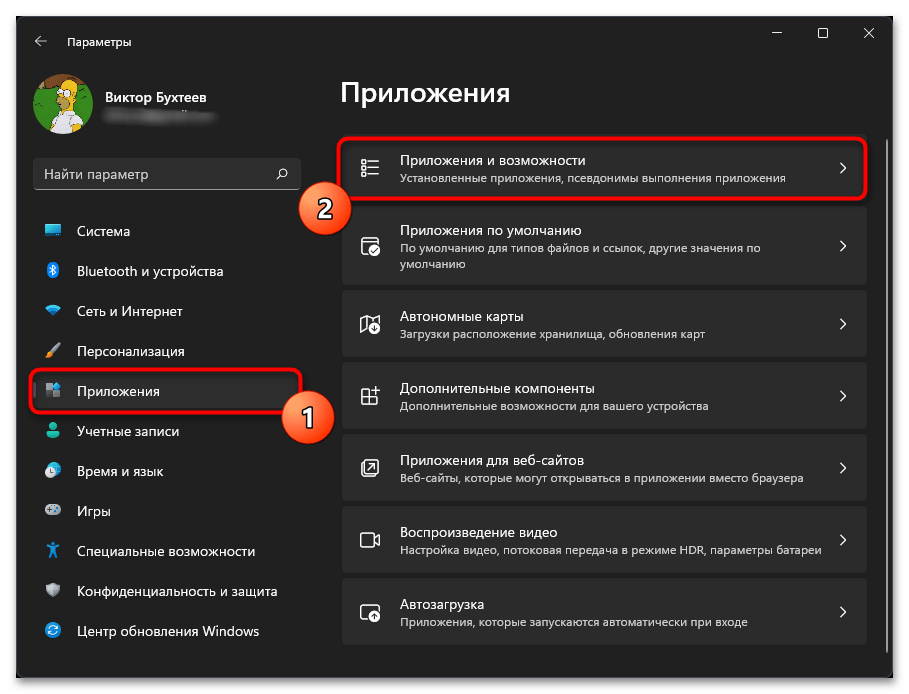
- Далее в разделе «Приложения» выберите категорию «Приложения и возможности».
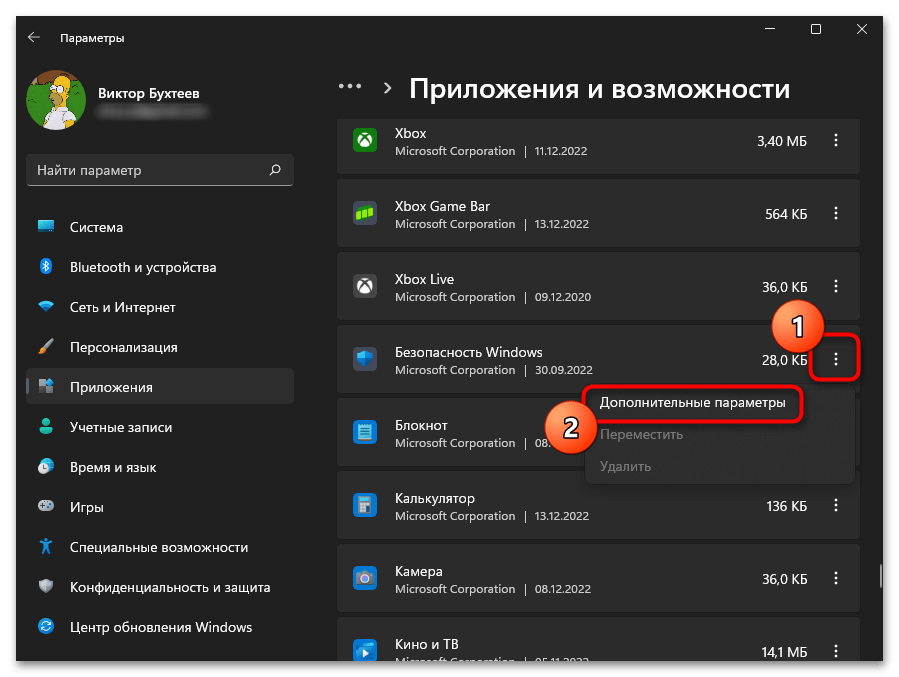
- В списке программ найдите «Безопасность Windows», справа в этой строке кликните по трем точкам для вызова меню, из которого выберите пункт «Дополнительные параметры».
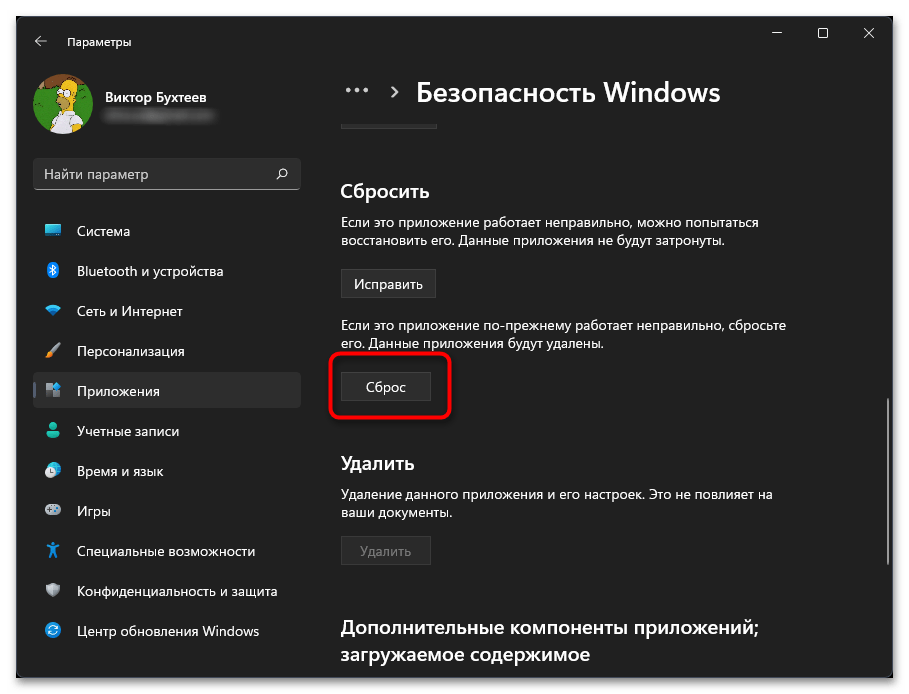
- В блоке «Сбросить» сначала рекомендуем щелкнуть по «Исправить», чтобы запустить автоматический процесс восстановления.
- Если после него вы все еще не видите нужное вам приложение или испытываете трудности с его запуском, нажмите «Сброс», а по завершении повторите попытку перейти к стандартному антивирусу.

Способ 3: Установка недостающих пакетов через «PowerShell»
Этот вариант следует попробовать, если при выполнении предыдущего вы даже не нашли приложение с названием «Безопасность Windows». Это может означать, что оно просто отсутствует в операционной системе или файлы являются поврежденными. Для установки недостающих компонентов понадобится воспользоваться «PowerShell». Только учитывайте, что вместе с Защитником будут добавлены и пакеты других стандартных программ, отсутствующих в вашей сборке или удаленных вручную.
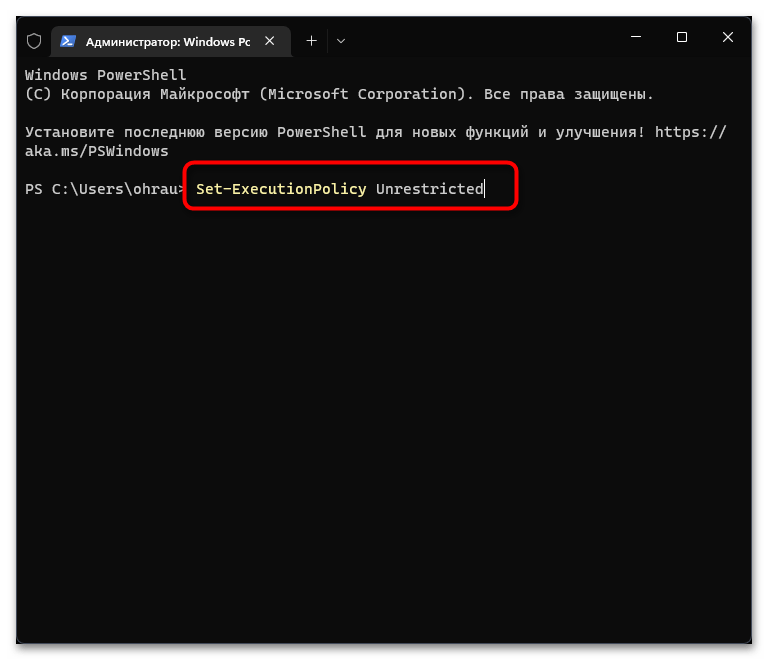
- Щелкните правой кнопкой мыши по «Пуску» и из появившегося контекстного меню выберите пункт «Терминал Windows (Администратор)».
- Введите команду
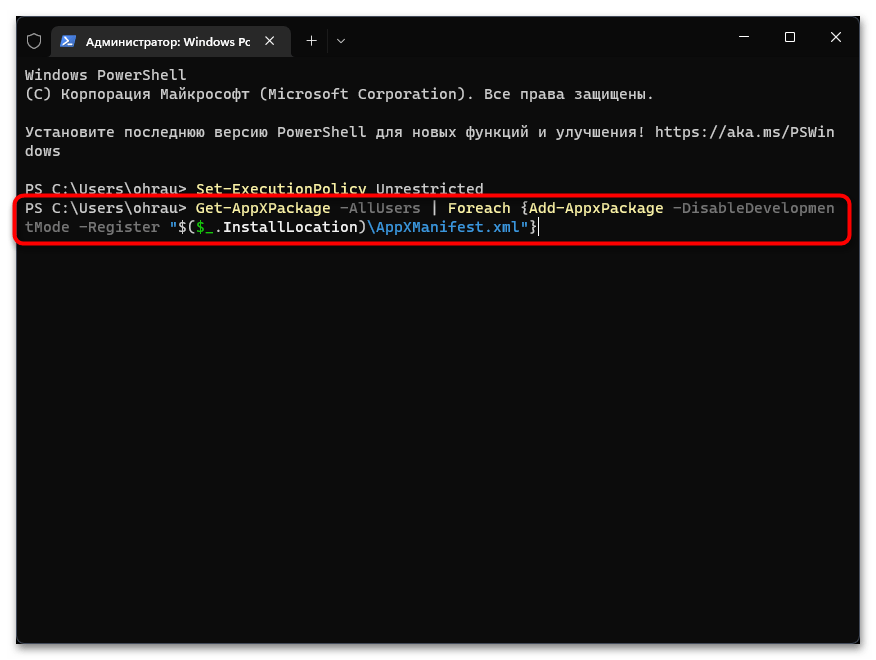
Set-ExecutionPolicy Unrestrictedдля получения списка недостающих пакетов. - После ее выполнения используйте
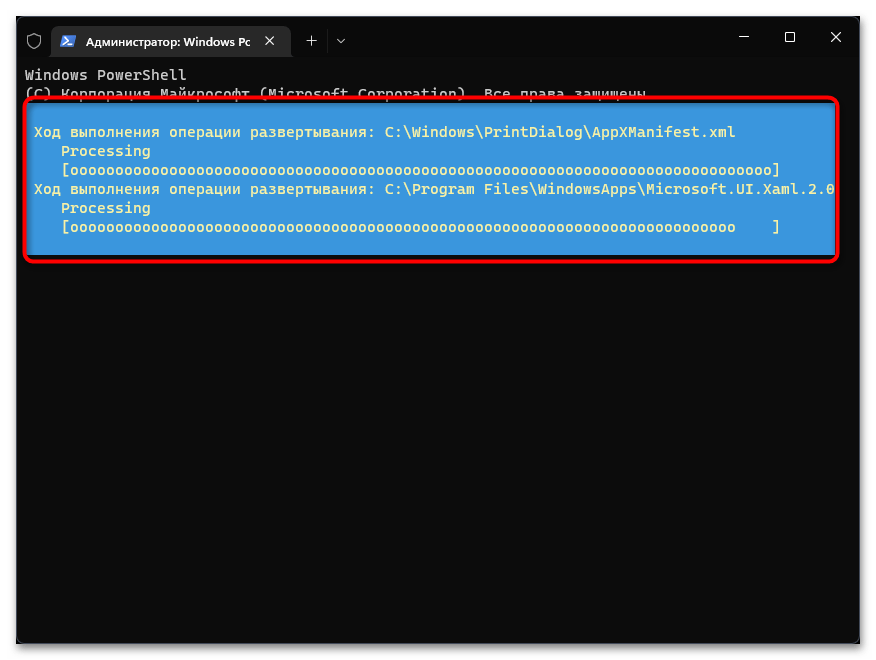
Get-AppXPackage -AllUsers | Foreach {Add-AppxPackage -DisableDevelopmentMode -Register "$($_.InstallLocation)\AppXManifest.xml"}и нажмите Enter для применения. - Начнется процесс поиска и инсталляции файлов. Это может занять много времени, что зависит от количества отсутствующих пакетов и скорости вашего интернета. Как только вы увидите сообщение об успехе, попробуйте перезагрузить ПК и снова поискать Windows Defender на вашем компьютере.
Способ 4: Восстановление и переустановка через «PowerShell»
Следующий метод снова подразумевает использование консоли, но на этот раз команда будет всего одна и предназначена она исключительно для работы с «Защитником Windows». Она проверит его файлы, а при их отсутствии произведет повторную установку, что часто позволяет наладить работу стандартного компонента.
- Обязательно запускайте «Терминал Windows» от имени администратора, как это было показано в предыдущей инструкции.
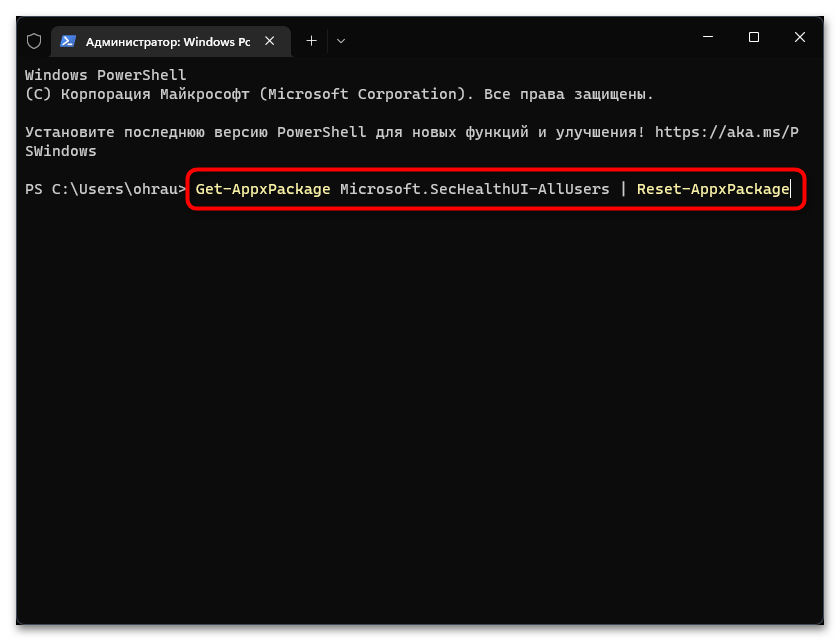
- Введите команду
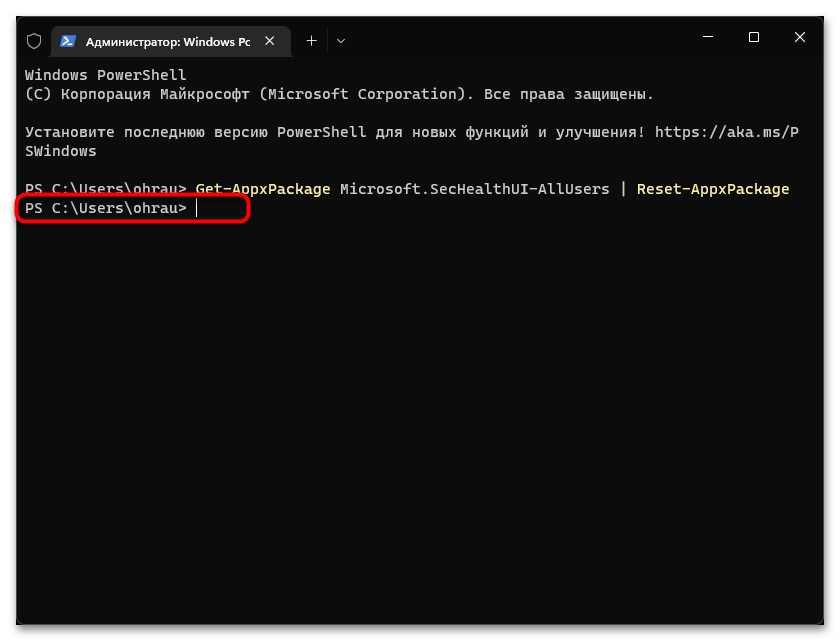
Get-AppxPackage Microsoft.SecHealthUI-AllUsers | Reset-AppxPackageи нажмите Enter для ее применения. - Через несколько секунд на экране должна появиться новая строка ввода. Это означает, что операция уже завершена, а вы можете переходить к проверке работы «Безопасности Windows».
Способ 5: Проверка системных обновлений
Сейчас очень активно выходят обновления для Windows 11, особенно это относится к различным апдейтам KB, связанным с безопасностью. Определенные из них вносят исправления в работу «Защитника Windows», что может вернуть компонент и наладить его запуск конкретно в вашем случае. Понадобится найти системные и необязательные обновления, затем произвести их инсталляцию.
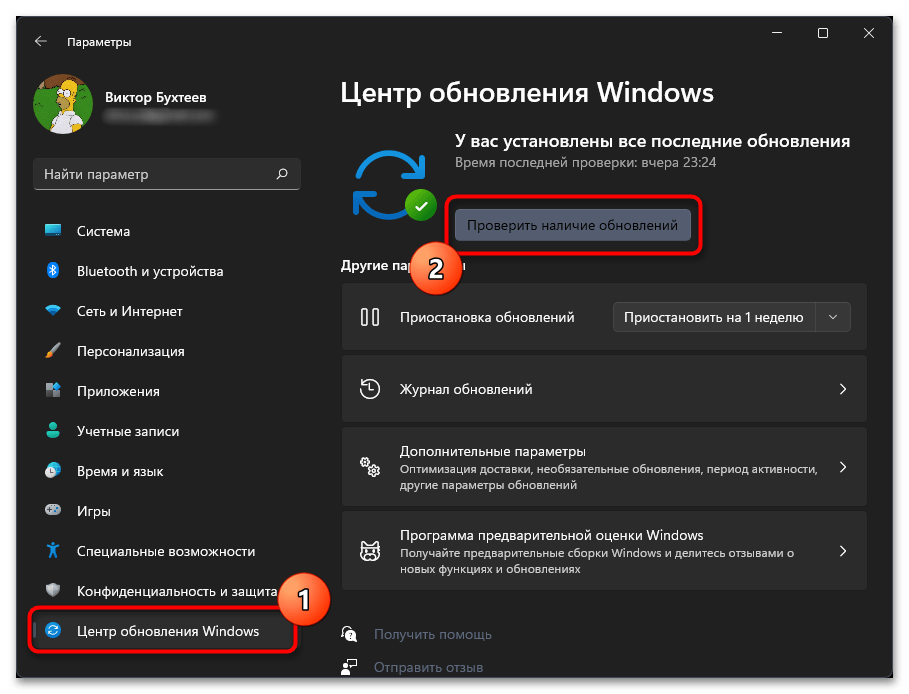
- В «Параметрах» выберите раздел «Центр обновления Windows» и запустите процесс поиска апдейтов.
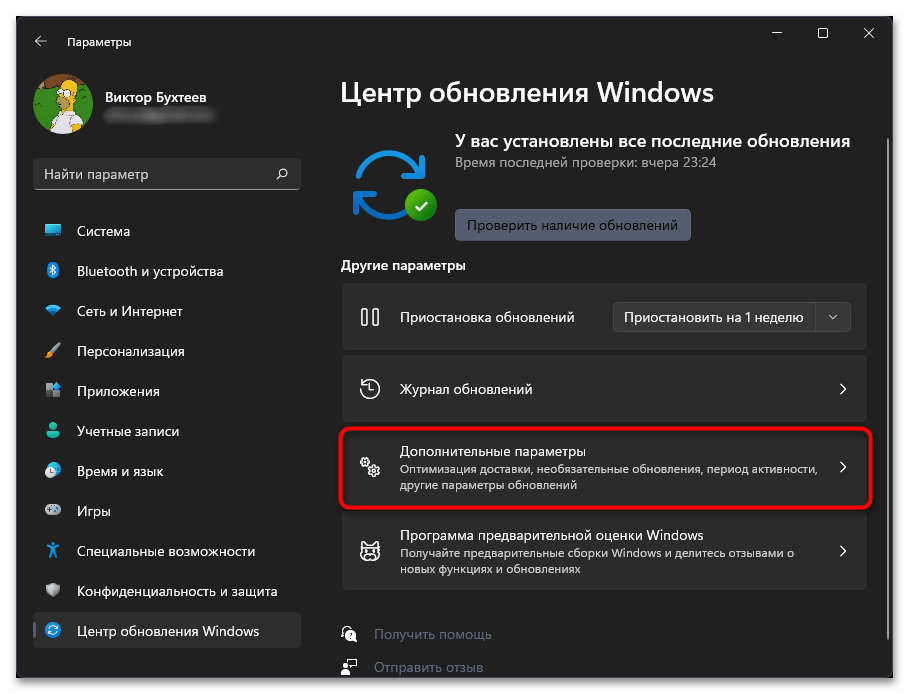
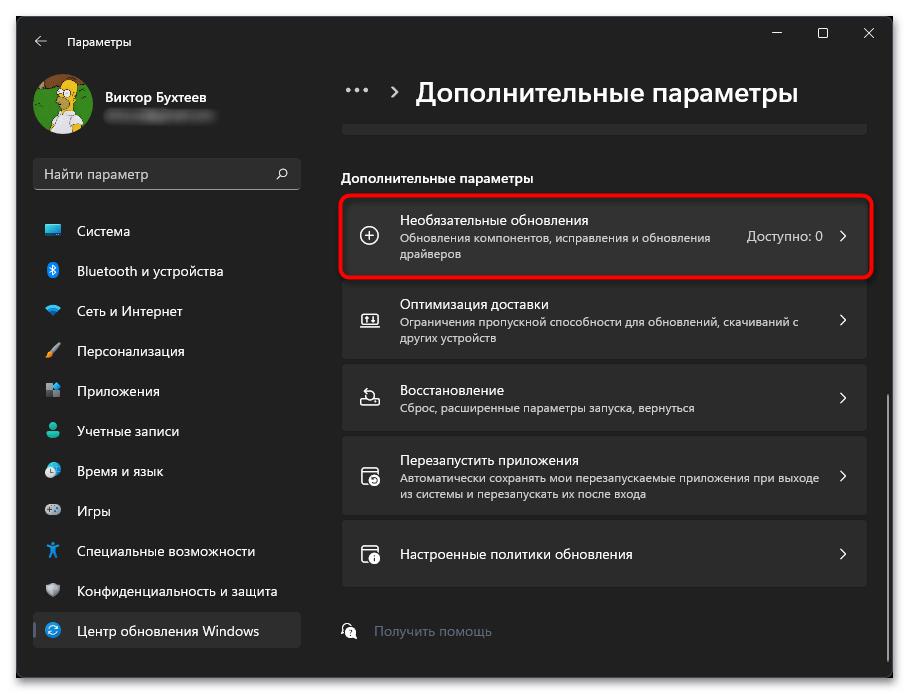
- Параллельно с этим можете перейти к просмотру необязательных обновлений, среди которых тоже могут быть патчи безопасности.
- Щелкните по списку «Необязательные обновления» для его открытия. Если апдейты будут найдены, отметьте их галочками и подтвердите инсталляцию (обновления драйверов в этом случае можно пропустить).
Способ 6: Проверка целостности системных файлов
Нередко причиной отсутствия или неудачного запуска «Защитника Windows» становятся поврежденные или отсутствующие системные файлы. Если ничего из перечисленного выше не помогло вам решить ситуацию, рекомендуем запустить системные утилиты, которые как раз и предназначены для сканирования и исправления подобных проблем. Детально о них рассказывает другой наш автор в своей статье по следующей ссылке.
Подробнее: Использование и восстановление проверки целостности системных файлов в Windows
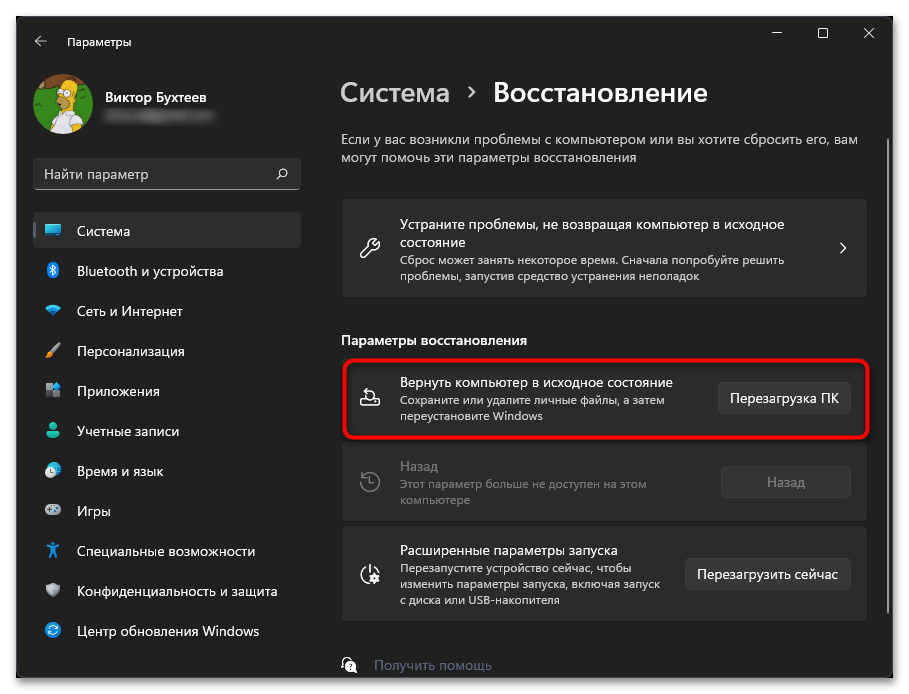
Способ 7: Возвращение Windows 11 к исходному состоянию
Прибегать к реализации этого метода стоит в тех случаях, когда при помощи предыдущих вам так и не удалось вернуть «Защитник Windows» в операционную систему. Возможно, его установка изначально прошла неуспешно по каким-то причинам или вы используете пиратскую сборку ОС, где компонент просто отсутствует. Можете попробовать выполнить переустановку путем возвращения Виндовс к исходному состоянию. Для этого не нужны специальные программы, обойтись можно штатным средством.
Подробнее: Сброс Windows 11 к заводским настройкам
Наша группа в TelegramПолезные советы и помощь
Windows Defender is the default anti-malware program on every Windows PC. Users complain about Windows Defender missing in action from their computers for various reasons. Common causes of such issues include security program conflicts or corrupted files. Interestingly, you can find effective solutions to the Windows Defender missing problem within a few steps. In addition, you can also seek an alternative for safeguarding your data under any circumstance. Let’s solve the problem of the missing Windows Defender.

See also:
Windows Defender Download
Quick Solutions
Microsoft Defender is one of the leading anti-malware services available on Windows. Therefore, it is also referred to as Windows Defender in many cases. However, you may end up missing the Windows Defender on your computer on certain occasions.
You wouldn’t want to miss the most powerful antivirus program associated with Windows 11. Most importantly, it is an essential tool for the safety of your computer from numerous threats such as viruses, malware attacks, spyware, and other issues. If Windows Defender does not work, you don’t have to panic. The following post will outline a few simple solutions for the missing Windows Defender on your Windows 11 PC.
Causes of Missing Windows Defender on Windows 11
The best way to solve the problem of Windows Defender involves the identification of the causes of the problem. Why don’t you see the Windows Defender protecting your system against malicious threats? The most common reasons for the missing Windows Defender include deleted Windows Defender files or conflicts with another security program. Some other reasons are listed below:
- You don’t have the latest updates for Windows 11.
- The time and date on your computer are incorrect.
- You have turned off Windows Defender manually.
- A system configuration error prevents Windows Defender from launching.
- Windows Defender has been turned off due to a Group Policy.
📖Read Also: Windows 11 Virus & Threat Protection Not Working
For example, if you have installed new antivirus software, it can interfere with the working of Windows Defender. Generally, you would find the following common causes for which Windows Defender is not visible on your system.
Full Analysis: Is Windows 11 Need Any Antivirus
Regardless of having built-in Windows Defender, antivirus software is essential to keep malware and spiteful attacks at bay! Consider using the EaseUS Todo Backup tool for complete PC protection.
How to Fix Windows Defender Missing Windows 11 Problem
As you can notice, the different causes for the missing Windows Defender problem are pretty trivial. With a keen eye for detail, you can identify these causes and resolve the issue with simple troubleshooting methods. For example, you can try resetting Windows Defender as the first solution. However, if you don’t find any likely results with the simple solutions, you can try the following solutions.
- Method 1. Re-enable Windows Defender If It’s Disabled
- Method 2. Restart Your System
- Method 3. Check for System Updates
- Method 4. Download and Run Microsoft Safety Scanner
- Method 5. Reinstall Defender from the Microsoft Website
Method 1. Re-enable Windows Defender If It’s Disabled
You can use the following steps to enable Windows Defender manually if it has been disabled by accident.
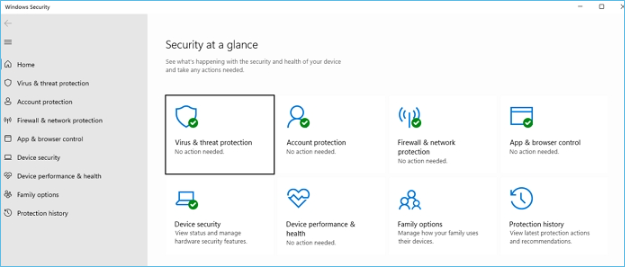
Step 1. Open «Settings» and access «Privacy & Security».
Step 2. Select «Windows Security» and click «Virus & threat protection».
Step 3. Open the Manage Settings link and enable «Real-Time Protection with Windows Defender».
Method 2. Restart Your System
One of the standard solutions for almost every problem is to restart your system. Here are the simple steps to restart your system.
Step 1. Save all your work.
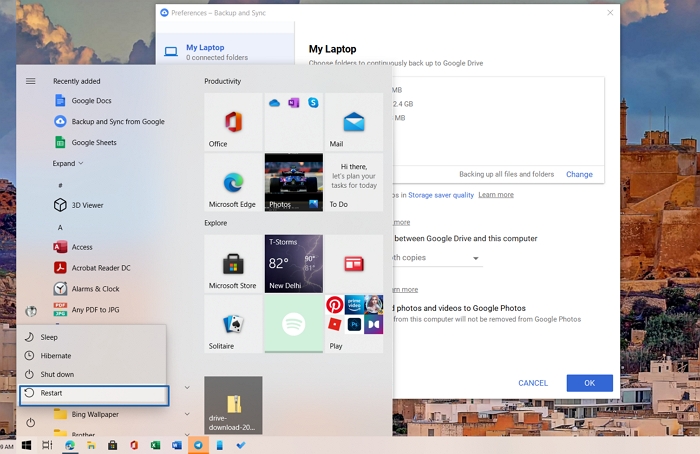
Step 2. Click on the «Windows» button
Step 3. Then click on the «Power» button, and then choose the «Restart» option.
Method 3. Check for System Updates
The lack of the latest updates can also be one of the common reasons for Windows Defender not working on your system. Here are a few easy steps to check for Windows updates.
Step 1. Open Windows settings using «Win» and «I» keys.
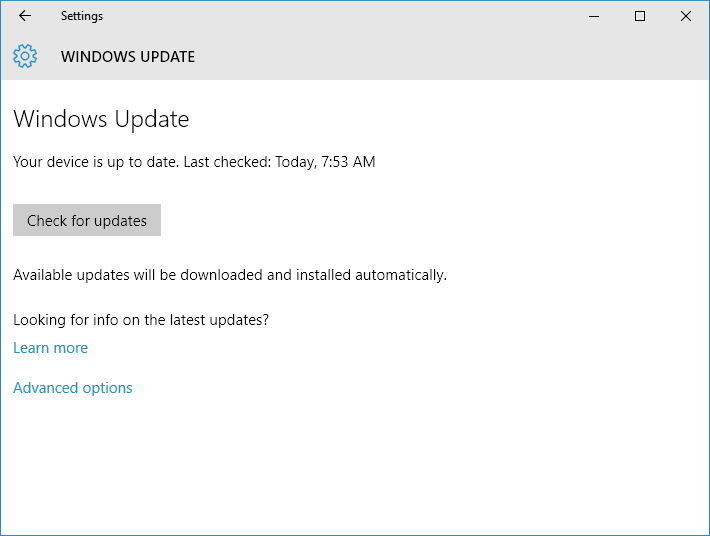
Step 2. Find «Windows Update» on the left-hand side of the screen and click on it.
Step 3. Look for the «Check for updates» option and click on it for running Windows updates manually.
Method 4. Download and Run Microsoft Safety Scanner
Microsoft Safety Scanner is a powerful tool tailored to identify and remove malware from Windows systems. You can download it and run a scan with the following steps.
Step 1. Download Microsoft Safety Scanner from the official Microsoft Support website and complete the installation process according to the instructions.
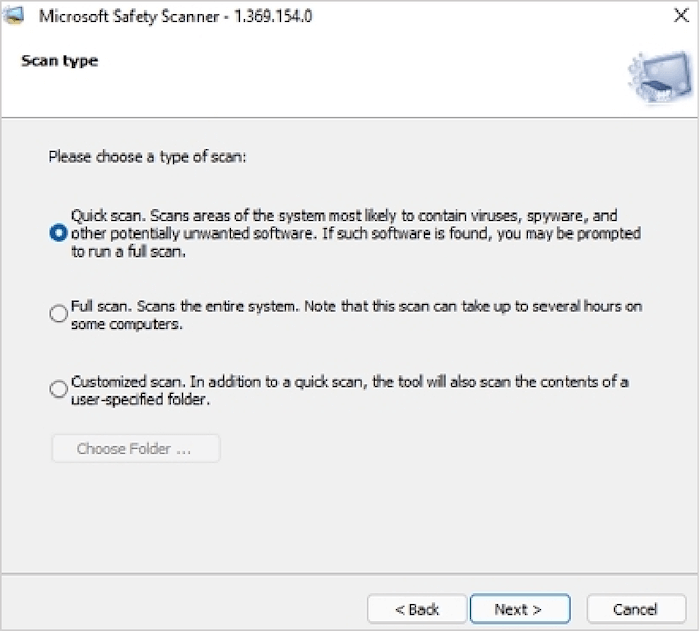
Step 2. Once you have completed the installation process, you will find three different scanning options: Quick scan, Full scan, and Customized scan.
Step 3. Depending on the type of scan you select, the Microsoft Safety Scanner would take several minutes for the scanning process.
Method 5. Reinstall Defender from the Microsoft Website
If the above solutions don’t work out, you must choose the final resort, i.e., reinstalling Windows Defender. Microsoft Defender is not available directly through the website, but you can download it using Windows terminal or PowerShell.
Step 1. Open Windows Terminal with admin permission.
Step 2. Copy-paste the following command and press the Enter key.
Get-AppxPackage Microsoft.SecHealthUI -AllUsers | Reset-AppxPackage
Step 3. It will install and fix any problem related to Defender in Windows.
Once done, search for Windows Defender in the Start Menu and open it. Make sure to setup the real-time protection.
Keep Data From Viruses Attack Even Windows Defender Go Missing
The problem of missing Windows Defender can have critical consequences for your computer. Without the default anti-malware protection tool, your system will likely be vulnerable to viruses and malware attacks. However, you need to note that whether you solve the issue of a missing Windows Defender or not, your data is at risk.
Therefore, your priority should be safeguarding your data above everything else. EaseUS Todo Backup tool can offer an exclusive opportunity for you to relax regarding data backup and security.
EaseUS Todo Backup is a powerful, one-stop destination for all your data backup requirements. You can easily take data backup from disks, files, operating systems, and partitions and store it according to your preferences. It also ensures easier data recovery to ensure you always have control over your data. However, the most crucial feature of EaseUS Todo Backup is called Security Zone. It’s a tool that creates a secret partition on your computer that cannot be explored or changed by the user or third-party apps or the Windows itself. This feature allows EaseUS Todo Backup to help protect your important data from ransomeware.
You can follow the steps listed below to keep your data from viruses attack even Windows Defender go missing.
Step 1. Select Backup Contents
On the main window, click the big question mark button to select backup contents. You can choose to back up individual files, entire disk or partition, operating system and mails.

Step 2. Select Security Zone as Backup Destination
While selecting backup destination, you can see the Security Zone option. Click Security Zone and use it as a backup destination.
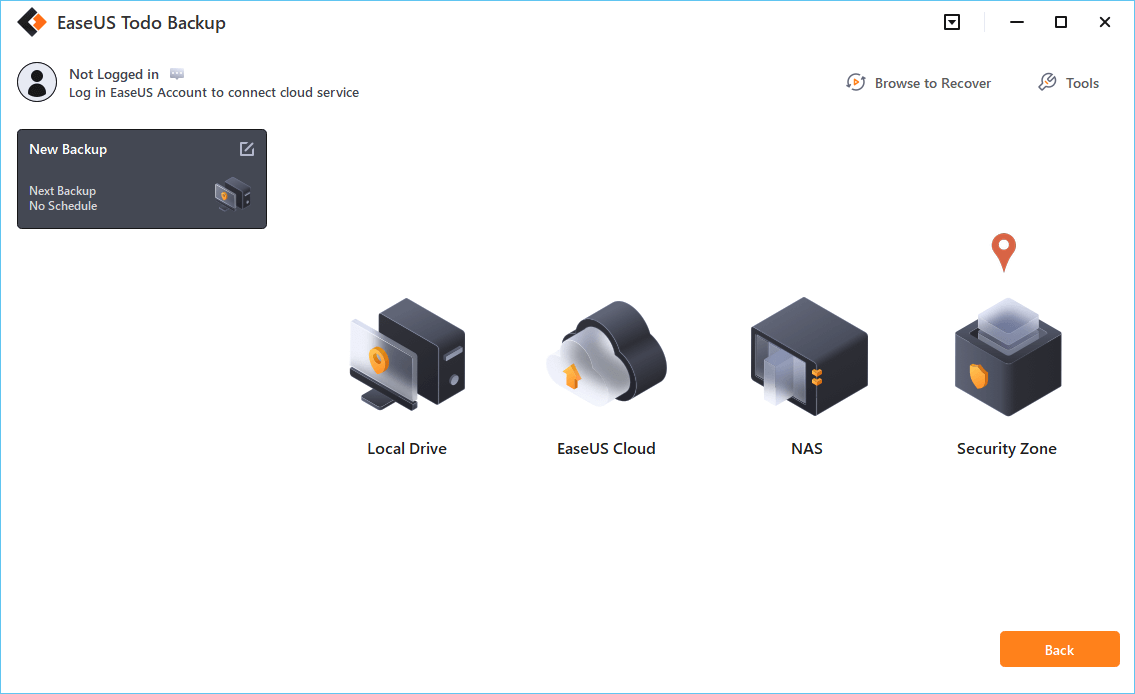
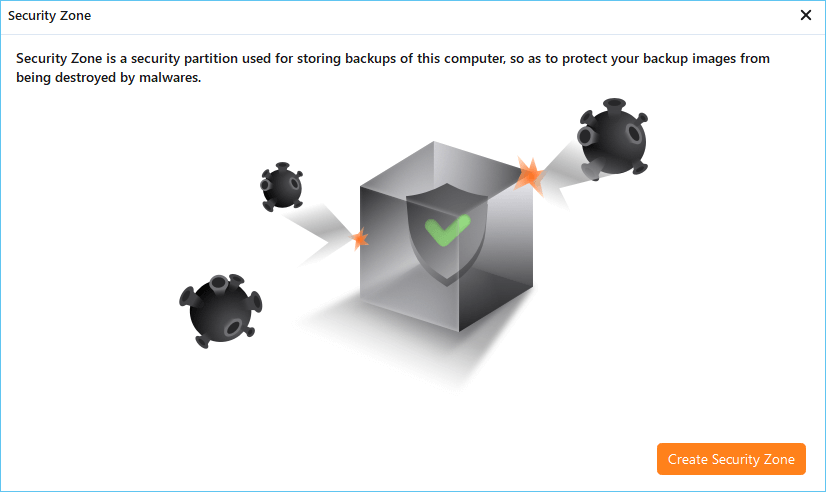
However, if you’re first to use the Security Zone function, EaseUS Todo Backup will guide you to create one. Click «Create Security Zone«.
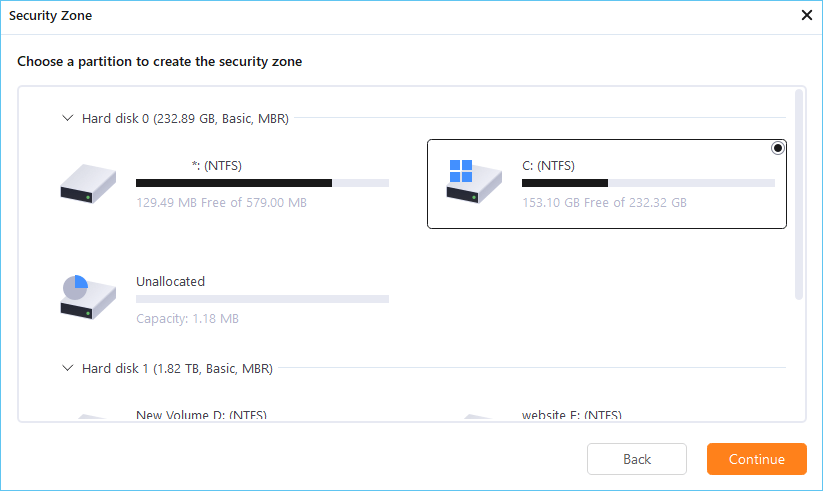
Choose a partition with enough free space for your backups and then click «Continue«.
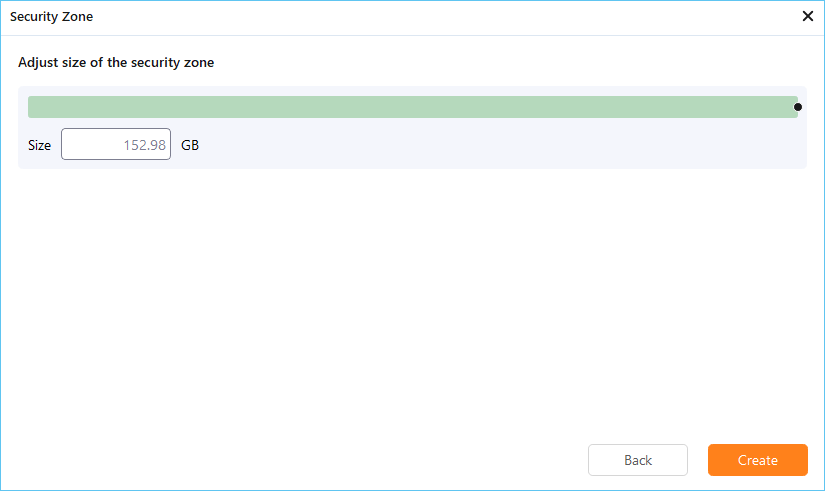
You can adjust the partition size for the security zone. Click «Create» to get it done.
Step 3. Execute the backup task
Click «Backup Now» to start the backup process. Your backups of OS, files, drives and mails in the security zone will be fully protected from being seen or destroyed by virus, ransomeware and trojan.
Bottom Line
The curious case of a missing Windows Defender can be annoying and troublesome if left unchecked. You don’t want to risk your valuable data to unprecedented malware attacks, viruses, or other threats. Therefore, you must identify the causes of the problem, such as a conflicting security program. Subsequently, you must implement the necessary troubleshooting methods and check whether Windows Defender works. Above everything else, you can ensure secure backup of your data with EaseUS Todo Backup, a reliable tool for safe data backup and recovery.
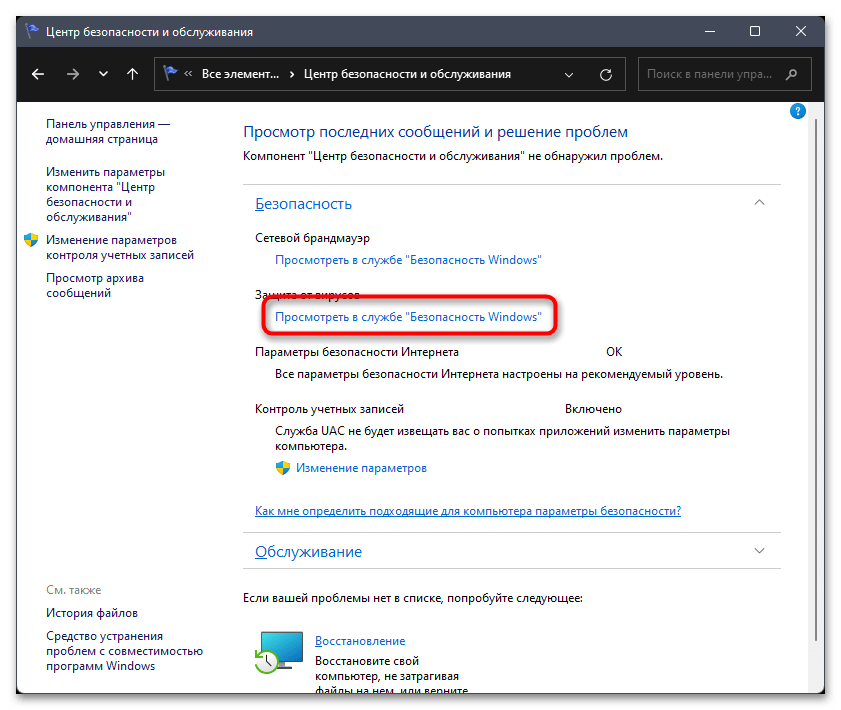
после сброса на заводские настройки через встроенный в систему сброс , пропал доступ к антивирусу совсем! при нажатии на любой пункт в разделе Конфиденциальность и Защита всплывает вот такое уведомление как на скриншоте и все. никогда такого не видел. винда — с лицензией Про для образовательных учреждений. версия 24Н2. сбрасывал и раньше но подобного не видел никогда. службы антивируса в диспетчере задач видны и работают

-
Вопрос задан
-
12481 просмотр
Что-то пошло не так..
Сделай ещё раз сброс(переустановку)
На этот раз внимательнее — отметь галочки «установить дефолтные приложения»
АПД. Вот так я делал буквально сегодня

Пригласить эксперта
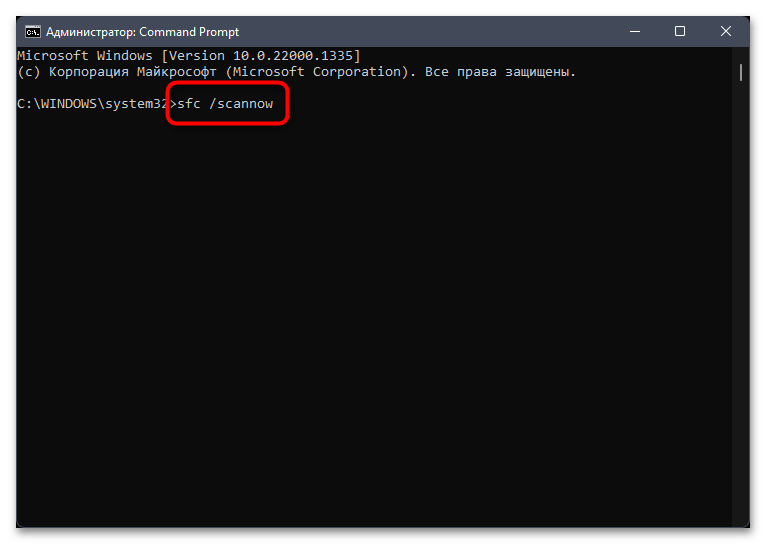
Попробуйте использовать sfc /scannow.
Возможно поможет.
Если обычные методы (в т.ч. обновление BIOS материнской платы с последующим сбросом настроек) не помогли, то проверьте процессор. Если используете битлокер, то аккуратнее со сбросом ftpm. Актуально для свежих Intel (13 и 14 поколения, но может проявится и на 11 при недостаточном охлаждении). Не рассчитывайте на ПО от Интел для ручного управления тепловым пакетом- кривой кусок кала, ошибки полезут со временем (начиная с 11 поколения, на 10 не наблюдалось).
В начале месяца был отдалённо похожий случай с 13900К, явно проявилось через отвал антивируса. Потом и куча других служб посыпалась. При этом тест IPDT перед этим прошёл штатно. ОССТ 13 версии при запуске начал вылетать, 11 версия запускалась и даже работала. Замена камня проблему решила полностью.
-
Показать ещё
Загружается…
Минуточку внимания
Every Windows computer comes with Windows Defender as its anti-malware tool by default. It is like the first line of defense in your Windows PC against malware/viruses. Although it has been found in many cases that the Windows defender is not showing up or Windows defender is missing on Windows 11/10 PCs.
One of the many issues users encounter while using Microsoft’s built-in antivirus on their system is that they can’t find Windows defender on their PC/laptops. Users have previously expressed dissatisfaction with Windows 11 Defender being disabled. However, several users were unable to locate the software at all on their PC.
Why Is There No Windows Defender On My Windows 11 PC
If you are wondering why don’t you have Windows defender on your Windows 11 PC?
- This could be due to many reasons including malware invasion and service issues.
- Additionally, modifications to the registry that disable Windows Defender could be the root of the problem.
With all said, now let us see the possible fixes for the issue.
Read Also: Is Windows Defender Good Enough For PC Protection
How to Fix Windows Defender Missing on Windows 11/10 PC
This article describes how to install Windows Defender on Windows 11/10 PC/laptops using the Settings app or PowerShell. So without further ado, Let’s get started.
Method 1: Install Windows Defender via PowerShell
You cannot install Windows Defender like you can other programs since it is not installed on your PC in the same way as other programs. Instead, utilize a PowerShell code to complete the task by following these instructions. It can take five seconds to several minutes to finish.
- Press the Windows key with the key X to open the WinX
- Now from the list, choose Windows terminal (Admin).
- Then paste these exact commands and press the Enter key after each command:
Set-ExecutionPolicy Unrestricted
Get-AppXPackage -AllUsers | Foreach {Add-AppxPackage-DisableDevelopmentMode – Register “$($_.InstallLocation) \AppXManifest.xml”}.

All default Windows applications can be reinstalled with the command above. This is extremely helpful if a file error during an update prevented Windows Defender from being installed on Windows 11.
Read Also: What To Do If Windows Defender Keeps Saying Threats Found
Method 2: Repair and install Windows Defender
Windows Defender can occasionally be installed improperly or incompletely. In Windows 11, the command listed below will disassemble every component of the computer and reinstall it from the scratch.
- Press the Windows key with the key X to open the WinX
- Now from the list, choose Windows terminal (Admin).
- Then paste this exact command and press the Enter key:
Get-AppxPackage Microsoft.SecHealthUI-AllUsers | Reset-AppxPackage

Read Also: How To Enable Ransomware Protection In Windows Defender?
Method 3: Reset Windows Defender
- Press the Windows key with the key I to open Settings and click on
- Now click on Default Apps.

- Scroll down to the bottom of the page and click Reset in front of Reset all default apps.


Read Also: How To Clear The Windows Defender Protection History On a PC
To Wrap This Up
So, in this way you can fix this Windows Defender missing on Windows 11/10 PCs. Contrary to several other problems, this one is simple to resolve, as was just explained above. We sincerely hope that this useful advice will help you reactivate Windows Defender to safeguard your computer.
Subscribe to our newsletter to ensure that you never miss a tech update. And for more such troubleshooting guides and tips & tricks related to Windows, Android, iOS, and macOS, follow us on Facebook, Instagram, and YouTube
Next Read: 5 Solutions to Fix the “Windows Defender Failed to Initialize” Issue
Вопрос о том, как включить Защитник Windows 10 задается, наверное, чаще чем вопрос о его отключении. Как правило, ситуация выглядит так: при попытке запуска Защитника Windows вы видите сообщение о том, что это приложение выключено групповой политикой, в свою очередь использование параметров Windows 10 для его включения также не помогает — в окне настроек переключатели неактивны и пояснение: «Некоторыми параметрами управляет ваша организация».
В этой инструкции — способы включить Защитник Windows 10 снова с помощью редактора локальной групповой политики или редактора реестра, а также дополнительная информация, которая может быть полезной.
Причина популярности вопроса обычно в том, что пользователь не сам отключал защитник (см. Как отключить Защитник Windows 10), а использовал, например, какую-либо программу для отключения «слежки» в ОС, которая, попутно, отключила и встроенный антивирус Windows Defender. Например, так по умолчанию делает программа Destroy Windows 10 Spying.

Включение Защитника Windows 10 с помощью редактора локальной групповой политики
Этот способ включить Защитник Windows подойдет только для владельцев Windows 10 Профессиональная и выше, поскольку только в них присутствует редактор локальной групповой политики (если у вас Домашняя или Для одного языка — перейдите к следующему способу).
- Запустите редактор локальной групповой политики. Для этого нажмите клавиши Win+R на клавиатуре (Win — клавиша с эмблемой ОС) и введите gpedit.msc после чего нажмите Enter.
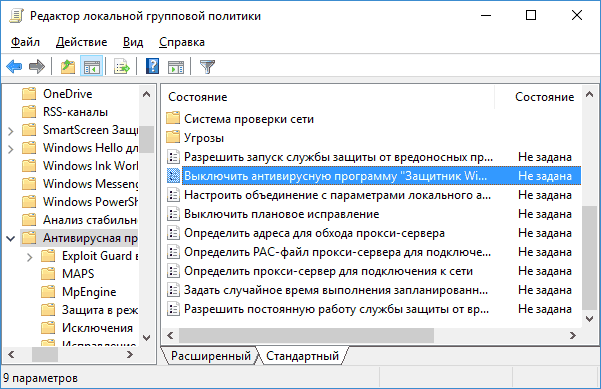
- В редакторе локальной групповой политики перейдите к разделу (папки слева) «Конфигурация компьютера» — «Административные шаблоны» — «Компоненты Windows» — «Антивирусная программа защитник Windows» (в версиях Windows 10 до 1703 раздел назывался Endpoint Protection).

- Обратите внимание на параметр «Выключить Антивирусную программу защитник Windows».
- Если там установлено «Включено», дважды кликните по параметру и установите «Не задано» или «Отключено» и примените настройки.

- Внутри раздела «Антивирусная программа Защитник Windows» (Endpoint Protection) загляните также в подраздел «Защита в режиме реального времени» и, если параметр «Выключить защиту в реальном времени» включен, переведите его в «Отключено» или «Не задано» и примените настройки.

После указанных процедур с редактором локальной групповой политики, запустите Защитник Windows 10 (быстрее всего — через поиск в панели задач).

Вы увидите, что он не запущен, но ошибки «Это приложение выключено групповой политикой» больше появиться не должно. Просто нажмите кнопку «Запустить». Сразу после запуска вам также могут предложить включить фильтр SmartScreen (в случае если он был отключен сторонней программой вместе с Windows Defender).
Как включить Защитник Windows 10 в редакторе реестра
Те же действия можно проделать и в редакторе реестра Windows 10 (по сути, редактор локальной групповой политики изменяет как раз значения в реестре).
Шаги для включения Защитника Windows данным способом будут выглядеть так:
- Нажмите клавиши Win+R на клавиатуре, введите regedit и нажмите Enter для запуска редактора реестра.
- В редакторе реестра перейдите к разделу (папки слева) HKEY_LOCAL_MACHINE\ SOFTWARE\ Policies\ Microsoft\ Windows Defender и посмотрите, есть ли в правой части параметр «DisableAntiSpyware». Если есть, кликните по нему дважды и присвойте значение 0 (ноль).

- В разделе Windows Defender есть также подраздел «Real-Time Protection», загляните в него и, если там имеется параметр DisableRealtimeMonitoring, то также установите значение 0 для него.
- Закройте редактор реестра.

После этого наберите в поиске Windows в панели задач «Защитник Windows», откройте его и нажмите кнопку «Запустить» для запуска встроенного антивируса.
Дополнительная информация
Если описанное выше не помогает или же возникают какие-то дополнительные ошибки при включении защитника Windows 10, попробуйте следующие вещи.
Ну а если и эти варианты не сработают — пишите комментарии, попробуем разобраться.