
Windows Security is the only preinstalled defense software that comes with Windows 11 and Windows 10. It is because of this software that the average Windows user does not need another paid security software. Therefore, such systems must have the Windows Security app working seamlessly.
However, users have reported on different occasions that their “Windows Security” app, especially the “Security at a glance” home page is not working as it should. Precisely, it is blank and no information is being displayed.
This sort of incident has been reported by users who had upgraded to Windows 11 and existing Windows 10 users. In short, there is no known pattern.
If you are reading this post, you are likely facing the same issue. In this article, we discuss the many possible ways to fix the issue and get your Windows Security up and working again, so that your PC is secure.
Table of Contents
Why is Windows Security Blank
There can be different reasons for the Windows security application to appear blank.
The number one reason that we found common amongst end users was using third-party antivirus software. When using another antivirus software, the Windows Security app automatically stops functioning and performing scans. This makes some pages inside the app appear blank.
Another reason for the empty Windows Security pages is because of corruption in the system files or the app itself, hindering the app’s ability to perform normally. Since corruption can occur at several different levels inside the Windows OS, we have listed several solutions below to fix this.
Let us now continue to the possible solutions to make sure that your computer is safe again.
Fix Blank Windows Security Page
We have listed the solutions to fix the Windows Security application chronologically. Perform these solutions in the order given.
Restart Computer
The first thing you ought to do is to start the computer.
The easier method would be to simply restart the dependent services for Windows Security. However, after doing some research, we found that the service “Security Center” cannot be restarted, neither from the Services console, the Command Prompt, nor the Windows Registry editor.
Therefore, we suggest that you restart the computer in an attempt to fix the issue.
If rebooting the PC didn’t work for you, then we suggest that you proceed with the following solutions.
Repair/Reset Windows Security
Just like all other UWP apps, Windows Security is also an app. Like all others, it can be repaired or reset, if needed.
We suggest that you perform the following steps in an attempt to repair the app. If repairing it doesn’t work, try resetting it.
-
Navigate to the following:
Settings app >> Apps >> Installed apps
-
Search for “Windows Security.”

Search for Windows Security -
Click on the 3 dots in front of the app and then click “Advanced options.”
Open advanced app options -
Scroll down and click “Repair.”
Repair Windows Security Windows will now repair the app.


Now check to see if you can view the Windows Security pages which appeared blank earlier. If the issue persists, navigate to the same Settings page, open advanced Windows Security options, and click “Reset.”

Now, check again once the app has been reset.
Uninstall Third-Party Antivirus
As we mentioned earlier, the Windows Security application may appear blank on some pages when another antivirus is installed on the computer. In this case, you must uninstall this antivirus for Windows Security to work normally again.
You can remove any third-party antivirus software from the Programs and Features applet by typing in “appwiz.cpl” in the Run Command box, or from Settings app >> Apps >> Installed Apps.
Alternatively, you can also use the dedicated antivirus removal tool to uninstall all traces of the software.
Fix Corrupted Files with DISM and SFC
Deployment Image Servicing and Management (DISM) and System File Checker (SFC) are built-in tools in Windows that can scan and repair system files. Use the following steps to run the DISM and SFC scans in an attempt to repair any corrupted system files that may be affecting the Windows Security app:
-
Launch an elevated Command Prompt.
-
Execute the following commands one after the other:
DISM.exe /Online /Cleanup-image /Checkhealth DISM.exe /Online /Cleanup-image /Scanhealth DISM.exe /Online /Cleanup-image /Restorehealth -
Then run the SFC scan using this cmdlet:
SFC /ScanNow
Execute DISM and SFC cmdlets to repair system files

Once the scans have run successfully, check to see if the problem has gone away.
Install Pending Windows Updates
Windows updates also include system files that are overwritten on the existing files. Therefore, it may also replace any corrupted system files with new, fresh ones.
Perform the following steps to check and install any available Windows updates:
-
Navigate to:
Settings app >> Windows Update
-
Click “Check for updates.”

Check for pending updates The app will now begin searching the web for updates.
-
If any update(s) is available, download and install it.
-
Once the update(s) is installed, restart the computer.

Register System Files
Unregistered system files can cause the respective services to not be able to run. You can register Dynamic Link Libraries (DLLs) using the “regsvr32” command line tool.
Perform the following steps to register the crucial files for Windows Security in an attempt to bring back the empty pages:
-
Launch an elevated Command Prompt.
-
Run the following cmdlets one after the other:
regsvr32 jscript
regsvr32 vbscript
Register system files -
Restart the computer.

Once the computer restarts, check to see whether you are now able to see the empty Windows Security pages.
Manipulate Windows Registry
If no solution has worked for you thus far, try manually changing the Windows Registry to your favor and fix the issue using these steps:
Note: Misconfiguration of critical values in the system’s registry could be fatal for your operating system. Therefore, we insist that you create a system restore point before proceeding forward with the process.
You can also use our top selection of disk imaging and backup software so you never lose your data or operating system again.
-
Open the Registry Editor by typing in “regedit” in the Run Command box.
Open the Registry editor -
Paste the following in the navigation bar for quick navigation:
Computer\HKEY_LOCAL_MACHINE\SYSTEM\CurrentControlSet\Services\SecurityHealthService

Quick navigation in the Registry Editor -
Double-click the “Start” DWORD.
Open the DWORD value -
Change the Value Data to either “1” or “2.”
Change the Value Data -
Restart the computer for the changes to take effect.


Reinstall the Windows Security App
If changing the Windows Registry had no effect either, then you can try factory resetting the Windows Security app – as if it were freshly installed. Here’s how to do it:
-
Open an elevated PowerShell instance.
-
Run the following cmdlet:
Get-AppxPackage Microsoft.SecHealthUI -AllUsers | Reset-AppxPackage
Factory-reset the Windows Security app

Now check the Windows Security application to see if the issue has been resolved.
If it hasn’t, then you can also try a similar, yet more aggressive approach below.
Redeploy all Applications
The following steps redeploy all Windows applications from scratch.
-
Open an elevated PowerShell instance.
-
Run the following cmdlet to allow runnings scripts:
Set-ExecutionPolicy Unrestricted
Allow script execution -
Now run the following cmdlet to redeploy all apps:
Get-AppXPackage -AllUsers | Foreach {Add-AppxPackage -DisableDevelopmentMode -Register "$($_.InstallLocation)\AppXManifest.xml"}
Redeploy all Windows app This step can take a few minutes to redeploy all apps.
Additionally, ignore any errors you see as they will be prompting you to close the apps/services to redeploy certain apps. That won’t be necessary.


Once the command has been executed completely, check to see if you encounter the same error with Windows Security.
If this hasn’t worked either, then the only possible workaround would be to reset your computer.
Reset Windows
Resetting the computer brings all configurations back to their factory default settings and values. If the solutions discussed above did not work for you, then you must now reset your PC.
Note that this will retain all your personal data.
Follow these sites to reset your PC:
-
Navigate to the following:
Settings app >> System >> Recovery
-
Click “Reset PC” in front of Reset this PC.
Reset computer The reset wizard will now open.
-
Click “Keep my files.”
Keep files while resetting Windows -
Select “Local reinstall.”
Perform local reinstallation -
Click Next.
Proceed -
Click Reset.
Click Reset


The complete reset process can take a while, depending on your computer’s specs. Please allow it ample time to complete and do not power off or restart your PC during the process.
Once the computer is reset, it will be reverted to factory settings, with the exception of your personal data on board.
Now, check the Windows Security application and see if the blank pages have now been restored.
If the issue remains, then the only solution now is to perform a clean Windows installation.
Conclusion
To conclude, we must do whatever it takes to restore the Windows Security application to its functional state, as it is the primary firewall between your data and the outside internet. With Windows Security out of the way, and no other protection software installed, your PC and the data on it will be vulnerable to attacks.
That said, this article lists all the possible methods to fix the missing Windows Security pages that many users experience out of the blue. We hope that at least one of the given solutions worked for you.
Windows Security offers built-in protection for Windows systems to keep your computer and files secure at no extra cost. However, at times when you try to open the app, it shows a blank screen.
Windows Defender is usually affected due to the presence of another antivirus in your PC. Here we discuss a few troubleshooting steps to help you resolve this issue in Windows 10 quickly.
Why Is Windows Security Showing a Blank Screen?
As mentioned earlier, Windows Security is usually affected if you have a third-party antivirus installed on your PC. And when you uninstall an antivirus, it is important to use its removal tool to fully complete the job.
Disabled or missing Windows Defender Antivirus Service in Services can also trigger this problem. In such instances, you may have to perform a Repair Upgrade to fix the issue. System file corruption is another common cause for this issue and may require you to perform an upgrade, reset, or clean install to resolve the issue.
If you experience this issue, here is how to troubleshoot and fix the problem for good.
1. Restart Windows Security Center Service
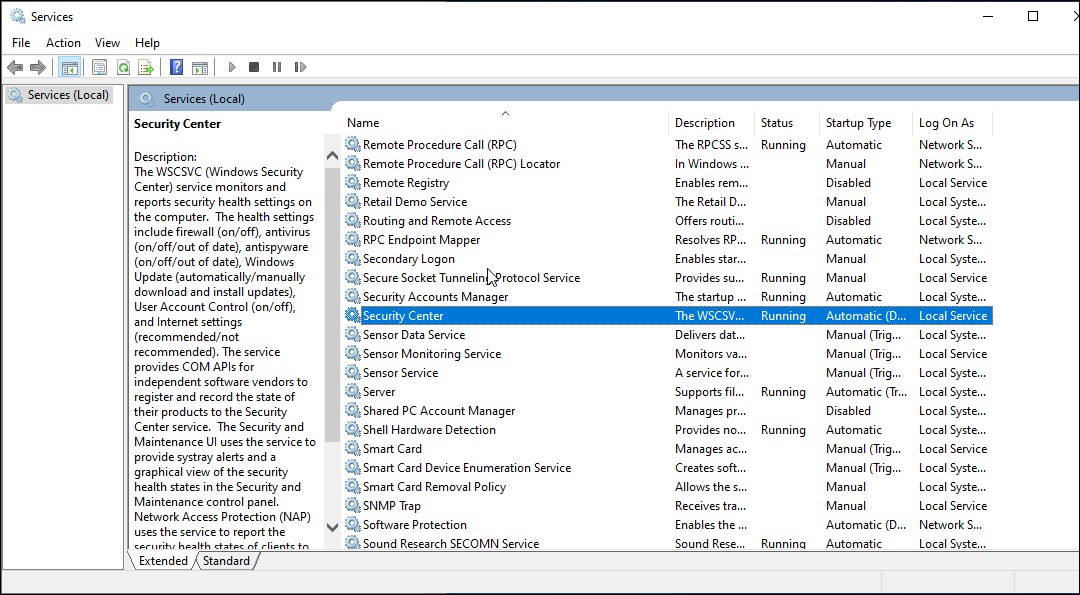
The Windows Security Center service is an essential aspect of the OS. It detects and notifies the users about the pending updates and security issues such as disabled antivirus, etc. If the service is closed or set to run manually, try restarting it to see if that helps.
To restart Windows Security Center Service:
- Press Win + R to open Run.
- Type services.msc and click OK.
- In the Services window, scroll down and locate the Security Center service.
- Check the status of the service. If it is not running, right-click and select Restart.
- Close Services and check for any improvements.
2. Check for Pending Windows Updates
If a bug or glitch is causing Windows Security to malfunction, check if a fix is available in the Windows Updates.
To check and download Windows updates:
- Go to Start > Settings > Windows Updates.
- Click on Check for updates
- Next, download and install all the pending updates.
- Restart your PC and check if the issue is resolved.
3. Check with your Administrator
If you are using a work computer, the administrator may have blocked access to some Windows 10 settings. Verify the Group Policy and Registry entries to find and fix any issues with Windows Security.
If available, try performing an in-place upgrade to the latest available version. A Windows 10 to 11 upgrade will reinstall the OS without removing your apps and files.
4. Run the System File Checker Tool
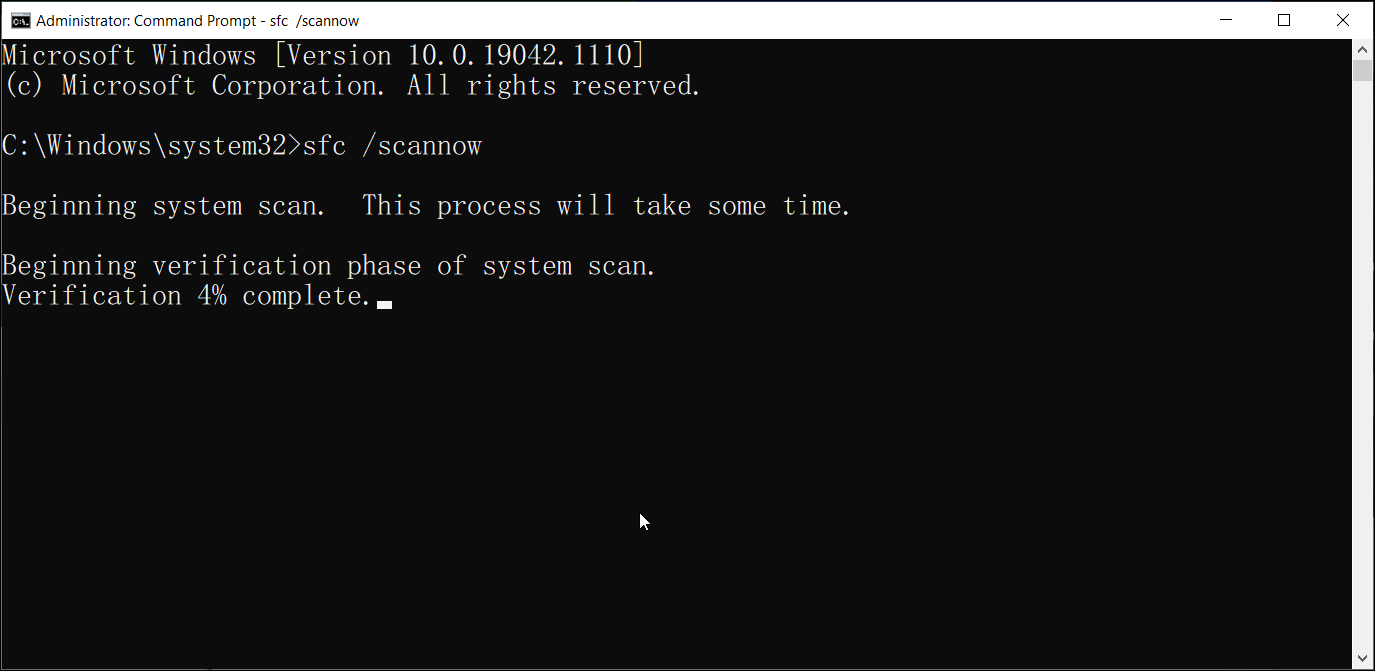
Corrupt system files can cause one or more features to stop working in Windows 10. The System File Checker tool deployed with the sfc /scannow command will scan all protected system files and replace corrupted ones with a fresh cached copy.
To run System File Checker tool:
- Type cmd in the Windows search bar.
- Right-click on the Command Prompt option and select Run as administrator.
-
In the Command Prompt window, type the following command and hit enter:
sfc /scannow - The verification process may take some time, so wait till it is 100% complete.
After the process is complete, you will receive one of the following messages:
- Windows Resource Protection did not find any integrity violations—This means the System File Checker did not find any issues with your system files.
- Windows Resource Protection found corrupted files and successfully repaired them.
- Windows Resource Protection found corrupted files but was unable to fix some of them.
- Windows Resource Protection could not perform the requested potation—In this stance, run the System File Checker in Safe Mode to resolve this error.
If the error is found and fixed, reboot the computer and check if the Windows Security blank screen issue is resolved.
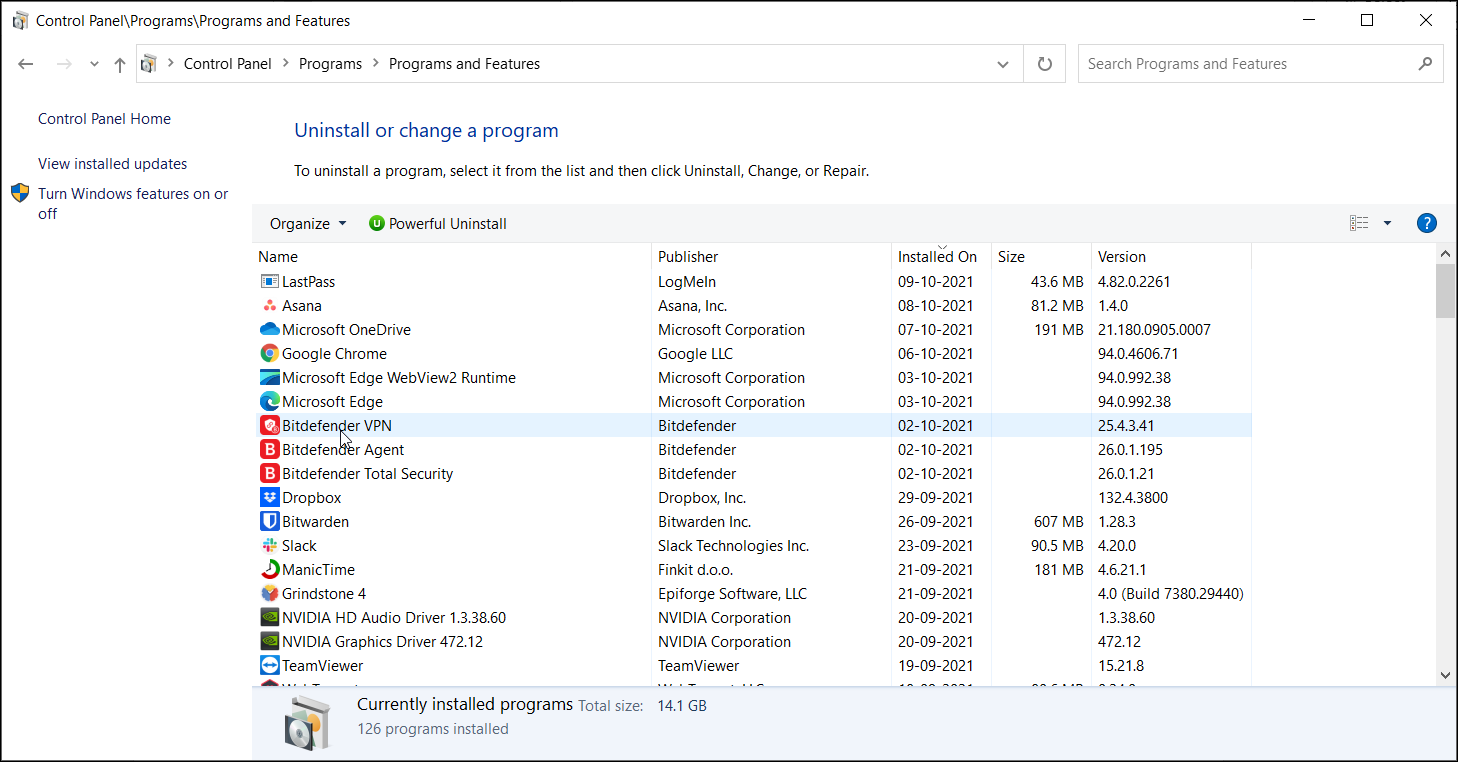
4. Check for the Presence of Third-Party Antivirus
By design, Windows Security will be disabled in the presence of a third-party antivirus. Though, it will not affect the Window Defender functionalities.
Some antivirus software like Malwarebytes allows you to turn off the protection and exit the app. If not, you may have to uninstall your antivirus to see if that helps.
To check if you have a third-party antivirus installed:
- Press Win + R to open Run.,
- Type appwiz.cpl and click OK to open the Control Panel.
- Go through the installed apps and look for any third-party antivirus installed.
Most antivirus companies offer a removal tool to completely remove the software from the user’s computer. Head over to your antivirus company’s official website and download the tool. Run the installer and follow on-screen instructions to delete your antivirus software.
As a last resort, perform a reset to reinstall Windows 10 without affecting your personal files and folders. However, this will remove all the third-party apps installed on your computer, so make sure to create a backup before resetting your PC.
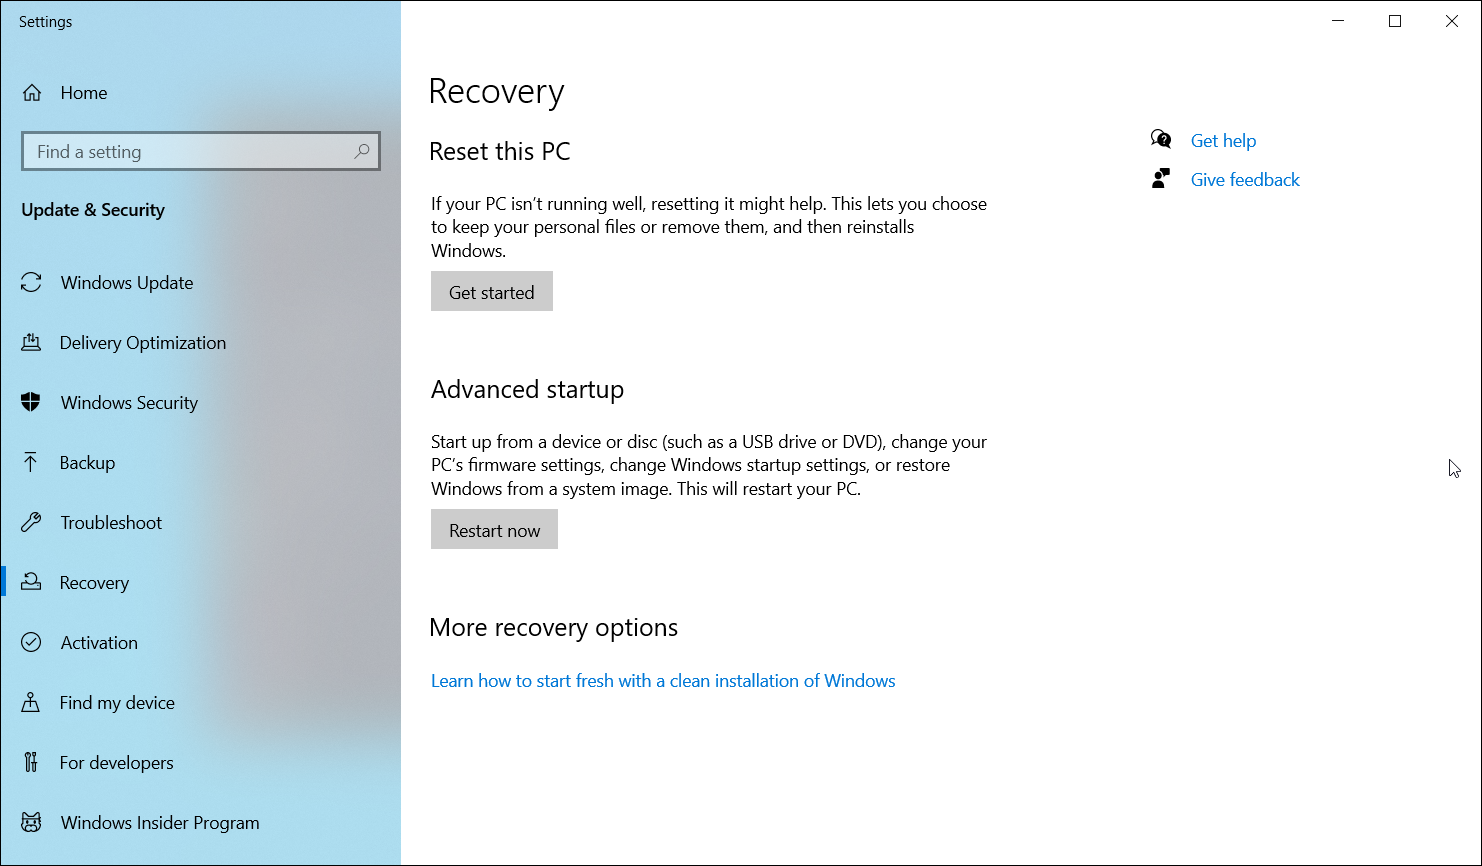
To reset your PC:
- Go to Start and open Settings.
- Open Update & Security.
- Open the Recovery tab from the left pane.
- Scroll down to the Advanced startup section and click on Restart Now.
- Windows will not boot into the Windows Recovery Environment.
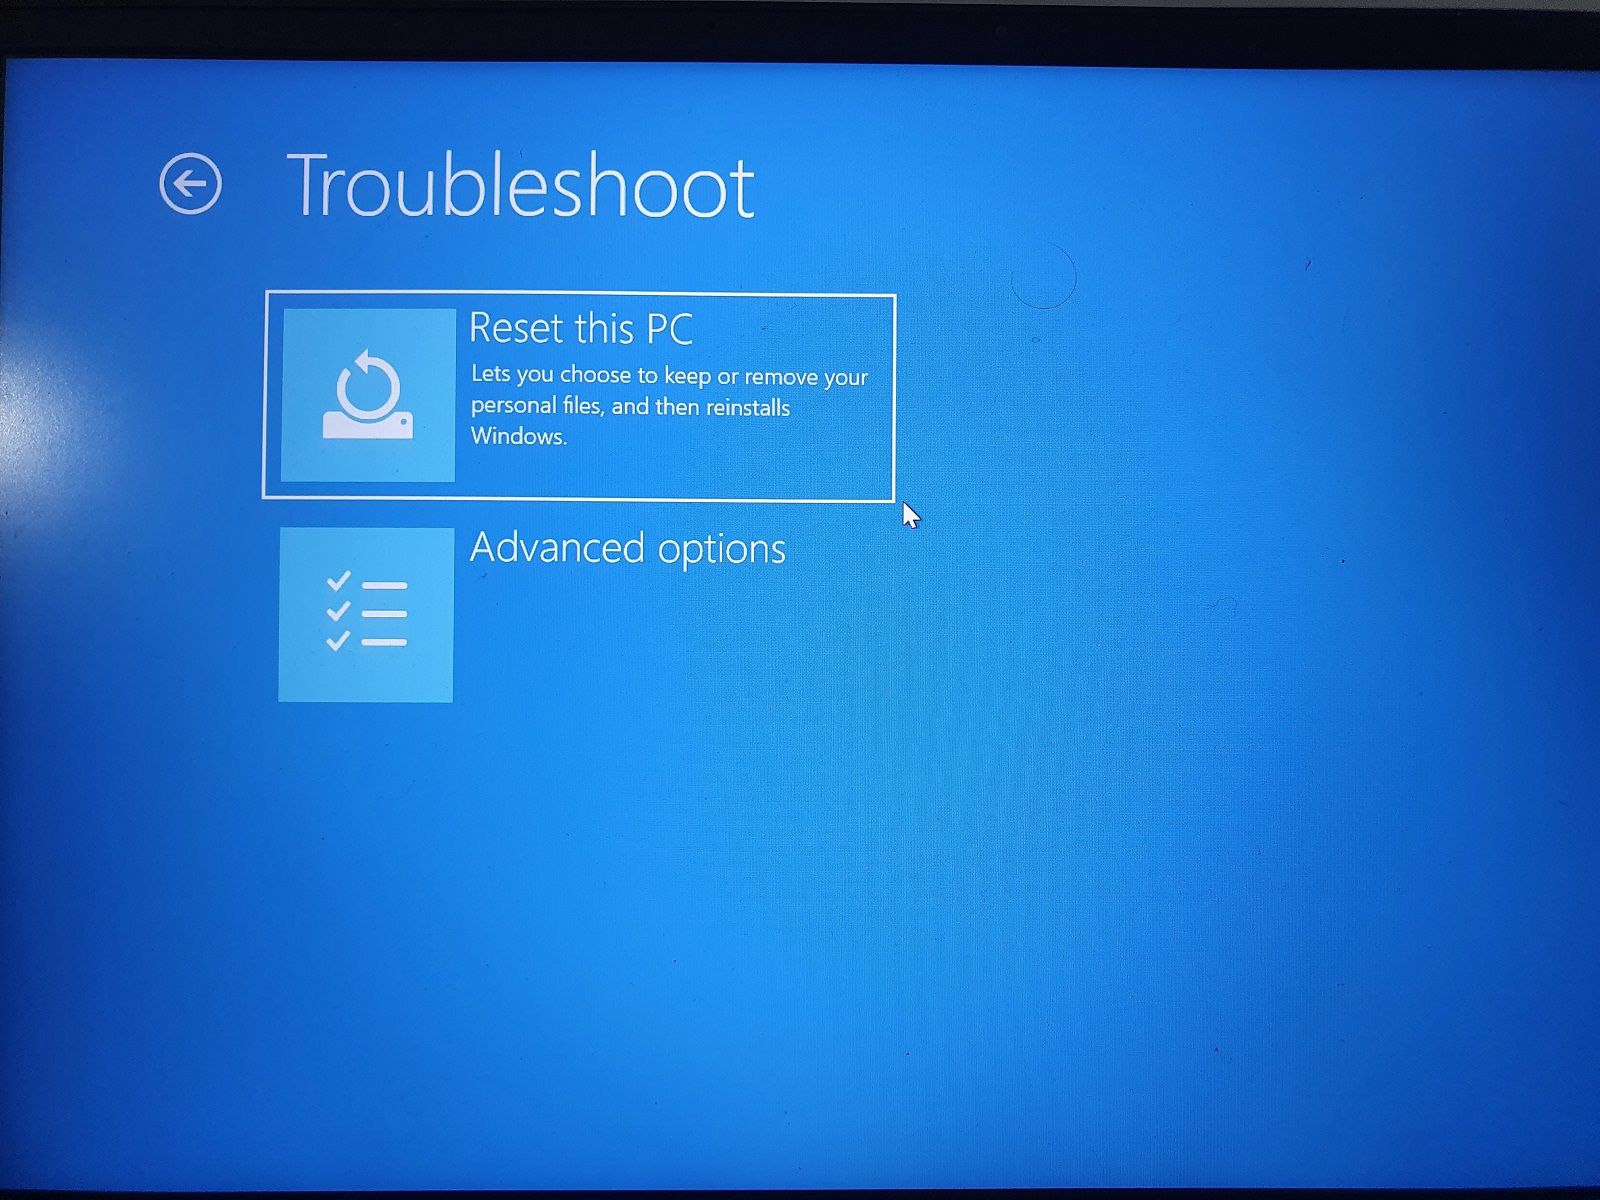
-
Select Troubleshoot and then click on Reset this PC.

- Under Reset this PC, click on Keep My files. This option will reinstall Windows 10 while keeping your personal files. However, it will remove third-party apps and settings.
- Once your PC restarts, select the user account and enter the password associated with your Microsoft account.
- Click Continue to proceed.
- In the How would you like to reinstall Windows? screen, select one of the following: Cloud Download: Requires a fast internet connection and can use up to 4GB of data to download required Windows files. Local reinstall: This allows you to reinstall Windows from your existing device. Select this option if you don’t have a stable internet connection.
- Read the description displayed on the screen and click the Reset button to confirm the action.
The reset process may take a few minutes to a few hours to complete. Leave your computer connected to a power source during the resetting process.
In most cases, resetting the PC to factory default should fix Windows Security showing blank screen problems in Windows 10 and Windows 11 systems. If not, you will have to clean install Windows 10/11 with a bootable drive.
Fixing Windows Security Showing Blank Screen in Windows 10
Windows Security showing blank screen issues can occur due to file corruption and is usually resolved with a repair install or upgrade to the latest version of the Windows OS. Before that, try to troubleshoot by restarting essential Windows Defender services, and checking for third-party antivirus interference.
If resetting or reinstalling Windows 10 is not an option, consider using a dedicated third-party antivirus solution for your system as a Windows Defender alternative.
Вы тут: Главная → Windows → Fix | Пустая страница инсайдерской программы в Параметрах Windows
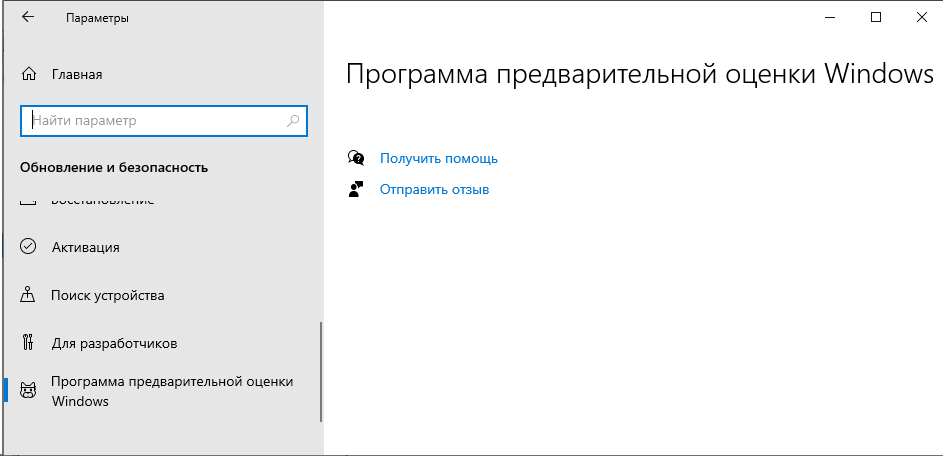
В апреле некоторые читатели решили перейти в кольцо Release Preview, чтобы получить ранний доступ к Windows 10 20H1. Кое-кто из них столкнулся с проблемой – страница программы предварительной оценки в Параметрах оказалось пустой. Сегодня я объясню две возможные причины такого поведения и приведу решения.
[+] Сегодня в программе
Начнем с простой причины, специфичной для 1909.
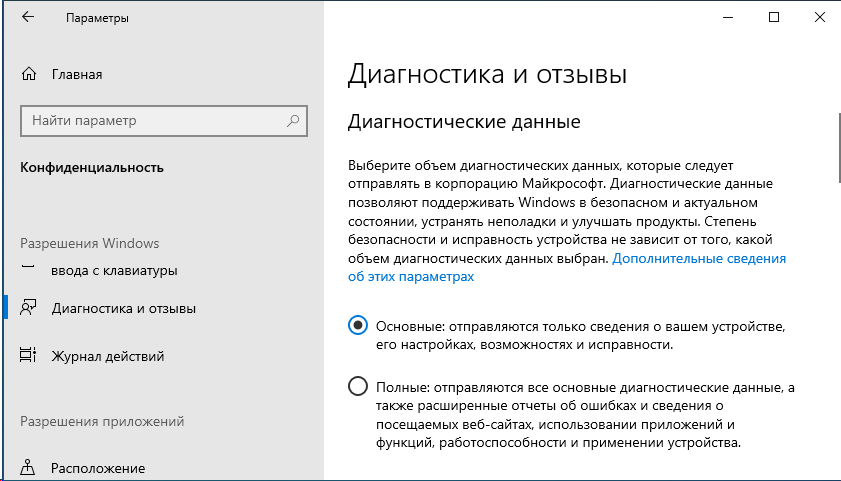
Причина 1: уровень телеметрии – не полный
По умолчанию в Windows 10 установлен базовый уровень телеметрии. На картинке Параметры конфиденциальности – Диагностика и отзывы.
Для получения инсайдерских сборок, куда входит и кольцо Release Preview, необходим полный уровень. В целом, на странице инсайдерской программы в Параметрах предусмотрен сценарий, когда задан другой уровень.

Однако из-за регрессионного дефекта в версии 1909 это сообщение не отображается. Поэтому решение простое – надо установить полный уровень телеметрии. После этого страница инсайдерской программы оживет.
Причина 2: нарушены разрешения на раздел реестра с параметрами телеметрии
В этом случае уровень телеметрии тоже не полный, но изменить его в Параметрах не удается.
Проблема
Даже если задать в Параметрах полный уровень телеметрии, настройка не применится. Заметить это можно, если перейти на другую страницу параметров, а потом вернуться обратно – уровень телеметрии останется прежним.
Настройка эквивалентна параметрам AllowTelemetry и MaxTelemetryAllowed в разделе реестра.
HKLM\SOFTWARE\Microsoft\Windows\CurrentVersion\Policies\DataCollection
При основном уровне оба параметра имеют значение 1, а при полном – 3.
Причина
Логично предположить, что внести изменения в реестр из Параметров мешает отсутствие разрешений. Проверить разрешения на раздел реестра можно из Regedit или в PowerShell от имени администратора:
Get-Acl -Path HKLM:\SOFTWARE\Microsoft\Windows\CurrentVersion\Policies\DataCollection | Format-List
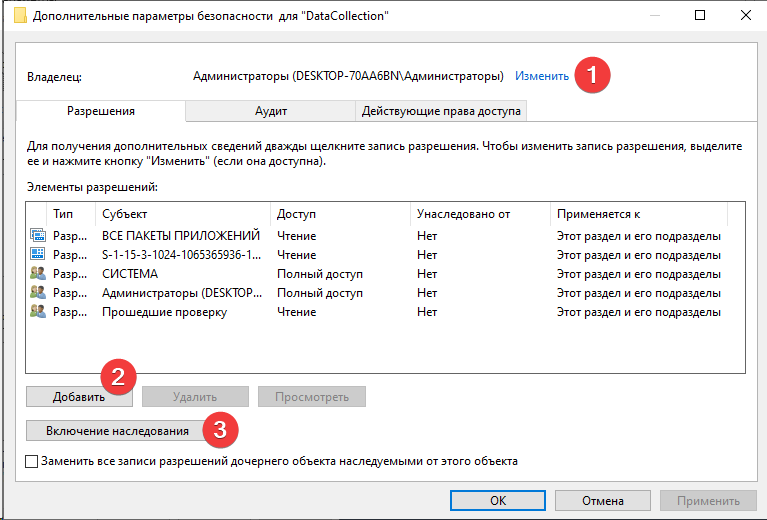
В чате @winsiders мы сравнили проблемные разрешения с рабочими. Сразу бросилось в глаза, что в проблемном случае владельцем этого раздела была группа администраторов, хотя должна быть система. Кроме того, заметно отсутствие в списке субъекта «Создатель-владелец», а также присутствие группы «Прошедшие проверку».
Я решил поковырять вопрос через пару дней, но к сожалению (или к счастью:), эту ОС уже обновили до 20H1. Поэтому дальше мне пришлось экспериментировать на ВМ. И тут я немного пожалел, что не попросил скриншот дополнительных параметров безопасности. Потому что курить синтаксис SDDL грустно даже с мануалом:)
С учетом того, что на проблемном ПК система все-таки имела полный доступ, воспроизвести проблему мне удалось в неочевидной последовательности:
- Отключение наследования разрешений [от родительского раздела реестра Policies].
- Удаление системы из списка субъектов с разрешениями!
- Включение наследования.
В скобках замечу, что после действия 3 в список субъектов автоматически добавляется из раздела Policies не только система, но и «Прошедшие проверку», что и наблюдалось на проблемном ПК.
Обходной путь
Чтобы задать необходимые параметры телеметрии и разблокировать страницу инсайдерской программы, достаточно задать в реестре верные значения. Например, в PowerShell от имени администратора выполнить:
$path = "HKLM:\SOFTWARE\Microsoft\Windows\CurrentVersion\Policies\DataCollection"
# Telemetry level: 1 - basic, 3 - full
$value = "3"
New-ItemProperty -Path $path -Name AllowTelemetry -Value $value -Type Dword -Force
New-ItemProperty -Path $path -Name MaxTelemetryAllowed -Value $value -Type Dword -Force
Решение
Чтобы вернуть возможность настройки из Параметров, придется исправить наследование разрешений.
Строго говоря, первые два пункта необязательны, но раз уж вы туда полезете…
- Установите владельцем раздела реестра СИСТЕМА (SYSTEM).
- Добавьте СОЗДАТЕЛЬ-ВЛАДЕЛЕЦ (CREATOR-OWNER) и дайте ему полные права на раздел.
- Включите наследование разрешений (inheritance). Возможно, понадобится сначала его выключить, преобразовав в явные разрешения, а затем снова включить.
В скобках названия субъектов и терминов для английской ОС. См. также Как получить доступ к разделу реестра и вернуть все на свои места.
Бонус: способы восстановления разрешений на разделы реестра
Трудно сказать, как возник такой расклад. Владелец проблемной системы не лез в разрешения руками, но обнаружил эту ситуацию на двух своих ПК.
Поэтому вероятнее всего изменения внесла какая-то сторонняя программа. Зачем она ломает разрешения – вопрос, ибо у администраторов и так полные права на раздел.
В принципе, сломать можно и руками. Поэтому по ссылке выше описаны методы правки реестра путем запуска cmd/regedit от имени SYSTEM и Trusted Installer. Это не гарантирует отсутствия проблем, но по крайней мере исключает сценарий с неправильными разрешениями.
Для их исправления есть несколько вариантов:
- Точечный, как в этой статье. Но зачастую неочевидно, что некая проблема возникает именно из-за разрешений, т.е. до этого надо еще дойти смекалкой или диагностикой.
- Откат к точке восстановления. Это самый простой способ в любой непонятной ситуации. Однако он не поможет, если проблема обнаружилась спустя значительное время после возникновения. То же самое относится и к восстановлению резервной копии реестра даже при ее наличии.
- Переустановка ОС поверх. Некоторые люди почему-то воспринимают этот способ как неспортивный, даже расписавшись в своем бессилии обращением в форум


Был еще способ defltbase.inf (KB313222), но он работал только вплоть до XP. Начиная с Vista, часть разрешений формируется динамически при установке ОС. Поэтому шаблоны разрешений не могут восстановить картину целиком.
Дискуссия и опрос
Не исключаю, что проблему породили те или иные попытки борьбы с телеметрией. Для меня очевидна ее полезность для экосистемы Windows. Однако я остаюсь при мнении, что Microsoft следует дать возможность ее отключения во всех изданиях.
С миллиардом устройств на Windows компании хватит объема данных от тех, кто не меняет стандартные настройки. При этом сразу исключается существенный пласт потенциальных и вполне реальных проблем, вызванных попытками отключить или вырезать телеметрию способами различной степени варварства.
В статье про мифы LTSC был такой фрагмент:
Мне абсолютно понятно, что людей беспокоит передача личной информации. Однако опрашиваемые в чате адепты полного отключения телеметрии не могут назвать конкретные аспекты ее базового уровня, касающиеся персональных данных. Попробуйте и вы — до и после прочтения документации!
Но никто из читателей не откликнулся. Предложение все еще актуально 
В каком состоянии у вас телеметрия в Windows 10?
- Базовый уровень / Стандартные настройки (44%, голосов: 51)
- Полный уровень / Инсайдер (21%, голосов: 24)
- Вырезано/отключено одним сторонним средством (10%, голосов: 12)
- Вырезано/отключено несколькими способами (10%, голосов: 12)
- Отключено политикой в Enterprise / LTSC (9%, голосов: 11)
- Отключено политикой в другом издании (3%, голосов: 3)
- Другое / Моего варианта тут нет (3%, голосов: 3)
Проголосовало: 116 [архив опросов]
Загрузка …
Protection history is a part of the Windows Security app that displays actions and recommendations about threats in Windows 11 and 10. The page includes Quarantined items, Cleaned items, Removed items, Allowed items, Removed items, Blocked actions, and severity of a threat. Blocked actions option has 3 sub-menus – Block folder access, Blocked items, and Ruled-base block, similarly Severity has 4 items – Severe High, Moderate, and Low. But sometimes people complain Protection History missing issue.
The Windows Defender Protection history is empty or blank and nothing can be seen on the page when the problem occurs. Immediately after running a “Quick Scan”, “Full Scan”, “Custom Scan” or “Microsoft Defender offline scan”, usually a user navigates to Protection history. But he gets disappointed and finds himself out of nowhere when finds unoccupied because he is unable to know the status of threats or clear them on his Windows 11 computer. Fortunately, there are solutions to this problem. See – Fix: Insider Program Settings Blank, Empty, or Missing in Windows 10.
Windows Defender Protection History missing
Here is how to fix Protection History missing in Windows 11 or 10 –
Way-1: Disable Windows Defender and reboot the PC
To normally access the concerned settings you can go through – How to See Protection History in Windows 10, but in this case, the content inside this page is missing. Turning off the Windows Defender and deleting the mpcache files work like wonder to fix the issue –
- Hit – Windows and R.
- Type – cmd.exe.
- Press Ctrl + Shift + Enter.
- Select Yes when the User account control setting popup opens.
- Type the following commands successively and press Enter.
del "C:\ProgramData\Microsoft\Windows Defender\Scans\History\Service\DetectionHistory\*"
del "C:\ProgramData\Microsoft\Windows Defender\Scans\mpenginedb.db"- Click on Search.
- Type Windows Security.
- Press Enter.
- Select – Virus & threat protection.
- Now click on the Manage settings link.
- From the next page, turn off Real-time protection and Cloud-delivered protection.
- Now open File Explorer (Win+E).
- Go to (C:) drive.
- Double-click on ProgramData.
- Open the Microsoft folder.
- Enter Windows Defender and the launch Scans folder.
- The path will be as follow –
C:\ProgramData\Microsoft\Windows Defender\Scans- Find all the files with prefix mpcache and delete them.
- On my computer, the Scans folder has the following files which I am deleting –
mpcache-8B71EC38EE6CA744C8B3D9719F943BEFDB9392A9.bin
mpcache-8B71EC38EE6CA744C8B3D9719F943BEFDB9392A9.bin.01
mpcache-8B71EC38EE6CA744C8B3D9719F943BEFDB9392A9.bin.6C
mpcache-8B71EC38EE6CA744C8B3D9719F943BEFDB9392A9.bin.7C
mpcache-8B71EC38EE6CA744C8B3D9719F943BEFDB9392A9.bin.7E
mpcache-8B71EC38EE6CA744C8B3D9719F943BEFDB9392A9.bin.67
mpcache-8B71EC38EE6CA744C8B3D9719F943BEFDB9392A9.bin.79
mpcache-8B71EC38EE6CA744C8B3D9719F943BEFDB9392A9.bin.80
mpcache-8B71EC38EE6CA744C8B3D9719F943BEFDB9392A9.bin.83
mpcache-8B71EC38EE6CA744C8B3D9719F943BEFDB9392A9.bin.87
mpcache-8B71EC38EE6CA744C8B3D9719F943BEFDB9392A9.bin.A0
mpcache-8B71EC38EE6CA744C8B3D9719F943BEFDB9392A9.bin.DB
mpcache-8B71EC38EE6CA744C8B3D9719F943BEFDB9392A9.bin.E6- Sometimes, you might not be able to delete mpcache files and get a message – “The action cannot be completed because the file is open in Microsoft Defender Antivirus Service”.
- In this case, press Ctrl+Shift+Esc.
- On the Task Manager, Find the processes related to Widows Security and Windows Defender.
- Right-click on each of them and select End task.
- Now try to delete mpcache files.
- Reboot the PC if you can get back the missing Protection history in Windows Defender.
Way-2: Delete mpcache files using cmd command to fix missing Windows security threat history
II you can not remove mpcache files even after turning off real-time protection and using End Task in Task Manager then a cmd command may help.
- Launch Command prompt as administrator (Steps are mentioned in the first method)
- Enter the following command –
del "C:\ProgramData\Microsoft\Windows Defender\Scans\mpcache*" /s > NUL 2>&1- Finally, restart your PC to see missing Protection History in Windows 11 or 10.
Methods:
Way-1: Disable Windows Defender and reboot the PC
Way-2: Delete mpcache files using cmd command
That’s all!!