
Skip to content
How to create beautiful animated material user interface design using C# Winforms
-
View Larger Image

This is our very first article where we take you step by step with an example of animated Material User Interface created with Bunifu UI Winforms. You will need it to use some of the controls and components mentioned.
Let’s dive into it!
First of all, please create a new Windows Forms Application and add a Bunifu Ellipse on the main form. It will look simple, without borders.
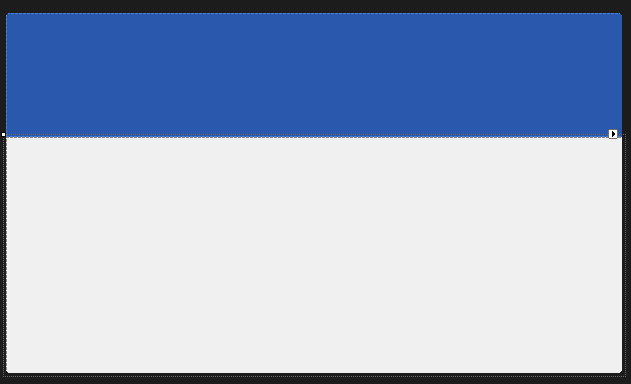
Now please add 2 panels on the form, the first one with dock to the top and the second one with dock to fill. Set the BackColor of the first panel (the top one) to 42, 88, 173 and you should get the following effect:
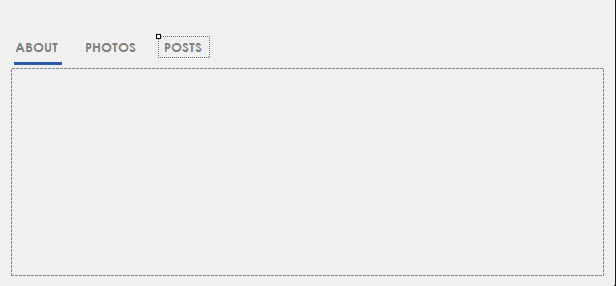
Now we’ll work on the panel on the bottom (the second one). First let’s add another panel inside this one and then above that new panel let’s add 3 labels named About, Photos and Posts (with the font Century Gothic) and above the first one let’s add a Bunifu Separator colored Blue with a Thickness of 3.
This should be the effect:
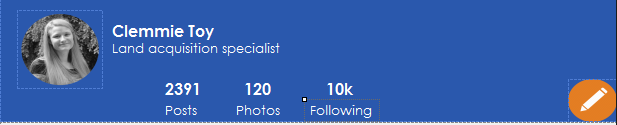
Now we move in the panel on the top, where we’ll add 2 picture boxes to maintain the profile picture and the edit picture. Also we’ll add some labels with the name, position and different statistics. This is an example of designing:
Now we’ll do something very interesting: we’ll make the form move when we drag the panel above (this one that contains the profile picture).
In order to do that, make sure that the name of your panel is Panel1 and type that code in the Form1 class:
[code lang=”csharp”]
Bunifu.Framework.UI.Drag drag = new Bunifu.Framework.UI.Drag();
public Form1()
{
InitializeComponent();
}
private void panel1_MouseDown(object sender, MouseEventArgs e)
{
drag.Grab(this);
}
private void panel1_MouseUp(object sender, MouseEventArgs e)
{
drag.Release();
}
private void panel1_MouseMove(object sender, MouseEventArgs e)
{
drag.MoveObject();
}
[/code]
Now you can easily move your entire form by just dragging the top panel!
Let’s move now the separator (that blue line below the About label) to each label, when we click on it.
We just need to implement the Click event on each label:
[code lang=”csharp”]
private void label1_Click(object sender, EventArgs e)
{
bunifuSeparator1.Width = label1.Width;
bunifuSeparator1.Left = label1.Left;
}
private void label3_Click(object sender, EventArgs e)
{
bunifuSeparator1.Width = label3.Width;
bunifuSeparator1.Left = label3.Left;
}
private void label2_Click(object sender, EventArgs e)
{
bunifuSeparator1.Width = label2.Width;
bunifuSeparator1.Left = label2.Left;
}
[/code]
You can simply test it and see it working:
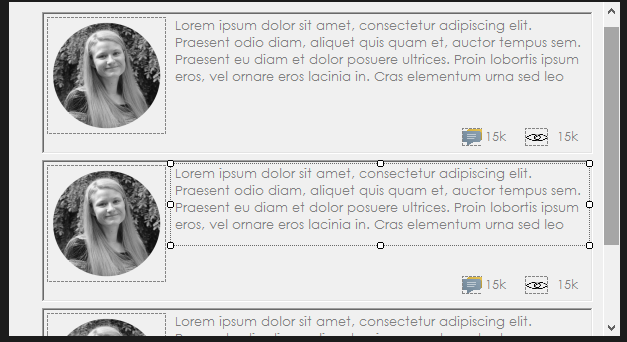
Now we’ll complete each tab. We’ll create each tab as a new User Control component. So let’s work on the “About” tab. Add a new User Control and name it About. Then, place some labels and some pictures in it to fit the following layout:
This is a new user control (defined by you) so you can simply find it in the toolbox and you can basically drop it to the form (as you do with all the other controls).
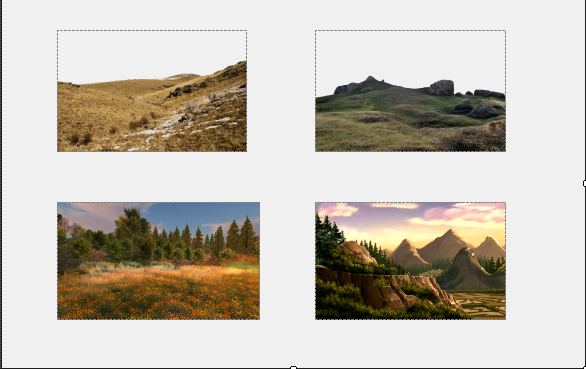
Now let’s add the Photos User Control:
In order to animate the transition between the newly created controls (About, Photos, etc.), let’s add a Bunifu Transition Component and set it’s animation type to HorizSlide. Then add this code in the label1_click method:
[code lang=”csharp”]
about1.Visible = false;
about1.BringToFront();
bunifuTransition1.ShowSync(about1);
[/code]
You need to add a similar structure in the same label_click method that we implement. This way when we click on “Photos” we’ll get a horizontal transition of all the controls of the previous control.
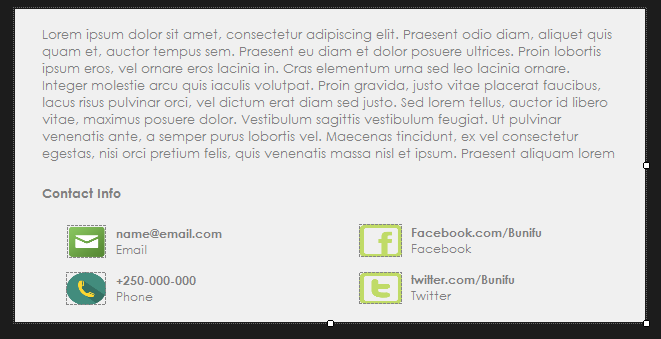
The last control, Posts, can be easily done by adding another panel inside our user control and designing it like that (as an example):
It’s just a simple styling of labels and finding the right image. Just rebuild the solution and you’ll find the control in the toolbox. Add it on the form, complete the label3_click method to use the animation (as I mentioned above) and that’s it.
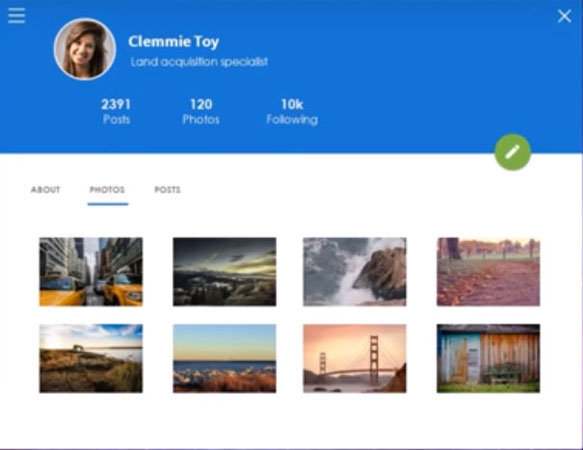
Finally, we created an amazing User Interface that we can use to interact with our backend. We can see again how much we can get from Bunifu UI Winforms.
You can watch a detailed video of the same below.
Please let us know in the comments what you think…More posts coming, stay tuned 🙂
Enjoy!
Share This Story, Choose Your Platform!
Related Posts
This site uses Akismet to reduce spam. Learn how your comment data is processed.
Page load link
Go to Top
Вступление: Часто встречаются приложения которые не блестят особым дизайном UI, так же в них нет вкуса и все в сером цвете. С помощью не хитрых действий можно сделать современное приложение которая не будет уступать монстру WPF, к которому очень не легко сразу научится писать ПО, эта статья скорей для тех кто пишет под WinForms и боится начать WPF, так как они вроде бы похожи но все же отличаются сложностью и крутостью.
Итак. Для простого примера создадим наш собственный браузер на движке webkit с помощью платформы .Net Framework на языке программировании c#
Глава 1: Цвет залог успешной дружелюбности, чем он приятней тем лучше, и кстати белый цвета тоже не плохо смотрятся
Свойства формы: FrameBorder=none, BackColor=white
Глава 2: Кнопки играют не маловажную роль в интерфейсе любой ПО, главное их правильное расположение, размер, текст и цвет,
Для этого создадим UserControl
using System;
using System.Drawing;
using System.Linq;
using System.Text;
using System.Windows.Forms;

namespace habr
{
    public partial class btn : Button//UserControl
    {
        public enum ButtonType
        {
            GoBack,
            Home,
            GoForward,
            Refresh,
            Search,
            Close,
            Minimize
        }
        public btn()
        {
            InitializeComponent();
        }
        private Color _OnMouseEnterColor = Color.Blue;
        private Color _OnMouseClickColor = Color.BlueViolet;
        private Color _MixedColor = Color.CadetBlue;
        private byte _Transparency1 = 64;
        private byte _Transparency2 = 64;
        private byte _AngleOfTransparency = 90;
        private float _Resizer = 1.05f;
        private ButtonType _ButtonType;

        private bool IsOver;
        private bool IsDown;
        private Point _initLocation;
        private Font _initFontSize;
        private Point _tempLocation;
        private Size _tempSize;

        public Color OnMouseEnterColor { get { return _OnMouseEnterColor; } set { _OnMouseEnterColor = value; Invalidate(); } }
        public Color OnMouseClickColor { get { return _OnMouseClickColor; } set { _OnMouseClickColor = value; Invalidate(); } }
        public Color MixedColor { get { return _MixedColor; } set { _MixedColor = value; Invalidate(); } }
        public byte Transparency1 { get { return _Transparency1; } set { _Transparency1 = value; Invalidate(); } }
        public byte Transparency2 { get { return _Transparency2; } set { _Transparency2 = value; Invalidate(); } }
        public byte AngleOfTransparency { get { return _AngleOfTransparency; } set { _AngleOfTransparency = value; Invalidate(); } }
        public float Resizer { get { return _Resizer; } set { _Resizer = value; Invalidate(); } }
        public ButtonType ButtonTypeThumb { get { return _ButtonType; } set { _ButtonType = value; Invalidate(); } }


        protected override void OnMouseEnter(EventArgs e)
        {
            base.OnMouseEnter(e);
            IsOver = true;
        }
        protected override void OnMouseLeave(EventArgs e)
        {
            base.OnMouseLeave(e);
            IsOver = false;
        }
        protected override void OnMouseDown(MouseEventArgs mevent) //Эффект увеличивания / уменьшения
        {
            base.OnMouseDown(mevent);
            _initLocation = Location;
            _tempLocation = new Point(Location.X + Width / 2, Location.Y + Height / 2);
            _tempSize = Size;
            Size = new Size((int)(Width / _Resizer), (int)(Height / _Resizer));
            Location = new Point(_tempLocation.X - Size.Width / 2, _tempLocation.Y - Size.Height / 2);
            _initFontSize = Font;
            Font = new Font(Font.FontFamily, Font.Size / _Resizer);
            IsDown = true;

        }
        protected override void OnMouseUp(MouseEventArgs mevent)
        {
            base.OnMouseUp(mevent);
            Location = _initLocation;
            Size = _tempSize;
            Font = _initFontSize;
            IsDown = false;
        }
        protected override void OnPaint(PaintEventArgs pevent) //отрисовка иконки ИСПОЛЬЗОВАТЬ ШРИФТ SEGOE UI SYMBOL. Который позволяет отрисовывать такие жамечательные картинки
        {
            base.OnPaint(pevent);
            if (_ButtonType == ButtonType.GoBack) Text = "\ue096";
            if (_ButtonType == ButtonType.GoForward) Text = "\ue097";
            if (_ButtonType == ButtonType.Home) Text = "\ue10f";
            if (_ButtonType == ButtonType.Refresh) Text = "\ue149";
            if (_ButtonType == ButtonType.Search) Text = "\ue11a";
            if (_ButtonType == ButtonType.Close) Text = "\ue10a";
            if (_ButtonType == ButtonType.Minimize) Text = "\ue108";

            if (IsOver)
            {
                if (IsDown)
                {
                    Color c1 = Color.FromArgb
                    (_Transparency1, _OnMouseClickColor);
                    Color c2 = Color.FromArgb
                        (_Transparency2, _MixedColor);
                    Brush b = new System.Drawing.Drawing2D.LinearGradientBrush
                        (ClientRectangle, c1, c2, _AngleOfTransparency);
                    pevent.Graphics.FillRectangle(b, ClientRectangle);
                    b.Dispose();
                }
                else
                {
                    Color c1 = Color.FromArgb
                   (_Transparency1, _OnMouseEnterColor);
                    Color c2 = Color.FromArgb
                        (_Transparency2, _MixedColor);
                    Brush b = new System.Drawing.Drawing2D.LinearGradientBrush
                        (ClientRectangle, c1, c2, _AngleOfTransparency);
                    pevent.Graphics.FillRectangle(b, ClientRectangle);
                    b.Dispose();
                }

            }
        }

    }
}
Глава 3: Не много функциональности для формы
public partial class Form1 : Form
    {
        public Form1()
        {
            InitializeComponent();
        }
        private bool IsDown;
        private Point Origin;
        private void btn6_Click(object sender, EventArgs e)
        {
            Application.Exit();
        }

        private void btn7_Click(object sender, EventArgs e)
        {
            WindowState = FormWindowState.Minimized;
        }

        private void panel4_MouseDown(object sender, MouseEventArgs e)
        {
            IsDown = true;
            Origin = new Point(e.X, e.Y);
        }

        private void panel4_MouseUp(object sender, MouseEventArgs e)
        {
            IsDown = false;
            Location = new Point(Location.X - Origin.X + e.X, Location.Y - Origin.Y + e.Y);
        }

        private void panel4_MouseMove(object sender, MouseEventArgs e)
        {
            if (IsDown) Location = new Point(Location.X - Origin.X + e.X, Location.Y - Origin.Y + e.Y);
        }

        private void panel1_DoubleClick(object sender, EventArgs e)
        {
            if (WindowState == FormWindowState.Maximized) WindowState = FormWindowState.Normal;
            else WindowState = FormWindowState.Maximized;
        }
    }
Заключение: Не смотря на многообещающий WPF, Winforms еще жив, пока и не мере в Казахстане и России, и во многих странах, да и вообще везде, не мало людей кто пишут. Путем не многих модернизации можно добиться схожих результатов как и в WPF.
Еще один пример
-
#2
Обратите внимание, пользователь заблокирован на форуме. Не рекомендуется проводить сделки.
Тема заслуживает внимания, но уже задолго до тебя написали библиотеки по типу — Bunifu UI или Guna UI и так далее. Ну ты и сам прекрасно о них знаешь. Следовательно напрашивается вопрос: «Зачем изобретать велосипед, когда есть уже мопед?»
Да, можно ссылаться на то, что Bunifu — платная библиотека и прочее. Но ее постоянно крякают и сливают в паблик. Так что тут я не знаю 50/50 конечно. В общем и целом из этого гайда взял для себя — стиль формы как у телеграма.
The sample app that demonstrates how to create a desktop application with a modern UI (WinForms, C#, .NET 7, .NET Framework)
1
star
0
forks
Branches
Tags
Activity
Star
Notifications
You must be signed in to change notification settings
Стиль Material Design в Windows Forms
admin
23.02.2019
Видеоуроки
Нет комментариев
В видеоуроке рассказывается, как заменить стандартную тему оформления Windows Forms на стиль Material Design от Google. Проект создается на языке программирования C#.
3.9/5 — (22 голоса)
c#, Windows Forms, Видео, Видеоурок, Урок
Поделиться в соц. сетях:
- ← Является ли число простым — Проверяем на языке Си
- Потоки в Visual C++ — Пример реализации и использования →
Добавить комментарий
Ваш адрес email не будет опубликован.
Комментарий
Имя
Сайт
Сохранить моё имя, email и адрес сайта в этом браузере для последующих моих комментариев.
Уведомить меня о новых комментариях по email.
Уведомлять меня о новых записях почтой.