
Все способы:
- Измеряем скорость интернета в Виндовс 10
- Способ 1: Тест скорости на Lumpics.ru
- Способ 2: Яндекс Интернетометр
- Способ 3: Приложение Speedtest
- Просмотр текущей скорости
- Заключение
- Вопросы и ответы: 1
Скорость интернет-соединения – довольно важный показатель для любого компьютера или ноутбука, а точнее, для самого пользователя. В обобщенном виде эти характеристики предоставляет поставщик услуг (провайдер), они же содержатся в оформленном с ним договоре. К сожалению, таким образом можно узнать лишь максимальное, пиковое значение, а не «повседневное». Для получения реальных цифр необходимо самостоятельно измерить этот показатель, и сегодня мы расскажем о том, как это делается в Windows 10.
Измеряем скорость интернета в Виндовс 10
Существует довольно много вариантов проверки скорости интернет-соединения на компьютере или ноутбуке, работающем под управлением десятой версии Windows. Мы рассмотрим лишь наиболее точные из них и те, что положительно себя зарекомендовали за длительное время использования. Итак, приступим.
Примечание: Для получения наиболее точных результатов перед выполнением любого из представленных ниже способов закройте все программы, для работы которых требуется подключение к сети. Запущенным должен остаться только браузер, причем крайне желательно, чтобы в нем был открыт минимум вкладок.
Читайте также: Как в Виндовс 10 повысить скорость интернета
Способ 1: Тест скорости на Lumpics.ru
Раз уж вы читаете эту статью, наиболее простым вариантом проверки скорости интернет-соединения будет использование сервиса, интегрированного в наш сайт. В его основе лежит всем известный Speedtest от Ookla, который в данной сфере является эталонным решением.
Перейти к тесту скорости интернета на Lumpics.ru
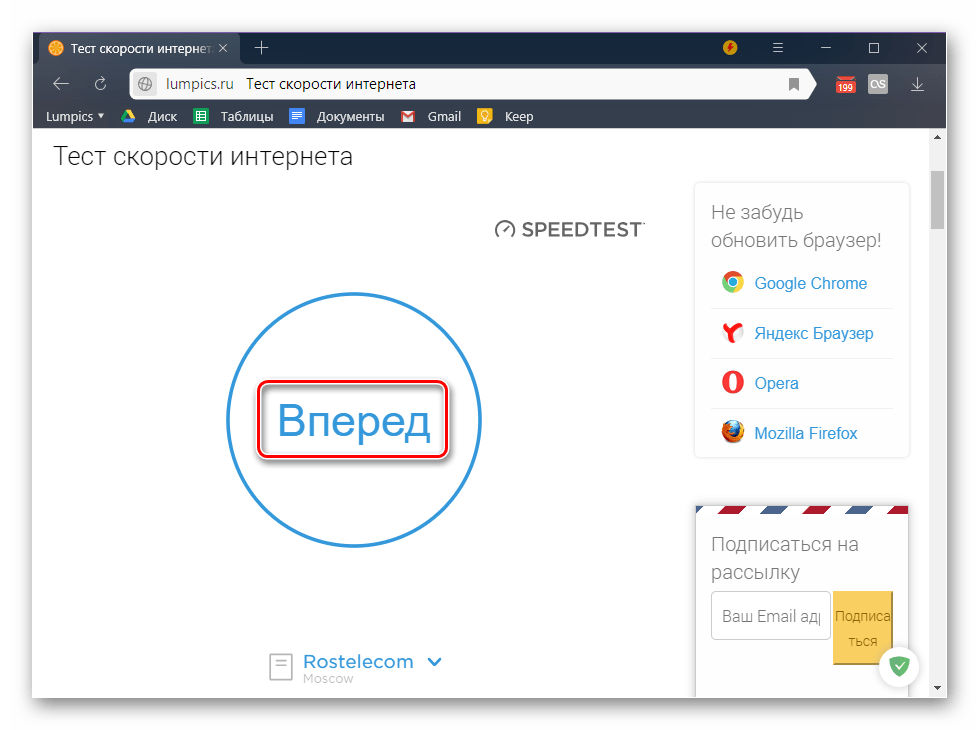
- Перейдите по ссылке выше.
- Нажмите по кнопке «Начать» и дождитесь завершения проверки.

Постарайтесь в это время не тревожить ни браузер, ни компьютер.
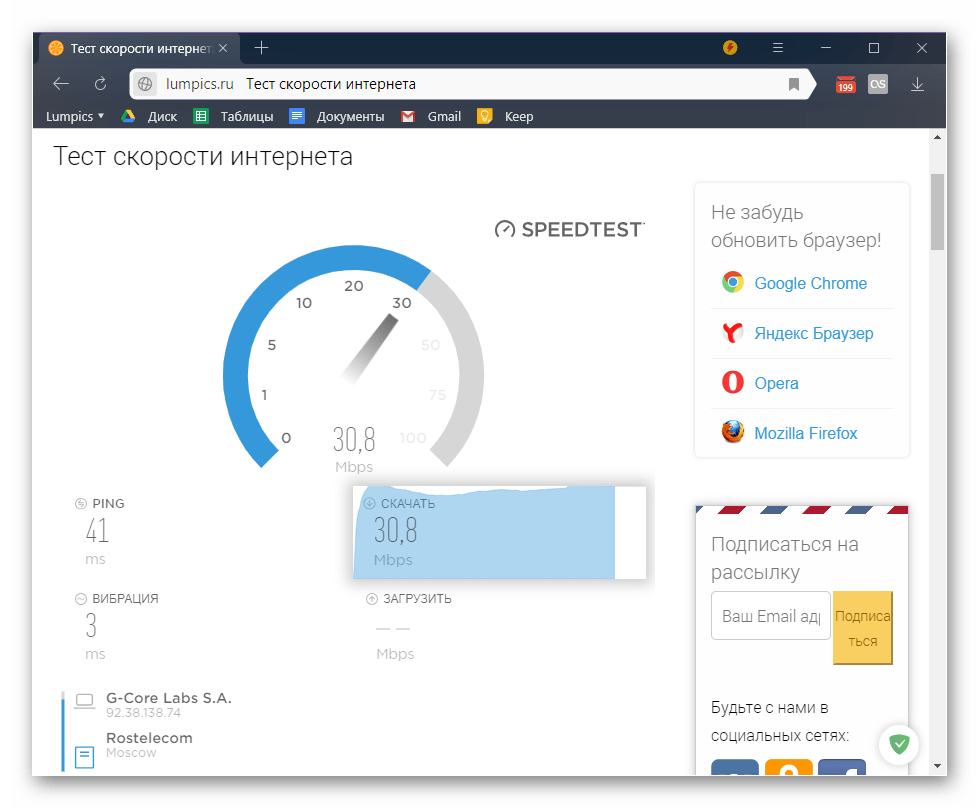
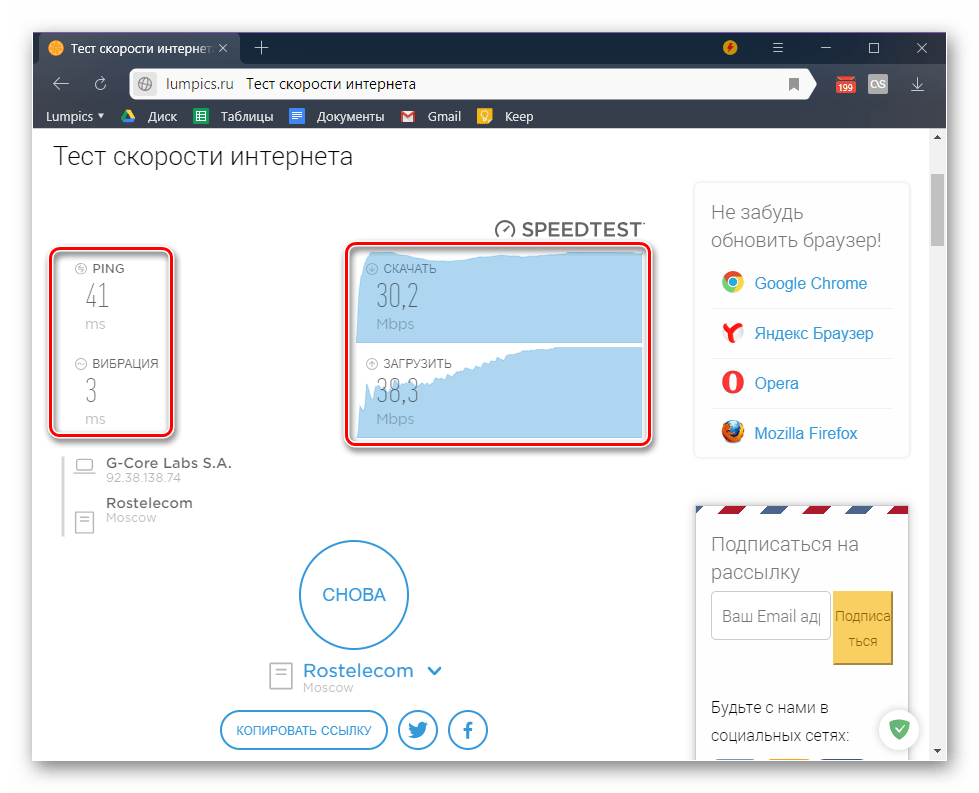
- Ознакомьтесь с результатами, в которых будет указана реальная скорость вашего интернет-соединения при скачивании и загрузке данных, а также пинг с вибрацией. Дополнительно сервисом предоставляется информация о вашем IP, регионе и поставщике сетевых услуг.
Способ 2: Яндекс Интернетометр
Так как в алгоритме работы разных сервисов для измерения скорости интернета есть небольшие отличия, для получения максимально приближенного к действительности результата следует воспользоваться несколькими из них, а затем определить среднюю цифру. Поэтому предлагаем вам дополнительно обратиться к одному из многочисленных продуктов Яндекса.
Перейти на сайт Яндекс Интернетометра
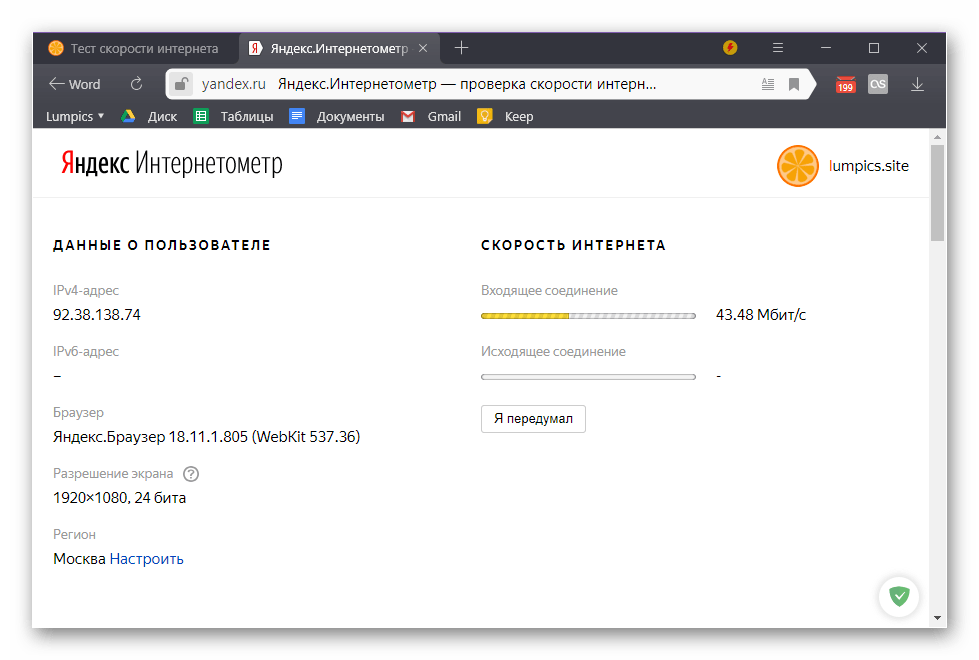
- Сразу после перехода по представленной выше ссылке нажмите по кнопке «Измерить».
- Дождитесь завершения проверки.
- Ознакомьтесь с полученными результатами.
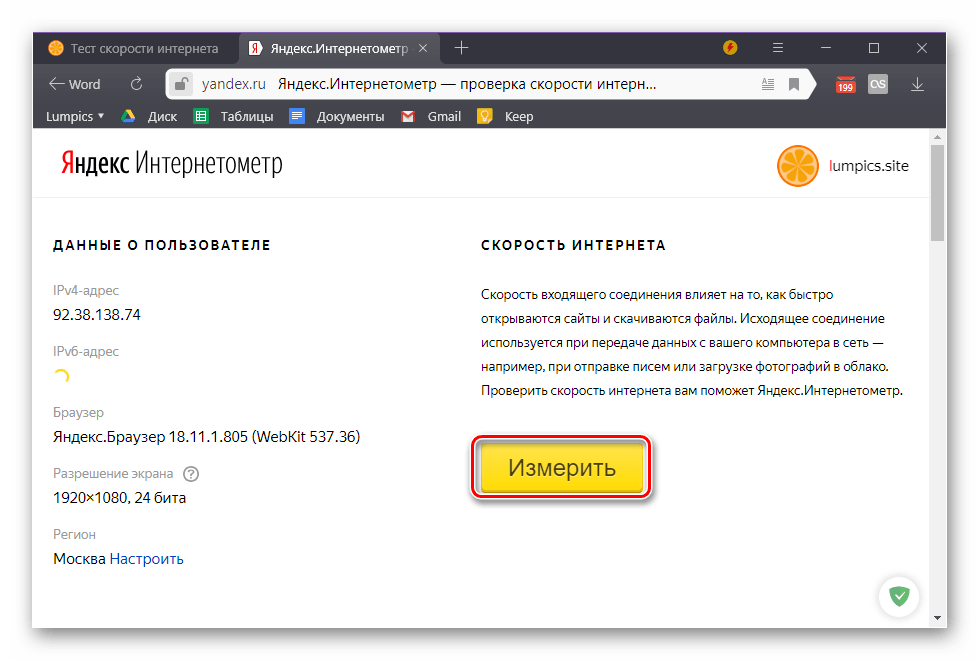
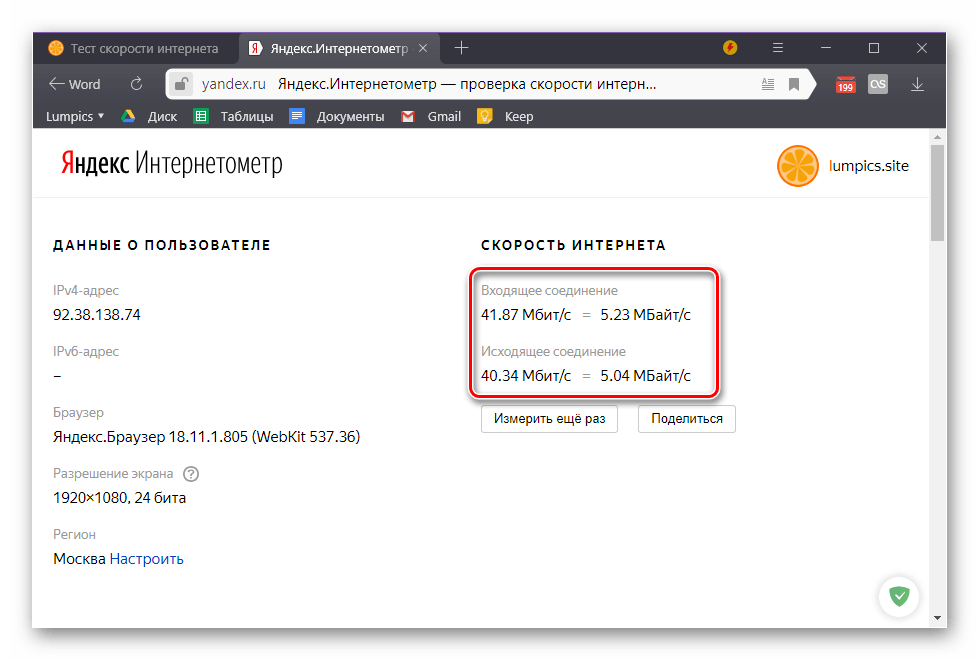
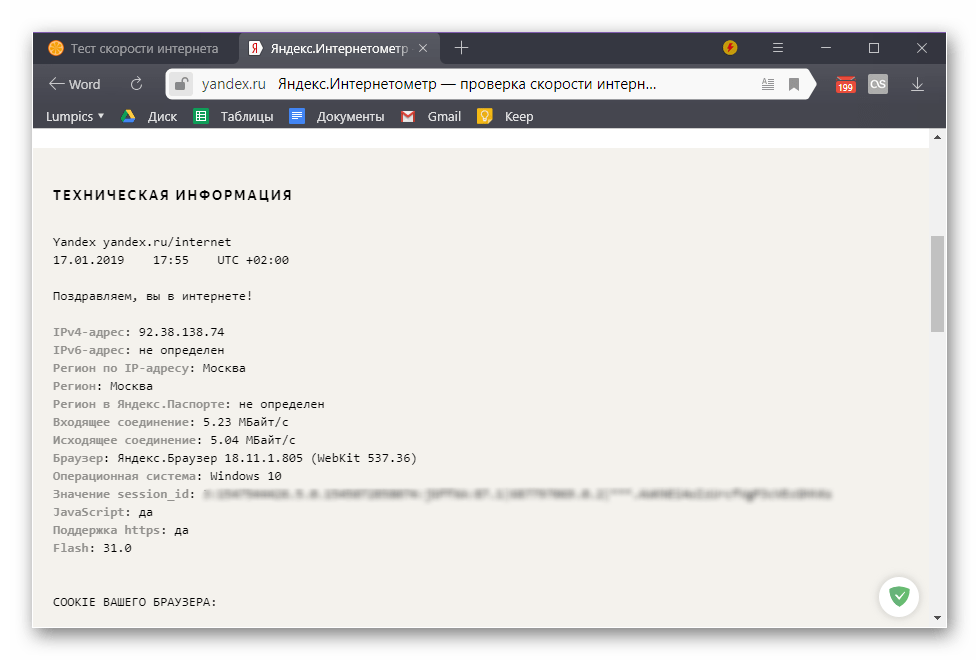
Интернетометр от Яндекса несколько уступает нашему тесту скорости, по крайней мере, если говорить о его прямых функциях. После проверки вы сможете узнать только скорость входящего и исходящего соединения, зато помимо общепринятых Мбит/с она будет указана еще и в более понятных мегабайтах за секунду. Дополнительная информация, которой на данной странице представлено довольно много, никакого отношения к интернету не имеет и говорит только о том, как много Яндекс знает о вас.
Способ 3: Приложение Speedtest
Рассмотренные выше веб-сервисы могут быть использованы для проверки скорости интернет-соединения в любой версии Виндовс. Если же говорить конкретно о «десятке», то для нее разработчики упомянутого выше сервиса Ookla создали еще и специальное приложение. Установить его можно из фирменного магазина Майкрософт.
Скачать приложение Speedtest в Microsoft Store
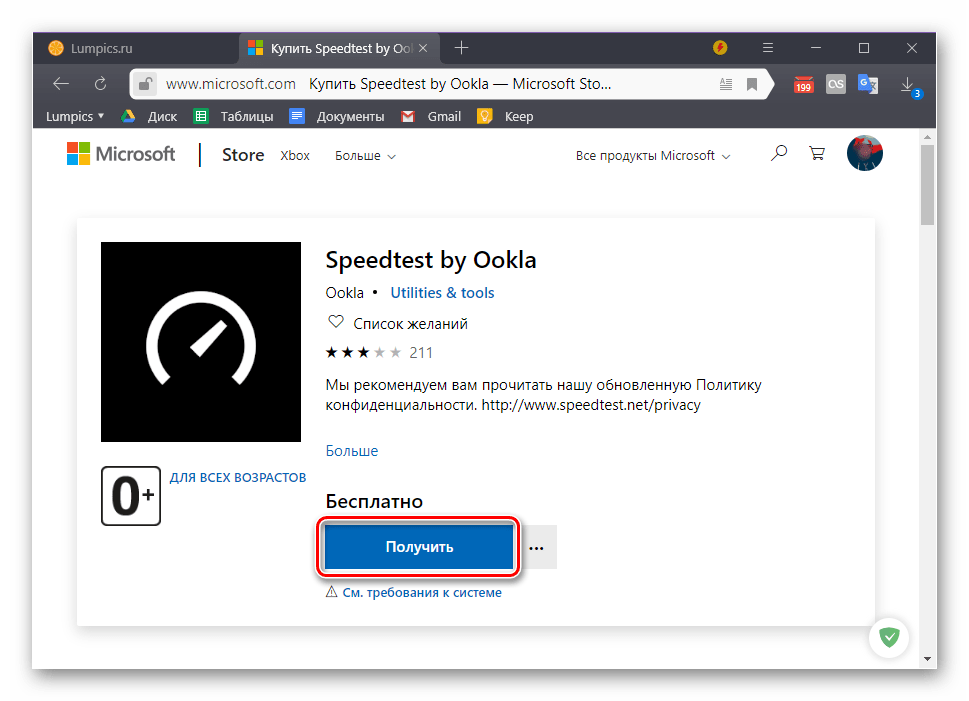
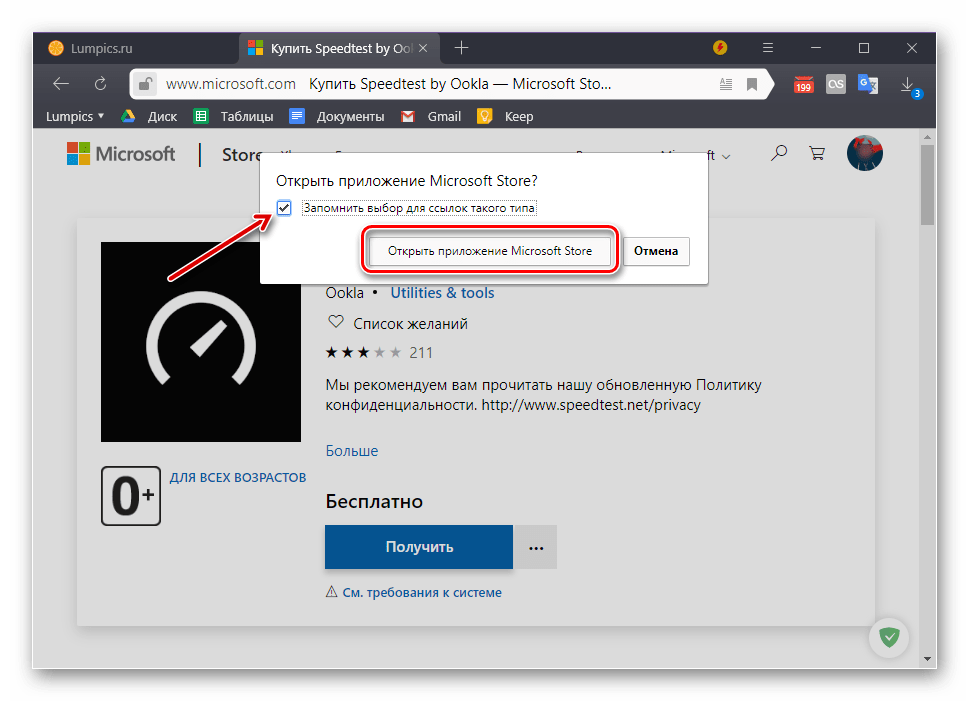
- Если после перехода по представленной выше ссылке Магазин приложений Windows не будет запущен автоматически, нажмите на его странице в браузере по кнопке «Получить».

В небольшом всплывающем окне, которое будет запущено, нажмите по кнопке «Открыть приложение Microsoft Store». Если хотите, чтобы в дальнейшем его открытие происходило автоматически, установите галочку в отмеченном на скриншоте чекбоксе.
-
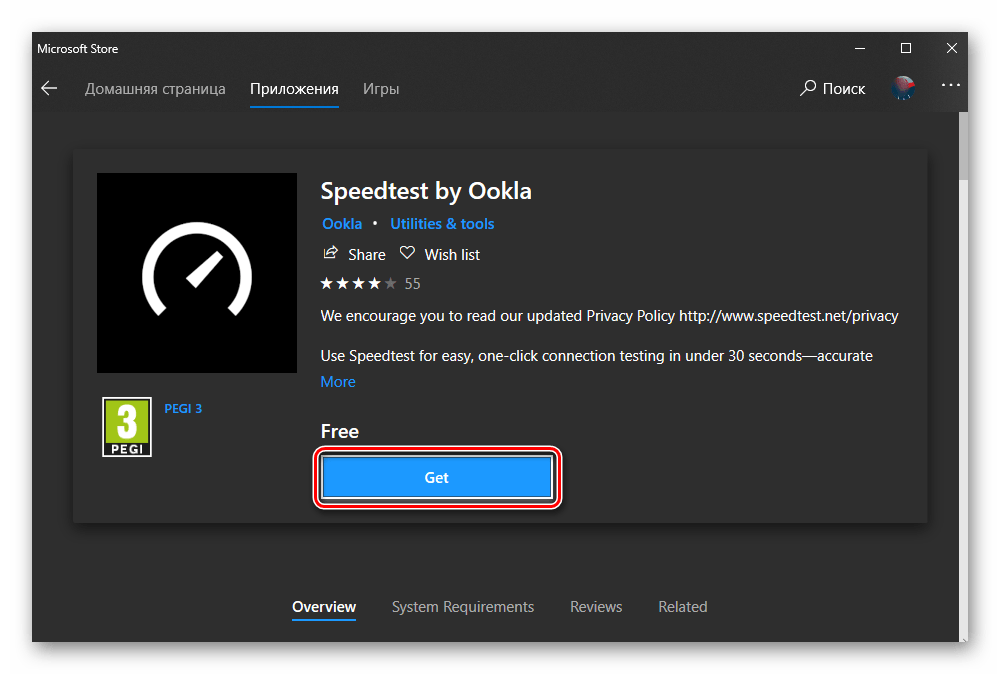
В Магазине приложение воспользуйтесь кнопкой «Get»,

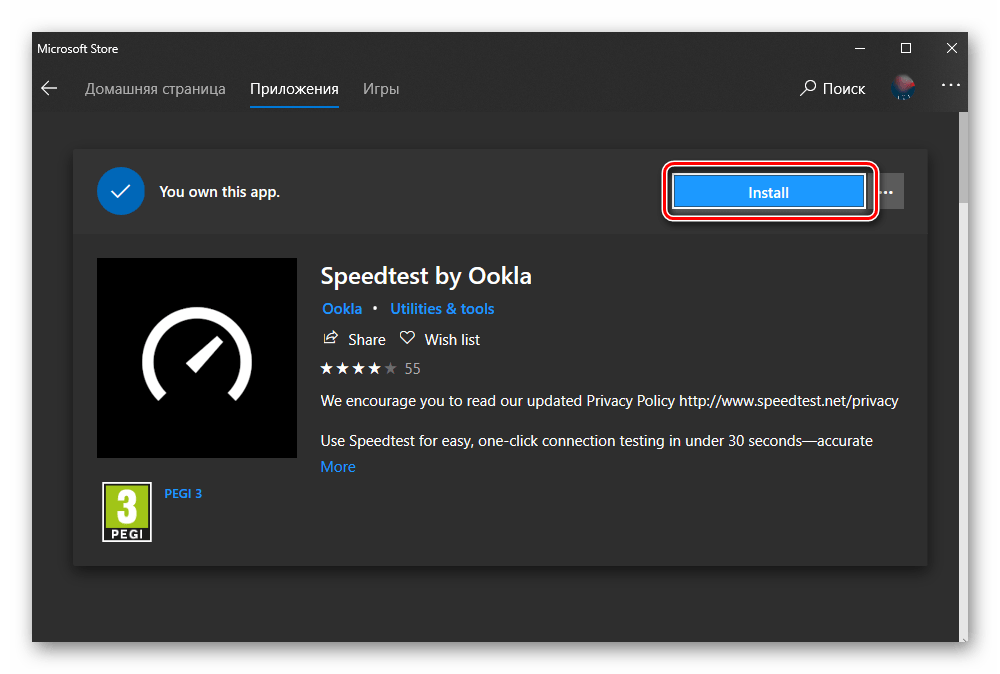
а затем «Install».
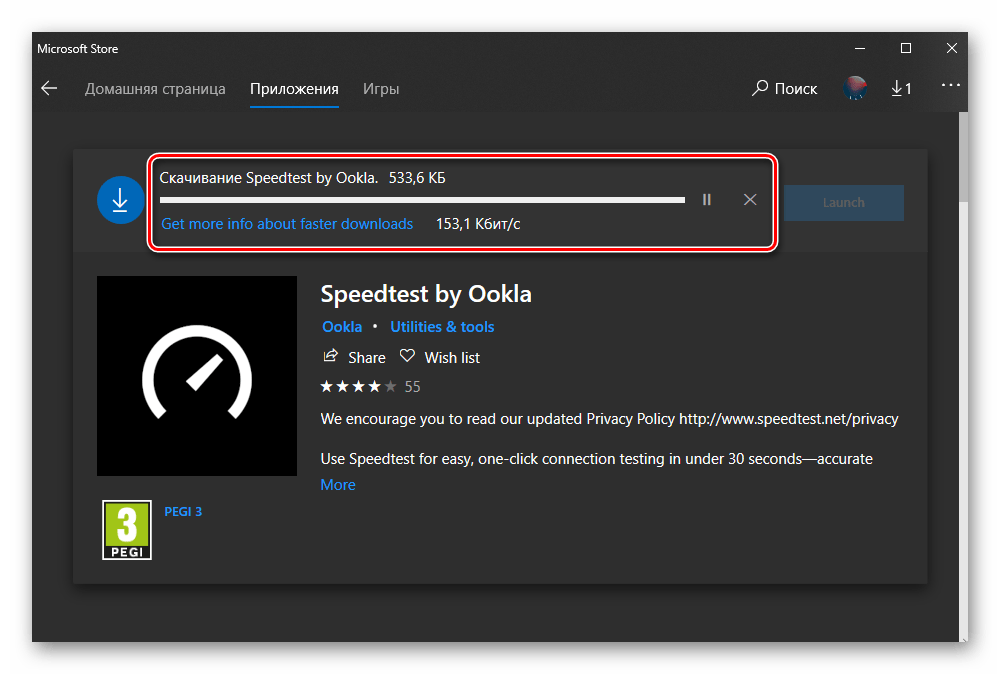
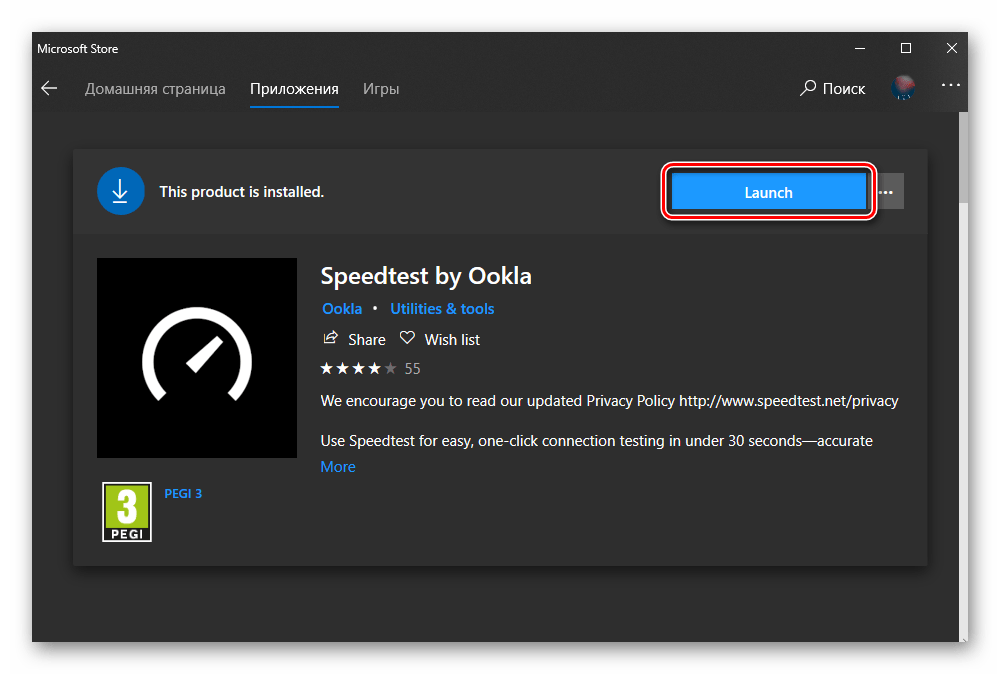
- Дождитесь завершения скачивания SpeedTest, после чего вы сможете его запустить.
Для этого кликните по кнопке «Launch», которая появится сразу после окончания установки.
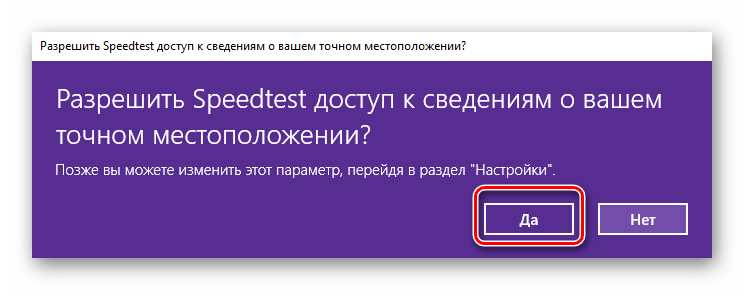
- Предоставьте приложению доступ к сведениям о вашем точном местоположении, нажав «Да» в окне с соответствующим запросом.
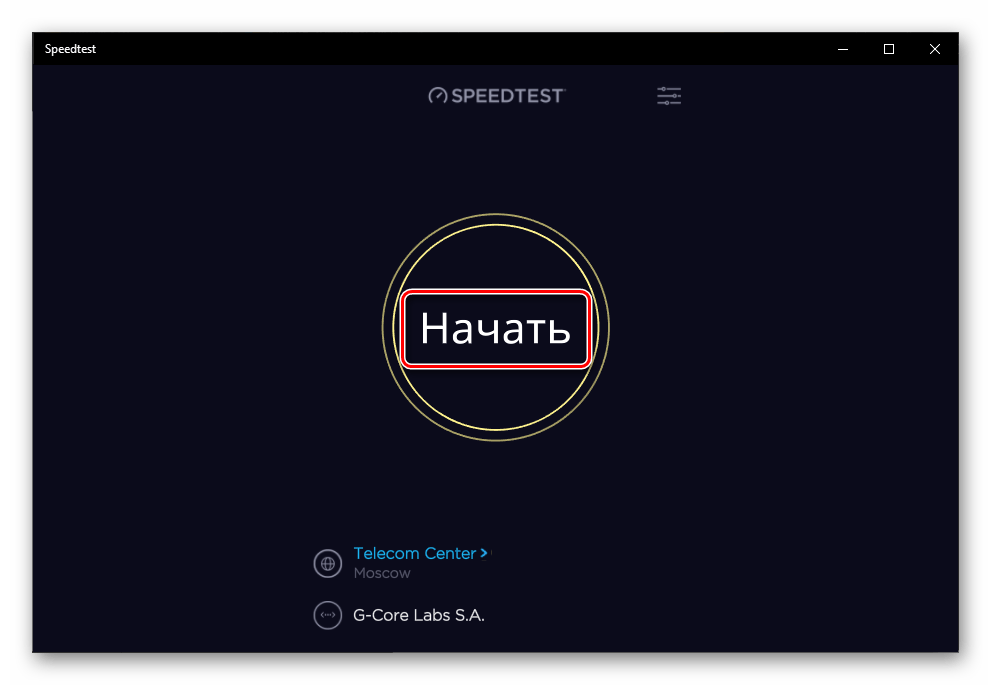
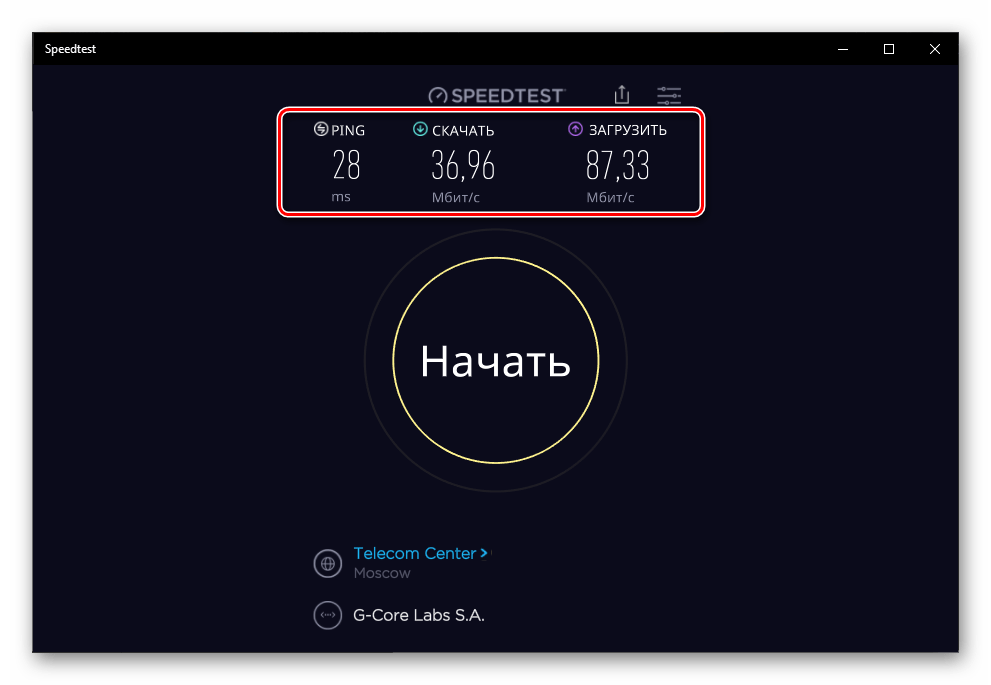
- Как только Speedtest by Ookla будет запущен, вы сможете проверить скорость своего интернет-соединения. Для этого кликните по надписи «Начать».
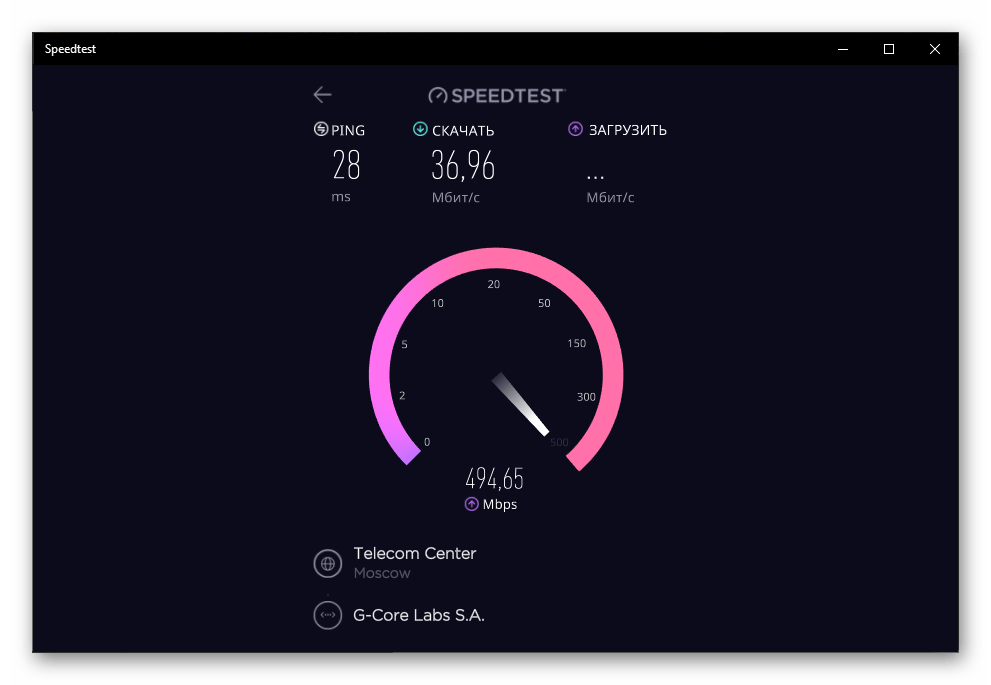
- Подождите, пока программа завершит проверку,

и ознакомьтесь с ее результатами, в которых будет показан пинг, скорость скачивания и загрузки, а также информация о провайдере и регионе, которая определяется еще на начальном этапе тестирования.
Просмотр текущей скорости
Если вы хотите посмотреть, с какой скоростью вашей системой потребляется интернет при ее обычном использовании или в период простоя, потребуется обратиться к одному из стандартных компонентов Виндовс.
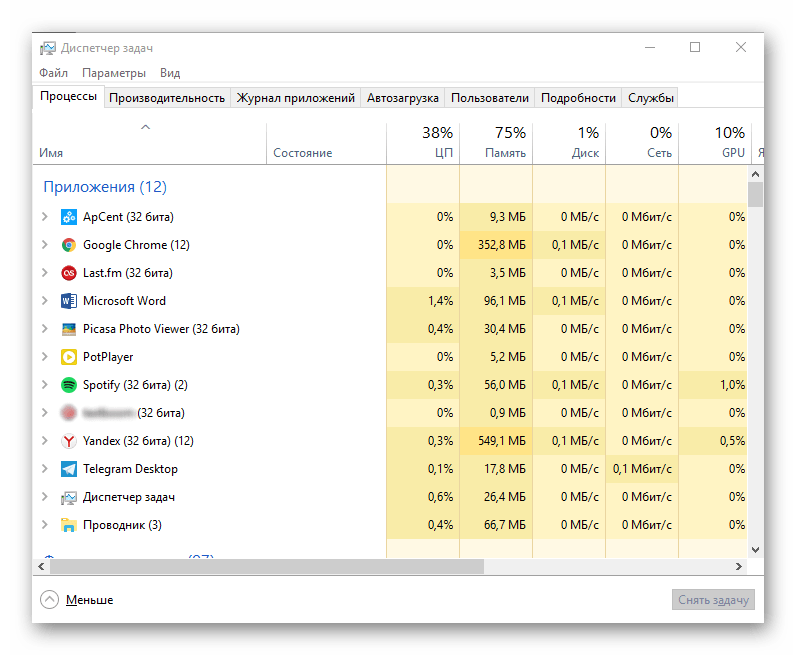
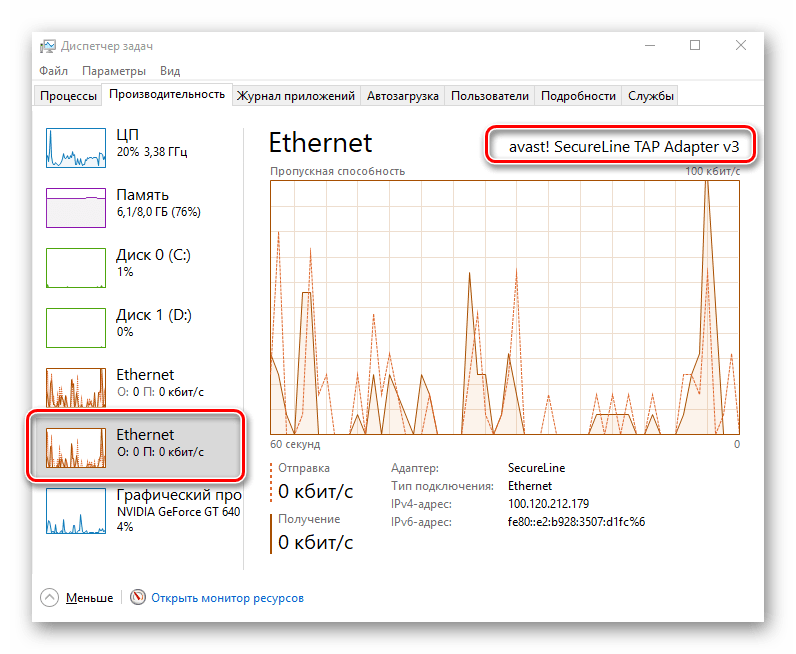
- Нажмите клавиши «CTRL+SHIFT+ESC» для вызова «Диспетчера задач».
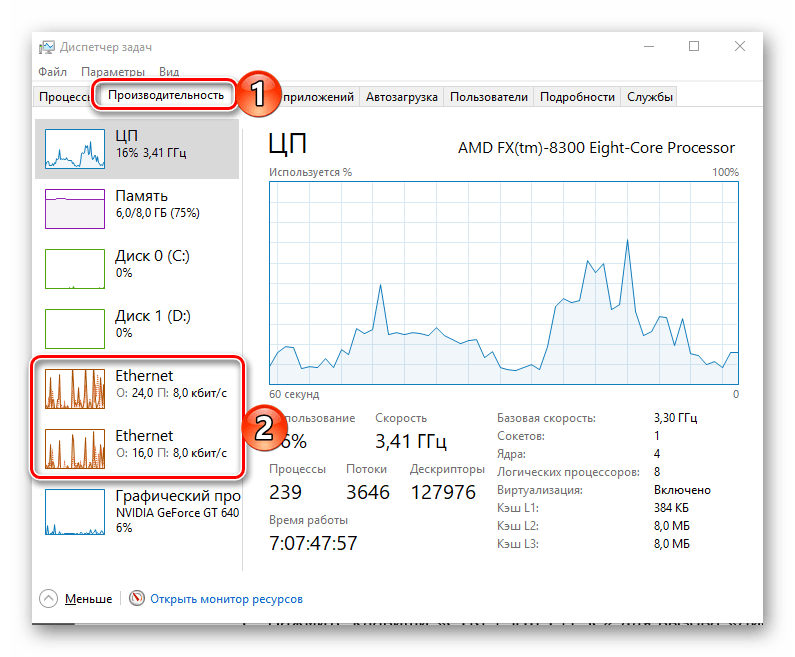
- Перейдите во вкладку «Производительность» и кликните в ней по разделу с названием «Ethernet».
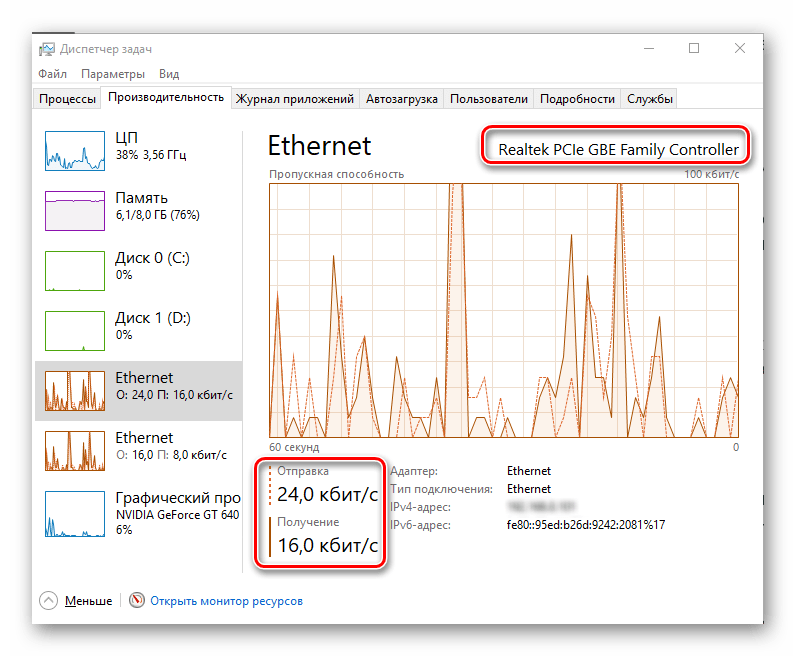
- Если вы не пользуетесь VPN-клиентом для ПК, у вас будет только один пункт под названием «Ethernet». В нем и можно узнать, с какой скоростью осуществляется скачивание и загрузка данных через установленный сетевой адаптер при обычном использовании системы и/или во время ее простоя.

Второй одноименный пункт, который есть в нашем примере, это работа виртуальной частной сети.
Читайте также: Другие программы для измерения скорости интернета
Заключение
Теперь вы знаете о нескольких способах проверки скорости интернет-соединения в Windows 10. Два из них подразумевают обращение к веб-сервисам, один – использование приложения. Решайте сами, каким из них пользоваться, но для получения действительно точных результатов стоит попробовать каждый, а затем высчитать средние скорости скачивания и загрузки данных, суммировав полученные значения и поделив их на количество проведенных тестов.
Наша группа в TelegramПолезные советы и помощь
Recently, Microsoft released Windows 11 stable build for the general public. But still, Windows 11 doesn’t come with an Internet Speed Meter. Like, we get in the Android status bar. Yes, by going into Task Manager > Performance > Wi-Fi (Or Ethernet). You can check your current Internet speed. But, there isn’t any option to get a real-time internet speed meter in the Windows Taskbar. That means, there isn’t any way to check, how much your Computer is consuming the internet in real-time.
In this situation, third-party network speed indicator Software comes in handy. There are many free and paid tools available to show internet speed in the Taskbar. But, In this post, I will suggest to you some best tools. These tools will show you real-time internet upload and download speed on your Windows PC.
How Internet Speed Meter is helpful?
Network Speed Meter is very helpful if you don’t have a high-speed or stable Internet connection. In Windows, updates get downloaded automatically. And, if you have a slow connection, then, it can affect the work that you’re doing. Also, If your Internet speed fluctuates. Then, keeping an eye on real-time Internet speed is useful. Basically, it will help you to track connection problems.
Best Internet Speed Meter for Windows.
NetSpeedMonitor. (Free)
If you’re looking for free Internet Speed Monitor software. That can show you real-time download and upload speed. Then, this is the best tool, which you can use. There isn’t any specific site to download this software. You can download it from Softpedia for free. Though, this tool is designed to run only on Windows XP, Vista, and 7. So, it might not work directly in Windows 8 and 10, and Windows 11. You have to run the installer in compatibility mode.
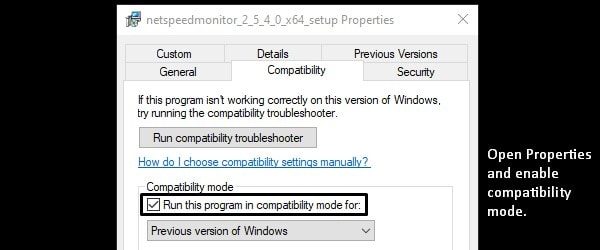
1. Download NetSpeedMonitor from Softpedia. Right-Click on the installer > Click on Properties.
2. Click on the Compatibility tab > Mark the “Run this program in compatibility mode for” and click on OK.
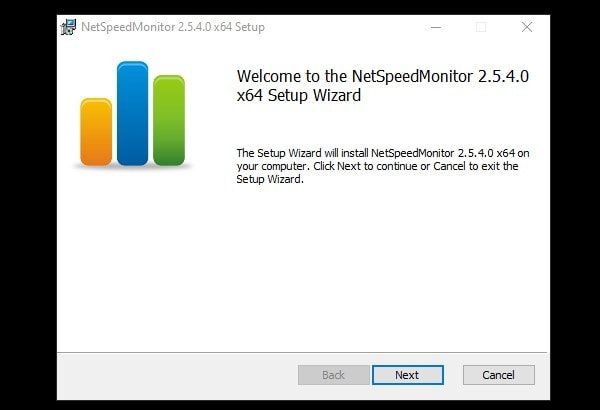
3. Now, you can install it and you will not get any compatibility error.
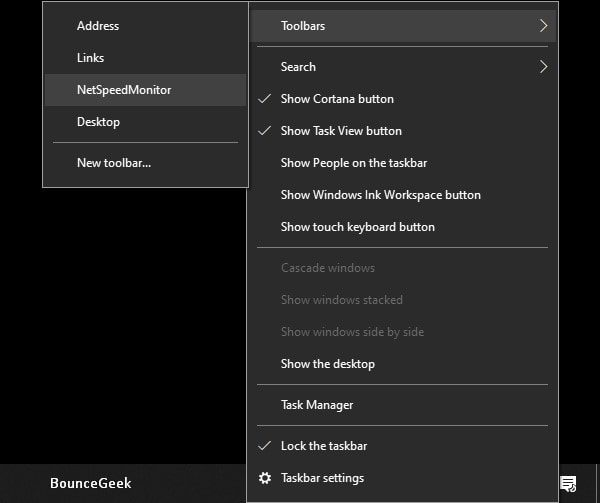
4. After installing NetSpeedMonitor, Right-click on the taskbar. Go to Toolbars and click on “NetSpeedMonitor”.
Note: In Windows 11 you won’t find the Toolbars option. So, scroll down, and you will find a tool to enable Toolbars.
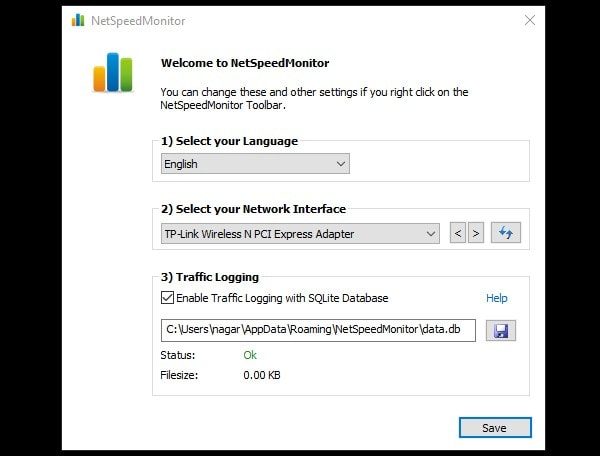
5. NetSpeedMonitor one-time setup window will now appear. Select the right network interface from it. And, click on save.
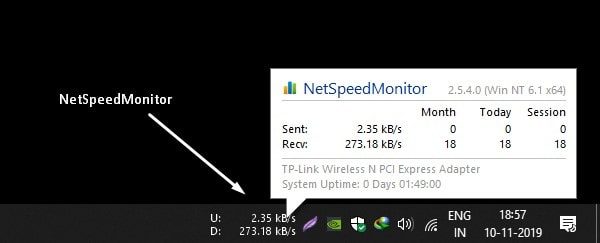
6. That’s it. You will now be able to see the speed meter by NetSpeedMonitor in Taskbar.
7. Right-Click on Net Speed Meter, and choose the “Configuration” option. You can select Bitrate and customize it.
NetWorx (Windows, macOS, and Linux.)
NetWorx is one of the most powerful tools to measure Internet Speed. It also helps to track suspicious activity on the network, like, hacker attacks and trojan horses. You can also use it as a bandwidth monitor if you have limited Internet. NetWorx also can identify the possible reasons or sources of network issues. The Software also can send you a visual and sound alert when the connection is down. Or, when some suspicious activity is occurring in Windows. With Networx, You can always see statistics of monthly and weekly bandwidth usage.
And, yes, you can enable Internet Speed Meter in Windows Taskbar or Toolbar. And, the speed meter will show you real-time upload and download speed. You can also customize the speed indicator graph. There are multiple graph types available to select. Like, histograms, numeric, polylines, and columns. You can also select the transfer rate unit between Bytes and Bits. But, I suggest you select Bytes/s.
Install Networx and Show Internet Speed Meter in Taskbar.
1. First, download the latest version of Networx and install it like normal Windows software. (During installation select recommended settings only.)
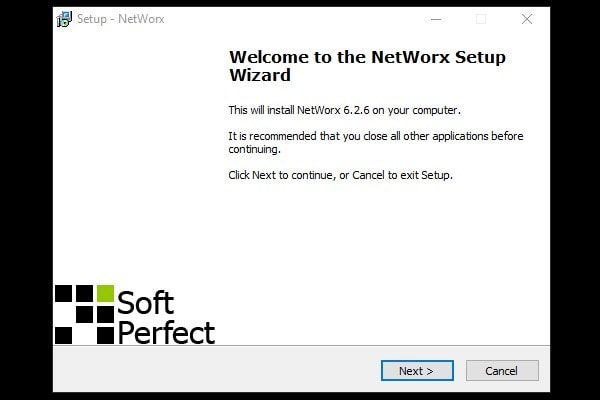
2. After installing it successfully, NetWorx welcome window will appear. Select Language and Click on Next.
3. Now NetWorx will ask you to select your Internet Connection. You can either select a specific connection or can keep it on “All Connections”.
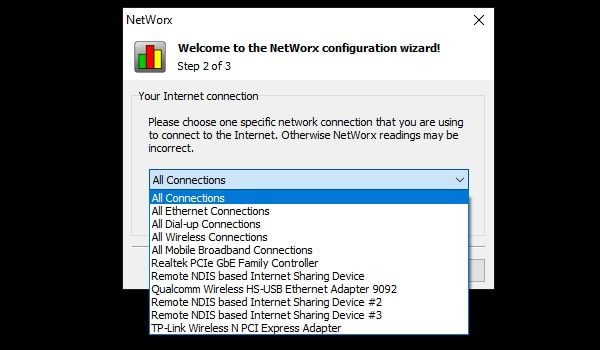
4. Click on Next, and then click on Finish.
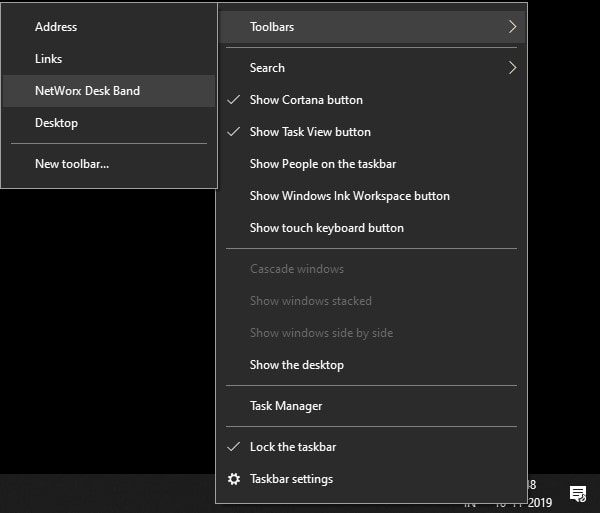
5. To show the Internet speed meter now in the toolbar. Right-Click anywhere in the taskbar. And then, take the mouse pointer over Toolbars. And, mark the “NetWorx Desk Band” option.
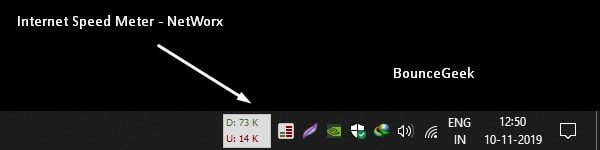
6. That’s it. You will be able to see real-time download/upload speed in Taskbar.
7. And, to customize graph settings, Right-Click on the Networx icon, and then click on Settings. (Don’t forget to select Bytes/s in the transfer unit rate. And, Apply the settings.)
DU Meter.
After NetWorx, DU Meter is the best Internet Speed Meter for Windows 10 and Windows 11. DU Meter comes with 30 days of free trial. And, if you find it useful then you can buy its license. There are two license plans available to choose from. Single-user and business licenses and Family Pack. Currently, for Indian users, it is available for $9.95. DU meter also allows adding a speed meter in the taskbar. And, that’s all you wanted.
You can customize the color & sound of the DU Meter. So basically, you can do audible network monitoring. Also, you can customize the traffic monitor Graph. Apart from the taskbar or toolbar, you can enable a floating window of the DU Speed monitor. The data transfer rate unit option is also available. It also shows the highest Internet speed.
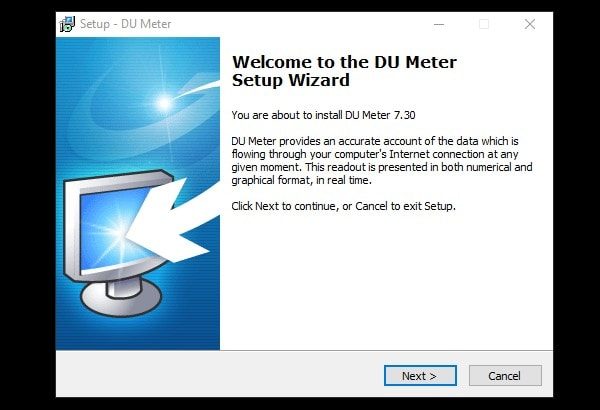
1. Download DU Meter and install it on your Windows PC.
2. To enable Network Speed Monitor in the taskbar. Right-Click on the toolbar. Take the mouse pointer on Toolbars > Click on “DU Meter” to enable.

3. That’s it, now you will be able to see upload and download speed in Taskbar.
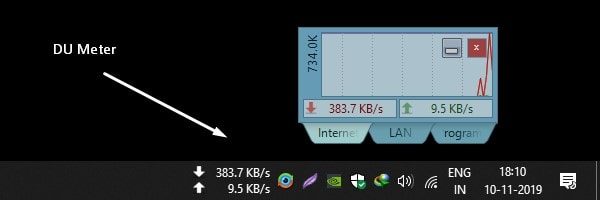
4. To enable or disable the floating Internet speed Monitor, Right-Click on the DU Meter icon. And, click on the Show/Hide DU Meter option. And, by clicking on “User options”, you can access settings. Can customize DU Meter.
Get Back Windows 11 Quick Launch Toolbar.
Microsoft has removed Quick Launch Toolbar in its latest version of Windows 11. And, all the mentioned Network speed monitor work with the Toolbar option. So, if you want to get back the toolbar option, then you have to install Explorer Patcher from Github. It’s a free and open-source add-on for Windows 11, that enables Windows 10 toolbar in Windows 11.
1. Simply download ExplorerPatcher from GitHub. Click on the Assets section to get the setup file.
2. Run the setup. Windows Protected screen might appear, click on More Info > Run Anyway.
3. UAC window will appear, click on Yes.
4. The screen will go black for a minute. And, after that, when you right-click on the taskbar you will get the toolbar option.
Yes, if you like you can uninstall it from Control Panel.
Summing-up
So, these are some of the best speed-tracking software for Windows 10/11. Personally, I found “NetSpeedMonitor” best. Because it’s free and offers what exactly you want. DU Meter and Networx come with a trial period. But, offers many other features, that’s why you need to buy a subscription. Though, if you don’t want to spend to get some extra features. Then, NetSpeedMonitor is best for you.
(Image credit: Future)
On Windows 10, the network adapter is an essential component that offers the means to connect to the network and internet using a wired or wireless connection, and understanding the current link speed can come in handy in many scenarios.
For example, checking the link speed is helpful to find out whether the adapter is operating according to its technical specifications and can help you diagnose performance problems. If you’re upgrading your internet service to a faster tier, knowing the maximum speed of the Wi-Fi or Ethernet adapter will help to confirm whether you’ll be able to take advantage of all the bandwidth. If you plan to upgrade the network to 10Gbps, you can quickly determine if you need to change the card. Or if you use a USB network adapter that doesn’t include any information, checking the speed connection will reveal if you’re using a 100Mbps or 1Gbps chipset.
Whatever network card you use, Windows 10 provides different features to confirm the link speed of a connection using Settings, Control Panel, and command lines with PowerShell and Command Prompt.
This guide will walk you through several ways to determine the speed of the adapter connected to the network, whether you’re using a wired or wireless connection.
How to check network adapter speed from Settings
To view the connection speed for a Wi-Fi or Ethernet adapter, use these steps:
- Open Settings.
- Click on Network & Internet.
- Click on Status.
- Under the «Change your network settings» section, click the «View your network properties» option.
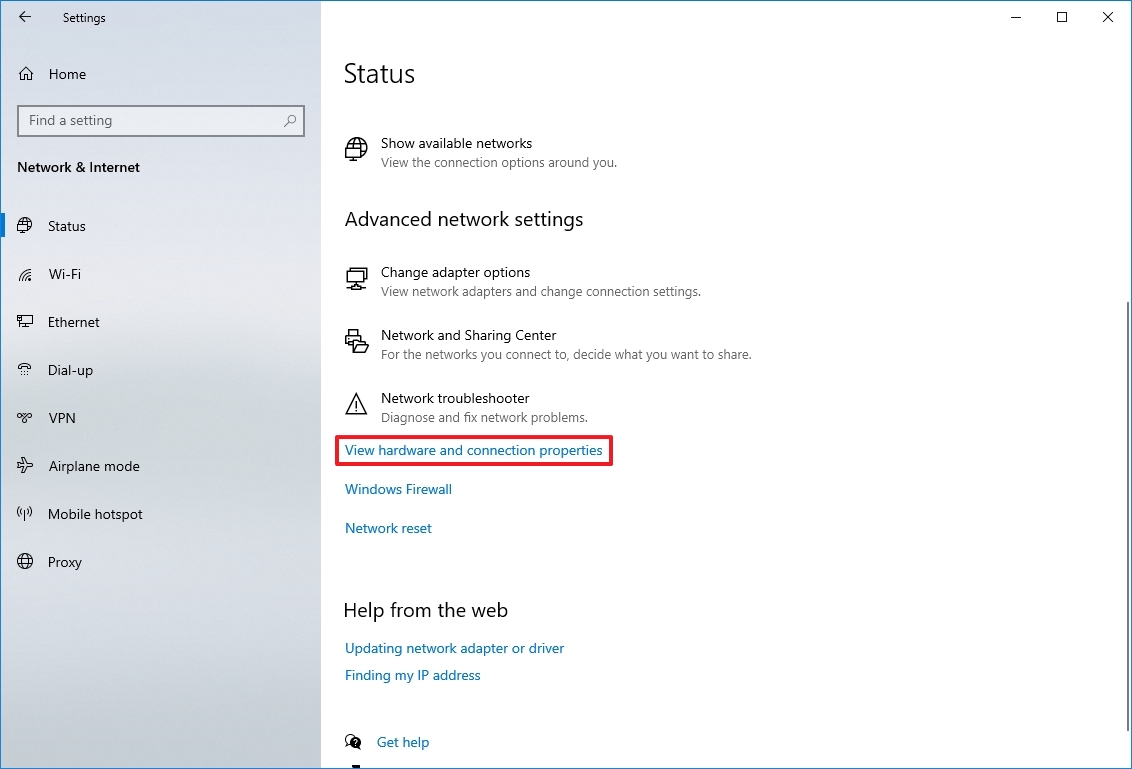
- Under the «Properties» section, find the network adapter (Wi-Fi or Ethernet).
- Determine the connection speed in the «Link speed (Receive/Transmit)» field.
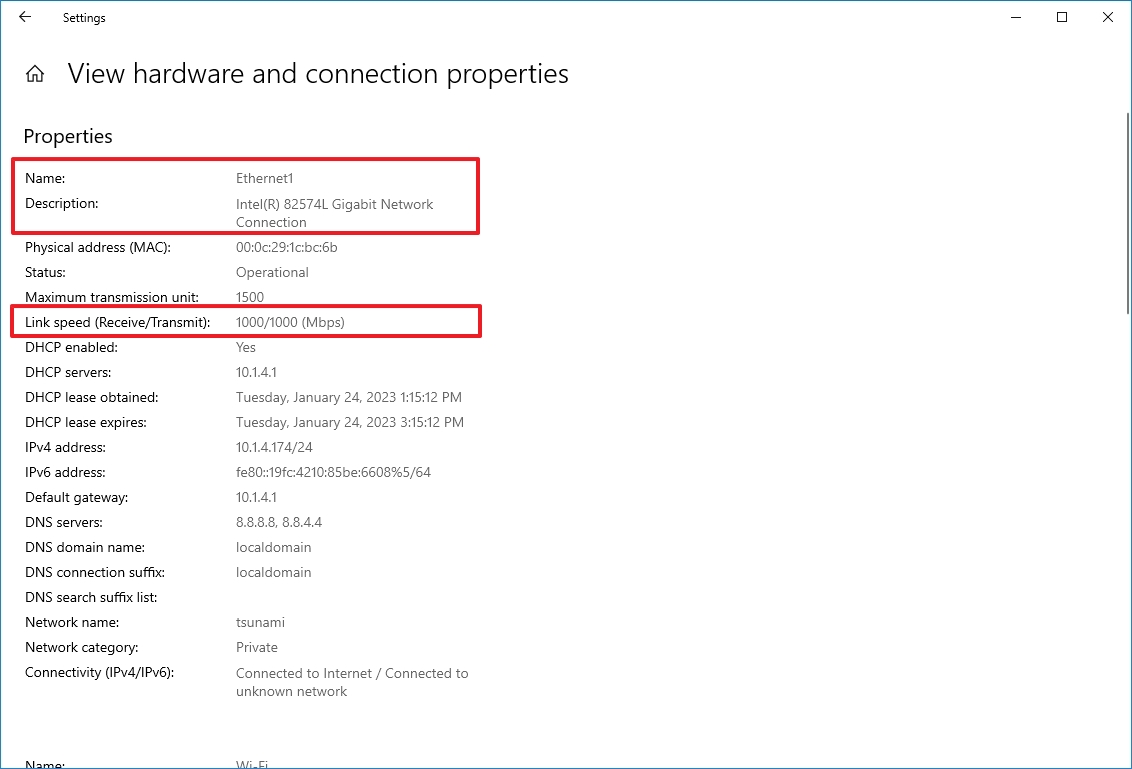
Once you complete the steps, the Settings app will reveal the speed the adapter uses to connect to the network.
How to check network adapter speed from Control Panel
To determine the network adapter speed with the Control Panel settings, use these steps:
All the latest news, reviews, and guides for Windows and Xbox diehards.
- Open Control Panel.
- Click on Network and Internet.
- Click on Network and Sharing Center.
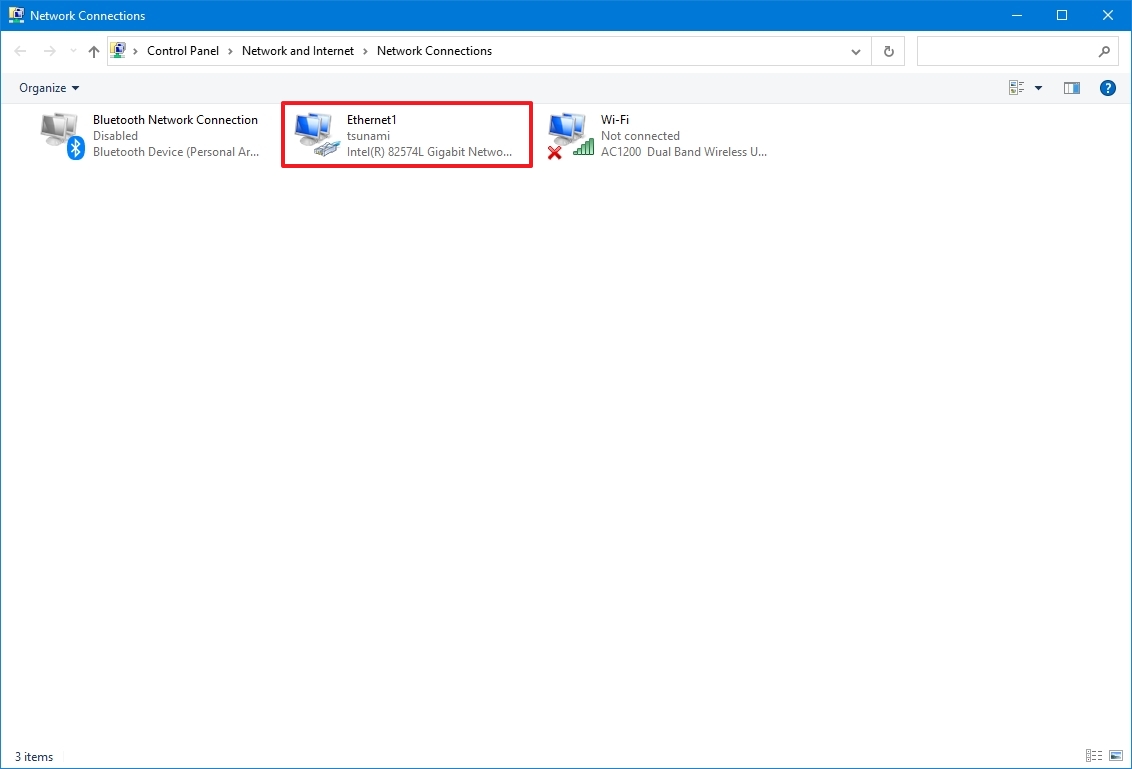
- Click the «Change adapter settings» in the left pane.
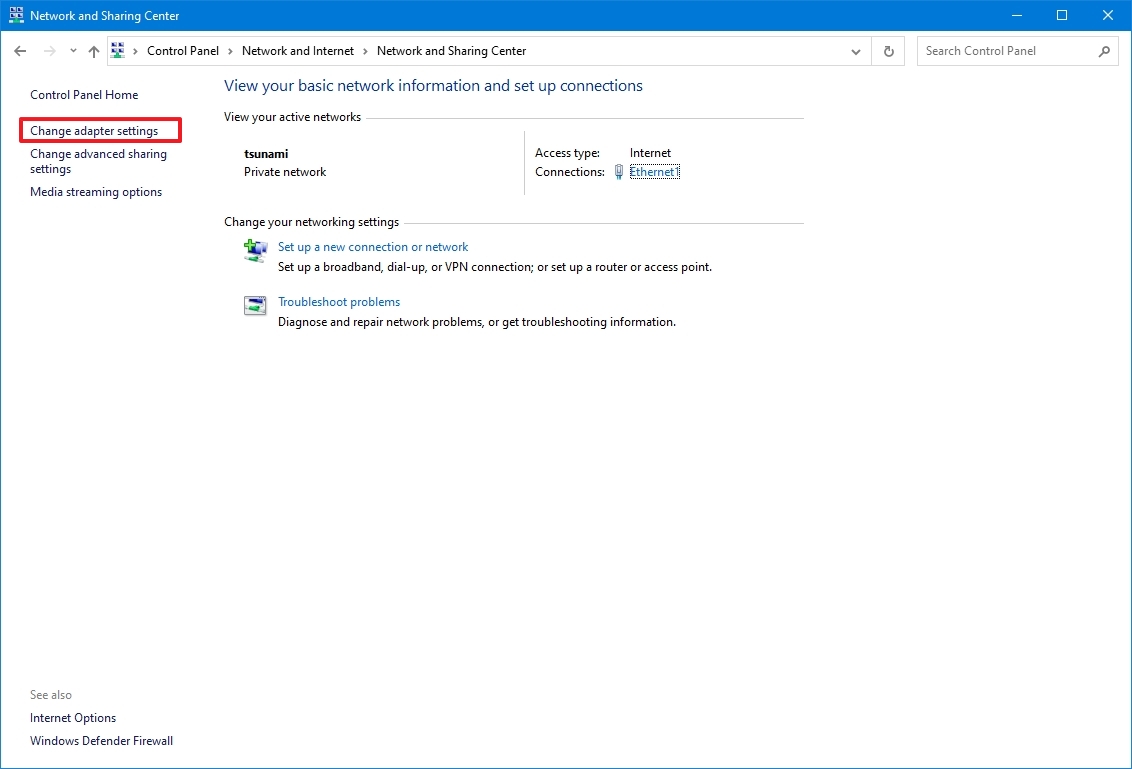
- Double-click the network adapter (Ethernet or Wi-Fi).
- Check the connection speed in the Speed field.
- Quick note: If you’re looking at a Wi-Fi adapter, you can also confirm the signal quality.
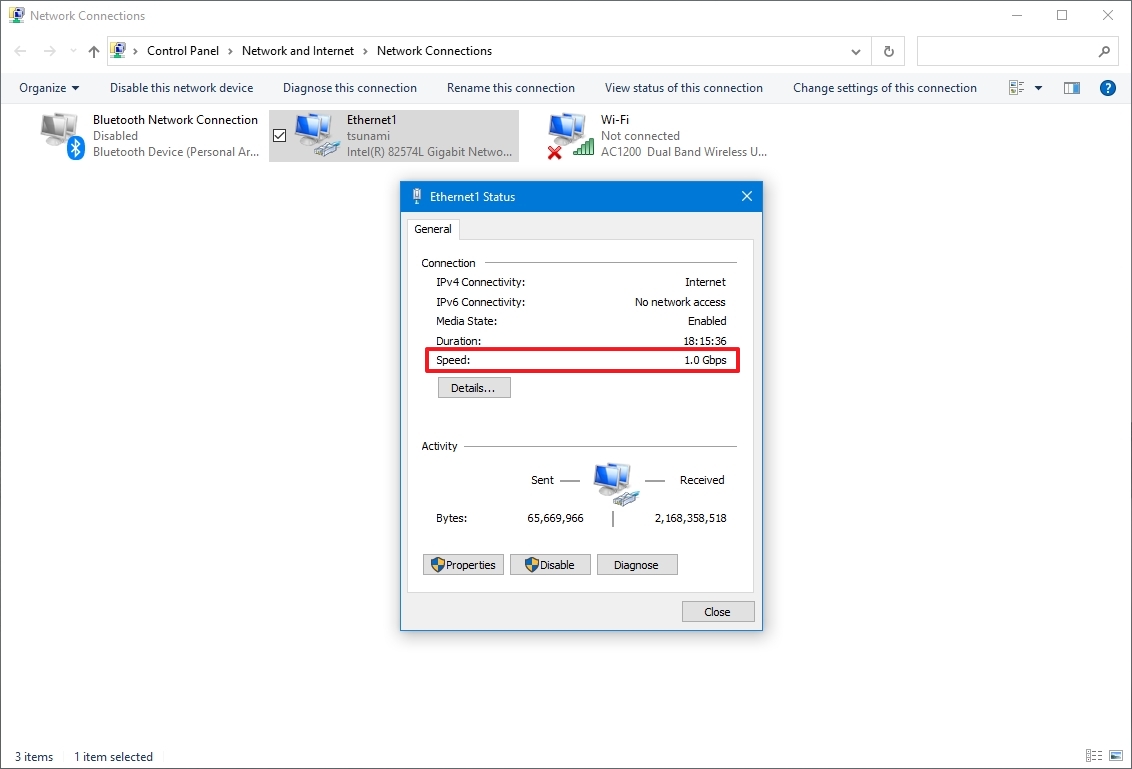
After completing the steps, you’ll better understand the connection speed for the Ethernet or Wi-Fi adapter connected to the network.
How to check network adapter speed from Command Prompt
To find out the speed for the wireless or wired adapter with Command Prompt, use these steps:
- Open Start.
- Search for Command Prompt and click the top result to open the console.
- Type the following command to determine the connection speed for all the Ethernet and Wi-Fi adapters and press Enter: wmic nic where netEnabled=true get name, speed

- Confirm the network adapter speed.
Once you complete the steps, you’ll be able to determine the speed (in bits) the card uses to connect to the network.
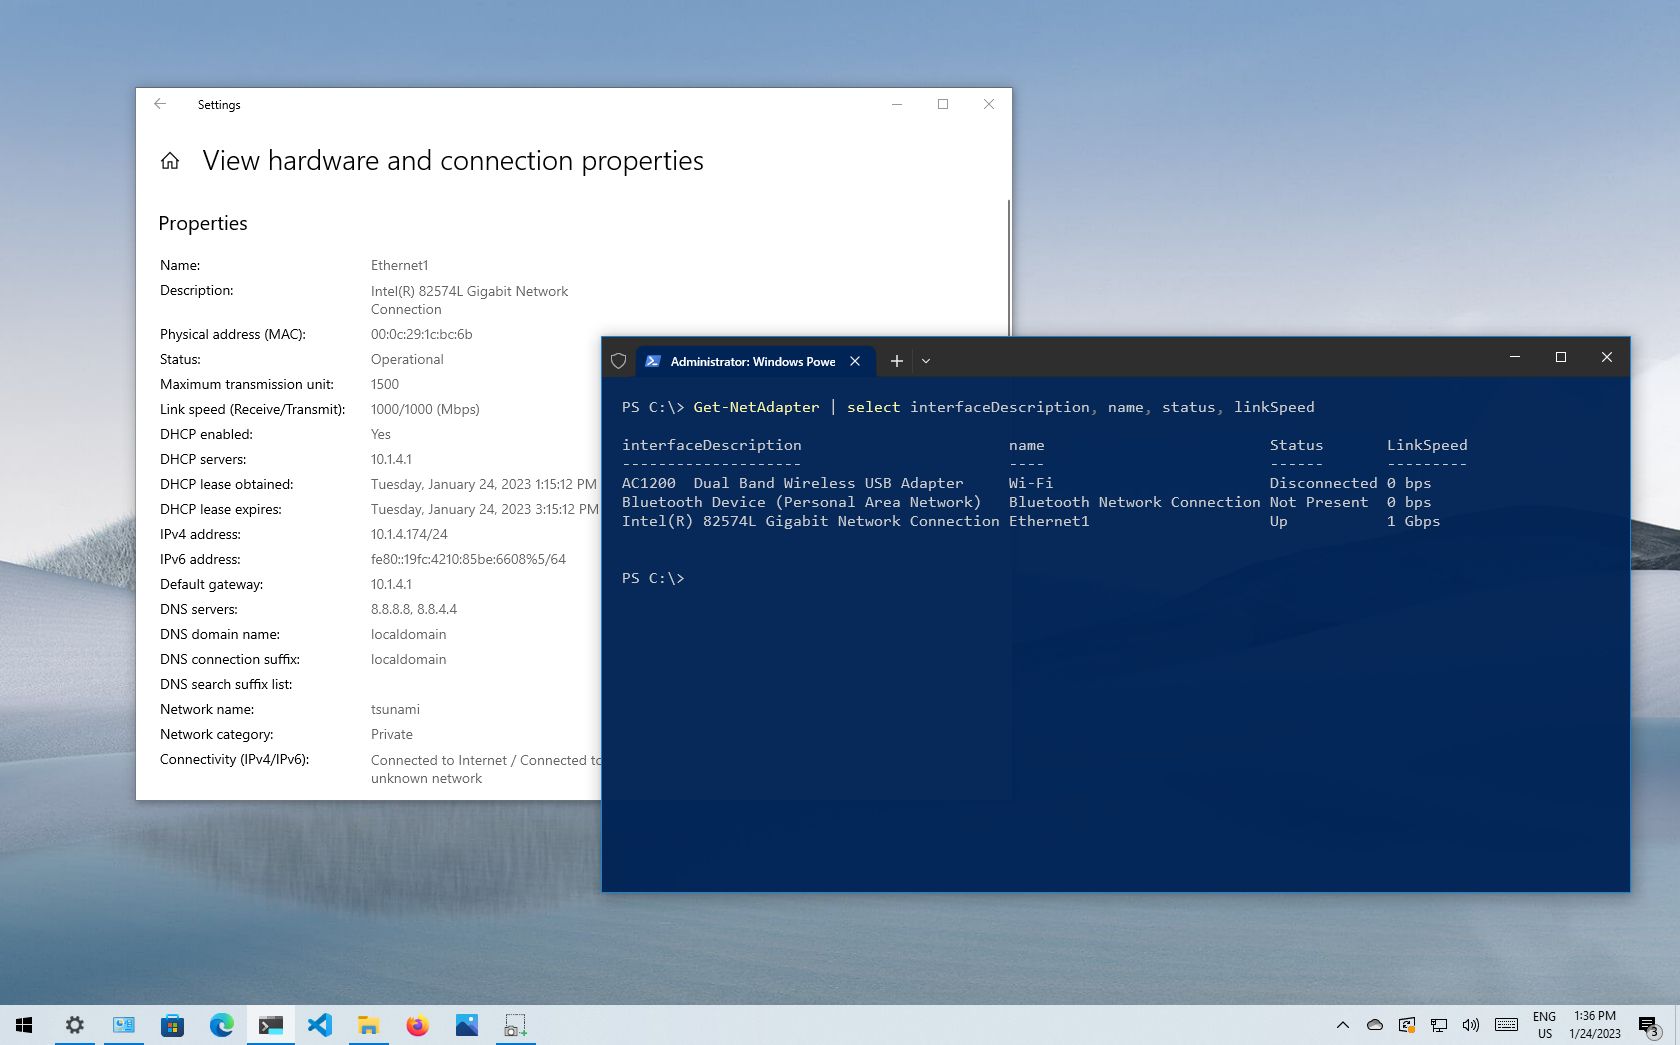
How to check network adapter speed from PowerShell
To check the Ethernet or Wi-Fi connection speed on Windows 10 with PowerShell, use these steps:
- Open Start.
- Search for PowerShell and click the top result to open the console.
- Type the following command to determine the connection speed for all the Ethernet and Wi-Fi adapters and press Enter: Get-NetAdapter | select interfaceDescription, name, status, linkSpeed
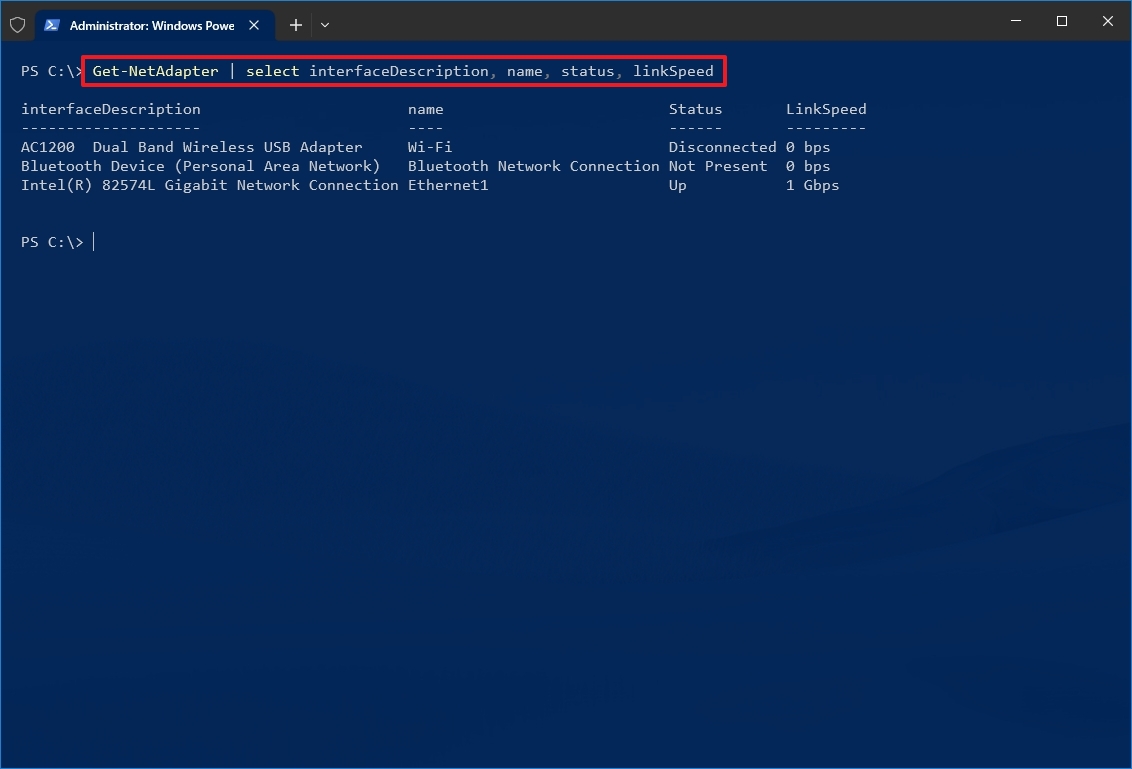
- Check the Wi-Fi or Ethernet network card connection speed.
After you complete the steps, the PowerShell output will display the connection speeds in a user-friendly format (for example, 780 Mbps and 1 Gbps).
More resources
For more helpful articles, coverage, and answers to common questions about Windows 10 or Windows 11, visit the following resources:
- Windows 11 on Windows Central — All you need to know
- Windows 10 on Windows Central — All you need to know

Cutting-edge operating system
A refreshed design in Windows 11 enables you to do what you want effortlessly and safely, with biometric logins for encrypted authentication and advanced antivirus defenses.
Mauro Huculak has been a Windows How-To Expert contributor for WindowsCentral.com for nearly a decade and has over 15 years of experience writing comprehensive guides. He also has an IT background and has achieved different professional certifications from Microsoft, Cisco, VMware, and CompTIA. He has been recognized as a Microsoft MVP for many years.
Как проверить скорость Интернета в командной строке
Для проверки скорости Интернета есть различные онлайн-сервисы и программы — все они в достаточной мере удобны и в разной степени точны. Но, если по какой-то причине обычных методов вам недостаточно, можно использовать и командную строку Windows.
В этой простой инструкции о том, как проверить скорости Интернета в командной строке Windows 11/10.
Использование Speedtest CLI
Многим известен и часто используется тест скорости Интернета SpeedTest by Ookla. Этот же разработчик предлагает программу для интерфейса командной строки, позволяющую оценивать скорости Интернета. Скачать необходимые файлы можно с официального сайта.
Скачав архив, распакуйте его в удобное расположение на диске (чтобы в командной строке не требовалось вводить полный путь к исполняемому файлу, можно использовать папку, добавленную в переменную среды PATH).
Этого достаточно, чтобы приступить к использованию. Для простой проверки скорости Интернета запустите командную строку и введите:
speedtest.exe
В примере я указываю speedtest.exe, но в зависимости от расположения файла может потребоваться ввести полный путь к нему. При первом использовании потребуется принять условия лицензионного соглашения (ввести Y или YES и нажать Enter). Ближайшие серверы будут подобраны автоматически. Учитывайте, что результат представлен в мегабитах в секунду, если требуются мегабайты — разделите значение на 8.

При необходимости вы можете использовать speedtest с дополнительными параметрами, список которых можно найти в файле speedtest.md в скачанном архиве.
Несколько примеров:
- Используя параметр
-uMB/s
или
--unitMB/s
можно включить измерение в мегабайтах в секунду.

- С помощью параметра
-L
или
--servers
можно получить список ближайших серверов, а затем указать нужный сервер по его id с помощью параметров
-s
или
--server-id
- Для регулярной автоматической проверки скорости и сохранении результатов в файл CSV (с добавлением новых результатов к старым), можно использовать команду PowerShell, запускаемую в планировщике заданий или иным способом:
speedtest --accept-license --format=csv --progress=no --output-header| convertfrom-csv | Export-Csv "C:\speedtest.csv" -append -notypeinformation -force

При необходимости можно использовать speedtest.exe в собственных сценариях bat, PowerShell, Python и других. Хороший пример использования в сценарии PowerShell для автоматизации тестирования скорости Интернета.
Несмотря на то, что большинство проектов, имеющих отношение к проверке скорости Интернет-соединения, используют Speedtest от Ookla (например, Speedtest-cli на Python), есть и другие решения. Один из примеров — мультиплатформенный LibreSpeed CLI.
Speedtest
для Windows
Speedtest — бесплатная утилита для Windows, которая предлагает пользователю самый быстрый и легкий способ проверить скорость Интернет-подключения. Программа очень проста в использовании, и не содержит никаких настроек. Для начала измерения необходимо просто нажать кнопку «Начать».
Приложение позволяет измерить скорость входящего и исходящего соединения, пинг, джиттер (пульсации) и потерю пакетов. Присутствует возможность посмотреть историю замеров, а именно сколько всего тестов уже запускали, среднее значение скорости интернета и итоги теста самого быстрого соединения.
Также можно поделиться результатом, отправив друзьям и знакомым ссылку на итоги замеров.
- Speedtest by Ookla для Android
- Speedtest.net для iOS
ТОП-сегодня раздела «Мониторинг»
Wireshark 4.4.0
Wireshark — утилита для детального анализа сетевых пакетов локальных сетей в реальном времени,…
Speedtest 1.13.194
Небольшая, бесплатная и простая в использовании десктопная программа, которая…
InSSIDer 5.5.0.0
InSSIDer — полезное приложение, благодаря которому можно легко выбрать лучшую из доступных Wi-Fi…
WifiInfoView 2.96
WifiInfoView — небольшая бесплатная утилита, которая сканирует ближайшие беспроводные сети, и…
TCPView 3.05
TCPView — крошечная, не требующая установки утилита, которая показывает все TCP и UDP на вашем…
Отзывы о программе Speedtest
Олег про Speedtest 1.11.165 [29-05-2024]
Перестала работать. Пишет нет подключения к интернету. Хотя интернет есть.
2 | 1 | Ответить
Sergiuzs про Speedtest 1.6.85.1 [21-08-2021]
На Win-7 64 bit не работает не смотря на то, что скачал 64 битную версию программы. После запуска сразу же выдает ошибку.
31 | 25 | Ответить
Митя в ответ Sergiuzs про Speedtest 1.11.165 [23-10-2024]
Для Windwows 7 другую версию нужно использовать. К примеру, сейчас это 1.11.164, а не 165.
| 1 | Ответить