
The Shell command you all are aware of renders you to the required folder either via File Explorer or Control Panel. However, to retrieve them, you need to execute their names headed by Shell in the Run box. A wide range of folders are kept secretly in Windows 10 are not obtained easily. Although, Registry Editor aids you with the names, but it is always an irksome task to go through each entry and then find out the names of the hidden stuff. Now, you don’t have to pay heed to the Registry Editor as we present you the List of Entire Shell Commands in Windows 10 whether it is for Hidden folder or not hidden in this article.
We have said above you could see the Shell Commands on Registry Editor. Navigate to the path below:
HKEY_LOCAL_MACHINE => SOFTWARE => Microsoft => Windows => CurrentVersion => Explorer => FolderDescriptions
How to Execute Shell Commands in Windows 10
- Jointly hit Win+R.
- Copy the shell command from the right column of the table
- Paste in the Run Box. Tap Enter.
There will be two tables: the first table will list you the shell commands of those which are not hidden in Windows 10 whereas the second table deals with the ones that are hidden in Windows 10.
Related
How to Run PowerShell as administrator in Windows 10
Note: If you desire to examine the paths of the folders you will have to enter your username on the PC replacing user-name word.
List of Entire Shell Commands in Windows 10
1. Shell Commands in Windows 10 to open Unhidden Folders
| Path of Unhidden Folder it Opens |
Explanation | Shell Command |
|
Directly ships you to the Control Panel window where you have the provision to implement new features |
shell: AddNewProgramsFolder |
|
Get a glimpse of all the installed modern apps ofyour system at one single place |
Shell:AppsFolder |
|
Swiftly displays you the entire list of the updates that have took place |
shell:AppUpdatesFolder |
|
Favorite shots seized by the camera of your system are stored here |
shell:Camera Roll |
|
Fetches the Control Panels area from where you can swiftly withdraw any program from your system |
shell: ChangeRemoveProgramsFolder |
|
Exhibits the list of items available in Public Desktop |
shell:Common Desktop |
|
Transports you to the Public Documents folder. |
shell:Common Documents |
|
To view the Public Downloads, use this shell and to manually reach there, follow the path mentionedon the left column |
shell:CommonDownloads |
|
Directs you towards the folder of CommonMusic |
shell:CommonMusic |
|
Spreads the Public Pictures folder |
shell:CommonPictures |
|
Follow this command to open the folder that stores the public videos |
shell:CommonVideo |
|
If you encounter any sync dispute, this shell command will fetch you the items that are in dispute and hence are unable to syncproperly |
shell:ConflictFolder |
|
All the established and accessible connections will bepopped up |
shell:ConnectionsFolder |
|
If you have stored any contacts (address book) in your account, they will be shown |
shell:Contacts |
|
The hub for all the settings, Control Panel will arrive |
shell:ControlPanelFolder |
|
Retrieve desktop items through this route |
shell:desktop |
|
This is the by default location to save any documents |
shell:documentsLibrary |
|
The downloads folder which by default saves downloaded stuff here |
shell:downloads |
|
The favorites folder under the username will arrive |
shell:Favorites |
|
The multiple fonts of Windows can be retrieved either from manually goingthrough the path or using the shell command |
shell:Fonts |
|
See your list of games here | shell:Games |
|
If you have created a HomeGroup, the present user folder can be viewed |
shell: HomeGroupCurrentUserFolder |
|
HomeGroup folder will be opened where you could see the users |
Shell:HomeGroupFolder |
|
Username links are displayed |
shell:Links |
|
Libraries folder is obtainable |
shell:Libraries |
|
Music under Libraries can be seen |
shell:MusicLibrary |
|
This launches the music folder of the user name |
shell:My Music |
|
The Pictures folder under the user name will be achieved |
shell:My Pictures |
|
This folder displays the videos captured by you |
shell:My Video |
|
It simply showcases the items of your Desktop |
shell: MyComputerFolder |
|
The Network section will emerge |
shell: NetworkPlacesFolder |
|
This also leads you to the Documents folder where the items are saved by default |
shell:Personal |
|
Displays the library of images under Pictures folder |
shell:PicturesLibrary |
|
The Printers window will be showcased |
shell:PrintersFolder |
|
Your profile aka user name profile will be displayed |
shell:Profile |
|
Program files stored on your main operating drive will be seen |
shell:ProgramFiles |
|
Common Files under Program Files are listed here |
shell: ProgramFilesCommon |
|
The common files of 64-bit operating system will be shown |
shell: ProgramFilesCommonX64 |
|
The common files of x86 of 64-bit operating system will be fetched |
shell: ProgramFilesCommonX86 |
|
shell:ProgramFilesX64 | |
|
shell:ProgramFilesX86 | |
|
The overall public folder is displayed |
shell:Public |
|
Bring your Recycle Bin folder |
shell:RecycleBinFolder |
|
The resources folder under Windows |
shell:ResourceDir |
|
The saved games are viewed here |
shell:SavedGames |
|
Opens up the folder where the screenshots are saved |
shell:Screenshots |
|
The saved searches and search connectors are seen here |
shell:Searches |
|
With this command, you can make search on FileExplorer |
shell:SearchHomeFolder |
|
The StartMenuAllPrograms will be launched |
shell: StartMenuAllPrograms |
|
The Sync Center of Control Panel opens up |
shell:SyncCenterFolder |
|
The results window of the most recent sync activity will be displayed |
shell:SyncResultsFolder |
|
The sync set up window will get launched |
shell:SyncSetupFolder |
|
To view the System window, this shell command will help you |
shell:System |
|
shell:SystemX86 | |
|
Launches the items of your desktop |
shell: ThisPCDesktopFolder |
|
Users window under the OS loaded drive can be fetched |
shell:UserProfiles |
|
The items under the username will spread out |
shell:UsersFilesFolder |
|
Another way of launching the Libraries |
shell:UsersLibrariesFolder |
|
Windows folder will be fetched |
shell:Windows |
2. Shell Commands
in Windows 10
to open Hidden Folders
| Path of Hidden Folder it Opens |
Explanation | Shell Command |
|
To see the account photos you had used for your account, you need to implement this way |
shell:AccountPictures |
|
Go through this way to view all hidden admin tools, if any |
shell:Administrative Tools |
|
The Roaming folder which is hidden will be popped up |
shell:AppData |
|
This is Windows Applications shortcut window |
shell:Application Shortcuts |
|
To view the hidden caches folder use this command |
>shell:Cache |
|
Temporary burn folder | shell:CD Burning |
|
The mostly required tools are kept hidden |
shell:Common Administrative Tools |
|
Walkthrough this way to see Common AppData |
shell:Common AppData |
|
The Start Menu programs can be retrieved |
shell:Common Programs |
|
For most of the users, it is empty, the ringtones |
shell:CommonRingtones |
|
The Start Menu folder | shell:Common Start Menu |
|
The Startup folder | shell:Common Startup |
|
Way to the Windows Templates | shell:Common Templates |
|
The small text files – Cookies folder |
shell:Cookies |
|
INET Cookies can be scanned and necessary actions can be taken |
shell:Cookies\Low |
|
Microsoft Credentials folder | shell:CredentialManager |
|
Encrypt private or secure keys |
shell:CryptoKeys |
|
On your local computer Metadata packages are stored |
shell:device Metadata Store |
|
It is a Windows password recovery key |
shell:dpapiKeys |
|
Games Explorer window opens up |
shell:GameTasks |
|
Nothing to explain here. Command to view the history |
shell:History |
|
Shortcut links are placed here which are not seen easily on the desktop are stored here |
shell:ImplicitAppShortcuts |
|
Local Folder under hidden App Data of your user name |
shell:Local AppData |
|
It stores the data that usually does not roam with the users |
shell:LocalAppDataLow |
|
It is a Network Neighborhood folder and is a series of shortcut links |
shell:NetHood |
|
If you have added any shortcuts to the printers, its stores its path here in this folder |
shell:PrintHood |
|
Launches Programs folder | shell:Programs |
|
Public Account Pictures folder will appear |
shell:PublicAccountPictures |
|
It also launches you the Game Explorer folder |
shell:PublicGameTasks |
|
The Libraries folder under Public which is hidden is accessible from here |
Shell:PublicLibraries |
|
Displays quick launch items | shell:Quick Launch |
|
Recently opened items can be viewed here |
shell:Recent |
|
Way to see the ringtones | shell:Ringtones |
|
It shows you the tiles that are accessible in roaming section |
shell:Roaming Tiles |
|
Access SendTo folder to put any shortcuts to make them available in the SendTo command |
shell:SendTo |
|
Observe Start Menu through this route |
shell:Start Menu |
|
Pass along this path to reach Startup |
shell:Startup |
|
The System Certificate folder under Microsoft is seen |
shell:SystemCertificates |
|
Windows Templates folder pops up |
shell:Templates |
|
User Pinned | shell:User Pinned |
Try them out to retrieve the deeply rooted folders of your File Explorer. Please let us know if we missed any Shell commands.
Readers help support Windows Report. We may get a commission if you buy through our links.
Read our disclosure page to find out how can you help Windows Report sustain the editorial team. Read more
Ivan Jenic
Windows Hardware Expert
Passionate about all elements related to Windows and combined with his innate curiosity, Ivan has delved deep into understanding this operating system, with a specialization in drivers and driver troubleshooting.
When he’s not tackling diverse driver-related problems, Ivan enjoys watching good movies and spending time hiking with his family and friends.
A lot of Windows users have never touched the Command Prompt. With today’s streamlined operating systems, it’s easy to use a computer without ever worrying about entering old-school text commands in the command line.
However, it’s a good idea to become familiar with command line basics in Windows. It helps you appreciate the OS more and can come in handy for some tasks. Here’s a beginner’s guide to the Windows Command Prompt for those who aren’t yet familiar.
What Is the Command Prompt?
The Command Prompt, officially called the Windows Command Processor and often abbreviated to CMD, is the command line interface for Windows operating systems. A command line interface is a way of interacting with a computer directly using text commands.
These hearken back to the early days of computers, when you had to type commands into a terminal to execute processes on the machine. Early PC operating systems, like MS-DOS, operated exclusively through command-line interfaces. There were no mouse cursor, window management, or similar graphical user interface (GUI) elements we take for granted today.
Another term you should know is the word «shell,» which is used to describe a program that allows the user to give commands to the computer. So a command line interface, as well as a GUI, are both shells.
Early versions of Windows, like Windows 3.1, effectively ran as a visual interface on top of DOS. Later versions, including Windows 95 through Windows ME, also included MS-DOS integration. These allowed you to run commands through the MS-DOS Prompt, as the Command Prompt was called at the time.
Starting with Windows XP, Windows broke away from MS-DOS. However, in modern versions of Windows, you can still use the Command Prompt to interface with your computer directly instead of clicking through various menus. The Command Prompt can also run batch files; these make automating tasks easy.
Power users prefer the Command Prompt for some tasks, as you can take actions with a few simple keystrokes that would require dozens of clicks in the GUI.
How to Open the Command Prompt in Windows 10 and Windows 11
There are a few ways to open the Command Prompt in Windows. Below are the most convenient:
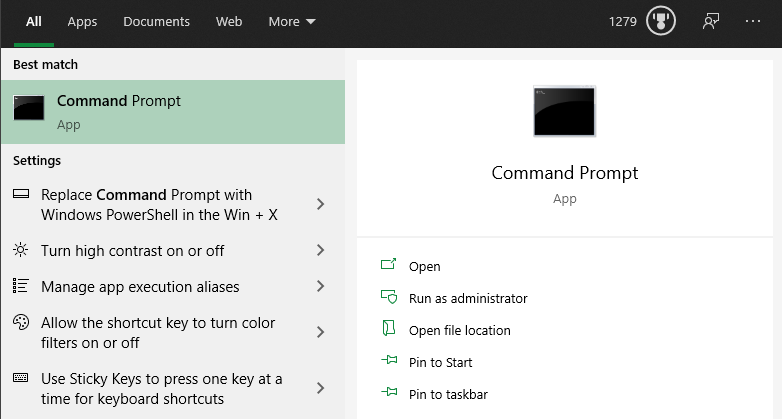
- Type «command prompt» into the Start menu to search for it. You can also type «cmd» (the short name of the executable that runs the Command Prompt) if you prefer.
- Press Win + R to open the Run box, then type «cmd» and hit Enter to open it.
-
Press Win + X (or right-click the Start button) and choose Command Prompt from the menu.
- Depending on your Windows settings, this may show Windows PowerShell or Windows Terminal instead. The new Windows Terminal and PowerShell are both more powerful than the Command Prompt, but are backward-compatible with all CMD commands.
Any of these will open the Command Prompt with regular permissions. A lot of useful commands require you to have administrator permissions, which will fail with a regular CMD window.
To run the Command Prompt as an admin, hold Ctrl + Shift when you launch either of the first two options above. If you use the third option, pick Command Prompt (Admin) (or the corresponding option that appears for you) instead. This will require you to accept a UAC prompt, so you’ll need to be logged into an admin account or provide an admin password.
How to Use the Windows Command Prompt: Basics
When you open a Command Prompt window, you’ll see some basic info about your current Windows version. Below this, you’ll see a line like the below:
C:\Users\[Username]>
This is your current location. Any commands you run that rely on location (such as deleting files) will take place in this folder. Other CMD commands are more general and don’t rely on you being in a specific location.
It’s important to know that when working in the Command Prompt, you must type commands exactly as the system expects. Since you’re issuing commands directly to your computer, it won’t understand if you type something wrong.
If you type a command that your computer doesn’t recognize, you’ll see a message that says ‘[Command]’ is not recognized… and Windows won’t do anything.
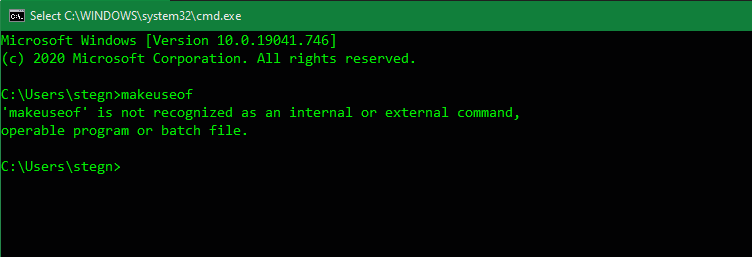
This isn’t a problem; what’s more of a risk is accidentally typing the wrong command, or using a command in a way you didn’t intend. For example, when trying to delete one file, you might accidentally tell it to delete an entire folder instead.
The command line will run whatever you tell it, as long as it’s a valid option. So you should always double-check what you’re about to do before you fire it off, and don’t use an admin Command Prompt for general purposes.
Basic Command Prompt Commands for Beginners
There are lots of Command Prompt commands, and most of them aren’t intuitive for newcomers. Learning them takes some time, so it’s best to pick up a few at a time and slowly build your knowledge.
Let’s look at a handful of CMD commands that illustrate its use for a beginner. These are just a very small sampling of what the Command Prompt can do, however. When you’re ready to move on, have a look at more CMD commands you should know, as well as our cheat sheet of handy Windows commands.
Getting Help
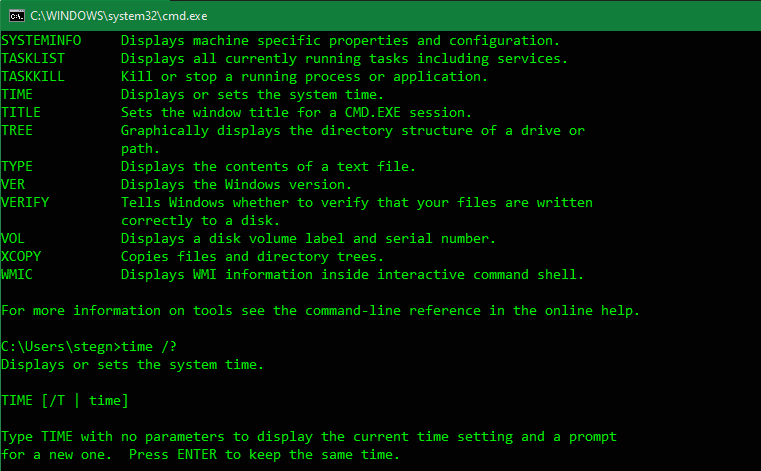
Typing help will list many common commands that you can use. These will get you started, so you don’t have to go looking for command names on your own.
If you’d like more specific information about how to use a certain command, type it followed by /?. This will give you more help, plus additional options for modifying how it works.
Listing and Changing Directories
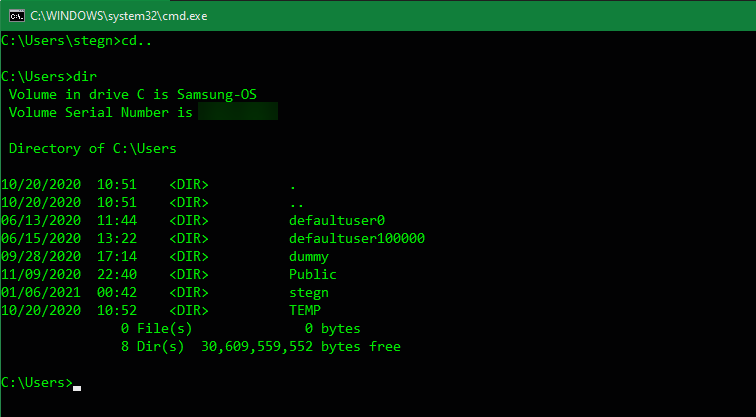
The dir command, which is short for directory, will list the contents of the folder that you’re currently in. As mentioned earlier, you can check this by looking at the folder that appears to the left of your current command.
To change your current location, use cd (short for change directory) followed by the folder you want to visit. Available folders are marked with <DIR> when you run the dir command.
So for example, to move to your Desktop folder from your default user folder, you would type cd Desktop. You can move up one folder by using the cd.. shortcut.
Creating and Deleting Files and Folders
Use mkdir [new folder name] (make directory) to create a new folder. For instance, mkdir Awesome Pics will make a folder called Awesome Pics.
Similarly, rmdir [folder name] (remove directory) will delete a folder, but only if it’s empty. To delete a file, use del [file name].
CMD Management
If there’s too much clutter on the Command Prompt’s screen, type cls to clear the contents and start fresh. And if there’s a command running that you want to cancel (maybe it’s taking too long), hit Ctrl + C to end it.
Networking Commands
Some of the most useful Command Prompt commands deal with networking. Commands like ping let you see if your computer can reach a remote destination and how long it takes. Meanwhile, ipconfig lets you see the network overview for your current connection.

Learning about CMD commands for managing networks is thus a great use of the tool.
Commands for Troubleshooting
A common use for firing up the Command Prompt is to run one of several troubleshooting commands. CHKDSK lets you scan your storage drives for errors, while SFC allows Windows to detect and fix corrupt system files. For more, see our comparison of CHKDSK, SFC, and DISM.
Taking the Command Prompt to the Next Level
Now you’re familiar with the basics of the Command Prompt, even if you’ve never used it before. Some tasks, like managing files and folders, will probably feel clunky in the command line if you’re used to doing these with the GUI. But for other tasks, like checking your IP address, running a quick CMD command is much more convenient than clicking through a bunch of menus.
While most CMD commands are specific to the Windows environment, Windows 10 and later also allow you to run the Bash shell used by Linux, macOS, and many other OSes. This is worth learning about if you use multiple platforms.
Skip to content
There are lots of shell commands in Windows 10, that you can access by typing shell:<SomeFriendlyName> into the «Run» dialog or the Start menu search box. In most cases, these shell commands open some system folder or Control panel applet. For example, you can access the Startup folder quickly, if you type the following in the Run dialog:
shell:Startup
These commands can also show some hidden secret features like the two so called «God Mode» folders — All Tasks and All Settings. Today I would like to share with you the exclusive list of the shell commands in Windows 10. It is the most complete list and includes every single command that exists in Microsoft’s latest OS.
Shell Dump
| Shell Command | Purpose |
| shell:AccountPictures | Account Pictures |
| shell:AddNewProgramsFolder | AddNewProgramsFolder |
| shell:Administrative Tools | Administrative Tools |
| shell:AppData | AppData |
| shell:Application Shortcuts | Application Shortcuts |
| shell:AppsFolder | AppsFolder |
| shell:AppUpdatesFolder | AppUpdatesFolder |
| shell:Cache | Cache |
| shell:Camera Roll | Camera Roll |
| shell:CD Burning | Temporary Burn Folder |
| shell:ChangeRemoveProgramsFolder | ChangeRemoveProgramsFolder |
| shell:Common Administrative Tools | Administrative Tools |
| shell:Common AppData | Common AppData |
| shell:Common Desktop | Public Desktop |
| shell:Common Documents | Public Documents |
| shell:Common Programs | Programs |
| shell:Common Start Menu | Start Menu |
| shell:Common Startup | Startup |
| shell:Common Templates | Common Templates |
| shell:CommonDownloads | Public Downloads |
| shell:CommonMusic | Public Music |
| shell:CommonPictures | Public Pictures |
| shell:CommonRingtones | CommonRingtones |
| shell:CommonVideo | Public Videos |
| shell:ConflictFolder | ConflictFolder |
| shell:ConnectionsFolder | ConnectionsFolder |
| shell:Contacts | Contacts |
| shell:ControlPanelFolder | ControlPanelFolder |
| shell:Cookies | Cookies |
| shell:CredentialManager | CredentialManager |
| shell:CryptoKeys | CryptoKeys |
| shell:CSCFolder | CSCFolder |
| shell:Desktop | Desktop |
| shell:Device Metadata Store | Device Metadata Store |
| shell:DocumentsLibrary | Documents |
| shell:Downloads | Downloads |
| shell:DpapiKeys | DpapiKeys |
| shell:Favorites | Favorites |
| shell:Fonts | Fonts |
| shell:Games | Games |
| shell:GameTasks | GameTasks |
| shell:History | History |
| shell:HomeGroupCurrentUserFolder | HomeGroupCurrentUserFolder |
| shell:HomeGroupFolder | HomeGroupFolder |
| shell:ImplicitAppShortcuts | ImplicitAppShortcuts |
| shell:InternetFolder | InternetFolder |
| shell:Libraries | Libraries |
| shell:Links | Links |
| shell:Local AppData | Local AppData |
| shell:LocalAppDataLow | LocalAppDataLow |
| shell:LocalizedResourcesDir | LocalizedResourcesDir |
| shell:MAPIFolder | MAPIFolder |
| shell:MusicLibrary | Music |
| shell:My Music | Music |
| shell:My Pictures | Pictures |
| shell:My Video | Videos |
| shell:MyComputerFolder | MyComputerFolder |
| shell:NetHood | NetHood |
| shell:NetworkPlacesFolder | NetworkPlacesFolder |
| shell:OEM Links | OEM Links |
| shell:OneDrive | OneDrive |
| shell:Original Images | Original Images |
| shell:Personal | Documents |
| shell:PhotoAlbums | Slide Shows |
| shell:PicturesLibrary | Pictures |
| shell:Playlists | Playlists |
| shell:PrintersFolder | PrintersFolder |
| shell:PrintHood | PrintHood |
| shell:Profile | Profile |
| shell:ProgramFiles | Program Files |
| shell:ProgramFilesCommon | ProgramFilesCommon |
| shell:ProgramFilesCommonX64 | ProgramFilesCommonX64 |
| shell:ProgramFilesCommonX86 | ProgramFilesCommonX86 |
| shell:ProgramFilesX64 | ProgramFilesX64 |
| shell:ProgramFilesX86 | Program Files (x86) |
| shell:Programs | Programs |
| shell:Public | Public |
| shell:PublicAccountPictures | Public Account Pictures |
| shell:PublicGameTasks | PublicGameTasks |
| shell:PublicLibraries | PublicLibraries |
| shell:Quick Launch | Quick Launch |
| shell:Recent | Recent Items |
| shell:RecordedTVLibrary | Recorded TV |
| shell:RecycleBinFolder | RecycleBinFolder |
| shell:ResourceDir | ResourceDir |
| shell:Retail Demo | Retail Demo |
| shell:Ringtones | Ringtones |
| shell:Roamed Tile Images | Roamed Tile Images |
| shell:Roaming Tiles | Roaming Tiles |
| shell:SavedGames | Saved Games |
| shell:Screenshots | Screenshots |
| shell:Searches | Searches |
| shell:SearchHistoryFolder | SearchHistoryFolder |
| shell:SearchHomeFolder | SearchHomeFolder |
| shell:SearchTemplatesFolder | SearchTemplatesFolder |
| shell:SendTo | SendTo |
| shell:SkyDriveCameraRoll | SkyDriveCameraRoll |
| shell:SkyDriveDocuments | SkyDriveDocuments |
| shell:SkyDriveMusic | SkyDriveMusic |
| shell:SkyDrivePictures | SkyDrivePictures |
| shell:Start Menu | Start Menu |
| shell:StartMenuAllPrograms | StartMenuAllPrograms |
| shell:Startup | Startup |
| shell:SyncCenterFolder | SyncCenterFolder |
| shell:SyncResultsFolder | SyncResultsFolder |
| shell:SyncSetupFolder | SyncSetupFolder |
| shell:System | System |
| shell:SystemCertificates | SystemCertificates |
| shell:SystemX86 | SystemX86 |
| shell:Templates | Templates |
| shell:ThisPCDesktopFolder | ThisPCDesktopFolder |
| shell:User Pinned | User Pinned |
| shell:UserProfiles | Users |
| shell:UserProgramFiles | UserProgramFiles |
| shell:UserProgramFilesCommon | UserProgramFilesCommon |
| shell:UsersFilesFolder | UsersFilesFolder |
| shell:UsersLibrariesFolder | UsersLibrariesFolder |
| shell:VideosLibrary | Videos |
| shell:Windows | Windows |
That’s it. Please let me know if I missed anything.
Support us
Winaero greatly relies on your support. You can help the site keep bringing you interesting and useful content and software by using these options:
If you like this article, please share it using the buttons below. It won’t take a lot from you, but it will help us grow. Thanks for your support!
#статьи
-
0
Популярные способы, работающие в Windows 7, 8, 10 и 11.
Иллюстрация: Оля Ежак для Skillbox Media
Филолог и технарь, пишет об IT так, что поймут даже новички. Коммерческий редактор, автор технических статей для vc.ru и «Хабра».
Это статья для тех, кто начинает изучать программирование и знакомится с командной строкой. Мы объясним, что такое командная строка и чем она отличается от консоли или терминала. Затем рассмотрим основные способы запуска командной строки во всех основных версиях Windows. А если вы используете Linux или macOS — загляните в последний раздел.
Содержание
- Что такое командная строка
- Как открыть командную строку в Windows 7, 8
- Через меню «Пуск»
- Через сочетание горячих клавиш
- Через диспетчер задач
- Через «Проводник» Windows
- Через создание ярлыка
- Как открыть командную строку в Windows 10 и 11
- Через Windows Terminal
- Через Microsoft Copilot
- Как открыть командную строку в Windows от имени администратора
- Как открыть командную строку при установке Windows
- Как запустить командную строку в других операционных системах
- Как открыть командную строку в Linux
- Как вызвать командную строку в macOS
Командная строка — это текстовый интерфейс для взаимодействия с операционной системой, который можно использовать вместо мыши и графических окон. Обычно командная строка представлена экраном с чёрным фоном и белыми символами. С её помощью можно управлять файлами, запускать программы, настраивать систему, автоматизировать задачи, администрировать сеть и выполнять множество других действий.
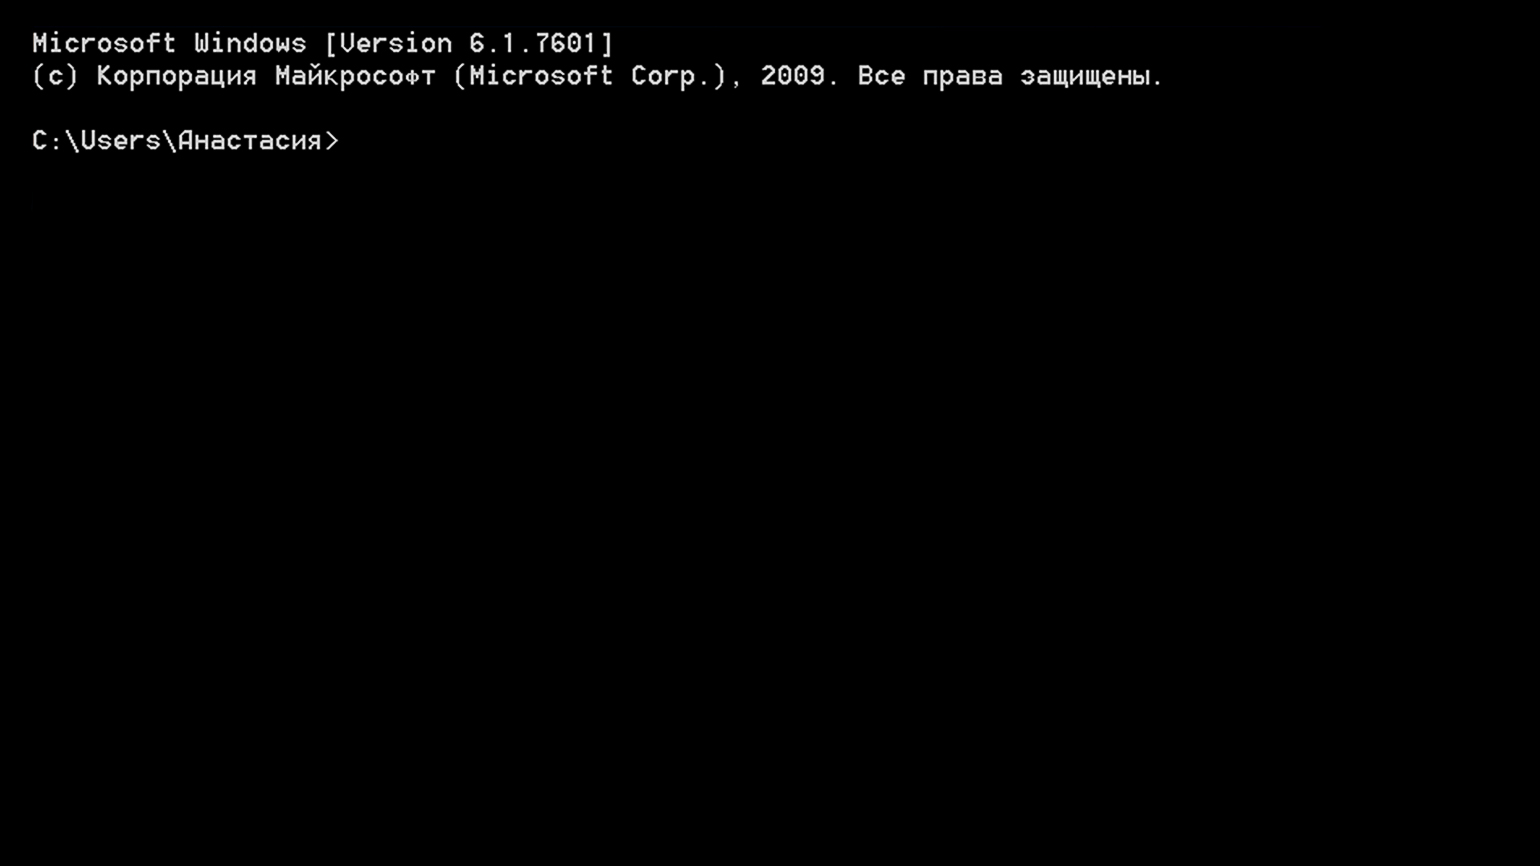
Скриншот: Skillbox Media
Командную строку часто называют терминалом или консолью. Хотя эти термины можно рассматривать как синонимы, между ними есть разница:
- Командная строка — это способ взаимодействия с операционной системой с помощью набора текстовых команд. В Windows такой интерфейс представлен приложением Command Prompt (cmd).
- Терминал — это общее название для всех программ или устройств, которые предоставляют доступ к командной строке. Например, это «Терминал» в macOS или Gnome Terminal в Linux. В Windows, помимо Command Prompt, терминалами можно назвать такие программы, как Windows Terminal и PowerShell.
- Консоль — это более общий термин, который может означать как физическое устройство, так и виртуальный экран, на который выводится текстовое содержимое программы. В контексте Windows консолью часто называют окно приложения Command Prompt, в котором пользователь может вводить команды и получать текстовые ответы.
Если не обращать внимания на нюансы терминологии, то командная строка, терминал и консоль служат одной цели — они обеспечивают пользователю доступ к выполнению команд в операционной системе.
Видео: Пётр Калинин
В Windows 7 и 8 можно запустить командную строку через меню «Пуск», комбинацию клавиш, диспетчер задач, программу «Проводник» или ярлыки.
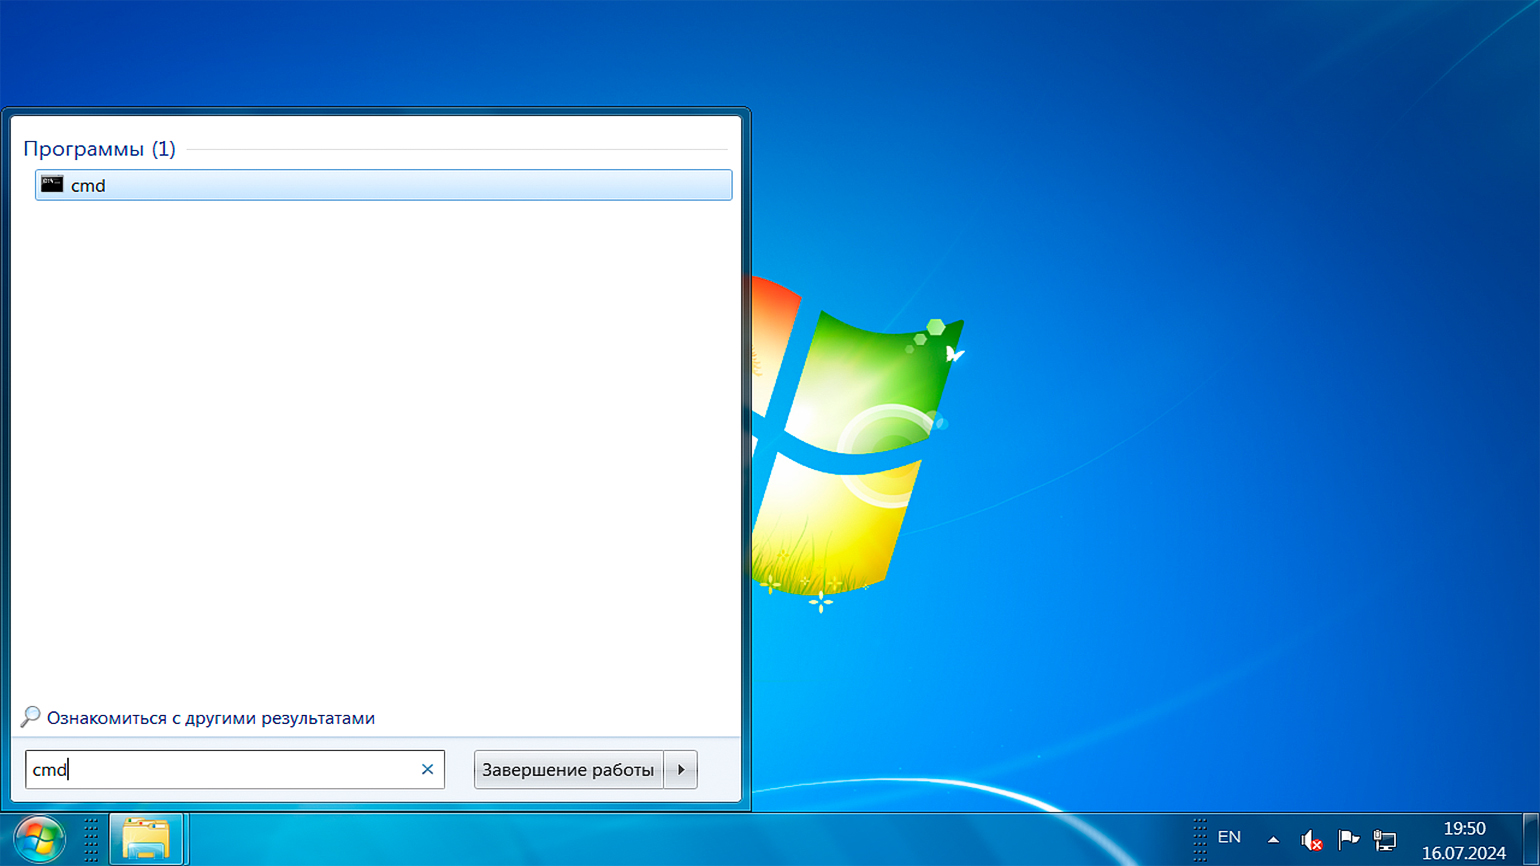
Нажмите кнопку «Пуск» в левой нижней части рабочего стола и в поле поиска введите cmd или командная строка. Если вы ввели cmd, выберите исполняемый файл cmd.exe для запуска командной строки. Если вы ввели командная строка, система сразу откроет соответствующее приложение.
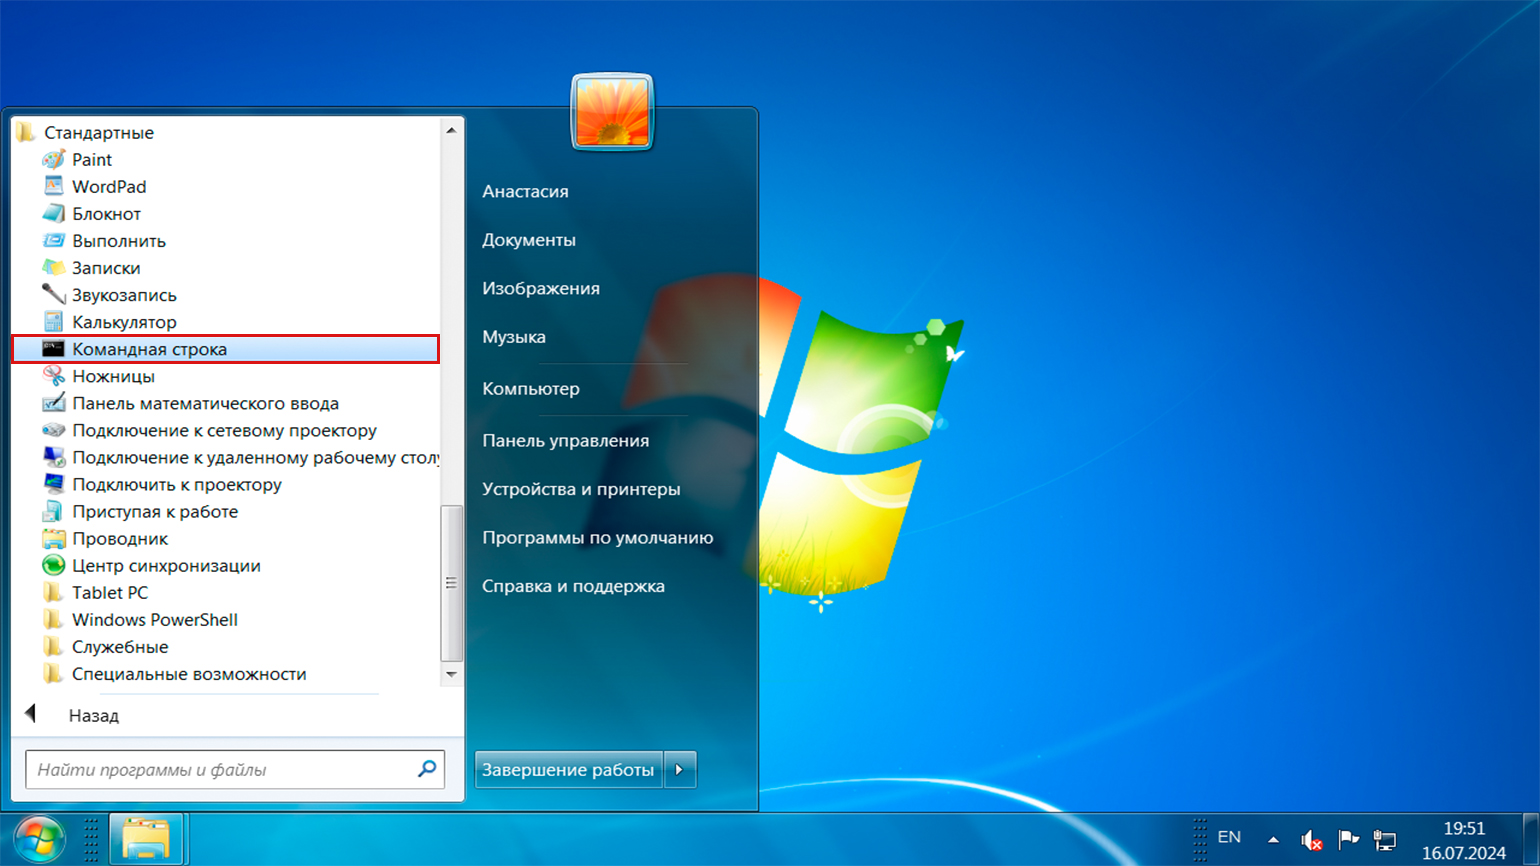
Командную строку можно вызвать и без поиска. Для этого откройте «Пуск», перейдите в раздел «Все программы», найдите папку «Стандартные» и выберите «Командная строка» в списке приложений.
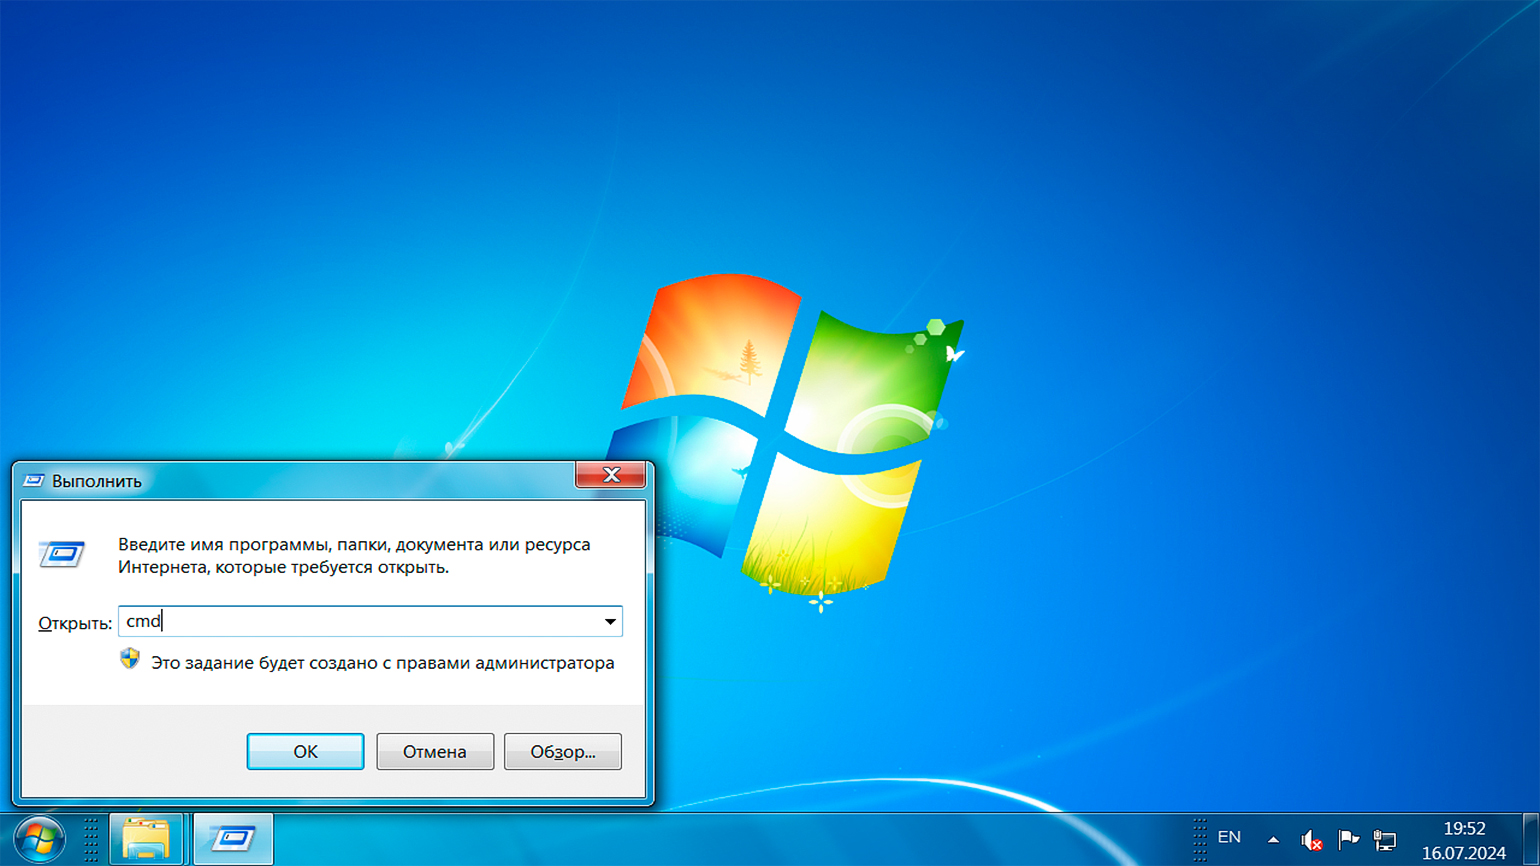
Нажмите комбинацию клавиш Win + R, чтобы открыть диалоговое окно «Выполнить». Введите cmd в поле «Открыть» и нажмите на кнопку «OK».
Начиная с Windows 8, в системе доступно специальное меню Power User, которое можно вызвать нажатием клавиш Win + X. Это меню предоставляет быстрый доступ к командной строке, диспетчеру задач, панели управления, сетевым подключениям и другим важным функциям. Это меню можно использовать вместо диалогового окна «Выполнить».
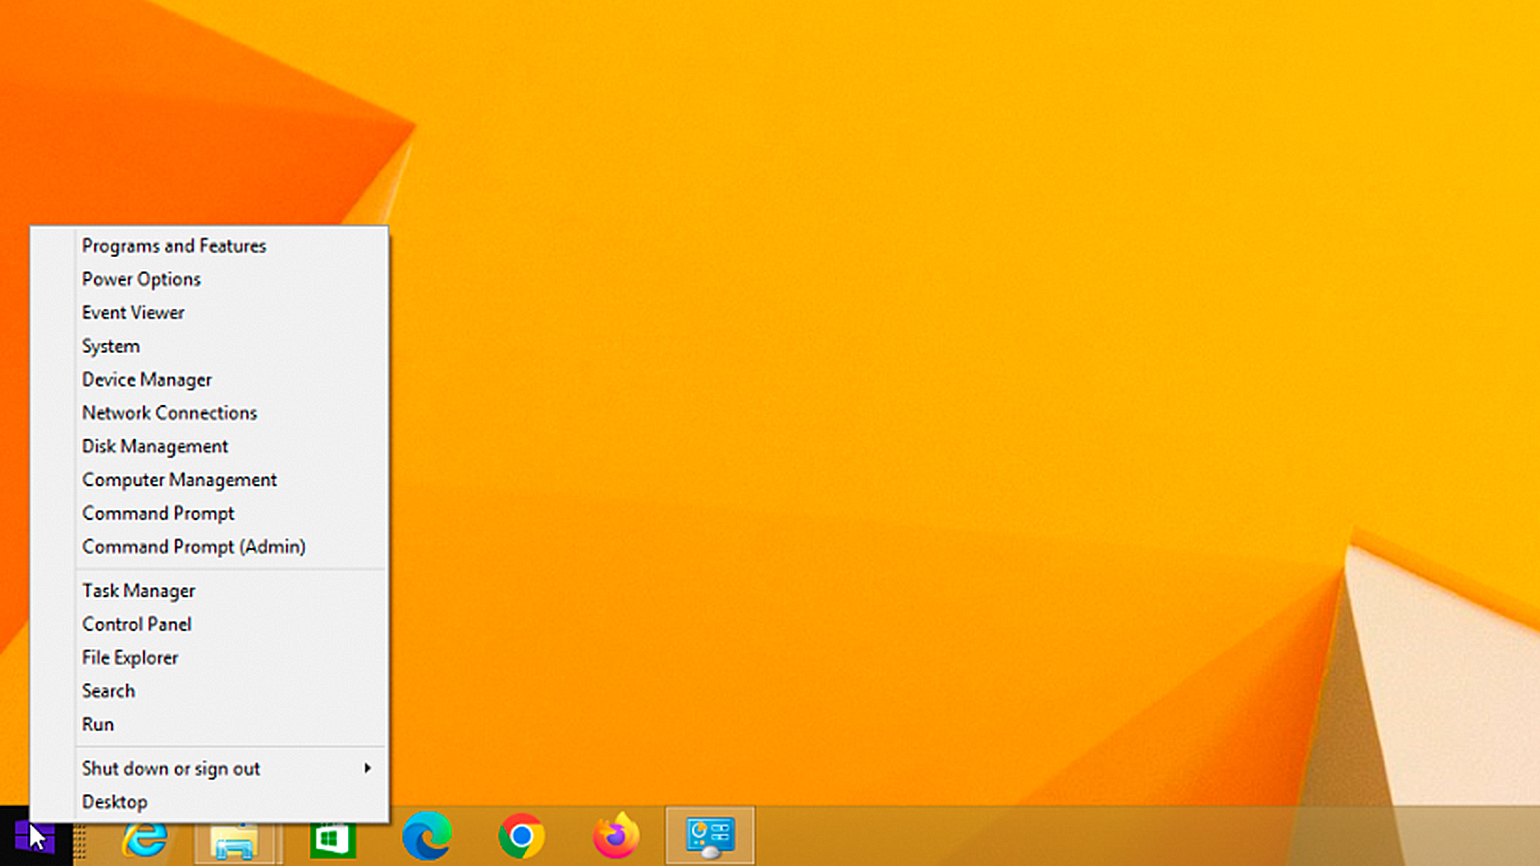
Скриншот: PCMag
Если у вас Windows 7, но вы хотите открывать Power User Menu с помощью сочетания клавиш Win + X, попробуйте программу WinPlusX:
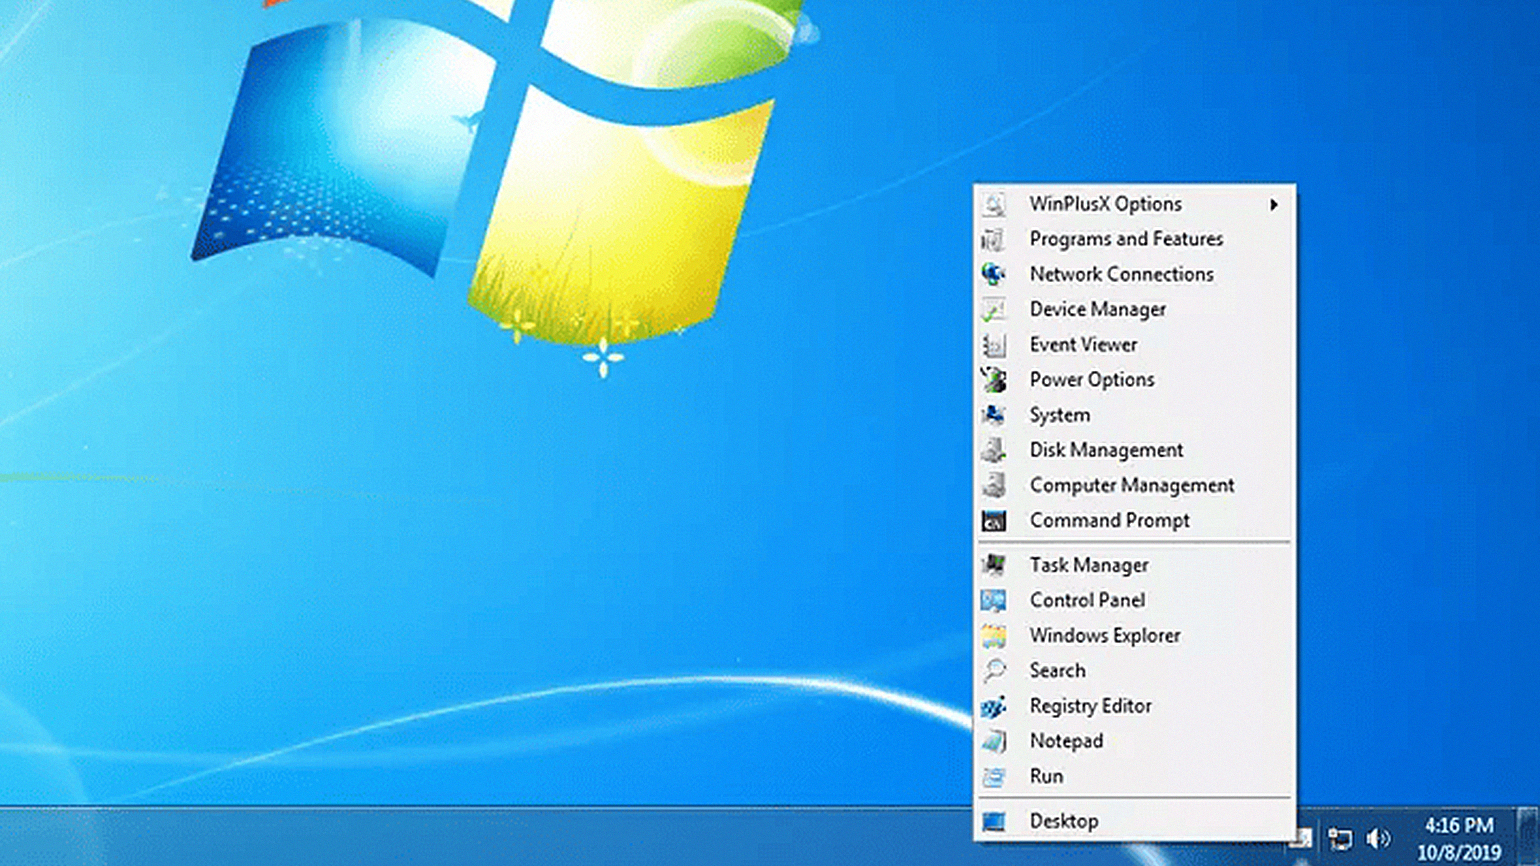
Скриншот: Lifewire
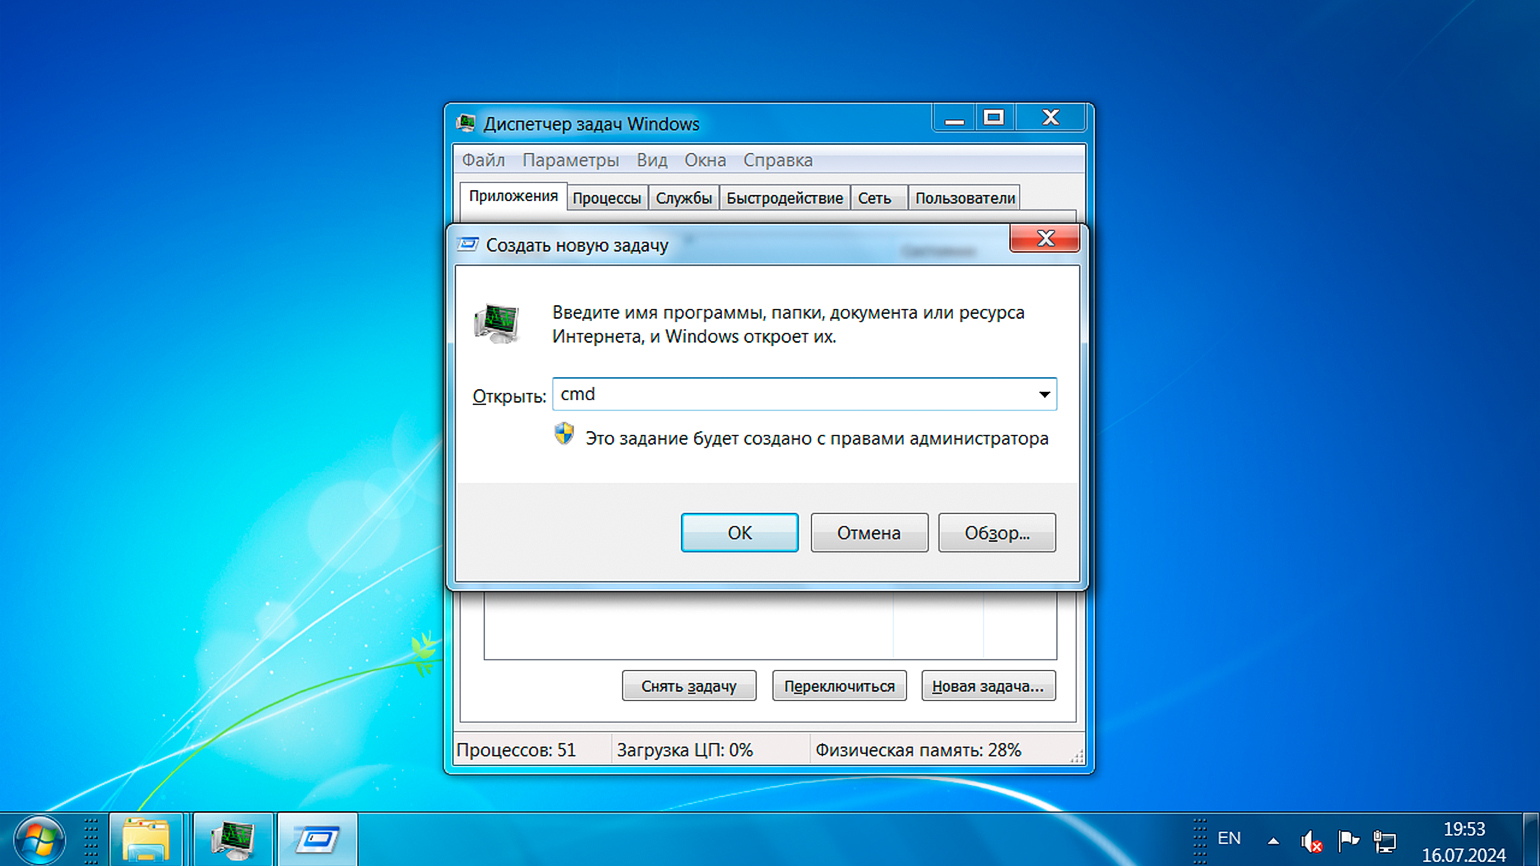
Нажмите комбинацию Ctrl + Shift + Esc или Ctrl + Alt + Del, чтобы вызвать диспетчер задач. Перейдите на вкладку «Файл», создайте новую задачу, введите cmd в поле «Открыть», а затем нажмите Enter или кнопку «OK».
Заходить в командную строку через диспетчер задач удобно в ситуациях, когда графический интерфейс завис или функционирует некорректно. Диспетчер задач всегда доступен и позволяет восстановить систему.
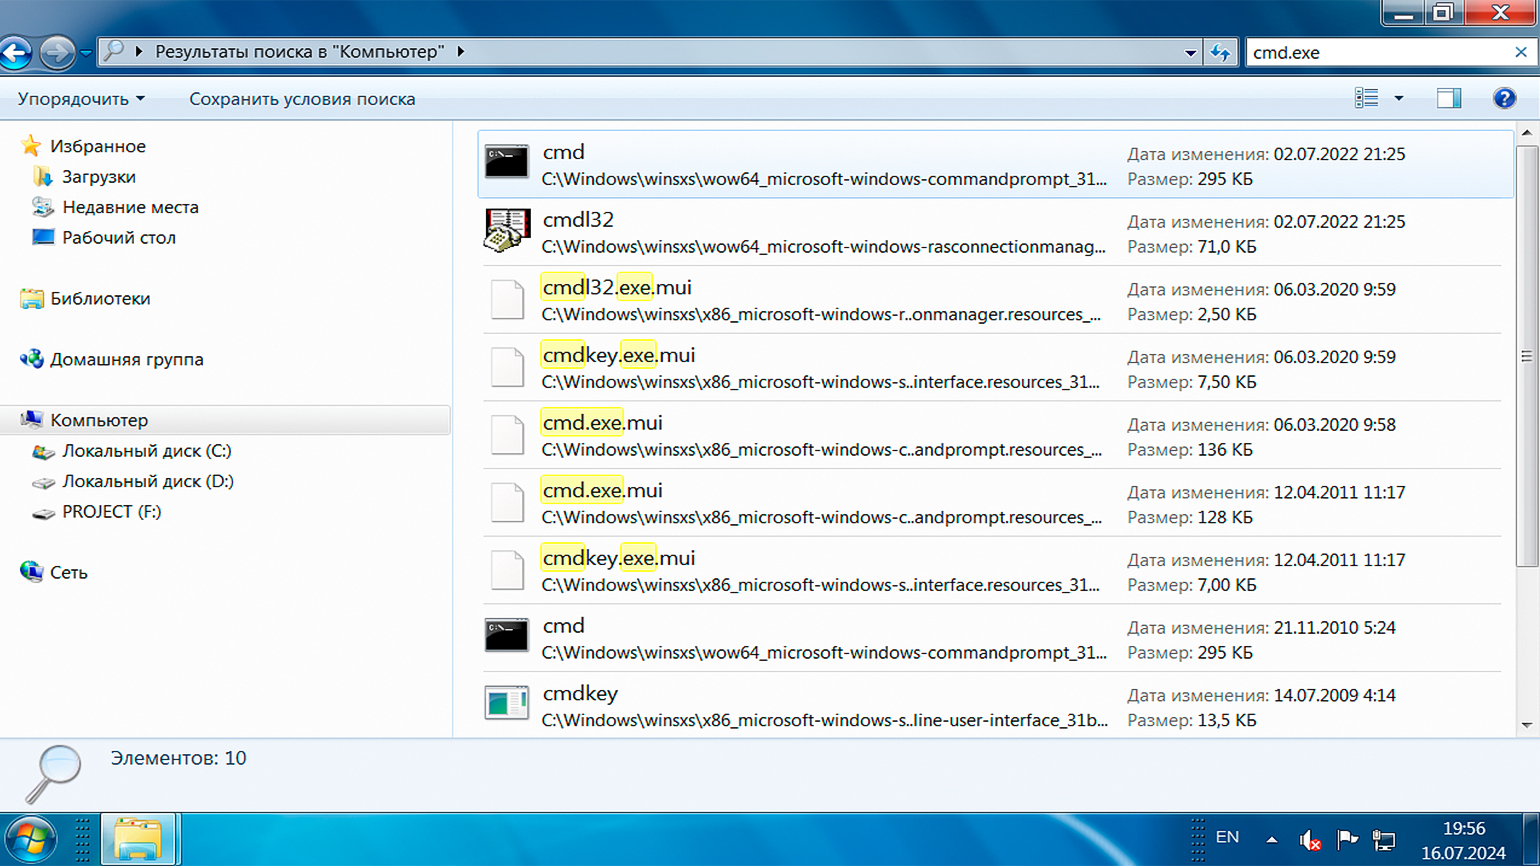
Откройте программу «Проводник», введите в строку поиска cmd.exe и нажмите Enter. В результатах найдите исполняемый файл, дважды кликните по нему левой кнопкой мыши и запустите командную строку.
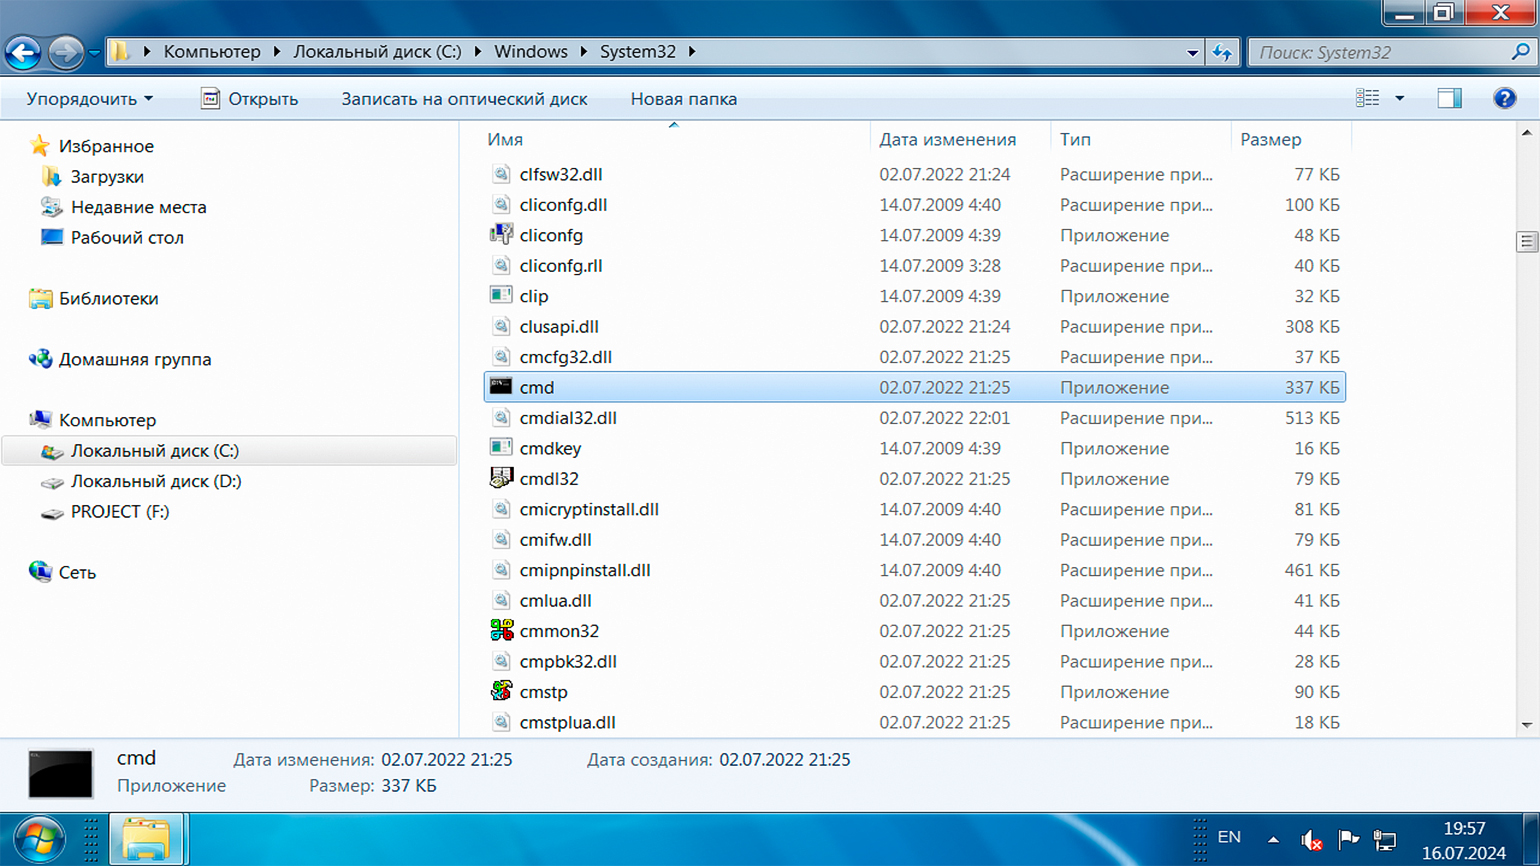
Если хотите, можете найти исполняемый файл вручную. Для этого откройте «Проводник» и перейдите по пути: «Компьютер» → диск C → Windows → System32. Затем запустите cmd.exe, кликнув на него мышью.
Щёлкните правой кнопкой мыши по пустому месту на рабочем столе или в любой папке, выберите пункт меню «Создать» → «Ярлык». В открывшемся окне в поле «Укажите расположение элемента» введите cmd.exe. Затем придумайте имя для ярлыка и нажмите «Готово». Теперь вы сможете использовать этот ярлык для быстрого запуска командной строки.

Ярлыки упрощают выполнение повседневных задач. Чтобы попробовать это на практике, выберите любую папку на своём компьютере, создайте ярлык и в поле «Укажите расположение элемента» введите команду:
cmd /k "dir"
После нажмите «Далее», дайте ярлыку имя — например, «Командная строка с dir» — и нажмите «Готово». Теперь при использовании этого ярлыка он откроет командную строку и сразу отобразит список доступных файлов.
Попробуем другой сценарий. Перейдите на рабочий стол, создайте ярлык и в поле «Укажите расположение элемента» введите другую команду:
cmd /k "cd Путь_к_папке && dir"
В этой команде Путь_к_папке вам нужно заменить на путь к той папке, в которую вы хотите перейти при открытии командной строки. После дайте ярлыку имя — например, «Командная строка в Папке» — и нажмите «Готово».
Теперь, когда вы запустите ярлык на рабочем столе, командная строка откроется в указанной папке и сразу отобразит её содержимое.
Многие способы запуска командной строки в Windows 10 и 11 напоминают те, что доступны в предыдущих версиях операционной системы. Речь идёт о запуске через поиск или меню «Пуск», диалоговое окно «Выполнить», диспетчер задач, программу «Проводник» и ярлыки. В этом разделе мы не будем их повторять и рассмотрим способы, о которых ещё не упоминали.
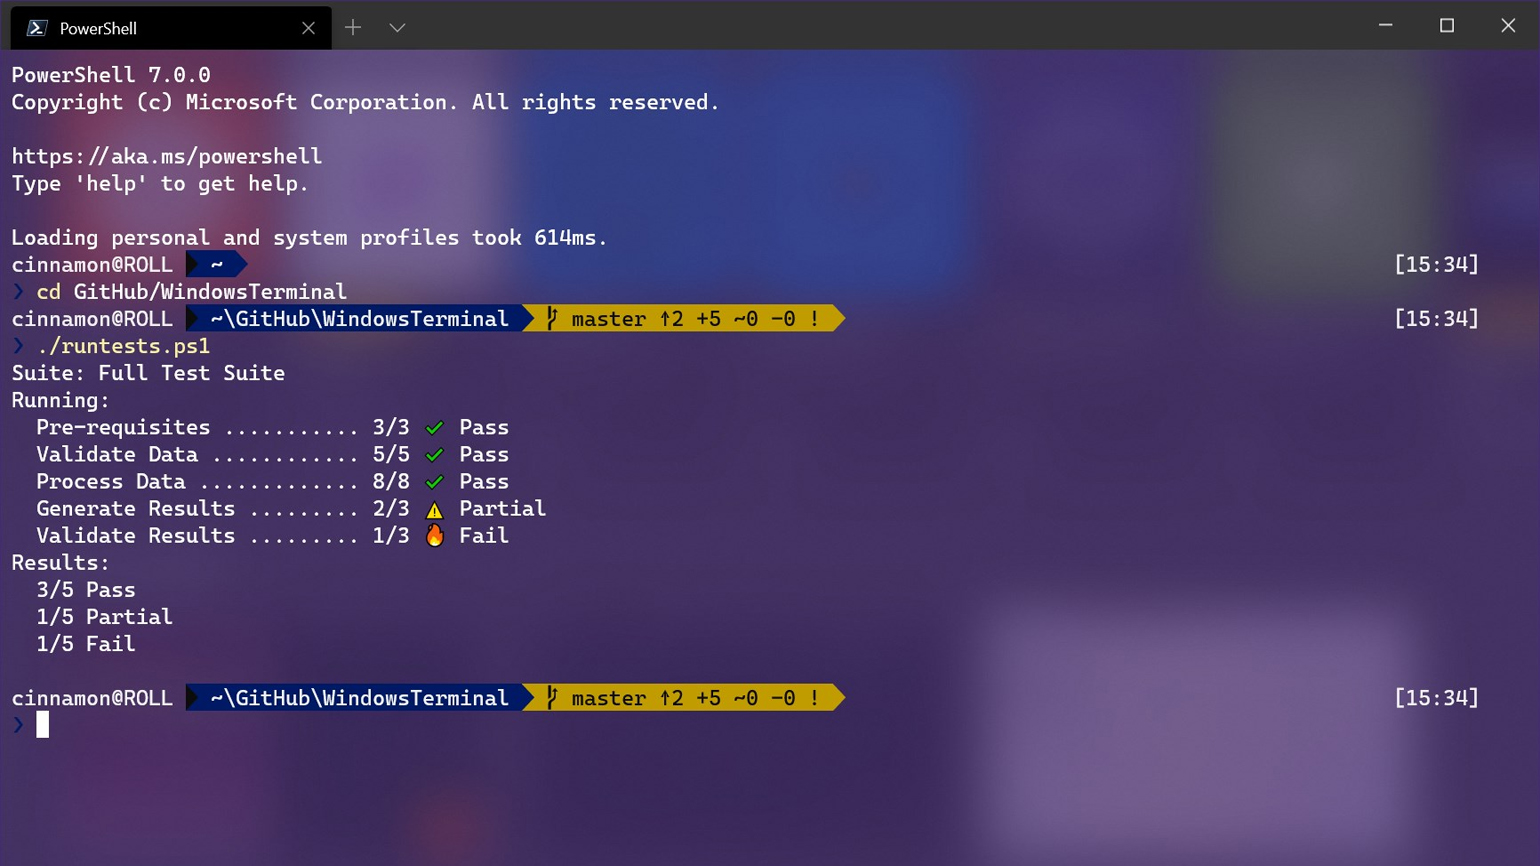
Windows Terminal — это многооконное приложение, которое поддерживает Command Prompt, PowerShell, Linux Bash и другие терминалы. Вы можете выбрать нужный или пользоваться сразу несколькими в разных вкладках.
В Windows 11 программа «Терминал» установлена по умолчанию, а для Windows 10 её нужно скачать из Microsoft Store. Для быстрого доступа к командной строке найдите «Терминал» через поиск в меню «Пуск» и закрепите его на панели задач или начальном экране списка приложений.
Скриншот: Microsoft Corporation
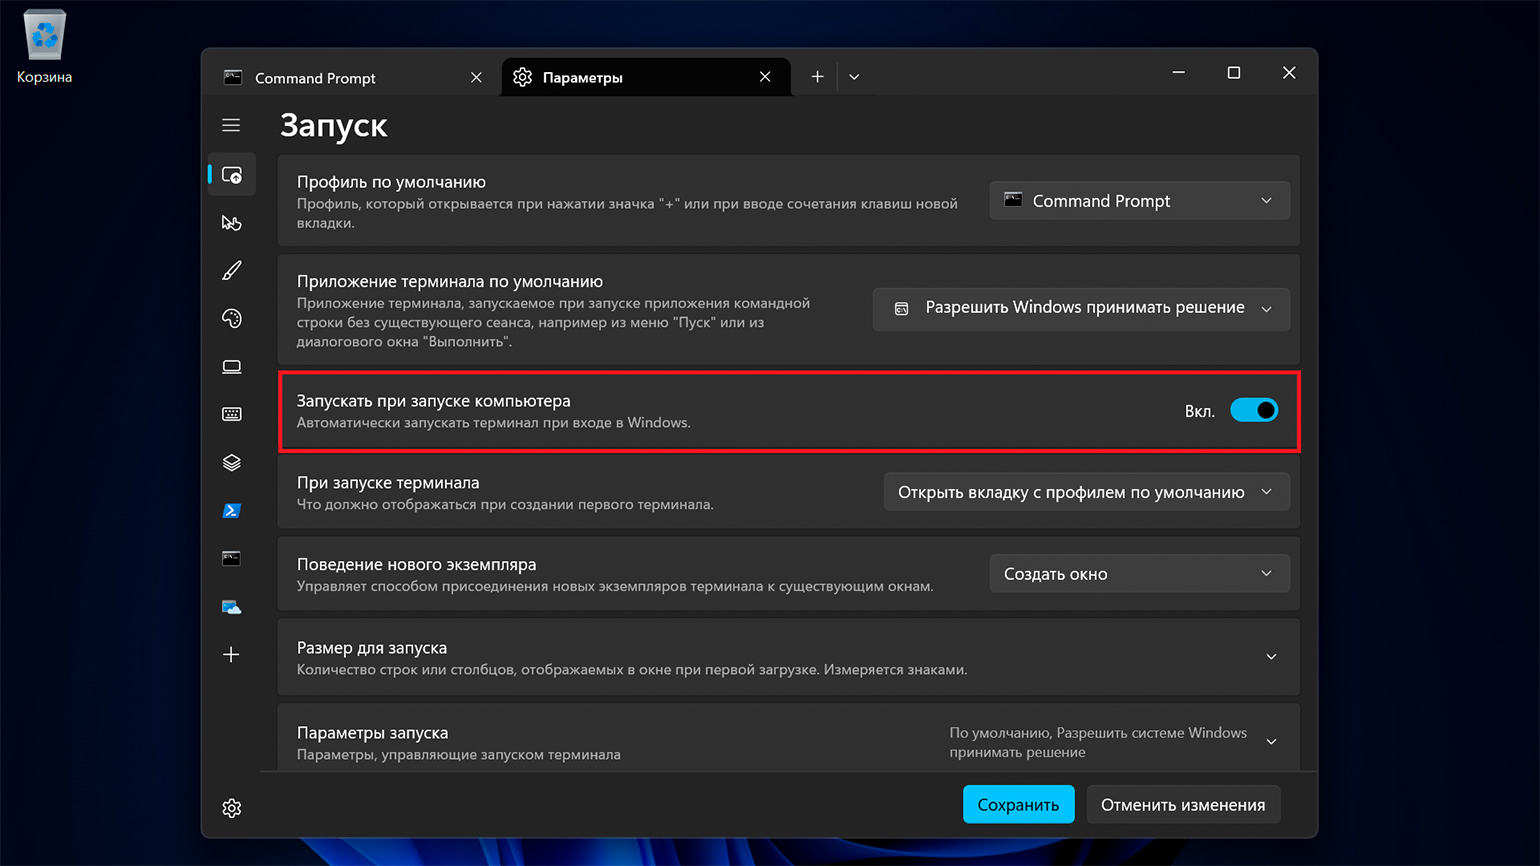
Удобство Windows Terminal в том, что вы можете перейти в «Параметры» и включить опцию «Запускать при запуске компьютера». Это позволит получить доступ к командной строке сразу после включения системы.
Если у вас нет Windows Terminal, вам придётся создать ярлык и поместить его в папку «Автозагрузки». Вот пошаговая инструкция:
- Нажмите Win + R, чтобы открыть диалоговое окно «Выполнить».
- Введите shell:startup и нажмите Enter.
- Перетащите созданный ярлык командной строки в открытую папку.
Ещё вы можете использовать «Планировщик задач» для автоматического запуска, но для этого нужно выполнить больше дополнительных шагов.
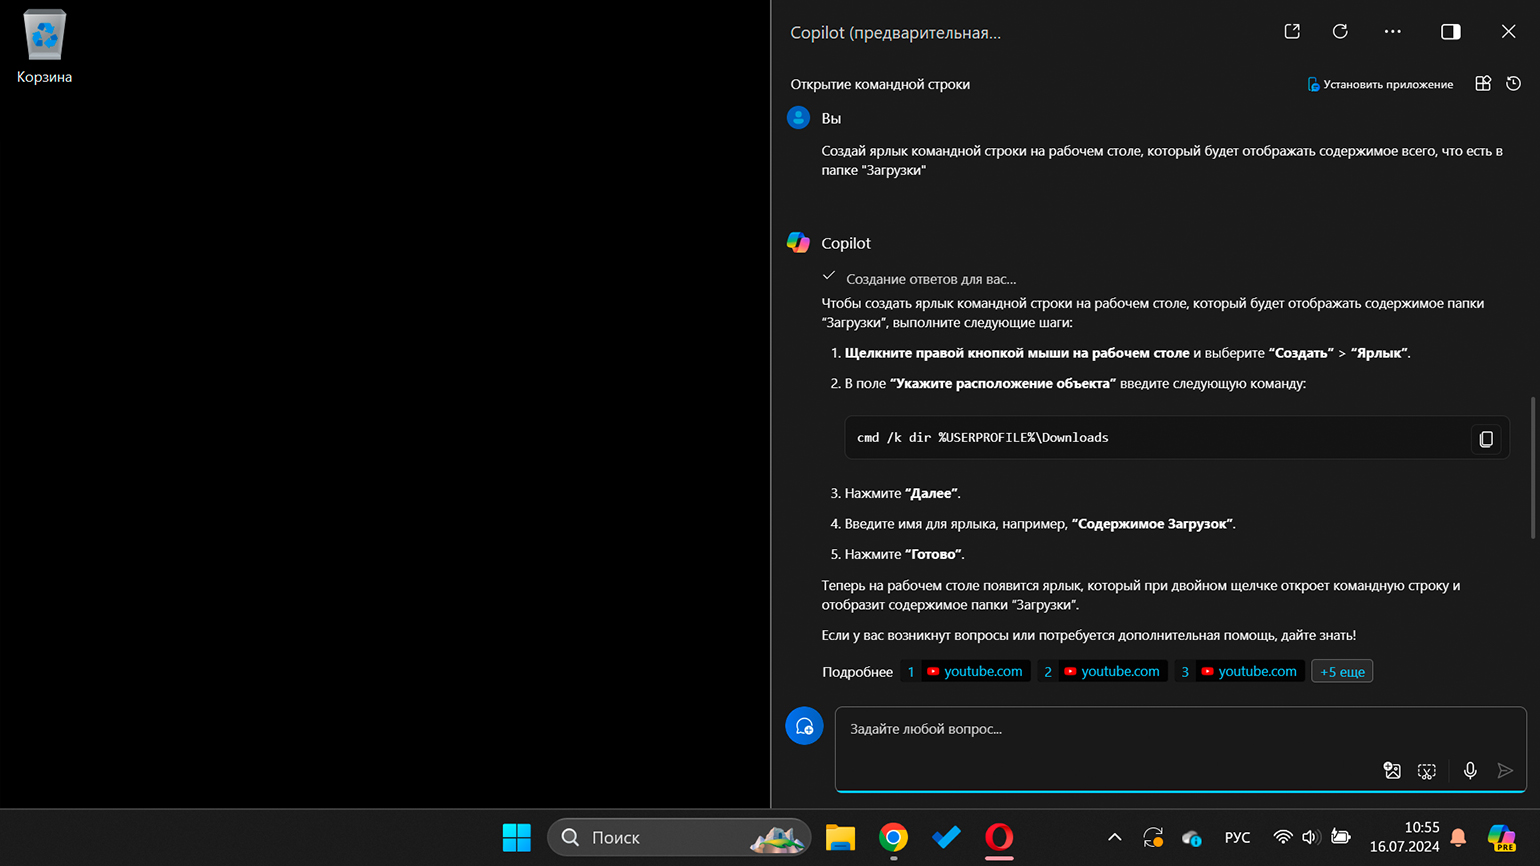
Microsoft Copilot — это интеллектуальный помощник, поставляемый вместе с Windows 11 и интегрированный с ней на уровне системы. Он позиционируется как инструмент для ответов на вопросы, предоставления полезной информации и выполнения различных повседневных задач.
Чтобы воспользоваться им, кликните на иконку приложения в правой нижней части экрана или найдите его через меню «Пуск». В диалоговом окне попросите его открыть командную строку и подтвердите выполнение.

Если попросить Microsoft Copilot создать ярлык или выполнить более сложную задачу, он пока не сможет это сделать. Вместо этого он предложит инструкцию и ссылки на интернет-ресурсы по вашему запросу.
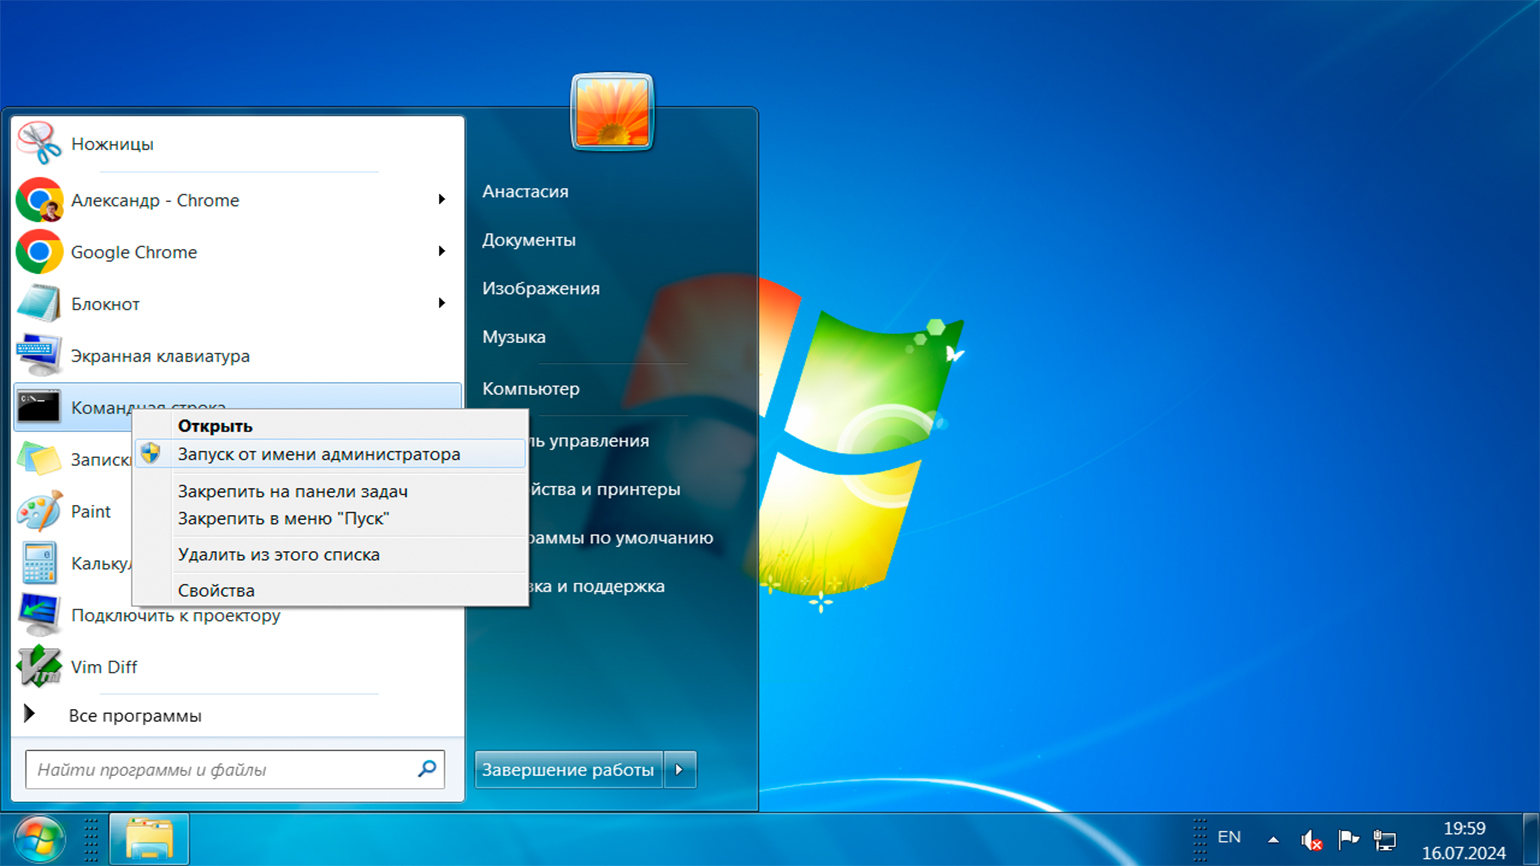
Чтобы открыть командную строку от имени администратора, вы можете использовать большинство из ранее описанных способов, но вместо обычного запуска выбирайте пункт «Запуск от имени администратора».
Вот пример для Windows 7: откройте меню «Пуск» → «Все программы» → «Стандартные» → «Командная строка». Затем кликните правой кнопкой мыши по приложению и в контекстном меню выберите способ запуска.
Запуск командной строки от имени администратора необходим для выполнения команд или запуска программ с повышенными привилегиями доступа к ресурсам системы. К таким действиям относятся, например, управление службами, настройка сети, установка обновлений, изменение конфигурации безопасности, доступ и изменение ключей реестра, диагностика и решение проблем, связанных с конфигурацией, и многое другое.
Операции от имени администратора могут повлиять на работу системы, поэтому будьте осторожны и не используйте эти права без необходимости.
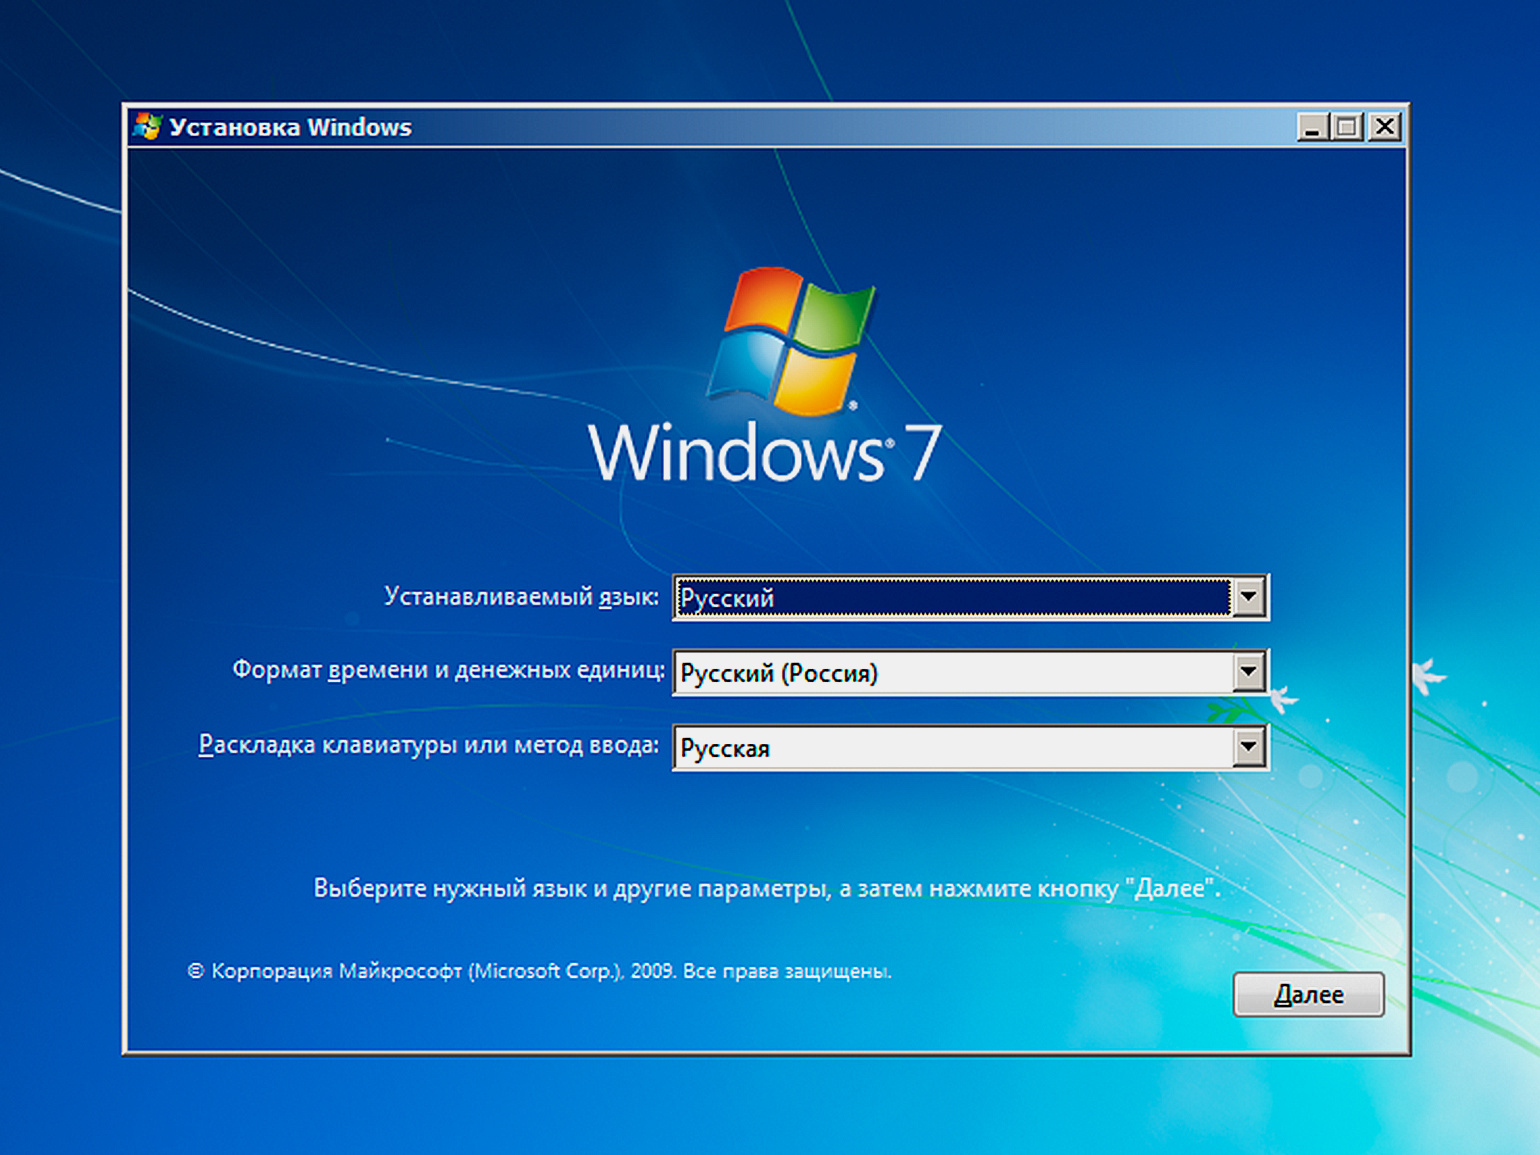
На первом шаге необходимо запустить процесс установки Windows и дождаться появления экрана, на котором можно выбрать язык и регион.
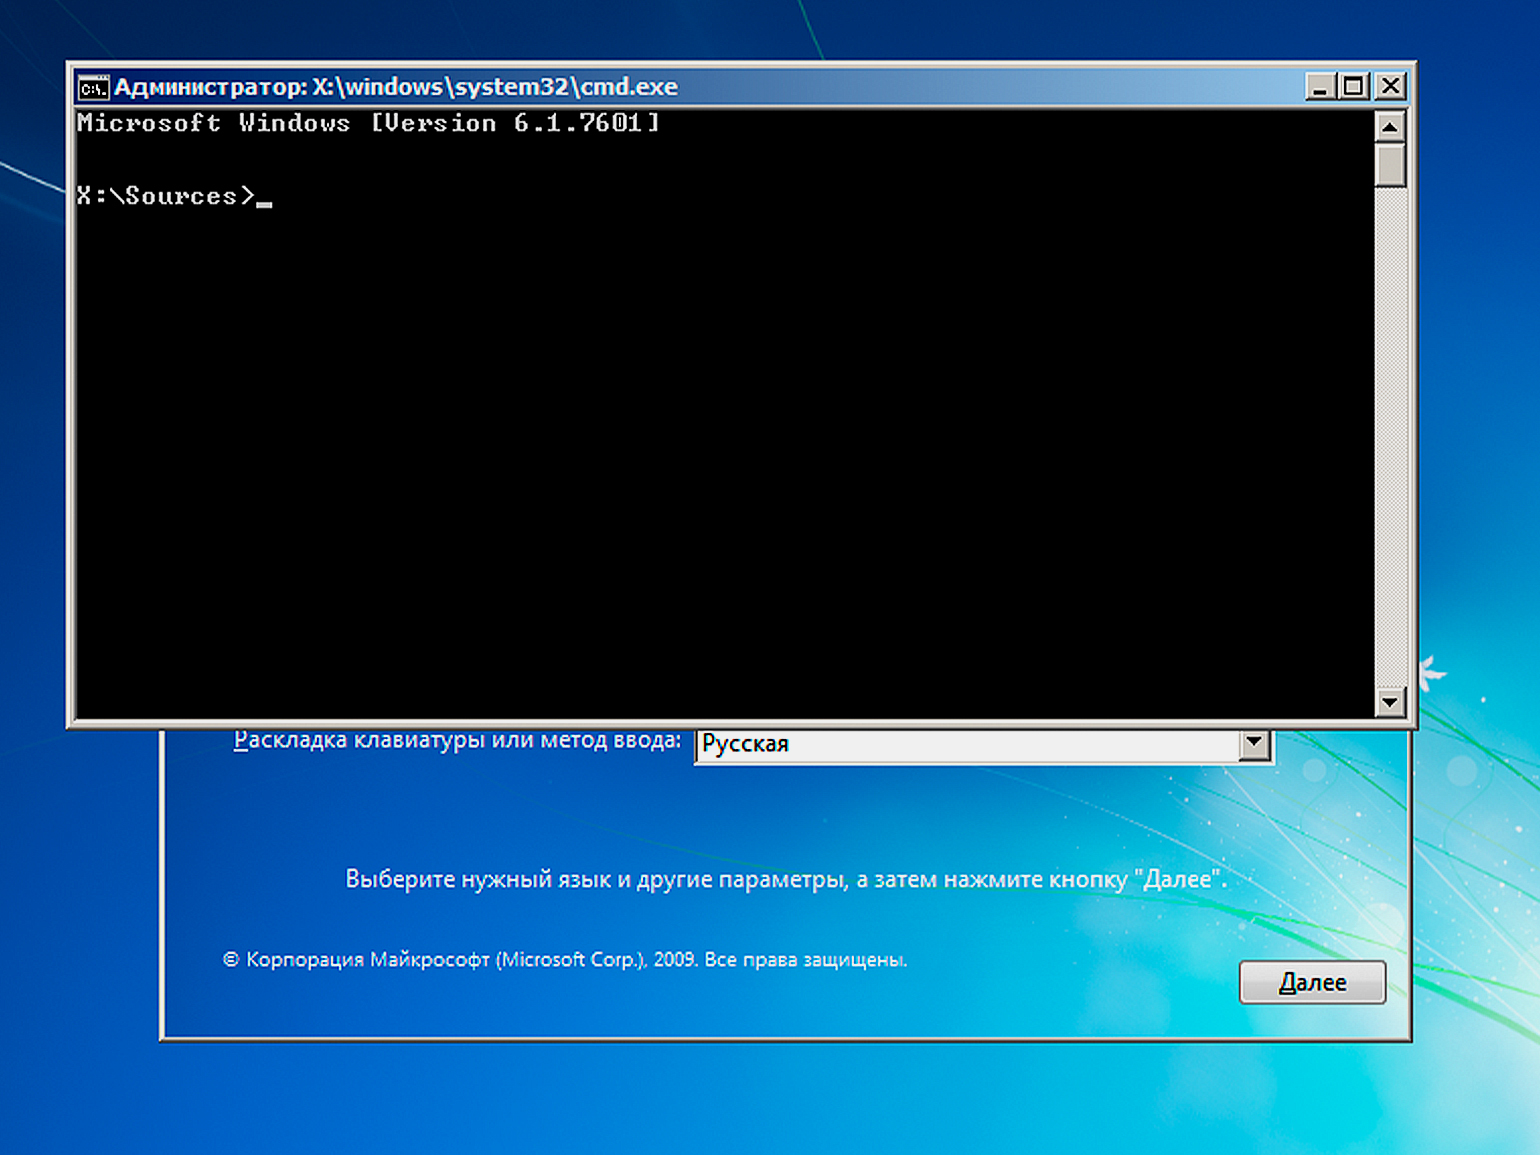
После этого нажмите сочетание клавиш Shift + F10, и вы получите доступ к командной строке. Это может быть полезно:
- для диагностики и исправления ошибок;
- создания, удаления и форматирования разделов на жёстком диске;
- копирования, перемещения или удаления файлов и папок;
- редактирования настроек загрузки;
- запуска скриптов или команд для автоматизации задач до или после установки системы;
- сброса пароля администратора, если вы забыли его и не можете войти в систему;
- решения множества других задач по настройке и оптимизации Windows.
Для Linux и macOS мы не будем разбирать способы вызова командной строки с учётом версии операционной системы, так как статья посвящена Windows. Но мы рассмотрим несколько популярных вариантов.
В большинстве Linux-дистрибутивов вы можете открыть новое окно терминала, нажав комбинацию клавиш Ctrl + Alt + T. Также его можно найти в меню приложений или через строку поиска по запросу terminal.
Если у вас уже открыт терминал и вам нужно дополнительное окно для работы, вы можете выполнить команду gnome-terminal для среды GNOME. Для других сред рабочего стола используются аналогичные команды: konsole для KDE или xfce4-terminal для XFCE.

В macOS доступ к командной строке открывает программа «Терминал». Быстрее всего её можно открыть через Spotlight: нажмите комбинацию Cmd + Пробел, введите в строке поиска терминал и нажмите Enter.
Также можно воспользоваться Launchpad — приложением с иконкой ракеты на панели Dock. Откройте Launchpad, найдите иконку «Терминал» и запустите её. Аналогично можно сделать с помощью файлового менеджера Finder: перейдите в раздел «Приложения» → «Утилиты» → «Терминал».
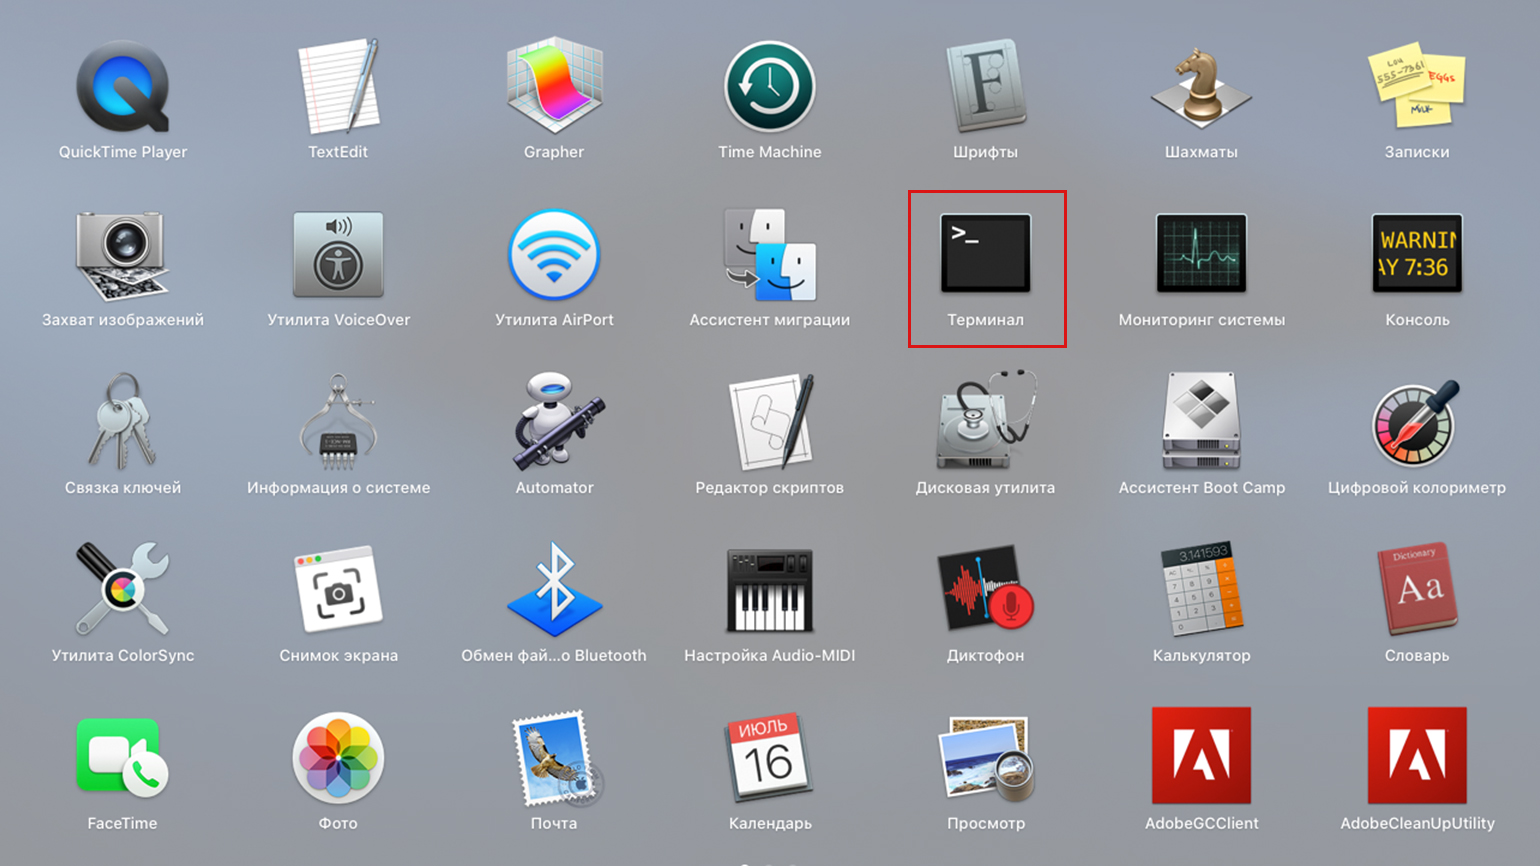
Скриншот: Skillbox Media
Как быстро заработать в IT в 2025 году
Попробуйте себя в разных направлениях IT и сделайте первый шаг к новой профессии на удалёнке!
Учиться бесплатно →