
Domain Information Groper, commonly known as dig command, is a DNS lookup utility that is very popular on Linux. Dig is a more flexible and better DNS tool than the Windows Nslookup tool.
Unfortunately, it isn’t shipped with Windows 10, but we can get a version of dig that runs on Windows 10/11 by installing BIND tools.
The quickest way to install DIG on Windows 11/10 is to use the Chocolatey package manager. Open a PowerShell console and execute the following command to install Chocolatey:
Set-ExecutionPolicy Bypass -Scope Process -Force; [System.Net.ServicePointManager]::SecurityProtocol = [System.Net.ServicePointManager]::SecurityProtocol -bor 3072; iex ((New-Object System.Net.WebClient).DownloadString('https://chocolatey.org/install.ps1'))After that, run the following command to install the bind-toolsonly package:
choco install -y bind-toolsonlyAnd that is it! You can now run the dig command from both CMD and PowerShell.
If for some reason, you don’t like to use the Chocolatey, you can still install DIG by manually downloading the bind tool package. The following section provides detailed instructions on how to do it.
Download BIND for Windows 10
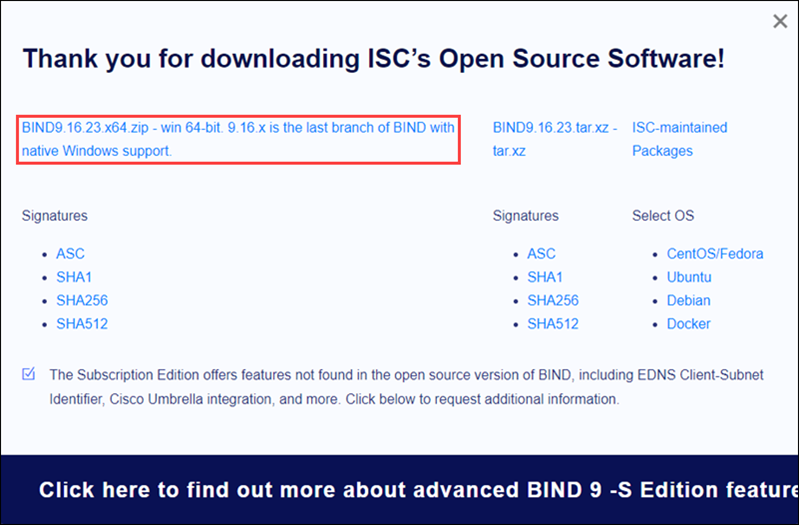
Open a web browser, navigate to www.isc.org/download/ and download the latest version of BIND.

For Windows 10, we need to download the 64bit zip file.
Install Bind Tools
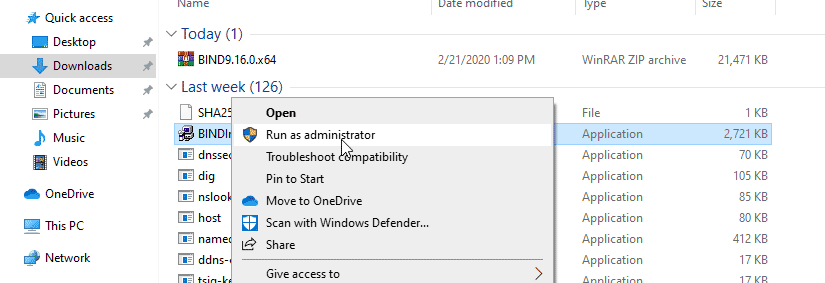
After the download has finished, extract the ZIP file. Then right-click on the BINDInsall and choose run as administrator from the contextual menu.
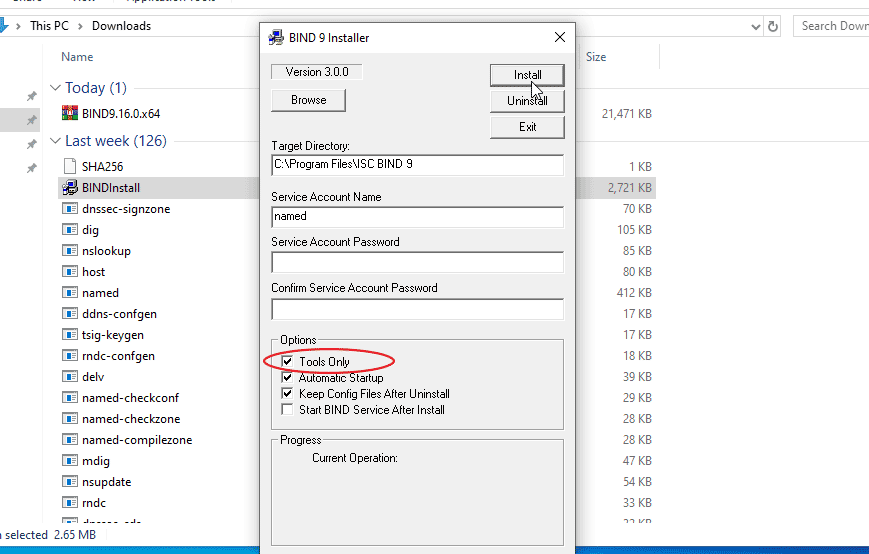
Check the Tools only checkbox and click the Install button.
If successful, you will see the message: «BIND installation completed successfully».
Add Dig to Windows Path variable
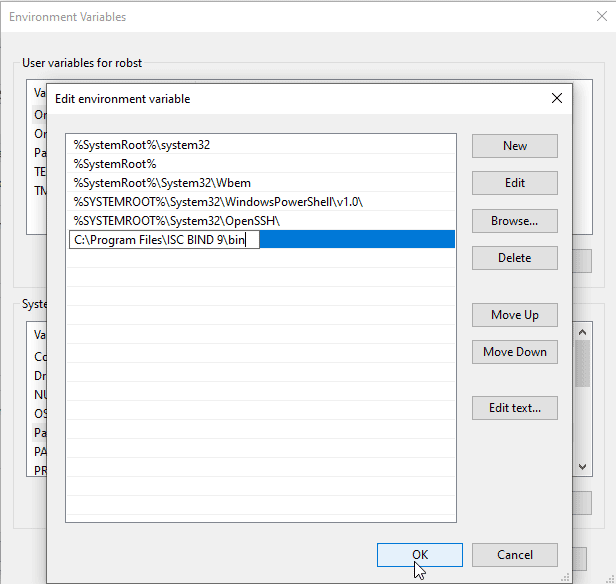
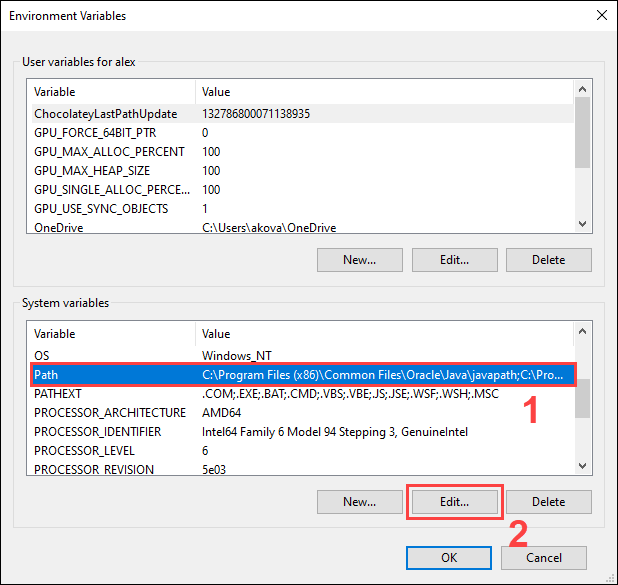
There is one more thing. We need to add the bin directory (C:\Program Files\ISC BIND 9\bin), which contains the dig.exe file, to the Windows PATH variable.
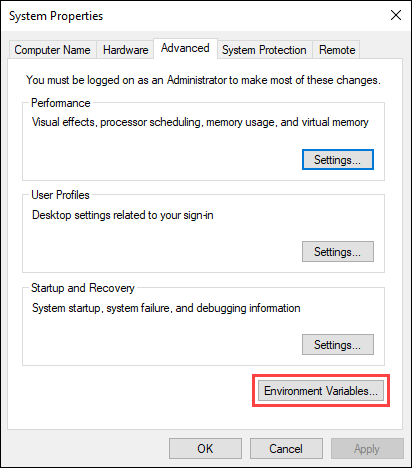
Right-click on This PC and select Properties. Go to Advanced system settings > Environment Variables. Edit the PATH variable under the System variables.
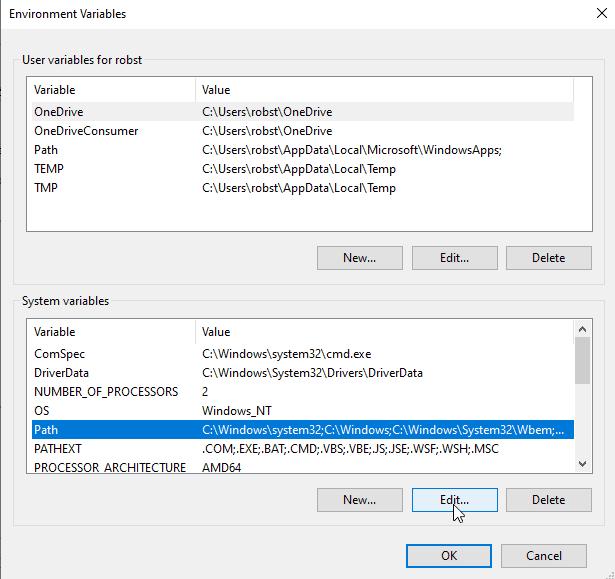
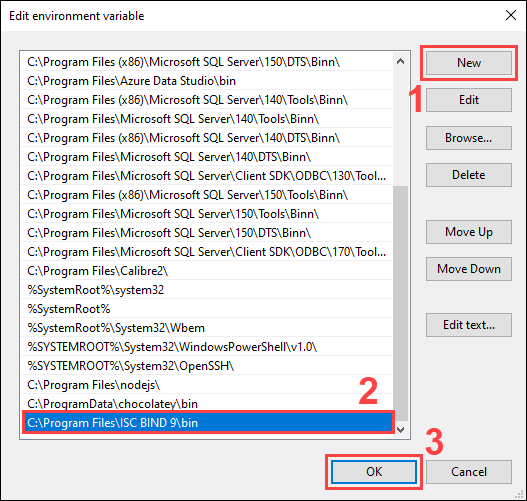
Click the New button and paste the path C:\Program Files\ISC BIND 9\bin.
And that is all we need to do.
Using the dig command
The basic usage of the dig command is to specify the domain name you want to look up and the type of record you want to query (e.g. A for address records, MX for MX records). Let’s see a couple of examples.
Find IP address of a website or domain (A record):
dig example.com AFind IPv6 address of a domain (AAAA record):
dig example.com AAAAWe can specify the nameserver we’d like to query:
dig A example.com @8.8.8.8Looks up MX records:
dig mx example.comThe -x option performs a reverse lookup when you specify the IP address:
dig -x 8.8.8.8Types of DNS records you can query include: A, AAAA, MX for Mail exchanger, NS, and TXT.
The dig command (Domain Information Groper) is a popular Linux utility used for performing DNS lookups. It provides more flexibility than Windows NSLookup but, unfortunately, it isn’t available in Windows 10 by default.
One option for using dig on Windows is to install BIND. This tool lets you use the dig command in the Windows command prompt.
In this tutorial, we will show you how to install BIND and edit Windows environment variables to enable dig. We also provide examples of using the dig command to perform a DNS lookup.
Prerequisites
- A system running Windows 10.
- An account with administrator privileges.
- Access to the command prompt.
Download BIND
1. Visit the BIND download page using your preferred web browser.
2. Click the Download button to select the latest stable version of BIND. In this tutorial, we are using version 9.16.23.
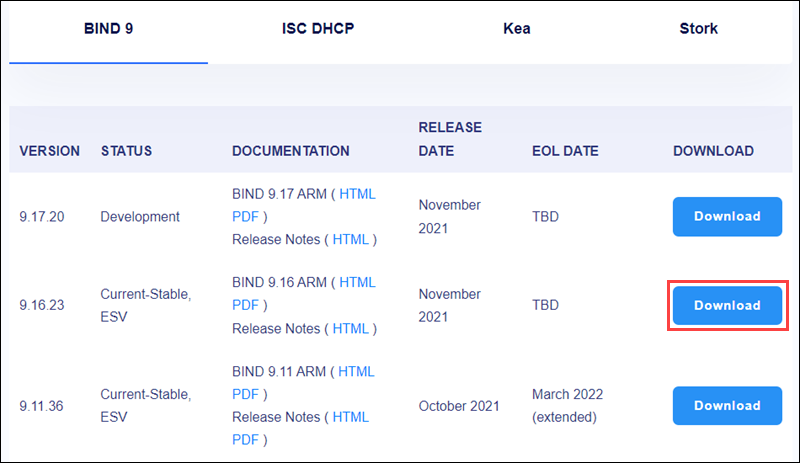
3. Click the link to download the BIND installation zip file.
Install BIND
1. Extract the BIND installation file.
2. Open the BINDInstall.exe file as an administrator to start the installation wizard.
3. In the Target Directory field, set the path to where you want to install BIND on your system.
4. Set a name for your service account in the Service Account Name field.
5. Set and confirm a password for the service account.
6. In the Options section, check the Tools Only box.
7. Click the Install button to start the installation process.
Note: Installing BIND may automatically install Microsoft Visual C++ Redistributable. In this case, click the Install button to confirm.
8. Once the installation is complete, click OK to confirm and Exit to close the installer.
Create Windows Path Variable
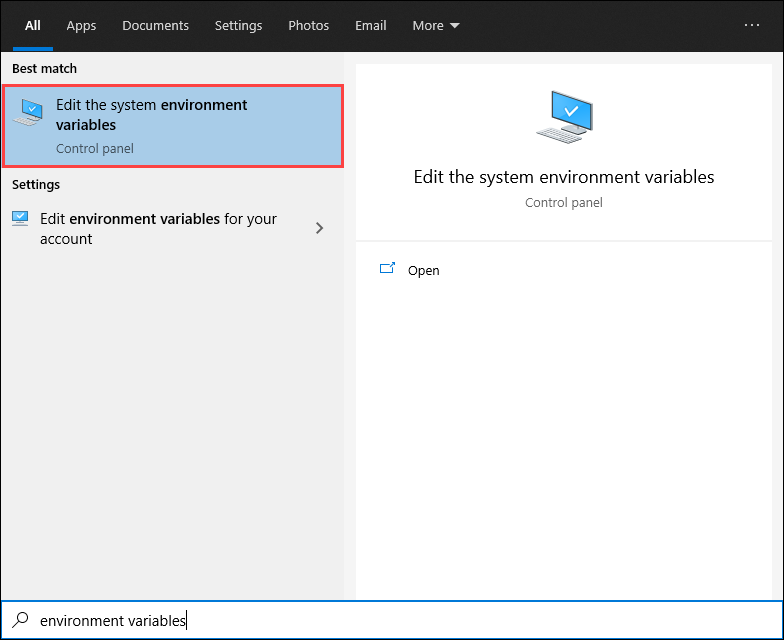
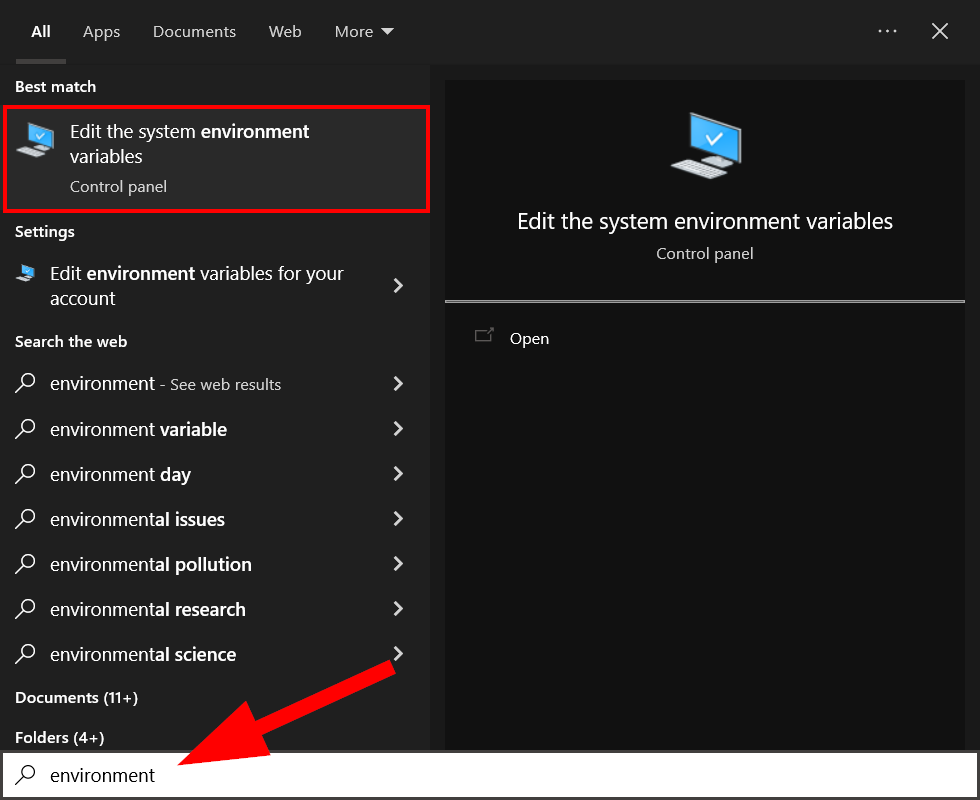
1. Open the Start menu and search for «environment variables«.
2. Select the Edit the system environment variables option.
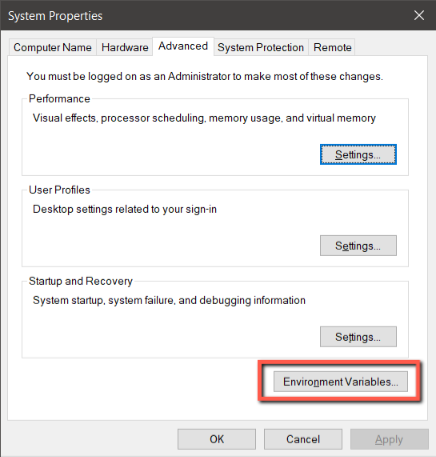
3. In the System Properties window, under the Advanced tab, click the Environment Variables… button.
4. Under System variables, scroll down and select Path, then click the Edit button.
5. In the variable editing window, click New and enter the path to the BIND installation folder (the default path is C:\Program Files\ISC BIND 9\bin).
6. Click OK to confirm the edits to the Path variable.
7. Click OK to confirm the changes and exit the Environment Variables window.
Using dig Command in Windows
After installing BIND, open the Windows command prompt to start using the dig command. The dig command uses the following syntax:
dig [hostname] [options]Using dig Without Command Options
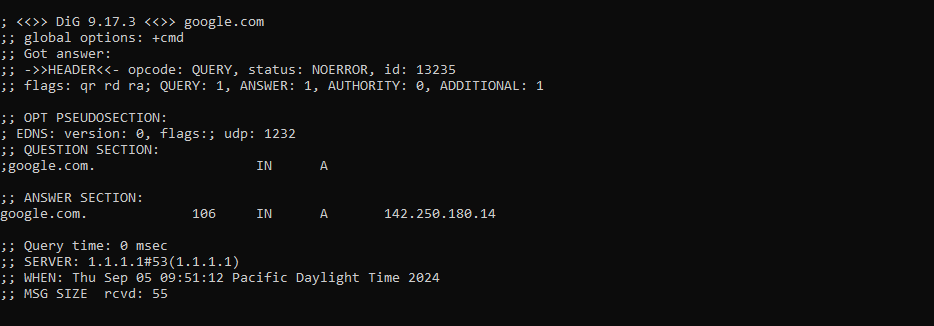
Using the dig command without any options returns DNS data on the provided hostname. For instance:
dig google.com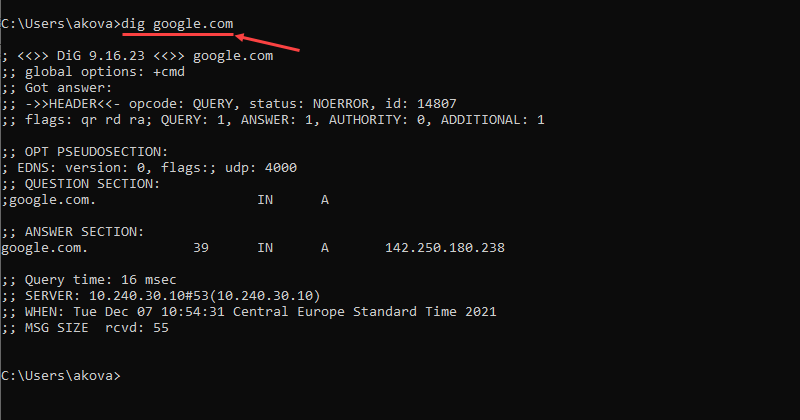
The default dig command output contains the following sections:
HEADER: Basic information about the request.OPT PSEUDOSECTION: Advanced information about the request.QUESTION SECTION: The summary of the query made to the DNS. In this example, it is the first available A record for the hostname provided.ANSWER SECTION: The answer to the query made to the DNS. In this example, it is the IP address for the first A record.
The dig command also allows you to specify the type of record you want to query by using:
dig [hostname] [record type]Note: The DNS record types you can query include A, AAAA, MX (Mail Exchanger), NS, and TXT. Learn more in our guide to DNS record types.
List All Records for a Hostname
To return all records for the provided hostname, use the any option:
dig [hostname] anyGet a Hostname’s IP Address
Using the +short option with the dig command provides a shortened output (usually just the IP address):
dig [hostname] +shortFor example:
dig google.com +short
Check DNS Resolution
Adding the +trace option resolves the query starting from the root nameserver and working its way down, reporting the results from each step:
dig [hostname] +traceFor instance:
dig google.com +trace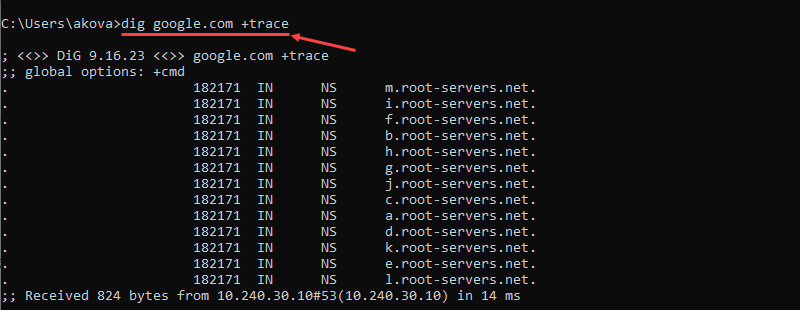
Query a Nameserver Directly
The dig command also allows you to query a nameserver directly:
dig @[nameserver address] [hostname]Do a Reverse DNS Lookup
Another use for the dig command is performing reverse DNS lookups:
dig -X [IP address]Conclusion
After reading this tutorial, you should be able to use the dig command in the command prompt through BIND.
If you want to use dig with a Linux system instead, check out our guide to installing dig on CentOS 7 and 8.
Was this article helpful?
YesNo
Dig stands for Domain Information Groper and is a tool used to look up information in Domain Name Systems through command lines. It’s really helpful for network administrators when they need to solve problems related to DNS. With Dig, they can quickly find out which servers are connected to a specific domain and check if the DNS records are set up correctly. This helps use managing and monitoring the network more efficient.
The default Windows systems doesn’t provides dig command line tool, but still you can add it to your systems. This tutorial will help you to install dig command on Windows.
Step 1: Download Package
The latest version of ISC BIND no longer supports Windows. However, you can still get the older version that worked with Windows. The last version that supports Windows is BIND 9.17.15. You can download it by clicking on this link: Bind9 Windows Zip File.
After you download it, you’ll need to unzip the file to a place you choose on your computer. For instance, I unzipped mine into the “C:\BIND9” folder. This is where you can access all the files you need.
Step 2: Setup System Environment Variable
Bind9 includes a Windows installer, but if you only need the dig command, you can simply set up the Path environment variable instead. Here’s how you do it step-by-step:
- Click the Windows button in keyboard and start typing “system environment variable” on your Windows computer.

Open system environment variables. - The above search will open the “System Properties” window. Here, click on the “Environment Variables” button.

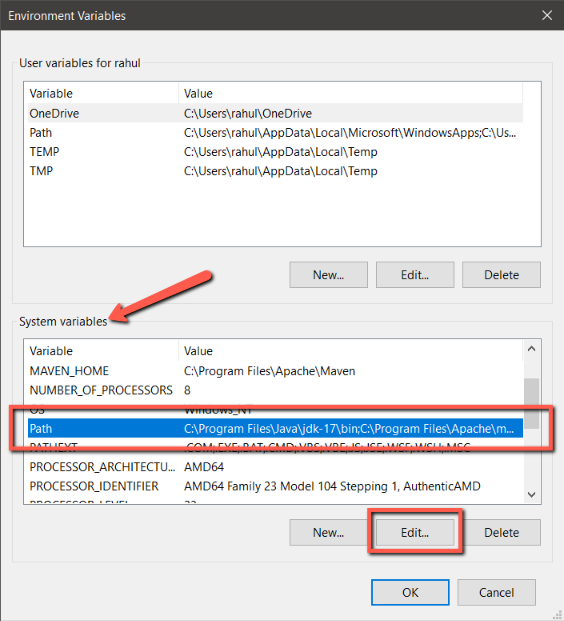
Click environment variables button - In the “System variables” section, select the “Path” variable and then click the “Edit” button.

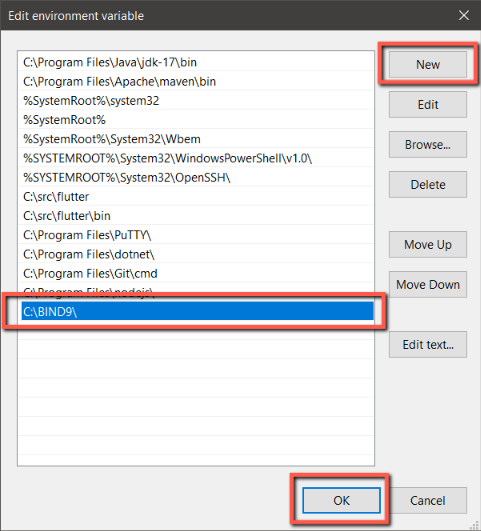
Editing Path environment variable - In the new window, you’ll see all the directories that are already added to the Path environment variable. Simply click the “New” button to add a new row and enter the Bind9 directory location. In my case it was “C:\BIND9\”. After you’ve added this, click “OK” to save the changes.

Adding Bind9 Directory to Path - That’s it! You have successfully added the dig utility to your system’s Path, making it ready to use from any command prompt.
Now, whenever you need to use the dig command, it will be readily accessible from any command prompt on your computer.
Step 3: Using dig Command in Windows
To use the dig tool on your Windows computer, open the command prompt or PowerShell and type the following command:
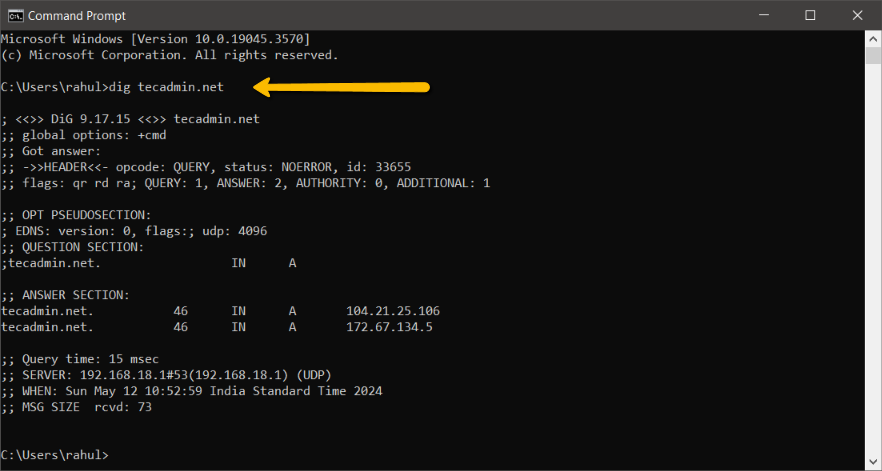
dig tecadmin.net
This command will show you various DNS records for the domain “tecadmin.net” as below screenshot:
Here are a few more simple commands you can use with dig:
- To check the IP address for a domain, type:
dig +short tecadmin.net - To find out the mail servers for a domain, use:
dig tecadmin.net MX +noall +answer - To get a detailed report about a domain, enter:
dig tecadmin.net ANY +noall +answer
These commands will help you quickly gather important DNS information directly from your command line.
Conclusion
This tutorial has shown you how to set up the dig command line tool on your Windows system. Now, you can use it to check the records for your domain in the Domain Name System (DNS). This will make it easier for you to troubleshoot DNS-related issues and find out what’s causing them.
Download dig command tool for windows and perform advanced DNS queries using dig command on windows. The dig command which comes as a part of Linux is very useful for performing DNS lookups on domain names and provides detailed information like TTL and class type. It is now possible to use the dig command on windows also. I’ve included the dig package for windows with this post and also step-by-step instructions on how to use it.
Step 1:- Download dig for windows
The files required for dig command is available with BIND DNS software you can download the software from their official website unzip it and separate the files dig.exe, libbind9.dll, liblwres.dll, libisccfg.dll, libdns.dll, libisc.dll, libxml2.dll. For your convenience I’ve attached a zip file containing these files.
Download dig command for windows and extract the files to your hard disk.
Step 2:- Paste the files inside System32 folder
You’ll now have a total of 7 files, one exe file and six dll files. Paste all these files inside C:\Windows\System32. Replace C: drive with the partition where windows is installed. Do NOT create any folder inside System32 just paste the files inside it.
Step 3:- Text the dig command from the command-line
Press [windows key] + R or Start -> Run, type cmd and hit enter to fire up the windows command line tool. Type dig [domain name] -t [record] example dig example.com -t ns and you’ll see the following output
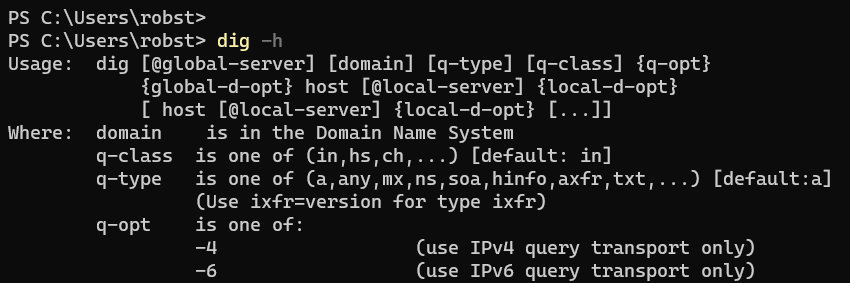
For a complete list of parameters type dig -h
Dig a powerful network tool is valuable for DNS stands for Domain Name System troubleshooting and exploration. While primarily associated with Linux and Unix environments it is entirely possible to install and use Dig on Windows.
In this post, we will cover the steps providing detailed instructions for different approaches and more user-friendly to install Dig Windows 10 system.
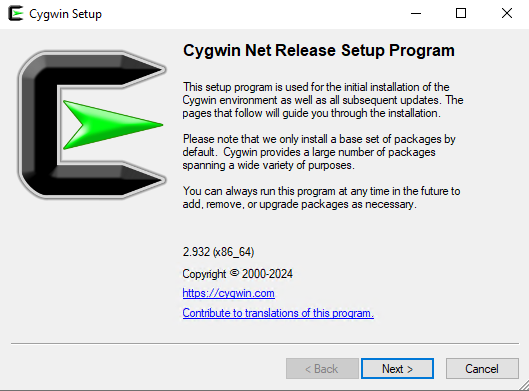
Install Dig via Cygwin
To download Dig Windows you need an additional tool like Cygwin is a compatibility layer that allows you to run Unix like programs on Windows. It is a popular choice for those who frequently work with Linux based tools.
Step 1: Download Cygwin
Visit the official Cygwin website and download the setup for Windows executable.
Step 2: Run the Setup
Double-click the downloaded setup file to start the installation process.
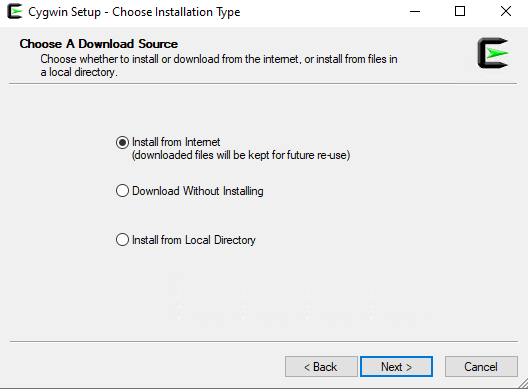
Step 3: Select Installation Type
Choose “Install from Internet” to download the necessary packages.
Step 4: Select Root Directory
Specify the directory where you want to install Cygwin. The default is usually fine.

Step 5: Install Dig Package
Choose “Default” based on your needs. In the “Package Selection” screen search for “dig” and select it. Click “Next” to proceed with the installation.
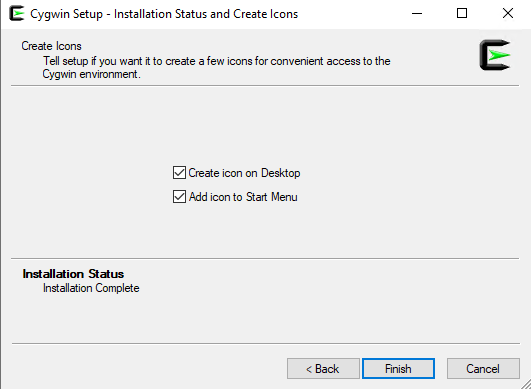
Once the installation is complete, open the Cygwin terminal.
Step 6: Verify Dig Installation
Type the following command in the Cygwin terminal. If Dig is installed correctly you should see DNS records.
dig google.com
Install Dig via Git Bash
Git Bash is a command-line interface included with Git a popular version control system. It provides a Linux environment for running commands. To install Git refer to our guide on how to install Git on Windows system.
Step 1: Install Dig
Once Git is installed now it’s time to Dig Windows download, Open the Git Bash terminal. Type the following command in the terminal.
apt-get install dig

This command will install Dig using the built-in package manager.
Step 2: Verify Dig
Type the following dig command in the Git Bash terminal.
dig bing.com
If Dig is installed correctly you should see DNS records.
Install Dig on Our Cheap Windows VPS!
With Ultahost, Hosting Windows VPS has never been easier or faster. Enjoy ultra-fast SSD NVME speeds with no dropouts and slowdowns.
Example of Using Dig Command
Following are the practical examples of using the Dig command on the Windows operating system. Here are some of the most commonly used options:
Record Type
- A: Address (IPv4)
- AAAA: Address (IPv6)
- CNAME: Canonical Name
- MX: Mail Exchanger
- NS: Nameserver
- PTR: Pointer (reverse lookup)
- TXT: Text
- SRV: Service
To query for A records of example.com:
dig example.com A
@ is used to specify the DNS server to use. For example to query using a specific DNS server:
dig example.com @8.8.8.8
Recursion
- +norecurse: Prevents recursive queries.
- +recurse: Forces recursive queries.
To force a recursive query type the following command:
dig example.com +recurse
Trace
- +trace: Enables tracing the query path.
To trace the query path:
dig example.com +trace
Retries
- +retry=number: Sets the number of retries if the query fails. To retry the query 3 times:
dig example.com +retry=3
Important Notes
Following are some important notes after installing Dig on the Windows operating system:
- Dig is essential for troubleshooting DNS issues. You can use it to check DNS propagation identify DNS server problems, and analyze DNS responses.
- Dig can also be used to measure DNS performance. By comparing response times from different DNS servers you can identify the fastest and most reliable servers.
Conclusion
Installing Dig on Windows provides a powerful tool for DNS analysis and troubleshooting. By following the different methods outlined in this guide you can successfully install Dig on your Windows system and start exploring the functionalities of the DNS.
Ultahost caters to both big and small businesses by offering IP dedicated servers with flexible deployment options and customizable configurations. Our IP Bare Metal servers, at the forefront of technology, are designed to empower and drive the success of your business.
FAQ
What is Dig and why do I need it on Windows?
Dig is a tool for DNS queries useful for troubleshooting network issues on Windows.
Can I install Dig directly on Windows?
Yes, you can install Dig on Windows by downloading precompiled binaries.
Where do I download Dig for Windows?
You can download Dig as a part of different methods or find a standalone version online.
Do I need admin rights to install Dig on Windows?
Yes, you typically need admin rights to install and configure Dig on Windows.
Is Dig free to use on Windows?
Yes, Dig is a free tool available for Windows.
How do I verify Dig is installed correctly on Windows?
Open Command Prompt and type dig then press Enter to see if the command works.
Can I uninstall Dig from Windows easily?
Yes, you can remove Dig by deleting the files you installed package.