
-
Home
-
News
- Event ID 1014 – What is It & How to Fix the Error on Windows?
Event ID 1014 – What is It & How to Fix the Error on Windows?
By Anna | Follow |
Last Updated
What is the Event ID 1014? This article develops around the Event ID 1014 that happened on Windows that hassles users a lot. We will display a series of useful methods and guide you to troubleshoot the issues one by one. For more details, you can refer to this post on MiniTool Website.
What Is the Event ID 1014?
What is the Event ID error 1014? It is reported that some users find the Internet is interrupted but the cable is well connected. The Event Viewer shows the Event ID 1014 error. So, how to fix the issue? Don’t worry. We have concluded some useful methods for you to try. Please go on with your reading.
A Full Guide to Fixing the Event ID 1014
Fix 1: Disable Energy-Saving Options
You can check if the power energy saving feature automatically interrupts the Internet connection. Go to disable the related options and then check if the DNS error ID 1014 can be gone.
Step 1: Right-click on the Windows icon on the taskbar and choose Device Manager.
Step 2: Expand Network adapters and double-click on your controller to open its Properties.
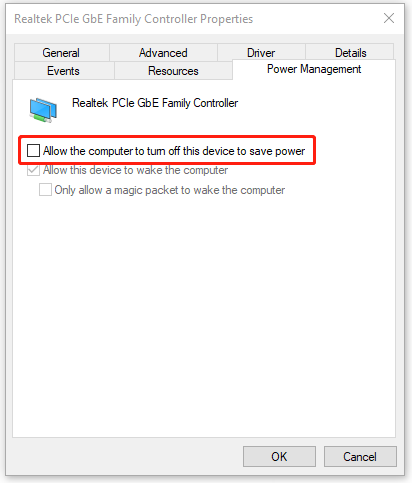
Step 3: Go to the Power Management tab and uncheck the option of Allow the computer to turn off this device to save power.
Step 4: In the Advanced tab, look through the related energy-saving options and choose to disable them. Then click OK to save your changes.
Fix 2: Use Network Troubleshooter
Network troubleshooter is an excellent utility to fix all kinds of network issues. You can remove some bugs or glitches by using this tool.
Step 1: Go to Start > Settings > Update & Security > Troubleshoot.
Step 2: Click Additional troubleshooters from the right panel and choose Internet Connection to click Run the troubleshooter.
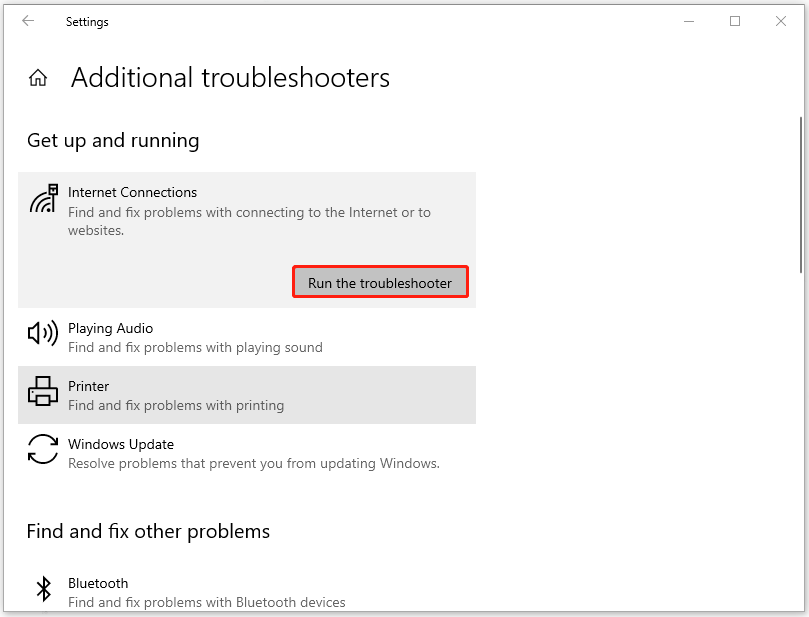
When it finishes, you can restart the computer to check if the connection restored.
Fix 3: Update Network Adapter Drivers
Another method to get rid of the Event ID 1014 is to update network adapter drivers. Specific steps are as follows.
Step 1: Open Device Manager and expand Network adapters.
Step 2: Locate the available devices and right-click on them to choose Update driver. Then click Search automatically for drivers.
Or, there is another method to update available drivers.
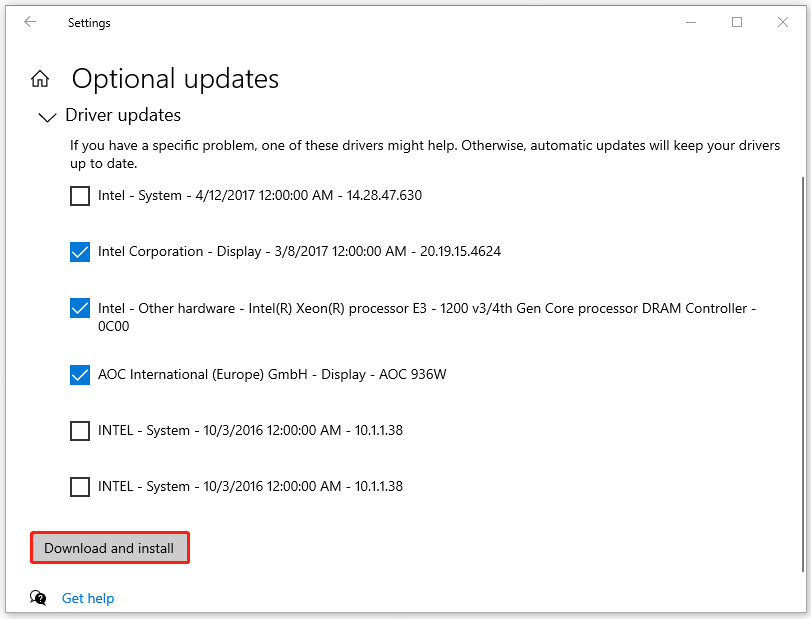
Step 1: Go to Start > Settings > Update & Security > Windows Update > View optional updates.
Step 2: Expand Driver updates and check the available driver updates to choose Download and install.
Fix 4: Uninstall the Latest Windows Update
If all the above methods have been proven useless for you and you have recently updated your Windows, you can try to uninstall the latest Windows installation.
But before you do that, notice that you should backup data in case anything goes wrong. Some new features and patches will be gone and data loss is a potential risk.
You can backup files, folders, systems, or partitions & disks with MiniTool ShadowMaker, this backup software free. Besides, you can also use it to perform a sector by sector cloning for a backup.
MiniTool ShadowMaker can do its best for your computer backup.
Download and install this program by clicking the following button and you can get a 30-day free trial version.
MiniTool ShadowMaker TrialClick to Download100%Clean & Safe
Step 1: Go to Windows Update in Settings and scroll down from the right panel to click View update history.
Step 2: Click Uninstall updates and click on the recent Windows update to choose Uninstall.
Bottom Line:
To fix the Event ID 1014, you need to check for your Internet connection first, like loose cable connections. Some easy tips can quickly fix the issue. All in all, backup is a good habit in this digital world and MiniTool software is worth trying!
About The Author
Position: Columnist
Anna is an editor of the MiniTool Team. She worked in this big family since her graduation. Her articles mainly focus on data backup and recovery, disk cloning, and file syncing, committed to resolving the data loss issues users may encounter on their PCs. Besides, more related computer articles are shared here. In her leisure time, she enjoys reading and watching movies. Travel can also be a good choice for her.
Event ID 1014: Understanding the Details and Implications
In the realm of Microsoft Windows operating systems, various event IDs correspond to specific system alerts or logs that can provide critical insights into system performance and issues. One such event is Event ID 1014, which pertains specifically to DNS (Domain Name System) events. This article will delve deeply into Event ID 1014, exploring what it is, its significance, common causes, potential solutions, and best practices for troubleshooting.
What is Event ID 1014?
Event ID 1014 is logged in the Windows Event Viewer and indicates that a DNS client on a Windows machine has failed to resolve a domain name. The error message typically associated with this event reads:
"Name resolution for the name [name] timed out after none of the configured DNS servers responded."This event suggests that a request made to resolve a specific domain name did not yield a response from the DNS servers configured on the user’s network. It usually occurs when the DNS server is either down, not reachable, incorrectly configured, or when network issues prevent the request from being fulfilled.
Importance of Event ID 1014
Understanding Event ID 1014 is crucial for IT professionals and network administrators because:
-
Network Reliability: DNS is a fundamental component of network communications. If DNS requests fail, it can lead to broader issues such as inability to access websites or network services, impacting productivity.
-
Troubleshooting: This event can help in diagnosing problems related to connectivity, allowing for early intervention before larger networking issues develop.
-
System Monitoring: Regular monitoring of Event ID 1014 can provide insights into the performance and reliability of DNS services. Sustained occurrences might indicate systemic issues that need resolution.
-
Security Implications: DNS issues could suggest possible security breaches or attacks, such as DNS spoofing or DDoS attacks targeting DNS servers.
Common Causes of Event ID 1014
Understanding why Event ID 1014 occurs is crucial for effective troubleshooting. Here are several common causes:
-
Incorrect DNS Server Configuration: If the DNS settings in the network configuration are incorrect, domain name resolutions will fail. This can happen due to manual misconfiguration or changes in network policies.
-
DNS Server Unavailability: The DNS service might be down, either because the server itself has crashed or due to network issues preventing access.
-
Network Connectivity Problems: Issues such as broken cables, switch malfunctions, or misconfigured routers can lead to a failure in reaching the DNS server.
-
Firewall or Security Software Interference: Security solutions might block DNS requests either due to perceived threats or misconfigurations.
-
Overloaded DNS Servers: When a DNS server is overwhelmed with requests, it may not respond to all queries, leading to timeouts and subsequent Event ID 1014 entries.
-
Malware or Malicious Attacks: In rare cases, malware infections can interfere with DNS operations, causing resolution failures.
Troubleshooting Event ID 1014
When encountering Event ID 1014, the following troubleshooting steps can help identify and resolve the underlying issues:
-
Check DNS Configuration:
- Open the network adapter settings and review the DNS server IP addresses. Ensure that the addresses are correct and match those provided by your ISP or organization.
- Use command line tools (like
ipconfig /allin Windows) to display current DNS settings.
-
Ping the DNS Server:
- Utilize command prompt to ping the DNS server’s IP address. A failure to receive replies could indicate network issues or server downtime.
-
Verify Network Connectivity:
- Ensure the system is connected to the network. Check other devices or try accessing the internet. Tools like
tracertcan help trace the path to the DNS server.
- Ensure the system is connected to the network. Check other devices or try accessing the internet. Tools like
-
Check Firewall Settings:
- Examine firewall settings to make sure DNS queries (UDP/TCP port 53) are not being blocked. Temporarily disabling the firewall can help determine if it is the source of the problem.
-
Examine DNS Server Health:
- If using a specific DNS server (not public ones), review the server logs and status. Ensure services are running and check for any evident issues.
-
Use Alternative DNS Servers:
- Configure the system to use well-known public DNS servers such as Google DNS (8.8.8.8, 8.8.4.4) or Cloudflare DNS (1.1.1.1). This can help determine if the problem lies with a local DNS server.
-
Update Network Drivers:
- Outdated or corrupt network drivers can contribute to connectivity problems. Update the drivers from the manufacturer’s website or use Windows Update.
-
Run Windows Network Troubleshooter:
- Utilize the built-in troubleshooter to diagnose and potentially fix common networking issues.
-
Check for Malware:
- Conduct a full virus/malware scan using trusted security software. Look for signs of malicious activity which could interfere with network operations.
-
Clear DNS Cache:
- Sometimes DNS cache corruption can lead to resolution failures. Use the command
ipconfig /flushdnsto clear the DNS cache.
- Sometimes DNS cache corruption can lead to resolution failures. Use the command
Best Practices to Prevent Event ID 1014
While troubleshooting is crucial when issues arise, implementing best practices can minimize the occurrence of Event ID 1014 in the first place:
-
Regular Monitoring: Employ network monitoring tools that can alert administrators when DNS resolution failures occur, enabling prompt attention.
-
Maintain Redundancy: Utilize multiple DNS servers for failover. This way, if one server becomes unresponsive, others can handle the request without downtime.
-
Review DNS Configuration: Regularly review and update DNS settings to ensure configurations are as per the latest best practices.
-
Update Systems Regularly: Keep the operating system, drivers, and all network devices updated. This can mitigate compatibility and security issues.
-
Security Measures for Network Devices: Use robust security policies on network devices to protect against DNS attacks or service disruptions.
-
Training and Awareness: Ensure IT staff is trained to recognize the significance of DNS issues, and implement procedures for regular checks.
-
Documentation: Maintain a robust documentation system for DNS settings and configurations to streamline troubleshooting.
Conclusion
Event ID 1014 is not just a mere log entry; it signifies a potentially disruptive issue that, if unmanaged, can lead to serious operational setbacks. Understanding its implications and diligently monitoring for such events is vital. By recognizing the significance of DNS in network operations, employing detailed troubleshooting processes, and adhering to best practices, network administrators can mitigate the impact of Event ID 1014 and maintain smoother network functionality. Being proactive allows organizations and IT departments to not only fix issues as they arise but to avert them before they can escalate into more significant problems.
In a world where digital connectivity is paramount, ensuring a robust and responsive DNS infrastructure is essential to keeping operations running smoothly and efficiently.
When checking out the Event Viewer, we stumbled upon Event ID 1014 which says Acquisition of End User License failed. You may encounter this error under various circumstances, such as failure of Microsoft 365 deployment, activation of a new Windows computer, and more. In this post, we will discuss in detail how to resolve this issue.
Acquisition of End User License failed
Source: Security-SPP
Event ID: 1014

If the acquisition of the end user license failed and you can see Event ID 1014 in the Event Viewer of your Windows 11/10 computer, follow the solutions mentioned below.
- Disable Automatically detect settings
- Make sure to have consistent network when activating
- Disable Proxy or VPN
- Reset Activation Timer
- Activate Windows machine to a Key Management Services (KMS)
- Repair Office or Microsoft 365
Let us discuss them in detail.
1] Disable Automatically detect settings
When you enable the Automatically detect settings feature, your computer will automatically configure your network settings, including the IP address and DNS server address. However, since your system is failing to acquire the license, there is a high possibility it is failing to detect the correct settings. So, we will disable it, and then reattempt at configuring Office or Microsoft 365. Follow the steps mentioned below to do the same.
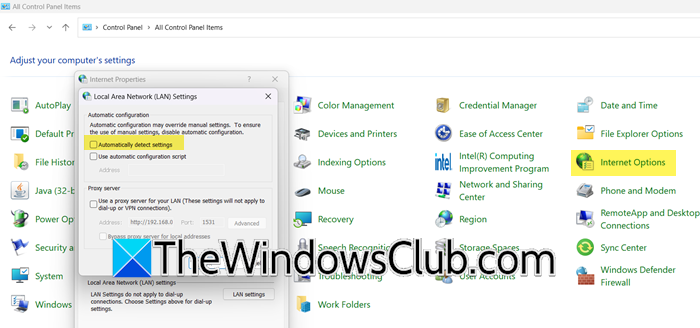
- Open Control Panel.
- Now, change the View by to Large icons.
- Then, navigate to the Connections tab and click on LAN settings.
- Untick the checkbox associated with Automatically detect settings.
- Click on Ok.
Once done, you can configure Microsoft 365 again. Hopefully, you will not encounter the same issue.
2] Make sure to have a consistent network when activating
One of the reasons why the license acquisition fails is the network’s inconsistency. So, before going forward, you need to check and make sure that your network is consistent, it’s always recommended to use a wired connection, but if you can’t, at least test out your network using a free Internet speed tester before going for the activation.
3] Disable Proxy or VPN
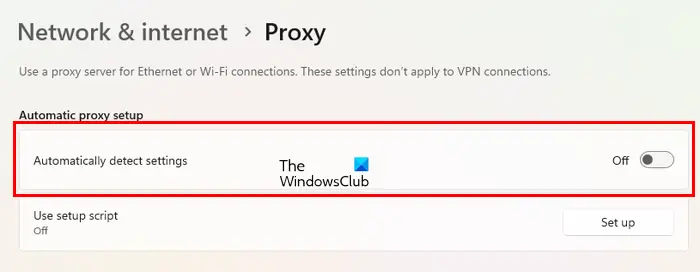
When setting up or deploying Microsoft 365, you need to disable the Proxy or VPN network. If they are enabled and you are connected to a proxy network, your system will look for the server in your region and will fail to do so. If you have not configured any Proxy, we recommend you check if Automatic detection is enabled. To do so, follow the steps mentioned below.
- Open Settings by Win + I.
- Now, go to Network and internet > Proxy.
- Then disable Automatically detect settings from the Automatic proxy setup.
Once done, reboot your computer, and then set up your license. Hopefully, this will do the job for you.
4] Reset Activation Timer
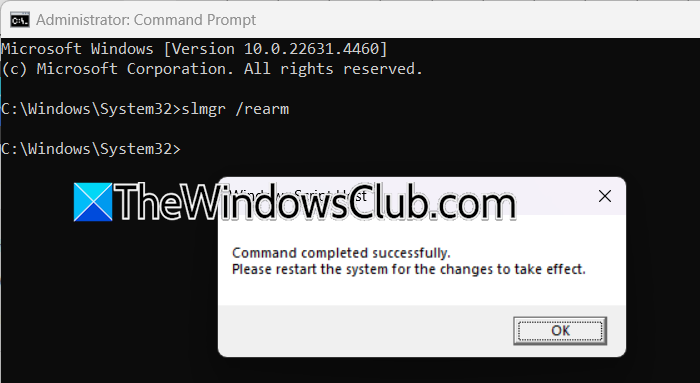
If you get this issue while activating Windows, there is a high chance that the grace period has expired. So, in that case, we need to use slmgr /rearm command to reset the activation timer. The command essentially resets the activation timer to its initial state, thereby extending the trial period of Windows. It is commonly used to postpone the activation prompt while using a trial operating system version. To do so, open the Command Prompt as an administrator and then run the following command.
slmgr /rearm
And then reboot the computer. Finally, check if the issue is resolved.
5] Activate Windows machine to a Key Management Services (KMS)
Key Management Services (KMS) is a technology used by Microsoft to activate products like Windows and Office in volume licensing environments. Since the normal activation method is failing, we are going to activate the machine to a Key Management Services (KMS) host using the correct Generic Volume License Key. To do so, follow the steps mentioned below.
- Open Command Prompt as an administrator by searching it out of the Start Menu.
- Now, run
slmgr /ipk <product-key>. - Then, run
slmgr /ato.
Finally, reboot your computer and then check if the issue is resolved.
6] Repair Office or Microsoft 365
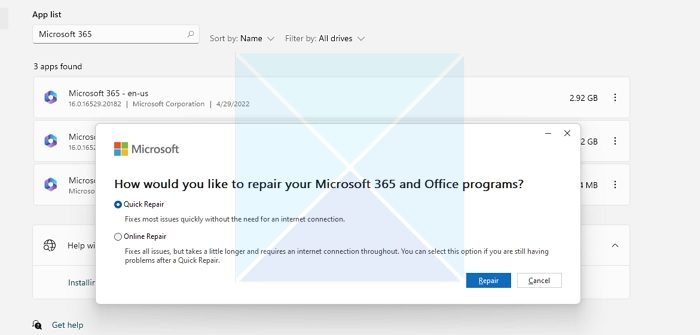
If you are not able to activate Office or Microsoft 365 and you have disabled the proxy and done the other network configurations mentioned earlier, we need to repair Office or Microsoft 365. To do so, follow the steps mentioned below.
- Open Settings.
- Go to Apps > Installed app.
- Search for “Microsoft 365” or “Office”, click on the three dots, and select Modify.
- Now, click on Quick Repair.
If this doesn’t work, go for Online Repair.
Hopefully, you can resolve the issue using the solutions mentioned in this post.
Read: How to disable Web Proxy Auto-Discovery (WPAD) in Windows
What does the Event ID 1014 indicate?
Event ID 1014 typically indicates a license acquisition failure in Windows. This error can occur when Windows tries to activate or validate its license but fails. The message “Acquisition of End User License failed” suggests that there was an issue during the activation process, it can either be when activating Microsoft 365 or Windows client or server OS.
Read: Windows 11/10 Activation Errors: Error codes, description, fixes
What is the Event ID for Failed logon in Windows event log?
Event ID 4625 is for Failed logon attempts. This event is logged in the Windows Event Viewer and documents every failed attempt to log on to a local computer. You can open the Event Viewer after a logon attempt failure, you will find this event logged in.
Read: Error Code PIN-INAPP-INVALIDPIN-8 when trying to activate Office.
How to Fix Event ID 1014 Error on Windows 11
Event ID 1014 is an error code you see when your system fails to connect to its DNS server. This article will explain the causes of this error and provide several ways to fix it.
What Causes Event ID 1014?
According to our research, you can get this error when your ISP-provided DNS server (Domain Name System) fails to respond to your computer, i.e., the network connection times out. Typically, users experience brief connection drops of 5-10 seconds, after which everything returns to normal.
When you get this error, your PC creates an event log with details. The log contains information that may help you determine the cause. Below is a list of the most common causes of this error.
- TCP/IP Offload has been enabled. TCP/IP Offload shifts CPU processing to the network adapter and frees up the CPU to perform other tasks. However, this feature may cause problems when enabled.
- Your network adapter and PC are on different WiFi channels. Usually, routers will change the channel automatically, but older routers may not.
- Outdated device drivers. Your device drivers, particularly your network adapter driver, may be outdated and needs updating.
- Your Internet Service Provider (ISP) experienced an outage. If there is a problem on your ISP’s end, you can only wait for the issue on their end to be resolved.
Before trying our fixes, here are some things you should do:
- Disable your proxy server if you have one set up.
- Disable your VPN service if you have one.
- Power-cycle/restart your Internet router.
- Disable or uninstall your third-party anti-virus software.
- Update the Internet router firmware.
Video Tutorial on How to Fix Event ID 1014
Table of Contents:
- Introduction
- Method 1. Run the Network and Internet Troubleshooter
- Method 2. Disable TCP/IP Offload
- Method 3. Change the DNS server Address and Disable IPv6
- Method 4. Reset the Hosts File to Default
- Method 5. Disable Network Adapter Power-Saving Option
- Method 6. Update the Network Adapter Driver
- Video Tutorial on How to Fix Event ID 1014
Download Computer Malware Repair Tool
It is recommended to run a free scan with Combo Cleaner — a tool to detect viruses and malware on your device. You will need to purchase the full version to remove infections. Free trial available. Combo Cleaner is owned and operated by Rcs Lt, the parent company of PCRisk.com read more.
Method 1. Run the Network and Internet Troubleshooter
The Network and Internet troubleshooter in Windows 11 may fix Event ID 1014 if misconfigured network settings cause it.
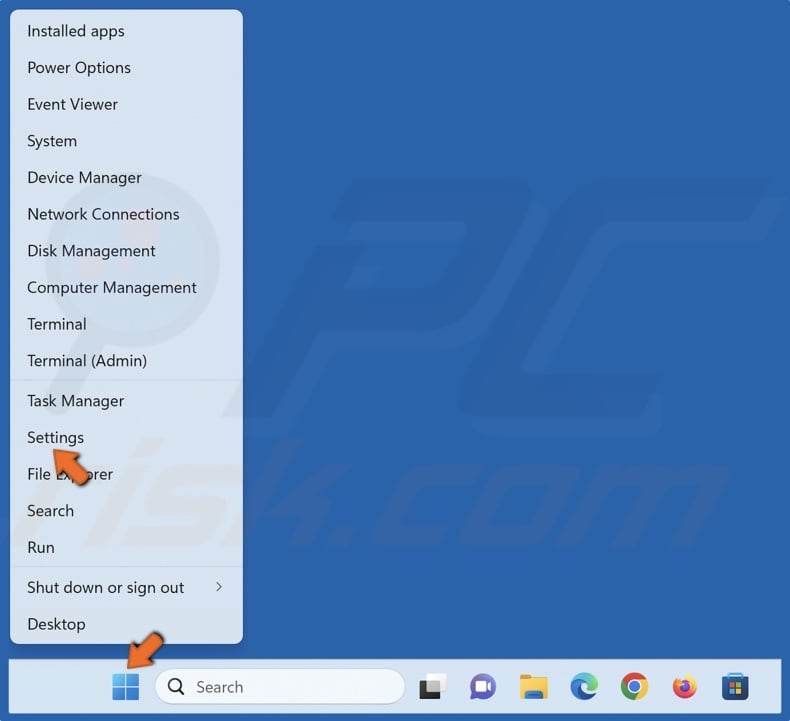
1. Right-click the Start button and select Settings.
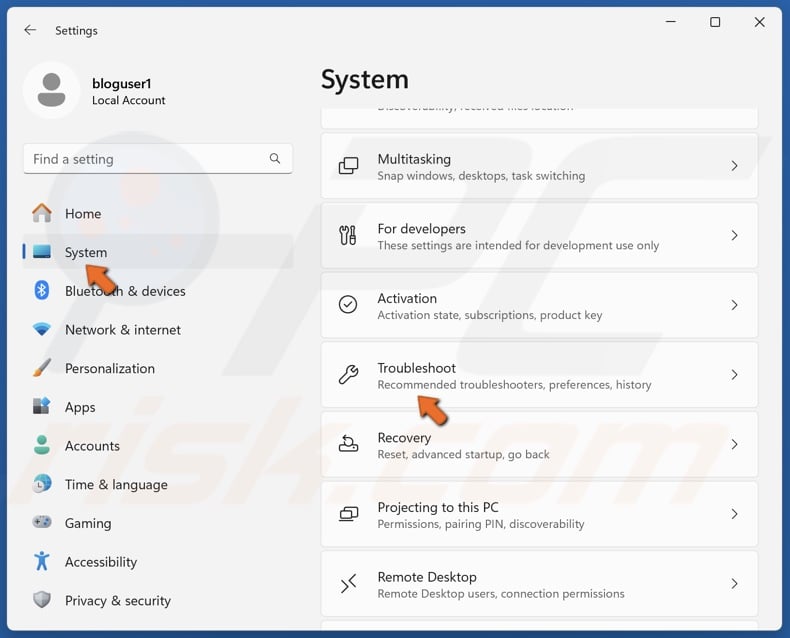
2. Select the System panel, scroll down, and click Troubleshoot.
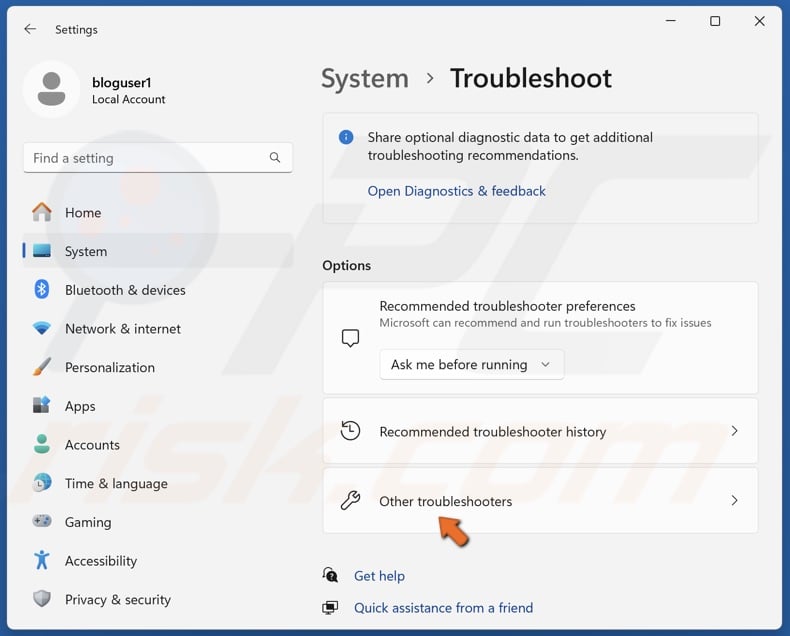
3. Select Other troubleshooters.
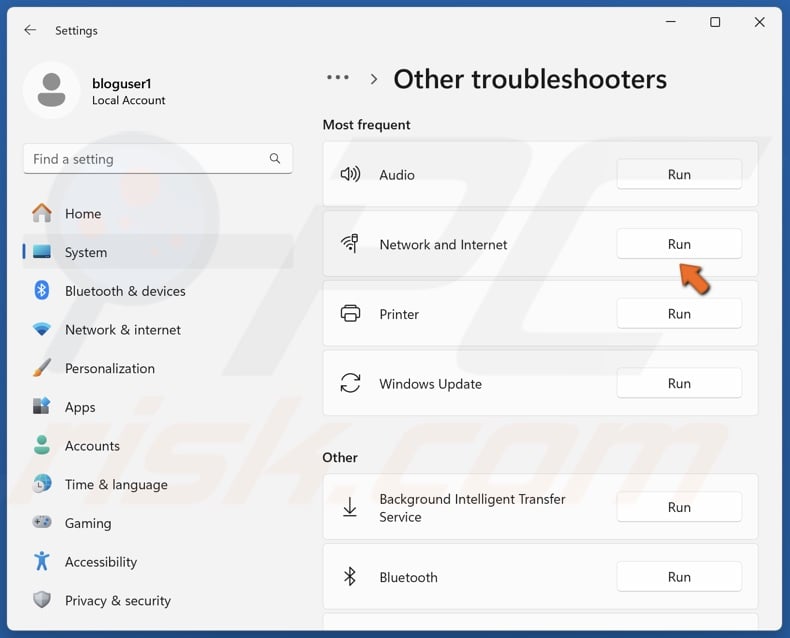
4. Run the Network and Internet troubleshooter.
[Back to Table of Contents]
Method 2. Disable TCP/IP Offload
Often, users get Event ID 1014 because TCP/IP Offload is enabled. Disabling RSS, autotuning, and task offload may resolve the issue.
1. Hold down Windows+R keys to open Run.
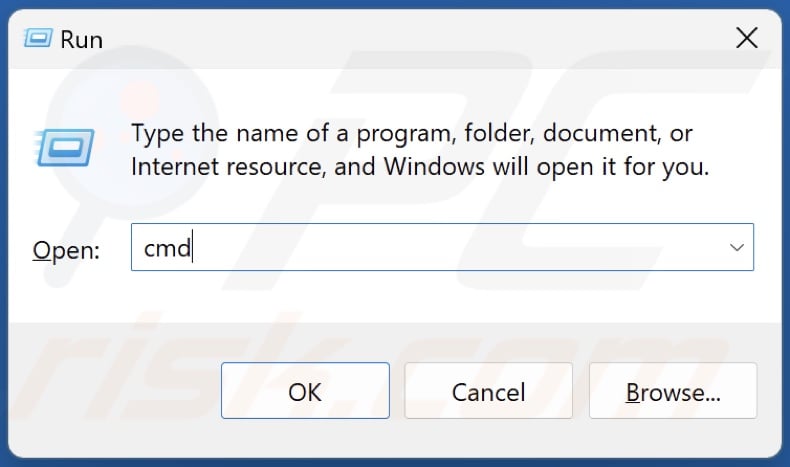
2. Type CMD in Run and hold down Ctrl+Shift+Enter keys to open Command Prompt as an administrator.
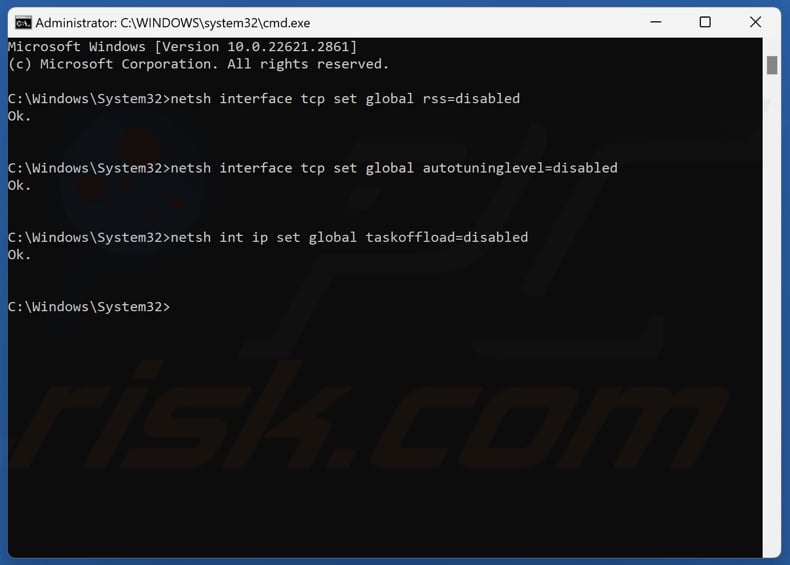
3. In Command Prompt, type in the commands below and press Enter.
netsh interface tcp set global rss=disabled
netsh interface tcp set global autotuninglevel=disabled
netsh int ip set global taskoffload=disabled
4. Close the Command Prompt and restart your PC.
[Back to Table of Contents]
Method 3. Change the DNS Server Address and Disable IPv6
You may get Event ID 1014 when your ISP-provided DNS server experiences issues. Switching to a more stable third-party DNS server may resolve your issue.
1. Hold down Windows+R keys to open Run.
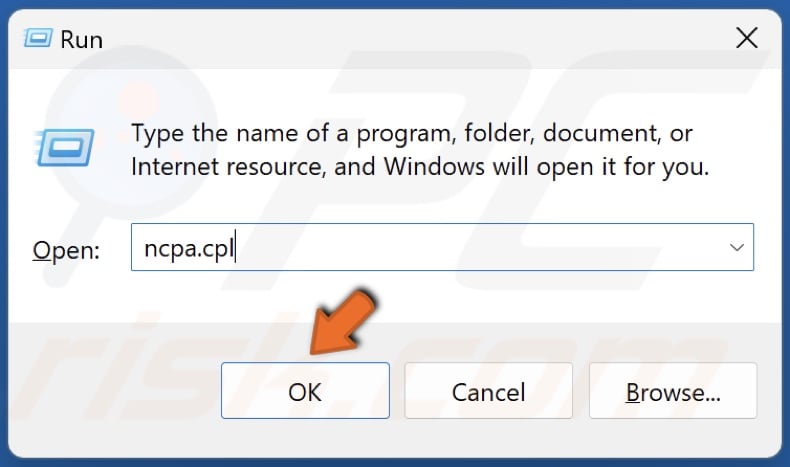
2. Type ncpa.cpl in Run and click OK.
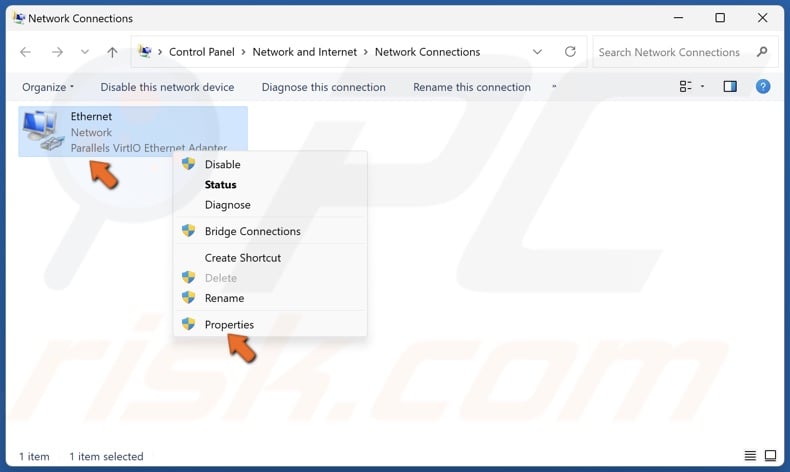
3. Right-click the network adapter and click Properties.
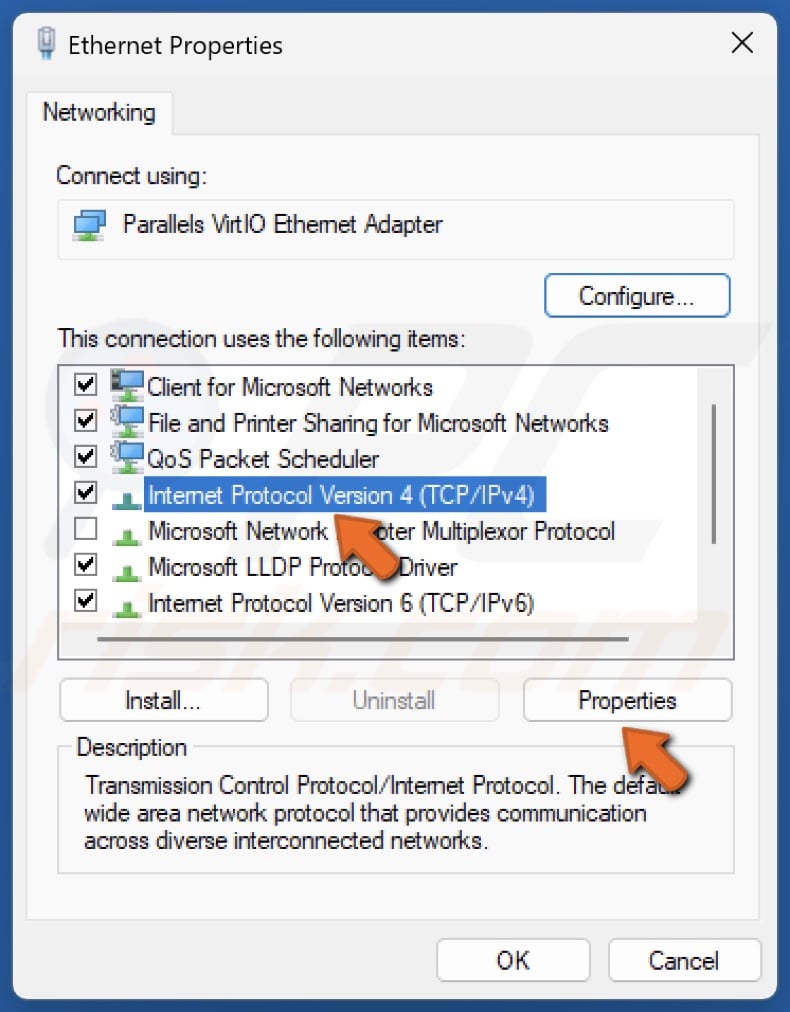
4. Select Internet Protocol Version 4 (TCP/IPv4) and click Properties.
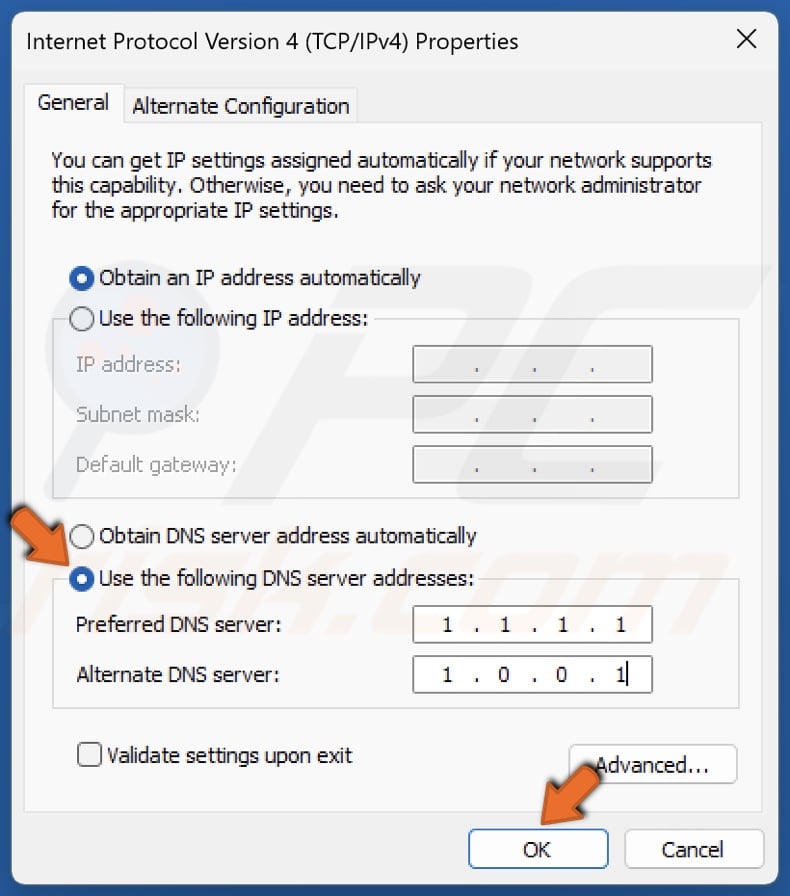
5. Select Use the following DNS server addresses option.
6. In the Preferred DNS server, type in 1.1.1.1
7. In the Alternate DNS server, type in 1.0.0.1
8. Click OK.
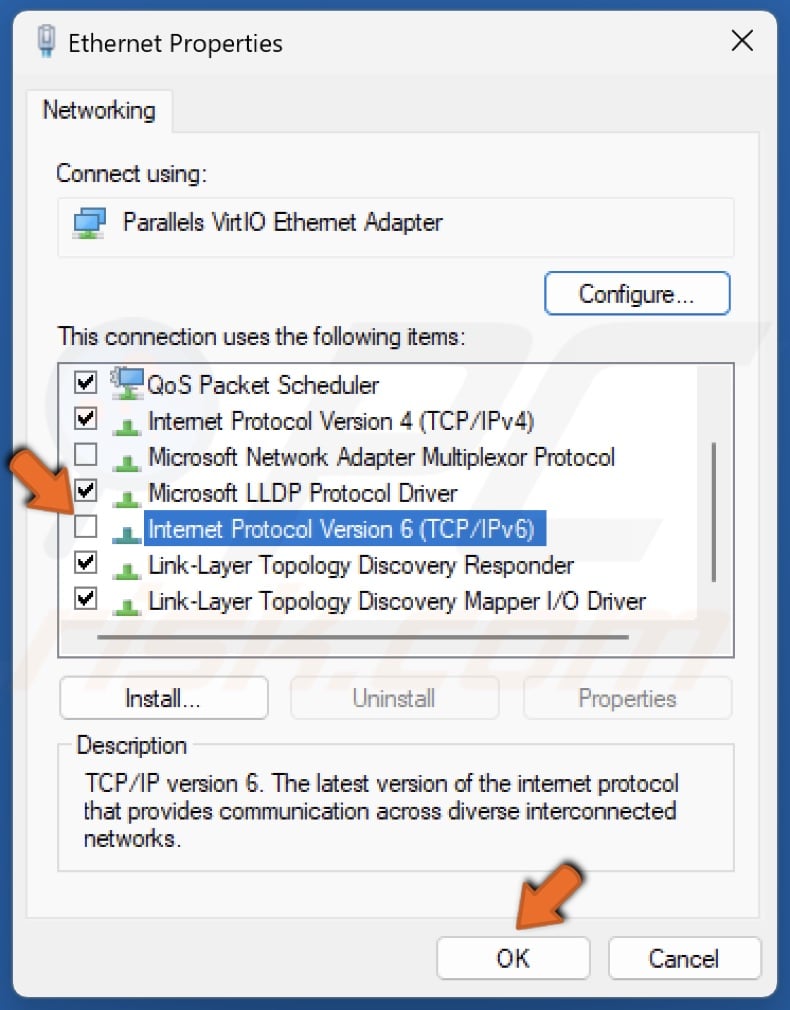
9. Unmark the checkbox next to Internet Protocol Version 6 (TCP/IPv6) to disable IPv6 and click OK.
10. Close the Properties window and restart your PC.
[Back to Table of Contents]
Method 4. Reset the Hosts File to Default
If your Windows hosts file has been corrupted, you may experience a DNS-related issue. Resetting the hosts file to default often resolves the issue.
1. Hold down Windows+R keys to open Run.

2. Type notepad in Run and click OK.
# Copyright (c) 1993-2009 Microsoft Corp.
#
# This is a sample HOSTS file used by Microsoft TCP/IP for Windows.
#
# This file contains the mappings of IP addresses to host names. Each
# entry should be kept on an individual line. The IP address should
# be placed in the first column followed by the corresponding host name.
# The IP address and the host name should be separated by at least one
# space.
#
# Additionally, comments (such as these) may be inserted on individual
# lines or following the machine name denoted by a ‘#’ symbol.
#
# For example:
#
# 102.54.94.97 rhino.acme.com # source server
# 38.25.63.10 x.acme.com # x client host# localhost name resolution is handle within DNS itself.
# 127.0.0.1 localhost
# ::1 localhost
3. Copy and paste the text above into notepad.
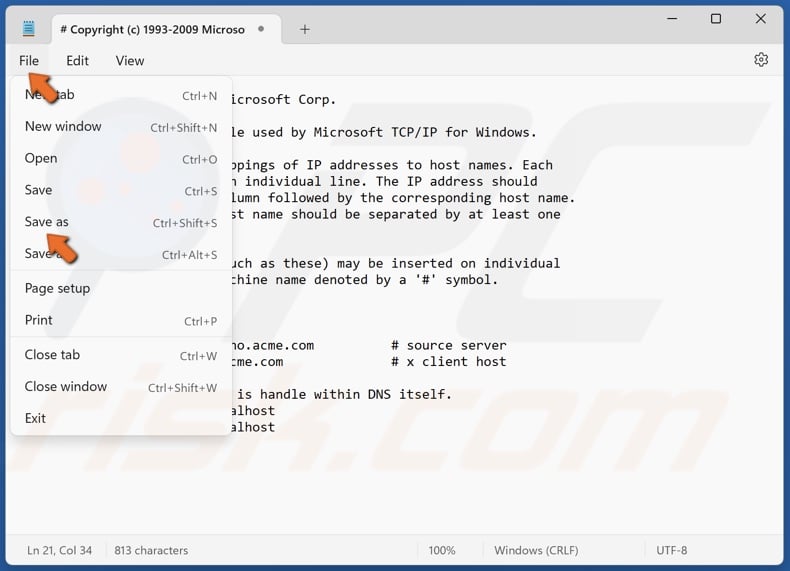
4. Click File and click Save As.
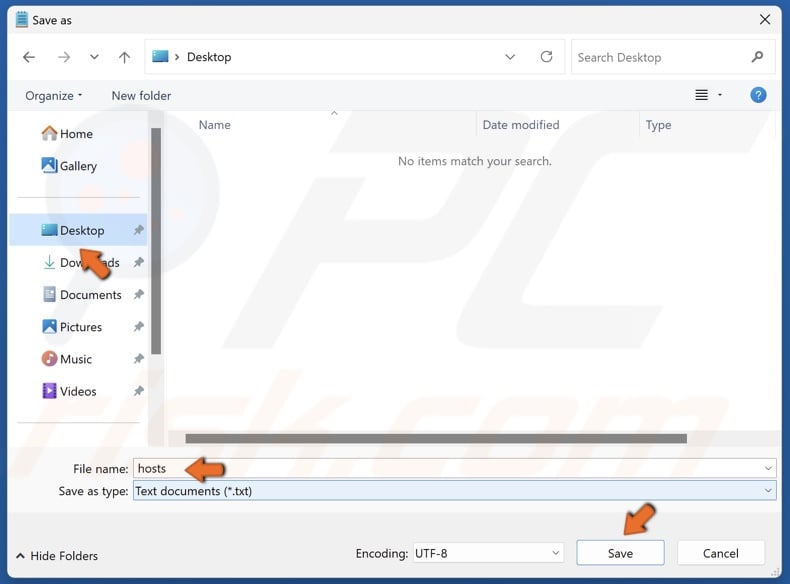
5. Name the file as hosts, choose to save it on your desktop, and click Save.
6. Hold down Windows+E keys to open File Explorer.
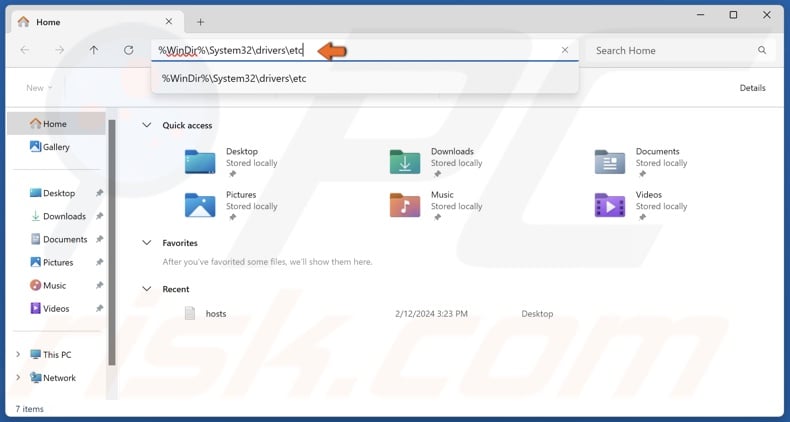
7. In the File Explorer address bar, type in
%WinDir%\System32\drivers\etc
8. Press the Enter key.
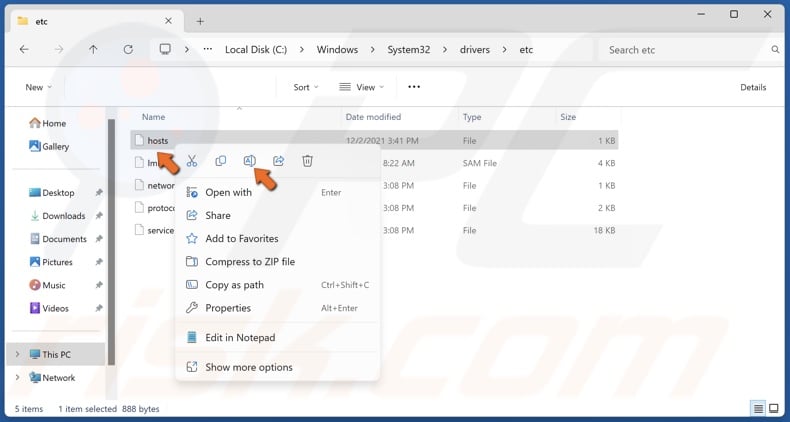
9. Right-click the hosts file and click Rename.
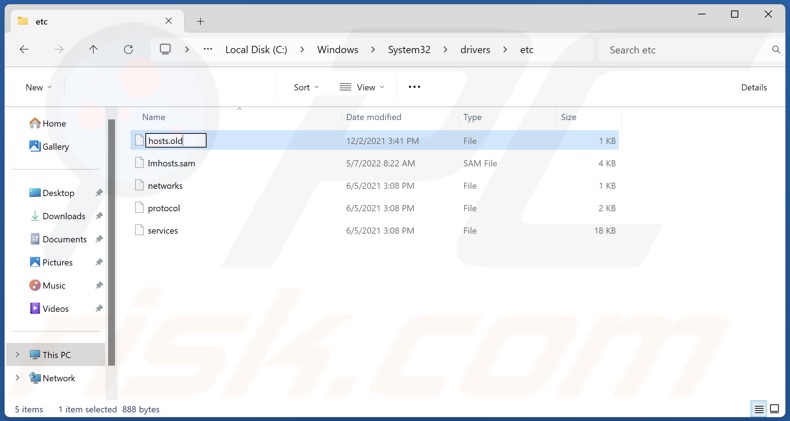
10. Rename the file to hosts.old and save it.
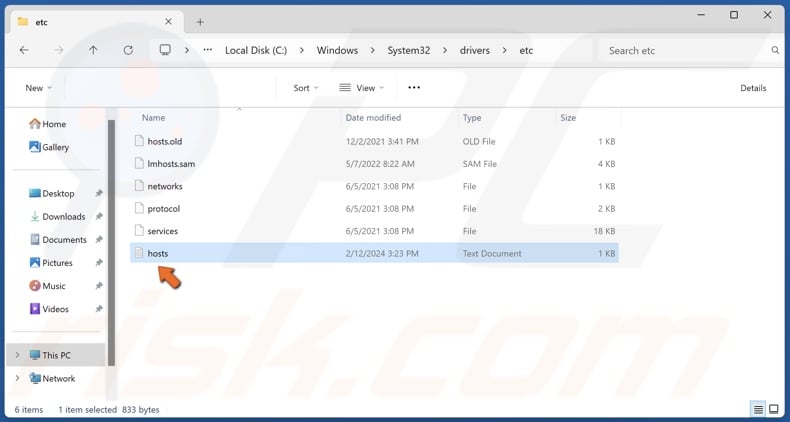
11. Move the newly created hosts file from your desktop into the folder.
[Back to Table of Contents]
Method 5. Disable Network Adapter Power-Saving Option
You may get the Event ID 1014 error because the power-saving option for your network adapter is enabled. Disabling it may resolve the error.
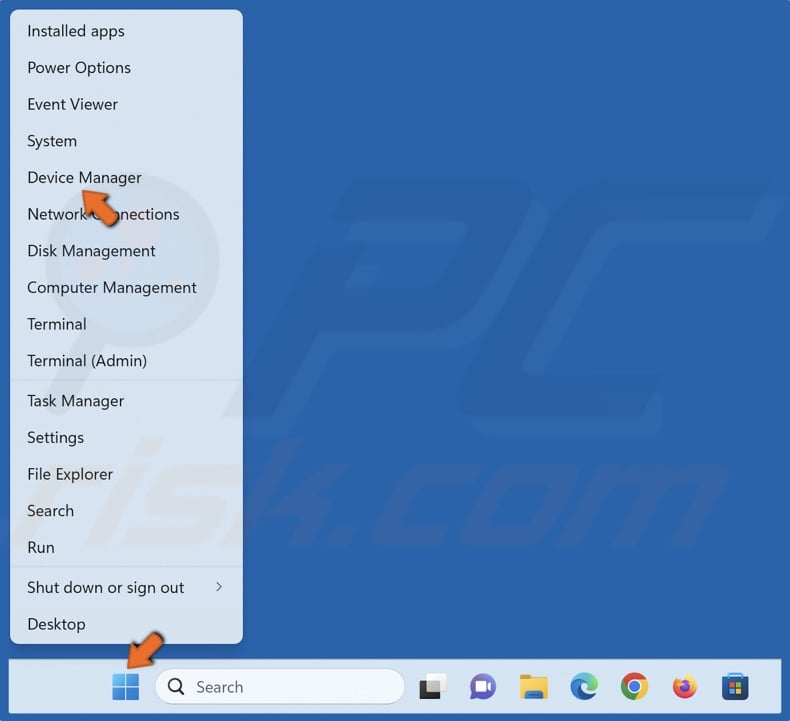
1. Right-click the Start button and select Device Manager.
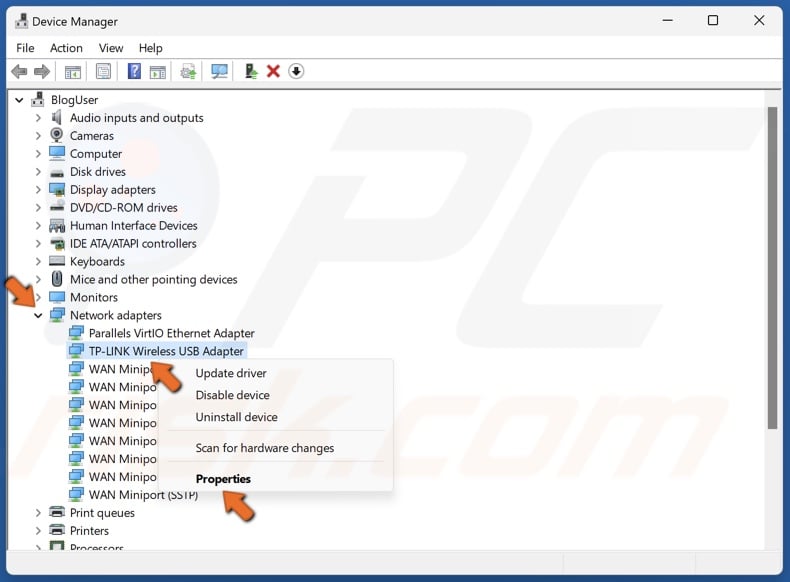
2. Expand the Network adapters list.
3. Right-click your network adapter and click Properties.
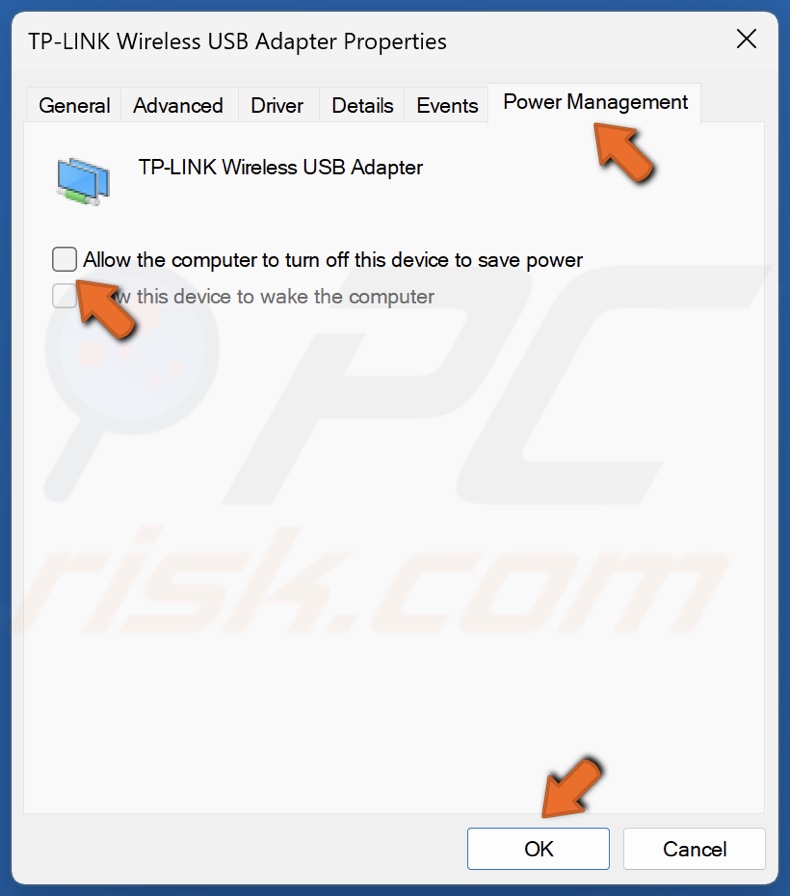
4. Select the Power Management tab.
5. Unmark the Allow the computer to turn off this device to save power checkbox.
6. Click OK.
7. Close the Device Manager and restart your PC.
[Back to Table of Contents]
Method 6. Update the Network Adapter Driver
An outdated or potentially incompatible driver installed for your network adapter may cause connection issues and, thus, the Event ID 1014 error. Updating your network adapter driver may fix it.
1. Right-click the Start button and select Device Manager.

2. Expand the Network adapters list.
3. Right-click your network adapter and click Update driver.
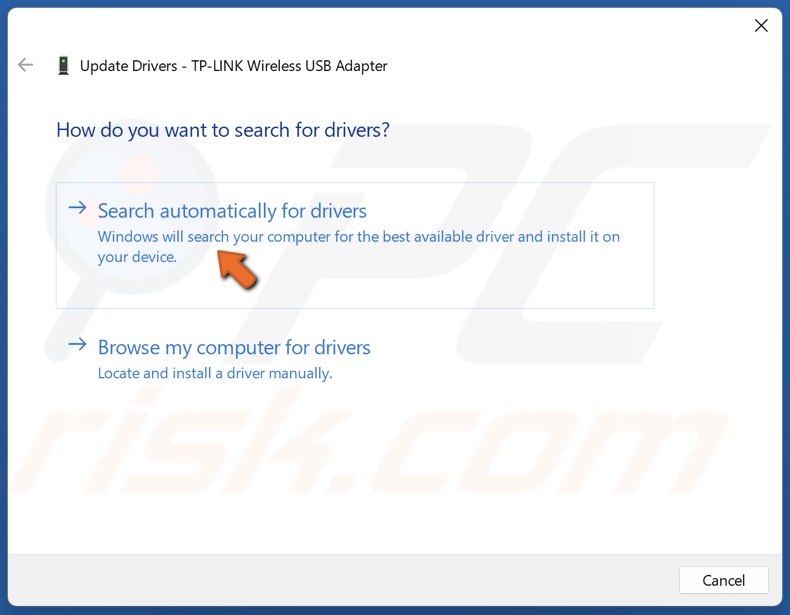
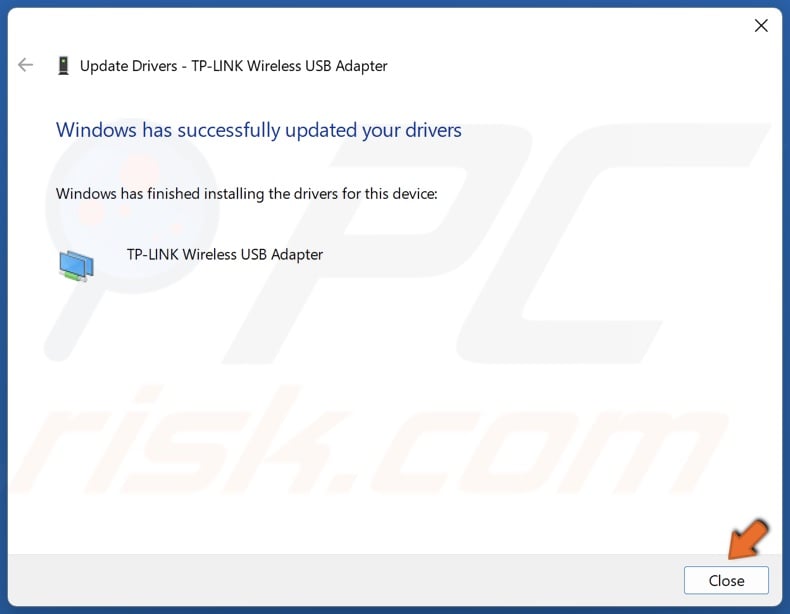
4. Select Search Automatically for drivers. Windows will find the best available driver stored locally and install it.
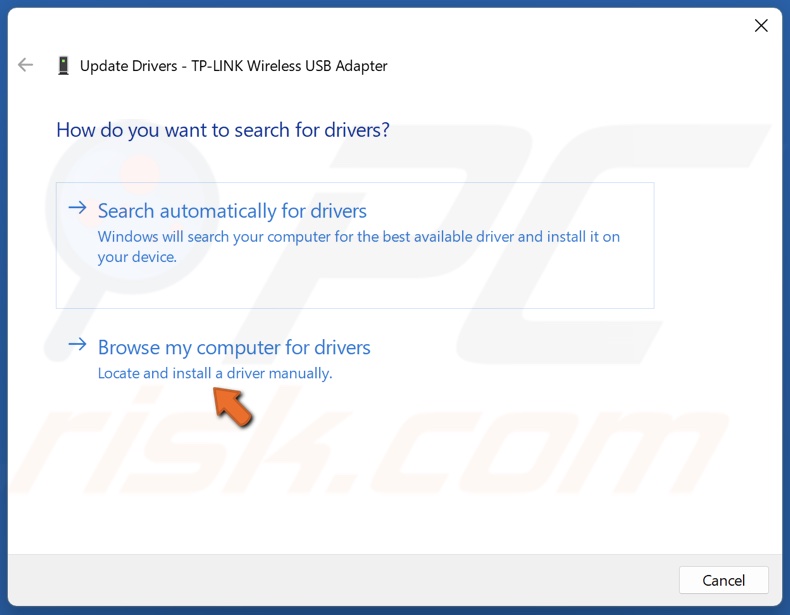
5. Alternatively, select Browse my computer for drivers.
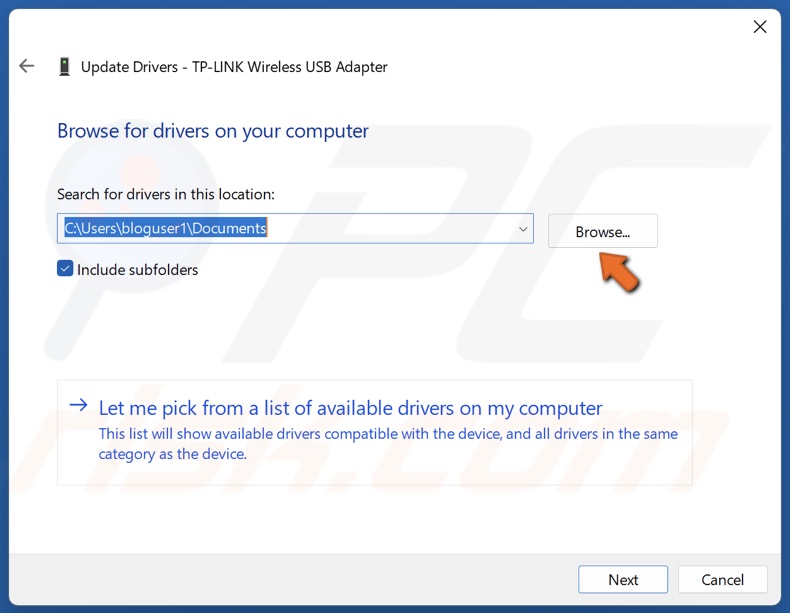
6. Click Browse and select a driver downloaded from the hardware manufacturer’s website.
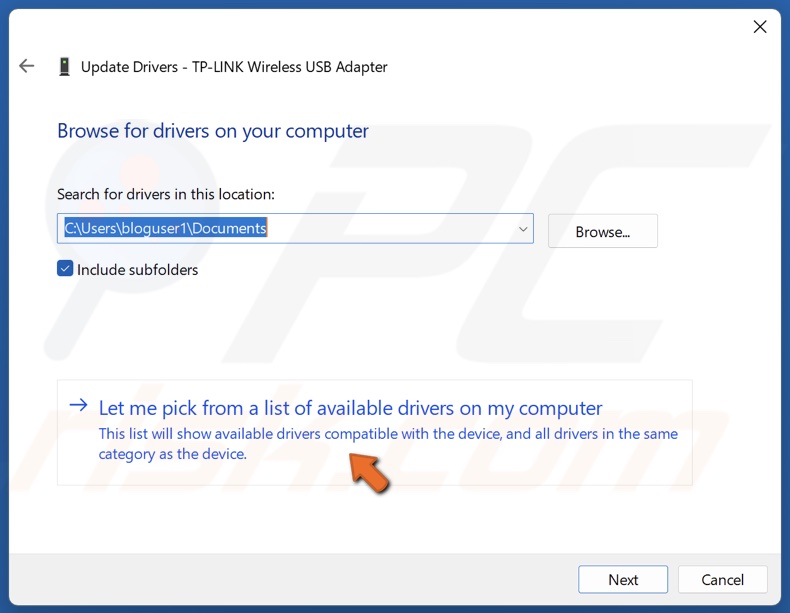
7. Alternatively, click Let me pick from a list of available drivers on my computer.

8. Select a compatible driver from the list of available drivers and click Next.
9. Click Close and restart your PC.
Did this guide help you resolve the issue causing Event ID 1014 on your PC? Leave a comment below to let us know.
[Back to Top]
Ones I was totally amazed to see that once I connected a Windows 10 machine in the network.
Everyone started shouting that they could not reach the internet, internet was terribly slow ?
The phone was red ringing complaints
After a long time I saw the connection between the new machine and the incident ?
Investigating and a bit of internet search delivered me the following :
Windows 10 Configuration settings (DNS issues on network) – Event ID 1014
Solution :
http://social.technet.microsoft.com/wiki/contents/articles/3336.event-id-1014-microsoft-windows-dns-client.aspx
User Action
Method one: Disable RSS, Autotuning, and Taskoffload
1. Run the following command in an elevated command prompt in Windows 7:
netsh interface tcp set global rss=disabled
netsh interface tcp set global autotuninglevel=disabled
netsh int ip set global taskoffload=disabled
2. Disable the Scalable Networking Pack (SNP) in Windows 7 by changing the registry settings as follows:
Perform a full-system backup before you disable the SNP.
[HKEY_LOCAL_MACHINE\SYSTEM\CurrentControlSet\Services\Tcpip\Parameters]
EnableTCPChimney=dword:00000000
EnableTCPA=dword:00000000
EnableRSS=dword:00000000
If the registry keys do not exist, create them, and then assign the previous values.
Method two : Disable TCP/IP v6
To disable TCP/IP v6
1. Click Start, click Control Panel, click Network and Internet, and then click
View network status and tasks.
2. In the left pane, click Manage Network Connections.
3. Right-click Local Area Connection, and then click Properties.
4. In the pop-up box, clear the Internet Protocol Version 6 (TCP/IPv6) check box.
5. Click OK, and then restart your computer.
To enable TCP/IP v6
1. Follow steps 1 through 3 in the previous procedure.
2. In the pop-up box, select the Internet Protocol Version 6 (TCP/IPv6) check box.
3. Click OK, and then restart your computer.
Method three: Enable the spanning tree portfast setting in your router
This action varies depending on your infrastructure router. Consult your manufacturer for further details.
Method four: Set you router and PC to communicate on same channel and standard manualy
1. Go to your router admin page which should be 192.168.1.1 (confirm with router manufacturer).
2. Navigate to WiFi settings and choose a channel which should comply with your location, for ex: 11. Save.
3. Choose Standard to broadcast WiFi signal as G only not abgn, bgn, gn (If your router is N capable and any PC in your home/office is only G ready). Save.
4. Go to your PC Network and Sharing Center (Windows 7) and Click on Change Adapter Settings, select you WiFi adapter, right click and choose Properties.
5. In pop up window select Configure, in next window click on Advance tab and browse settings there and choose same channel you choose in you router for ex: 11 and the same standard as G not abgn, bgn or gn. Save and Exit.
Method 1 solved the network issues.
Enjoy!
This entry was posted on Sunday, November 13th, 2016 at 7:08 pm and is filed under Client, Windows. You can follow any responses to this entry through the RSS 2.0 feed.
You can leave a response, or trackback from your own site.