
Все изученные нами случаи появления синего экрана смерти WDF_VIOLATION непосредственно связаны с драйверами. Это могут быть устаревшие или плохо совместимые драйвера устройств. Чаще всего жалуются на данный BSOD те, у кого есть какая-то периферия Apple или используются различные док-станции USB-C. Также в наибольшей зоне риска владельцы HP, хотя и у пользователей Lenovo проблема может появиться. Встречаются жалобы и у тех, кто не подпадает под перечисленные критерии.
Как убрать BSOD WDF_VIOLATION?
Основная задача – найти виновника BSOD. С высокой долей вероятности речь идет об одном из последних установленных или обновленных драйверов. Есть и более точный способ диагностики с помощью программ. Например, BlueScreenView. Это простой инструмент, который может указать, какой именно драйвер виновен. Только программа давно не поддерживается, поэтому нет гарантий, что это сработает.
Путем тестирования, возможно, даже поштучного перебора, должно получиться найти виновника. Нам известно, что порой BSOD вызывают драйверы клавиатуры Apple, а также драйверы Realtek. Их следует попробовать обновить или переустановить. Еще стоит удалить файлы драйверов HpqKbFiltr.sys, wdfilter.sys и MacHALDriver.sys, которые находятся в папке Windows/System32/drivers. Достаточно просто переименовать файл для исправления ошибки. В этом случае можно будет всегда восстановиться.
Все то, что удалось в сети, свидетельствует о проблеме с драйверами. Код остановки WDF_VIOLATION появляется либо из-за поврежденных, либо устаревших драйверов. Остается только найти проблемный элемент и проблема будет решена. При чем, если даже автоматически система не находит обновление, следует зайти на официальный сайт и проверить.
Blue Screen of Death is one of the most common Windows errors that abruptly crashes the entire system and negatively impacts your productivity. Many Windows 11/10 users are currently facing the BSOD error with the WDF_VIOLATION stop code. The error code indicates that Kernel-Mode Driver Framework has detected issues with the Framework-Based Drivers.
Recently, one of our team members was also repeatedly experiencing the same problem. After attempting different troubleshooting methods, they fixed this error from the roots. To check those tried and tested solutions, read this article and you should be able to resolve the WDF_VIOLATION error in your Windows 11/10 PC.
What Causes WDF_VIOLATION Error in Windows 11/10?
Here are some sources that are likely to cause the BSOD WDF_Violation error.
- Faulty Hardware
- Corrupted System Files
- Inaccurate BIOS Settings
- Outdated Drivers
- Less RAM
- Fault In Bluetooth Drivers
- Issues With USB Ports
- Third-Party Software
- Malware or Virus
Fix WDF_VIOLATION Error in Windows 11/10
Here in this section, we have mentioned over twelve most working solutions to help you login back into your system without interruption.
1. Rename Faulty HP Keyboard Driver
Many HP laptop users reported that a driver named, HpqKbFiltr.sys developed this issue on their machines. They also added that this particular driver was installed on their HP laptop through Windows Cumulative Update. Hence, this could be the same in your case if you are using an HP laptop. One of the ways to fix this issue is renaming the driver. You can follow along to rename the driver.
1. Open the Settings app by pressing Win + I.
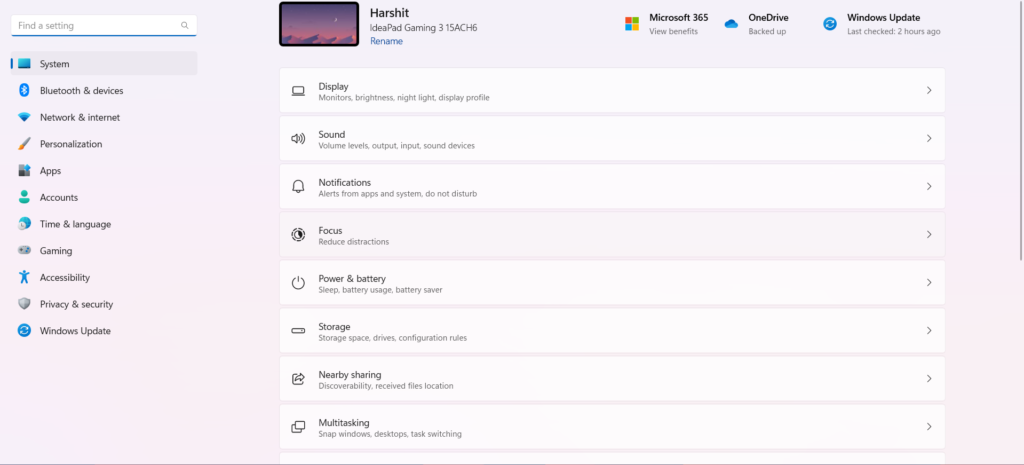
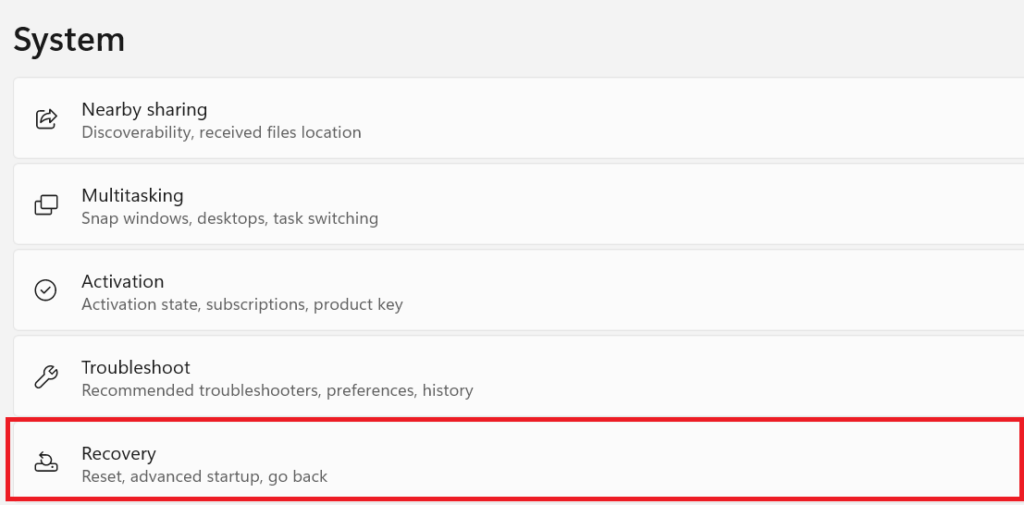
2. Search for the Recovery section and click on it.
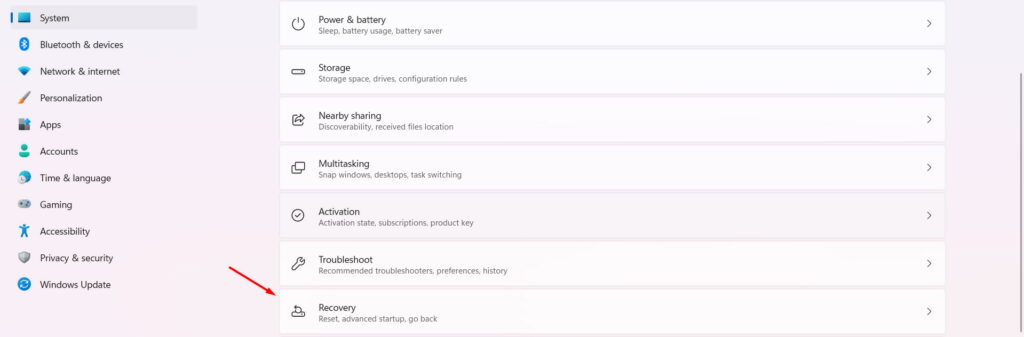
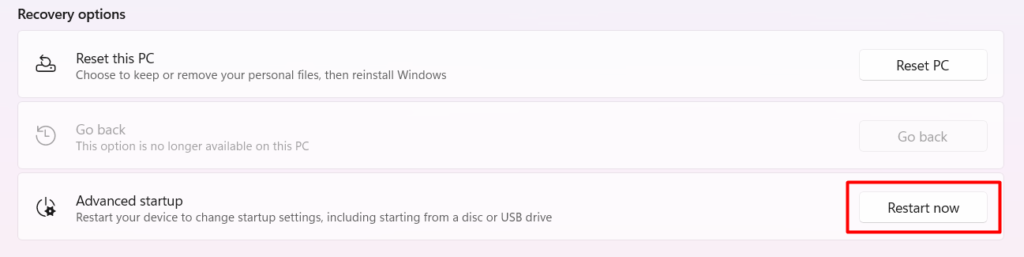
3. Click on Restart now to get access to advanced startup options.
4. You will now see various options on the Choose an option window. Click on Troubleshoot from the given options.
5. Now, click on Advanced options in the Troubleshoot menu.
6. Click on Command Prompt once you enter the Advanced options window.
7. Execute the below-mentioned commands in CMD to rename HpqKbFiltr.sys keyboard driver.
C:cd C:\Windows\System32\driversren HpqKbFiltr.sys HpqKbFiltr.sys.bak8. Reboot the PC after executing the mentioned command. Your PC should now start properly without the BSOD WDF_VIOLATION error.
2. Remove the Faulty HP Keyboard Driver
If renaming the HpqKbFiltr.sys driver doesn’t solve the problem, you can now try removing the HP keyboard driver. Don’t fret. Removing a malfunctioned driver doesn’t affect your system’s performance. Your system will automatically install the missing driver when needed. We have explained the process of removing the HpqKbFiltr.sys driver in the below-mentioned steps.
Note: Before implementing the below-mentioned steps, ensure that your PC is booted into Safe Mode. If not, you can check above steps to do so.
1. Boot your PC into Safe Mode and open Command Prompt.
2. Execute the mentioned command in CMD.
For 32-bit System:
dism /Image:C\ /Remove-Driver /Driver: C:\Windows\System32\DriverStore\FileRepository\hpqkbfiltr.inf_x86_f1527018cecbb8c2\HpqKbFiltr.infFor 64-bit System:
dism /Image:C:\ /Remove-Driver/Driver: c:\Windows\System32\driverstore\FileRepository\hpqkbfiltr.inf_amd64_714aca0508a80e9a\HpqKbFiltr.inf3. That’s it. The faulty keyboard driver must be removed now. Reboot your PC normally and check the status of the issue.
3. Try Disconnecting USB Peripherals
Faults in your system’s hardware could also lead to issues like this. We are referring Hardware to USB Peripherals attached to the PC. Many Windows 11/10 users encountered the error because of faulty USB peripherals or USB ports.
We suggest disconnecting all the USB peripherals one by one and rebooting the PC simultaneously. If the error gets fixed after disconnecting a specific USB device, we recommend replacing that particular accessory with a new one to avoid the same problem in the future.
4. Use Windows Driver Verifier Tool
One of the reasons for the WDF_VIOLATION error is an issue with the Framework-Based Drivers. But, there isn’t a straightforward method to detect the malfunctioned driver. You must first enable Minidumps and use the Driver Verifier Tool to continuously monitor all Kernel-Mode Drivers and Graphics Drivers. Follow the mentioned steps to use the Driver Verifier Tool to find out the culprit of the issue.
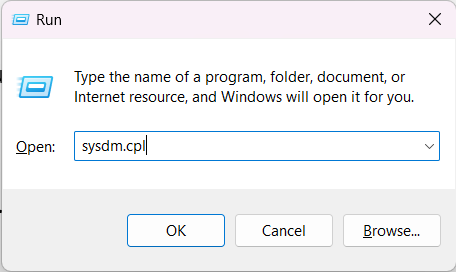
1. Press Win + R to open the Run program and type sysdm.cpl.
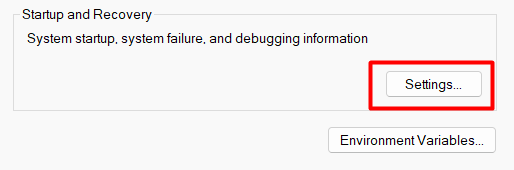
2. Head to Advanced > Startup & Recovery > Settings.
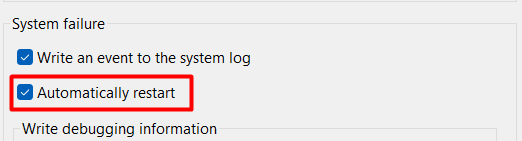
3. Uncheck the Automatically Restart option.
4. Select the Small memory dump (256 KB) option from the drop-down list under the Write debugging information section.

5. Make sure to set the Small dump directory to %SystemRoot%\Minidump.

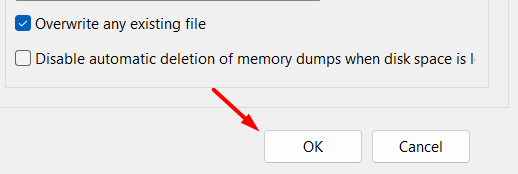
6. Click on OK to save the changes and reboot the PC.
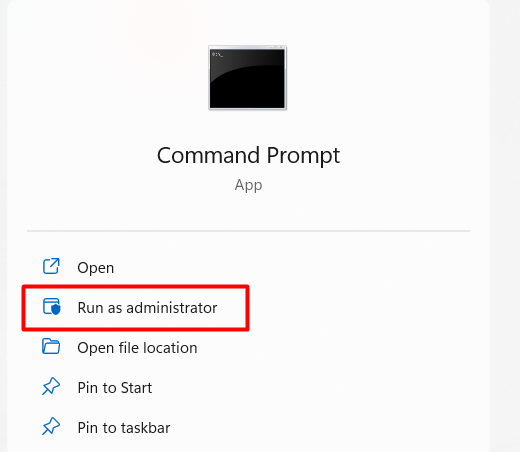
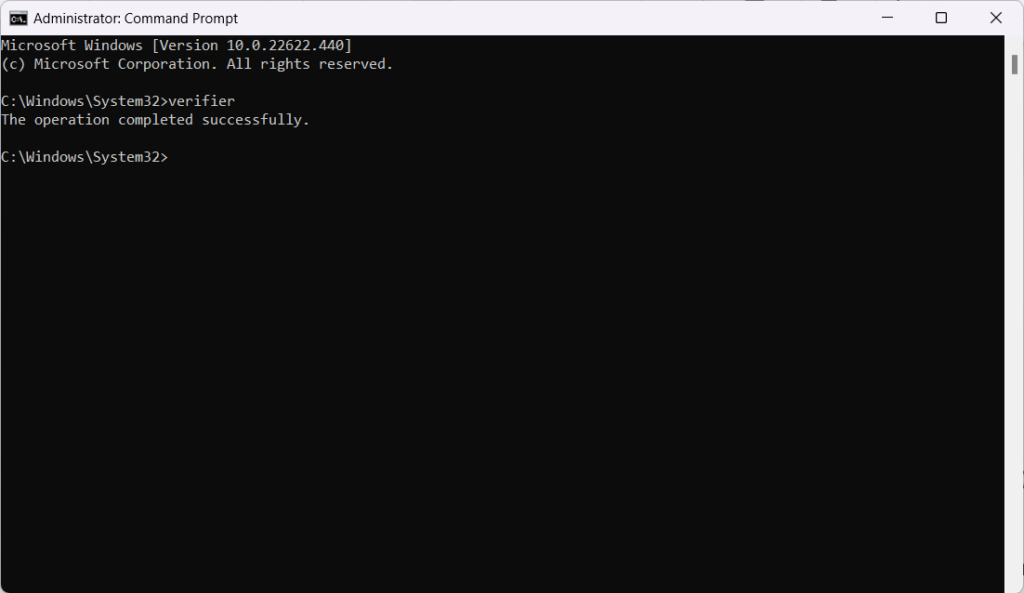
7. Run Command Prompt as administrator.
8. Type verifier in CMD and press Enter.
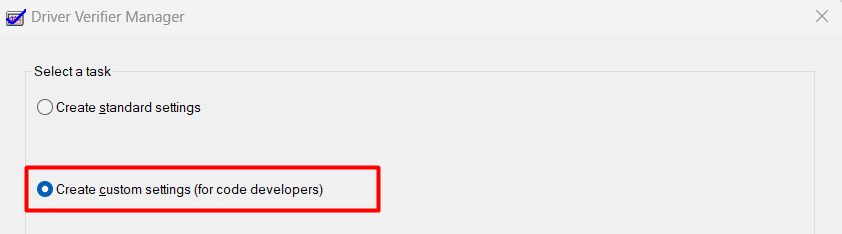
9. You will now see the Driver Verifier Manager window. Choose the Create custom settings (for code developers) option.
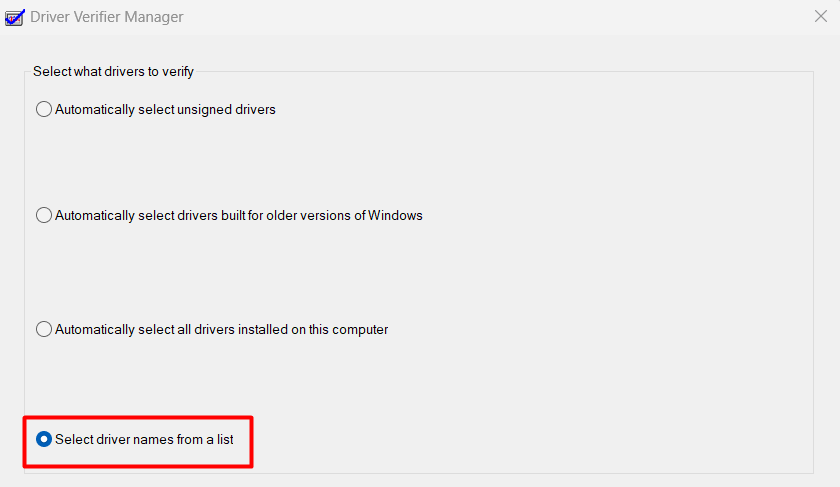
10. Check all the present in-the-box options, except Randomized low resources simulation and DDI compliance checking.

11. Click on the Select driver names from a list option.
12. Once done, select all the drivers that aren’t related to Microsoft Corporation. You can identify this by checking the Provider’s name.
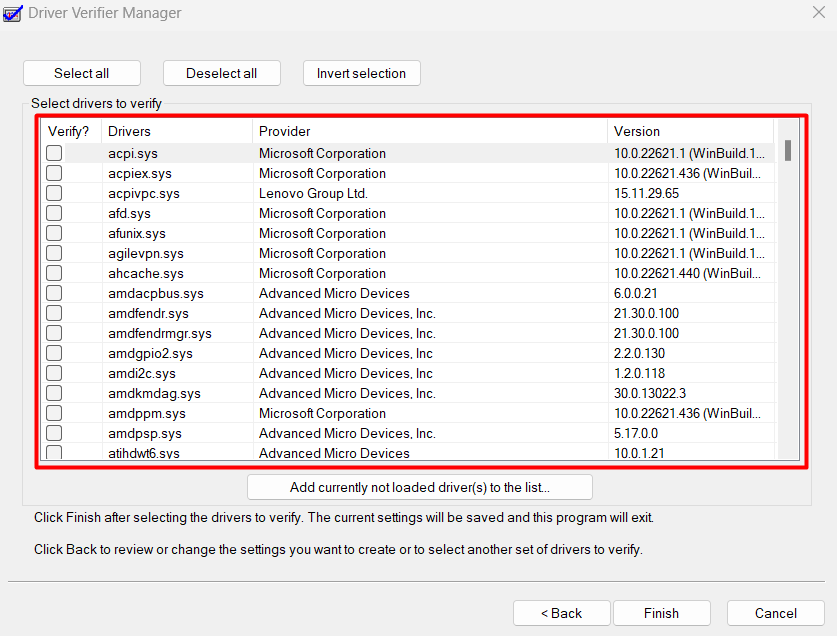
13. Lastly, click on the Finish button to save the changes.
That’s it. Now, wait for the next crash and the system to automatically create a DMP file. You can simply read the DMP file using the BlueScreenView tool.
5. Update Bluetooth Drivers
Some Windows 11/10 users used the method mentioned above to create a DMP file. A few users reported that their DMP file declared Bluetooth drivers as the culprit of the issue. Fortunately, updating the Bluetooth drivers fixed the problem for them, and you can try the same. Follow the below-mentioned steps to update Bluetooth drivers from the Device Manager.
1. Press Win + R and type diskmgmt.msc in the search box.

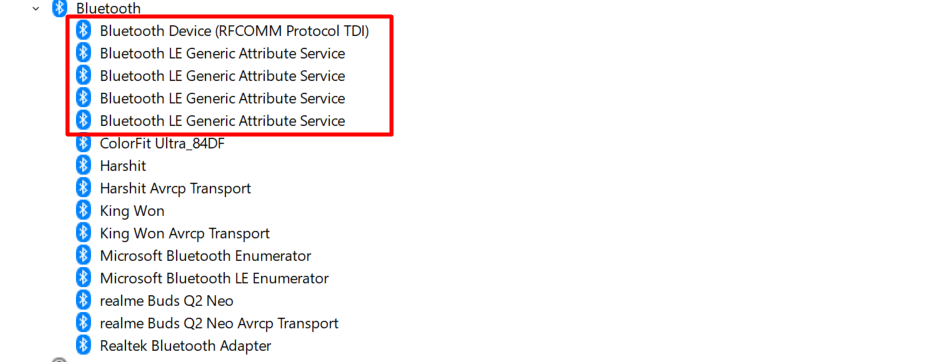
2. Click on Bluetooth to get a list of all Bluetooth drivers.
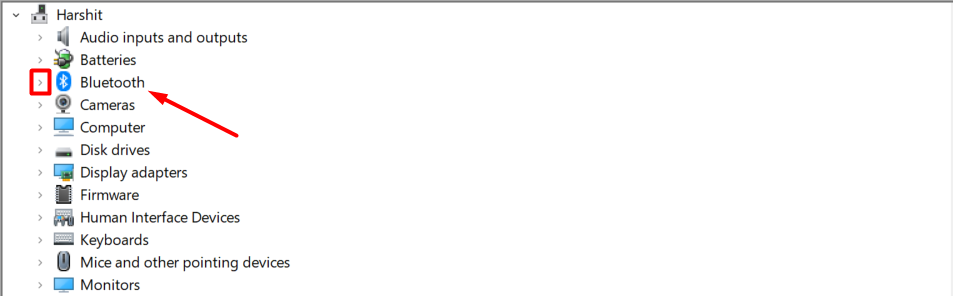
3. Right-click on the Bluetooth driver and click on the Update driver.
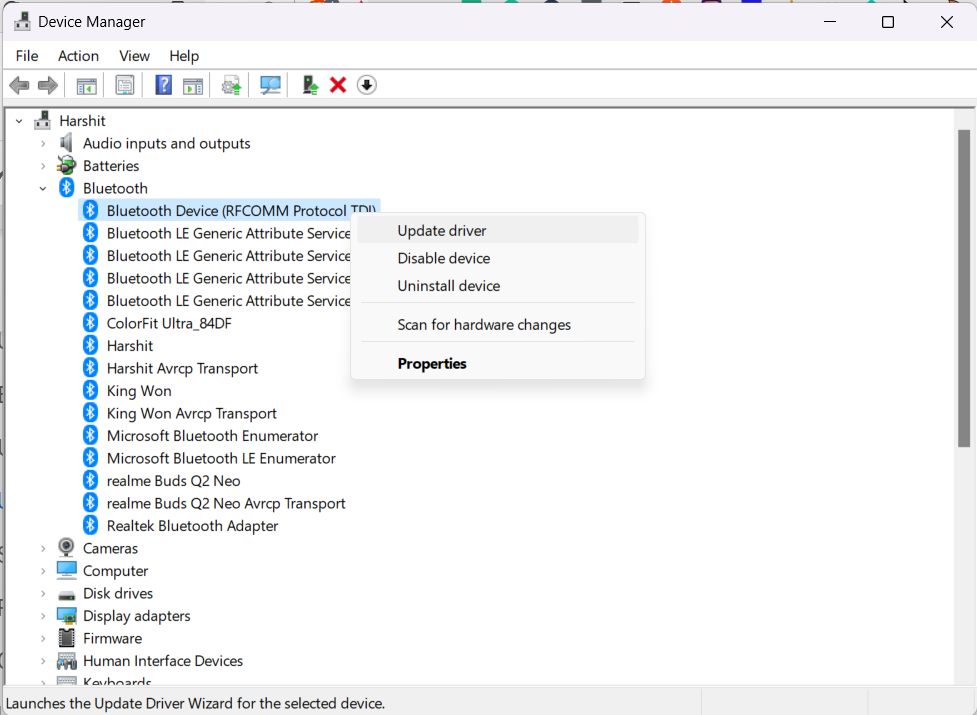
4. Follow the same steps with other Bluetooth drivers.
5. In the end, reboot the PC to see if the PC restarts normally or is still facing the same issue.
6. Scan For Viruses
It could be possible that your system has some infected files and applications that created this issue. We suggest running a Quick and later Detailed Scan to ensure everything on your system is safe. For this, You can use Windows’s Microsoft Defender Antivirus tool.
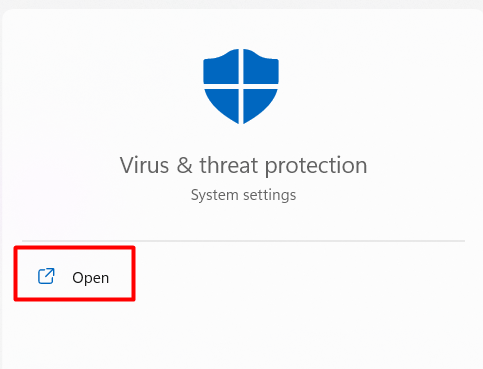
1. Press the Windows key.
2. Type Virus & threat protection and open it.
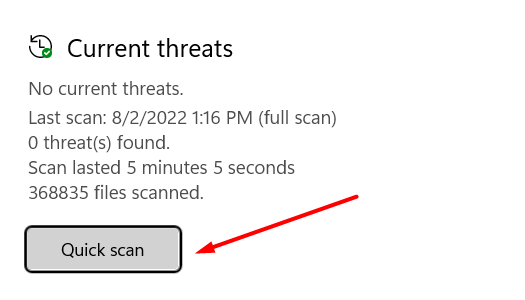
3. Click on the Quick scan.
4. Wait until the scan completes and see the results. If the scanner finds something infected, you can cross-check it and remove it.
5. Click on the Scan options.

6. Select the Microsoft Defender Antivirus (offline scan) option.
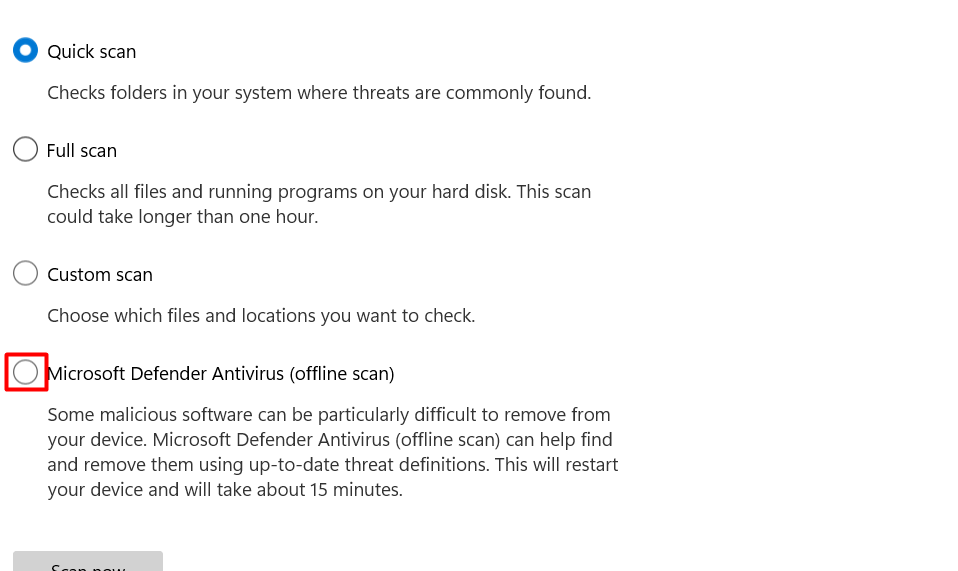
7. Click on the Scan now to run a detailed scan.

7. Run Windows Memory Diagnostic
BSOD error appears for many reasons, and one of the most common causes is defective hard drives. It could be possible that there are some issues with your hard drive. You can use the Memory Diagnostic tool to ensure your hard drives are in the perfect and working state. This tool will help you find and fix all problems related to the applications and memory with ease. You can follow the mentioned steps to use the Memory Diagnostic.
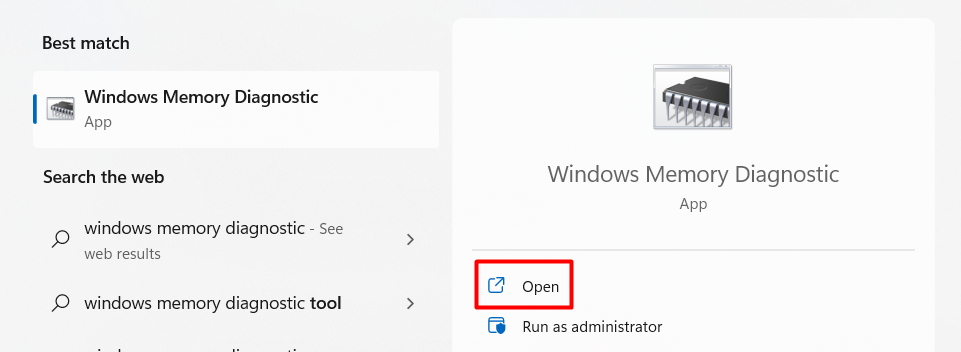
1. Press the Windows key and type Memory Diagnostic in the Search Box.
2. Click on Windows Memory Diagnostic.
3. Select Restart now and check for problems.
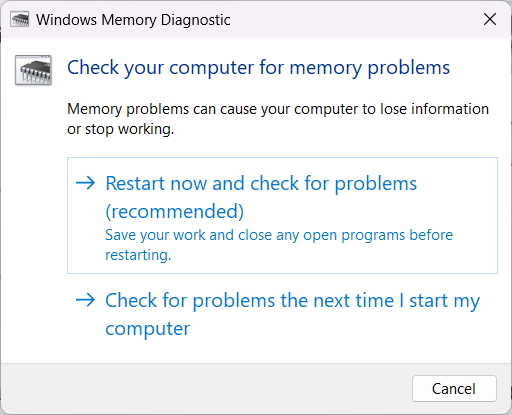
4. Your system will now reboot, and the tool will automatically start scanning for issues.
8. Use Disk Cleanup Tool
There is a possibility that the system isn’t getting ample storage to execute essential tasks, resulting in this issue. If this is the case, it can be easily fixed by freeing up some storage. Windows has an integrated Disk Cleanup tool that lets you clean unnecessary files in a few steps. Follow along to free up some space using the Disk Cleanup tool.
1. Press the Windows key and search Disk Cleanup.
2. Click on the Disk Cleanup.
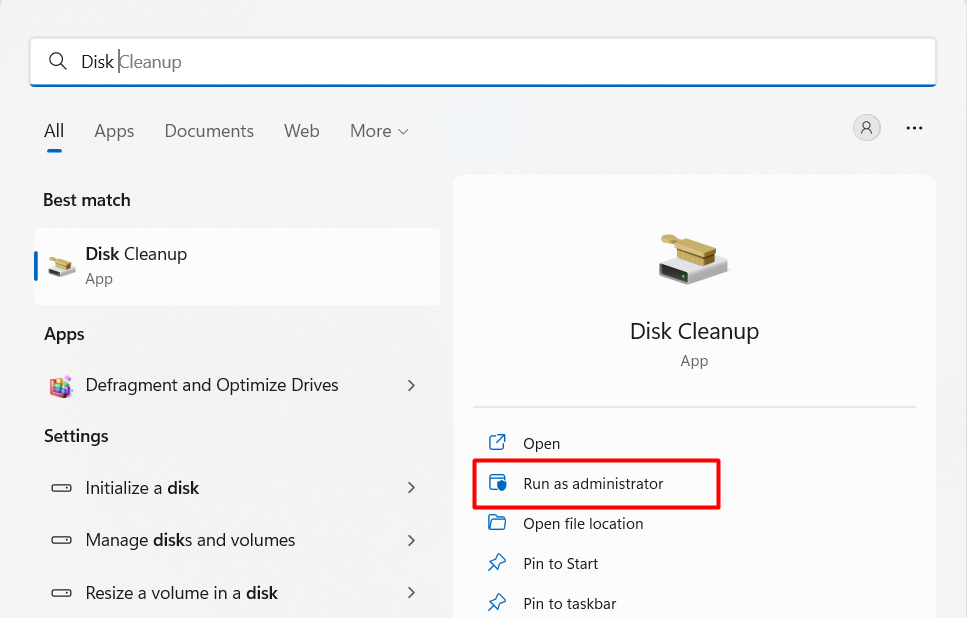
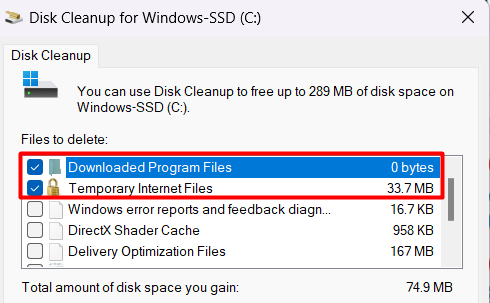
3. Select Downloaded Program Files, Temporary Internet Files, Thumbnails, and Temporary Files.
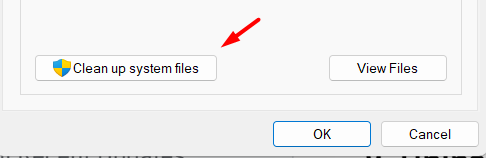
4. And finally, click on Clean up system files.
9. Uninstall Recent Updates
Several Windows 11/10 users reported that they started facing this issue after installing a Windows Cumulative Update. If you also started this error after the new update, then the culprit of the entire issue is in front of you. You can instantly fix the issue by uninstalling the update. You can follow along to do so.
Note: It is necessary to enter into Boot Mode before uninstalling recent updates. We recommend doing this to be on the safer side.
1. Open the Settings App and move to the Recovery settings.
2. Click on the Restart now button.
3. On the Choose an option window, click on Troubleshoot.
4. Then, click on Advanced options and head to Startup Settings.
5. Press F5 to enter into Safe Mode with the Internet.
6. Your PC will now restart only with essential drivers and applications. Press the Windows key and search Windows Update Settings.
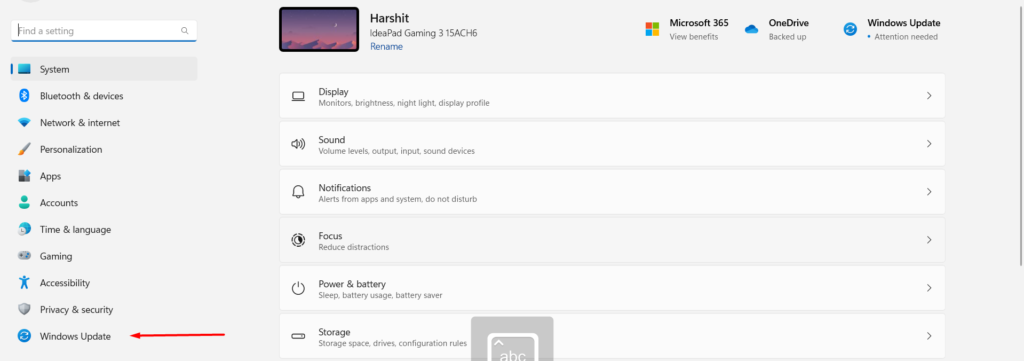
7. Head to the Update history section in the Windows Update settings.
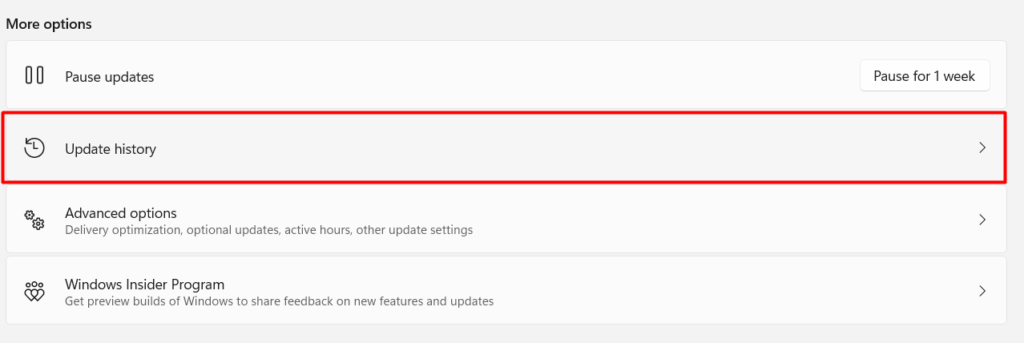
8. Scroll down and click on Uninstall Updates.

9. Click on Uninstall next to the recently installed Windows update.
10. Uninstall Recently Installed Applications
If you are getting WDF_VIOLATION issue after installing a new application, then uninstalling that recently installed app would be an ideal solution. We have explained the same in the below-mentioned steps.
1. Press Win + R, type appwiz.cpl, and hit Enter.
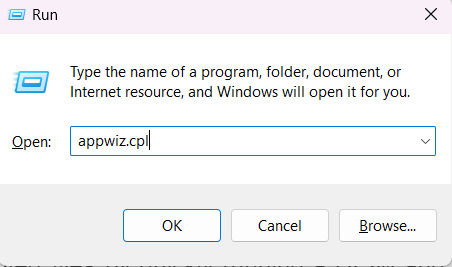
2. Try to remember the recently installed application/s and find them in the list of given applications.
3. Once found, right-click on the app and select Uninstall.

11. Run DISM, SFC Scan
In case the issue doesn’t fix after trying all the major solutions, then corrupted system files are expected to be the reason behind the issue. You can quickly find all the corrupted files by running a DISM and SFC scan. Follow the below-mentioned steps to do the same.
Run DISM Scan To Check for Files Integrity
1. Open CMD or Terminal as administrator.
2. Execute the mentioned command and press the Enter key: DISM.exe /Online /Cleanup-image /Restorehealth
3. Once the scan completes, restart the PC.
Quick SFC Scan To Fix Corrupted Files
1. Execute the mentioned command: SFC /scannow
2. Press the Enter key.
3. Restart the PC
12. CHKDSK Repair Command
Besides, we also suggest running the CHKDSK repair command to fix all errors related to your hard drive.
1. Run Command Prompt as administrator.
2. Copy and paste the mentioned command in the CMD and press Enter key: chkdsk /f C:

3. Restart the PC.
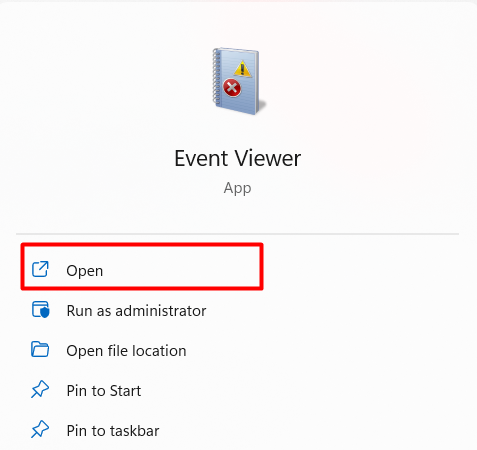
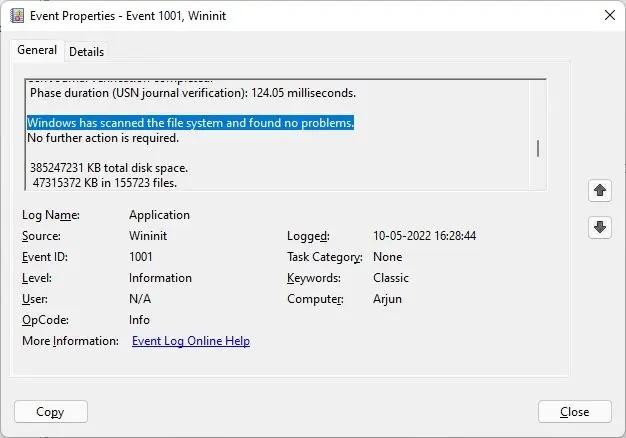
4. Open Event Viewer after the PC restarts.
5. Expand the Windows Logs section and click on Application.
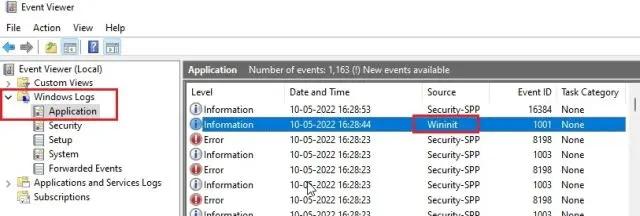
8. Search for Wininit and double click on it to open Event Properties windows.
10. On the Event Properties windows, you will see the errors found during the scan.
13. Reset BIOS Settings To Default
Putting BIOS settings to default could also fix the WDF_VIOLATION issue. However, not many users tried and suggested it. But, we found it useful because resetting the BIOS setting will make everything fresh. Hence, there are chances that this issue might disappear after doing this. Below are the steps to reset the BIOS settings in Windows 11.
1. Press Win + I to open the Settings window.
2. Open the Recovery section and click on the Restart now button under the Recovery options.
3. You will now be entered into the boot settings. Click on Troubleshoot on the Choose an option screen.
5. Select Advanced Options and then choose UEFI Firmware Settings.
7. Click on Restart to open the BIOS mode settings.
8. Press F9 to open Setup Defaults.
9. Lastly, select Yes using the keyboard arrow keys.
14. Reset the PC
If none of those mentioned above solutions works, the last option is to reset the PC and get everything back to the default state. We have mentioned the entire process of resetting the Windows 11/10 PC below.
1. Open the Settings app.
2. Head to the Recovery settings.
3. Click on Reset PC.

4. Select the Keep my files option.
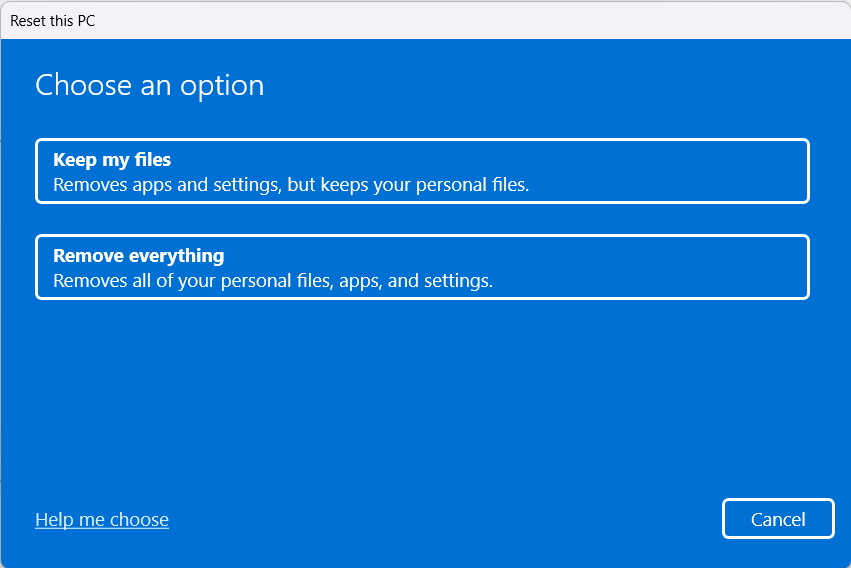
5. Your system will now return to the default state.
Frequently Asked Questions
How Do I Permanently Fix Blue Screen on Windows 10?
There are several ways to fix the blue screen error on Windows 10. One of the best ways is by uninstalling the recently installed Windows updates. You can also try using the Windows Driver Verifier tool to find the main culprit and rectify it accordingly.
How Do I Fix Blue Screen in Safe Mode?
You need to first open your system Settings app by pressing Win + I. Afterwards, head to the Recovery options and select Restart to open BIOS settings. First, click on Troubleshoot and then select Advanced options. Now, click on Command Prompt on the Advanced options screen. You can now try uninstalling recently installed third-party applications, recent updates, and Bluetooth drivers.
Can Not Fix Blue Screen of Death?
Blue Screen of Death mainly emerges due to hardware issues. Your PC might be having some hardware issues. In this situation, you can try hardware troubleshooting methods, such as fixing hard driver errors, clearing RAM sticks, etc.
Can RAM Cause Blue Screen?
Sometimes flaws in the RAM also lead to BSOD error. You can fix this error by trying different hardware and software troubleshooting methods.
Does BSOD Damage Your Computer?
Blue Screen of Death (BSOD) doesn’t damage your computer. It doesn’t affect your system files, applications, and anything else.
Final Words
You are working or playing, and everything suddenly stops due to a system crash. It ends up with a blue screen with an error code, WDF_VIOLATION. Getting this error could be frustrating and ruin your entire mood and day. We suggest trying the above-mentioned solutions to fix the WDF_VIOLATION Error in Windows 11/10.
Windows users are facing a new Blue Screen of Death error. It says WDF_VIOLATION and with the familiar message that Your PC ran into a problem and needs to restart. Although PC boots back up after this error, it crashes the system which can be frustrating. It is important to understand WDF meaning to prevent it from causing serious issues in the future. If you are also dealing with the same problem, you are at the right place. We bring to you a perfect guide that will help you fix WDF_violation error windows 10 along with explaining what is WDF.

Table of Contents
You must be thinking that what is WDF, WDF stands for Windows Driver Framework. It is a collection of tools and libraries which helps make device drivers. WDF_VIOLATION error occurs when there is a problem with the framework-based driver. It is common in HP computers but seen in other PCs as well. Here are some reasons behind it.
- In HP systems, it is caused due to HpqKbFiltr.sys (version 11.0.3.1) keyboard driver which doesn’t work properly in 1803 and 1809 version of Windows 10.
- Corrupt Bluetooth drivers
- Connectivity issues with USB devices
- System files issues
- Bugs in recent Windows builds
- Malware or Virus attack

After understanding what is wdf and the reasons behind WDF_VIOLATION error let’s go to the methods to fix it. As this error is driver related, the first step is to make sure all connected devices and their driver files are compatible with your PC. Here is how to fix WDF_violation error windows 10.
Method 1: Remove Faulty Keyboard Driver (For HP users)
This method is for HP users facing the error. Uninstalling incompatible HpqKbFiltr.sys driver may fix the issue but it is not straightforward. You will need to enter Windows Recovery Environment for it, follow our guide to do so.
1. Launch Windows Settings by pressing Windows and I keys simultaneously.
2. Click on Update & Security tile.

3. Click on Recovery and in the right pane and click on Restart now button under Advanced Startup section.

4. Wait for your system to enter Windows Recovery Environment and click on Troubleshoot under Choose an Option.

5. Select Advanced Options next.
6. Click on Command Prompt.

7. Depending on your system specifications, carefully enter below command lines given below and press enter key to execute them.
- Command for 32-bit version:
dism /Image:C\ /Remove-Driver /Driver: C:\Windows\System32\DriverStore\FileRepository\hpqkbfiltr.inf_x86_f1527018cecbb8c2\HpqKbFiltr.inf
- Command for 64-bit version:
dism /Image:C:\ /Remove-Driver/Driver: c:\Windows\System32\driverstore\FileRepository\hpqkbfiltr.inf_amd64_714aca0508a80e9a\HpqKbFiltr.inf
Note 1: You can check your system information by going to Settings > System > About and under Device Specifications look for a System type.
Note 2: If Windows on your PC is not installed on C: drive, replace C: in commands given with the drive letter in which you have your Windows.

8. Exit command prompt once command has been executed. Restart your PC.
Check if you have resolved WDF_violation error windows 10 issue.
Note: There is an official Microsoft KB4468304 patch which removes HpqKbFiltr.sys driver automatically. If you are able to start your PC, you can download it from here. Install it and see if it fixes the issue.
Also Read: 7 Ways to Fix iaStorA.sys BSOD Error on Windows 10
Method 2: Run Startup Repair
In the case where this error appears immediately after your PC turns on, Windows Startup Repair tool can help you. It is designed to diagnose and fix all kinds of startup issues. Follow the steps below to use it.
1. Go to Update & Security > Recovery > Advanced Startup and restart your PC, then select Troubleshoot option as shown in Method 1.
2. Click on Startup Repair.

Windows will start diagnosing and automatically fix any problems it finds. You can find Log file of the identified problems and repairs made at the given location path to check.
c:/windows/system32/logfiles/srt/srttrail.txt
Method 3: Disconnect USB Devices
External devices require drivers to communicate with the computer and if these driver files are incompatible or corrupt, errors like WDF_VIOLATION may occur. Follow the steps below.
1. Disconnect all connected USB peripherals, starting from the newest, and then reconnect them one by one until you have identified the problematic device. You can follow our guide to fix USB keeps disconnecting and reconnection issues.

2. If a USB device is indeed causing the issue, search online for compatible driver files and install them manually or get a replacement for the device.
Method 4: Disable USB Ports
Another way to resolve WDF_violation error windows 10 is to disable USB ports on your device. There are two ways to do this, one by using BIOS, and another by using Device Manager. Here are the steps to do it using Device Manager.
1. Press the Windows key, type device manager, and click on Open.

3. Locate and expand Universal Serial Bus controllers by double clicking it.

4. Right-click on the USB Composite Device and select Disable device.

5. Click on Yes when prompted to confirm.
6. Repeat the above step for all USB Composite Devices.
Check if WDF_violation error windows 10 is addressed.
If you wish to disable USB ports from the BIOS menu, follow our guide to learn how to access BIOS and then go to BIOS > Advanced Tab > Miscellaneous Devices > External USB Ports > Disable

Note: The exact labels in BIOS may vary depending on the manufacturer.
Also Read: How to Fix Windows Update Error 80072ee2
Method 5: Reinstall Bluetooth Device Drivers
In some cases, outdated Bluetooth drivers can also prompt the WDF_VIOLATION BSOD error when Bluetooth device is connected to the system. You can fix it by uninstalling these drivers. But first, you must boot your system into Safe Mode then uninstall the Bluetooth device drivers as shown below.
1. In Safe Mode, open Device Manager as shown in Method 3.
2. Double click on Bluetooth or click on the tiny arrow next to it to expand.
3. Right-click on device and select Properties from menu.

4. Go to Driver tab and click on Uninstall Device button.
5. In Uninstall Device pop-up, check the box marked Delete the driver software for this device and click on Uninstall to confirm.

6. After uninstalling the driver, reboot the PC.
7. Download the latest driver from the manufacturer’s website (e.g. Lenovo).

8. Boot your PC back normally by using our guide on How to Exit Safe Mode.
Also Read: Fix Computer Did Not Resync Because No Time Data was Available
Method 6: Repair System Files
System files on Windows 10 PC can get corrupted via third-party applications, malware, etc. or they may be missing altogether. It can cause WDF_violation error windows 10. You can run DISM & SFC scan now repair tools to repair or replace corrupted files by following our guide to Repair System Files on Windows 10.

Method 7: Perform System Restore
If WDF_VIOLATION error started after installing a new application or making changes to the Registry, you should try restoring the system back to a previous state. System Restore function in Windows 10 regularly creates restore points to revert back to whenever required. Follow our guide to Create a System Restore Point in Windows 10.

Also Read: Fix Ntoskrnl.exe BSOD Blue Screen error
Method 8: Reset Windows
If none of the above methods worked for you, you might need to perform hard reset. Only perform this method when it is absolutely necessary and you have no choice. You can reset your system while keeping all your files intact by following our guide to Reset Windows 10 Without Losing Data.

Note: If you can, we recommend reinstalling Windows using installation media in case the error persists.
Recommended:
- 27 Best Alternatives to Microsoft Word
- Fix Zoom Invalid Meeting ID Error in Windows 10
- Fix Windows Store Error 0x80072ee7
- Fix win32kfull.sys BSOD in Windows 10
We hope that this guide was helpful and you were able to fix WDF_violation error in Windows 10 along with learning what is WDF and WDF meaning. Let us know which method worked for you the best. If you have any queries or suggestions then feel free to drop them in the comments section.
WDF_VIOLATION is a Blue Screen of Death error that can be caused by various problems at the software or hardware level. It immobilizes your computer and keeps you from working, studying or playing.
If you have recently done something new on your PC, like installing an application or plugging in a new device, the event might have sent Windows over the edge, resulting in the WDF VIOLATION stop code.
On the bright side, you can fix BSOD errors by following the easy instructions below.
Resetting Windows 10 to factory settings is the last resort. Before jumping to that conclusion, you should try the following solutions since they will give you fewer headaches.
Keep in mind that it’s a good idea to create a system restore point on your computer if you haven’t done so recently. It allows you to effortlessly roll back the OS to a stable state in case you encounter additional problems.
1. Unplug new hardware components
If you have recently bought a new piece of hardware and connected it to your computer unit, it could not be fully compatible with your operating system. Or maybe it doesn’t have the correct driver installed.
Whatever the case may be, try unplugging it and restarting your computer to see if you get any more BSOD errors. It could be anything, from a brand new USB flash drive to a Wi-Fi adapter or webcam.
Also, if the device is USB-enabled, you might want to check your USB ports. It’s possible they suffer from hardware failure, which could affect your entire operating system. Try plugging the devices into different ports.
2. Use BlueScreenView
BlueScreenView is a lightweight, portable, and free application that provides a user-friendly graphical interface for examining the minidump files created by blue screen errors. So, you can use it to examine the .dmp file left behind by the WDF VIOLATION stop code.
- Download BlueScreenView from the official website
- Restart Windows right after you get the WDF VIOLATION error
- Launch BlueScreenView
- Open the DMP file created by WDF VIOLATION
- Examine the driver files involved in the error
- Locate the driver files in Device Manager to reinstall and update them (steps in the next solution)
3. Check your drivers
More often than not, devices fail to work properly due to outdated or incompatible drivers. In time, this can cause all sorts of computer problems, including blue screen errors.
To solve this problem, you can easily reinstall the devices and let Windows set up the correct drivers, as well as update the drivers to the latest version.
How to quickly reinstall drivers:
- Right-click the Start button and select Device Manager
- Expand the categories of devices and look for any entry with a yellow exclamation point
- Select and right-click that entry and click Uninstall device
- Follow the on-screen instructions to remove the device
- Do this for all devices with a yellow exclamation point
- Restart your PC
Don’t worry about ending up with missing device drivers because Windows will reinstall them correctly after restarting your computer.
How to update drivers:
- Go to Device Manager, right-click a device in the list and select Update driver
- Click Search automatically for updated driver software
- If you see the The best drivers for your device are already installed message, click Search for updated drivers on Windows Update
- Do this for all drivers
- Restart your computer
If Microsoft is unsuccessful at retrieving newer drivers through Windows Update, then you should turn to a third-party driver updater for help. It can automatically detect obsolete drivers on your PC and download the newer version.
4. Check your system memory
A faulty RAM card can be fatal to your computer and operating system. And it could also lead to BSOD errors like WDF VIOLATION. However, there’s an easy way to check it at the software level without having to installing anything extra, thanks to a built-in Windows tool.
How to use Windows Memory Diagnostic:
- Make sure to close all active applications
- Click the Windows 10 Start button, type Windows Memory Diagnostic, and open this app
- Click Restart now and check for problems
Windows Memory Diagnostic will do its job during reboot, finding and repairing any system memory errors on its own. Once it finishes, you can check if you still receive that nasty BSOD error.
5. Use System Restore
If you have recently made significant changes to the computer that you’re not aware of, you could have triggered the WDF VIOLATION stop code. For example, you could have installed a software application that made too many changes to the system registry.
Luckily, Windows has Recovery mode, which allows you to undo any modifications at the software level. This also covers programs and registry modifications, so keep in mind that any newly installed apps will disappear after the rollback.
It might be a good idea to verify their registration data to make sure you will be able to activate premium licenses once you reinstall those programs.
How to use System Restore
- Sign in to Windows 10 as the administrator
- Press Win key + R, type control panel, and hit Enter
- Click Recovery
- Click Open System Restore
- Choose a restore point from the list. If you want to see the exact applications that will be affected, click Scan for affected programs
- Click Next and proceed with the on-screen instructions
- Reboot your computer and check for BSOD errors
6. Run a malware scan
Cyber-attacks can be powerful enough to take down your computer’s entire defenses and mess up your system settings. Some malware agents can even cause blue screen error like WDF VIOLATION.
So you should count on your security software solution to run a malware scan and remove any pests from your PC.
How to use Windows Defender:
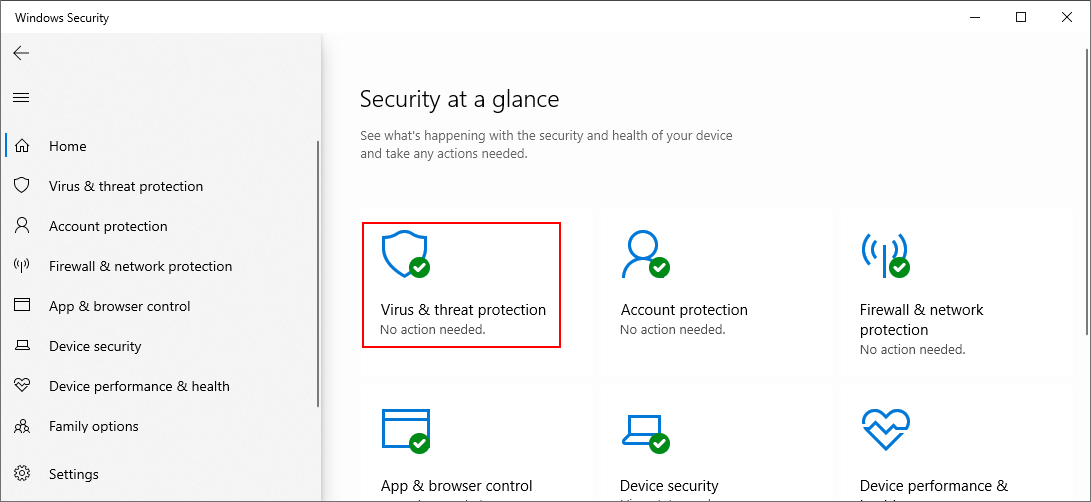
- Click the Start button, type Windows Security, and open this app
- Go to Virus & threat protection

- Click Scan options
- Select Quick scan and click Scan now
- Run another scan using Windows Defender Offline scan
If you have a third-party security application installed that overrides Windows Defender, make sure to adjust the steps above correctly.
7. Uninstall suspicious programs
Even if an application’s official page claims that it’s fully compatible with your operating system, that’s not always the case. In fact, some programs make too many modifications to the system registry, resulting in blue screen errors.
If System Restore mode is unavailable, the next best thing is removing the recent or suspicious program from your computer.
How to remove recent apps:
- Right-click the Start button and select Apps and Features
- Set Sort by to Install date (newest first)
- Pick the first app in the list and select Uninstall
- Remove the program by following the on-screen steps
- Restart your PC
- If you still get BSOD errors, uninstall the next app in the recent list
A programs uninstaller is more thorough than the Windows integrated tool because it not only removes an application but also any leftover files and registry entries which may harm your computer.
8. Clear up your disk space
If your HDD is full, Windows will not have enough disk space to run critical processes and services in the background. In turn, this can cause hardware failure as well as blue screen errors like WDF VIOLATION.
But you can solve this problem by just making more room on your hard drive. This means deleting large and unnecessary files, uninstalling big programs that you don’t use anymore, or copying photos and videos to an external hard disk.
As far as junk files are concerned, you can resort to a system cleaner or Disk Cleanup, a simple and effective utility built into the operating system.
How to use Disk Cleanup:
- Sign in to Windows 10 with elevated rights
- Launch your file navigator, right-click the partition where Windows is installed (it’s usually C:), and go to Properties
- Switch to the General tab and click Disk Cleanup
- Select everything in the Files to delete list and click Clean up system files
- As soon as the file scan is complete, select everything again, click OK and Delete Files to confirm
- Restart your PC and check for BSOD errors
9. Repair corrupt files
Hard disk corruption can be fixed using CHKDSK (Check Disk) while damaged system files can be restored with the help of SFC (System File Checker).
However, if the component store of the system image is corrupt, then you have to turn to DISM (Deployment Image Servicing and Management) to fix it.
It’s not necessary to install any third-party software since Windows 10 comes bundled with these three tools. You just need to launch a Command Prompt window with elevated rights. Furthermore, you should save any ongoing projects and terminate running applications.
How to use CHKDSK:
- Press Ctrl + R, type cmd, and press Ctrl + Shift + R to run CMD as admin
- Type
chkdsk c: /f. If you have Windows installed in another drive than C:, replacec:in the code with the correct letter. Press Enter - Type y when CHKDSK asks you to schedule the task at the next system boot and press Enter
- Restart your computer
How to use SFC:
- Run CMD as admin
- Type
sfc /scannowand press Enter - Wait until SFC scans your system and fixes any errors it finds
- Reboot your PC
How to use DISM:
- Launch Command Prompt as admin
- Type
DISM /online /cleanup-image /scanhealthand press Enter - If it reports any issues, fix them by running
DISM /online /cleanup-image /restorehealth - Restart your computer and run CMD as admin
- Type
sfc /scannowand press Enter - Restart your computer
10. Reset BIOS settings to default
If you have made any changes to your BIOS recently, perhaps you messed up something and accidentally triggered the WDF VIOLATION stop code. No need to worry, though, since you can easily reset BIOS settings to default.
- Restart your computer
- Before Windows loads, quickly press the hotkey shown on the bottom of the screen to enter BIOS mode
- Go to the Advanced section
- Set Reset Configuration Data to Yes
- Save the BIOS settings and exit with F10
The instructions might be different on your machine, depending on your BIOS version. Just make the necessary adjustments and you’ll be good to go.
11. Update BIOS to the latest version
While we’re on the topic of BIOS, it wouldn’t hurt to update it to the newest version. It’s not that complicated and it could help stop Blue Screen of Death error messages, too.
It’s just a matter of figuring out your BIOS version for update.
- Press the Win key, type System Information, and launch this app
- Go to System Summary and write down the BIOS Version/Date
- Access the website of your BIOS manufacturer and look for a newer version
- Download the BIOS update and transfer it to a USB pen drive
- Reboot your computer and enter BIOS
- Make sure to back up your current BIOS version to the flash drive
- Launch the BIOS update, follow the on-screen instructions, and wait until the task is over
- Whatever you do, don’t turn off or restart your computer during this time
- Start Windows as normal and check for BSOD errors
12. Run a clean boot
If you have a hard time attempting to troubleshoot the blue screen error because it gets immediately triggered, you can try running a clean Windows 10 boot.
It deactivates all non-essential drivers, processes and services to create a safe environment where you can further investigate the stop code.
How to clean boot Windows 10:
- Click the Start button, type System Configuration, and open this app
- Select the Services tab, uncheck Hide all Microsoft services, and click Disable all
- Switch to the Startup tab and click Open Task Manager
- Disable all startup programs
- Reboot your PC
Stop Code WDF_VIOLATION: Conclusion
There’s no need to panic over the WDF VIOLATION stop code since you can try a wide range of solutions on your own, without asking for an expert’s advice.
For instance, you should detach new hardware components from your computer, use BlueScreenView to find out more information about the involved drivers, as well as reinstall and update those drivers.
It’s also a good idea to check your RAM card for hardware failure, roll back Windows 10 to a stable checkpoint using System Restore, uninstall new software if System Restore fails, and check your computer for malware.
Furthermore, you should clear up your disk space, repair any corruption in the hard drive and operating system, reset BIOS settings to factory mode, update BIOS to the newest version, as well as run a clean Windows 10 boot.
And, if everything fails, get ready for a factory reset on Windows 10. But we hope you don’t need to go that far, though. Were these solutions useful for you? Let us know in the comment section below.

Are you slammed with the WDF_VIOLATION error? We will tell you all you need to know. Blue Screen of Death errors usually indicate a hardware problem or one related to your PC’s drivers and should be taken seriously.
If left unresolved, these crashes will cause permanent damage, primarily to your HDD, but other components can also be affected. So, let’s find out how to get things up and running.
Why does the wdf_violation error appear?
A number of various factors could have brought on the wdf_violation on your Windows 10 computer.
Until the procedures to correct it are implemented one at a time, and the error does not appear after a given patch, there is no way to determine the precise factor that is the cause of this problem.
But the following are the most likely triggers:
- Outdated or faulty software driver for Bluetooth devices – This is the primary reason, and you will be required to reinstall or update the driver.
- Malware on PC – A PC scan should do the trick if this is the problem.
- Corrupt system files – In this case, you will have to repair the corrupted file using a system utility.
- Corrupt USB devices – Scan these, or disconnect them, and the problem will be resolved.
What are variations of wdf_violation error?
The wdf_violation issue is not the only one of this type. Here are some similar problems that users have encountered:
- Wdf_violation in Windows 10 loop – In some cases, the PC may be in a wdf_violation loop that prevents it from entering Windows 10. To fix the problem, enter Safe Mode and try to delete the problematic driver.
- Wdf_violation while using Lenovo – Lenovo users reported this issue, and if you’re using a Lenovo device, you can try some of our solutions and check if that solves your problem.
- Wdf_violation in Windows 10 (HP laptop) – A number of users reported this inconvenience on HP devices as well. There’s no universal solution for HP computers, so you can try any solution from our article.
- Wdf_violation in Windows 8 – This error can appear on any version of Windows, and even if you don’t use Windows 10, you should be able to apply almost all solutions from this article to Windows 8.
- Wdf_violation in Razer – Sometimes, this issue can occur due to your hardware or USB peripherals. If that’s the case, disconnect all your USB devices and try to start your PC again.
- Wdf_violation on startup, crash – This problem can occur due to third-party applications on your PC, and to fix the issue, it’s advised to find and remove the problematic applications.
Can Corrupt Windows cause blue screen?
Almost anything, including broken system files, defective device drivers, and malfunctioning components, can result in a blue screen. And Yes! A faulty profile or corrupt Windows may cause a BSOD.
How do I fix the wdf_violation BSoD error on Windows 10?
1. Use a third-party BSOD fixer
A great practical solution to solve Blue Screen issues on your computer is to run effective PC health tools.
These tools are the best choices when you are dealing with PC issues like a BSoD, and you do not know the exact cause.
A quicker option to update your drivers is using third-party software.
Outbyte Driver Updater can scan your device and then searches the internet for the most recent update for your drivers. This way, it helps you prevent serious errors and performance issues.
4. Use the Check Disk command
- Press the Windows Key to open the Start Menu.
- In the search box, type Command Prompt and start it as administrator.

- After the CMD launches, type in the following command and press Enter:
chkdsk C: /f /r /x
- Replace the X with the letter of your drive you wish to check.
- Let the process complete.


Once you manage to boot Windows, many solutions can prevent the problem from occurring again. The most important one is performing a Disk Check.
Sometimes people aren’t sure what the exact cause is of their crashes. BSoDs can be hard to pinpoint. If a file on your device is causing problems, but you aren’t willing to completely restore the system, there are other ways.
Specialized repair software will scan your PC thoroughly for corrupted or problematic files. Once the culprit has been found, the tool will quarantine it and take other safety measures. It will most likely attempt to restore the file to an uncorrupted state.
If that isn’t possible, the software will replace it with an uncorrupted version from its database that is constantly updated and contains crucial Windows files.
- ERROR_OPLOCK_SWITCHED_TO_NEW_HANDLE [BSoD Fix]
- How to Fix the ERROR_OPLOCK_HANDLE_CLOSED?
5. Perform a System Repair
- Insert the installation DVD or USB and boot Windows 10 from it.
- In the Windows Setup page, select the Language, Time and currency format, and the Keyboard inputs method, then click Next.
- Now, click on Repair your computer and select Troubleshoot.

- Click on Advanced Options.

- Then, select Startup Repair to initiate the process.


The wdf_violation error will most likely cause the device to be stuck in the startup loop, which means that you won’t be able to access your desktop or any file that could help solve the problem.
If that’s the case, the only option is to create an installation media, set up the USB boot in the BIOS, and perform a Startup Repair using the CD/USB.
6. Disable USB ports in BIOS
- Restart your computer.
- During the restart, you will briefly see a message telling what key to press to open the BIOS/SETUP.
- Press that key (it might be a different one from the image below, depending on your motherboard’s manufacturer).

- Once the BIOS opens, you’ll need to go to Advanced Tab, then Miscellaneous Devices.
- Next, select External USB Ports and Disable it.
- Save the changes and restart your computer.

NOTE
This process might be different on your version of BIOS, therefore check your motherboard manual for detailed instructions.
Any USB device can cause a problem, so you might want to try disconnecting all the peripherals. There are even reports that cameras caused the issue.
To fix it, disconnect all the devices and plug them back in one by one to determine which one is the culprit.
7. Uninstall the Bluetooth driver in Safe Mode
- Restart your PC a couple of times during the boot sequence. Alternatively, click the Power icon on the profile selection screen, press and hold the Shift key and choose Restart from the menu.
- A list of options will now appear. Select Troubleshoot.

- Then Advanced options.
- Next, select Startup Settings.

- Click the Restart button.

- When your PC restarts, you’ll see a list of options. Press 4 or F4 to select Safe Mode.
- Press Windows Key + X to open Win + X menu.
- Now choose Device Manager from the list.
- Now locate your Bluetooth driver, right-click, and choose Uninstall device.
- Then, check Delete driver software for this device and click Uninstall to confirm.


Windows has a special segment called Safe Mode, which you can use to troubleshoot various issues. It uses the default drivers; therefore, it’s perfect if you can’t boot your system.
After entering Safe Mode, you must find and remove the problematic driver. Many users claim that a Bluetooth driver caused this issue for them, and you can remove it by doing as detailed above.
Then, restart your PC and try to start Windows 10 again. Remember that other drivers can cause this problem, so don’t focus only on the Bluetooth driver.
It’s also worth mentioning that sometimes the driver can automatically reinstall, so you’ll need to block Windows 10 from automatically installing drivers.
In some cases, the wdf_violation error can appear due to problematic software. Certain third-party applications might not be fully compatible with Windows 10, which can cause errors.
To fix the problem, it’s advised to remove the problematic application from the PC. Keep in mind that you need to remove this app completely to fix the problem permanently.
8. Perform a System Restore
- Press the Windows Key + S to open search and enter system restore.
- Choose Create a restore point from the list of results.
- In the System Properties window click System Restore.

- When the System Restore window opens, click Next.

- If available, check Show more restore points option and select the desired restore point.
- Now click Next to proceed.
- Follow the instructions on the screen to complete the restoration process.


Another tool that can help you fix the wdf_violation BSoD error is System Restore. If you’re unfamiliar, your system automatically creates restore points after installing new software or an update.
You can use these restore points to restore your system and fix problems like this.
How can I fix Wdf_Violation on Windows 11?
While this is a problem common in Windows 10, users of the new Microsoft OS have also experienced the same issues.
The good news is that if you have followed our guide, you can also solve the Event 1000 application error issues in Windows 11.
This is because OSs are very similar, and except for minor UI differences, the recommended fixes should work on Windows 11.
What safety measures should I take in case of repeated BSoDs?
Unfortunately, nobody can predict problems like these. You must always be on guard and remember that the number one safety measure is regularly saving your work. Doesn’t matter if you are designing something, writing an article, or playing a game.
Take your time and save the changes you made once in a while. This will reassure you that you won’t lose too much progress made during work.
Creating restore points is also a good idea. If your data gets corrupted in any way, you can always go back to a restore point before the corruption occurred.
If you are unlucky enough to get a blue screen that compromises the system’s files, you will lose documents that might be important.
That’s why backing up the data is mandatory in an emergency. Plenty of tools will create regular backups and upload them into an external cloud to keep your data safe.
Can overheating cause a blue screen?
Yes! A system crash and a blue screen of death may result from an overheating gadget. To avoid this issue, ensure that your PC has sufficient cooling systems.
Wdf_violation BSoD errors can be problematic on Windows 10 and should be treated as a serious matter, but we hope that some of our solutions were helpful to you.
Please tell us in a comment below if you solved the issue following our suggestions or if there are some others we should include in our list.