
Windows users occasionally encounter various error codes, and one such code is 0xc004c008. This error typically relates to issues with Windows activation and can be frustrating for users trying to validate their operating system.
In this article, we’ll explore the potential causes of error code 0xc004c008 and provide step-by-step solutions to resolve the issue.
Understanding Error Code 0xc004c008
1. Activation Issues:
Error 0xc004c008 often points to problems with Windows activation. This can occur if your operating system is not properly activated or if there are discrepancies in the activation process.
2. Product Key Mismatch:
Ensure that the product key entered during activation matches the one provided with your Windows installation. A mismatched or invalid product key can causes error 0xc004c008.
Solutions to Fix Error Code 0xc004c008:
Error code 0xc004c008 typically indicates a licensing or activation issue in Windows. Here are some solutions you can try:
1. Verify Product Key:
Double-check the product key used for Windows activation. Make sure it matches the key provided with your Windows installation media.
2. Re-enter Product Key:
If there is any doubt about the correctness of the product key, try re-entering it. Be careful to enter each character accurately.
3. Activate by Phone:
Windows provides a phone activation option. Follow the on-screen instructions to activate Windows by phone, providing the necessary information as prompted.
4. Check Internet Connection:
Ensure your device is connected to the internet. A stable internet connection is crucial for successful activation.
5. Windows Update:
Make sure your operating system is up to date by checking for Windows updates. Some activation-related issues are resolved through system updates.
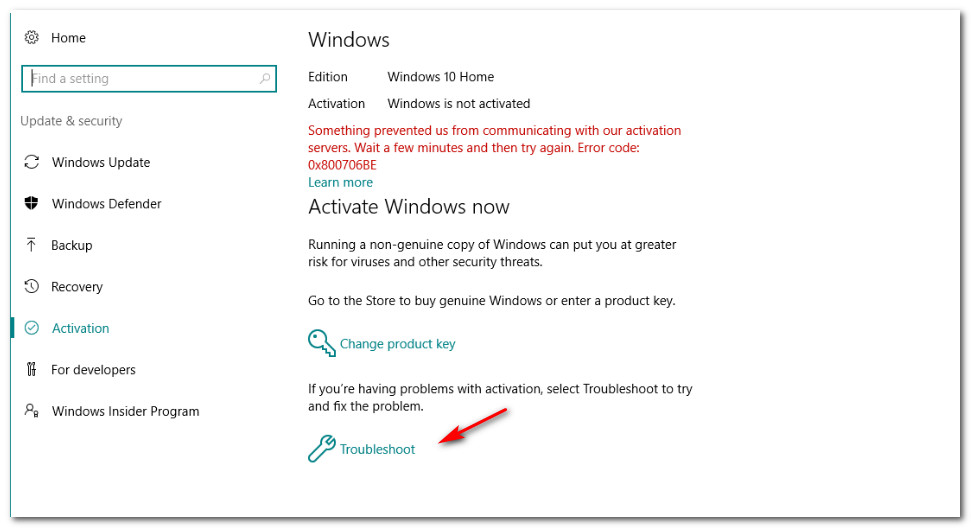
6. Run Activation Troubleshooter:
Windows includes a built-in Activation Troubleshooter. Run it to diagnose and resolve activation-related problems.
- Open to the Settings icon.
- Go to the “Update & Security option .”
- Choose the “Troubleshoot” from the left side menu bar.
- Select the “Windows Update” under “Get up and running” and click to “Run the troubleshooter.”
Conclusion:
Error code 0xc004c008 can be a hurdle in the smooth functioning of your Windows operating system. By carefully following the suggested solutions, you can troubleshoot and resolve activation issues, ensuring your Windows environment is properly licensed and functional.
At last, if you are still not able to resolve this issue. We recommend you to Chat with our experts. I am sure they will help you resolve this issue. If you like to see the procedure for paid support, to clarify, you may ask the Tech Available online.
Click here to visit our tech expert to clear your problem Chat with us for more Technical Support.
When you install the Windows 8.1 or Windows 10 product a particular variety of times, the error code 0xc004c008 usually triggers up, as the Windows 8.1 or Windows 10 license can only be installed on a solo device. This certain Windows 8.1 or Windows 10 error code pertains to the variety of times you can use your license number to install windows programs on computers.
Cause of Error 0xc004c008
- Corrupt download or incomplete installation of Windows 8 software.
- Corruption in Windows registry from a recent Windows 8-related software change (install or uninstall).
- Another program maliciously or mistakenly deleted Windows 8-related files.
Method to Fix Error 0xc004c008
Method 1: Use an Elevated Command Prompt
- Click Win key + R, type slui 4, and hit Enter.
- After that, Win key + S to open Settings.
- Select Update & security and click on Activation.
- If you PC is not activated, you will receive an option Activate by phone.
- After that, start the Product Activation Wizard.
- Open charms menu and click Settings.
- Then go to Change PC Settings and click Activate Windows.
- Click on one of the options, e.g., Activate, Activate by phone or Contact customer support for help.
- Follow the on-screen directions and activate Windows using your phone.
Method 2: Use System Restore
- Click the Start
- In the search box, type “System Restore” and hit ENTER.
- In the results, click System Restore.
- Enter any administrator passwords (if prompted).
- Follow the steps in the Wizard to choose a restore point.
- Restore your computer.
Method 3: Install Window Update
- Click the Start
- Type “update” into the search box and hit ENTER.
- The Windows Update dialog box will appear.
- If updates are available, click the Install Updates button.
Method 4: Run Windows Activation Troubleshooter
- Press Windows key + I to open Settings.
- Select Update & Security and open Activation tab.
- Click Troubleshoot button.
Method 5: Contact Customer Care
If you are not satisfied with the methods posted above, you can always directly call Microsoft office by calling the number “18009365700” and describe exactly what error message you get in your Windows 8.1 operating system.
Probably, the issue would get fixed over the phone and you can go on with your installation of Windows 8.1 or Windows 10.
Loading…
By Dr. Joseph H Volker
|
On August 8, 2018
Error Code 0xc004c008 — What is it?
This specific Windows 8.1 or Windows 10 error code has to do with the number of times you can use your license number to install windows programs on computers. All windows activation codes are licensed to be used one time for a device, to control piracy, but what happens when your PC crashes, or you have to change a hard drive component and are forced to re-install Windows Operating System. Luckily, there is an easy fix for this issue.
Solution
Error Causes
Basically, when you need to re-install the Windows operating system that you have previously bought and installed on another computer an error code will be displayed with a message telling you that the activation server determined that the specific key could not be used for activation. This occurs because the key has already been used on that computer, or a different one, to install operating systems. There are a few easy fixes for this issue, and most of them should be easily completed on your own.
Further Information and Manual Repair
There aren’t many explanatory ways to repair Error Code 0xc004c008. Below are two methods to go about addressing this issue.
Methods 1:
- The first step is to open the “Run” Window. You can do this in two ways. First, press the “Window” key and press the “R” key simultaneously. This will open the “Run” menu. Or you can start the “run” window by going to the Start menu and selecting Run.
- In the Run window type “SLUI 4” and click enter.
- A Phone Activation window will open up, after which you’ll need to select a few options.
- First chose the country in which you registered the product for the first time.
- Choose your country and a phone number will be displayed specific to your choice. You will now need to call the number provided.
- After you’ve dialed you will be prompted to write your “Installation ID”. Type your “Installation ID” on the phone.
- After that step, you will be asked how many copies of Windows have been installed using this license. Choose “1”, should anything else be chosen but “1”, this will not work.
- After the process is completed, you will be given a confirmation ID and should be able to proceed as normal with installation. You will have a workable product key again.
- Install whatever copy of the Windows Operating System you are attempting to with the new product key.
Method 2:
If the first method did not work, the only other option is to call Microsoft and walk through the process with a technician. To do this, dial “1-800-936-5700”. Explain the error that you received and the steps in the update process during which it was displayed. The technician will be able to walk through the steps from getting a new product key to finishing the installation.
If you’re not a tech-savvy individual but would like to solve this problem without the aid of a technician, download a powerful automated tool to fix error code 0xc004c008.
Do You Need Help with Your Device?
Our Team of Experts May Help
Troubleshoot.Tech Experts are There for You!
GET HELP
Troubleshoot.Tech experts work with all versions of Microsoft Windows including Windows 11, with Android, Mac, and more.
Share this article:
You might also like
When performing a Windows Backup to the NAS device (backup to a network share) that is running Samba, fails with an error message The backup failed, The version does not support this version of the file format (0xC03A0005). The problem occurs because of a conflict with the VHD file that is created by Windows Backup and is mounted during the process. There are three types of VHD files:
- Fixed,
- Expandable
- Differencing
If the VHD file is a sparse file that is not supported by the native VHD driver, the mounting will fail, and you will get this error. An example VHD file is one that keeps expanding depending on the backup size. The problem occurs only in the case of File Level backup (file/folders in a volume) but not on the block level backup as the vhd file is never mounted. However, in the case of File Level Backup, the vhd is mounted, created by Windows Backup, which does not support the mounting of sparse files.
The solution is to use Strict Allocate: option in the smb.conf file
Login to SMB using SSH. Open the configuration file using the VI editor located at /etc/samba/smb.conf. If the option is not there, you can manually add strict allocate = yes which will make sure there are no sparse file that is created.
Read More
The errors that are caused by the BIOS of your computer can get annoying as they can be hard to fix for they are really dangerous and won’t be resolved by simple fixes. This is because of the fact that these kinds of errors do not even allow you to load your operating system as it throws the error even before you can access your computer. One of these errors is the “Error 0199: System Security – Security password retry count exceeded”. Fixing this error can be quite tricky but you need not worry for you will be guided in doing so. Simply follow the given instructions below.
Option 1 – Try to update the BIOS
Updating the BIOS can help you fix the “Error 0199, Security password retry count exceeded” error but as you know, BIOS is a sensitive part of a computer. Even though it is a software component, the functioning of the hardware depends on it largely. Thus, you must be careful when modifying something in the BIOS. So if you don’t know much about it, it’s best if you skip on this option and try the other ones instead. However, if you are well-versed in navigating the BIOS, then follow the steps below.
- Tap the Win + R keys to open the Run dialog box.
- Next, type “msinfo32” in the field and press Enter to open System Information.
- From there, you should find a search field on the bottom where you have to search for the BIOS version and then press Enter.
- After that, you should see the developer and version of the BIOS installed on your PC.
- Go to your manufacturer’s website and then download the latest version of BIOS on your computer.
- If you are using a laptop, make sure that you keep it plugged in until you have updated the BIOS.
- Now double click on the downloaded file and install the new BIOS version on your computer.
- Now restart your computer to apply the changes made.
Option 2 – Try resetting the BIOS
If updating the BIOS didn’t help in fixing Error 0199, you can try to reset the BIOS instead.
- Start your computer and tap the F10 key during the booting process to enter the BIOS. If it does not work, you can try tapping the F1 or F2 key as well as the Del key.
- Once you’re already in the BIOS, tap the F9 key to get the prompt to RestoreLoad default configuration now for the BIOS.
- Next, click on Yes and then follow the next on-screen instructions that appear to set the BIOS back to its default settings.
- Once you’re done restoring the default settings of the BIOS, restart your computer and then check if it now boots properly.
Read More
Error Code 47 – What is it?
It is a device driver error that users encounter when they use Windows 2000 operating system and its later versions.
The error occurs when the connected peripheral device, upon removal using the ‘Safe Removal Hardware’ program, hangs up a problem within the process. The error prompt you then see is referred to within the operating system as error code 47.
It usually pops up on your computer screen with the following message:
Windows cannot use this hardware device because it has been prepared for «safe removal», but it has not been removed from the computer. (Code 47)
Solution
Error Causes
There are many factors responsible for the Error Code, the primary ones are listed below:
- An incomplete program installation
- An incomplete program uninstallation
- System recovery from viruses
- Corrupted Windows system registry entries
Further Information and Manual Repair
Error Code 47, like other device driver error codes, is relatively easy to solve. You can fix the error code in the following ways:
Method 1 – Reconnect the device to your computer
Unplugging and plugging the USB cable of the device into the computer is the easiest way to resolve the error.
Doing this will help refresh the system and increase the likelihood of the device driver files loading and function properly.
Method 2 – Restart your PC
Another simple method you can use to solve your PC error code is to simply restart your Windows system.
It may be that the error prompted upon connecting the device you have connected is merely a temporary problem, and upon restart, will resume functioning smoothly.
Method 3 – Manually uninstall then reinstall the device driver
If both of the above-listed methods fail to resolve the problem, you may have to resort to manually uninstalling and then reinstalling the device driver causing the problem.
This would be necessary since the remaining incomplete files due to a partial removal or installation of programs is what contributes to the error code. By uninstall and reinstalling the device driver program, it would lead to the completion of the files.
You can do this by firstly logging in as Administrator and open Device Manager. Select the device that is causing the problem and double click it and make sure that the peripheral is connected properly to the PC.
Upon opening, click on the ‘Driver’ tab and then select ‘Update Driver’. Make sure to refer to the system documentation that you received with your PC or computer to check for the motherboard details and driver specifics.
Method 4 – Use software to automatically download the driver
Manually uninstalling and reinstalling the driver will usually do the trick; however, it may be time-consuming especially when you would have to resort to your hardware user manual.
Therefore, using a program such as DriverFIX can save you a lot of time and frustration in having your device work properly on your computer.
DriverFIX, with its user-friendly approach to help you fix your PC issues, comes with an integrated database that detects which drivers you need to reconfigure within just a few seconds and downloads it automatically.
It further ensures that your drivers are installed in their entirety leaving no room for any incomplete files to remain that create Error Code 47.
It also has the added advantage of being able to backup and restores your files should there be the slightest possibility of system file damage.
Thus, registry damage can be averted by letting the software roll back the system files to an earlier healthy checkpoint. DriverFIX is the answer to fixing your PC error codes accurately and quickly.
Click here to download DriverFIX to fix Error Code 47 quickly and effectively!
Read More
Microsoft has been bringing new lock-screen features with every iterative feature release of Windows 10 in order to improve user experience. However, Windows 10 users have different opinions regarding it. Some users are pleased with it while some users simply do not like it. So if you are one of the users who seem to not approve of this feature, read on as this post will be about enabling or disabling the Console Mode sign-in feature in Windows 10.
Before you proceed, take note that you will not be able to use your mouse pointer in this Consol Mode login screen and you can only use your keyboard to navigate around various options. You might also want to create a System Restore point just in case.
To enable or disable the Console Mode sign-in in your Windows 10 computer, refer to the given steps below.
Step 1: Tap the Win + R keys to open the Run dialog box.
Step 2: Then type in “Regedit” in the field and tap Enter to open the Registry Editor.
Step 3: Next, navigate to the following registry path:
ComputerHKEY_LOCAL_MACHINESOFTWAREMicrosoftWindowsCurrentVersionAuthenticationLogonUITestHooks
Step 4: From there, look for a DWORD named “ConsoleMode”. If you don’t see this DWORD, you can just create a new DWORD and name it as “ConsoleMode” and make sure that its base is set to Hexadecimal.
Step 5: After that, double click on ConsoleMode and change its value to “0” to disable it and “1” to enable it.
Step 6: Now restart your computer to apply the changes made.
Like pointed out, you can only use your keyboard when you’re in the Console Mode login window or screen. You can just use the ESC button to go back to the menu while you can utilize the arrow keys so you can go through the options that are mostly vertically arranged and the Enter key to select an option. In the Console Mode, sign-in using the Passwords and PINs worked efficiently.
Read More
AtoZManuals is a Browser Extension developed by MindSpark Inc. This extension offers users an easy way to search Customer Manuals for Products. This extension may seem handy at first, however, this extension hijacks your browser home page, and changes your default search engine to MyWay.
While browsing the internet with this extension you will see additional ads, sponsored links, and pop-up ads in your browser. Additionally, this extension monitors your browser activity, including search words, visited links, shopping information, and sometimes even personal information, which is later used to display better-targeted ads.
Multiple anti-virus scanners have marked this extension as a Browser Hijacker, and due to its rogue behavior, it is not recommended to keep it on your computer.
About Browser Hijackers
Browser hijacking means a malicious program code has control over and altered the settings of your browser, without your permission. They’re made to interfere with web browser functions for various reasons. Often, it’ll drive users to predetermined websites that are trying to boost their ad earnings. Although it may seem naive, these tools were created by vicious people who always look to take advantage of you, so that hackers could earn money from your naivety and distraction. When the program attacks your laptop or computer, it begins to mess things up a whole lot that slows your system down to a crawl. In the worst-case scenario, you may be forced to tackle serious malware threats as well.
How one can recognize a browser hijack
There are various signs that indicate the internet browser has been hijacked: your homepage is reset to some unfamiliar website; you observe new unwanted favorites or bookmarks added, typically directed to ad-filled or porn sites; default search engine is changed; you see many toolbars on the browser; your internet browser displays endless pop-up windows; your browser has become unstable or starts running sluggishly; you’re prohibited access to specific web pages, for example, the site of an antivirus software developer like SafeBytes.
How it infects your PC
A browser hijacker could be installed on your PC when you check out an infected website, click on an email attachment, or download something from a file-sharing website. They are generally included with toolbars, add-ons, BHO, plug-ins, or browser extensions. A browser hijacker could also be installed as a part of freeware, shareware, demoware, and fake programs. Examples of popular browser hijackers are Fireball, CoolWebSearch. GoSave, Ask Toolbar, RocketTab, and Babylon Toolbar.
Getting rid of browser hijackers
Some kinds of browser hijackers can be removed from the computer by deleting malicious software or any other recently added freeware. However, many hijackers are much more difficult to discover or remove since they could get themselves connected with some important computer files that enable it to operate as a necessary operating-system process. Furthermore, manual removals demand in-depth system knowledge and thus could be a very difficult task for novice computer users.
Learn How To Install Safebytes Anti-Malware On An Infected Computer system
Malware may cause several kinds of damage to computing devices, networks, and data. Some malware is meant to restrict or block things that you wish to do on your computer system. It may well not allow you to download anything from the web or it will stop you from accessing a few or all internet sites, particularly the anti-virus sites. If you’re reading this right now, you might have perhaps recognized that virus infection is the cause of your blocked internet connectivity. So what to do when you want to download and install anti-malware software like Safebytes? Although this sort of issue will be difficult to get around, there are some actions you can take.
Install the anti-malware in Safe Mode
If any virus is set to load automatically when Microsoft Windows starts, getting into safe mode could block this attempt. Since just the minimum programs and services launch in “Safe Mode”, there are seldom any reasons for conflicts to happen. To start your Windows XP, Vista, or 7 computers in Safe Mode with Networking, follow the instructions below.
1) At power-on/startup, hit the F8 key in 1-second intervals. This would conjure up the Advanced Boot Options menu.
2) Make use of the arrow keys to select Safe Mode with Networking and press ENTER.
3) When you are into this mode, you should have an internet connection once again. Now, make use of your browser to download and install Safebytes Anti-malware.
4) Following installation, run a full scan and let the software program remove the threats it finds.
Obtain the security program in a different browser
Some malware might target vulnerabilities of a particular web browser that obstruct the downloading process. The best way to overcome this issue is to go with an internet browser that is well known for its security measures. Firefox contains built-in Malware and Phishing Protection to keep you secure online.
Install and run antivirus from your USB drive
Here’s another solution which is utilizing a portable USB anti-virus software package that can scan your system for viruses without the need for installation. To run anti-virus from a USB pen drive, follow these simple measures:
1) On a clean computer, download and install Safebytes Anti-Malware.
2) Mount the pen-drive onto the same computer.
3) Double-click the Setup icon of the antivirus software package to run the Installation Wizard.
4) Select the USB flash drive as the location when the wizard asks you exactly where you wish to install the application. Follow activation instructions.
5) Now, transfer the thumb drive to the infected PC.
6) Run the Safebytes Anti-malware directly from the USB drive by double-clicking the icon.
7) Click the “Scan” button to run a full system scan and remove viruses automatically.
How SafeBytes Anti-Malware Keep your Computer Malware Free
These days, an anti-malware tool can protect your computer or laptop from different kinds of internet threats. But exactly how to choose the right one amongst numerous malware protection software that is available in the market? As you might be aware, there are lots of anti-malware companies and tools for you to consider. Some of them are great, some are ok types, while some will affect your computer themselves! You have to select one that is reliable, practical, and has a good reputation for its malware source protection. When it comes to commercial application options, the majority of people go with well-known brands, such as SafeBytes, and are very happy with it.
SafeBytes is a powerful, real-time antivirus application that is made to assist the typical computer user in safeguarding their computer from malicious internet threats. With its outstanding protection system, this utility will instantly detect and remove most of the security threats, including viruses, adware, browser hijackers, ransomware, PUPs, and trojans.
SafeBytes carries a variety of great features that can help you protect your laptop or computer from malware attack and damage. Below are some of the great ones:
Robust Anti-malware Protection: Using its advanced and sophisticated algorithm, this malware elimination tool can find and get rid of the malware threats hiding in the computer system effectively.
Real-time Threat Response: SafeBytes delivers complete and real-time security for your computer system. It’ll inspect your computer for suspicious activity regularly and its unparalleled firewall guards your computer against unauthorized entry by the outside world.
Quick Multithreaded Scanning: This software has one of the fastest and most efficient virus scanning engines in the industry. The scans are very accurate and take a little time to complete.
Web Protection: Through its unique safety ranking, SafeBytes informs you whether a website is safe or not to access. This will ensure that you’re always certain of your online safety when browsing the world wide web.
Light-weight: SafeBytes is a lightweight and simple to use antivirus and antimalware solution. Since it utilizes minimal computer resources, this program leaves the computer’s power exactly where it belongs to: with you actually.
24/7 Online Technical Support: Support service is readily available for 24 x 7 x 365 days through email and chats to answer your queries.
Technical Details and Manual Removal (Advanced Users)
If you’d like to manually get rid of AtoZManuals without the use of an automated tool, it may be possible to do so by deleting the program from the Microsoft Windows Add/Remove Programs menu, or in cases of web browser extensions, going to the browsers AddOn/Extension manager and uninstalling it. You will likely also want to reset your web browser.
Lastly, examine your hard drive for all of the following and clean your Windows registry manually to remove leftover application entries after uninstalls. Please note that only experienced computer users should try to manually edit the system files simply because deleting any single critical registry entry leads to a serious issue or even a system crash. In addition, certain malware is capable of replicating itself or preventing its deletion. Completing this task in Safe Mode is suggested.
Folder:
C:Users%UserName%AppDataLocalTemp
Registry:
HKLMSOFTWAREClassesAppIDAtoZManuals.exe
HKEY_LOCAL_MACHINESOFTWAREMicrosoftInternet ExplorerExtensions
HKEY_LOCAL_MACHINESoftwareMicrosoftWindowsCurrentVersionExplorerBrowser Helper Objects
HKEY_LOCAL_MACHINESoftwareMicrosoftInternet ExplorerToolbar
HKEY_LOCAL_MACHINESOFTWAREGoogleChromeExtensions
HKEY_LOCAL_MACHINESOFTWAREMozillaFirefoxExtensions
HKEY_CURRENT_USERSoftwareOpera Software
HKEY_LOCAL_MACHINESOFTWAREMicrosoftWindows NTCurrentVersionvirus name
HKEY_CURRENT_USERSoftwareMicrosoftWindows NTCurrentVersionWinlogon Shell = %AppData%IDP.ARES.Generic.exe
HKEY_CURRENT_USERSoftwareMicrosoftWindowsCurrentVersionRun Random
HKEY_LOCAL_MACHINESoftwareMicrosoftWindows NTCurrentVersionRandom
Read More
If you suddenly encounter the DRIVER_CORRUPTED_EXPOOL Blue Screen of Death error when using your computer, then there might be some issues with the device drivers on your Windows 10 computer. This kind of BSOD error can occur at any point while you are using your PC. Its main cause is due to some error in the System Pool where a driver becomes incompatible with the operating system or when the configuration files get corrupted for some reason.
If you are one of the users who are currently inconvenienced by the DRIVER_CORRUPTED_EXPOOL error, worry not, as this post will give you some potential fixes that might help resolve the problem.
Option 1 – Perform a System Restore
Performing System Restore might help you in fixing the DRIVER_CORRUPTED_EXPOOL Blue Screen error. You can do this option either by booting into Safe Mode or in System Restore. If you are already in the Advanced Startup Options, just directly select System Restore and proceed with the next steps. And if you have just booted your PC into Safe Mode, refer to the steps below.
- Tap the Win + R keys to open the Run dialog box.
- After that, type in “sysdm.cpl” in the field and tap Enter.
- Next, go to the System Protection tab then click the System Restore button. This will open a new window where you have to select your preferred System Restore point.
- After that, follow the on-screen instructions to finish the process and then restart your computer and check if the problem is fixed or not.
Option 2 – Run the Blue Screen Troubleshooter
The Blue Screen troubleshooter is a built-in tool in Windows 10 that helps users in fixing BSOD errors like DRIVER_CORRUPTED_EXPOOL error. It can be found on the Settings Troubleshooters page. To use it, refer to these steps:
- Tap the Win + I keys to open the Settings panel.
- Then go to Update & Security > Troubleshoot.
- From there, look for the option called “Blue Screen” on your right-hand side and then click the “Run the troubleshooter” button to run the Blue Screen Troubleshooter and then follow the next on-screen options. Note that you might have to boot your PC into Safe Mode.
Option 3 – Update the Device drivers
The device driver installed in your computer might be incompatible with your operating system which is the reason why the DRIVER_CORRUPTED_EXPOOL Blue Screen error occurs. To fix that, you have to update your device drivers.
- Tap the Win + R keys on your keyboard to open the Run dialog box.
- After that, type “msc” in the field and hit Enter or click OK to open the Device Manager.
- After opening the Device Manager, update all the outdated Device drivers on your computer.
- Next, right-click on all the driver entries that are appropriately labeled, and then click the Update driver option.
- Now restart your PC and check if the BSOD error is fixed or not.
Option 4 – Uninstall any faulty device drivers
- Tap the Win + R keys on your keyboard to open the Run dialog box.
- After that, type “msc” in the field and hit Enter or click OK to open the Device Manager.
- From there, look for any device driver which has a yellow exclamation mark which indicates that something is wrong with them.
- And then right-click on each one of them and click on Uninstall.
- Once you’re done uninstalling the faulty drivers, restart your computer and allow your computer to reinstall the drivers you just uninstalled.
Option 5 – Try running the System File Checker
System File Checker or SFC is a built-in command utility that helps in restoring corrupted files as well as missing files. It replaces bad and corrupted system files with good system files that might be causing the Machine Check Exception BSOD error. To run the SFC command, follow the steps given below.
- Tap Win + R to launch Run.
- Type in cmd in the field and tap Enter.
- After opening Command Prompt, type in sfc /scannow
The command will start a system scan which will take a few whiles before it finishes. Once it’s done, you could get the following results:
- Windows Resource Protection did not find any integrity violations.
- Windows Resource Protection found corrupt files and successfully repaired them.
- Windows Resource Protection found corrupt files but was unable to fix some of them.
Option 6 – Try updating the BIOS
As you know, the BIOS is a sensitive part of a computer. Even though it is a software component, the functioning of the hardware depends on it largely. Thus, you must be careful when modifying something in the BIOS. So if you don’t know much about it, it’s best if you skip on this option and try the other ones instead. However, if you are well-versed in navigating the BIOS, then follow the steps below.
- Tap the Win + R keys to open the Run dialog box.
- Next, type “msinfo32” in the field and press Enter to open System Information.
- From there, you should find a search field on the bottom where you have to search for the BIOS version and then press Enter.
- After that, you should see the developer and version of the BIOS installed on your PC.
- Go to your manufacturer’s website and then download the latest version of BIOS on your computer.
- If you are using a laptop, make sure that you keep it plugged in until you have updated the BIOS.
- Now double click on the downloaded file and install the new BIOS version in your computer.
- Now restart your computer to apply the changes made.
Option 7 – Try resetting Windows 10
To fix this BSOD error, you can try resetting Windows 10. Doing so won’t get rid of any file in your system – instead of erasing all your media files and documents, this reset option resets all the system settings and files.
Read More
Gaming has come a long way since its infant days and grown from spending some free time between coding to full e-sport events watched worldwide. As have some basic peripherals been upgraded like gaming keyboards and gaming mouse so have headsets been receiving similar treatments.
In today’s article, we are presenting you with some of the best headsets specifically designed and made for gaming purposes. If you are looking for headphones for music listening look elsewhere, these bad boys are all made for replicating precise audio positioning and similar technology specifically tailored for games.
SteelSeries Arctis 7P/7X
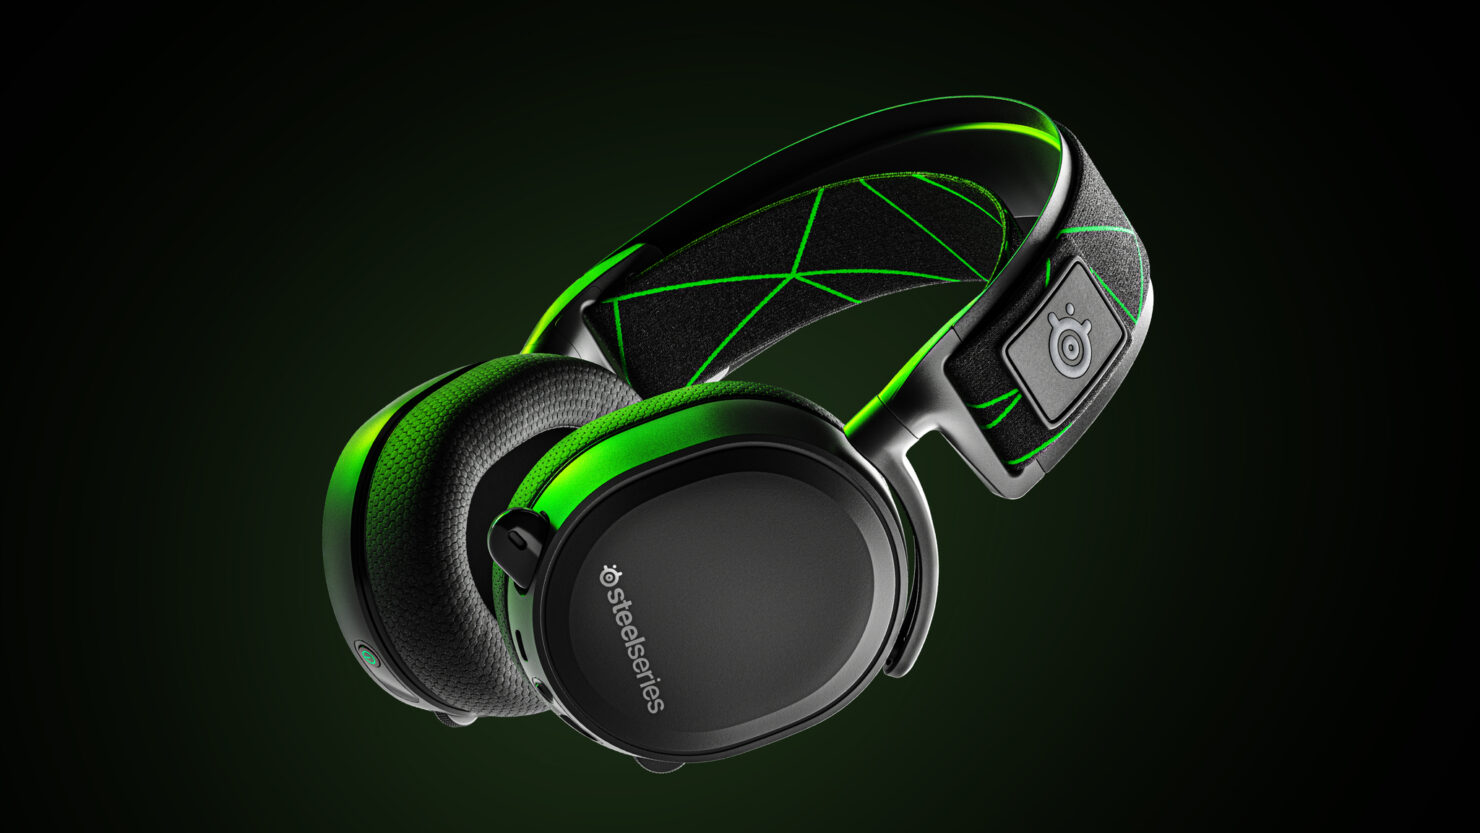
The best gaming headset overall for PC, PS5, PS4, Xbox Series X/S, Xbox One, Switch, Android
The SteelSeries Arctis 7P/7X is the best gaming headset overall, offering great sound, consistent wireless performance, and a comfy, attractive design at a reasonable price. The headset’s 2.4-GHz wireless connectivity keeps you glued to your game without any lag or interference. Even better: Thanks to its USB-C dongle and USB-A adapter, you can enjoy wireless performance with any system, from a PS5 to a Nintendo Switch in handheld mode, to an Android phone.
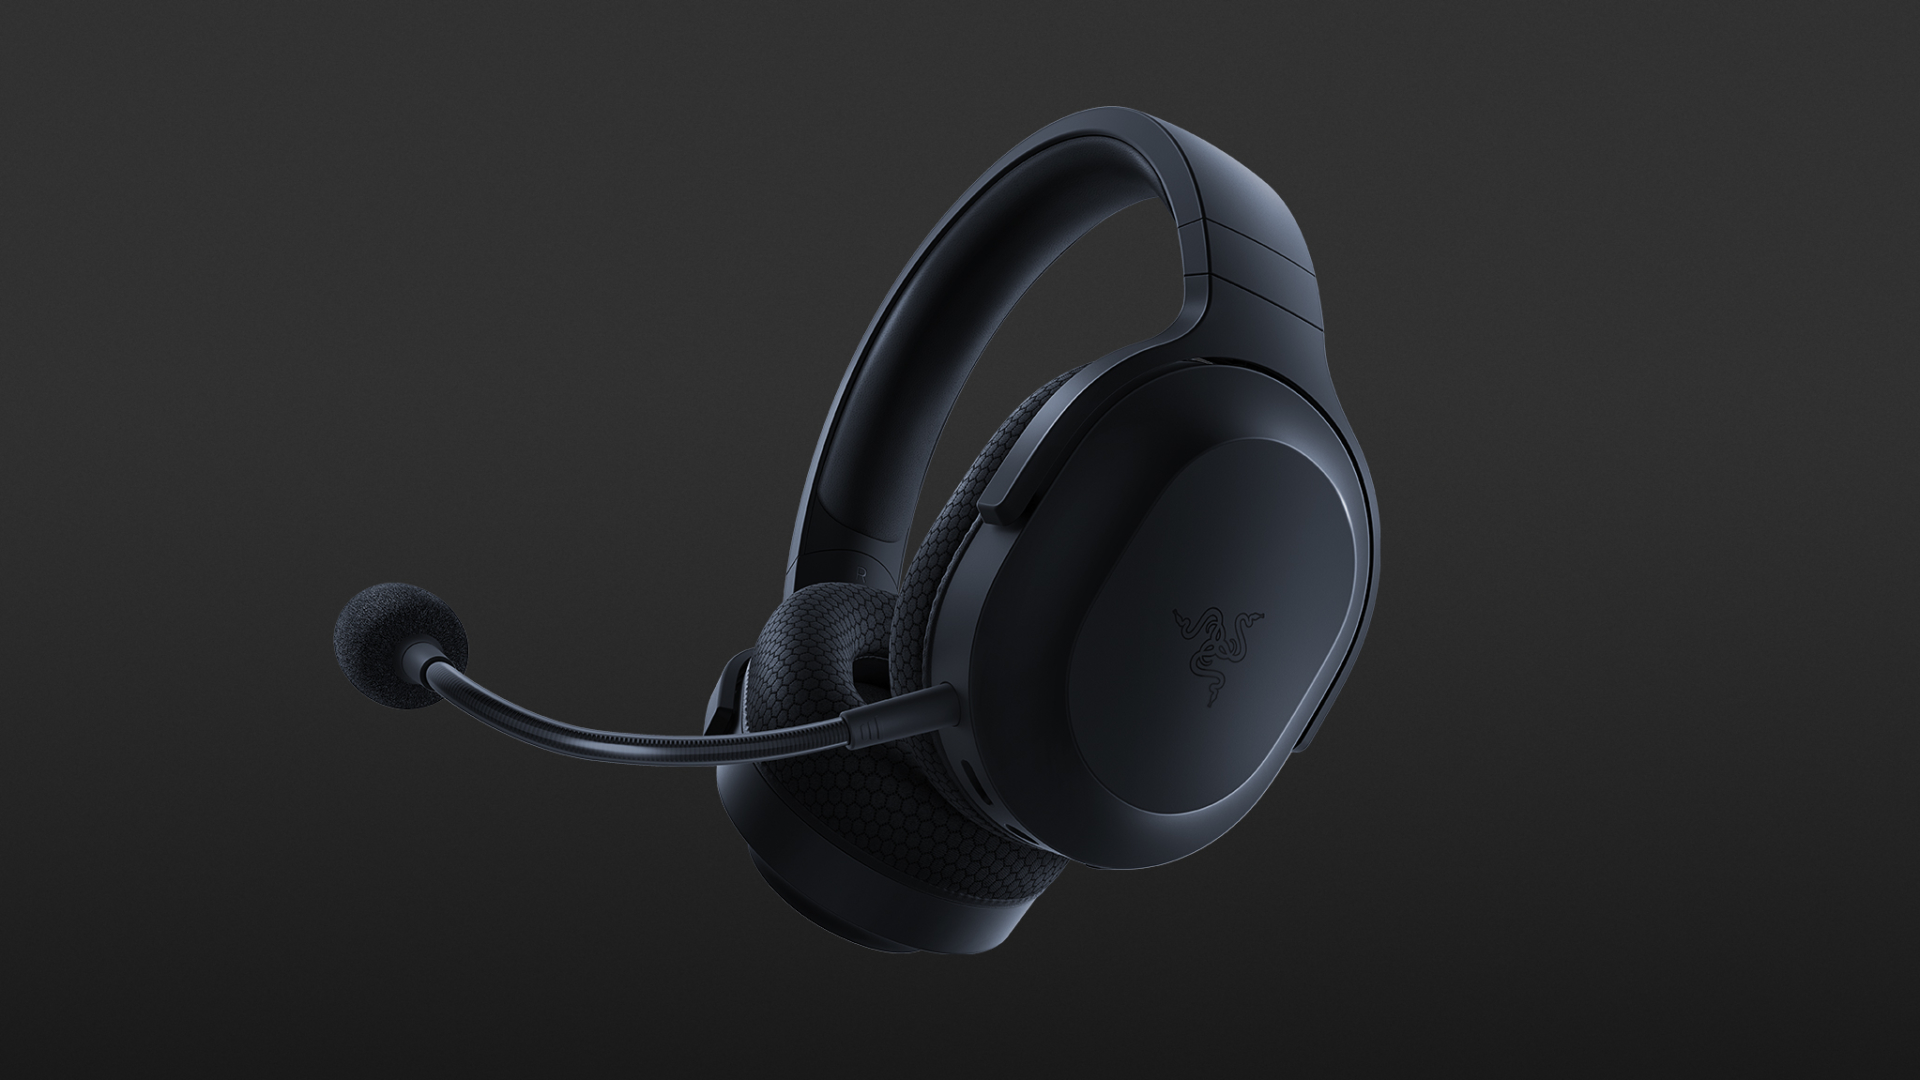
Razer Blackshark V2
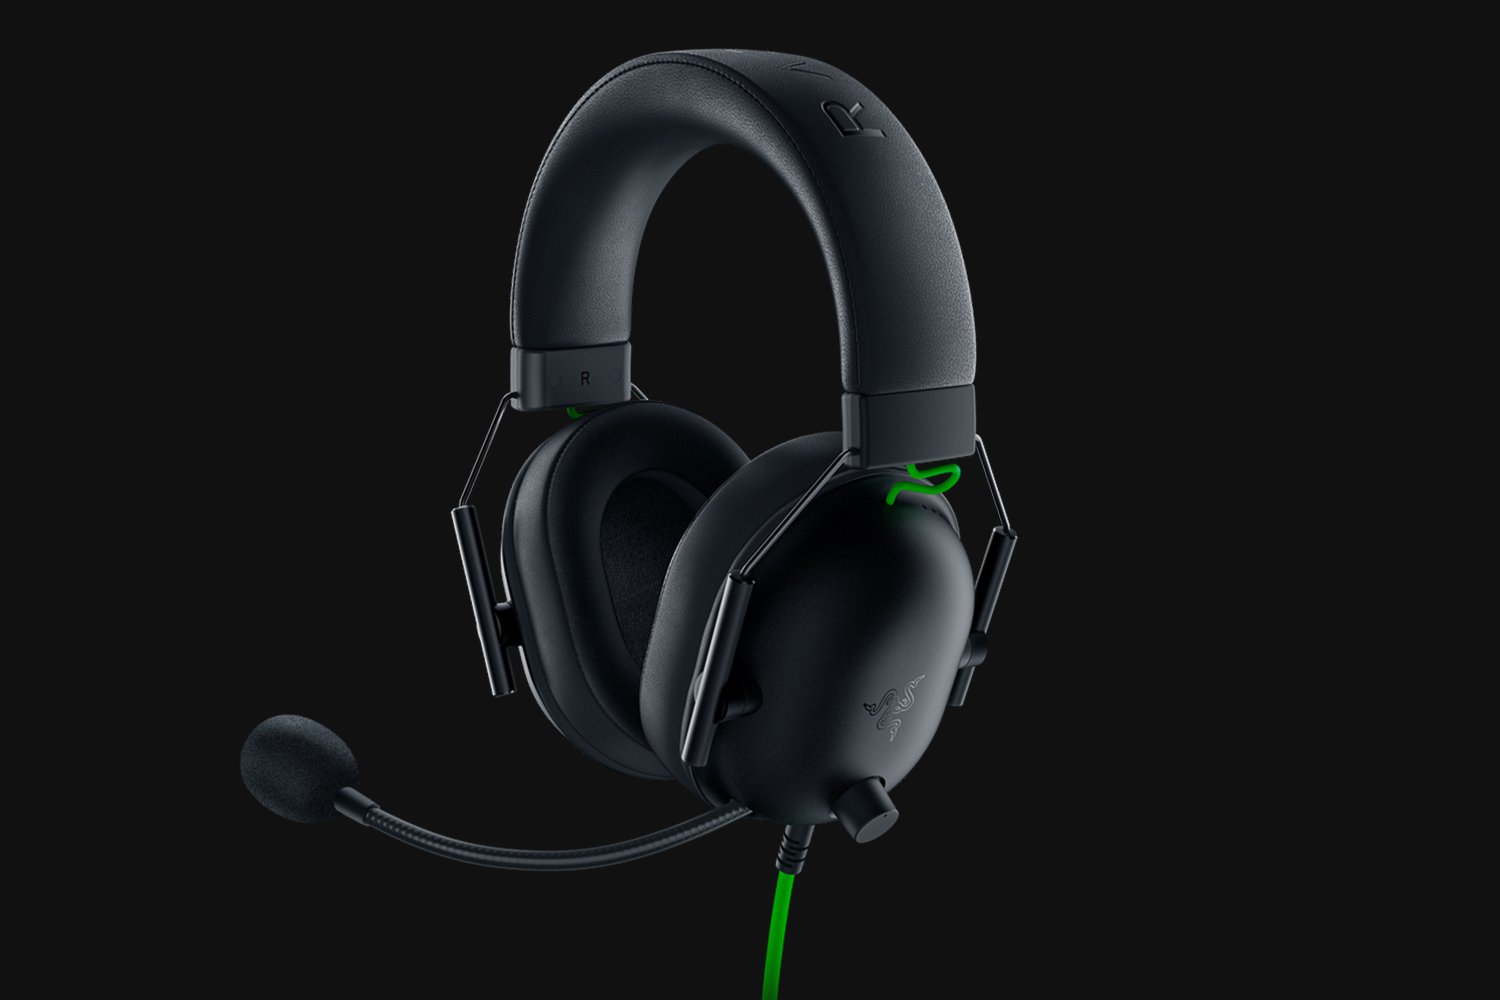
Razer’s best headset yet for PC, PS5, PS4, Switch, Xbox One
The Razer Blackshark V2 is probably the best headset that Razer has ever made. This mid-range wired headset provides fantastic sound for both games and music, particularly thanks to its innovative THX profiles. The famous film audio company has lent its expertise to make the Blackshark V2’s surround sound realistic and nuanced, especially for a handful of games like Apex Legends and Sekiro: Shadows Die Twice, which have their own optimized profiles.
Logitech G Pro X
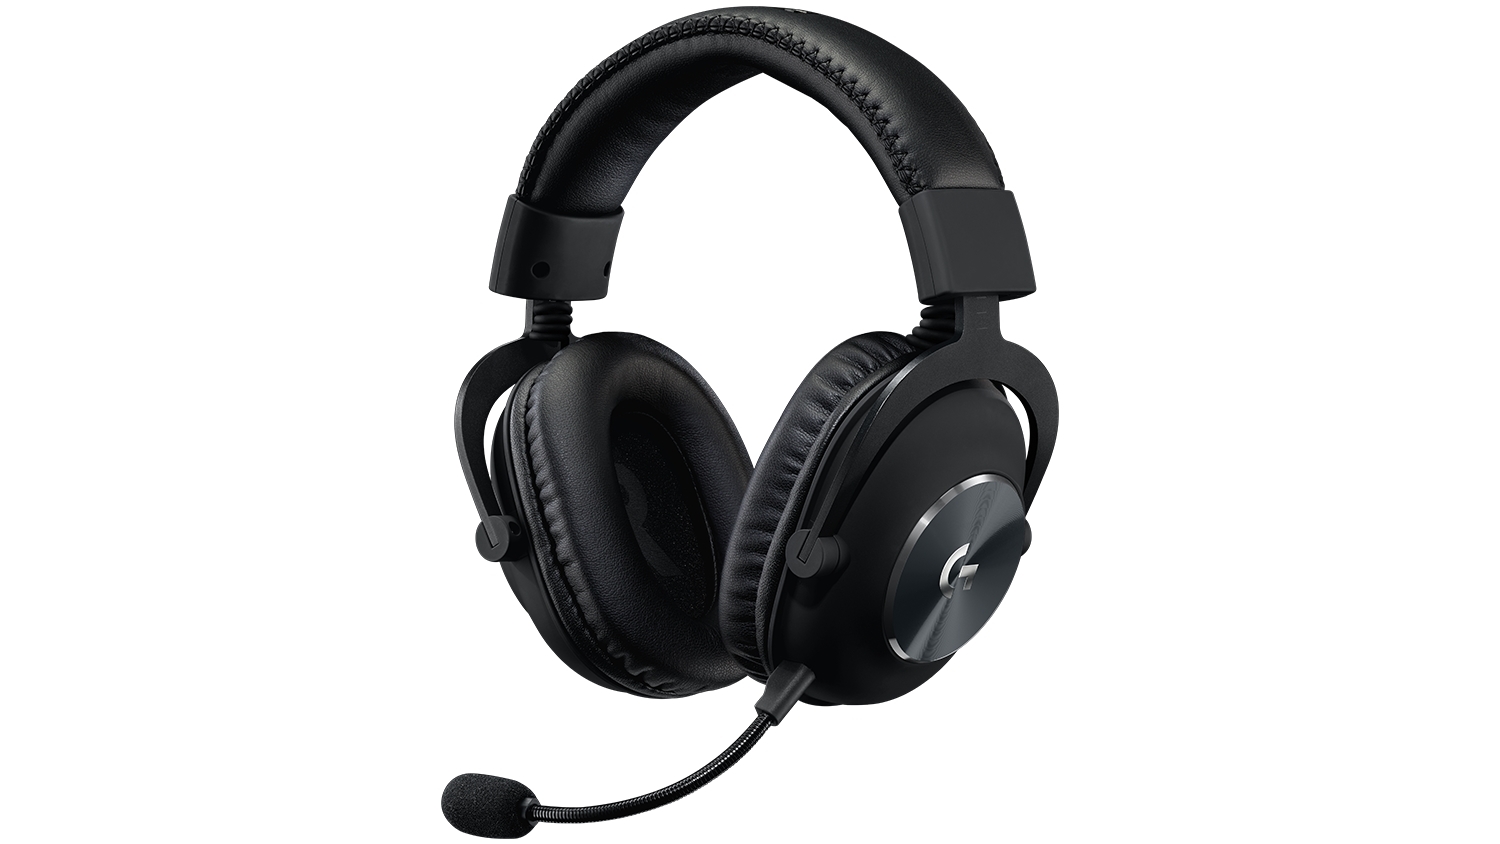
Built for tournament play for PC, PS5, PS4, Xbox One, Switch
The Logitech G Pro X delivers tournament-grade performance for a reasonable price. The headset’s distinguished black design sets itself apart from the competition, in no small part thanks to its flexible headband and supremely comfortable foam and leatherette earcup options. The Go Pro X delivers rich, direction-accurate sound out of the box whether you’re playing on PC or console. It’s also the first gaming headset to sport a built-in Blue microphone, allowing for extra-crisp voice chat whether you’re practicing with your Apex Legends squad or streaming to your online fans
SteelSeries Arctis Pro

Audiophile sound for gamers made for PS4, PC (with GameDAC), Xbox One, Switch, mobile (analog)
SteelSeries’ Arctis Pro + GameDAC brings audiophile-grade features to the already excellent Arctis design. This headset includes a DAC (digital-to-analog converter), which allows it to deliver high-resolution 96-kHz/24-bit audio. The GameDAC also allows for a wealth of customization options, whether you want to fine-tune sound via an equalizer or customize the headset’s subtle RGB lighting.
HyperX Cloud Stinger
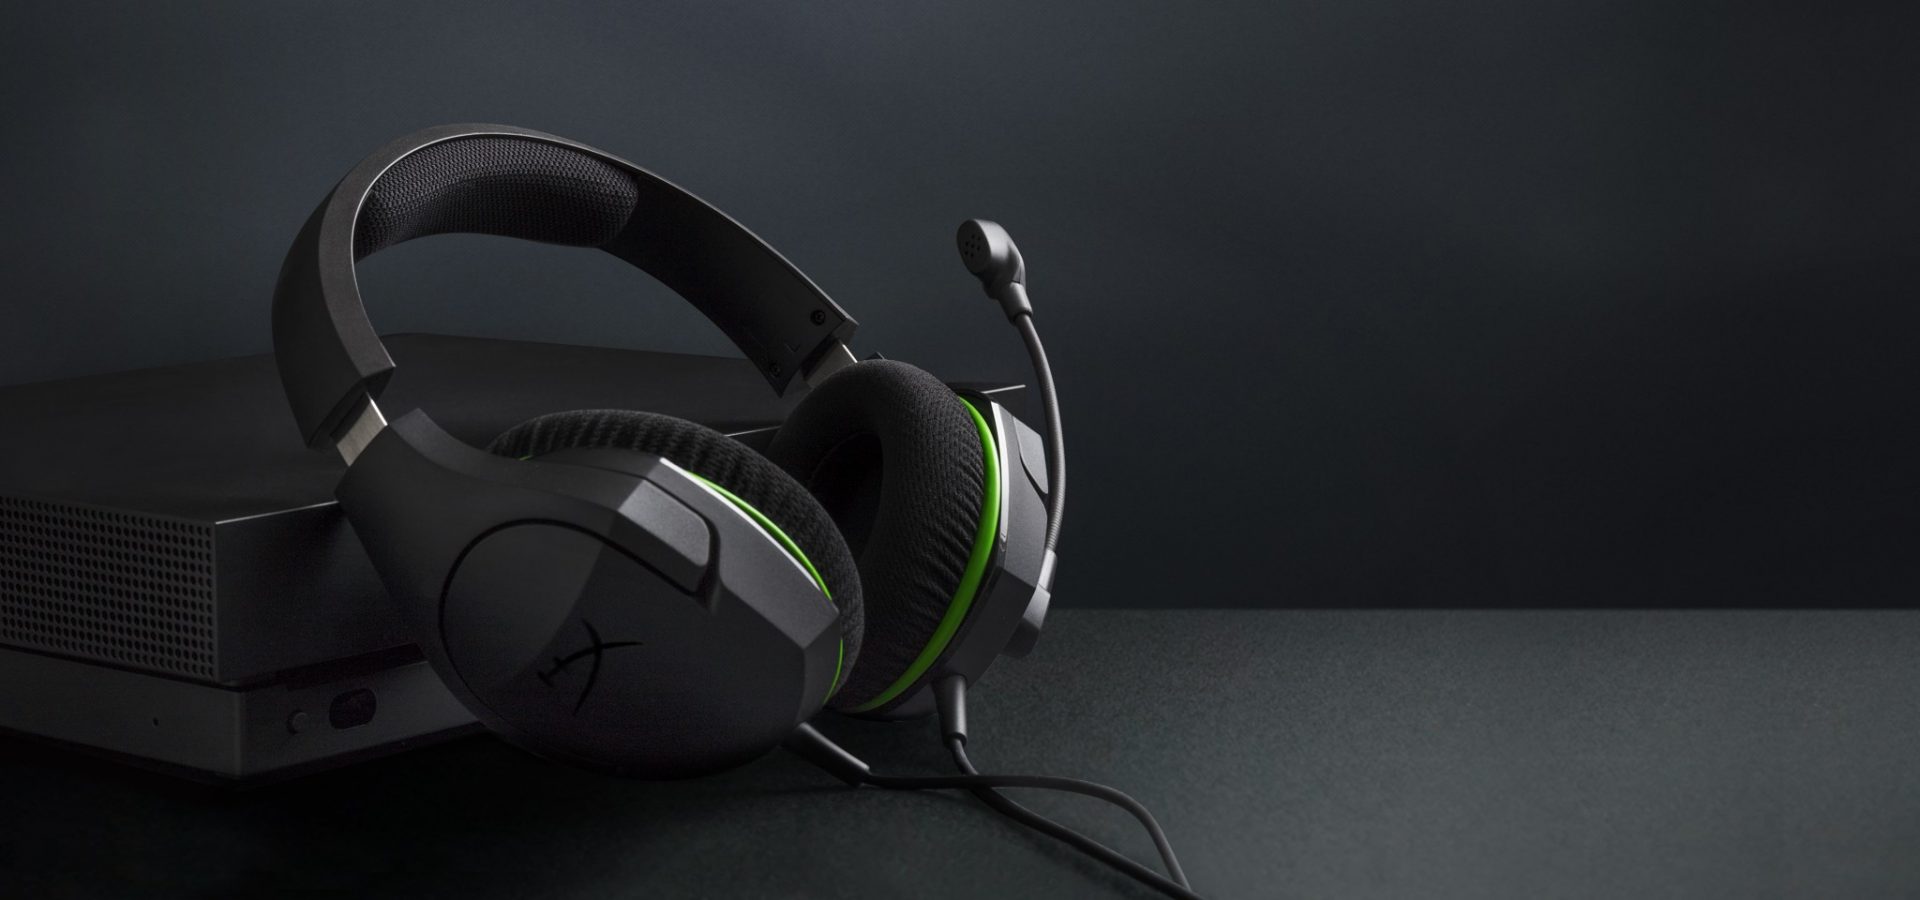
Big sound on a budget for PS, PS5, PS4, Xbox Series X/S, Xbox One, Switch, mobile
The Stinger’s sturdy, feather-light frame and soft, faux-leather earcups make for one of the best gaming headsets on a budget, and its handy on-ear controls and solid microphone certainly don’t hurt either. Finding a comfortable fit is arguably the most important thing you can look for in a gaming headset, and the Cloud Stinger doesn’t disappoint on that front. The Stinger also offers very solid audio quality for the price, though things can get a bit blown out at max volume
Corsair Virtuoso RGB Wireless XT

The best gaming headset with Bluetooth for PC, PS4, PS5, Xbox One, Xbox Series X/S, Switch (handheld), mobile
The Corsair Virtuoso RGB Wireless XT is one of the best gaming headsets that Corsair has ever made. Not only is this headset extremely comfortable, but it also provides excellent sound quality. It works wirelessly with PCs and PlayStation consoles via USB, as well as mobile devices, streaming players, and smart TVs via Bluetooth. You can connect it to a Switch, Xbox controller, or older system via a 3.5 mm audio cable. There’s very little that the Virtuoso RGB Wireless XT can’t do.
Xbox Wireless Headset
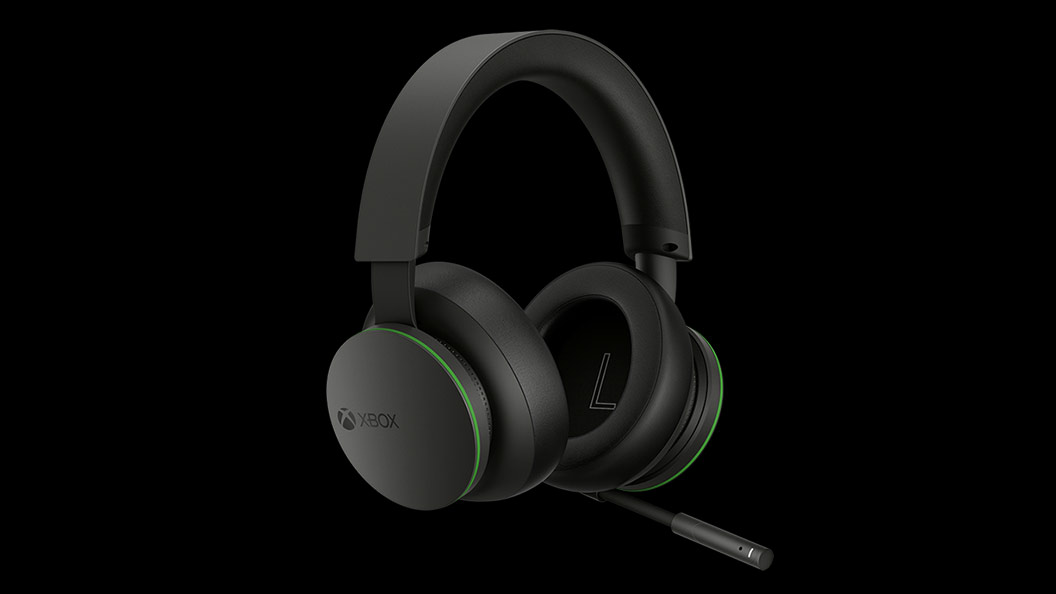
The best Xbox affordable headset for Xbox Series X/S, Xbox One, PC, mobile
The Xbox Wireless Headset is exactly what the name suggests: a wireless headset that works particularly well with Xbox consoles. Whether you have an Xbox Series X, an Xbox Series S, an Xbox One, or a Windows 10 PC with an Xbox controller adapter, this headset can provide fantastic sound with a simple pairing procedure. Not only that: the Xbox Wireless Headset supports Bluetooth as well, meaning that you can listen to music or take calls on your phone while you game.
Razer Kaira Pro

The best Xbox Series X wireless headset for Xbox Series X/S, Xbox One, PC, mobile
Debuting alongside the Xbox Series X, the Razer Kaira Pro is arguably one of the best gaming headsets for Microsoft’s next-gen console. This sleek, lightweight wireless headset pairs with Xbox consoles right out of the box. But you can also use it with PCs and mobile devices, thanks to built-in Bluetooth capabilities. The Kaira Pro is not terribly expensive, and the sound quality is excellent, particularly for video games.
SteelSeries Arctis 1 Wireless
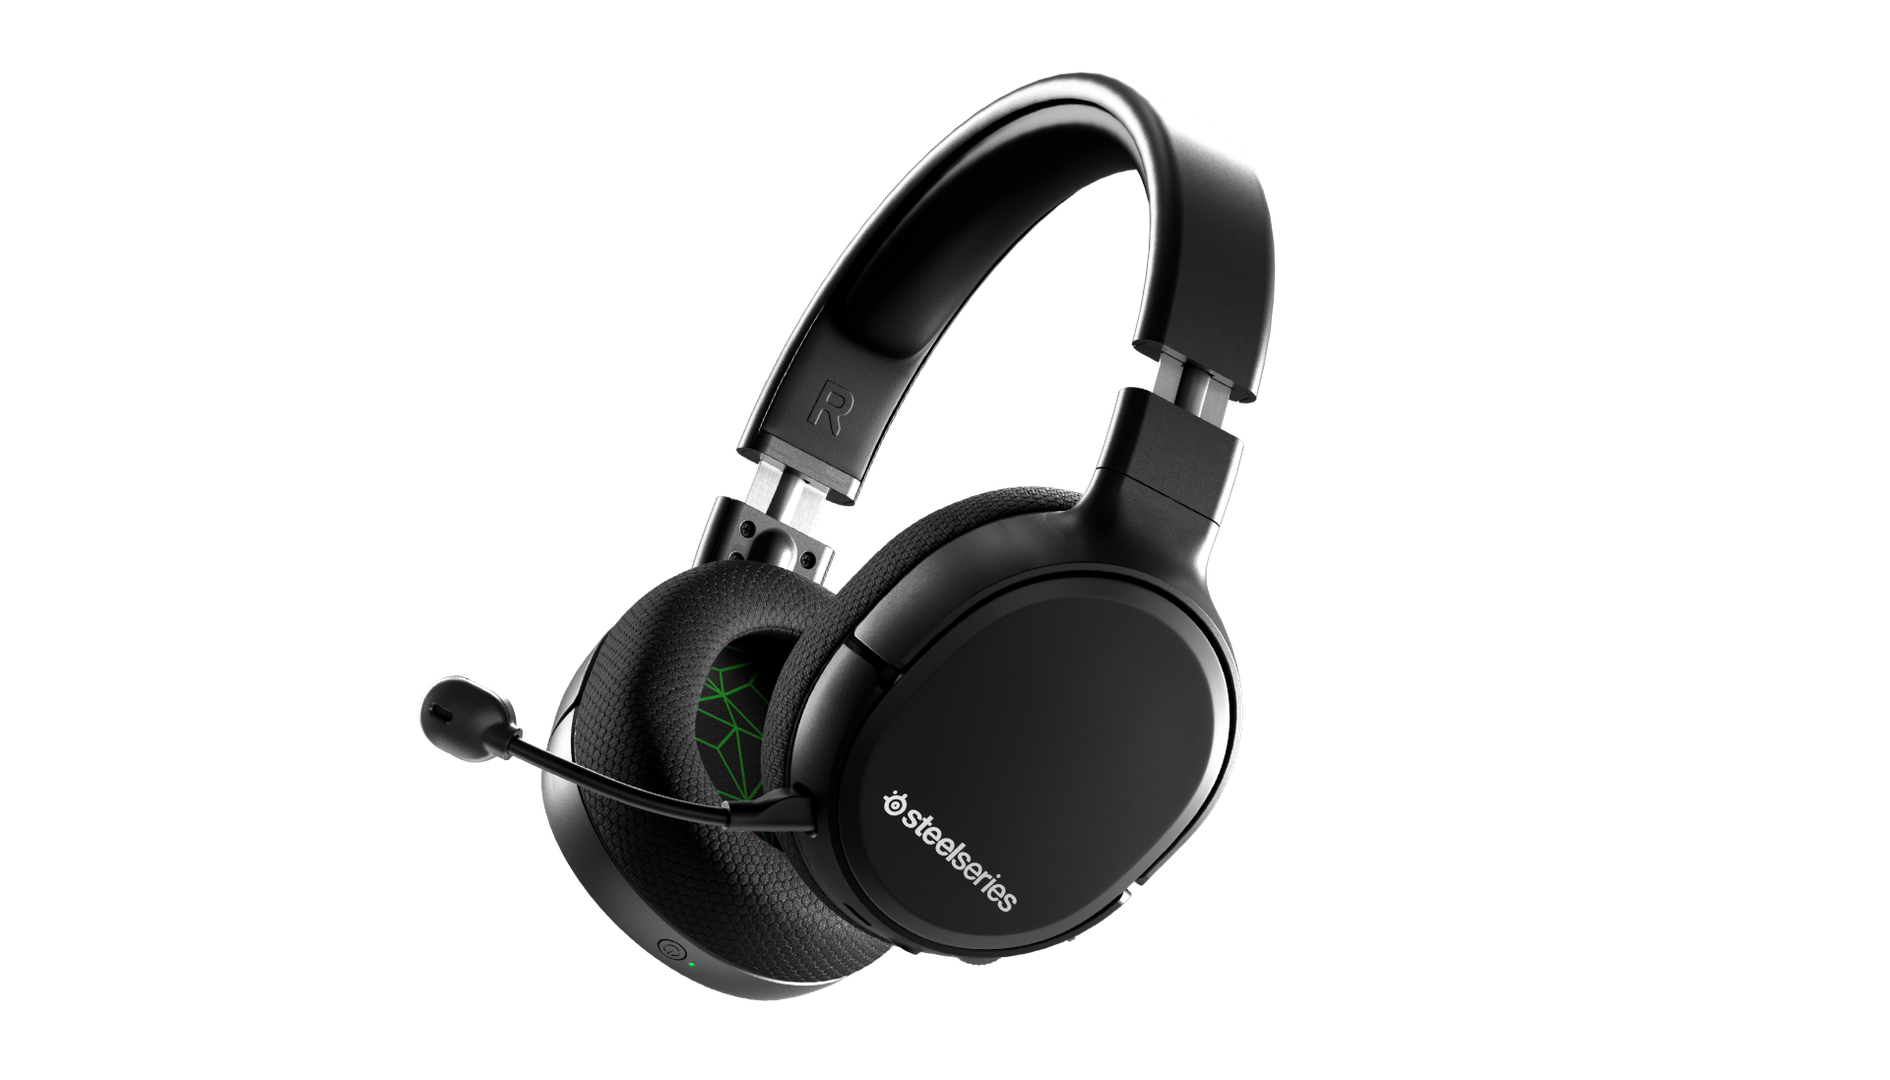
Affordable wireless for PC, PS5, PS4, Switch, Mobile (USB-C wireless), Xbox One (wired)
Getting good wireless performance has never been this seamless, or affordable. Thanks to its high-speed, discrete USB-C dongle, the SteelSeries 1 Arctis Wireless allows you to instantly enjoy wireless game audio from your Nintendo Switch, Android phone, PS4, or gaming PC, with none of the convoluted pairing or interference that comes with Bluetooth-based headsets. It’s worth mentioning the Nintendo Switch functionality again, as it’s hard to get a wireless headset for Nintendo’s handheld hybrid.
Turtle Beach Elite Atlas Aero
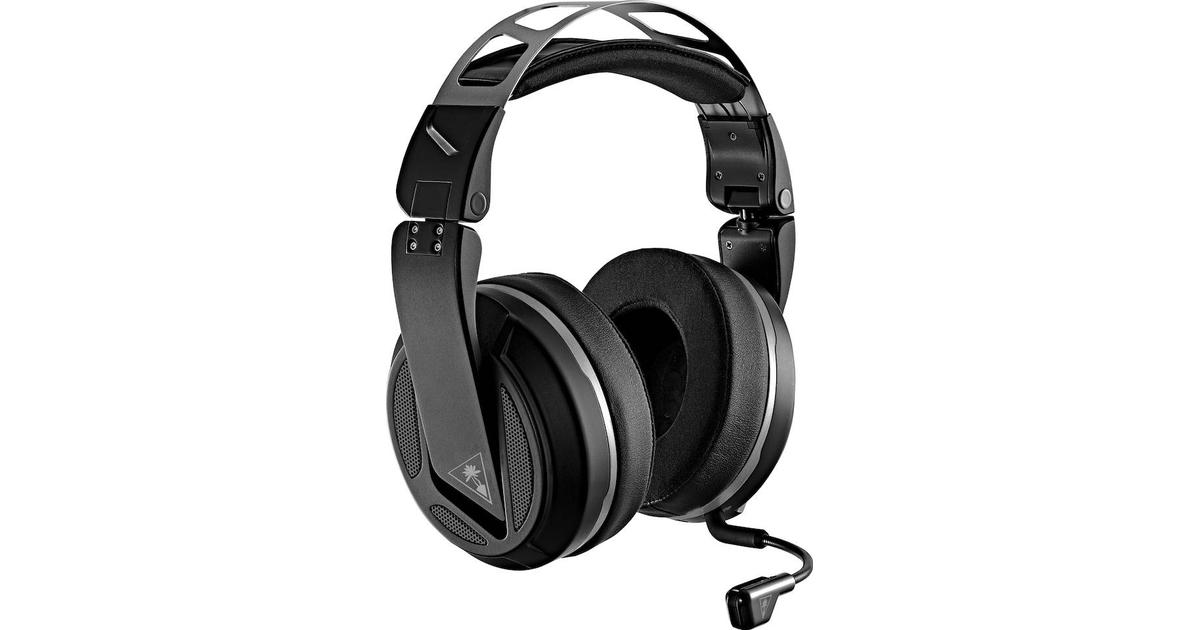
Absolute best in wireless for PC, PS4 (Wireless); Xbox One, Nintendo Switch, Mobile (Wired)
The highly customizable high-end headset that’s especially ideal for PC, the new Turtle Beach Elite Atlas Aero is one of the best gaming headsets out there. This premium headset packs an incredibly comfortable pair of gel-infused ear cushions, which are also designed to play well with glasses. The Aero’s 50mm speakers sound great out of the box, and it comes with a solid noise-canceling microphone to boot.
HyperX Cloud Alpha

Superior style, sound, and value for PC, PS4, PS5, Xbox One, Switch, mobile
Thanks to a sturdy metal frame, a slick red-and-black paint job, and some of the most comfortable leatherette earcups this headset is really a steal for its price. This is a headset that you can transport with you anywhere and connect to almost any system, without ever having to worry about it breaking.
Turtle Beach Stealth 700 Gen 2
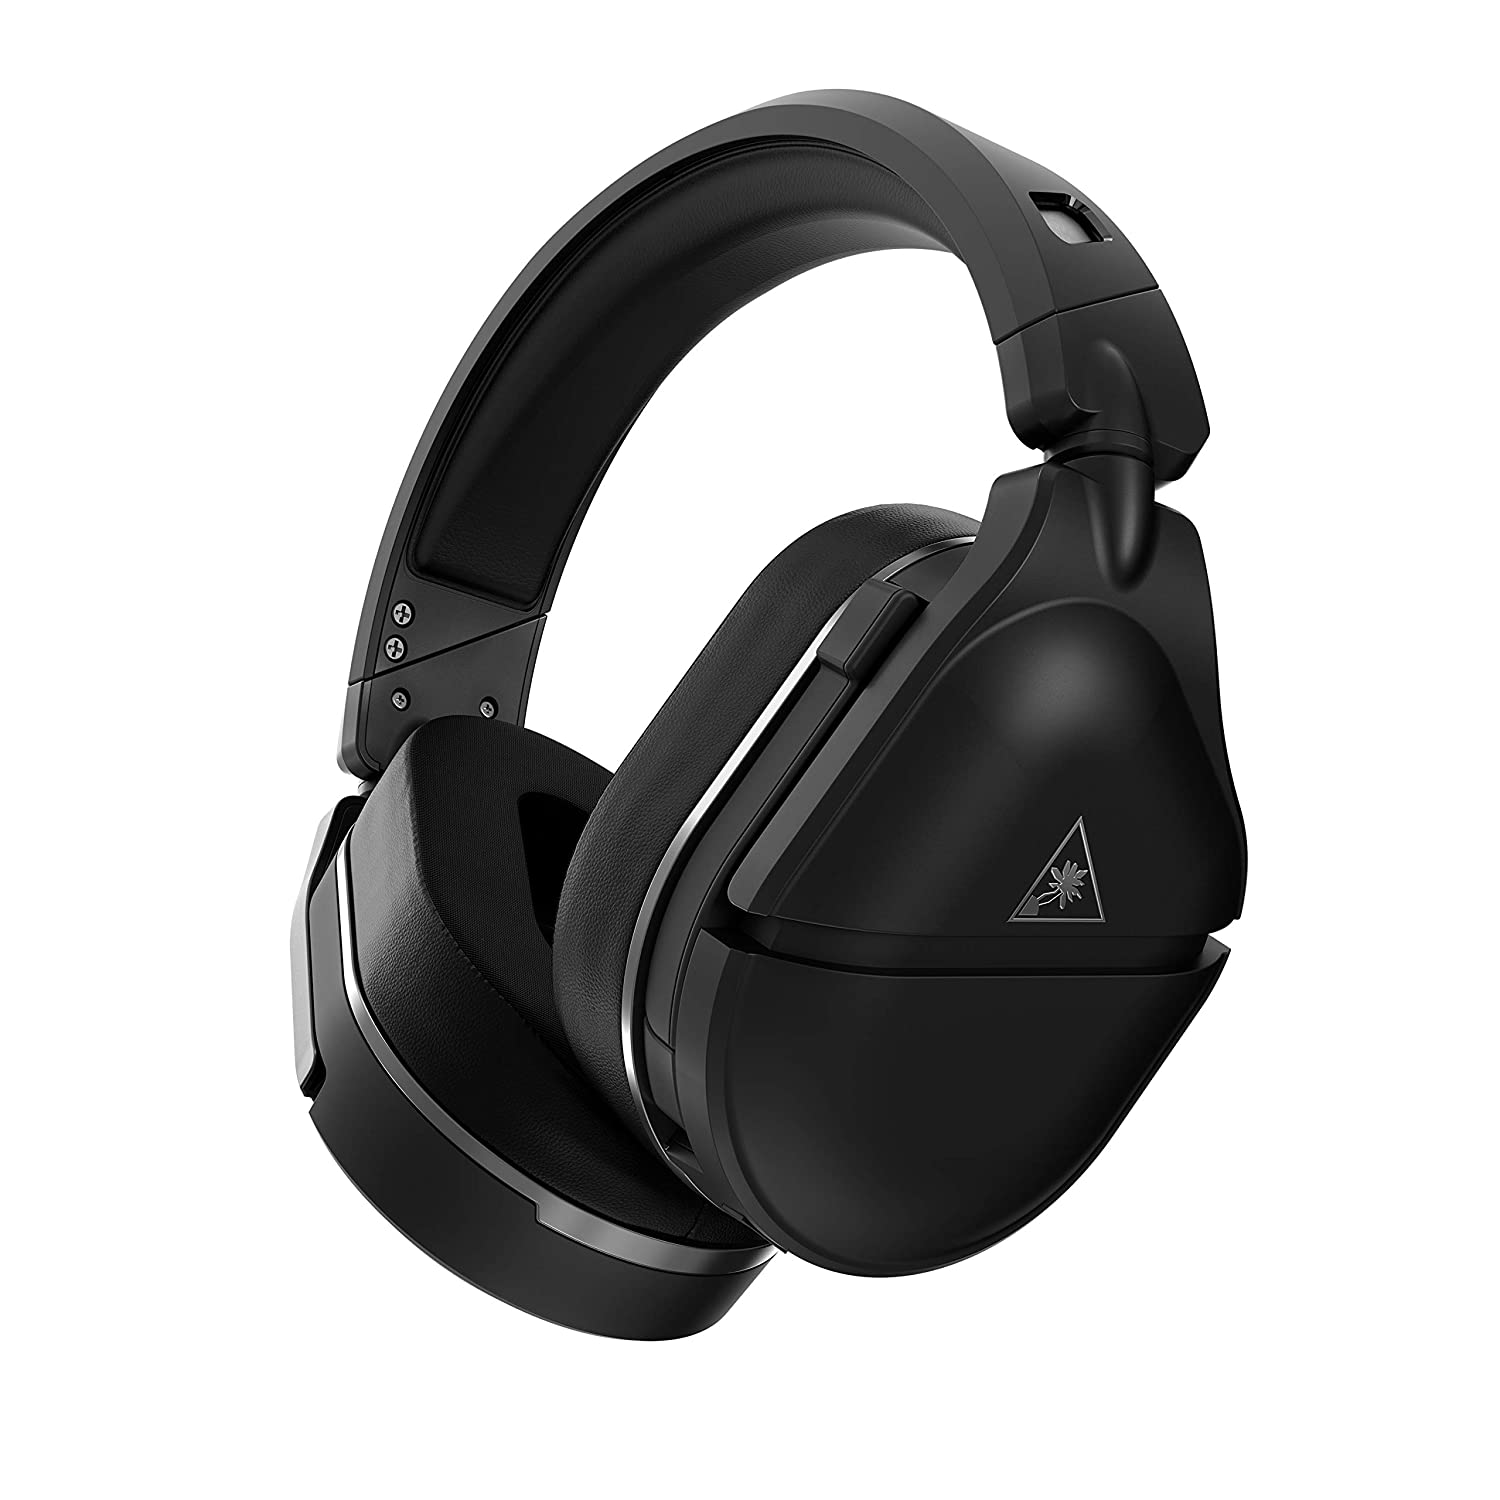
Console-centric wireless sound with Bluetooth for PC, PS4, Switch, Xbox One, mobile
The Turtle Beach Stealth 700 Gen 2 is one of the best console headsets on the market, particularly if you want a wireless model. This peripheral boasts great sound, plush earcups, and two kinds of wireless functionality. The PS4 version can connect to either PS4 or PC via a USB dongle; the Xbox One version can connect to the Xbox One right out of the box. Both versions can connect to mobile devices and PCs via Bluetooth. It’s an extremely convenient feature, especially since very few gaming headsets offer Bluetooth functionality.
Astro A20 Gaming Headset Gen 2
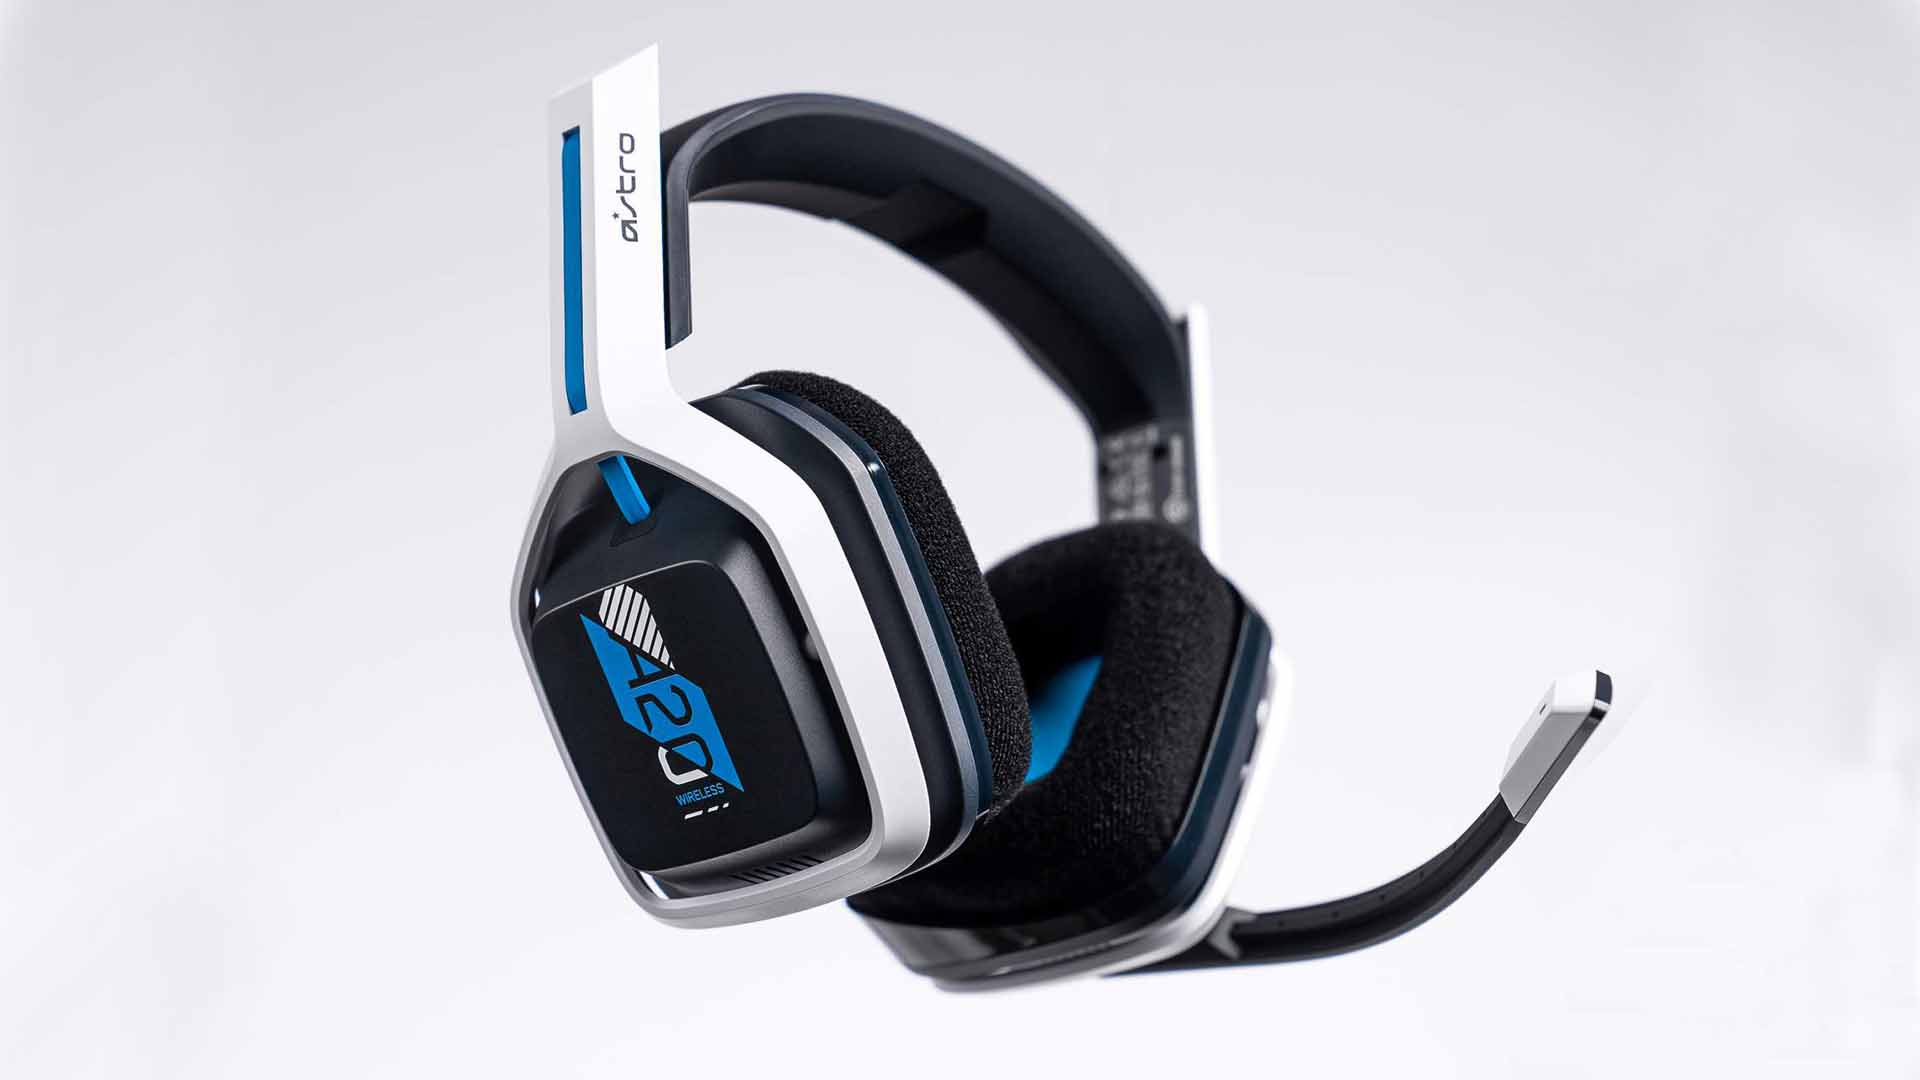
Wireless headset for both PS5 and Xbox Series X and PC, PlayStation, Xbox, Switch, mobile
The Astro A20 Gaming Headset Gen 2 is an ambitious and full-featured headset from one of the most trusted manufacturers on the market. This wireless peripheral offers excellent sound quality and a comfortable fit. More than that, though, the Astro A20 can also connect wirelessly to both the PS5 and the Xbox Series X, which is a rare feat, even among the best gaming headsets.
Razer Barracuda X
The best wireless Switch headset also for PC, PS4, PS5, Switch, mobile
The Razer Barracuda X is a wireless gaming headset that’s ideal for the Nintendo Switch and mobile platforms. Thanks to its small USB-C dongle, it can connect wirelessly o the Switch in handheld mode, a rarity among gaming headsets. However, it also comes with a USB-A adapter, which means you can connect it to just about any other system you like, from PC to PS4, to Switch in docked mode. The USB-C dongle also fits neatly into a PS5.
Read More
Windows 10 setup is a bit complicated which is why it’s uncommon to encounter errors along the way. One of these errors you can encounter when running Windows Setup is the error code 0x80070006. If you are trying to fix this error, you’ve come to the right place as this post will guide you on how to do so.
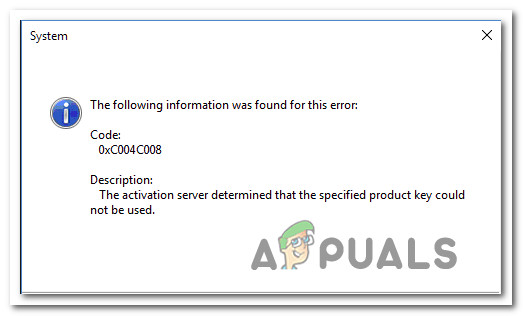
When you get the error code 0x80070006, you will see the following error message:
“Windows cannot install required files. Network problems may be preventing Windows from accessing the file. Make sure the computer is connected to the network and restart the installation. Error code: 0x80070006.”
As stated in the error message, this kind of error in Windows Setup is due to an unstable or unreliable network connection. Such problems can also be triggered by network hardware which includes the network adapters and the network routers. To fix this error, you need to check your internet connection and router or run the built-in network troubleshooter. You could also try using a different USB port or recreate a bootable USB drive as well as get a new Windows image file.
Option 1 – Try checking your internet connection and router
As mentioned, this Windows 10 setup error could be due to an unstable internet connection. To fix it, the first thing you have to do is to check the status of your internet connection and see if it is stable and has enough speed to run the setup. If it’s slow, then it’s no wonder that the setup process failed. To fix that, you can try to reboot your router from its admin panel or you can just turn it off manually and then turn it back on after a couple of seconds. In addition, you also have to check if it’s plugged in properly.
Option 2 – Try to run the Network Adapter troubleshooter
The next thing you can do is to run the Network Adapter troubleshooter. This built-in troubleshooter can help resolve any network issues. It can reset the adapters, remove cached settings, and many more. To run it, follow these steps:
- Go to Settings > Update & security and from there select Troubleshoot.
- Next, scroll down and select the “Network Adapter” option from the right pane.
- Then click on the Run Troubleshooter” button.
- After that, your computer will check for any possible errors and will pinpoint the root cause of the problem if possible.
Option 3 – Try to use a different USB port
You might want to check the integrity of the USB port where connected the device if you are using a bootable USB storage device to run the setup for Windows 10. All you have to do is switch the USB port or try to use another bootable USB device and see if it fixes the problem.
Option 4 – Try recreating the Windows 10 installation USB
Recreating the Windows 10 installation USB might help in fixing the problem. You can use a USB drive to do so but make sure that it has a great read-write speed. Follow the steps below to recreate Windows 10 installation USB”
- Click this link and then click the Download Tool Now button.
- Next, click the “Use the tool to create installation media (USB flash drive, DVD, or ISO file)…” option and follow the next given instructions on the screen.
- Now select the ISO file option in step 5.
- After that, you should now have an ISO file.
- Next, go to the location where you’ve downloaded the ISO file.
- Then right-click on the Windows 10 ISO file and select the Open with option and then select File Explorer.
- Now click on “setup.exe” and follow the next instructions that appear on the screen. When asked, you have to select either Nothing (clean install) or Keep personal files only option. Take note that you must not select the “Keep personal files, apps, and Windows settings since it doesn’t really work.
Option 5 – Try getting a new Windows image file
If none of the four given options above worked, you might want to get a newer installation image using the Windows Media Creation tool. After that, create the bootable USB drive and once completed and then try to run the Windows 10 setup again.
Read More
There are cases when your Windows 10 PC can encounter an issue where it gets stuck and will display a message that says, “Preparing Security Options”. If this is happening to your Windows 10 PC, you won’t be able to use your keyboard or even mouse and your screen will only be stuck on the screen as mentioned above.
As your computer is still stuck, you will be left with no choice but to shut it down and restart it. Tap the F11 key as soon as your PC powers on. This will take you to the Advanced Startup options where you can carry out some steps. If it still didn’t work, you have to boot your Windows 10 PC into Safe Mode and then try out the troubleshooting options below.
Option 1 – Try using System Restore
You can do this option either by booting into Safe Mode or in System Restore. If you are already in the Advanced Startup Options, just directly select System Restore and proceed with the next steps. And if you have just booted your PC into Safe Mode, refer to the steps below.
- Tap the Win + R keys to open the Run dialog box.
- After that, type in “sysdm.cpl” in the field and tap Enter.
- Next, go to the System Protection tab then click the System Restore button. This will open a new window where you have to select your preferred System Restore point.
- After that, follow the on-screen instructions to finish the process and then restart your computer and check if the problem is fixed or not.
Option 2 – Uninstall the Windows Updates you’ve installed recently
The issue could be caused by Windows Updates so you need to check if it’s indeed the case. The best way you can do so is via Safe Mode.
- Boot your PC into Safe Mode and then tap the Win + I keys to open Settings.
- After that, click on Update and Security and then select Windows Update from the left side menu column.
- Next, select the “View installed update history” option on the right-side column and click on Uninstall Updates which will open a window that will show the list of all the installed updates on your PC.
- From there, select the update you want to uninstall and click the Uninstall button located in the lower right corner of the window.
Option 3 – Try disabling the Fast Startup
- Boot your PC into Safe Mode.
- Then tap the Win + R keys to open the Run dialog box.
- Next, type in “control” to open Control Panel.
- After that, select Hardware and Sound and click on Power Options.
- Select “Choose what the power buttons do” from the left side menu pane and click on Change settings that are currently unavailable.
- Afterward, uncheck the “Turn on fast startup (Recommended)” entry and click on Save Changes.
- Now restart your PC and check if the problem’s fixed.
Option 4 – Try running both the SFC scan and CHKDSK utility
You can do both SFC and CHKDSK using Safe Mode and Advanced Startup options. For Advanced Startup options, click on the Command Prompt option and proceed with the steps. And if you have booted your computer into Safe Mode, follow these steps:
- Tap the Win + X keys or right-click on the Start button and click Command Prompt (admin).
- After that, type in this command and tap Enter to run the System File Checker or SFC – “Sfc /scannow”.
- Alternatively, you can use this command instead if the previous command didn’t work – “sfc /scannow /offbootdir=c: /offwindir=c:windows”.
- Wait until the SFC scan is done with the process and then restart your PC.
- Next, run the CHKDSK utility and once it’s done checking your disk for errors and then reboot your PC to save the changes made.
Option 5 – Try resetting Windows 10
You can reset your Windows 10 PC using either the Advanced Startup Options or by booting into Safe Mode.
- Tap the Win + I keys and go to Update and Security > Recovery.
- Then click on Get Started under the Reset this PC section.
- After that, follow the on-screen instructions with how you want to reset your PC and what files and settings you want to revert.
- Then it will reset your PC by reinstalling it
Option 6 – Try to rename the SoftwareDistribution folder
In this option, the Command Prompt is supposed to be like the one in option 4. You can use both ways there to open the Command Prompt.
- Open an elevated Command Prompt as admin and type in the commands below and tap Enter right after you typed in each one of them
- net stop wuauserv
- net stop bits
- rename c:windowsSoftwareDistribution SoftwareDistribution.bak
- net start wuauserv
- net start bits
Note: You can also rename the SoftwareDistribution folder to “SoftwareDistribution.bak” or “SoftwareDistribution.old” after you boot your PC into Safe Mode.
Option 7 – Try rebuilding BCD
Rebuilding the BCD can help you in fixing the stuck Windows 10.
- You can start by booting into the installation environment for Windows 10 from an installation media.
- After that, click on Repair your computer and on the blue screen, select Troubleshoot and then select the Advanced options menu.
- Next, select Command Prompt and type in the commands below one by one, and tap Enter right after you do so.
- exe /FixMbr
- exe /FixBoot
- exe /RebuildBcd
Read More
Error Code 0x8007000d — What is it?
Error Code 0x8007000d is a common error code that can be found on the Windows 10 Operating system, although it can also appear in previous versions of the operating system, as well.
Common symptoms include:
- Inability to download new updates.
- Inability to run the Update tool through to completion.
There are four basic ways to try to resolve Error Code 0x8007000d on your Windows machine. Three of these are pretty simple for even the most basic users, while the final method requires some familiarity with running commands in the Command Prompt. If you don’t feel that you have the skill or confidence to complete the steps listed below, it is generally recommended that you get in touch with a qualified computer repair technician that can assist you in error resolution.
Error Causes
The main cause for the appearance of Error Code 0x8007000d on a Windows machine is that one of the files that the Update tool uses to run one or more updates cannot be found or has experienced damage. Fortunately, there are a few things that you can try on your machine that can be used to attempt to resolve the issues at hand.
Further Information and Manual Repair
Three primary methods exist for the resolution of Error Code 0x8007000d on a Windows machine. As mentioned above, two of these methods can usually be accomplished by basic users, while the third requires some degree of familiarity with the tools associated with the Command Prompt. If you don’t feel that you have the knowledge or skill necessary to follow these steps, contact a computer repair technician to aid you.
Here are the best ways to try to resolve Error Code 0x8007000d on your device:
Method One: Use the Troubleshooting Tool from Windows Update
From the Windows Update tool, you can attempt to run a scan using the Windows Update Troubleshooter, which can try to identify the specific issue that is occurring and to fix it automatically.
Not only will this tool often fix the problem at hand, but it can also help you to avoid other errors that you may have encountered later on in the Update process. This tool should always be your starting point when you encounter an error as you attempt to download or install updates for your Windows machine.
After the tool has been run, restart your computer to apply any changes and then reopen the Update tool to reattempt installation.
Method Two: Reset Your Computer
In some cases, the missing or corrupted files may be extensive enough that you need to restore your computer to an earlier point. If you create regular backups of your information or have a past version of the software that you can install, this can help you to resolve the issue. Otherwise, you may need to restore your device to its factory settings to resolve the error.
Always make sure to backup your important files and information before you perform a reset of your device, in order to ensure that you are able to return the computer to its original state when you have finished.
Method Three: Use Command Line Tools to Resolve the Issue
One of the ways that you can try to resolve this particular error code is the use a DISM tool. This is accessed through the Command Prompt. In order to use this method, follow the steps below:
- Step One: Open up the search bar in the Start Menu and type in the words “Command Prompt,” selecting it and choosing to run it as an administrator.
- Step Two: Enter each of the commands below, hitting the “Enter” key when you finish each one:
- exe /Online /Cleanup-image /Scanhealth
- exe /Online /Clean-upimage /Restorehealth
- Exit
- Step Three: Attempt to run the Update program again. In some cases, you may want to restart your computer before you attempt to run the Update tool again.
If you have not been able to resolve the error code using the steps above or if you are unsure of your ability to follow these steps on your own, get in touch with a trusted computer repair professional that is familiar with the Update process and the errors associated with it.
Read More
Copyright © 2023, ErrorTools. All Rights Reserved
Trademark: Microsoft Windows logos are registered trademarks of Microsoft. Disclaimer: ErrorTools.com is not affiliated with Microsoft, nor claims direct affiliation.
The information on this page is provided for information purposes only.
Some Windows users have been reporting that their activation attempts fail with the error code 0xC004c008. The issue is reported to occur on Windows 7, Windows 8.1 and Windows 10.
Note: This article is only relevant in those situations where the Windows copy affected by the error code is genuine.
What is causing the ‘0xC004c008’ error code?
We investigated this particular issue by looking at various user reports and the repair strategies that are commonly used to resolve this error code.
Based on our investigations, it turns out that this error code is associated with an issue with the product key. As it turns out, there are a couple of scenarios that will trigger this particular error code:
- The product key is being used on another PC – Typically, Windows 10 and Windows 8.1 licenses can only be installed on a single device. If the license is actively being used on another computer, you’ll receive this error code until you’ll resolve the conflict.
- The KMS key is being used on more PCs than allowed by the Software License Terms – This issue might also occur if the KMS key has exceeded the activation limit. If you’re dealing with a KMS key, know that you can only activate it up to 10 times on six different computers.
If you’ve purchased your Windows copy from a genuine retailer and you’re struggling to resolve this particular error code that appears when you try to activate your Windows version, this article will provide you with several troubleshooting steps.
Down below, you’ll discover a collection of methods that other users in a similar situation have successfully used to avoid the error code and activate their Windows version. You should be able to follow every method regardless of your OS version, so feel free to follow whichever method seems more convenable to you.
Let’s begin!
Method 1: Using the Activation Troubleshooter (Windows 7 only)
Instances where you didn’t hit any restrictions related to your particular licensing, can typically be corrected by simply running the Activation Troubleshooter. This built-in tool contains a collection of repair strategies that will automatically resolve the issue with specific situations like re-installing the OS from a recovery environment or booting from a cloned drive from the first time on a different configuration.
Using this troubleshooter will most likely resolve the issue if you’ve encountered the 0xC004c008 after making a significant change such as replacing the motherboard or reinstalling Windows.
Note: But keep in mind that the procedure below is only applicable if you’re getting the error with Windows 10.
Here’s a quick guide on how to use the Activation troubleshooter:
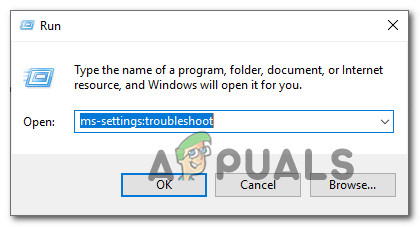
- Press Windows key + R to open up a Run dialog box. Then, type “ms-settings:activation” and press Enter to open up the Activation tab of the Settings screen.

Accessing the Activation troubleshooter - Once you get into the Activation tab, move over to the right pane, scroll down to the Activate Windows now menu and click on Troubleshoot.

Accessing Activation Troubleshooting - Leave the troubleshooter to investigate for problems, then click on Apply this fix if any issues are uncovered.
- Once the procedure is complete, restart your computer and see if your Windows is re-activated at the next startup.
If the issue is still not resolved or this method wasn’t applicable to your particular scenario, move down to the next method below.
Method 2: Using phone activation
If you purchased the key from a genuine retailer, you should be able to use phone activation to get your Windows version activated.
In most cases, you should be able to see a Phone Activation option inside the Activation window (in Windows settings). To get there, press Windows key + R to open up a Run dialog box. Then, type ‘ms-settings:activation‘ for Windows 10 or ‘slui’ for an Older Windows version and press Enter to open the activation menu.
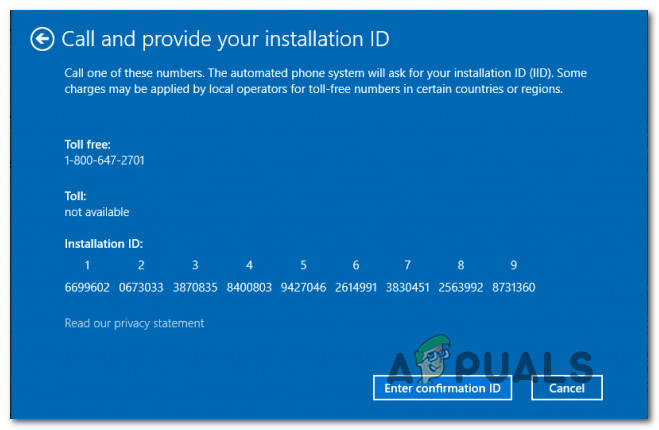
If you don’t see a “Phone Activation” option inside the Activation window, press Windows key + R (to open a Run box) and type “SLUI 4” to bring up the phone activation menu (works on every Windows version. Then, choose your Country from the list and click on Phone Activation.
Once you see the phone activation screen, simply call the number provided there and use the automated system as instructed. You will need to provide your own installation ID (displayed inside the Phone Activation screen) and after the verification is complete, your Windows will be activated.
If this method wasn’t applicable or you’re looking for a different approach, move down to the next potential workaround below.
Method 3: Contact a Microsoft Agent
If resolving the issue with the built-in Activation troubleshooter or with phone activation where not applicable to your particular scenario, then you’re left with little else choice but to contact Microsoft chat support and ask them to help you with the reactivation.
There are multiple ways to do so, but the easiest one is to simply follow this link (here), open the Get Help app and wait for a live agent to arrive in the chat and assist you with your situation. Several affected users reported that contacting an MS live agent helped them to resolve the issue in a matter of minutes.
But remember that this is only applicable if your Windows copy is genuine and you haven’t violated any of the Software License Terms related to your Windows license.
Kevin Arrows
Kevin Arrows is a highly experienced and knowledgeable technology specialist with over a decade of industry experience. He holds a Microsoft Certified Technology Specialist (MCTS) certification and has a deep passion for staying up-to-date on the latest tech developments. Kevin has written extensively on a wide range of tech-related topics, showcasing his expertise and knowledge in areas such as software development, cybersecurity, and cloud computing. His contributions to the tech field have been widely recognized and respected by his peers, and he is highly regarded for his ability to explain complex technical concepts in a clear and concise manner.
Чем асинхронная логика (схемотехника) лучше тактируемой, как я думаю, что помимо энергоэффективности — ещё и безопасность.
Hrethgir 14.05.2025
Помимо огромного плюса в энергоэффективности, асинхронная логика — тотальный контроль над каждым совершённым тактом, а значит — безусловная безопасность, где безконтрольно не совершится ни одного. . .
Многопоточные приложения на C++
bytestream 14.05.2025
C++ всегда был языком, тесно работающим с железом, и потому особеннно эффективным для многопоточного программирования. Стандарт C++11 произвёл революцию, добавив в язык нативную поддержку потоков,. . .
Stack, Queue и Hashtable в C#
UnmanagedCoder 14.05.2025
Каждый опытный разработчик наверняка сталкивался с ситуацией, когда невинный на первый взгляд List<T> превращался в узкое горлышко всего приложения. Причина проста: универсальность – это прекрасно,. . .
Как использовать OAuth2 со Spring Security в Java
Javaican 14.05.2025
Протокол OAuth2 часто путают с механизмами аутентификации, хотя по сути это протокол авторизации. Представьте, что вместо передачи ключей от всего дома вашему другу, который пришёл полить цветы, вы. . .
Анализ текста на Python с NLTK и Spacy
AI_Generated 14.05.2025
NLTK, старожил в мире обработки естественного языка на Python, содержит богатейшую коллекцию алгоритмов и готовых моделей. Эта библиотека отлично подходит для образовательных целей и. . .
Реализация DI в PHP
Jason-Webb 13.05.2025
Когда я начинал писать свой первый крупный PHP-проект, моя архитектура напоминала запутаный клубок спагетти. Классы создавали другие классы внутри себя, зависимости жостко прописывались в коде, а о. . .
Обработка изображений в реальном времени на C# с OpenCV
stackOverflow 13.05.2025
Объединение библиотеки компьютерного зрения OpenCV с современным языком программирования C# создаёт симбиоз, который открывает доступ к впечатляющему набору возможностей. Ключевое преимущество этого. . .
POCO, ACE, Loki и другие продвинутые C++ библиотеки
NullReferenced 13.05.2025
В C++ разработки существует такое обилие библиотек, что порой кажется, будто ты заблудился в дремучем лесу. И среди этого многообразия POCO (Portable Components) – как маяк для тех, кто ищет. . .
Паттерны проектирования GoF на C#
UnmanagedCoder 13.05.2025
Вы наверняка сталкивались с ситуациями, когда код разрастается до неприличных размеров, а его поддержка становится настоящим испытанием. Именно в такие моменты на помощь приходят паттерны Gang of. . .
Создаем CLI приложение на Python с Prompt Toolkit
py-thonny 13.05.2025
Современные командные интерфейсы давно перестали быть черно-белыми текстовыми программами, которые многие помнят по старым операционным системам. CLI сегодня – это мощные, интуитивные и даже. . .