
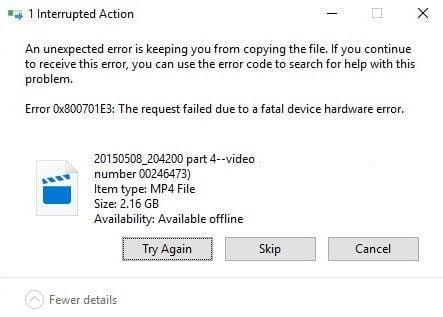
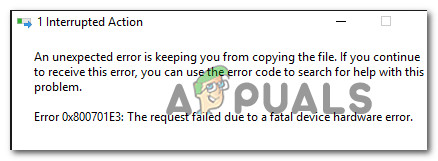
Некоторые пользователи сталкиваются с ошибкой 0x800701E3 при выполнении различных операций с жестким диском или SD-картой. В большинстве случаев проблема возникает при попытке переместить файлы с одного жесткого диска на другой. Другие пользователи сообщают, что проблема возникает при установке Windows 10 или другой версии Windows. Дословно код ошибки 0x800701E3 обозначается как DEVICE_HARDWARE_ERROR: «Запрос не выполнен из-за фатальной аппаратной ошибки устройства».
Причины возникновения кода ошибки 0x800701e3
К сожалению, эта конкретная проблема может быть связана с серьезной аппаратной проблемой или неисправностью периферийного устройства, например, кабеля SATA или адаптера SD-карты. Также оговариваемая ошибка может появляться при попытке удалить старую версию Windows после установки новой. В некоторых случаях ошибка 0x800701e3 может служить знаком о неисправности диска пользователя.
Но даже если ошибка 0x800701e3 являет признаком сбоя диска — существует несколько решений, которые позволят вам обойти сообщение об ошибке и завершить передачу данных. В этой статье мы как раз и посмотрим на эти решения. Если какой-то из методов не применим в вашей конкретной ситуации, то пропустите его и используйте другой.
Метод 1: работа с поврежденными секторами
Если вы видите ошибку 0x800701E3 при попытке установки оригинальной версии Windows, то это может быть связано с тем, что на используемом жестком диске слишком много поврежденных секторов. К счастью, в Windows присутствует программное обеспечение, способное в какой-то мере исправлять поврежденные сектора или бэд-блоки, как их еще называют в простонародье.
Некоторые из пользователей сообщают, что они смогли завершить установку Windows без ошибки 0x800701E3 после выполнения сканирования CHKDSK и SFC на диске. Вот рекомендации о том, как это сделать:
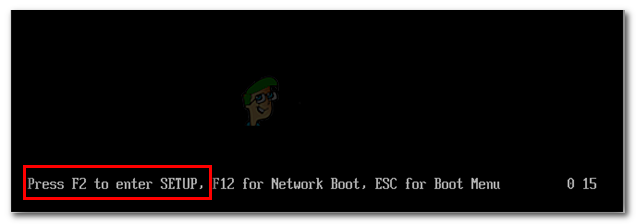
- Включите компьютер и нажмите любую клавишу для загрузки с установочного носителя, до появления «приветствия».
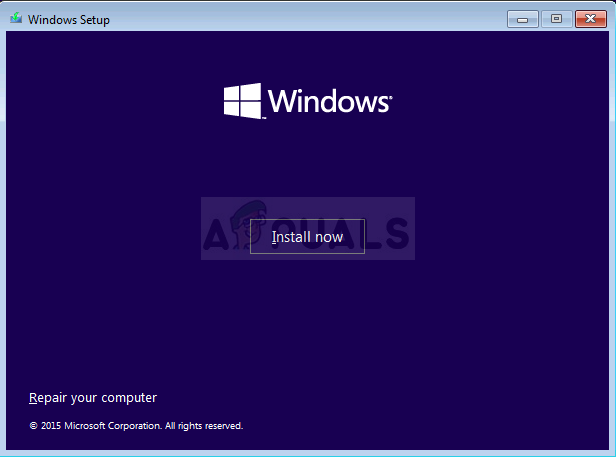
- На открывшемся экране установки Windows нажмите «Восстановление системы».
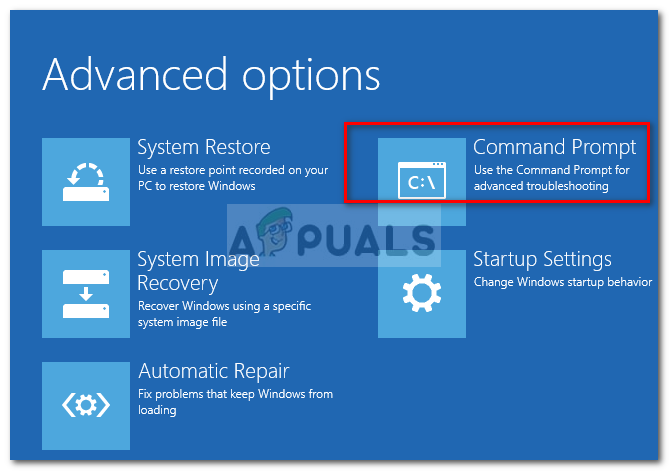
- В меню «Дополнительные параметры» найдите раздел «Устранение неполадок» и нажмите «Командная строка».
- Введите в командной строке следующую команду и нажмите Enter, чтобы запустить сканирование CHKDSK на соответствующем диске: chkdsk /f X (где X — буква нужного раздела диска). Эта команда запустит сканирование и восстановление отсутствующих или поврежденных системных файлов.
- После завершения сканирования CHKDSK введите следующую команду и нажмите Enter, чтобы запустить сканирование SFC (Проверка системных файлов): sfc /scannow
После завершения второго сканирования попробуйте снова повторить удаление старой версии ОС и посмотреть, удастся ли завершить процесс установки Windows без ошибки 0x800701E3.
Если этот метод неприменим или не помог решению проблемы, то перейдите к следующему способу.
Метод 2: отключение безопасной загрузки
Некоторые из пользователей, столкнувшиеся с данной проблемой, сообщают, что ошибка 0x800701E3 больше не возникала во время установки оригинальной Windows после отключения безопасной загрузки в UEFI/BOOT.
Безопасная загрузка — это отраслевой стандарт, разработанный крупнейшими производителями ПК для обеспечения использования программного обеспечения исключительно от производителей оригинального оборудования (OEM). Однако известно, что эта функция безопасности создает проблемы с установочными носителями, созданными за пределами официальных каналов (с использованием Rufus и другого подобного программного обеспечения).
Краткое руководство по отключению безопасной загрузки:
- Несколько раз нажмите на кнопку, отвечающую за вход в настройки UEFI/BIOS (во время начальной последовательности загрузки). Этой кнопкой может быть Esc, F1, F2, F3, F8, F9, F12 или клавишу Del.
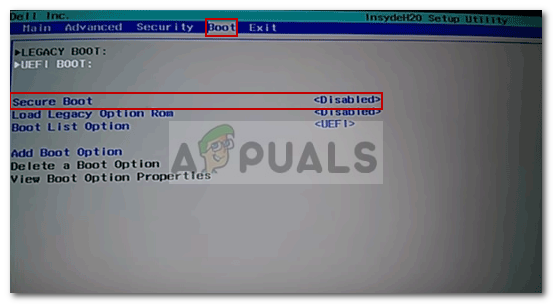
- Как только вы войдете в меню BIOS, найдите параметр с Secure Boot и установите для него значение Disabled.
Точное имя и местоположение будут отличаться в зависимости от производителя вашего устройства, но обычно вы найдете его во вкладке «Безопасность», на вкладке «Загрузка» или «Аутентификация». Если сообщение об ошибке все еще актуально, или этот метод не применим к вашему текущему сценарию, перейдите к следующему способу.
Метод 3: замена соединительного кабеля/адаптера карты
Данная ошибка обычно указывает на проблему аппаратного обеспечения или SD-карты. Однако в некоторых случаях проблема может быть вызвана такими периферийными устройствами, как кабеля SATA или адаптеры SD-карты. Если это возможно — замените соединительный кабель/адаптер SD-карты и убедитесь в том, что 0x800701e3 больше не возникает.
Метод 4: повторение операции снова и снова
Если данные, которые вы пытаетесь скопировать или переместить, имеют для вас первостепенную важность, то можете продолжать восстанавливать фрагменты, повторяя процесс снова и снова. Вместо того, чтобы копировать или перемещать все файлы одновременно, попробуйте переместить нужные данные по отдельности и посмотреть, что из этого получится. Несколько пользователей со схожей проблемой сообщили, что им удалось постепенно скопировать данные отдельными кусками и избежать появлению ошибки 0x800701e3.
Метод 5: использование стороннего программного обеспечения для восстановления данных
Существует несколько специализированных программ, которые помогут восстановить данные в случаях, когда другие способы не работают. Большая часть программного обеспечения предназначена для опробования разных стратегий преодоления, повторения и пропуска блоков, которые невозможно передать.
Вот некоторые бесплатные программы для восстановления, которые мы рекомендуем:
- DDRescue
- Unstoppable Copier
- Disk Drill
Но для простоты выполнения поставленной задачи мы рассмотрим руководство по восстановлению с Unstoppable Copier, поскольку она востребована и широко используется как самая надежная программа для восстановления данных.
Инструкция
- Загрузите Unstoppable Copier с официального сайта разработчика.
- Откройте загруженный файл и следуйте инструкциям на экране для завершения установки Unstoppable Copier.
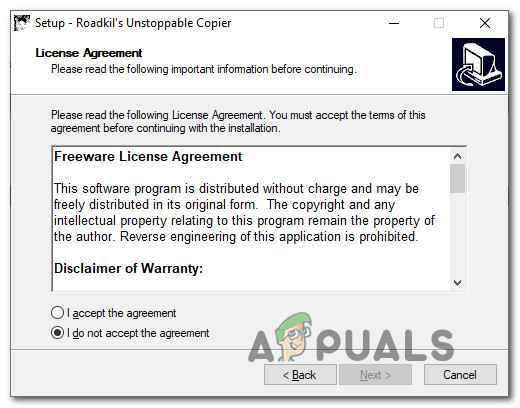
- После завершения установки запустите Unstoppable Copier и дайте согласие с лицензионным соглашением.
- Внутри Unstoppable Copier перейдите на вкладку Copy и установите неисправный диск в качестве источника переноса данных.
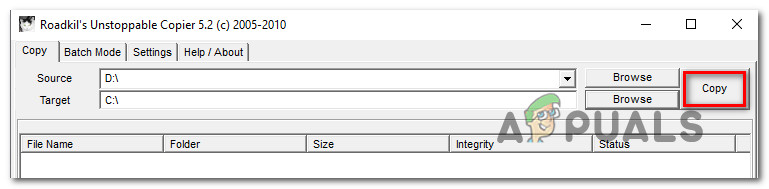
- Затем установите исправный диск в качестве конечной цели. После просто нажмите кнопку «Копировать», чтобы начать передачу.
Как только процесс начнется, программа автоматически попробует другую стратегию передачи и проигнорирует поврежденные сектора, которые не могут быть восстановлены. Когда процесс завершится, перейдите к целевому местоположению и посмотрите, удалось ли вам восстановить ваши данные. Мы надеемся, что данная статья была полезна для вас и вы смогли исправить или хотя бы обойти ошибку 0x800701e3.
Рассказываем, из-за чего возникает ошибка 0x800701E3 и как ее можно исправить.
Как и у большинства других ошибок в Windows, у этой нет конкретной причины. Обычно с этой проблемой сталкиваются после переустановки операционной системы. В частности, после неполной переустановки с сохранением пользовательских данных. Но чаще всего код 0x800701E3 указывает на серьезный сбой в работе соединительного шлейфа для жестких дисков и SD-адаптеров. В худшем случае ошибка может означать критическую аппаратную поломку жесткого диска.
Далее рассмотрим несколько способов исправления ошибки 0x800701E3.
Сбой чаще всего происходит при попытке взаимодействовать с конкретным файлом или папкой. Поэтому перед тем как переходить к инструкциям, попробуйте заново скопировать или удалить файлы, отзывающиеся ошибкой. Попробуйте раз 5. Иногда ошибка 0x800701E3 имеет временный характер и исчезает сама по себе.
Пытаемся починить поврежденные сектора памяти
Для начала пройдемся по системе специальными программами, которые могут отыскать «битые» участки данных и восстановить их.
Используем системные средства
Лучше всего проверить компоненты Windows еще на этапе загрузки.
Для этого:
- Создаем флэшку с установочными файлами Windows.
- Вставляем ее в компьютер.
- Перезагружаем или включаем его.
- При загрузке устройства нажимаем на клавишу F8.
- Появится список доступных для загрузки устройств. Выбираем только что вставленную флэшку.
- В появившемся окне выбираем строчку «Восстановление системы».

Нам нужны утилиты для восстановления системы
- Открываем меню поиска и устранения неисправностей.

Выбираем первое меню
- Ищем в списке утилит командную строку и запускаем ее.

Нам нужен пункт посередине в левом столбце
- Вводим в командную строку команду chkdsk буква диска, который надо проверить: /f
- Нажимаем клавишу Enter, чтобы активировать проверку диска.

Вот так это выглядит
- Ждем, пока завершится автоматический процесс поиска и устранения проблем.
После этого стоит поискать ошибки с помощью утилиты System File Checker.
Для этого:
- Повторяем шаги из предыдущей инструкции и снова запускаем командную строку.
- Но вводим другую команду: sfc /scannow.
- Ждем завершения работы еще одной утилиты по поиску ошибок.
После выполнения обеих процедур можно попробовать вновь запустить Windows и повторить сценарии, в ходе которых возникала ошибка. Возможно, она больше не появится.
По сути, обе программы можно запускать и в обычном режиме, но система в любом случае потребует перезагрузки и дополнительного сканирования.
Загрузка …
Используем сторонние приложения
Проверить состояние жесткого диска можно с помощью отдельного приложения. Например, Victoria HDD или HDDScan. Они довольно распространенные и зачастую хорошо справляются со своими задачами. Подробно останавливаться на них тут не буду. Ранее мы уже составляли топ лучших программ для исправления ошибок в работе жесткого диска. Ознакомьтесь с ними и поищите то, что вам подходит больше.
Загрузка …
Выключаем режим безопасной загрузки
Иногда предотвратить появление ошибки с кодом 0x800701E3 помогает отключение функции «Безопасная загрузка». Ее задача обеспечивать корректную загрузку системы только из официальных источников. То есть от производителей компьютеров и самой Microsoft. Могут возникнуть проблемы, если вы захотите установить дистрибутив, добытый из торрент-трекеров.
Чтобы отключить безопасную загрузку:
- Перезагружаем (или включаем) компьютер.
- В ходе запуска жмем на одну из кнопок, отвечающих за запуск BIOS (зависит от производителя материнской платы и компьютера в целом).
- Оказавшись в BIOS, ищем параметр Secure Boot. Эта опция может находиться как в разделе Main, так и в разделе Boot. Зависит от версии BIOS.
- Наводим на него курсор с помощью клавиш-стрелок и нажимаем на Enter
- В появившемся списке выбираем пункт Disabled
Загрузка …
Используем утилиты для восстановления данных
Если ошибка возникает из-за поврежденных файлов, можно попробовать воспользоваться специальной программой для устранения такого рода неполадок.
Эти приложения устроены по-разному и каждая имеет свой набор функций. Визуально они тоже сильно отличаются, поэтому охватить все в рамках этой статьи не получится. Я вкратце расскажу о том, как устроена программа Disk Drill. Покажу, какие возможности по поиску неисправностей в ней есть.
На главном экране отображаются все доступные диски и логические разделы. Вам нужно найти тот, на котором располагаются «поврежденные» файлы. Поврежденные — это те, при взаимодействии с которыми появляется ошибка.

Интерфейс для macOS почти не отличается от такового для Windows
Для каждого диска есть заданный набор настроек. Можно:
- Одновременно включить все методы поиска и восстановления данных.
- Запустить глубокое (весьма длительное) сканирование файлов.
- Искать утерянные разделы.
- Проанализировать поврежденные сектора памяти и попытаться «исправить» их.
Этот список доступен при нажатии на один из разделов и в меню «Файл»
Для выполнения этой же задачи можно использовать утилиты типа Recuva, Unstoppable Copier, DDRescue и множество других.
Загрузка …
Проверяем аппаратную часть
Отдельного внимания заслуживает разъем интерфейса SATA.
- Необходимо убедиться, что он корректно подключен к жесткому диску и материнской плате.
- Шлейф не должен быть поврежден.
Стоит попробовать заменить шлейф, разъем, переходник для диска или карты памяти. Один из этих компонентов может провоцировать появление ошибки.
Загрузка …
В крайнем случае придется заменить жесткий диск (или другой используемый накопитель). Некоторые аппаратные поломки просто невозможно исправить, а они бесконечно ведут к появлению одной и той же ошибки.
Загрузка …
Post Views: 4 445
Several users are encountering the 0x800701E3 when performing a hard disk / SD card operation that involves copying or moving files on a Windows computer. In most cases, the issue is reported to occur when the user tries to move files from one hard drive to another. Other users report that the issue is occurring when they try to clean install Windows 10 or a different Windows version. Looking at the status code, the 0x800701E3 error DEVICE_HARDWARE_ERROR, “The request failed due to a fatal device hardware error.”
What is causing the 0x800701e3 error code?
Unfortunately, this particular issue is associated with a serious hardware problem that usually can’t be fixed. Most of the time, the issue is a surefire sign that the drive is failing. Upon seeing this message, your first stop should be to recover as much data as possible before it’s not too late.
Update: As it turns out, the error message might also be caused by a failing peripheral like a SATA cable or an SD card adapter. You might also see a false positive if you get this error while trying to clean install a Windows version from an installation media creating through unofficial channels.
But even if the 0x800701e3 error is an obvious sign that the drive is failing, we managed to find a few workarounds that will allow you to circumvent the error message and complete the data transfer.
Since not every method will be applicable to your scenario, we advise you to follow the potential workarounds in the order that they are presented and skip the ones that are not applicable to your scenario.
Method 1: Dealing with bad sectors
If you’re seeing the 0x800701E3 error when trying to clean install a Windows version, it’s probably because your HDD contains too many bad sectors. There are a couple of built-in utilities that are capable of fixing bad sectors to some degree.
Some affected users have reported that they were able to complete the installation without the 0x800701E3 error after performing CHKDSK and SFC scans on the affected drive. Here’s how to do this:
- Start your computer and press any key to boot from the installation media while the prompt is showing.

Press any key to boot from installation media - At the initial Windows installation screen, click on Repair your computer.

Choosing Repair your computer from Windows Setup - Inside the Advanced Options menu, go to Troubleshoot and then click on Command Prompt.

Opening Command Prompt - In the Command Prompt, type the following command and press Enter to run a CHKDSK scan on the affected drive:
chkdsk /f X:
Note: X is simply a placeholder. Replace it with the letter of the affected drive.
This scan will scan and repair missing or corrupted system files.
- Once the CHKDSK scan is finished, type the following command and press Enter to run an SFC (System File Checker) scan:
sfc /scannow
Note: This command will scan all protected system files and replace corrupted files with a cached copy.
- Once the second scan is finished, try to clean install the Windows version again and see if the process manages to complete without the 0x800701E3 error.

If this method was not applicable or didn’t resolve the issue, move down to the next method below.
Method 2: Disabling Secure boot
Some affected users have reported that the 0x800701E3 error was no longer occurring during a clean installation of Windows after they disabled Secure boot from UEFI/BOOT.
Secure boot is an industry standard that was developed by the biggest manufacturers in the PC industry to ensure that the PCs are using software exclusively from Original Equipment Manufacturers (OEM). However, this security feature is known to create problems with installation media created outside of the official channels (using Rufus and other similar software).
Here’s a quick guide on disabling Secure boot:
- Press the Setup (Boot key) repeatedly after powering up your machine (during the initial bootup sequence).

Press the BIOS key during the startup procedure Note: Most of the time, the Setup key is visible on the screen during the initial screen. But you can also search online for your particular Setup key or press typically keys that are used for this purpose: Esc key, F keys (F1, F2, F3, F8, F12) or Del key.
- Once you gain entry into your BIOS menu, look for a setting named Secure Boot and set it to Disabled. The exact name and location will be different from manufacturer to manufacturer, but typically, you’ll find it inside the Security tab – you might also find it inside the Boot or Authentication tab.

Disable Secure Boot - Save the changes and exit your BIOS settings. Then, try to clean install Windows again and see if you’re still getting the 0x800701E3 error.
If you’re still seeing the same error message or this method wasn’t applicable to your current scenario, move down to the next method below.
Method 3: Changing the connection cable/card adapter
This error is typically indicative to an electronic problem inside the hardware/ SD card enclosure. However, there are some cases where the issue was actually caused by a peripheral like a SATA cable or an SD card adapter.
If possible, change the connectivity cable / SD card adapter and check if the issue is still occurring.
In the event that this method is not applicable to your current scenario, move down to the next method below.
Method 4: Retrying the operation over & over again
If the data you are trying to copy or move is very important, you might be able to recover bits and pieces by retrying the process over and over again.
And instead of copying / moving all the files at once, try to move the data separately and see if you are successful.
Several affected users have reported that they were able to gradually copy the data that was previously failing with the 0x800701e3 error by copying data individually and retrying multiple times until the transfer was successful.
But keep in mind that this method is only effective with failing SD cards. And even then, it will only work as long as whole sections of the chip inside are not failing.
If this method is not applicable, move down to the next method below.
Method 5: Using a third party software to recover data
There are a few specialized software that will help you recover data in cases where traditional transfer attempts fail. Most of this software is designed to try different coping strategies, retry and skip the blocks that are beyond transferable.
We tried different free recovery software and we can recommend any of the following:
- DDRescue
- Unstoppable Copier
- Disk Drill
But for the sake of keeping things simple, we’re going to feature a recovery guide with Unstoppable Copier since it’s widely regarded as the most reliable recovery feature out of the bunch. Here’s how to use it:
- Visit this link (here), select your Windows version and hit the Download button to commence the download of the installer.

Downloading Unstoppable Copier’s installer - Open the installation executable and follow the on-screen prompts to complete the installation of Unstoppable Copier.

Installing Unstoppable Copier - Once the installation is complete, launch Unstoppable Copier and agree with the End User Licence Agreement.

Accepting the User Agreement - Inside Unstoppable Copier, go to the Copy tab and set the failing drive as the Source. Then, set a healthy drive as the Target. Then, simply hit the Copy button to commence the transfer.

Transferring data with Unstoppable Copier Once the process has been commenced, the program will automatically try different transferring strategy and ignore bad sectors that can’t be recovered. When the process is finished, navigate to the Target location and see if you managed to recover your data.


Kevin Arrows
Kevin Arrows is a highly experienced and knowledgeable technology specialist with over a decade of industry experience. He holds a Microsoft Certified Technology Specialist (MCTS) certification and has a deep passion for staying up-to-date on the latest tech developments. Kevin has written extensively on a wide range of tech-related topics, showcasing his expertise and knowledge in areas such as software development, cybersecurity, and cloud computing. His contributions to the tech field have been widely recognized and respected by his peers, and he is highly regarded for his ability to explain complex technical concepts in a clear and concise manner.
Рассказываем, из-за чего возникает ошибка 0x800701E3 и как ее можно исправить.
Как и у большинства других ошибок в Windows, у этой нет конкретной причины. Обычно с этой проблемой сталкиваются после переустановки операционной системы. В частности, после неполной переустановки с сохранением пользовательских данных. Но чаще всего код 0x800701E3 указывает на серьезный сбой в работе соединительного шлейфа для жестких дисков и SD-адаптеров. В худшем случае ошибка может означать критическую аппаратную поломку жесткого диска.
Далее рассмотрим несколько способов исправления ошибки 0x800701E3.
Сбой чаще всего происходит при попытке взаимодействовать с конкретным файлом или папкой. Поэтому перед тем как переходить к инструкциям, попробуйте заново скопировать или удалить файлы, отзывающиеся ошибкой. Попробуйте раз 5. Иногда ошибка 0x800701E3 имеет временный характер и исчезает сама по себе.
Пытаемся починить поврежденные сектора памяти
Для начала пройдемся по системе специальными программами, которые могут отыскать «битые» участки данных и восстановить их.
Используем системные средства
Лучше всего проверить компоненты Windows еще на этапе загрузки.
Для этого:
- Создаем флэшку с установочными файлами Windows.
- Вставляем ее в компьютер.
- Перезагружаем или включаем его.
- При загрузке устройства нажимаем на клавишу F8 .
- Появится список доступных для загрузки устройств. Выбираем только что вставленную флэшку.
- В появившемся окне выбираем строчку «Восстановление системы».

Нам нужны утилиты для восстановления системы
- Открываем меню поиска и устранения неисправностей.

Выбираем первое меню
- Ищем в списке утилит командную строку и запускаем ее.

Нам нужен пункт посередине в левом столбце
- Вводим в командную строку команду chkdsk буква диска, который надо проверить : /f
- Нажимаем клавишу Enter , чтобы активировать проверку диска.

Вот так это выглядит
- Ждем, пока завершится автоматический процесс поиска и устранения проблем.
После этого стоит поискать ошибки с помощью утилиты System File Checker.
Для этого:
- Повторяем шаги из предыдущей инструкции и снова запускаем командную строку.
- Но вводим другую команду: sfc /scannow .
- Ждем завершения работы еще одной утилиты по поиску ошибок.
После выполнения обеих процедур можно попробовать вновь запустить Windows и повторить сценарии, в ходе которых возникала ошибка. Возможно, она больше не появится.
По сути, обе программы можно запускать и в обычном режиме, но система в любом случае потребует перезагрузки и дополнительного сканирования.
Загрузка …
Используем сторонние приложения
Проверить состояние жесткого диска можно с помощью отдельного приложения. Например, Victoria HDD или HDDScan. Они довольно распространенные и зачастую хорошо справляются со своими задачами. Подробно останавливаться на них тут не буду. Ранее мы уже составляли топ лучших программ для исправления ошибок в работе жесткого диска . Ознакомьтесь с ними и поищите то, что вам подходит больше.
Загрузка …
Выключаем режим безопасной загрузки
Иногда предотвратить появление ошибки с кодом 0x800701E3 помогает отключение функции «Безопасная загрузка». Ее задача обеспечивать корректную загрузку системы только из официальных источников. То есть от производителей компьютеров и самой Microsoft. Могут возникнуть проблемы, если вы захотите установить дистрибутив, добытый из торрент-трекеров.
Чтобы отключить безопасную загрузку:
- Перезагружаем (или включаем) компьютер.
- В ходе запуска жмем на одну из кнопок, отвечающих за запуск BIOS (зависит от производителя материнской платы и компьютера в целом).
- Оказавшись в BIOS, ищем параметр Secure Boot. Эта опция может находиться как в разделе Main, так и в разделе Boot. Зависит от версии BIOS.
- Наводим на него курсор с помощью клавиш-стрелок и нажимаем на Enter
- В появившемся списке выбираем пункт Disabled
Загрузка …
Используем утилиты для восстановления данных
Если ошибка возникает из-за поврежденных файлов, можно попробовать воспользоваться специальной программой для устранения такого рода неполадок.
Эти приложения устроены по-разному и каждая имеет свой набор функций. Визуально они тоже сильно отличаются, поэтому охватить все в рамках этой статьи не получится. Я вкратце расскажу о том, как устроена программа Disk Drill. Покажу, какие возможности по поиску неисправностей в ней есть.
На главном экране отображаются все доступные диски и логические разделы. Вам нужно найти тот, на котором располагаются «поврежденные» файлы. Поврежденные — это те, при взаимодействии с которыми появляется ошибка.

Интерфейс для macOS почти не отличается от такового для Windows
Для каждого диска есть заданный набор настроек. Можно:
- Одновременно включить все методы поиска и восстановления данных.
- Запустить глубокое (весьма длительное) сканирование файлов.
- Искать утерянные разделы.
- Проанализировать поврежденные сектора памяти и попытаться «исправить» их.
Этот список доступен при нажатии на один из разделов и в меню «Файл»
Для выполнения этой же задачи можно использовать утилиты типа Recuva, Unstoppable Copier, DDRescue и множество других .
Загрузка …
Проверяем аппаратную часть
Отдельного внимания заслуживает разъем интерфейса SATA.
- Необходимо убедиться, что он корректно подключен к жесткому диску и материнской плате.
- Шлейф не должен быть поврежден.
Стоит попробовать заменить шлейф, разъем, переходник для диска или карты памяти. Один из этих компонентов может провоцировать появление ошибки.
Загрузка …
В крайнем случае придется заменить жесткий диск (или другой используемый накопитель). Некоторые аппаратные поломки просто невозможно исправить, а они бесконечно ведут к появлению одной и той же ошибки.
Загрузка …
Post Views: 3 116
There are various components that take part during a Windows Upgrade process such as the CPU, Disk, Network, and many more. This is why the process of upgrading your Windows 10 computer can be quite complex and due to its complexity, there are times when you might encounter some errors like the Windows Upgrade error 0x800701E3.
If you encounter this kind of error then it has something to do with the “disk” part of the whole upgrade process which could be due to a conflict with the storage of your Windows 10 computer. When you receive this error, you will see the following error message on your screen:
“Windows cannot install required files. Make sure all files required for installation are available and restart the installation. Error code: 0x800701e3.”
To fix this Windows Upgrade error, here are some suggestions that might help.
Option 1 – Delete Files from Software Distribution Folder & Catroot2 folders
The downloaded Windows Updates are placed in a folder called “SoftwareDistribution”. The files downloaded in this folder are automatically deleted once the installation is completed. However, if the files are not clean up or if the installation is still pending, you can delete all the files in this folder after you pause the Windows Update service. For complete instructions, refer to the steps below.
- Open the WinX Menu.
- From there, open Command Prompt as admin.
- Then type in the following command – don’t forget to hit Enter right after typing each one of them.
net stop wuauserv
net start cryptSvc
net start bits
net start msiserver
- After entering these commands, it will stop the Windows Update Service, Background Intelligent Transfer Service (BITS), Cryptographic, and the MSI Installer
- Next, go to the C:/Windows/SoftwareDistribution folder and get rid of all the folders and files thereby tapping the Ctrl + A keys to select them all and then click on Delete. Note that if the files are in use, you won’t be able to delete them.
After resetting the SoftwareDistribution folder, you need to reset the Catroot2 folder to restart the services you just stopped. To do that, follow these steps:
- Type each one of the following commands.
net start wuauserv
net start cryptSvc
net start bits
net start msiserver
- After that, exit Command Prompt and restart your computer, and then try to run Windows Update once more.
Option 2 – Try running the DISM tool
You can try running the Deployment Imaging and Servicing Management or DISM tool to fix the Windows Upgrade problem. Using this built-in tool, you have various options such as the “/ScanHealth”, “/CheckHealth”, and “/RestoreHealth”.
- Open the Command Prompt with admin privileges.
- Then type in the following commands and make sure to hit Enter right after you type each one of them:
- Dism /Online /Cleanup-Image /CheckHealth
- Dism /Online /Cleanup-Image /ScanHealth
- exe /Online /Cleanup-image /Restorehealth
- Do not close the window if the process takes a while as it will probably take a few minutes to finish.
Option 3 – Run the System File Checker Scan
System File Checker or SFC is a built-in command utility that helps in restoring corrupted files as well as missing files. It replaces bad and corrupted system files with good system files. To run the SFC command, follow the steps given below.
- Tap Win + R to launch Run.
- Type in cmd in the field and tap Enter.
- After opening Command Prompt, type in sfc /scannow
The command will start a system scan which will take a few whiles before it finishes. Once it’s done, you could get the following results:
- Windows Resource Protection did not find any integrity violations.
- Windows Resource Protection found corrupt files and successfully repaired them.
- Windows Resource Protection found corrupt files but was unable to fix some of them.
- Restart your computer.
Option 4 – Try running the ChkDsk utility
You can also run the ChkDsk utility to fix the Windows Upgrade error 0x800701E3.
- First, open This PC and right-click on your operating system partition for Windows.
- Next, click on Properties and navigate to the Tools tab.
- Then click on Check under the Error Checking section.
- After that, a new mini window will be opened and from there click on Scan drive and let it scan your disk drive partition for any errors and then restart your computer.
Option 5 – Run the Windows Update Troubleshooter
Running the built-in Windows Update troubleshooter is one of the things you can first check out as it is known to automatically resolve any Windows Update or upgrade errors like error code 0x800701E3. To run it, go to Settings and then select Troubleshoot from the options. From there, click on Windows Update and then click the “Run the troubleshooter” button. After that, follow the next on-screen instructions and you should be good to go.
Option 6 – Run Microsoft’s online troubleshooter
Running Microsoft’s online troubleshooter might also help you fix the Windows Upgrade error code 0x800701E3. This online troubleshooter is known to help in fixing Windows Update errors, it scans your computer for issues that might be causing the problem and then fixes them automatically.
Do You Need Help with Your Device?
Our Team of Experts May Help
Troubleshoot.Tech Experts are There for You!
GET HELP
Troubleshoot.Tech experts work with all versions of Microsoft Windows including Windows 11, with Android, Mac, and more.
Share this article:
You might also like
Roblox is a very popular online game with millions of gamers playing it each day and as such it will naturally bring a lot of malware and attack on players trying to steal and exploit them for monetary gains. The latest attack and high-profile stealing of currency and assets happened exactly in Roblox.

Malicious activities have been reported to come from chrome extensions. So far 2 extensions have been identified that have hidden malware inside them but there could be more of them currently undetected. Extensions work as a front while in the back they mine user logins and other data in order to steal stuff from the Roblox platform.
To make things worse some of the malware is within long extensions like SearchBlox. The SearchBlox extension allows you to search quickly for other users if it was legitimate but has been compromised within the last month. There is evidence that people are stealing Roblox currency with the data gathered by the hidden backdoor in it.
SearchBlox extension is still Active in Chrome Web Store, with the primary listing still with the «Featured » badge. Google is actively removing malicious software from its storefront on a regular basis but this one still lingers in it.
If you or your kid have this Chrome extension installed, uninstall it right away and always be careful about which extension you install and give access to your system, keep them updated and check various blogs and article sites to inform yourself when a bad one is found.
Read More
The failure of MS Vista or XP to execute an Input or Output Signal activity is that which we refer to as an I/O device error. This malfunction takes place when MS Vista is not able to execute activities for example reading and duplication different kinds of information from the disk or drive.
Solution
Error Causes
- A piece of destroyed hardware equipment: You are getting messages informing you about the I/O device Malfunction when your Computer features an equipment apparatus that Windows is not able to utilize.
- Broken/Faulty hardware Apparatus: If for whatever reason the equipment hardware is broken at all, or includes a flaw, you will also get such messages suggesting the existence of an I/O device error.
- Incompatible/Broken Hardware Drivers: Such malfunctions are frequently the result of incompatible or broken equipment drivers.
- Cable Link Problems: Technicians have determined the existence of link trouble, for instance, a cable that’s in a bad situation, as another variable that can also cause these error messages.
- Terrible/Dusty CD or DVD Disc: Yet another variable that’s frequently accountable for the I/O device error is a broken CD or DVD disc. If it has not been cleaned by you, and in case the disc is dirty, prepare yourself to receive such messages often.
Further Information and Manual Repair
You should not stress yourself ill over the I/O Device Malfunction when it occurs on your own Computer. You can really fix it.
First, before you spend lots of cash on the problem and sprint off to find a technician, reboot the pc.
Subsequently, strive to obtain the push or disc, that you were not able to formerly. Second, clean the disc. Locate a great cleansing agent, and execute this. Utilize another pc to access the disc which you’re incapable of using on the present pc. If it opens on another pc, then the disk is functional and should work on your computer as well.
Let’s assume that you lack another pc, search for a distinct disc, and strive to start it with your current pc.
If the problem is not with the computer, the fresh disk should open and you can access the contents. If you fail completely, you’re totally within your rights to move searching for a tech to repair the situation, if you attempt every one of the preceding choices.
You could also do these aI/O device sections to view if you would repair the problem yourself.
a) Network Cable Connections: Clearly, this is really something you can do without requiring a tech. Always check to see whether the networking and computer cables are well-connected. If you believe it’s broken in case utilizing an exterior push, you could change the cable with yet another one.
For inner cabling, unless you’ve high-level pc abilities, you shouldn’t make an effort to change them.
b) Attempt a Clean Boot of the PC: You can do this by yourself. Likely, the driver or software is incompatible together with the drive available on the PC. Clean boot up the pc is similar to configuring MS Windows.
If the error is fixed following the preceding action, then it indicates your pc features a driver or software which is incompatible with the rest.
c) Recognize the IDE Channel Attributes, and Adjust the Transfer Mode: It’s feasible that you, or somebody otherwise, changed the Transfer Mode, which makes it challenging/impossible for the transport of information in the disk of your PC. If you understand the I/O Device right transfer mode, and if this occurred, just change it.
Don’t attempt a change or alter the Main IDE Channel.
d) Check the Condition of Device: Confirming the working nature of the hardware device, which you may do under Device Manager, may inform you if it’s operating right or not.
e) Search the Manufacturing Company: When the rest fails, and you’ve likely employed a tech that can’t solve the problem, you need to contact the producer, or check out their site, and see when there is an upgrade. It’s possible to obtain to resolve the I/O Device Error, once for all through a simple upgrade.
Read More
Hello everyone and welcome to our Windows 10 security basics where we will provide you with common practices you should aim to follow in order not to cough some viruses, malware, keylogger, worm, etc.
As you are all aware, we live in a digital age where we are surrounded by luxuries of unlimited information, video chats all over the globe, free calls via the internet, applications that track stuff for us, and many many more things that make our lives easier. Sadly with this kind of technology comes risks of cyber attacks that aim to steal your information, credit card numbers, or any other relevant stuff which could be used illegally in order to make purchases, loans, and other theft in your name so ones doing that could not get caught.
Think of data stealers the same as you think of armed robbers in a dark alley, just this time their pray is data about your life so they can make purchases for themselves more than once.
This article aims to provide you with some common logic, tips, and tricks of what should you do and where should you pay attention in order not to provide wrong people with your crucial information and data. we hope that you will find reading informative and helpful.
-
Keep Windows updated.
Microsoft is working hard on their Windows defender and firewall to provide protection to its users and fixing any introduced security leaks which are found in Windows itself. By updating and keeping Windows updated you make sure that every security leak that is found is patched and removed from Windows and that you have the latest database of known malware inside the firewall and defender.
This common practice, however, should not be limited to Windows only, you should update every application you are using for the same reasons. -
Use antivirus, anti-malware, and firewall
These applications exist for a reason and that reason is to protect your data. Dedicated applications specifically made for purposes of defending your data are better than any kind of I am careful mentality since sometimes is enough to just visit a website or just click on some link and you are compromised. You can use Windows Defender and firewall if you wish, they are already in Windows but if you are serious about your data and like to surf the internet some better protection is worth the investment.
-
Get a dedicated password manager
Your password is bad, if you use the same password everywhere then it is even worse. Computers have come a long way in the last 50 years and so have cyber attack applications which make your commonsense passwords extremely vulnerable and all of your accounts open to cyber attacks. Dedicated password managers that can hash passwords and automate them are your safest bet that your passwords will not be compromised, get one, and get it today.
-
Do not click on anything inside emails
Cyber attacks come in vast variety and one of them is sending you emails informing you that for example your Paypal or anything else has been hacked and that you must click this link to reset your password. These you do not click, no matter how convincing they sound or how good they look, if you need to update your information on a specific service or website, you delete email, open browser and go to that service and change stuff. The same goes with different offers, discounts, women seeking you, men seeking you, prince sending you 1 billion in gold. Only click on links in emails from a trusted and verified source.
-
Do not click on pop-ups
Similar to clicking on links in emails you should not click on pop-ups, the same rules, same stuff apply as with emails.
-
Be careful what you are downloading
Be careful from where you download your software and be careful what are you downloading and stop using pirated software, any kind of malicious applications, keyloggers, viruses, etc could be hidden in these downloads, and by downloading them you are opening doors to your private information. Only use legal software from trusted sources.
-
Never leave your phone or computer unattended
You can never tell who can implement malicious software or get some crucial information from unattended devices, lock them all time and take them with you.
There you go, 7 common tips and tricks for the basic security of your computer. Thank you for reading and I hope to see you again on our site.
Read More
Fooriza is a browser extension for Google Chrome. This extension offers users the latest trending news from the internet. These news widgets are usually sponsored content that the application displays based on your search history or visited links. While this extension is not that dangerous on its own, it usually comes bundled with other Potentially Unwanted Programs and Browser Hijackers that could pose a security risk.
When installed this extension changes your default search engine to yahoo. And while active you might see some additional ads injected into the search results.
Due to its bundled nature with other PUP-s and the potential dangers that might come with them, several anti-virus scanners have detected this extension as a Browser Hijacker and are marked for removal.
About Browser Hijackers
Browser hijackers (also called hijackware) are a kind of malware that alters internet browser configurations without the user’s knowledge or consent. These kinds of hijacks appear to be increasing at a worrying rate around the world, and it could be really nefarious and often dangerous too. They’re made to interfere with browser functions for many different purposes. In general, hijackers are programmed for the benefit of internet hackers often through revenue generation from forced advert clicks and site visits. However, it isn’t that harmless. Your internet safety is compromised and it is extremely irritating. Additionally, hijackers can make the whole infected system vulnerable – other destructive malware and viruses would seize these opportunities to get into your PC effortlessly.
Indications of browser hijack
Signs that your web browser is hi-jacked include:
1. your browser’s home page is suddenly different
2. you find yourself constantly directed to a different web page than the one you actually intended
3. default web engine is changed
4. you’re getting new toolbars you haven’t seen before
5. you may find numerous pop-up ads on your computer screen
6. your web browser gets sluggish, buggy, and crashes frequently
7. you are blocked to access those sites of anti-malware solution providers.
Exactly how browser hijacker finds its way to your computer
Browser hijackers infect computer systems in numerous ways, including via a file-share, a drive-by download, or an infected e-mail attachment. They are usually included with toolbars, BHO, add-ons, plug-ins, or browser extensions. Also, some freeware and shareware can put the hijacker in your PC through “bundling”. Some of the most well-known hijackers are Fooriza, Babylon Toolbar, Conduit Search, OneWebSearch, Sweet Page, and CoolWebSearch.
Browser hijacking could lead to serious privacy issues and even identity theft, disrupt your web browsing experience by taking control over outbound traffic, drastically slows down your personal computer by consuming lots of resources, and cause system instability also.
Browser Hijacker Malware – Removal
Some hijackers can be simply removed by deleting the freeware they came with or by deleting any add-ons you have recently added to your system. At times, it can be a challenging task to discover and remove the malicious program since the associated file will be running as part of the operating system process. You should think of carrying out manual repairs only if you happen to be a tech-savvy person since there are potential risks associated with messing around with the computer registry and HOSTS file.
Installing and running antivirus software on the affected system can automatically erase browser hijackers and other malicious applications. SafeBytes Anti-Malware detects all kinds of hijackers – such as Fooriza – and eliminates every trace quickly and efficiently.
What To Do If You Cannot Install Safebytes Anti-Malware?
Every malware is bad and the degree of the damage will vary greatly with regards to the type of infection. Some malware is designed to interfere with or prevent things that you wish to do on your personal computer. It may not allow you to download anything from the internet or prevent you from accessing some or all of the websites, in particular the antivirus websites. If you are reading this, you probably have infected by malware that prevents you from installing a computer security application like Safebytes Anti-Malware. There are a few actions you can take to get around this problem.
Get rid of malware in Safe Mode
If the malware is set to load at Windows start-up, then booting in Safe Mode should avoid it. Just minimal required programs and services are loaded when you boot your PC in Safe Mode. The following are the steps you should follow to eliminate malware in Safemode.
1) At power on, press the F8 key while the Windows splash screen starts to load. This will bring up the Advanced Boot Options menu.
2) Choose Safe Mode with Networking with arrow keys and press Enter.
3) When you are into this mode, you should have access to the internet again. Now, obtain the malware removal program you need by using the internet browser. To install the software, follow the guidelines within the installation wizard.
4) Once the software is installed, allow the diagnostic scan to run to eliminate viruses and other malware automatically.
Use an alternate web browser to download the anti-malware application
Some malware might target vulnerabilities of a specific web browser that block the downloading process. The ideal way to overcome this problem is to select an internet browser that is known for its security measures. Firefox contains built-in Malware and Phishing Protection to help keep you secure online.
Run anti-malware from your USB drive
Another option is to make a portable anti-malware program on your USB stick. Do these simple actions to clean up your affected PC using a portable antivirus.
1) On a clean PC, install Safebytes Anti-Malware.
2) Put the USB drive into the clean PC.
3) Double-click the executable file to run the installation wizard.
4) When asked, choose the location of the USB drive as the place in which you would like to put the software files. Follow the instructions on the computer screen to finish off the installation process.
5) Disconnect the USB drive. You may now use this portable anti-virus on the affected computer.
6) Double-click the antivirus program EXE file on the pen drive.
7) Press the “Scan” button to run a full system scan and remove malware automatically.
How SafeBytes Anti-Malware Keep your Machine Virus Free
Nowadays, an anti-malware program can protect your PC from different types of internet threats. But how to decide on the best one amongst plenty of malware protection application that’s available out there? As you might be aware, there are many anti-malware companies and tools for you to consider. A few of them do a good job in removing malware threats while many will ruin your computer by themselves. When searching for an antimalware program, purchase one that gives dependable, efficient, and complete protection against all known viruses and malware. Among few good applications, SafeBytes Anti-Malware is the highly recommended program for the security-conscious individual.
SafeBytes anti-malware is a very effective and easy-to-use protection tool that is designed for end-users of all levels of IT literacy. With its cutting-edge technology, this application will assist you to get rid of several types of malware including computer viruses, trojans, PUPs, worms, adware, ransomware, and browser hijackers.
SafeBytes anti-malware takes computer protection to a whole new level with its enhanced features. These are some of the great features included in the software.
Active Protection: SafeBytes provides real-time active checking and protection against all known computer viruses and malware. This utility will constantly monitor your PC for any suspicious activity and updates itself regularly to keep abreast of the latest threats.
Robust, Anti-malware Protection: Using its advanced and sophisticated algorithm, this malware elimination tool can detect and remove the malware threats hiding in the computer system effectively.
Extremely Speed Scanning: This application has got one of the fastest and most efficient virus scanning engines in the industry. The scans are highly accurate and take a short amount of time to complete.
Web Filtering: SafeBytes checks the links present on a web page for possible threats and alerts you whether the website is safe to explore or not, through its unique safety rating system.
Light-weight: SafeBytes gives total protection from online threats at a fraction of the CPU load because of its enhanced detection engine and algorithms.
24/7 Assistance: You may get high levels of support round the clock if you’re using their paid software.
All in all, SafeBytes Anti-Malware is a solid program as it has lots of features and can identify and remove any potential threats. You now may understand that this particular software does more than just scan and delete threats on your computer. So if you’re trying to find a comprehensive antivirus program that’s still simple enough to use, SafeBytes Anti-Malware is just what you need!
Technical Details and Manual Removal (Advanced Users)
If you want to perform the removal of Fooriza manually rather than employing an automated software tool, you may follow these steps: Go to the Windows Control Panel, click the “Add or Remove Programs” and there, choose the offending program to remove. In case of suspicious versions of browser plug-ins, you can easily remove them through your web browser’s extension manager. It is also advised to factory reset your browser to its default condition to fix corrupt settings.
Finally, examine your hard disk for all of the following and clean your computer registry manually to remove leftover application entries following uninstalls. Please note that only experienced computer users should try to manually edit the system files mainly because deleting any single vital registry entry leads to a major problem or even a computer crash. Moreover, some malware keeps replicating which makes it tough to remove. Doing this malware-removal process in Safe Mode is recommended.
Files:
%LOCALAPPDATA%\Google\Chrome\User Data\Default\Extensions\nnamllomkmngnaklpijbbaokmonnkcne
%UserProfile%\Local Settings\Application Data\Google\Chrome\User Data\Default\Extensions\nnamllomkmngnaklpijbbaokmonnkcne
Read More
FLoC is Google’s alternative to third-party cookies and is based on machine learning. This will allow the browser, any browser, to anonymously study how users are browsing and then group them into ‘cohorts’. Following this, you will be served ads based on your cohort and not on your individual data. So, you are still going to be targeted with ads but in a more anonymous manner.
Google claims that this will improve user privacy since this “federated learning” happens on the user’s device and artificial intelligence-based learning involves sharing lesser users than what happens with third-party cookies. If something like this gets widely adopted by ad companies and services, it should “protect users” from tracking methods that are more intrusive than third-party cookies, like browser fingerprinting.
Who is against it?
Privacy-focused browsers DuckDuckGo, Brave, and Vivaldi have all warned users against FLoC and have said that they are going to block it on their end.
Brave says that Google FLoC has a design that does not respect the customer’s privacy and consent. It has been designed to provide browsing behavior and interest data with any website that users may interact with, and this process does not involve fully informed consent.
Vivaldi, another popular Chromium-based web browser, has also made its stance clear regarding the status of FLoC. The company said in a Reddit thread that the FLoC experiment does not work in Vivaldi. It happens because for FLoC to work, some features need to be enabled under the hood, but Vivaldi does not provide those options. The company also added that it plans to stop the entire FLoC component from being a part of the browser, regardless of how Google may implement it. Considering that Brave and Vivaldi have been privacy-focused browsers since their beginnings, the decision to stay away from FLoC is not surprising.
Read More
Experiencing issues while using Remote Desktop connections is not uncommon. One of the issues that users encountered recently while trying to connect to their Remote Desktop network is the error saying, “Your credentials did not work, The login attempt failed”. If you are one of these users, then you’ve come to the right place as this post will walk you through fixing the problem.
When facing this kind of problem, the first thing you can try before you do some troubleshooting steps is to verify the credentials. But if you are certain that you’ve entered the correct credentials just like what other users reported, then it’s completely a different matter. Based on the reports, this error is common on newly installed versions of Windows 10 or after reinstalling the operating system which could mean that the problem might be due to the Windows security policies or the username might have been recently modified. The latter case is a possibility especially if you’ve reinstalled Windows 10 and had entered a new username. In such a case, you will really have a difficult time connecting to your Remote Desktop connection since its credentials do not really automatically change.
If you’ve verified that your credentials are correct, then now’s the time you troubleshoot the problem with the help of the potential fixes provided below. Just make sure that you follow each one of them in sequence.
Option 1 –Try to run the Network Adapter troubleshooter
To run the Network Troubleshooter, refer to these steps:
- Open the Search bar on your computer and type in “troubleshoot” to open the Troubleshoot settings.
- Next, scroll down and select the “Network Adapter” option from the right pane.
- Then click on the Run Troubleshooter” button.
- After that, your computer will check for any possible errors and will pinpoint the root cause of the problem if possible.
- Restart your computer.
Option 2 – Try to change the network profile from public to private
According to some reports, this error occurs on systems where the network profile was set to public. Thus, you need to change the network profile to private to resolve the problem. How? Refer to these steps:
- Go to Start and from there click on Settings > Network & Internet > Status.
- Next, click on the “Change connection properties” option.
- After that, set the radio button of Network Profile from Public to Private.
- Wait for a couple of seconds until the system is done applying the changes you’ve made and then see if you can now connect to the Remote Desktop connection.
Option 3 – Try changing the account username
As mentioned, one of the possible causes for this error is the reinstallation of the operating system. You might have changed the username for the system but it does not really change the username of the Remote Desktop connection as well. Thus, you have to change the username back to what it was before you’ve reinstalled Windows 10.
Option 4 – Try modifying the Windows Security Policy
You can also try to edit the Windows Security Policy as it could help in resolving the error. This Windows Security Policy, when enabled, will not allow non-admin users to log on to the Remote Desktop connection. So if you want to allow non-admin users to use the Remote Desktop connection, then you need to modify this policy. Note that you can only do that if you are the admin of the system yourself.
- Tap the Win + R keys to open the Run utility.
- Then type “secpol.msc” in the field and tap Enter or click OK to open the Local Security Policy.
- After opening the Local Security Policy window, select Local Policies > User Rights Agreement located on the left pane.
- Next, double click on “Allow log on through Remote Desktop Services” located in the right pane.
- And in the next window that appears, select Add user or group.
- After that, type in the username of the intended non-admin user under the “Enter the object names to select” column.
- Once done, click on the Check Names button to fix the username and then click OK to save the changes made.
- Restart your computer.
Option 5 – Use the Group Policy Editor
- Tap the Win + R keys to open the Run dialog box and then type “gpedit.msc” in the field and tap Enter to open the Group Policy Editor.
- Next, navigate to this path: Computer Configuration > Administrative Templates > System > Credentials Delegation.
- Double click on the “Allow delegating default credentials with NTLM-only server authentication” policy setting located on the right pane to edit it.
- After that, shift its radio button to Enabled and click on Show.
- Then type “TERMSRV/*” in the Value box and click OK.
- Now repeat the same for the following policy settings:
- “Allow delegating default credentials”
- “Allow delegating saved credentials”
- “Allow delegating saved credentials with NTLM-only server authentication”
- Once you’re done, restart your computer and see if the problem is fixed.
Read More
You might be familiar with the Encryption File System or EFS algorithm if you rather keep your files and folders encrypted. Encryption File System is a built-in feature in Windows 10 which allows users to secure their important files. Although there is an alternative way for you to secure your data on your Windows 10 computer, you can’t ignore the fact that the main advantage of an Encryption File System over BitLocker is that the former can help you encrypt a particular folder rather than encrypting the whole hard drive partition.
If you move a file inside a folder encrypted with the Encrypting File System it will automatically get encrypted. There are some users who like this feature but unsurprisingly, there are some that don’t. So if whether you want your files encrypted when you place them in an encrypted folder or if you want to keep it as it is, read on as to how you can do it either way. You can enable or disable automatic encryption of files moved to encrypted folders in Windows 10 using the Registry Editor or the Group Policy Editor.
Before you proceed, make sure to create a System Restore Point first because the modifications you’re about to make in your computer might affect its overall functioning so if anything goes wrong, you can always undo the changes. Once you have that covered, refer to the options given below to enable or disable automatic encryption in Windows 10.
Option 1 – Enable or disable automatic encryption using Registry Editor
- Press the Win key + R key at the same time to open the Run dialog box.
- Then type “Regedit” in the field and press Enter to open the Registry Editor and if a User Account Control or UAC prompt appears, just click Yes to proceed.
- After opening the Registry Editor, navigate to this key location: HKEY_LOCAL_MACHINESOFTWAREMicrosoftWindowsCurrentVersionPoliciesExplorer
- Next, right-click on Explorer and select New > DWORD (32-bit) Value and then name the newly create DWORD to “NoEncryptOnMove” and press Enter to save it.
- After that, double click on the NoEncryptOnMove DWORD and set its value to the following preferences:
- 1 – Disable Auto Encryption of files moved to encrypted folders.
- 0 – Enable Auto Encryption of files moved to encrypted folders.
- Now close the Registry Editor and restart your computer to successfully apply the changes made.
Option 2 – Enable or disable automatic encryption using the Group Policy Editor
- Press the Win + R keys to open the Run box and type “gpedit.msc” in the field and press Enter to open the Group Policy Editor.
- After that, navigate to this path: Computer ConfigurationAdministrative TemplatesSystem
- Next, look for the “Do not automatically encrypt files moved to encrypted folders” option and double click on it to set the policy. From there, you will see the following description:
“This policy setting prevents File Explorer from encrypting files that are moved to an encrypted folder. If you enable this policy setting, File Explorer will not automatically encrypt files that are moved to an encrypted folder. If you disable or do not configure this policy setting, File Explorer automatically encrypts files that are moved to an encrypted folder. This setting applies only to files moved within a volume. When files are moved to other volumes, or if you create a new file in an encrypted folder, File Explorer encrypts those files automatically.”
- Now select one of the radio buttons below depending on your preference:
- Not Configured or Disabled: Enable Auto Encrypt of files moved to EFS Encrypted folders.
- Enabled: Disable Auto Encrypt of files moved to EFS Encrypted folders.
- Then click on the Apply and OK buttons to save the changes made.
- Exit the Group Policy Editor and restart your computer.
Read More
Error Code 1007 — What is it?
This is a typical system error. This error means the requested operation cannot be performed in full-screen mode. It hampers your ability to run your desired program on Windows PC. It is displayed on computer screens in the following format:
«ERROR_FULLSCREEN_MODE» and/or as the hexadecimal value 0x3EF.”
Solution
Error Causes
The system error code 1007 can be triggered due to several reasons. This includes but is not limited to:
- Windows registry damage or corruption
- Device driver conflicts
- Spyware or viral infection
- Hardware malfunction
- Software file damage or corruption
Unlike the blue screen of death error codes, this error is not fatal. But it may hamper your ability to run and work on your desired program. To avoid the inconvenience, it is advisable to fix it immediately.
Further Information and Manual Repair
Try these easy and effective do it yourself methods to repair the system error code 1007 on your PC:
Method 1 — Scan Your System for Viruses
If the underlying cause of error 1007 on your system is viral and spyware infection, then it is advisable to download a powerful antivirus and scan your entire PC.
An antivirus not only detects but also removes all types of viruses including spyware, Trojans and adware. Once removed, try running your desired program again, if the program runs successfully, this means the error is resolved.
Method 2 — Update the Drivers
When the error code 1007 occurs due to driver conflict, then it is advisable to update the drivers. To do so simply use the driver update wizard from within Device Manager. The wizard will guide you through the entire driver update process, making it extremely simple for you to update the drivers in minutes.
Method 3 — Clean and Repair the Registry
You may experience the error 1077 because of registry damage or corruption. If this is the reason, then it is suggested you download Restoro.
This is a user-friendly and multi-functional PC Fixer deployed with a powerful registry cleaner. It scans your entire system for registry related errors and issues, removes all unnecessary and obsolete files like cookies, junk files and bad registry entries, notorious for registry corruption.
In addition to this, it also repairs the registry and damaged system files, thereby resolving the system error code 1007 immediately.
Click here to download Restoro on your PC and fix system error code 1007 today!
Read More
FunPopularGames is a browser extension developed by Mindspark Inc. that lets you play popular, best-rated, and other games via popular websites, it also allows you to bookmark your favorite games for faster and easier access.
When installed it changes your default new tab page and default search engine to Search by MyWay. While browsing the internet with this extension enabled you will see additional injected ads, sponsored content, and pop-up ads throughout your browsing sessions.
While active this extension monitors user activity and browsing sessions, enabling it to track visited websites, clicked links, and other useful information that it later forwards to Mindspark to be used/sold for better ad placement.
About Browser Hijackers
Browser hijacking is amongst the internet’s constant risks that target internet browsers. It’s a kind of malicious software that alters your web browser’s configuration settings so that you are redirected to sites or web pages you had no intention of visiting. Browser hijackers could do a variety of things on your PC. These are generally used to force hits to predetermined sites, manipulating web traffic to generate ad revenue. Although it may seem naive, all browser hijackers are harmful and therefore always classified as security threats. Browser hijackers could also allow other destructive programs without your knowledge to further damage your PC.
How to determine if your internet browser has been hijacked
The following are some signs and symptoms that indicate you’ve been hijacked:
1. the home page of your browser is changed suddenly
2. you find new unwanted bookmarks or favorites added, usually directed to ad-filled or porn sites
3. the default online search engine and the default browser settings are altered
4. you see unsolicited new toolbars added
5. unstoppable flurries of popup ads show up on your computer screen
6. your browser has become unstable or starts running sluggishly
7. you can’t navigate to certain web pages, such as security software-related sites.
Exactly how browser hijacker finds its way onto your PC
There are several ways your computer or laptop can become infected with a browser hijacker. They typically arrive by way of spam email, via file sharing websites, or by a drive-by download. They can also originate from any BHO, extension, add-on, toolbar, or plug-in with malicious intent. Sometimes you might have accidentally accepted a browser hijacker as part of an application bundle (usually freeware or shareware).
Browser hijacking can cause serious privacy problems and also identity theft, disrupt your browsing experience by taking control of outbound traffic, drastically slows down your computer by consuming lots of resources, and lead to system instability at the same time.
Browser Hijacker Malware – Removal
Certain browser hijacking can be simply reversed by discovering and removing the corresponding malware application from your control panel. But, the majority of hijacking codes are not easy to get rid of manually, since they go deeper into the operating system. Moreover, manual removals require in-depth system understanding and therefore could be a very difficult job for beginner computer users.
Anti-malware software is really effective with regards to discovering and removing browser hijackers that standard anti-virus program has overlooked. To eradicate any type of browser hijacker from your personal computer, you should download this certified malware removal application – SafeBytes Anti-Malware.
What To Do When You Cannot Install Any Anti-virus?
Malware can cause all sorts of damage if they invade your PC, ranging from stealing your private information to deleting data files on your computer. Some malware is created to interfere with or prevent things that you want to do on your computer system. It may not allow you to download anything from the web or it will stop you from accessing a few or all internet sites, especially the anti-malware websites. If you’re reading this, you may have got affected by malware that stops you from downloading a security program such as Safebytes Anti-Malware. Although this type of issue will be difficult to circumvent, there are a few steps you can take.
Get rid of malware in Safe Mode
In Safe Mode, you are able to modify Windows settings, un-install or install some software, and eradicate hard-to-delete viruses. In the event the malware is obstructing internet access and affecting your PC, launching it in Safe Mode allows you to download antivirus and run a scan while limiting potential damage. To start the computer into Safe Mode, press the “F8” key on the keyboard just before the Windows logo screen comes up; Or right after normal Windows boot up, run MSConfig, look over “Safe Boot” under the Boot tab, and then click Apply. As soon as you reboot into Safe Mode with Networking, you can download, install, as well as update the anti-malware program from there. At this point, you can run the anti-malware scan to get rid of computer viruses and malware without any hindrance from another application.
Switch over to an alternate browser
Malicious program code may exploit vulnerabilities in a particular web browser and block access to all anti-malware software sites. If you are not able to download the security program using Internet Explorer, this means malware is targeting IE’s vulnerabilities. Here, you must switch to a different web browser like Chrome or Firefox to download the Safebytes application.
Create a portable antivirus for removing malware
Another method is to download and transfer anti-malware software from a clean PC to run a scan on the affected computer. Follow these steps to employ a flash drive to clean your corrupted system.
1) On a clean PC, install Safebytes Anti-Malware.
2) Plug the Thumb drive into the clean computer.
3) Double-click the Setup icon of the anti-malware software to run the Installation Wizard.
4) Choose the flash drive as the location for saving the file. Follow the directions to finish the installation process.
5) Remove the USB drive. You can now use this portable antivirus on the infected computer system.
6) Double-click the antivirus program EXE file on the USB flash drive.
7) Run Full System Scan to identify and clean-up up all kinds of malware.
SafeBytes Security Suite Benefits
In order to protect your laptop or computer from a variety of internet-based threats, it’s very important to install an anti-malware program on your PC. But with so many anti-malware companies out there, nowadays it’s difficult to decide which one you should obtain for your computer. A few of them do a good job in removing malware threats while some will ruin your computer by themselves. You have to pick one that is dependable, practical, and has a good reputation for its malware protection. Among few good applications, SafeBytes Anti-Malware is the strongly recommended software program for the security-conscious end user.
SafeBytes anti-malware is a powerful, highly effective protection tool designed to help end-users of all levels of IT literacy in finding and removing harmful threats out of their personal computers. With its cutting-edge technology, this application will allow you to eradicate several types of malware which include viruses, PUPs, trojans, worms, ransomware, adware, and browser hijackers.
SafeBytes has got a plethora of wonderful features that can help you protect your computer from malware attacks and damage. A few of them are listed as below:
World-class AntiMalware Protection: With its advanced and sophisticated algorithm, this malware elimination tool can detect and remove the malware threats hiding in the computer effectively.
Real-time Active Protection: SafeBytes offers an entirely hands-free active protection that is set to check, block and destroy all computer threats at its first encounter. They’re very efficient in screening and removing various threats since they’re continuously revised with new updates and safety measures.
Internet Security: SafeBytes gives an instant safety rating to the pages you’re about to visit, automatically blocking dangerous sites and ensuring that you are certain of your online safety while browsing the web.
Lowest CPU and Memory Usage: SafeBytes is a lightweight and easy-of-use anti-virus and antimalware solution. Since it utilizes minimum computer resources, this software leaves the computer’s power exactly where it belongs: with you.
24/7 Online Support: For any technical concerns or product assistance, you could get 24/7 professional assistance via chat and email.
SafeBytes has come up with an excellent anti-malware solution that can help you conquer the latest malware threats and virus attacks. Malware trouble can become a thing of the past when you put this software program to use. You will get the very best all-around protection for the money you pay on SafeBytes Anti-Malware subscription, there isn’t any doubt about it.
Technical Details and Manual Removal (Advanced Users)
If you do not wish to use an automated tool and like to get rid of FunPopularGames manually, you could possibly do so by going to the Windows Add/Remove Programs menu in the Control Panel and delete the offending program; in cases of browser extensions, you may remove it by going to the browser’s Add-on/Extension manager. You will probably also want to reset your web browser to its default configuration settings.
To be certain of complete removal, find the following registry entries on your computer and remove them or reset the values accordingly. However, editing the registry is usually a hard task that only advanced users and professionals should try to fix the problem. Moreover, some malicious programs have the capability to defend against its removal. Completing this task in Safe Mode is advised.
Files:
Search and delete:
AppIntegrator.exe
AppIntegrator64.exe
AppIntegratorStub.dll
AppIntegratorStub64.dll
AssistMonitor.dll
AssistMonitor64.dll
BAT.dll
CrExt.dll
CrExtPdu.exe
DpnMngr.dll
dubar.dll
dubarsvc.exe
dubprtct.dll
dudatact.dll
dudlghk.dll
dudlghk64.dll
dufeedmg.dll
duhighin.exe
duhtmlmu.dll
duhttpct.dll
duidle.dll
dumedint.exe
dumlbtn.dll
duPlugin.dll
duregiet.dll
duscript.dll
duskin.dll
duskplay.exe
duSrcAs.dll
HiddenToolbarReminder.dll
HkFxMgr.dll
HkFxMgr64.dll
InstallEnabler.dll
t8EPMSup.dll
T8EXTEX.DLL
T8EXTPEX.DLL
T8HTML.DLL
t8Res.dll
T8TICKER.DLL
ToolbarGuard.dll
ToolbarGuard64.dll
Verify.dll
TPIManagerConsole.exe
Read More
Hello everyone, I hope you are all doing well. Today we will be changing the Windows Lock Screen background. Changing the lock screen background is a very easy task and it can be done in a very short time. So let’s jump right into it.
The first thing you need to do is to press the Windows start button on the bottom left and then press settings.
Once the settings screen appears, choose and click on Personalization.

Inside personalization, click on the Lock Screen tab.

On the right screen, under the picture, you will find Windows spotlight, click on it to bring a drop-down menu up.

Your choice is presented as a single picture for background or slideshow, a series of pictures that are going to be looped in a given time interval.
If you would like just a single picture for your background, choose that and click on it.

Once you are in choose picture dialog, click on the browse button and navigate to the picture on your storage which you would like to have as a background.
If however, you fancy slideshow as your lock screen background, click on the background drop-down menu and choose the slideshow. Next, click on add a folder and navigate to a folder where you have pictures that you would like to have as a slideshow for your Windows lock screen.

Read More
Copyright © 2023, ErrorTools. All Rights Reserved
Trademark: Microsoft Windows logos are registered trademarks of Microsoft. Disclaimer: ErrorTools.com is not affiliated with Microsoft, nor claims direct affiliation.
The information on this page is provided for information purposes only.