
Сообщение об ошибке с кодом 0x8007000d может появляться в различных ситуациях: обновление или установка Windows, активация системы, использование отдельных системных инструментов.
В этой инструкции о том, как исправить ошибку 0x8007000d при обновлении Windows 11 или Windows 10, в том числе и при ручной установке обновлений, во время установки системы или её активации, а также о возможных причинах ошибки.
Ошибка 0x8007000d при обновлении Windows
Самый распространенный случай ошибки 0x8007000d — соответствующая ошибка обновления в Центре обновлений или при использовании автономного установщика обновлений. Причиной обычно является поврежденные файлы скачанных обновлений. Для быстрого решения можно использовать следующие шаги:
- Запустите командную строку от имени администратора (для этого можно начать набирать «Командная строка» в поиске на панели задач, затем нажать правой кнопкой мыши по результату и выбрать нужный пункт меню).
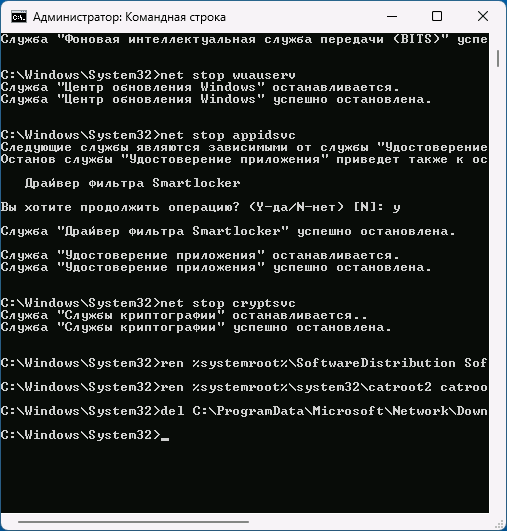
- По порядку введите следующие команды, нажимая Enter после каждой:
net stop bits
net stop wuauserv
net stop appidsvc
net stop cryptsvc
ren %systemroot%\SoftwareDistribution SoftwareDistribution.bak
ren %systemroot%\system32\catroot2 catroot2.bak
del C:\ProgramData\Microsoft\Network\Downloader\qmgr*
net start bits
net start wuauserv
net start appidsvc
net start cryptsvc

- Перезагрузите компьютер и выполните скачивание обновлений в Центре обновлений повторно, затем попробуйте выполнить их установку.
Если предыдущий вариант не помог, причиной могут оказаться поврежденные системные файлы, чтобы устранить ошибку:
- Запустите командную строку от имени администратора.
- По порядку выполните следующие две команды (процесс их выполнения может занять продолжительное время, и они могут «зависать», наберитесь терпения):
dism /online /cleanup-image /restorehealth
sfc /scannow

- Перезагрузите компьютер, затем проверьте, была ли решена проблема.

Если обновление выполняется через Центр обновлений и вы получаете сообщение об ошибке с указанным кодом, либо файл обновления скачан со стороннего сайта, используйте официальный каталог обновлений Майкрософт для загрузки файла обновления и его ручной установки: в поле поиска введите KB-номер обновления, скачайте нужную версию файла и запустите его.

Обычно один из предложенных способов решает проблему. Однако, если это не сработало, попробуйте дополнительные варианты из инструкции Способы исправить ошибки Центра обновления Windows.
При установке
Следующий распространенный вариант — ошибка 0x8007000d при установке Windows с флешки, а иногда при запуске установки из уже запущенной системы. Для первого случая наиболее частая причина — повреждение файлов на накопителе или невозможность их чтения по какой-либо причине.
Основные способы исправить ошибку при чистой установке ОС с флешки:
- Попробуйте использовать другой USB-накопитель для создания загрузочной флешки.
- Загрузите ISO-образ системы из другого источника, лучше всего — с официального сайта Майкрософт.
- Попробуйте использовать другие разъемы USB, например 2-й версии вместо 3-й или наоборот. В случае ПК используйте разъемы на задней панели системного блока.
Если эта же ошибка появляется при установке Windows 11/10 «внутри» уже запущенной системы, оптимальным вариантом будет запуск чистой установки путем загрузки с USB-накопителя. Если этот вариант не подходит, попробуйте:
- Выполнить проверку целостности и восстановление системных файлов с помощью команд
dism /online /cleanup-image /restorehealth
sfc /scannow
- Если установка выполняется с использованием образа ISO со сторонних сайтов, использовать оригинальный образ системы.
- При наличии сторонних антивирусов на компьютере — временно отключить их.
При активации
Ошибка 0x8007000d при активации Windows 11/10 может быть вызвана различными причинами, но чаще всего в наших реалиях возникает при активации «неофициальными» методами, а причиной может быть:
- Неработоспособность сервера активации, если используется ручная активация с использованием альтернативных серверов.
- Антивирус — как сторонний, так и встроенный Microsoft Defender.
Решение для этой ситуации — поискать альтернативные методы.
В случае лицензионной Windows и ошибках активации в ней, причинами могут быть:
- Временная недоступность серверов активации (если до этого с активацией всё было в порядке), как из-за проблем на стороне Майкрософт, так и по причине использования VPN, прокси, стороннего файрволла, утилит для блокировки/отключения функций телеметрии Windows.
- Повреждение системных файлов Windows, как и в предыдущих случаях, попробуйте выполнить команды восстановления в командной строке, запущенной от имени администратора, после чего перезагрузить компьютер:
dism /online /cleanup-image /restorehealth
sfc /scannow
- Неправильные разрешения для раздела реестра
HKEY_LOCAL_MACHINE\SYSTEM\CurrentControlSet\Enum\ROOT
и его подразделов. Возможное решение (причина маловероятна и если вы не уверены в своих действиях, лучше не менять разрешения): вручную предоставить полный доступ к разделу для группы «СИСТЕМА», подробнее на тему: Как стать владельцем раздела реестра в Windows.
В завершение — некоторые дополнительные возможные причины и подходы к исправлению ошибки 0x8007000d в различных ситуациях, если предыдущие варианты не сработали:
- Ранее случалось, что рассматриваемая ошибка при установке обновлений в Центре обновлений была вызвана проблемами со стороны Майкрософт, которые затем были решены. Если вы получаете сообщение об указанной ошибке при установке одного конкретного обновления, а действия из первой части инструкции не помогли, может иметь смысл подождать несколько дней, не предпринимая каких-либо дополнительных действий.
- При появлении ошибки после каких-либо недавних обновлений, модификации системы, установки программ, можно попробовать использовать точки восстановления системы на дату, когда проблема не наблюдалась.
- Иногда причиной ошибки 0x8007000d при установке обновлений или активации оказываются сторонние службы и фоновые приложения. Проверьте, появляется ли ошибка, если использовать режим чистой загрузки Windows.
- Вы можете переустановить Windows, исправив большинство ошибок и не затрагивая пользовательские программы и данные: для этого достаточно смонтировать образ Windows (правый клик по файлу ISO — Подключить) и запустить файл setup.exe с него.

- Ошибка 0x8007000d в процессе установки обновлений или операционной системы обычно говорит о повреждении данных в каких-либо из используемых файлов. Иногда причиной оказываются выходящие из строя накопители или ошибки оперативной памяти. Это редкий случай, но проверка оперативной памяти и диска на ошибки не будет лишней.

Надеюсь, один из предложенных вариантов был результативен в вашем случае. Буду благодарен, если вы сможете оставить комментарий о том, при каком процессе вы столкнулись с рассмотренной ошибкой и что сработало для её исправления: эта информация может быть полезной другим пользователям.
Error 0x8007000d is an update-related issue in Windows and it typically occurs when you are upgrading Windows to its latest version i.e. Windows 11. Recently, several users reported facing this error code when they installed the latest cumulative update KB5031356 on their systems.
You may sometimes succeed in initiating the upgrade via Windows Update. However, this will either fail or get stuck at a certain percentage. Since you are here, you must have faced this issue and are not able to install or even upgrade to the recent OS Build version. This prevents all updates from installing on Windows including non-security or optional updates.
What causes Update Error 0x8007000d?
This update error 0x8007000d occurs when either the system files or folders have been corrupted. Corrupt files or stored caches in the Microsoft Store may also result in similar error codes. You may attempt the SFC and DISM tools to find and repair file corruption within your system.
Purge Windows Cache folders to solve the cache problems within SoftwareDistribution and catroot2 folders. If this error persists even after applying these fixes, go for troubleshooting Windows Update or Reset Update Components. Let’s explore these tweaks in more detail –
Update error code 0x8007000d Fixes
To solve the Update error 0x8007000d on Windows 11/10, try the following suggestions –
1] Run Windows Update Troubleshooter
Windows Update, in general, fails due to corrupt Windows update components. Since bugs and errors are pretty common in Windows 10 OS, the company provides an essential tool that works to minimize such issues. Here’s how to run the troubleshooter –
Windows 11:
- Press Windows + X, and select Settings.
- Navigate to the below path inside Settings –
System > Troubleshoot > Other troubleshooters
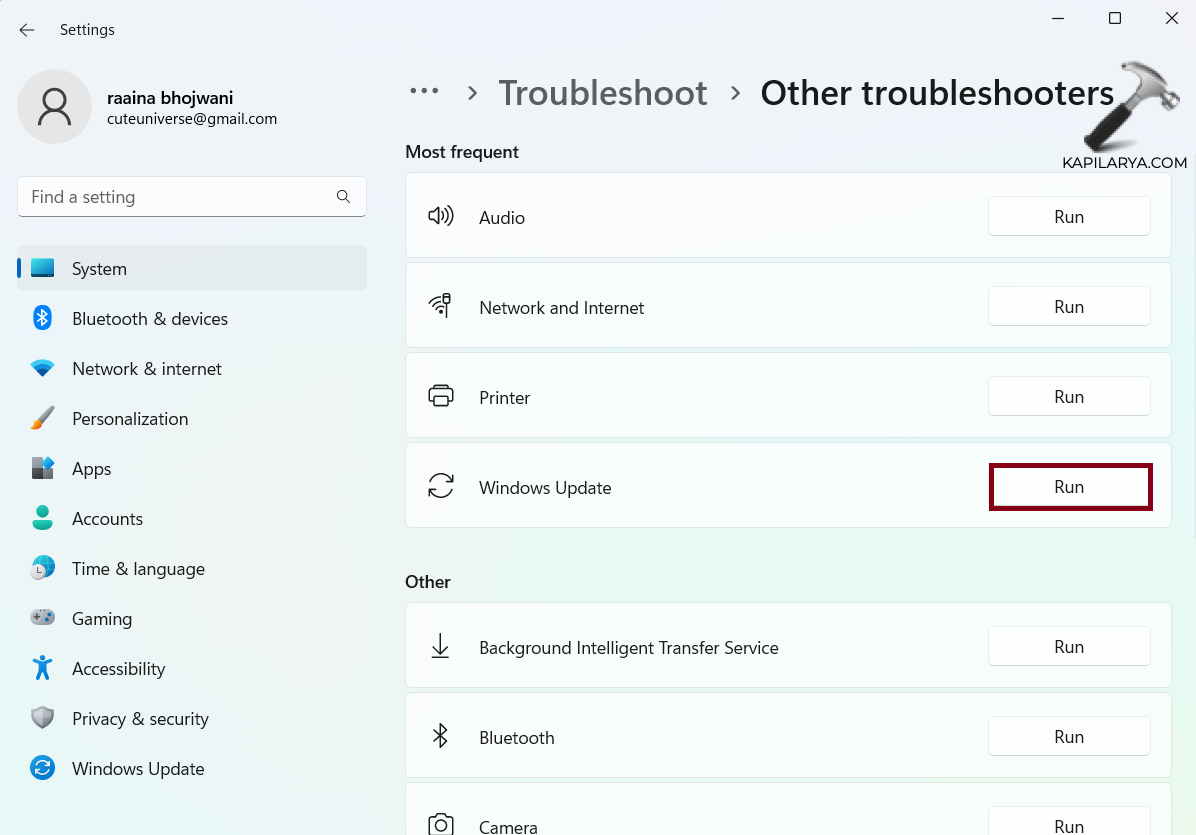
- Locate Windows Update, and hit the Run button available on its right end.

- Click Next and follow the on-screen instructions.
- As soon as this troubleshooting task is completed, restart your PC.
Sign back into your device again and check if this resolves the update error 0x8007000d on your Windows PC.
Windows 10:
- First of all, launch the Settings app by pressing Windows + I.
- Select Update & Security and click Troubleshoot on the right pane.
- Find and click on Additional troubleshooters next.
- On the right pane, you will find an option to Windows Update.
- Well, click on it once and hit Run the troubleshooter.

- The repairing task begins immediately afterward.
Restart your PC when this troubleshooting method is completed.
2] Scan and Repair Missing/Corrupt System Files
The presence of corrupt/damaged system files in Windows may also lead to an error code 0x8007000d. To counter this, one may attempt the System File Checker.
Running this command-line utility program scans the entire PC for outdated files and repairs the same (if exists any). Here’s how to proceed –
- Press Win + R to invoke the Run dialog.
- Type cmd at the void and simultaneously press Ctrl + Shift + Enter keys to launch the Command Prompt.
- On the User account control window, tap Yes to go ahead.
- Now, type
sfc/scannowon the elevated prompt and press the Enter key.

- This process will take a few minutes to complete, so wait accordingly.
- Once over, Reboot the Windows 10 device and check whether this solves the update error 0x8007000d or not.
3] Initiate a DISM scan
Sometimes the SFC scan fails to fix the underlying causes. In such cases, one should run the Deployment Image Servicing and Management in-built tool to repair the corrupt files. Here is the complete procedure –
- Go to the Search and type Command Prompt.
- Right-click on the top result and choose Run as Administrator.
- If the UAC window comes into view, tap Yes.
- Copy/paste the following code near the blinking cursor and hit Enter –
dism.exe /online /cleanup-image /scanhealth

- The execution process begins immediately afterward, so wait accordingly.
- When the scanning/repairing completes successfully, execute the below code –
dism.exe /online /cleanup-image /restorehealth
- This command too will take a few minutes to finish. When this completes and reports fixing the underlying cause, Restart the PC.
- Now, try upgrading the Windows 10 OS without receiving the error code 0x8007000d.
4] Enable Windows Update using Group Policy Editor
Sometimes, the disabled update components may cause this error 0x8007000d while performing an OS Build upgrade. If this indeed is the case, enable Windows Update components via Policy Editor. Here are the essential steps to work on –
- Jointly press the Win and R keys to open the Run dialog.
- Type
gpedit.mscat the void and press OK to start the Group Policy Editor. - On the upcoming window, reach out to the following path –
Computer Configuration/ Administrative Templates/ System
- Scroll down and locate the “Specify settings for optional component installation and component repair” policy.

- Once you find this policy, double click the same to open the respective window.
- Here, check the Enabled radio button and hit OK to save the recent changes.

- Finally, Restart your Windows and check for Updates from the next login.
5] Manually download standalone packages and install them on your PC
Microsoft uploads the standalone packages for each and every cumulative update that came for either Windows 11 or 10 OS. All of them remain available on the Update catalog website. Go visit this site, and look for the latest patch update number that came for your version of Windows 10. Windows 11 users may visit this website instead.
Now that you have the KB number with you, copy/paste the same into the Microsoft update catalog’s search field. Press Enter and you will find a list of updates corresponding to different system architectures. Pick the one that suits your system configuration and hit the download button.
Click the top link on the succeeding window and the patch file starts downloading. Double-click on the downloaded setup file and the error 0x8007000d resolves automatically thereafter.
Here’s a detailed description of how to download and install updates manually into your system.
6] Manually Reset the Windows Update Components
If none of the above solutions resolve the error 0x8007000d, you should try to manually reset the Windows update components.
To perform this task, you need to start Windows Console as an Admin and execute a few command lines. Here’s how to proceed –
- Right-click anywhere on the taskbar and select Task Manager.
- When this desktop app comes into view, click File followed by Run new task.
- Under the text box, type cmd (Admin) and hit the OK button.
- Now, run each of the below codes separately. They are meant to stop the essential core services –
net stop bits
net stop wuauserv
net stop appidsvc
net stop cryptsvc
- Subsequently, remove the qmgr*.dat from Windows 10 OS executing the command line –
Del “%ALLUSERSPROFILE%\Application Data\Microsoft\Network\Downloader\qmgr*.dat- Afterward, navigate to the System32 folder running the below code –
cd /d %windir%\system32
- Now, copy/paste the following codes to re-register .dll files. They, in turn, reset the corrupted Windows Update components. Don’t forget to press Enter at the end of each command line –
regsvr32.exe atl.dll
regsvr32.exe urlmon.dll
regsvr32.exe mshtml.dll
regsvr32.exe shdocvw.dll
regsvr32.exe browseui.dll
regsvr32.exe jscript.dll
regsvr32.exe vbscript.dll
regsvr32.exe scrrun.dll
regsvr32.exe msxml.dll
regsvr32.exe msxml3.dll
regsvr32.exe msxml6.dll
regsvr32.exe actxprxy.dll
regsvr32.exe softpub.dll
regsvr32.exe wintrust.dll
regsvr32.exe dssenh.dll
regsvr32.exe rsaenh.dll
regsvr32.exe gpkcsp.dll
regsvr32.exe sccbase.dll
regsvr32.exe slbcsp.dll
regsvr32.exe cryptdlg.dll
regsvr32.exe oleaut32.dll
regsvr32.exe ole32.dll
regsvr32.exe shell32.dll
regsvr32.exe initpki.dll
regsvr32.exe wuapi.dll
regsvr32.exe wuaueng.dll
regsvr32.exe wuaueng1.dll
regsvr32.exe wucltui.dll
regsvr32.exe wups.dll
regsvr32.exe wups2.dll
regsvr32.exe wuweb.dll
regsvr32.exe qmgr.dll
regsvr32.exe qmgrprxy.dll
regsvr32.exe wucltux.dll
regsvr32.exe muweb.dll
regsvr32.exe wuwebv.dll
- Next, use the below commands to reset the network services –
netsh winsock reset
netsh winhttp reset
- Once over, restart the services that you have stopped initially. To do so, use the below codes –
net start bits
net start wuauserv
net start appidsvc
net start cryptsvc

- At last, Reboot your system so that the changes made come into effect after the next login.
I hope the above fixes work to address the update error 0x8007000d on your computer. If you have any queries or suggestions related to this article, ask us in the comment section.
Windows 11, as well as 10, is no doubt a feature-rich version of the OS but issues and bugs have close kinships with it at the same time. 0x8007000d is such an error code that appears when trying to download a cumulative update or build. When the problem occurs Windows update stuck and ails you with the error message.
Although 0x8007000d error could arise due to a number of reasons often the primary cause of this nagging issue is Windows update Component. This puts a sort of restriction over your system and prevents it from downloading or installing any new patch on your PC. However, it may be hard to resolve these errors here are some methods that will certainly help you.
Windows 11 and 10 update Error 0x8007000d
Here is how to fix Windows 11/10 Update Error 0x8007000d –
1] Purge the Windows update components
In order to resolve this issue, the first thing that you can try is purging your windows update components. Resetting will recalibrate the entire update installation module which churns out the faulty bug that may be causing the error.
- Press Windows+S keys and type in – cmd.
- Hit the – Ctrl+Shift+Enter.
- Select – Yes to approve the User account control.
- On the Command Prompt screen type in the below lines and hit enter after each and don’t forget to enter –
net stop wuauserv
net stop cryptSvc
net stop bits
net stop msiserver
- Now enter the following command to rename the SoftwareDistribution folder –
ren C:\Windows\SoftwareDistribution SoftwareDistribution.old
ren C:\Windows\System32\Catroot2 Catroot2.old
- Now run the following commands to re-enable the windows update related services –
net start wauserv
net start cryptSvc
net start bits
net start msiserver
2] Make sure that BITS is running
BITS is an essential service of Windows that helps the system to download files from the Microsoft server. Furthermore, it also assists the OS and application during foreground or background downloads or uploads. BITS also allows the system to exchange files between the device and the remote server that too without impacting the network experience.
If for some reason this service stops, windows update would mostly fail and reflect the error 0x8007000d. Hence it is quite important that BITS is always in automatic startup type and running status. You can do that by following these few simple steps:
- Press Windows+S and type in the – service.msc.
- Hit Enter to open the services console.
- Find “Background Intelligence Transfer Service” in the Name column.
- Now Right-click on this one and select the – Properties.
- Here, set the startup type to – Automatic.
- Click the Start under service status and wait for a while.
- Make sure to click Apply and then OK to save the changes.
3] Rename the CBS log files to fix 0x8007000d Error code
CBS log sometimes might be the reason for the error 0x8007000d appear during updates. This Component-based servicing keeps a detailed record and information regarding all the updates that have been installed in a component over a period of time. These logs could get corrupted and cause trouble in the process of updating your system.
Sometimes deleting these logs easily resolves the issue but if you don’t feel it’s safe renaming the file could also do the trick. Follow the guidelines –
- Hit the – Windows+Q.
- Now type in the following and hit Enter –
%systemroot%\Logs\CBS
- Now change the CBS.log file name to anything else such as error.log.
- If the system doesn’t allow you to alter the name, do the following
- Open Services console as you did in the above mentioned process.
- Next, scroll down and look for the – Windows modules installer.
- Double click on it to open.
- Set the startup type to manual and click on Apply then OK to save the changes.
- Reboot your system and go to the logs directory – C:\Windows\Logs\ and rename cbs.log.
- Restart your pc again and open the services console
- Set the startup type of windows modules installer back to automatic again.
4] Use Windows Updates troubleshooter
Windows built-in troubleshooter has proven it’s worth many times. The utility is quite handy and user friendly and you don’t need to go through any of those lengthy time-consuming processes to resolve simple and basic errors. Just a few clicks on the utility and the troubleshooter would scan your device to ascertain the cause of error 0x8007000d to come up and would render you some easy one-step solution to get rid of it.
Let’s see how you can do that –
- Press Win+S and then type – troubleshoot.
- Hit the – Enter.
- Once on the Troubleshoot Settings page, click the – Additional troubleshooters.
- Click the – Windows update.
- Select the – Run the Troubleshooter.
- The troubleshooter might prompt you to apply some fixes, follow them accordingly.
If you are using Windows 11, open Settings => Select Troubleshoot from right pane => click Other troubleshooters. Finally, hit Run button located alongside Windows update.
5] Try going for Manual Update
Windows update has been designed in a way that it would run discretely in your background without even giving you a hint, provided that you are on an unlimited data usage network. But sometimes these autonomous and discreet procedures may fail to run due to extremely low internet speed or interference in the network. In such cases, you may need to ensure that your Windows updates are accomplished without any glitches.
So try to receive the update manually as of now using the following instructions –
- Click taskbar search, type update, and press – Enter.
- From right pane, click – Check for Updates.
- Wait until the completion of downloading and lastly, click the – Install now.
6] Remove Windows Update download path to solve Error 0x8007000d
In order to make sure all your windows components are running smoothly you must ensure that all the Registry keys are intact. A single letter error with any of its strings may result in an unexpected error. It could be in the case of windows update as well, if any associated string value gets corrupted it could reflect error 0x8007000d. In such an eventuality what you must do is modify or remove that key what is necessary in order to get rid of the disturbing issue.
Note – Be very careful while changing the registry, as an invalid registry could adversely affect your PC and OS, you end up losing data as well.
- Press Windows & S keys together and type in – “regedit”
- Hit the – Enter
- Click the – Yes when a User account control box appears.
- In the Registry Editor console, type in the following string
HKEY_LOCAL_MACHINE\SOFTWARE\Policies\Microsoft\Windows\WindowsUpdate
- Right-click on WUserver and choose Delete.
- Then right-click on the – WIStatusServer and delete it as well.
- Now close the Registry Editor console and Reboot your system
7] Uninstall or put your Antivirus software on Stand-by status
We have often seen people buying an antivirus kit along with their first laptop and we can’t blame them for it. Everyone is apprehensive of data loss and won’t bother spending a bit extra for it. But these third-party applications sometimes can’t differentiate between a virus and a Microsoft update. Hence in order to deal with it what you must do is disable your antivirus for a period of time and manually start the update and check if the error still comes up.
- Click the up arrow present on the right-hand side of the taskbar to open the hidden icons on the system tray.
- Right click on the Antivirus icon and choose – Disable.
- The Antivirus program would ask you for the period of time after which the program is re-enabled automatically. Select as per your choice.
- Now go to the – Settings
- Click the – Update and Security.
- Here, select the – Check for Updates.
Suppose the update isn’t installed then you must uninstall your antivirus program immediately.
Here’s is how you can do that
- Press the Windows logo key, type in appwiz.cpl, and hit enter
- Here, from the list of programs on your system, select the antivirus and click Uninstall from the top bar.
8] Clean boot to fix Windows Update Error 0x8007000d
Often the reason for update failed error 0x8007000d is the malicious third party applications that change the windows update components. So you must perform a clean boot of the windows which would start up our system with the least of the drivers, programs, or services.
- Hit the Win+S, type in msconfig, and press – Enter.
- Click on radio button alongside the – Selective Startup.
- Uncheck the box set for – Load Startup items.
- Click the – Services tab.
- Click and select the box for the – Hide all Microsoft services
- Next, click the – Disable all.
- Switch to the – Startup tab.
- Select the – Open Task Manager.
- Right-click on the enabled program and choose the Disable one by one.
- Repeat the same for all enabled programs.
- Now close the –Task Manager.
- Go back to the – system configuration.
- Click on Apply and then Ok.
9] Wipe out the Temporary Files
Temporary files are created to facilitate a smooth and seamless transition while working on Windows. These are records of your activities and provide an easy and quick recovery of data in case of an unintentional shutdown or power outage. Unfortunately, these are redundant data keep sitting on your system, making it slower and slower by each day. Furthermore, disk space might runs short leading to error: 0x8007000d. So, delete all the files of these kinds using the following guidelines –
- Press the – Windows+R.
- Type in Temp and hit the – Enter.
- Once you are inside the temp folder, press Ctrl+A to select all items.
- Hit the – Delete.
- Once again open the run box and type in %temp%.
- Select all items similarly and wipe out them.
10] Set Microsoft Edge as your Default Browser
Sometimes 0x8007000d might occur due to the add-ons that you install on your browser. Setting Microsoft Edge as your Default Browser could resolve the issue and do the trick. Also, reset the Internet Explorer Settings using the following instructions –
- Open Control panel.
- Put the View by status either of Large or Small icons.
- Click the – Internet options.
- Select the – Advanced tab.
- Next, click the – Reset.
- A dialogue box will appear, select the – Delete personal settings.
- And finally, click the – Reset.
11] Uninstall any previously existing updates
More often, it has been noticed that the existing update would raise a conflict with the new patch and cause an obstruction in downloading and installing the latest one on the system. It could even be the case of a bug being carried on the latest installed update patch. You can easily resolve this issue by removing all of the previously existing updates.
- Press Windows + I keys together to open “Settings”
- Go to the – “Update and Security”
Windows 11 users, open Settings app => choose Windows update from left pane to get same settings page.
- From right hand side, click – “View Update history” or Update history.
- Move down and Choose – “Uninstall updates”
- Scroll down to reach Microsoft Windows section.
- Select the recent update you received and click Uninstall.
- Comply with all the prompts in order to complete the uninstallation process.
- When the process ends, kindly reboot your system
12] Get rid of any kind of existing corruption on your PC
System elements could go missing or in worse case scenarios, go corrupt, if our PC suffers any kind of malware attack, software collisions, or anything similar to that sort. This could be a prominent reason for error 0x8007000d to come up. In order to recover the missing system elements or resolve this corruption, we must execute these few simple steps –
- Press Windows+S key together and type in – “cmd”
- Now press the – ‘Ctrl+Shift+Enter’.
- When the User Account Control box appears, click the – Yes.
- In the elevated Command Prompt window, type in the following syntax exactly it is and hit enter.
DISM.exe /Online /Cleanup-image /Restorehealth
- Once you have executed the command Reboot your system.
- This should have fixed 0x8007000d error when you sign back in.
- However, if the issue still persists, open command prompt again as administrator.
- Type in the following command and hit enter –
Sfc /scannow
- Wait patiently till the procedure completes without any kind of interruption.
- When the process ends, reboot your windows PC.
13] Ensure that the Windows defender is working effectively
Windows Defender Firewall protects your system from any kind of potentially harmful and malicious programs that your system may encounter. Error 0x8007000d may come up if this system is turned off. The reason why it happens is not clear yet but turning it back on has often resolved the issue. So let’s see how you can do that in a few simple steps –
- Click the Taskbar Search and type in – control.
- Hit Enter and open the Control panel.
- Set the View by option to Large icons.
- Click the – Windows Defender Firewall
- On the next page, check carefully and make sure that each option is green, and in case if you find any option red, turn it manually.
- To do that, click the – Turn Windows Firewall On or Off.
- Click on the radio button alongside – Turn on Windows Firewall
- Make sure you choose the same option for both Private Network Settings and Public Network Settings
- Finally, click on OK to save the settings.
14] Free up essential Disk Space
Sometimes windows update packs require a significant amount of space In order to download and install them in a smooth and consolidated process.
If your system is running out of storage and you don’t have enough space for the updates, this could interfere the update process and result in error 0x8007000d. Hence you must clean up the junk files and allocate more space in order to resolve the issue by following the instructions –
- Press Windows+Q keys and type in – cleanmgr.
- Hit Enter to open Disk Cleanup console
- After assessing how much space the system utility can evacuate, Disk Cleanup for ( C: ) will open.
- Click the – Clean up system files.
- Simply click Ok on the next prompt.
- On the next screen, Disk Cleanup for ( C: ) will appear.
- Click the checkboxes available under Files to delete
- Then hit the – OK
- Finally, select the – Delete files.
15] Restore your PC
Error 0x8007000d might appear after you made some modifications in Registry or Settings, or installed a third-party shady program. Then it’s highly probable that your recent ministrations have adversely affected the system and you might need to restore your PC.
- Press the Windows logo and type in – rstrui
- Hit enter to open System Restore.
- When “system restore” opens click on Next.
- Click and Check the checkbox alongside – Show more restore points
- Choose the most recent date and time of restore available here and click – Next
- On the next step click – Finish.
- Click Yes on the final confirmation prompt.
- The system will reboot itself once the restoration process completes.
- Once the system restarts, the new update patch would most certainly be installed without any kind of error 0x8007000d appearing.
16] Do clean install of Windows
Suppose everything fails to fix 0x8007000d error then the clean install is the last solution. This allows you to start afresh without any shred of previous install residues, no cache data, or any damaged files residues whatsoever.
Follow the instructions in this post – How to Install Windows 10 2009 October 2020 update.
Methods list
1] Purge the Windows update components
2] Make sure that BITS is running
3] Rename the CBS log files
4] Use Windows Updates troubleshooter
5] Try going for Manual Update
6] Remove Windows Update download path
7] Uninstall or put your Antivirus software on Stand-by status
8] Clean boot Windows
9] Wipe out the Temporary Files
10] Set Microsoft Edge as your Default Browser
11] Uninstall any previously existing updates
12] Get rid of any kind of existing corruption on your PC
13] Ensure that the windows defender is working effectively
14] Free up essential Disk Space
15] Restore your PC
16] Do a clean install of Windows
That’s all!!
Windows Update is a crucial component of the Windows operating system that ensures users receive the latest security patches, bug fixes, and feature enhancements. However, encountering error codes during the update process can be frustrating. One such error code is 0x8007000d, which has troubled numerous Windows 11 users. This error typically occurs when Windows Update encounters a problem with the installation or configuration of updates. Resolving the error requires a systematic approach to diagnosing and fixing the underlying issues. In this article, we will provide effective solutions to help users overcome this obstacle and successfully update their Windows system.
Page Contents
Fix 1: Run SFC
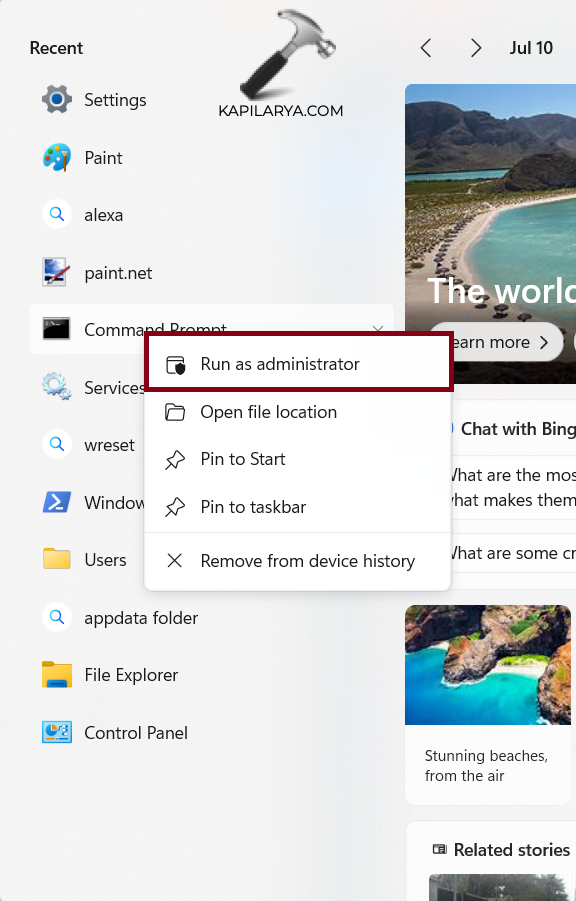
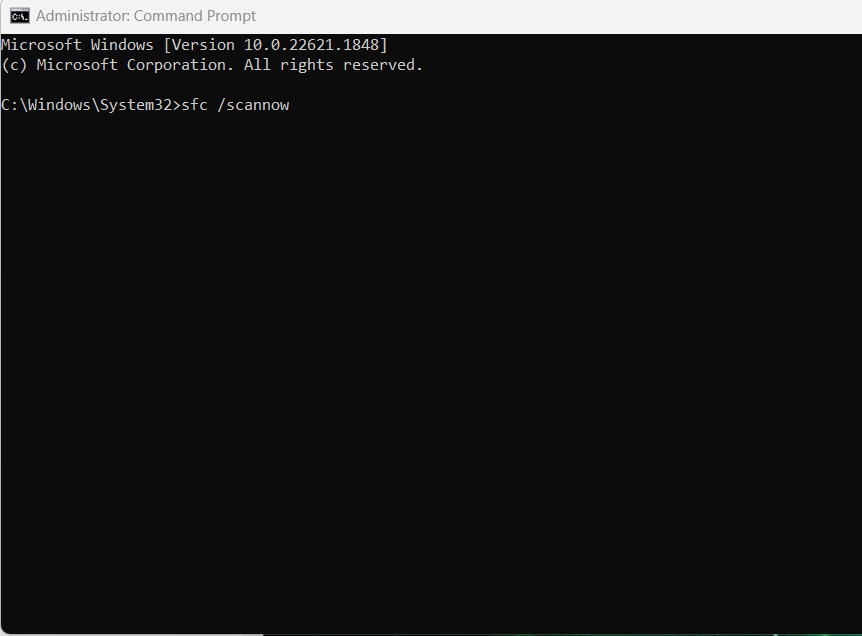
1. Open Command Prompt as an administrator.
2. Type the below command and press Enter key:
sfc /scannow
Fix 2: Use Windows Update Assistant
1. Through your browser go to Windows 11 Update Assistant download (https://www.microsoft.com/en-us/software-download/windows11) website.
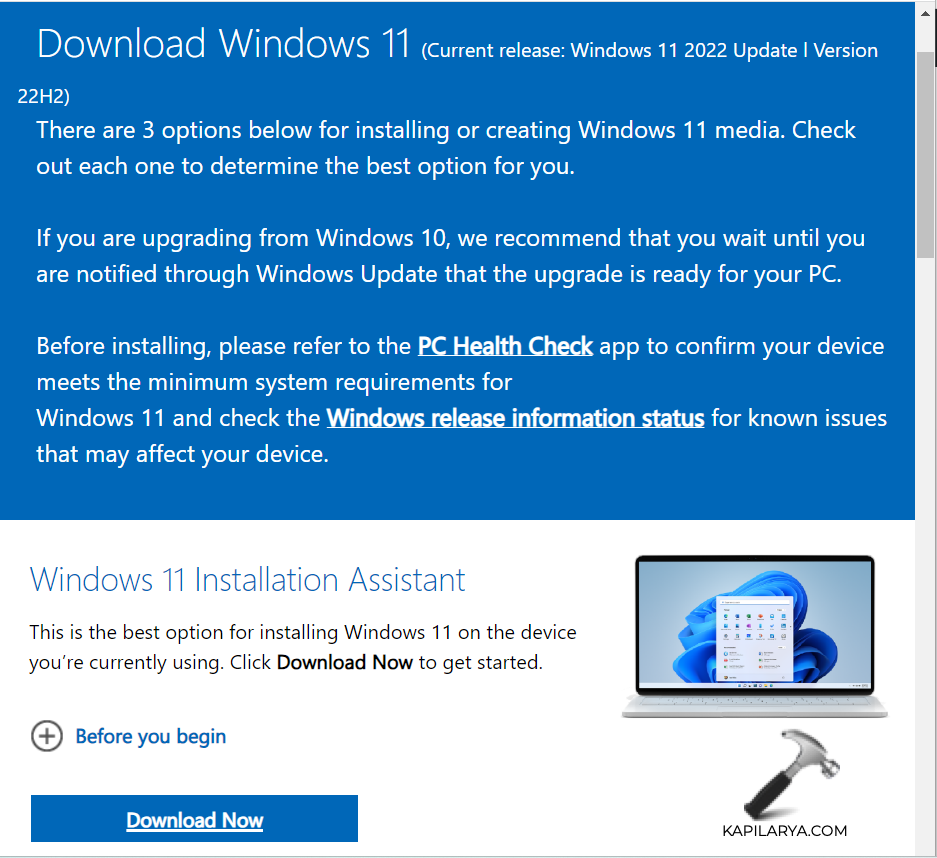
2. Click on “Download Now”.
3. Follow the on-screen instructions.
4. Restart your computer after the process completes.
Fix 3: Run Troubleshooter to fix Windows Update error code 0x8007000d
1. Open Settings by pressing the Windows + I keys.
2. Click on “Troubleshoot”.

3. Click on “Other troubleshooters”.
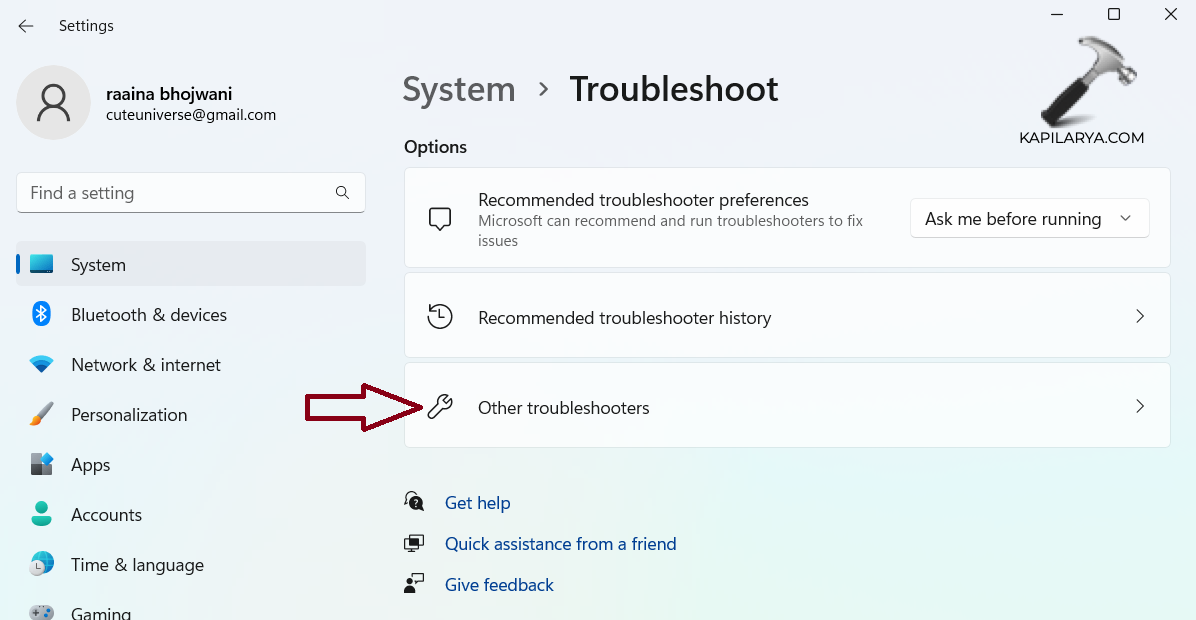
4. Click on “Run” next to Windows Update.
Fix 4: Configure Group Policy Setting
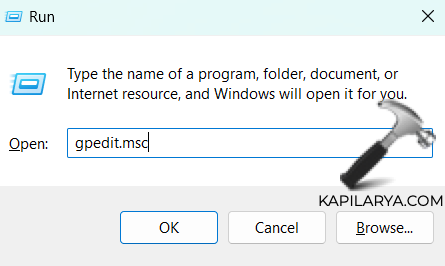
1. Open Run by pressing Windows + R keys.
2. Type gpedit.msc and press Enter key.
3. Navigate through the following path:
Computer Configuration > Administrative Templates > System
4. Right-click on the “Specify settings for optional component installation and component repair” and choose “Edit”.
5. Select the “Enabled” option and click “OK”.
6. Reboot your computer.
Fix 5: Reset Windows Update Components Manually
1. Open Command Prompt as an administrator and type the below commands. Press Enter after each command:
net stop bitsnet stop wuauservnet stop cryptsvc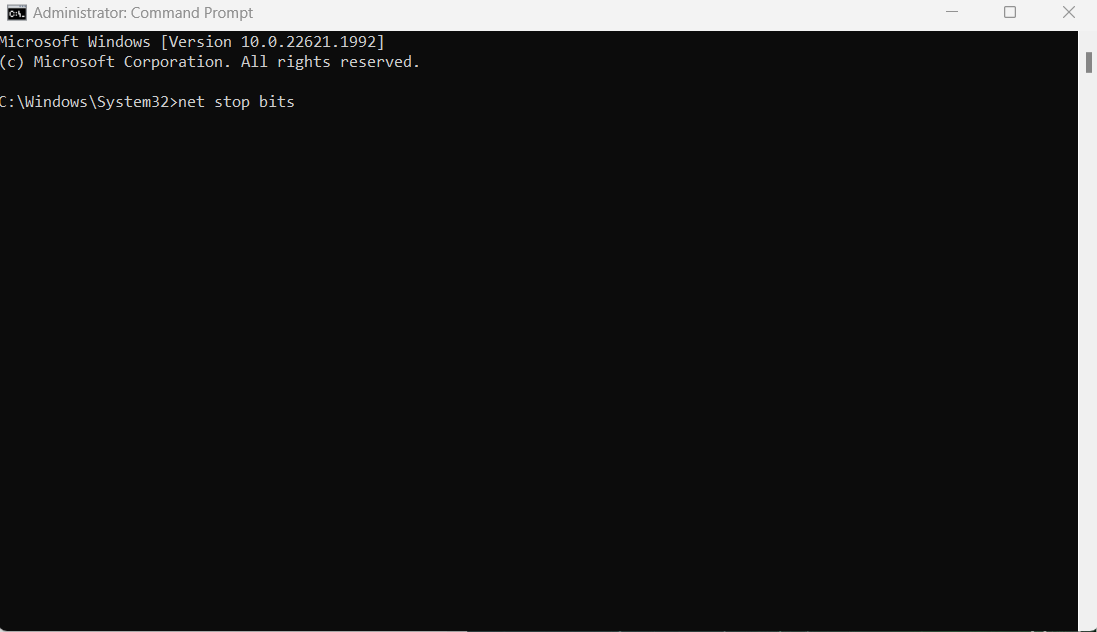
2. Next, execute this command:
Del “%ALLUSERSPROFILE%\ApplicationData\Microsoft\Network\Downloader\qmgr*.dat
3. Execute the below commands to rename folders:
renC:\Windows\SoftwareDistribution SoftwareDistribution.bakren C:\Windows\System32\catroot2 catroot2.bak4. Next execute this command to enter in System32 folder:
cd /d %windir%\system32
5. Now, type below commands and press Enter key after each command:
regsvr32 /s wuapi.dllregsvr32 /s wuaueng.dllregsvr32 /s wucltui.dll6. Next execute this command:
netsh winsock reset
7. Lastly, execute these commands to restart services that we stopped initially:
net start bitsnet start wuauservnet start cryptsvc8. Finally, reboot your system.
Fix 6: Run DISM utility
1. Open Command Prompt as an administrator and type the below commands. Also, press Enter after each command.
Dism /Online /Cleanup-Image /CheckHealth
Dism /Online /Cleanup-Image /ScanHealth
Dism /Online /Cleanup-Image /RestoreHealth
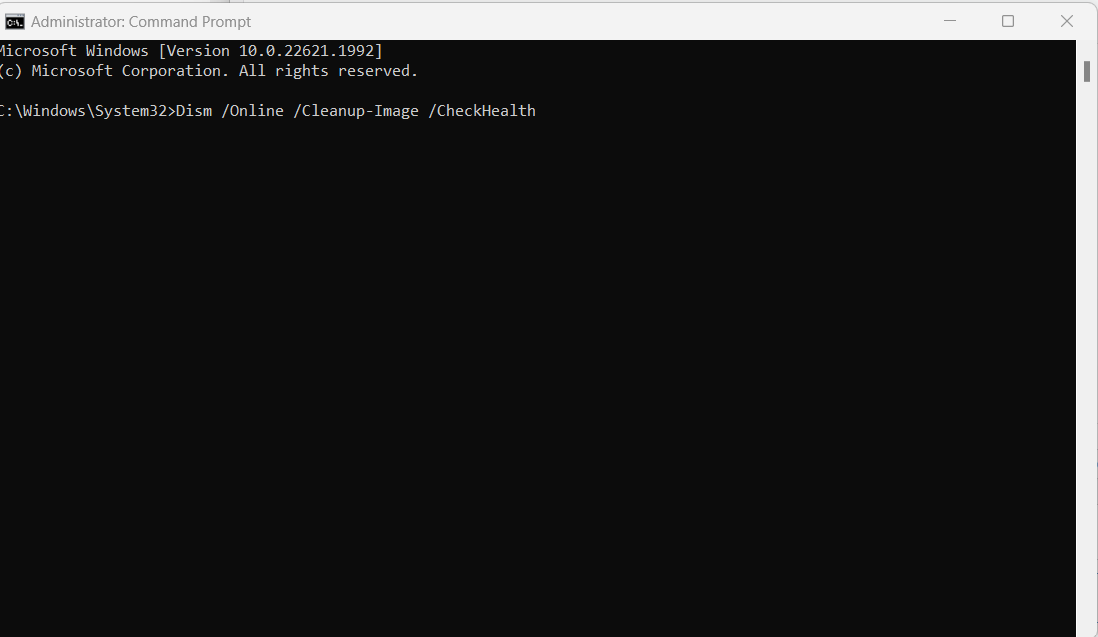
2. As all 3 commands are executed, restart your computer.
Fix 7: Manually Download and Install Update Packages
1. Visit Microsoft Catalog (https://www.catalog.update.microsoft.com/home.aspx) webpage.
2. Enter the KB (Knowledge Base) number of the update you want to download in the Search bar.
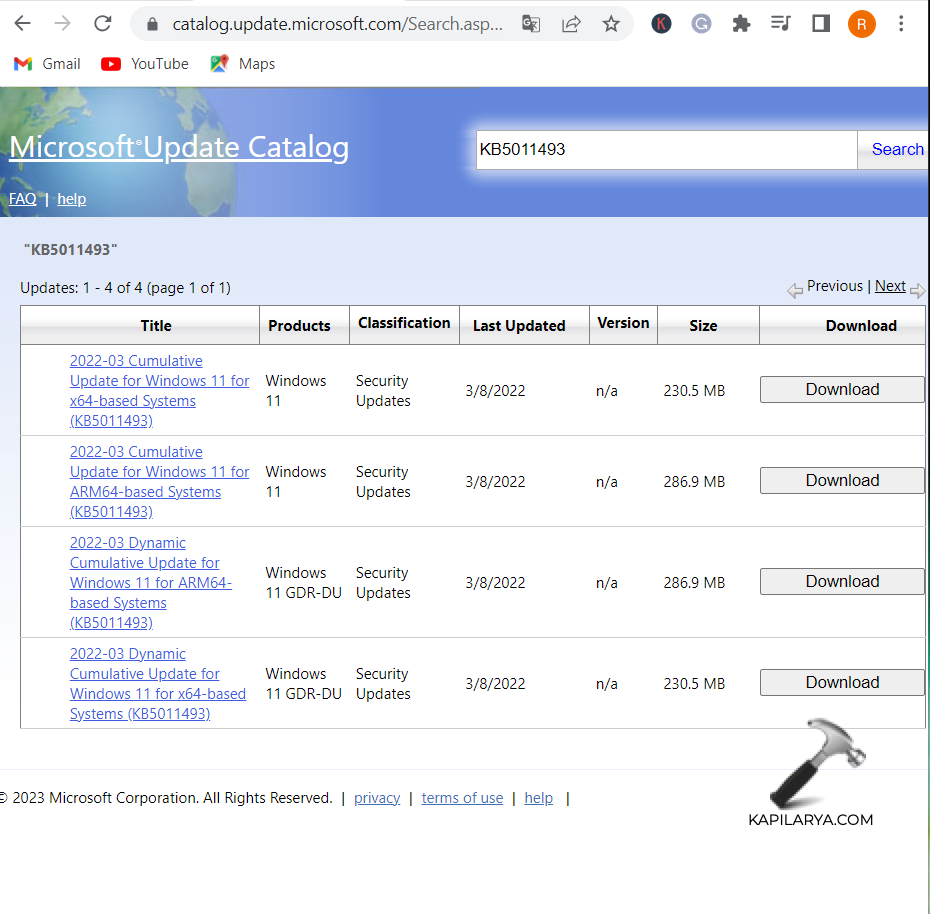
3. Find the Correct package and Click “Download”.
4. Next, click on the link to start downloading.
5. Go to Downloads and double-click on the update package.
6. Click “Next” and follow the instructions.
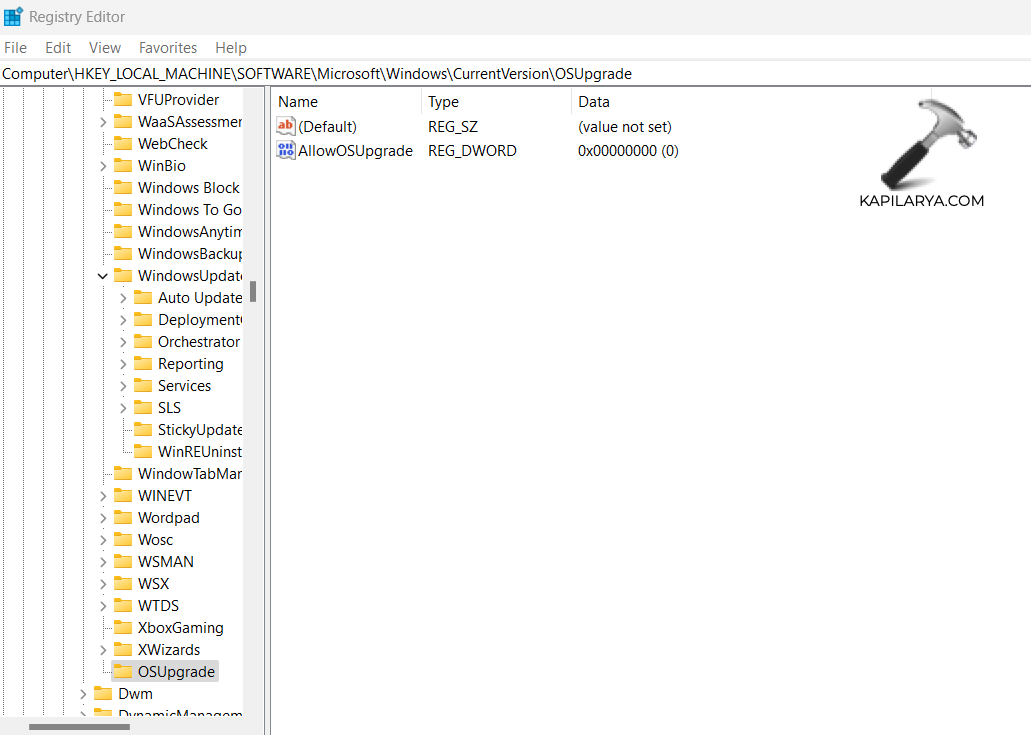
Fix 8: Edit Registry to fix Windows Update error code 0x8007000d
1. Open Run by pressing Windows + R keys and type regedit. Press Enter.
2. In Registry Editor navigate to the following path:
HKEY_LOCAL_MACHINE\SOFTWARE\Microsoft\Windows\CurrentVersion\WindowsUpdate
3. Locate the “OSUpgrade” folder. If you can’t find it then create it manually with the next step.
4. Right-click on the WindowsUpdate and select “New” > “Key”. Name it “OSUpgrade”.
5. Now, right-click on the “OSUpgrade” and select “New” > “DWORD (32-bit) Value”, and name it “AllowOSUpgrade”.
6. Right-click on AllowOSUpgrade and select “Modify”.
7. Change the Value data field to 1 and click “OK”.
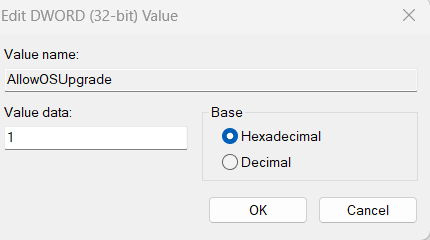
8. Close Registry and restart your system.
That’s it!