
Многие пользователи Windows 10 все чаще и чаще сталкиваются с ошибкой 0x8000000b, когда пытаются добавить учетную запись Gmail в приложение Mail. В сегодняшней статье мы расскажем, как избавиться от данной ошибки и продолжить пользоваться почтовым приложением ОС Windows 10.
Как исправить ошибку 0x8000000b?
Нажмите комбинацию клавиш Windows+S. Пропишите в поисковике системы «Mail» и кликните ЛКМ на найденный результат. В окошке приложения Mail нажмите на значок в виде трех горизонтальных полосок и нажмите на пункт «Accounts». Далее нажмите на «Add account» со значком плюса.
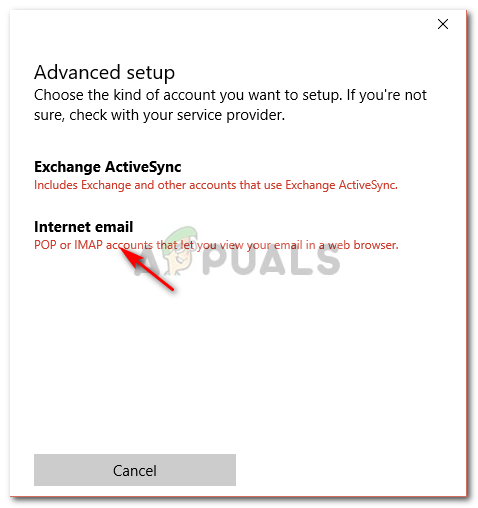
Перед вами появится совершенно новое окошко «Добавить учетную запись». Опуститесь в самый низ этого небольшого окошка и кликните на строчку «Advanced setup» со значком шестеренки. Окошко изменится — кликните на пункт «Internet email».
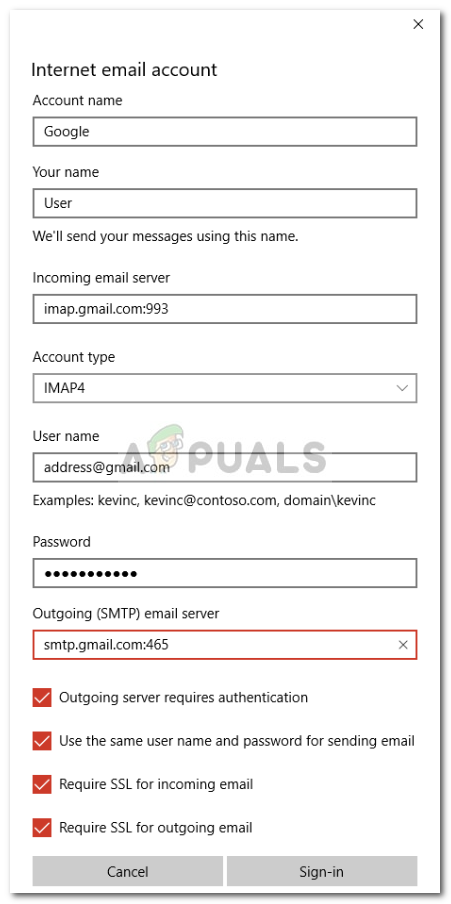
Укажите необходимые вам данные в соответствующих строках, после чего пропишите:
- Incoming email server — imap.gmail.com:993
- Account type — IMAP4
- Outgoing email server — smtp.gmail.com:465.
Убедитесь, что вы поставили галочки возле следующих опций:
- Outgoing server requires authentication
- Use same user name and password for sending email
- Require SSL for incoming email
Как только все поля будут заполнены, нажмите на кнопку «Sign in», после чего подождите несколько минут. Ваша учетная запись Gmail будет добавлена в приложение Mail Windows 10, и никакая ошибка 0x8000000b вас не побеспокоит.
Windows 10 has a built-in Mail app that lets you sync your Gmail, Yahoo or any other accounts. When you try to log in, the Mail application tries to connect with your respective email server to get the server settings, however, recently users have been experiencing the ‘Error 0x8000000b’ error which stops you from syncing your email.
Although the core of the problem is the same, you might get a different error code like 0x80070425, 0x8007042b, 0x8000ffff. Since the heart of the problem is the same, the solutions are identical too. If you are looking for solutions regarding this error, you’ve come to the right place. We’ve made sure to mention the solutions for this specific error that were shared by Microsoft itself and other tech gurus.
What causes the Mail Error 0x8000000b?
For such an error, the causes could depend on various factors that include:
- POP or IMAP is not enabled. You are likely to face this issue if your Post Office Protocol (POP) and Internet Message Access Protocol (IMAP) settings are not enabled in the email server.
- Windows Firewall blocking the request. According to Microsoft, this can happen if your firewall is blocking the request sent by Mail application.
- Third-party Antivirus or Windows Defender. If you are using a third-party antivirus or your Windows Defender is enabled, these softwares could potentially be the cause of the error.
Let us get into the real reason of us being here and jump into the solutions:
Solution 1: Turning Off Antivirus or Windows Defender
If you are not able to sync your email, this could possible be due to your antivirus or windows defender blocking the request sent by Windows Mail application. In such a case, you should try to disable your antivirus and give it a go again. To disable your Windows Defender, do the following:
- Open Start and type in Windows Defender Security Center.
- Click on Windows Defender Security Center from the results.
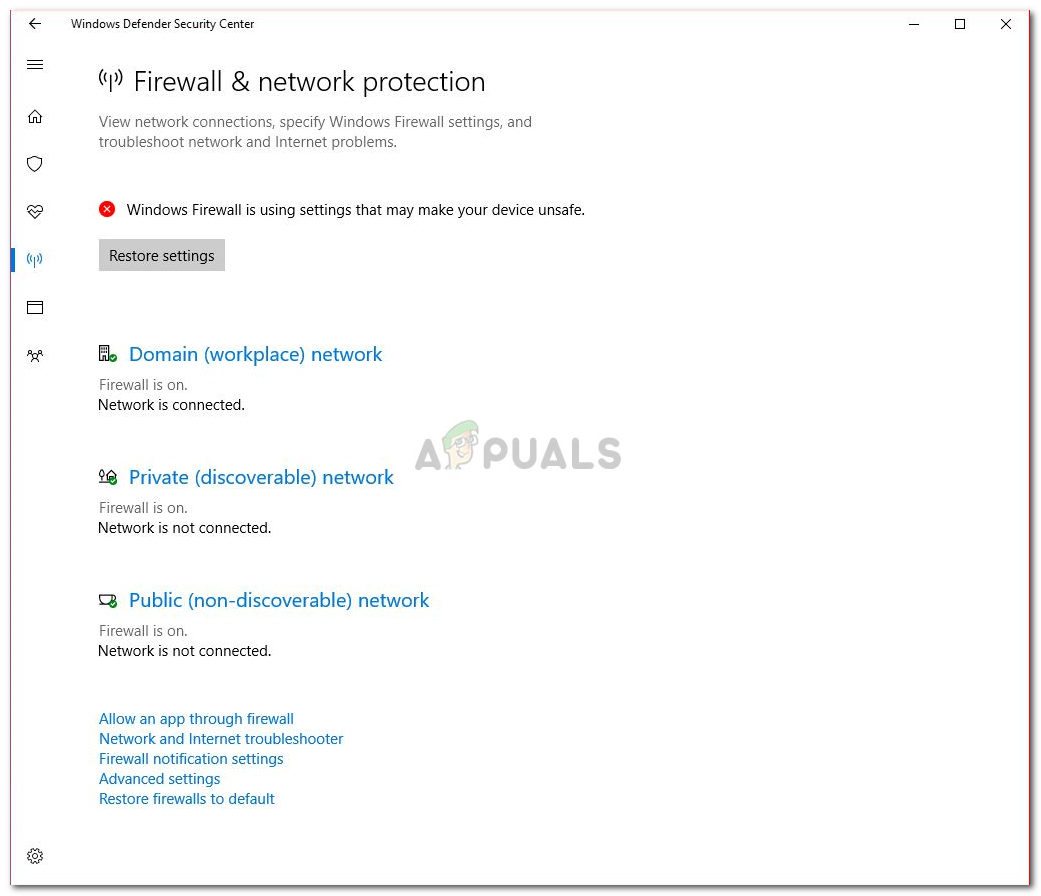
- In Windows Defender Center, go to ‘Firewall and network protection’.
- Choose a network profile and turn off Windows firewall for it. Do this step for each profile present.

Choose a profile and disable firewall - See if you are able to sync your email again.
Solution 2: Allow Mail through Windows Firewall
If turning off Windows defender allowed you to sync your email then you must follow this step as well. For those whose problem wasn’t resolved by solution 1, this could help in solving your problem. To allow your Mail application through Windows firewall, do the following:
- Go to Windows Defender Security Center again.
- Click on ‘Firewall and network protection’.
- Choose ‘Allow an app through firewall’ and then select ‘Change settings’.
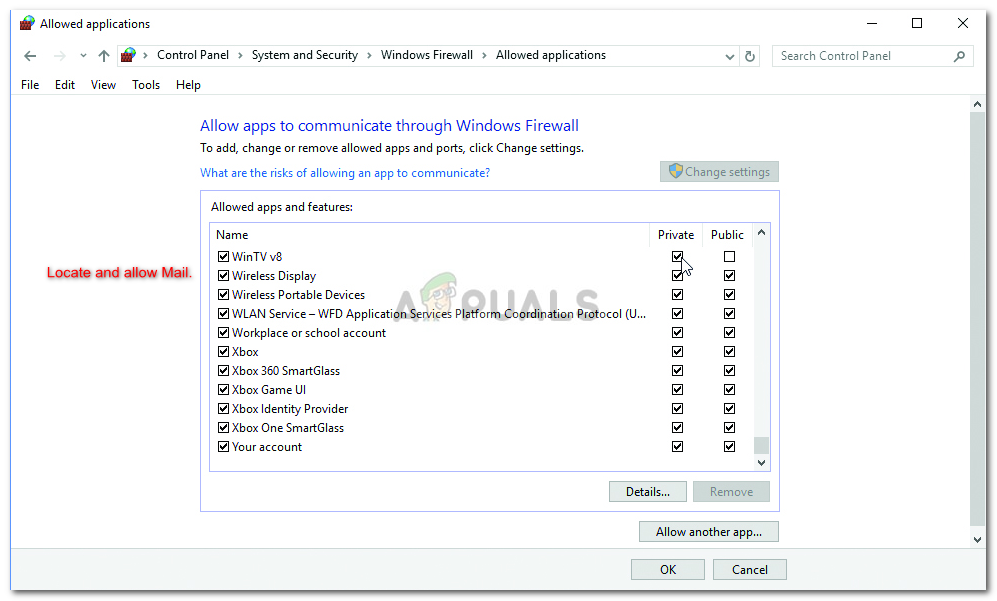
- In the list of allowed applications, make sure to select and check the both Private and Public boxes for Mail.

Locate and allow Mail. - Hit OK.
Solution 3: Removing and Adding your Account
If your account has stopped syncing recently, occasionally, the problem can be fixed quite easily by removing and adding your account again. To do this:
- Open Start Menu and type in Mail.
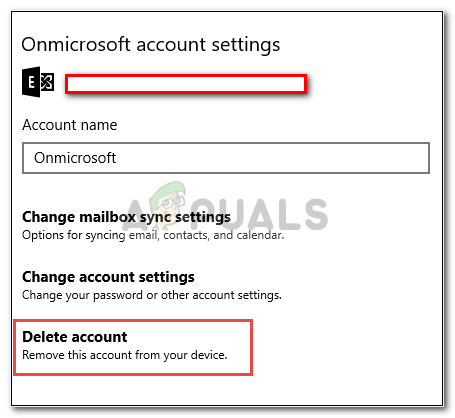
- You’ll see a ‘Settings’ icon at the bottom of the Mail navigation pane, click it.
Click settings - Choose the account you to remove and select ‘Delete account’.

Click Delete account - After you’ve done that, add your account and see if it syncs.
Solution 4: Sign in using Advanced Settings
If all the solutions mentioned above don’t work for you, this is your last resort. Here, you’ll be signing into your account through advanced settings.
For Google:
If you have a Gmail address, go through the following instructions. First and foremost, you are going to have to enable some settings in your Gmail account settings.
- Log in to your Gmail account via browser.
- After you’ve logged, enable IMAP which can be found here.
- Lastly, you’ll have to turn ON the ‘Allow less secure apps’ option in your Gmail account settings; found here.
After you’ve followed the above instructions, it is time to log in.
- Go to Start and open Mail.
- Open Mail settings.
Click settings - Select Accounts and then click ‘Add Account’.
- Click ‘Advanced setup’.
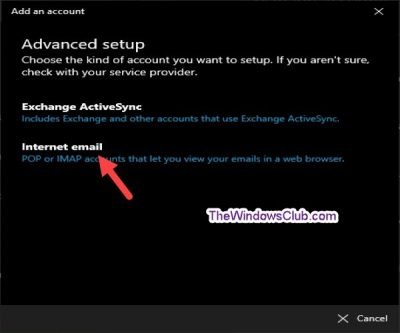
- You’ll be asked to select your email account type, choose ‘Internet email‘.

Choose Internet email - Enter your account details. In the ‘Incoming email server’ box, type in:
imap.gmail.com:993
- Select IMAP4 as ‘Account type’ and enter the following in ‘Outgoing email server’:
smtp.gmail.com:46
- After you’ve entered all of the details, click ‘Sign in’.
For Outlook:
If you have an Outlook email, do the following:
- Open Mail and go to Settings.
Click settings - Select Accounts and then click ‘Add Account’.
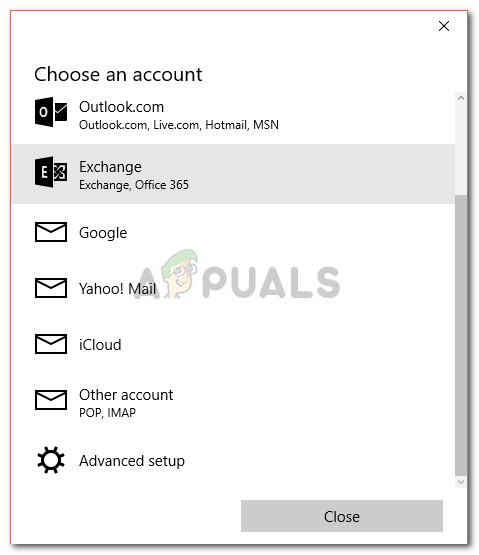
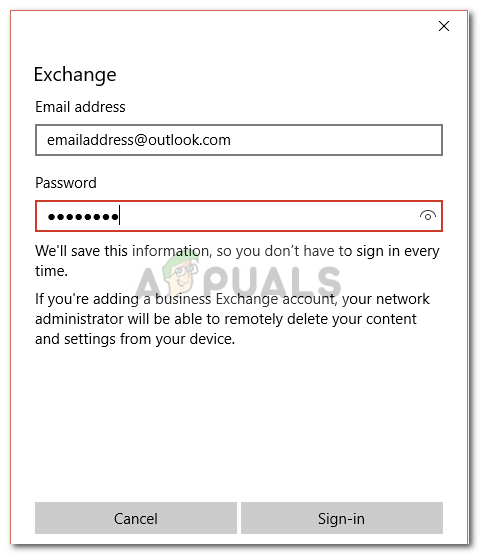
- Instead of choosing Outlook, choose ‘Exchange‘.

Choose Exchange. - Enter your email address, click Next. You’ll be asked to enter your password.

Enter your email and password. - Click ‘Sign in’.
- Done! Check if your issue is solved.
Kevin Arrows
Kevin Arrows is a highly experienced and knowledgeable technology specialist with over a decade of industry experience. He holds a Microsoft Certified Technology Specialist (MCTS) certification and has a deep passion for staying up-to-date on the latest tech developments. Kevin has written extensively on a wide range of tech-related topics, showcasing his expertise and knowledge in areas such as software development, cybersecurity, and cloud computing. His contributions to the tech field have been widely recognized and respected by his peers, and he is highly regarded for his ability to explain complex technical concepts in a clear and concise manner.
Download Windows Speedup Tool to fix errors and make PC run faster
Some incompatibility has arisen between the security policy of Google and the Windows Mail app, resulting in many reports of error 0x8000000b being generated when trying to add a Gmail account to the Mail app in Windows 11/10.
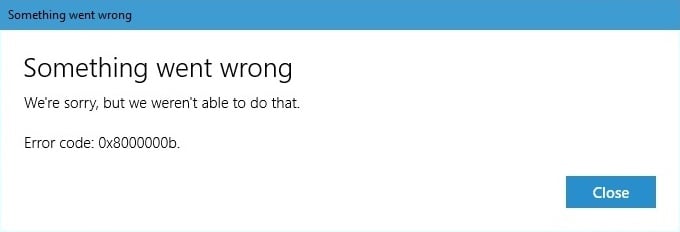
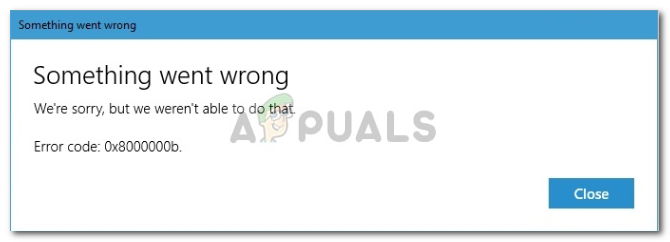
Something went wrong, We’re sorry, but we weren’t able to do that. Error code 0x8000000b

Note: You may receive other error codes such as 0x8007042b, 0x80040154, 0x8000ffff, 0x8007000d, 0x80c8043e, 0x80070435, 0x8007006d, 0x80070425 associated with this same error message. Whichever error code you receive, the underlying issue remains, that you can’t add your Gmail account. Generally, the error prevents you from using your Gmail account on the Mail app.
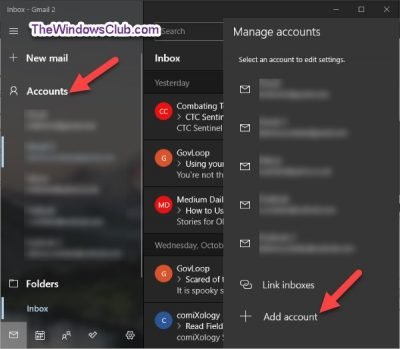
Launch the Mail app and click Accounts on the left pane. From the pop up on the right, under Manage accounts, click Add account.
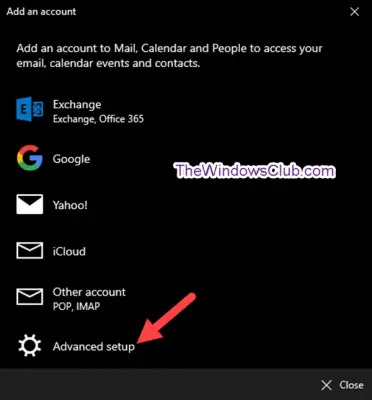
Now in Add an account, click Advanced setup.
In the same Add an account window, click Internet email.
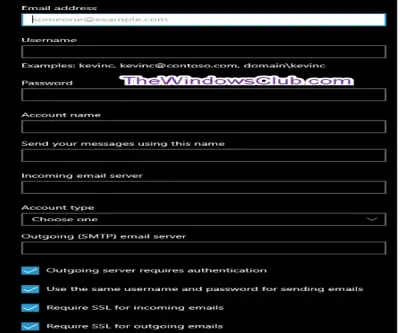
On the next screen on the same window, fill in your Gmail account details.
- In the Incoming email server field, type in: imap.gmail.com:993
- In the Account type field, type in: IMAP4
- In the Outgoing email server field, type in: smtp.gmail.com:465
Ensure these options are checked:
- Outgoing server requires authentication
- Use same user name and password for sending email
- Require SSL for incoming email.
Click Sign in when you’re done and wait for a few minutes, your Gmail account will be added successfully to Windows 11/10 Mail app without the error 0x8000000b.
That’s it, folks. I hope that helps.
Obinna has completed B.Tech in Information & Communication Technology. He has worked as a System Support Engineer, primarily on User Endpoint Administration, as well as a Technical Analyst, primarily on Server/System Administration. He also has experience as a Network and Communications Officer. He has been a Windows Insider MVP (2020) and currently owns and runs a Computer Clinic.
Readers help support Windows Report. We may get a commission if you buy through our links.
Read our disclosure page to find out how can you help Windows Report sustain the editorial team. Read more
You’ve got an important email to send, but you receive the error 0x8000000b while trying to send your email. What now? To first understand why this happened, we have to understand the nature of this error.
This error is related to syncing issues, and it appears when you’re trying to set up your email app. Whether you use Gmail or Yahoo, this can happen when you’re configuring them in the Windows 10 email app.
When you click on that Send button, your email app will try to connect with the email server automatically to get the server settings, but sometimes this error occurs. But fear not, we’ve created a list of tips and fixes for you. So let’s get to solving.
How can I fix error 0x8000000b?
- Setting up your mail in Windows 10
- Resetting Windows apps
- Allow access through Firewall
- Disable your Firewall
1. Setting up your mail in Windows 10
Let’s try adding your proffered email account into the Mail app. This should help you solve error 0x8000000b. To do this, follow these steps:
- Launch your Mail app and click on the Settings icon.

- Select Manage accounts, and then click Add account and then click on the Advanced setup option.
- Next, in the same Add an account section, click the Internet email option.
- On the next screen, provide your desired email account details.
- Now, click Sign in and wait for a few minutes, your email account will be added successfully to the Mail app.

2. Reset the Mail app
You might be able to fix error 0x8000000b by resetting the Windows 10 apps which are not working properly. When you’re done, check if the Mail app works for you.
- Press the Windows logo + I keys on the keyboard, and open the Settings.
- Click on System and then click on Apps & Features, and select the Mail app.
- You will see Advanced options, click on it.
- In the Advanced options, click on Reset.

- Click once more on the Reset button to confirm.
- You can now close the Settings app and return to your desktop.

3. Allow access through Firewall
In the event that you are using an antivirus or your Windows Defender is enabled, they can potentially be the cause for error 0x8000000b. So let’s get on it.
- Open Start and type Windows Defender Security Center.
- Select the Firewall and network protection.
- Now choose Allow an app through firewall, and click on Change settings.

- You will see a list of allowed applications, make sure to select both Private and Public boxes for Mail.
- Click OK, and you’re all set.

4. Disable your Firewall
In the event that you’re still having error 0x8000000b, you can try to disable your Firewall, and see if that works. To do this, follow these steps:
- Open your Windows Defender Center again.
- Head to the Firewall and network protection section.
- Now select a network profile and turn off Windows firewall for it.
- Try running your Mail app now.
You can remove and add your account if it doesn’t sync at first. In order to do this, follow these steps:
- Type Mail in your Start Menu.
- Once you’ve clicked on the app, you should head over to the Settings icon.
- Choose your account and select Delete account.
- After this, add your account back in.
We hope that these solutions were of use to you and that you’ve managed to fix error 0x8000000b.
RELATED STORIES TO CHECK OUT:
- Fix: Windows Live Mail error 0x8007007A on Windows 10
- Windows Live Mail not working in Windows 10? We’ve got solutions
- Top 4 software to recover lost email account passwords
Madalina Dinita
Networking & Security Specialist
Madalina has been a Windows fan ever since she got her hands on her first Windows XP computer.
She is interested in all things technology, especially emerging technologies — AI and DNA computing in particular.
Prior to joining the WindowsReport team, she worked in the corporate world for a number of years.
If you try to configure emails in your Mail app or maybe synchronize them, you will encounter a problem with Windows 10 Mail. The Mail app is not syncing with an error code 0x8000000b. This problem occurred mainly when setting up Gmail and Yahoo email accounts in Windows 10 Mail.
Normally, once you have entered your email address and password, the Mail app will automatically attempt to communicate with the email server to obtain server settings.
Complete Error Message:
Something went wrong, We’re sorry, but we weren’t able to do that. Error code 0x8000000b
What is the Cause of the Error 0x8000000b?
A syncing problem with Windows 10 Mail application can be caused by several factors. Most often the problem occurs due to one of the following reasons.
- Incorrect password.
- Mail server problem.
- Unstable Internet connection.
- Incorrect virus protection or firewall settings.
- POP and IMAP settings are not activated on the mail server.
With the same error message you can get other error codes such as 0x8007042b, 0x80040154, 0x8000ffff, 0x8007000d, 0x80c8043e, 0x80070435, 0x8007006d, 0x80070425. No matter what error code you get, the fact is that you still cannot add your email account This ultimately prevents you from using your Gmail account on the built-in mail application on Windows 10.
How to Troubleshoot Issue and Fix the Windows 10 Mail App 0x8000000b Error?
To solve the issue and properly configure your email account in your Mail app, perform any of the troubleshooting methods below.
We recommend that you create a System Restore point first before continuing with troubleshooting. If something is wrong during process, you can easily restore it to the previous working state.
1 – Enable Folders

Outlook and Mail for Windows 10 require access to folders in Gmail. Make sure that the folders are configured to be displayed in IMAP.
- In your browser, go to Gmail.com.
- Select Settings.
- Select the Labels tab.
- In IMAP, make sure that IMAP Display is selected for Inbox, Sent, Trash, and All Messages folders.
- You can also choose to View in IMAP for other tags you want to see in Outlook or Mail for Windows 10.
2 – Sign in Using Advanced Settings
If the above solution does not work for you, this is another method you can try. Here you will login to your account using advanced settings.
For Google:
If you have a Gmail address, follow these instructions. First of all, you need to activate some settings in your Gmail account settings.
- Sign in to your Gmail account using your browser.
- After logging in, activate IMAP.
- Finally, you need to enable the “Allow less secure apps” option in your Gmail account settings.
- Once you have followed the instructions above, it’s time to login.
- Click Start and open Mail app.
- Open the Mail Settings.
- Select Accounts, and then click Add Account.
- Click Advanced Configuration.
- You will be prompted to select your email account type and select “Internet email”.
- Enter your account information. In the Inbox Server field, enter the following: imap.gmail.com:993
- Select IMAP4 as “Account Type” and enter the following in the “Outbound Email Server” field: smtp.gmail.com:46
- After entering all the details, click “Login”.
For Outlook:
If you have an Outlook email, follow these steps:
- Open Mail and go to Settings.
- Select Accounts, and then click Add Account.
- Instead of selecting Outlook, select Exchange.
- Enter your e-mail address and click Next. You will be prompted to enter your password.
- Click Login.
- Check if your problem is fixed.
3 – Reset the Mail App

Error 0x8000000b error can be eliminated by resetting the incorrectly functioning Windows 10 applications. Once done, make sure that your Mail app is working properly.
- Tap the Windows Logo + I on your keyboard and open the Settings.
- Tap System, select Apps & Features, and then click on the Mail app.
- Click Advanced options.
- In the Advanced options, tap Reset.
- Tap Reset again to confirm.
- You can now close the Settings application and return to the desktop.
4- Re-register the Mail App

If a particular application does not work in Windows 10, re-registering the application can also help correct the error code 0x8000000b.
- Click Search in the taskbar and enter cmd.exe in the corresponding field. When you see the result, right-click on the command line and select Run as administrator.
- If you see UAC, click Yes to continue.
- In the black box, type the following command, and then press Enter.
PowerShell -ExecutionPolicy Unrestricted -Command "& {$manifest = (Get-AppxPackage windowscommunicationsapps).InstallLocation + '\AppxManifest.xml' ; Add-AppxPackage -DisableDevelopmentMode -Register $manifest}"
When this is done, exit the command line window and restart the computer.
5 – Allow Mail Through the Windows Firewall

Error code 0x8000000b means that the Mail application cannot connect to the Gmail IMAP server. Make sure that your firewall allows outbound connections to ports 993, 465 and 587. Some antivirus software can also cause this problem, so try to temporarily disable email scanning to allow direct connection.
To allow Mail app to use the Windows Firewall:
- Return to the Windows Defender Security Center.
- Click on the “Firewall and Network Protection” button.
- Select “Allow an app through firewall” and then “Change settings”.
- In the list of authorized applications, make sure you put a checkmark in the Private and Public boxes for Mail app.
6 – Disable Firewall

If the error 0x8000000b is still present, you can try to disable the firewall and check if it works. To do this, follow these steps:
- Open the Windows Defender Center again.
- Go to the Firewall and Network Protection section.
- Now select the network profile and disable the Windows Firewall.
- Now try running the Mail application.
- You can delete and add your account if it hasn’t been previously synchronized. To do this, proceed as follows:
- Enter Mail in the Start menu.
- After clicking on the application, go to the Settings icon.
- Select your account and select Delete Account.
- You can then add your account again.
Conclusion
I hope that the troubleshooting steps above will help you to solve the Windows 10 Mail 0x8000000b error on Windows 10 computers. Let us know what you think, please leave us a message or a comment below.
Windows Dispatch is a website supported by its readers & community. Some pages may contain affiliate links which may allow us to earn a little money when you buy through them.
Aileen G. M.
A technology writer with a degree in Business Administration majoring in Marketing. Aileen loves creating helpful but simple guides for troubleshooting and fixing complex issues on today’s gadgets and services.