
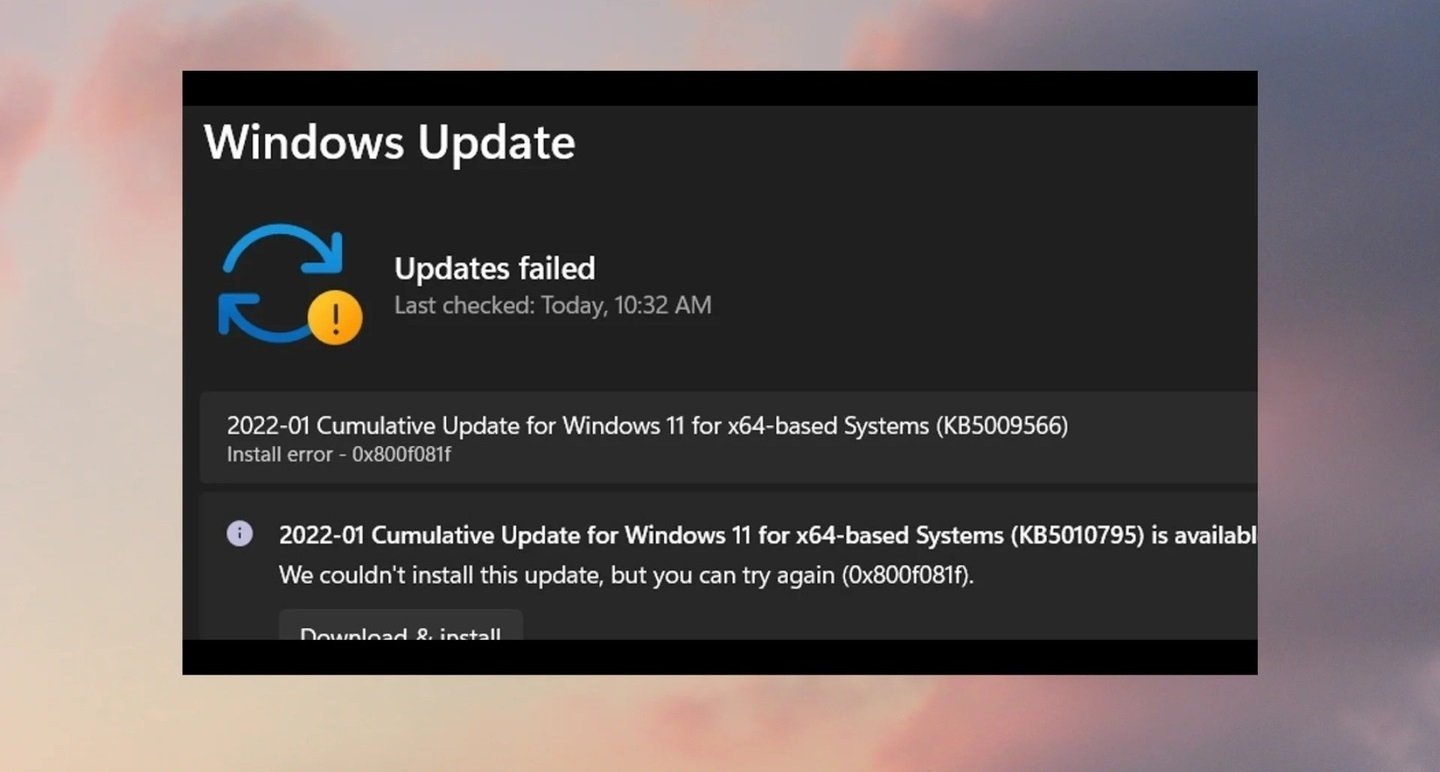
При установке обновлений Windows 11 или 10 некоторые пользователи могут столкнуться с ошибкой установки 0x800f081f, при этом повторные попытке скачивания и установки обновления обычно не срабатывают.
В этой инструкции подробно о способах, которые могут помочь исправить ошибку и установить обновление, с которым возникла проблема. Обратите внимание: если ошибка появляется при установке .NET Framework, решения приведены в отдельной инструкции.
Очистка кэша обновлений и сброс компонентов Центра обновлений Windows

Как и при большинстве других ошибок Центра обновлений, первое, что следует попробовать выполнить в случае ошибки 0x800f081f — очистку кэша обновлений, для этого достаточно выполнить следующие действия:
- Запустите командную строку от имени администратора (как это сделать).
- По порядку введите следующие команды (если некоторые сообщат об ошибке, пропускаем и переходим к следующей):
net stop bits
net stop wuauserv
net stop appidsvc
net stop cryptsvc
ren C:\Windows\SoftwareDistribution SoftwareDistribution.old
ren C:\Windows\System32\catroot2 Catroot2.old
net start bits
net start wuauserv
net start appidsvc
net start cryptsvc
- Перезагрузите компьютер.
Выполнив перезагрузку, попробуйте снова скачать и установить обновление — возможно, в этот раз всё пройдёт исправно.
Если описанные шаги не привели к решению проблемы, попробуйте выполнить полный сброс компонентов Центра обновления Windows:
В ситуации, когда вышеописанные шаги не помогли, можно сделать предположение, что проблема не ограничивается Центром обновлений и его компонентами, возможно, её источник — сама Windows 11 или Windows 10, а точнее какие-то неполадки в её работе, об устранении которых — в следующем разделе.
Дополнительные варианты решения
Ошибка 0x800f081f может быть вызвана повреждением системных файлов Windows, чтобы восстановить их, запустите командную строку от имени администратора и по порядку выполните команды:
dism /online /cleanup-image /restorehealth
sfc /scannow
После чего перезагрузите компьютер и повторите установку обновления.
Если не помогло и это, можно попробовать такие варианты:
- Выполнить поиск обновления в официальном каталоге обновлений по его KB-номеру, скачать обновление и выполнить установку вручную.
- По некоторым сообщениям пользователей может сработать отключение компонентов .NET Framework в Win+R — appwiz.cpl — дополнительные компоненты, перезагрузка и повторное их включение.

- Если на компьютере присутствуют сторонние антивирусы, а также программы очистки места на диске или оперативной памяти в автоматическом режиме, попробуйте временно отключить их.
- Попробуйте откатить систему с использованием точек восстановления: нажмите клавиши Win+R на клавиатуре, введите rstrui и нажмите Enter, выберите недавнюю точку восстановления, когда всё работало исправно и попробуйте выполнить откат, а после него вновь установить доступные обновления.

- На всякий случай, выполните проверку компьютера на наличие вирусов и других вредоносных программ, но используя не тот антивирус, который у вас установлен, а другие варианты — KVRT, Kaspersky Recue Disk.


И, наконец, в крайнем случае можно попробовать выполнить «Обновление на месте» для исправления ошибок Windows и, с большой вероятностью, всех ошибок при установке обновлений.
How to Fix Update Error 0x800f081f in Windows 10
If you’re getting error 0x800f081f when trying to update your operating system, you won’t get important system updates. This article will show you several methods to fix this error.
What Causes Error 0x800f081f
You may experience error 0x800f081f due to incompatibility issues caused by Microsoft .NET Framework 3.5. It has been determined that such incompatibilities occur when users enable NET Framework.
In Windows 10, NET Framework works as an on-demand feature, meaning that when the user turns it on, the Windows Update service tries to acquire the binaries of .NET and other files. If your computer has been incorrectly configured, you will get the 0x800f081f error because Windows Update cannot find the necessary files for NET.
If Microsoft NET Framework is the cause of error 0x800f081f, then you may be able to resolve the issue by using an offline NET Framework installer or enabling the currently installed NET Framework version manually. NET Framework can be enabled using a PowerShell Command, the Deployment Image Servicing, and Management tool, or the installation wizard.
Video Guide on How to Fix Windows Update Error 0x800f081f
Table of Contents:
- Introduction
- Solution 1. Run the Windows Update Troubleshooter
- Solution 2. Enable Microsoft .NET Framework using Command Prompt
- Solution 3. Run the System File Checker (SFC) Scan
- Solution 4. Run the Deployment Image & Servicing Management (DISM) Scan
- Solution 5. Configure the Group Policy Setting
- Solution 6. Upgrade Windows 10 Using the Media Creation Tool
- Video Guide on How to Fix Windows Update Error 0x800f081f
Download Computer Malware Repair Tool
It is recommended to run a free scan with Combo Cleaner — a tool to detect viruses and malware on your device. You will need to purchase the full version to remove infections. Free trial available. Combo Cleaner is owned and operated by Rcs Lt, the parent company of PCRisk.com read more.
Solution 1. Run the Windows Update Troubleshooter
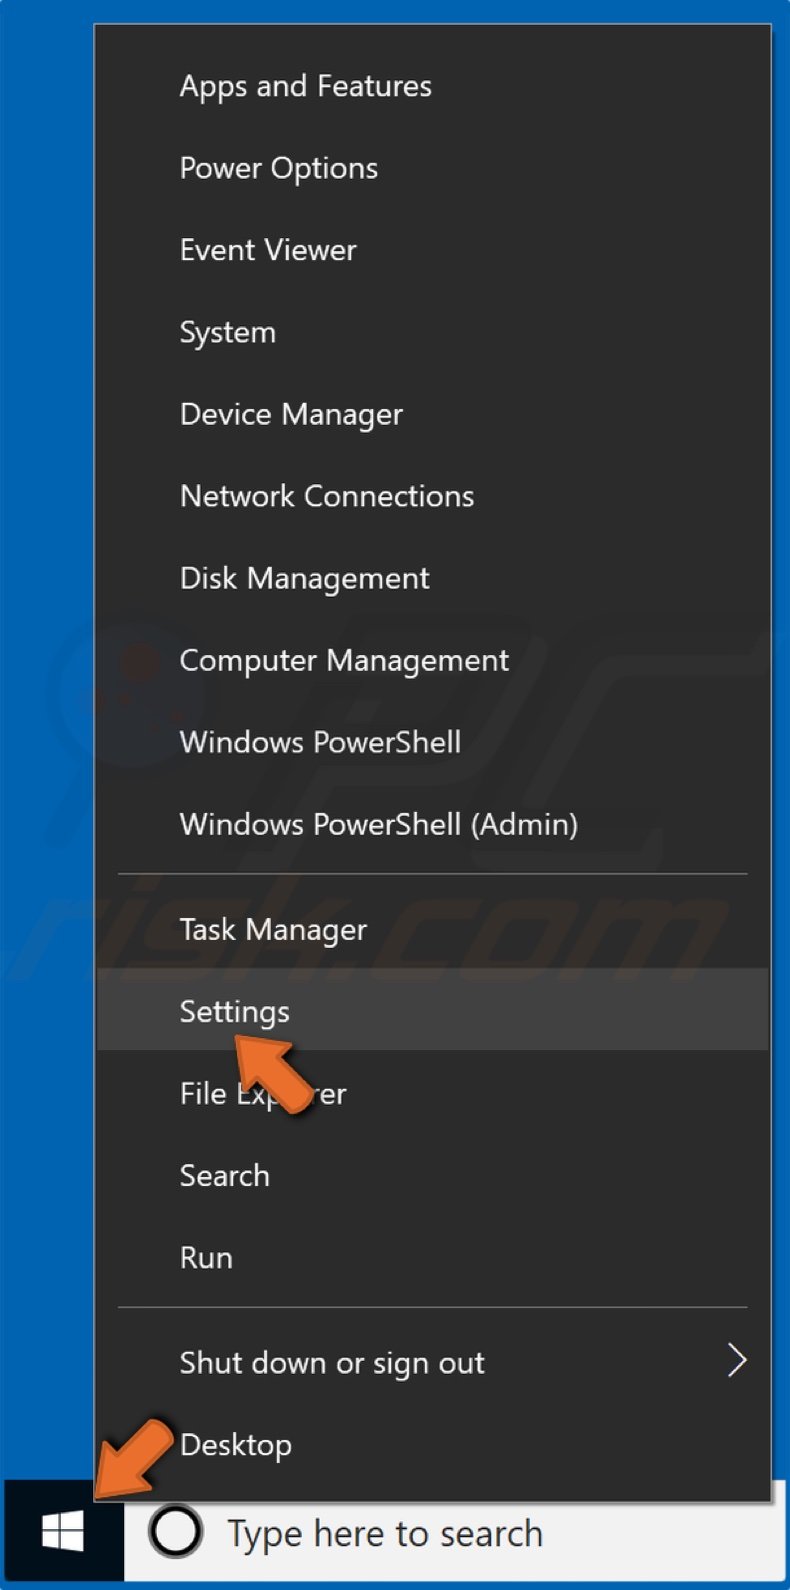
1. Right-click the Start Menu and click Settings.
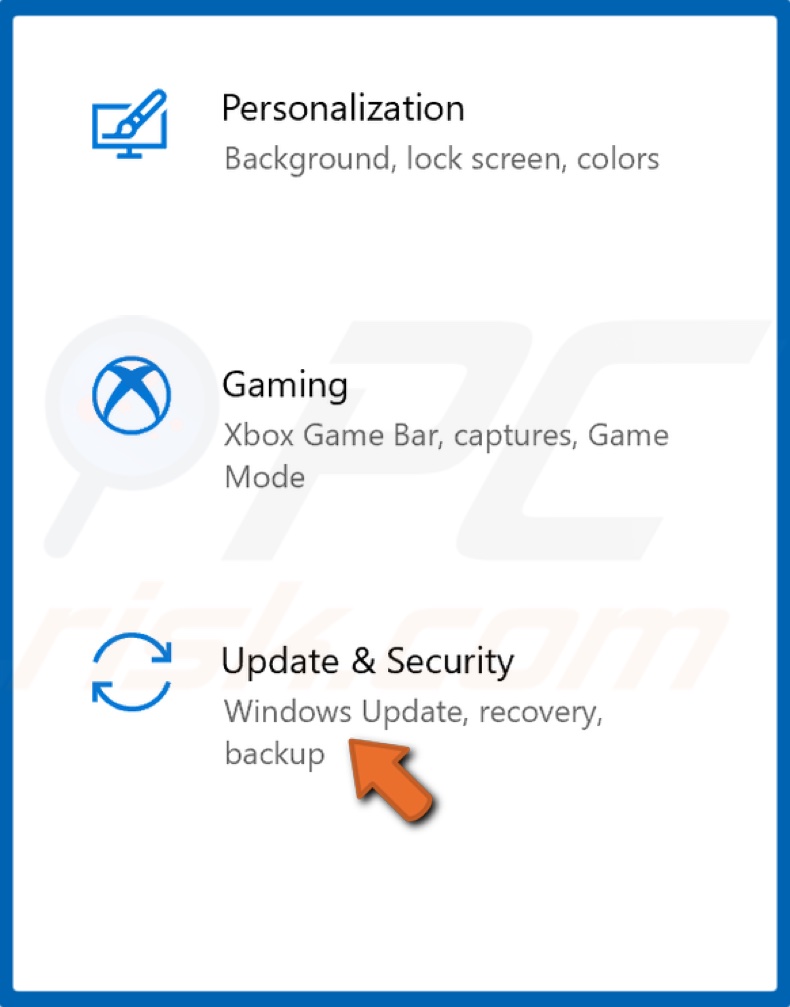
2. Select Update & Security.
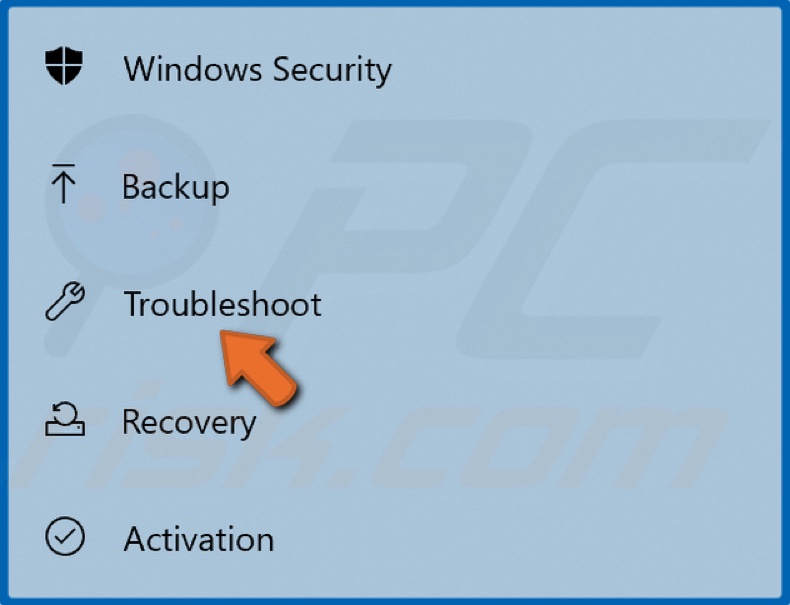
3. Click Troubleshoot.
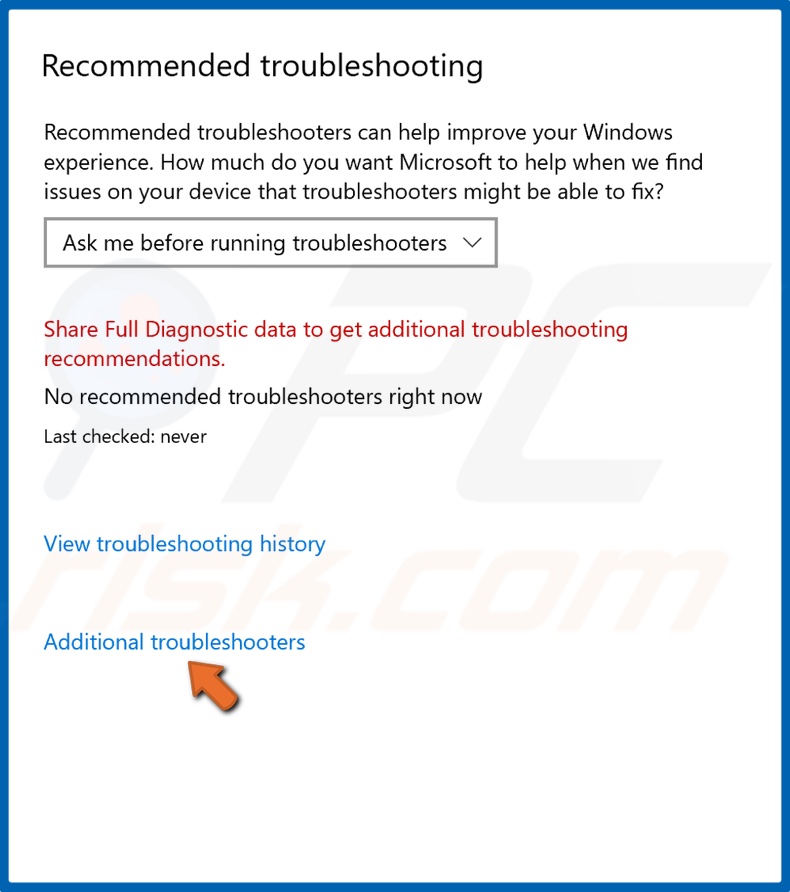
4. Click Additional troubleshooters.
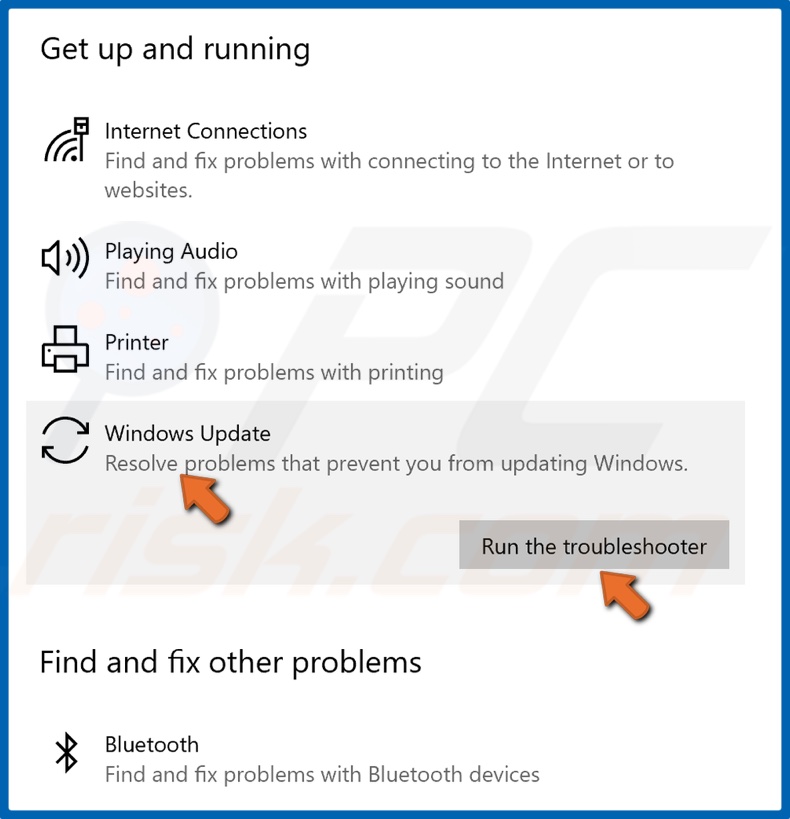
5. Select Windows Update and click Run the troubleshooter.
6. If the troubleshooter detects an issue, it will select and apply a fix automatically.
[Back to Table of Contents]
Solution 2. Enable Microsoft .NET Framework using Command Prompt
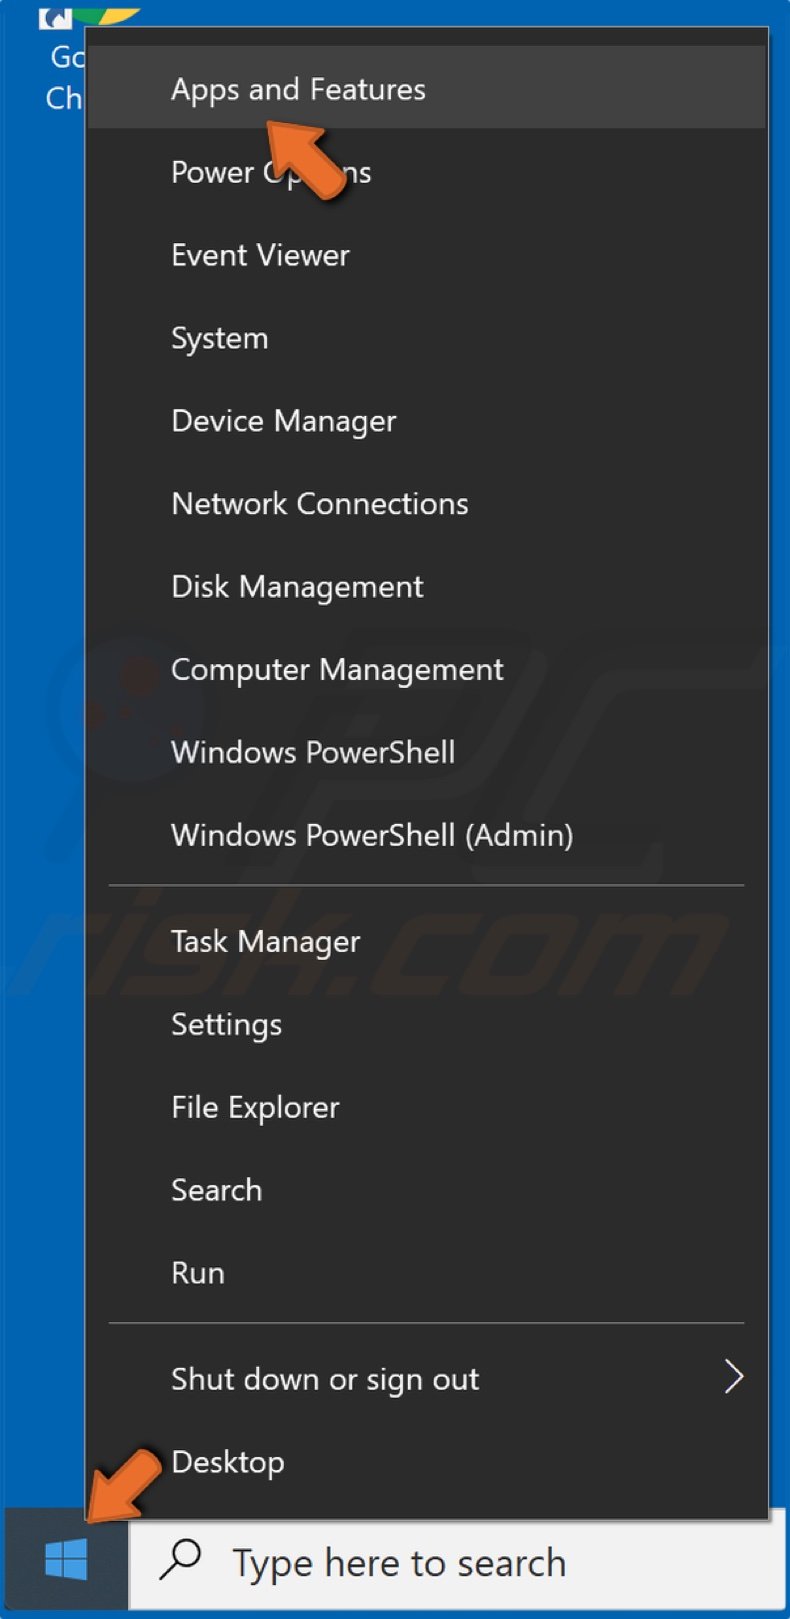
1. Right-click the Start Menu and select Apps and Features.
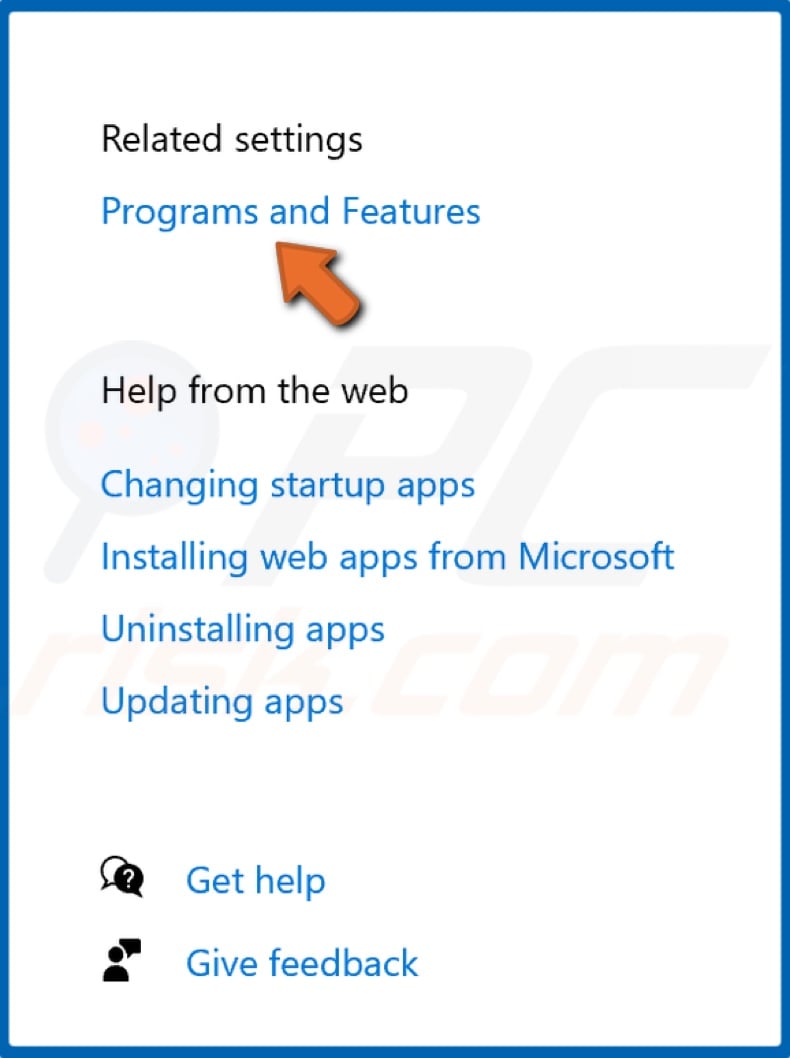
2. At the top-right of the window, select Programs and Features.
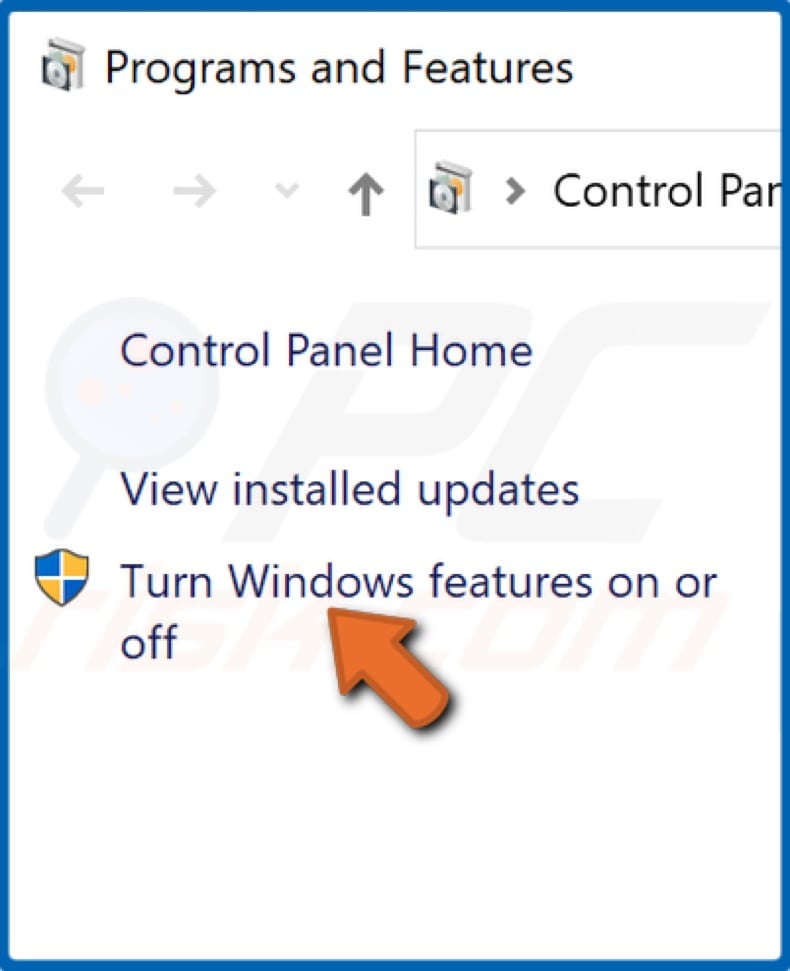
3. In the resulting Programs and Features window, click Turn Windows features on or off.
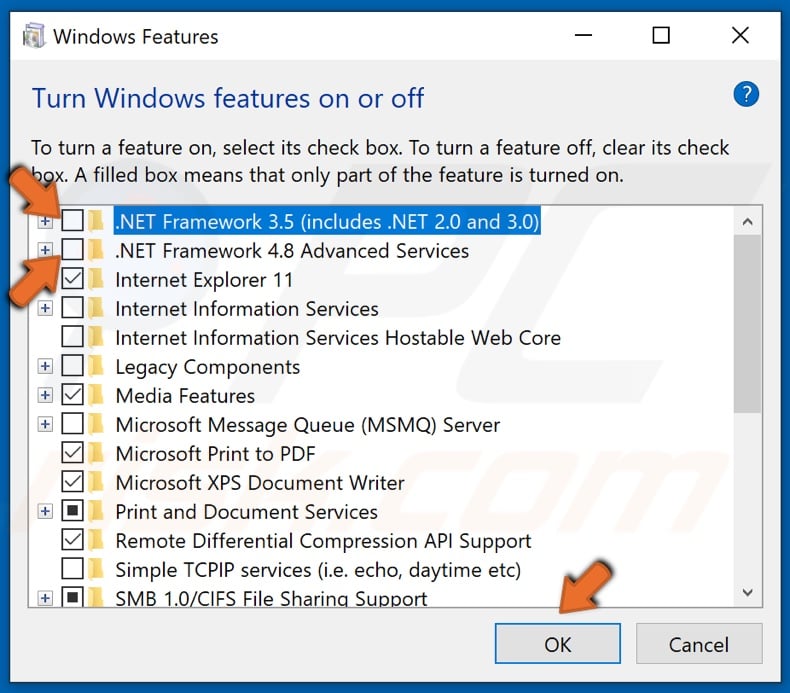
4. Find .NET Framework 3.5 and .NET Framework 4.8.
5. Uncheck the boxes next to .NET Framework 3.5 and .NET Framework 4.8 and click OK to disable them.
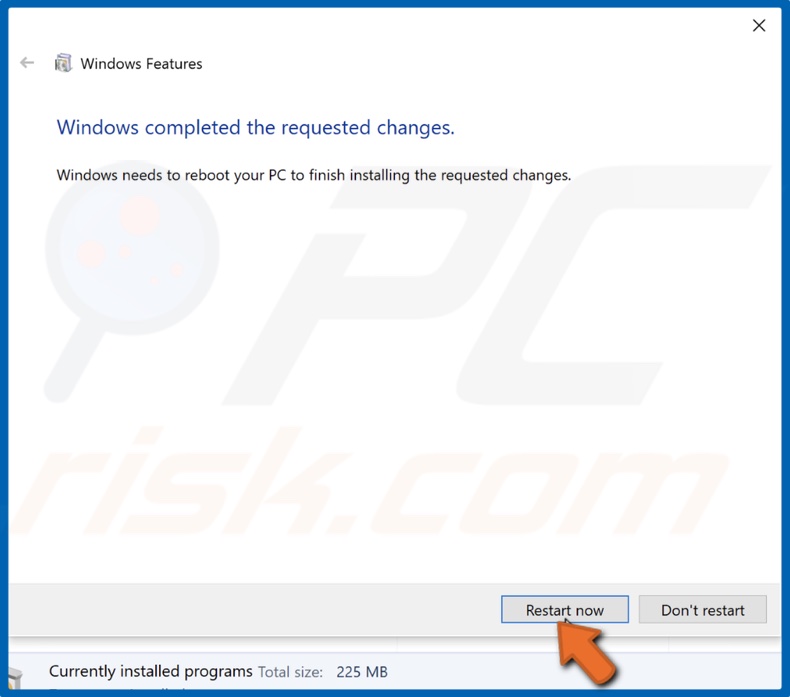
6. Click Restart Now.
7. Return to the Turn Windows features on or off window.
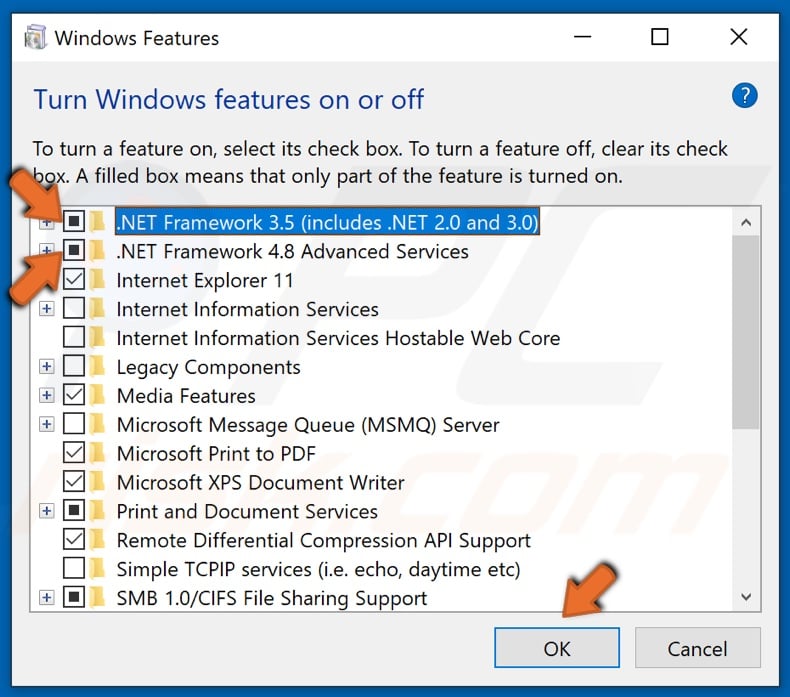
8. Check the boxes next to .NET Framework 3.5 and .NET Framework 4.8 and click OK.
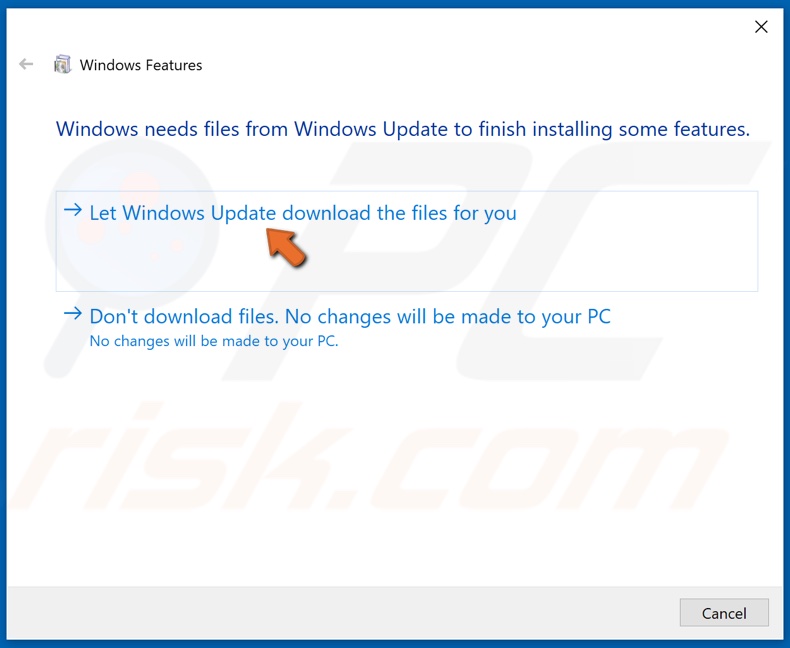
9. Then, click the Let Windows Update download the files for you option.
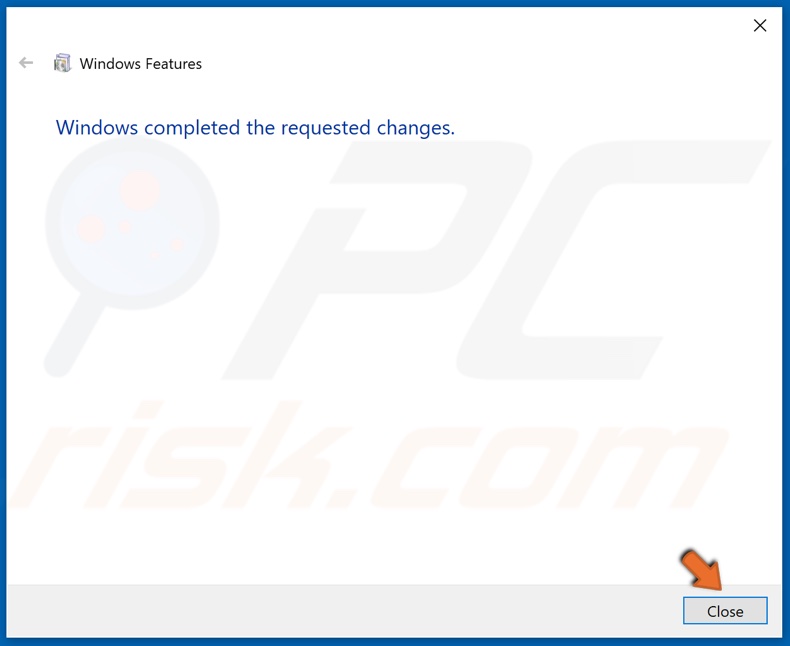
10. Click Close once the requested changes have been completed.

11. Then, Hold down Windows+R keys to open the Run dialog box.
12. Type in CMD in the dialog box, and hold down Ctrl+Shift+Enter to open elevated Command Prompt.
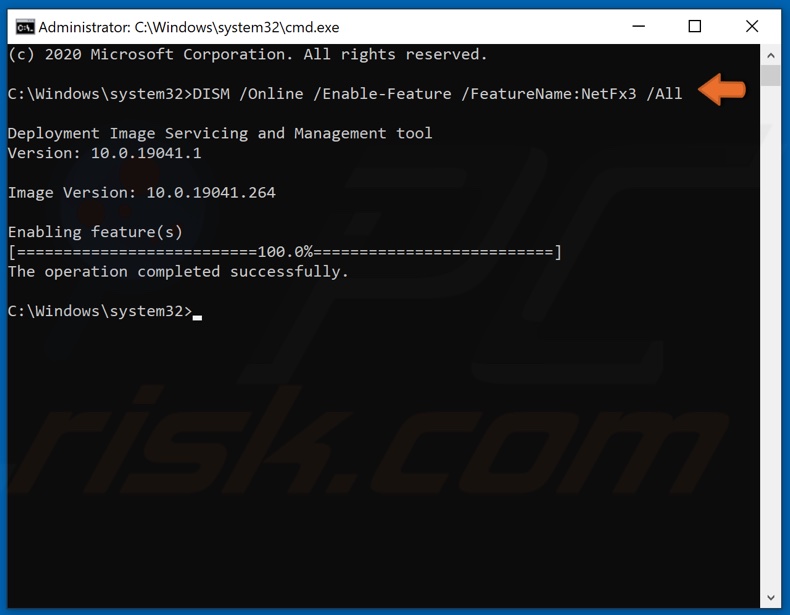
13. In the Command Prompt window, type in DISM /Online /Enable-Feature /FeatureName:NetFx3 /All and hit the Enter key.
14. Close the Command Prompt and try updating Windows.
[Back to Table of Contents]
Solution 3. Run the System File Checker (SFC) Scan
1. Hold down Windows+R keys to open the Run dialog box.
2. Type in CMD in the Run text box and hold down Ctrl+Shift+Enter keys to open the elevated Command Prompt.
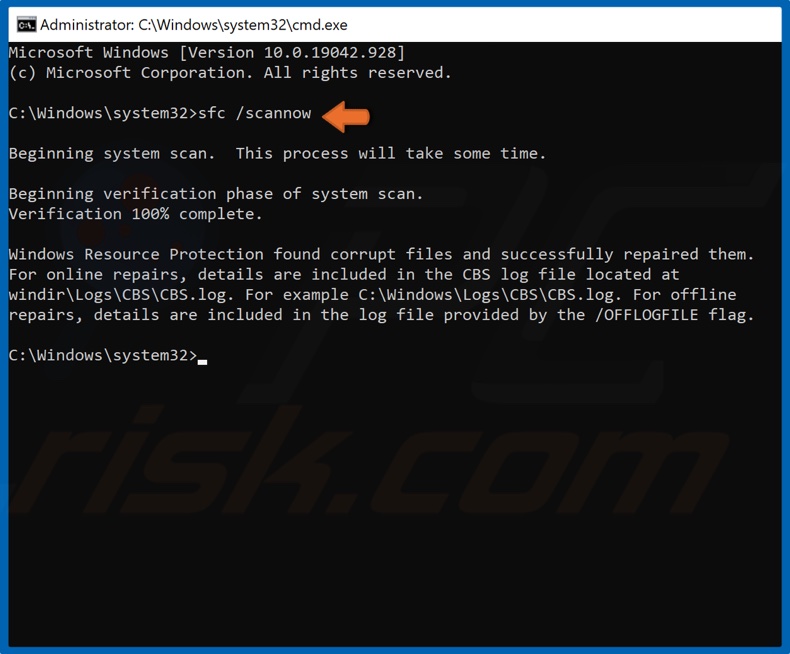
3. In the Command Prompt window, type in SFC /Scannow and hit the Enter key to start the scan.
4. Once the scan has been completed, restart your PC.
[Back to Table of Contents]
Solution 4. Run the Deployment Image & Servicing Management (DISM) Scan
1. Hold down Windows+R keys to open the Run dialog box.
2. Type in CMD in the Run text box and hold down Ctrl+Shift+Enter keys to open the elevated Command Prompt.
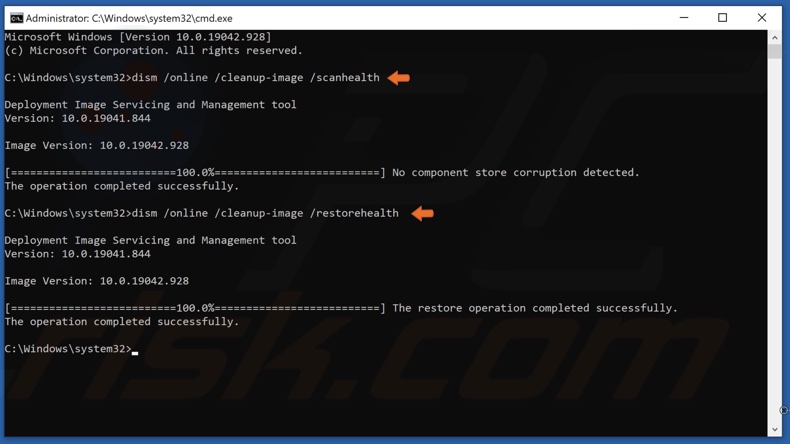
3. In the Command Prompt window, type in DISM /Online /Cleanup-Image /ScanHealth and hit the Enter key. This parameter will scan the component store for corruption.
4. Type in DISM /Online /Cleanup-Image /RestoreHealth and hit the Enter key.
5. Once the process has been completed, try updating Windows 10.
[Back to Table of Contents]
Solution 5. Configure the Group Policy Setting
This solution is not possible on Windows 10 Home Edition since the Home Edition does not have the Group Policy Editor.
1. Hold down Windows+R keys to open the Run dialog box.
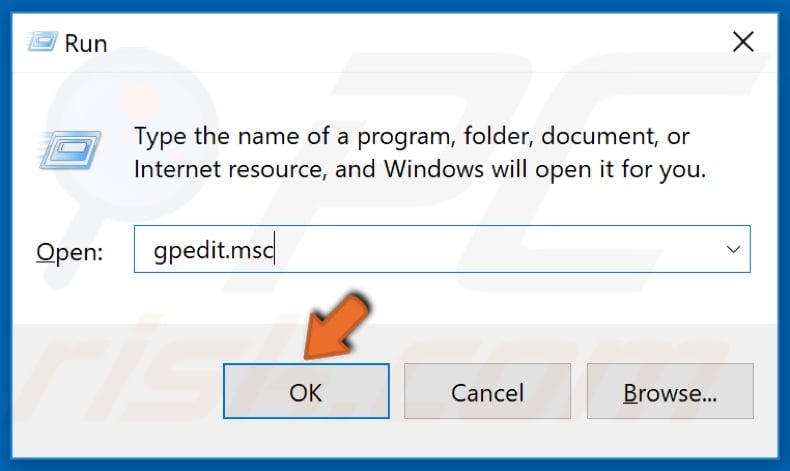
2. In the Run dialog box, type in gpedit.msc and click OK.
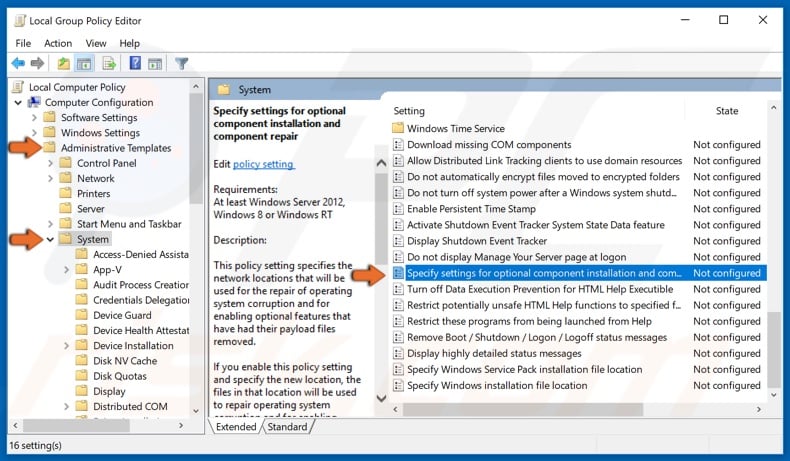
3. In the left pane, expand Administrative Templates.
4. Then, select System.
5. In the right pane, open the Specify Settings for Optional Content Installation.
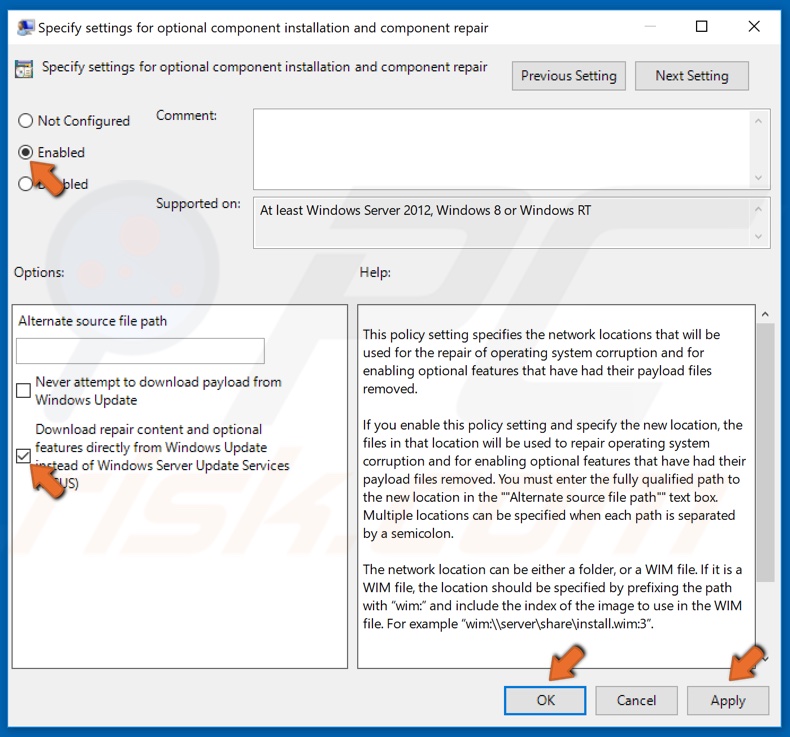
6. At the top-right of the window, select the Enabled option.
7. Then, mark the Download Repair Content and options features directly from Windows Update instead of Windows Server Update Services (WSUS) checkbox.
8. Click Apply and click OK to save the changes.
[Back to Table of Contents]
Solution 6. Upgrade Windows 10 Using the Media Creation Tool
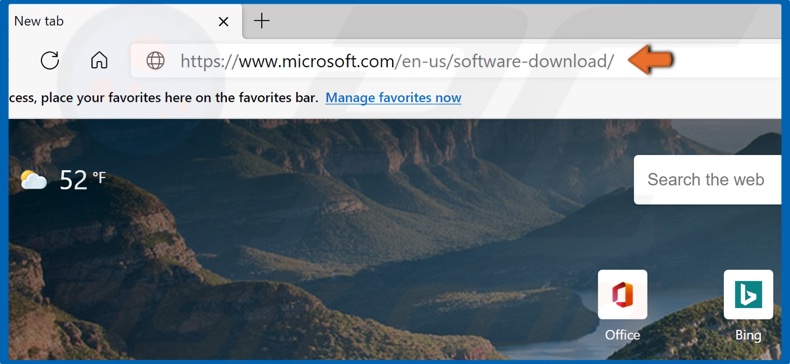
1. Open your web browser, and go to Microsoft’s Download Windows 10 web page.
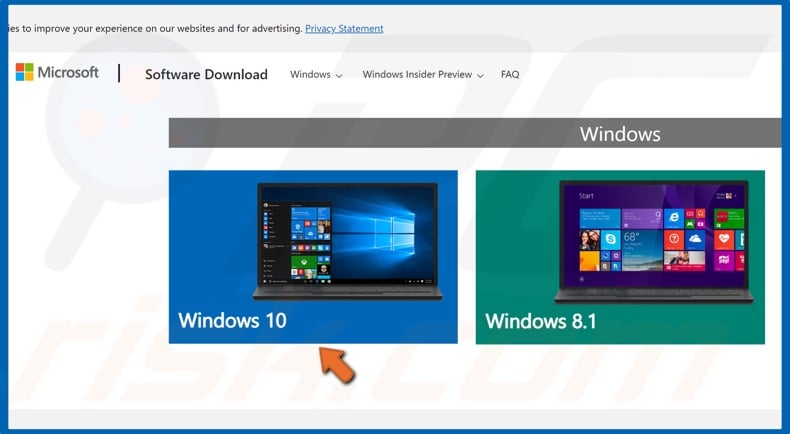
2. Once on the website, select Windows 10.

3. Click Download tool now to get the Media Creation Tool.
4. Run the Media Creation Tool once it’s been downloaded.
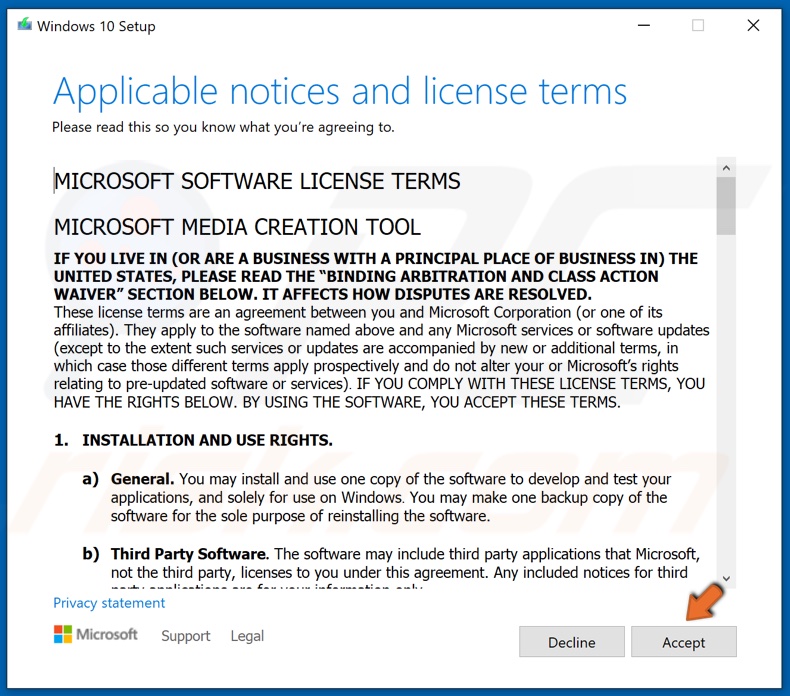
5. Then, Accept the license agreement.
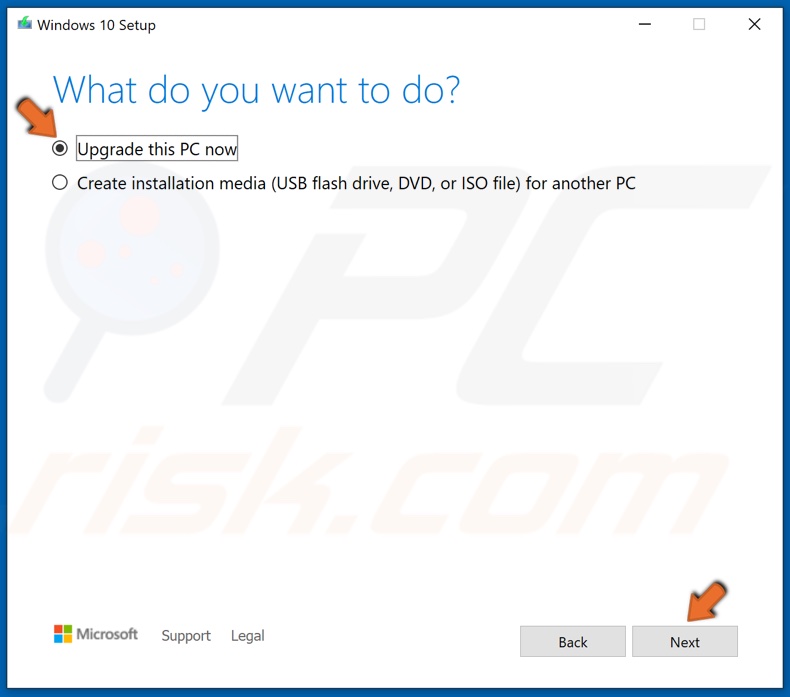
6. Make sure that the Upgrade this PC now is ticked, and click Next.
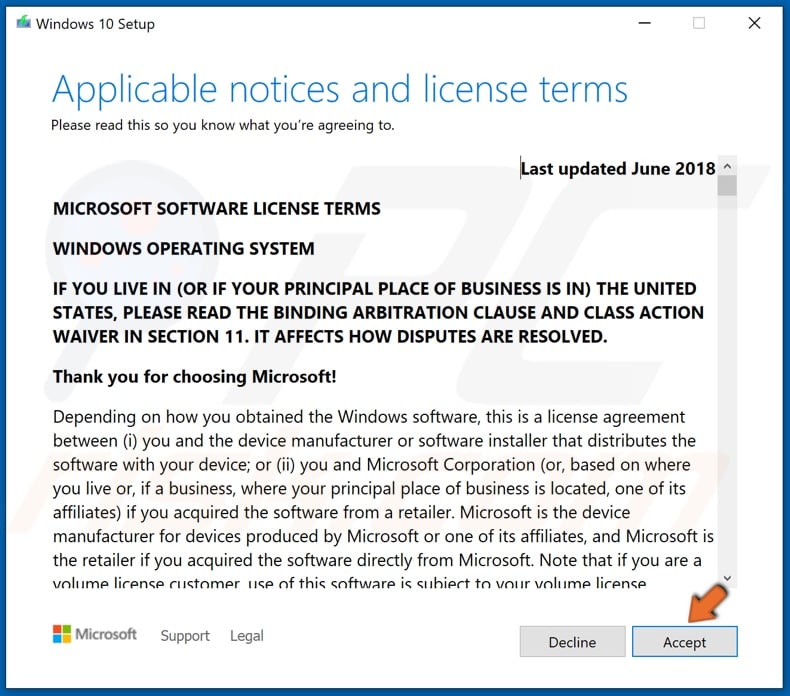
7. Then, Accept the Windows 10 license agreement.
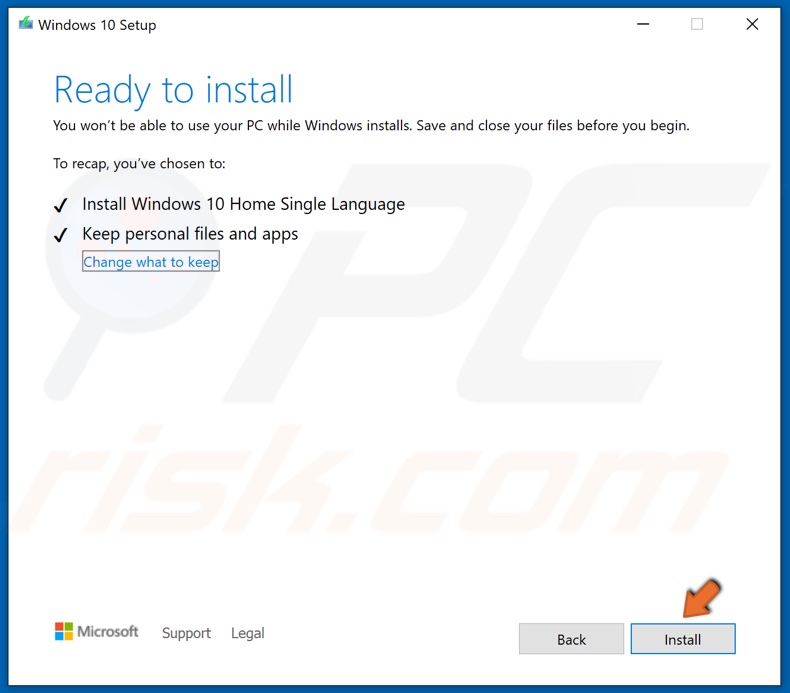
8. You can opt to keep your personal files and apps, but if you want a clean installation of Windows 10, click the Change what to keep button to customize the installation settings.
9. Then, click Install, and the setup will begin installing Windows 10.
Take note that the installation will take some time, and your computer will restart several times throughout the installation.
[Back to Top]
Код ошибки 0x800f081f в большинстве случаев возникает во время установки пользователями кумулятивных обновлений для операционной системы Windows 10. Стоит отметить, что этот же код может возникать и во время установки программного обеспечения .NET Framework 3.5, тем не менее эти ошибки кардинально отличаются друг от друга.
Как было отмечено, наиболее часто ошибка 0x800f081f встречается при установке следующих кумулятивных обновлений:
KB4058258
KB4090913
KB4056892
KB4051963
KB4048955
KB4074588
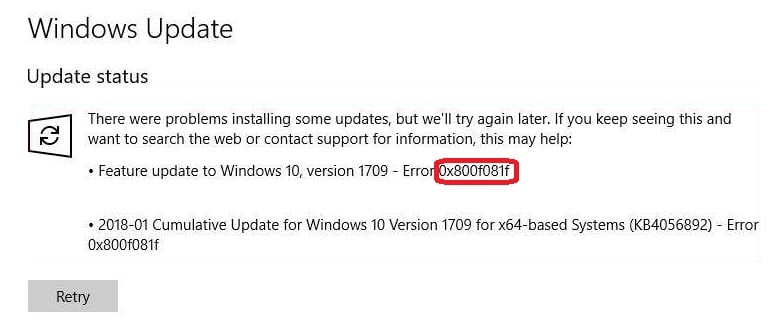
Кстати, последнее обновление в списке — это кумулятивное обновление для Windows 10 версии 1709. Разумеется, что после после появления данной ошибки вы не сможете установить нужное вам обновление, даже если вы попробуете повторить процедуру: установка остановится на определенном моменте, а изменения, выполненные ранее, будут отменены.
Причин у ошибки 0x800f081f может быть несколько: поврежденные системные файлы, поврежденные компоненты Центра обновления, конфликт между устанавливаемым и установленным обновлением, антивирус или брандмауэр, блокирующие процесс установки обновления.
Как устранить ошибку 0x800f081f?
Восстановление системных файлов
Давайте начнем с самого простого, что вы можете сделать в случае появления ошибки 0x800f081f — сканирование и восстановление системных файлов. Существует вероятность, что вы не можете установить то или иное обновление в связи с тем, что в вашей Windows были повреждены определенные системные файлы, являющиеся крайне важными для самого процесса обновления.
Вы можете найти и восстановить поврежденные системные файлы с помощью системной утилиты под названием System File Checker(SFC). Запустить в работу эту утилиту возможно только через Командную строку. Не знаете как открыть Командную строку? Вам нужно нажать правой кнопкой мыши на Пуск и выберите «Командная строка(администратор)».
Как только вы откроете Командную строку, введите в черное окошко команду sfc/ scannow и нажмите Enter. Вот и все, что вам нужно сделать. После нажатия на Enter перед вами начнется проверка системных файлов, а также восстановление поврежденных, если такие будут присутствовать. Как и положено, по окончанию проверки вам будет предоставлена сводка проделанной SFC работы, в которой вы сможете узнать, были ли в вашей Windows 10 поврежденные файлы и были ли они восстановлены. Если сводка подтвердила догадку — перезагрузите компьютер.
Отключение антивируса и брандмауэра
Антивирус и брандмауэр — это крайне важное программное обеспечение, которое содержит наши с вами системы в безопасности. Однако, как знают многие опытные пользователи, антивирус или брандмауэр может запросто блокировать те или иные элементы операционной системы по какой-то причине.
Попробуйте отключить антивирус и Брандмауэр Windows, чтобы убедиться, что они не вызывают ошибку 0x800f081f. Если вы установили сторонний антивирус — вам придется разбираться в его функционале самостоятельно. Впрочем, с системным сетевым экраном все куда проще:
- нажмите Windows+S;
- впишите «Панель управления»;
- перейдите в раздел «Брандмауэр Защитника Windows»;
- перейдите по ссылке «Включение и отключение брандмауэра защитника Windows;
- поставьте галочки напротив опции отключения для всех типов сети;
- сохраните измененные параметры.
Отключив антивирус и брандмауэр, снова попробуйте установить нужное вам обновление и убедитесь, что ошибка 0x800f081f была устранена.
Сброс компонентов Центра обновления Windows
Не получается обновить систему? Возможно, вы столкнулись со случаем поврежденных компонентов Центра обновления. Чтобы устранить повреждения, вам нужно сбросить оговариваемые компоненты с помощью набора определенных команд для Командной строки:
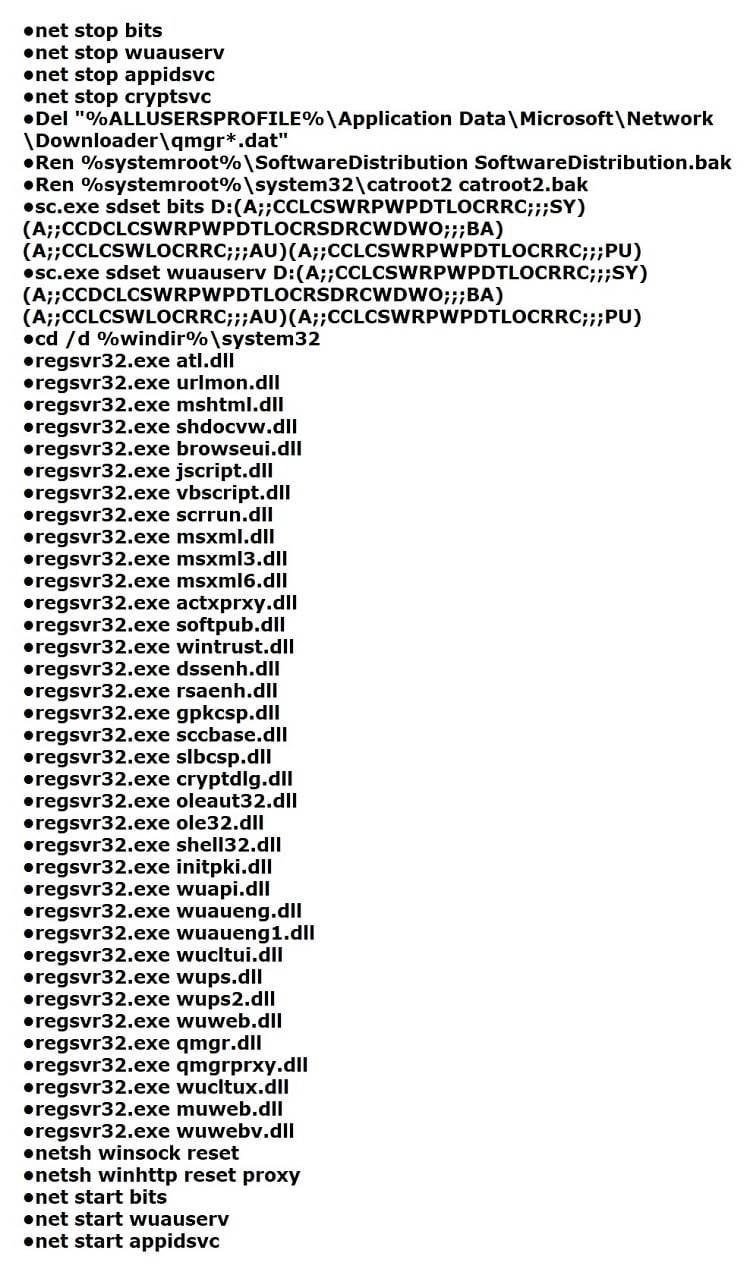
Выполнив все вышеуказанные команды, перезагрузите свой ПК, а затем проверьте наличие ошибки 0x800f081f. Как правило, она должна быть устранена. Однако, если же она все еще присутствует, то мы рекомендуем вам в таком случае воспользоваться ручной установкой нужного обновления: пройдите в Каталог обновлений Майкрософт, найдите обновление, загрузите установочный пакет и установите обновление.
DISM /Online /Cleanup-Image /RestoreHealth is one of the most commonly used command lines that can repair a damaged Windows system image. However, some of you may receive DISM error 0x800f081f while running it. If you are struggling with the same error, this guide on MiniTool Website might be helpful to you.
Deployment Image Servicing and Management (DISM) is a useful way to repair corrupted system images. Usually, it works together with System File Checker to scan and repair your computer and return it to a healthy work state.
However, like other inbuilt Windows tools, it goes wrong sometimes. Quite a few users complain that they encounter DISM error 0x800f081f when running the DISM /Online /Cleanup-Image /RestoreHealth command and receiving the following error messages.
- Error: 0x800f081f. The source files could not be found.
- Windows couldn’t find the required files to complete the requested changes. Make sure you’re connected to Internet, and try again. Error: 0x800f081f.
This error indicates that DISM cannot find the files required to fix the online Windows image in the default location. DISM error 0x800f081f can lead to other errors on your computer and prevents other processes from functioning properly, so you must take some measures to get rid of it as soon as it crops up.
# Suggestion: Back up Your Computer in Advance
As you can see, it is not easy to troubleshoot manually because you don’t know the exact reason for DISM failed error 0x800f081f. What’s more, you may make some mistakes during the troubleshooting process below if you are not proficient in computers. Any small changes may make huge differences or even cause severe consequences to your computer.
As a result, we sincerely advise you to back up your computer in advance. With a backup copy in hand, you can easily restore your system to a normal state. Some of you may assume that creating a backup of your system seems difficult. Don’t worry! With a piece of professional backup software – MiniTool ShadowMaker, everything will be easier.
This free tool is compatible with almost all Windows systems and allows you to create a file, folder, partition, disk, or system backup on your Windows PC. What’s more, it is very popular among the Windows community because of its one-click system backup solution. Without further ado, let’s see how it works!
Step 1. Download, install and launch this program.
MiniTool ShadowMaker TrialClick to Download100%Clean & Safe
Step 2. After launching it, hit Keep Trial to get a 30-day free trial and then go to the Backup page.
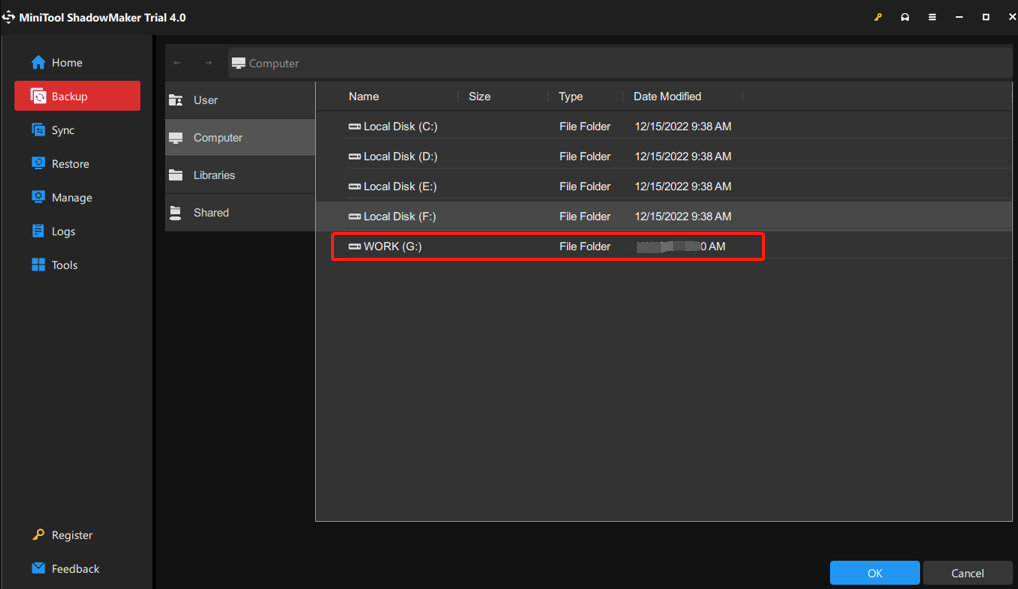
Step 3. On this page and you can see the system-required partitions are selected by default in SOURCE and you only need to choose a storage path for your backup in DESTINATION.
Tips:
Here, we recommend you to back up your system to a USB flash drive or an external drive.
Step 4. After making your decision, you can either hit Back Up Now to start the backup process or delay the backup task by hitting Back Up Later.
Then, go to Tools > Media Builder > WinPE-based media with MiniTool plug-in > USB Flash Disk to create a bootable drive. If your computer encounters some other radical changes such as black screen, Blue Screen of Death, or system crashes in the future, you can boot your computer from this USB flash drive and perform a system recovery with the system image that you backed up.
Tips:
As for backing up files, see this tutorial to get detailed instructions — How to Backup Files on Windows 10? Try These Top 4 Ways.
How to Fix DISM Error 0x800f081f on Windows 10/11?
Fix 1: Perform a Component Cleanup
You can clean up the image files and make everything run properly with the DISM component cleanup switch. Follow the steps below:
Step 1. Type cmd in the search bar to locate Command Prompt and right-click on it to choose Run as administrator.
Step 2. In the command window, run the following commands one by one and don’t forget to hit Enter after each command.
dism.exe /online /Cleanup-Image /StartComponentCleanup
sfc /scannow
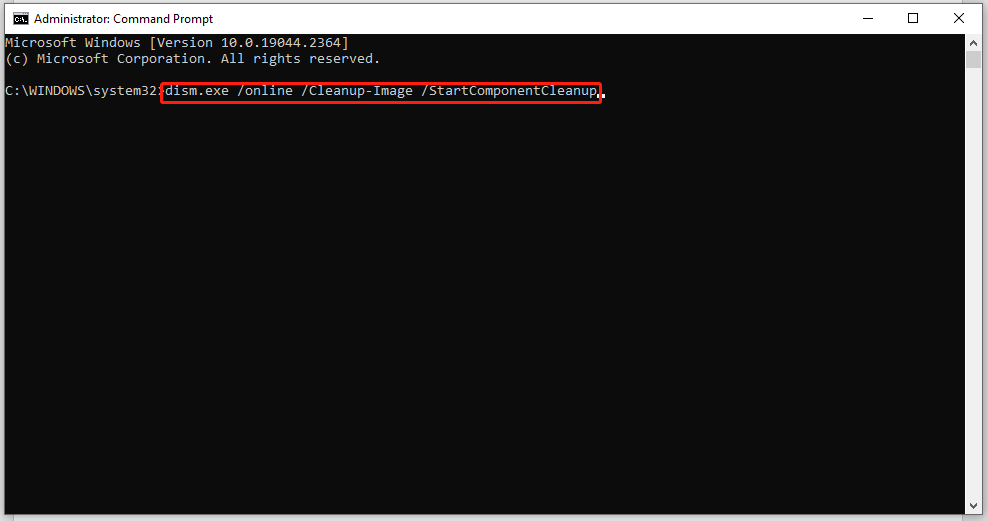
Step 3. When the two commands are complete, run Dism /Online /Cleanup-Image /RestoreHealth again to see if it works properly.
Fix 2: Run Windows Update Troubleshooter
As is known to all, Microsoft Windows Update Center triggers problems regularly and these problems can prevent you from implementing upgrades or improvements by downloading or installing new updates. In this case, Microsoft offers you a troubleshooting tool called Windows Update troubleshooter which can fix most errors including DISM Online Cleanup Image RestoreHealth error 0x800f081f.
Step 1. Press Win + I to open Windows Settings.
Step 2. In the settings menu, scroll down to find Update & Security and click on it.
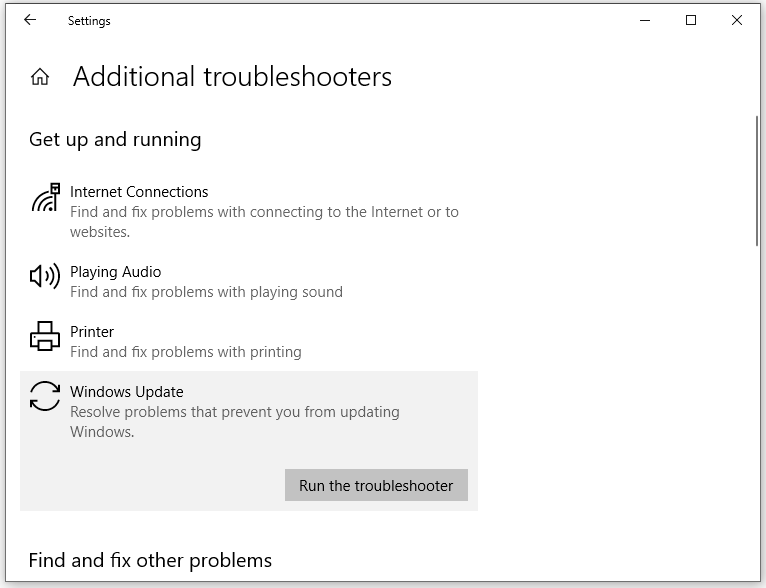
Step 3. Under the Troubleshoot tab, hit Additional troubleshooters.
Step 4. Under Get up and running, hit Windows Update and then press Run the troubleshooter. Once the troubleshooting process is done, it will show a message to inform you of the result.
Fix 3: Reinstall Microsoft .NET Framework 3.5
Since DISM error 0x800f081f is related to Microsoft .NET Framework 3.5, it is a good option to reinstall it.
Step 1. Click Start and go to Control Panel.
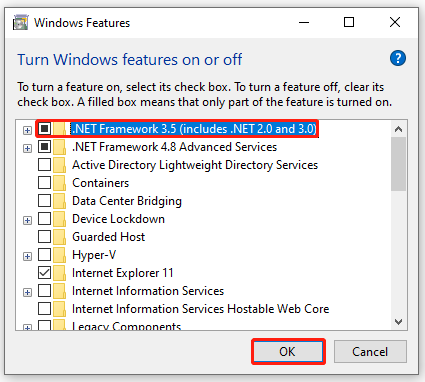
Step 2. Hit Programs and Features > Turn Windows features on or off.
Step 3. Check .NET Framework 3.5 (includes .NET 2.0 and 3.0) and hit OK.
Fix 4: Get Source from Windows Image
Usually, the DISM /Online /Cleanup-Image /RestoreHealth command is used to fix problems by searching in Windows Update or WUSU to replace the corrupted files. If DISM cannot repair a file required by the Windows image, it will result in DISM error 0x800f081f the source files could not be found.
To address this error, you need to specify a valid Windows image file (install.wim) which contains all the files required during the repairing process. The install.wim file should be included in the source folder of Windows 10 Installation media.
Move 1: Download and mount the ISO file
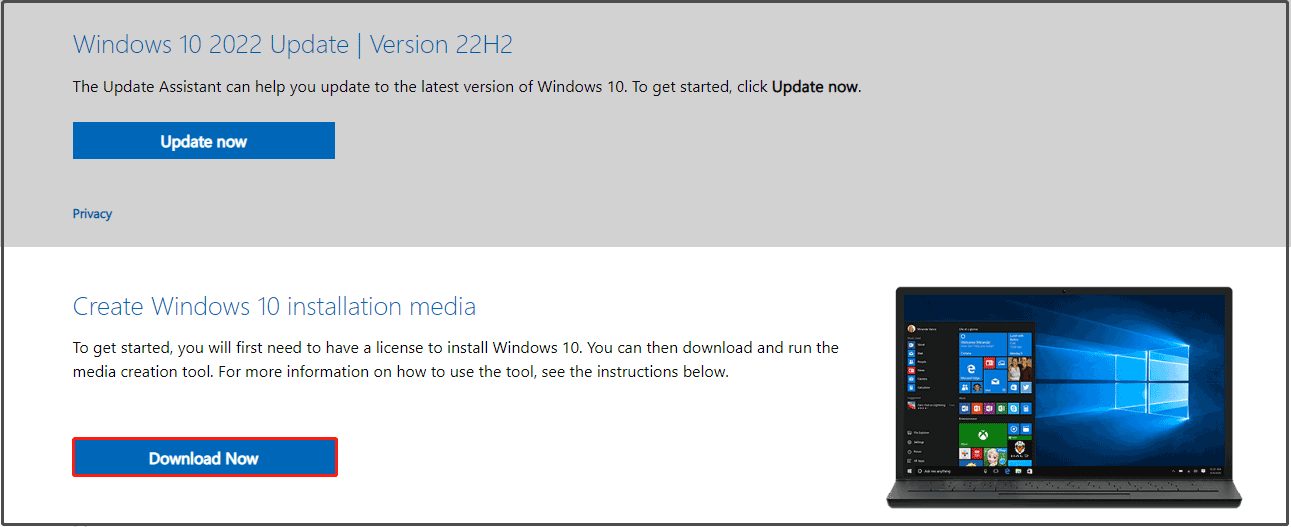
Step 1. Go to the Microsoft Software Download website and hit Download Now under Create Windows 10 installation media.
Step 2. Hit Accept to accept the license terms > tick Create installation media (USB flash drive, DVD, or ISO file) for another PC > hit Next > select Language, Architecture, and Edition > hit Next > tick ISO file > hit Next > choose a download location for Windows 10 ISO file > hit Save.

Step 3. Press Win + E to evoke File Explorer and then locate the Windows 10 ISO image file.
Step 4. Right-click on the ISO file and select Mount in the drop-down menu.
Step 5. After the mounting process is finished, go to This PC and you can see a virtual drive in the right-hand pane.
Move 2: Extract the install.wim file from the install.esd file
Step 1. From the mounted Windows ISO file, right-click on the install.esd file from the source folder to copy it to the root folder of drive C:.
Step 2. Launch Command Prompt as an administrator.
Step 3. Type cd\ to go to the root folder of drive C:.
Step 4. Type the following command and hit Enter to find which images are in the install.esd file.
dism /Get-WimInfo /WimFile:install.esd

Note down the index number according to the Windows 10 installed version.
Step 5. Run the following command to extract the install.wim file according to your Windows version. Don’t forget to replace the IndexNumber with the corresponding index number you noted down just now.
dism /export-image /SourceImageFile:install.esd /SourceIndex:IndexNumber /DestinationImageFile:install.wim /Compress:max /CheckIntegrity
Step 6. Now, you can find the exported install.win file on the drive C:.
Tips:
What if Windows Media Creation Tool is not working? Take it easy! Every problem has a fix. Follow this guide — Best Fixes for Windows 10/11 Media Creation Tool Not Working, and you will work it out.
Move 3: Run DISM Tools
Step 1. Launch Command Prompt as an administrator.
Step 2. Run the two commands below and hit Enter.
DISM /Online /Cleanup-Image /StartComponentCleanup
DISM /Online /Cleanup-Image /AnalyzeComponentStore.
Step 3. Run the following command to specify the C:\install.wim as the source of the known good files.
DISM /Online /Cleanup-Image /RestoreHealth /Source:WIM:c:\install.wim:1 /LimitAccess
Step 4. When this process is done, type sfc /scannow and hit Enter.
Fix 5: Perform an In-place Upgrade
The last method is performing an in-place upgrade. This process will reinstall the entire Windows core with the latest image from Microsoft. It may take a long time, please wait patiently.
Step 1. Download & Install Windows 10 Media Creation Tool on your computer and run it with administrative rights.
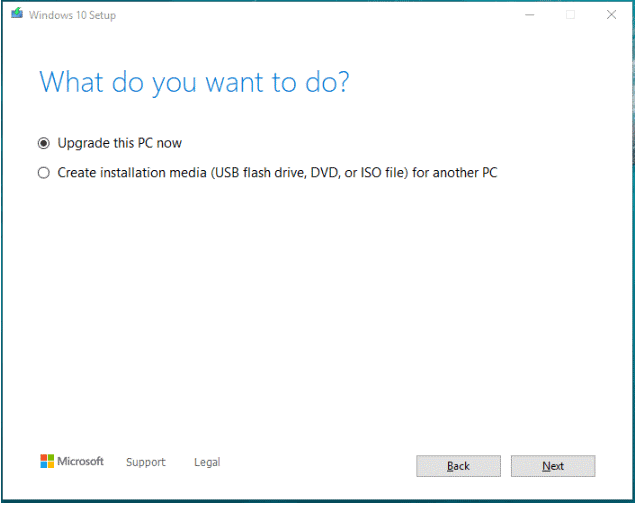
Step 2. Accept the license terms and tick Upgrade this PC now.
Step 3. Then, follow the prompts on the screen to complete the upgrade. After the completion, run Dism /Online /Cleanup-Image /RestoreHealth to see if DISM error 0x800f081f is gone.
Tips:
If you fail to run the DISM /Online /Cleanup-Image /RestoreHealth command without error code 0x800f081f, this guide might provide you with some feasible solutions — Best Fixes: DISM /online /cleanup-image /restorehealth Is Stuck.
What’s your opinion about the solutions mentioned in this guide? Which method do you prefer? Click here to share your ideas with your friends on Twitter.Click to Tweet
We Need Your Voice
That’s all about the causes and solutions to DISM error 0x800f081f. By now, we believe that you may manage to get rid of this error from your computer. Also, it is highly recommended to back up your system in advance with MiniTool ShadowMaker as a remedy in case that you encounter any severe changes on your system the next time.
Welcome to leave your joy and tell us which solution works for you in the comment zone. For more queries about our software, please feel free to contact us via [email protected].
DISM Error 0x800f081f FAQ
How do I fix error 0x800f081f?
Fix 1: Perform a Component Cleanup
Fix 2: Run Windows Update Troubleshooter
Fix 3: Reinstall Microsoft .NET Framework 3.5
Fix 4: Get Source from Windows Image
Fix 5: Perform an In-place Upgrade
How to fix DISM 0x800f081f error in Windows Server 2016?
To fix DISM 0x800f081f error in Windows Server 2016, you can:
- Run a component cleanup and then perform an SFC scan.
- Offer DISM a location that contains the files it needs to perform the image repair.
- Perform an in-place upgrade.
How do I fix corrupted DISM?
Fix 1: Check Antivirus or Security Programs
Fix 2: Run DISM Command in Clean Boot
Fix 3: Specify the Correct Location of the install.wim File
Fix 4: Uncheck install.wim Read-Only
Fix 5: Clean up System Image Components
Fix 6: Reset Windows Update Service
Fix 7: Run Windows Update Troubleshooter
Fix 8: Disable Proxy on Your Computer
Нередко при обновлении .NET Framework 3.5, Cumulative Updates и других системных пакетов возникает ошибка 0x800f081f. Это приводит к нестабильной работе Windows — вплоть до зависаний. В этом материале мы рассмотрим основные причины появления ошибки и способы ее устранения.
Пользователь может столкнуться с ошибкой 0x800f081f по самым разным причинам. Чаще всего проблема кроется в следующем:
- Отсутствие необходимых файлов или компонентов для установки обновления;
- Повреждение системных файлов или реестра;
- Проблемы с хранилищем компонентов Windows;
- Конфликт свежего обновления с ранее установленными патчами на системном уровне;
- Блокировка нужных файлов антивирусом.
Способы устранения ошибки 0x800f081f
Способы решения данной проблемы во многом зависят от причины его возникновения. Но в любом случае начать следует с самых базовых действий, а именно с проверки устройства на наличие вирусов и шпионских программ, установки свежих драйверов и очистки реестра. Также убедитесь, что на вашем жестком диске достаточно свободного места для установки обновлений.
Источники: Windows Report / Уведомление об ошибке 0x800f081f
Если после этого неприятное уведомление продолжает выскакивать, следует прибегнуть к более сложным вариантам.
Средство проверки системных файлов
Утилита System File Checker считается одним из самых действенных инструментов, вшитых в саму систему и позволяющих решить множество проблем. Она способна проверить целостность важных файлов, отвечающих за установку обновлений, и восстановить их в случае необходимости.
Для запуска проверки через программу нужно:
- Кликнуть правую кнопку мыши на «Пуск» и открыть «Терминал Windows (Администратор)»;
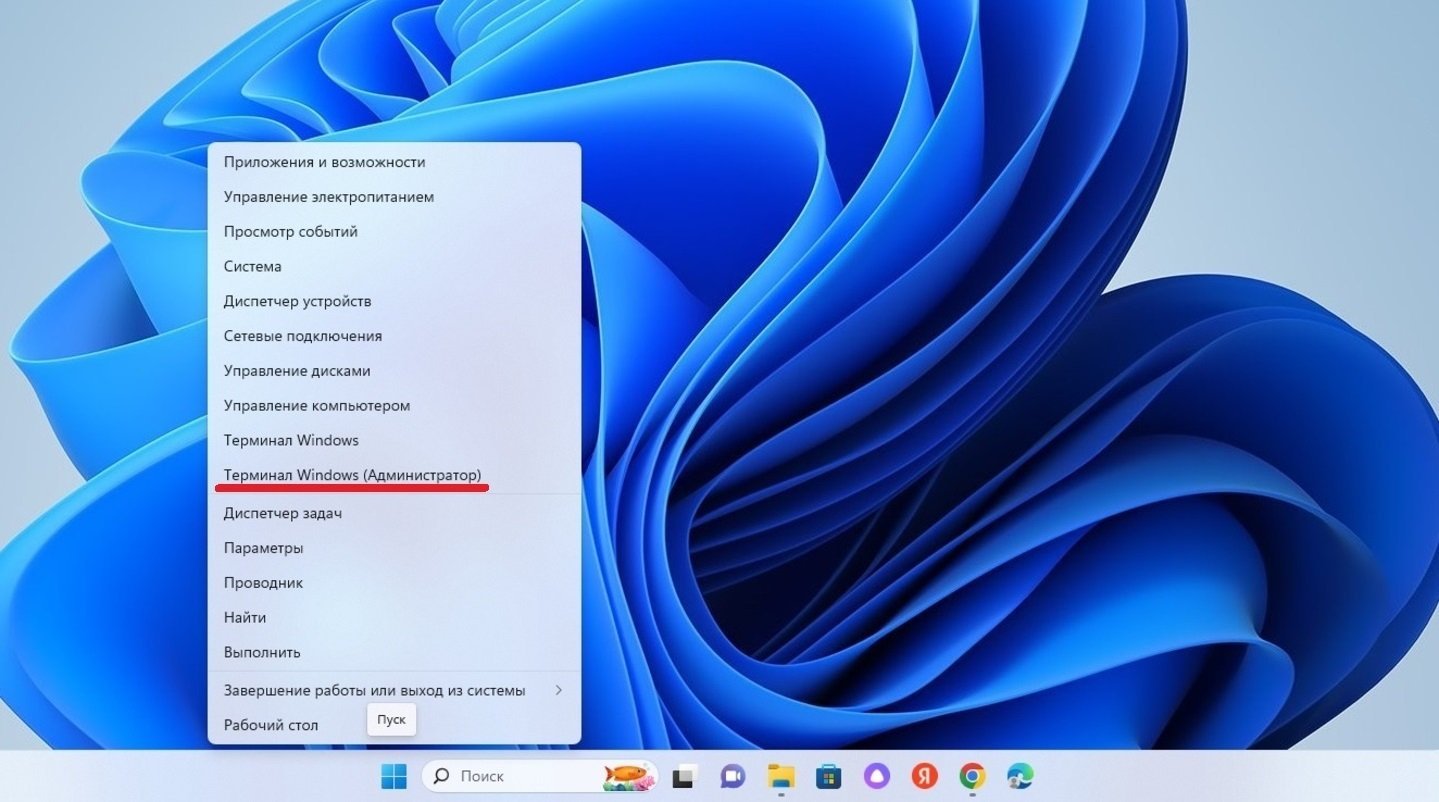
Источники: CQ / Запуск «Терминала Windows»
- В поле набрать команду sfc /scannow и нажать Enter.
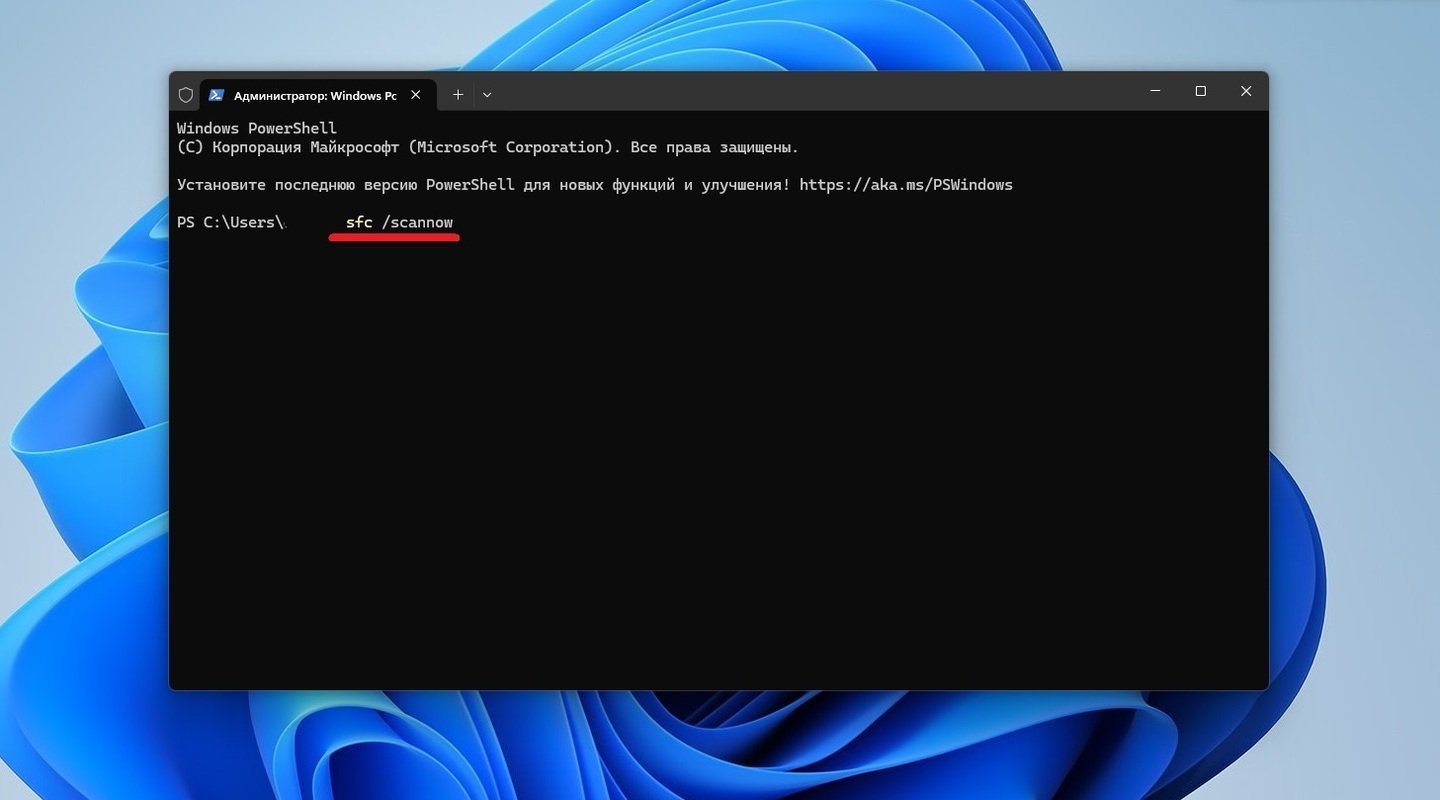
Источники: CQ / Сканирование через команду sfc /scannow
После этого остается только дождаться окончания сканирования. В случае обнаружения поврежденных файлов, система постарается восстановить их. В самом конце надо перезагрузить компьютер и проверить, решена ли ошибка. Кстати, ознакомиться с отчетом работы программы можно как в окне терминала, так и в специальном файле.
Средство восстановления хранилища компонентов
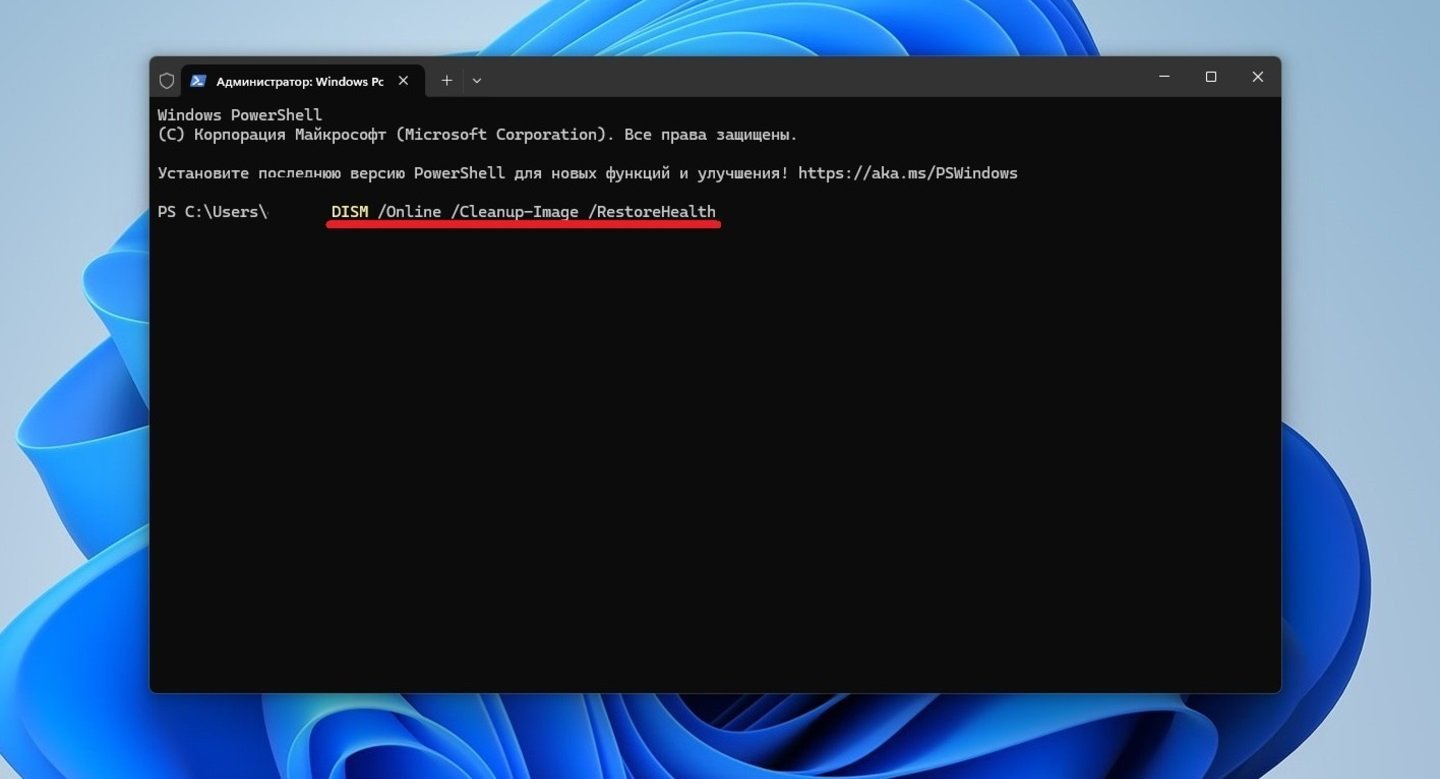
DISM — еще один встроенный инструмент сканирования и восстановления системных компонентов. Чтобы устранить ошибку установки 0x800f081f с ее помощью:
- Кликните правую кнопку мыши на «Пуск» и откройте «Терминал Windows (Администратор)»;
Источники: CQ / Запуск «Терминала Windows»
- Введите команду DISM /Online /Cleanup-Image /RestoreHealth и нажмите Enter.
Источники: CQ / Сканирование через утилиту DISM
Данная опция позволяет восстановить повреждения, обнаруженные в хранилище компонентов образа Windows, путем скачивания, установки или замены недостающих и неисправных файлов. Сама процедура может занять более получаса реального времени, после которой необходимо заново перезапустить компьютер.
Отключение антивируса
Если внутренний защитник Windows обычно работает стабильно, то сторонние антивирусы могут «переусердствовать» и стать причиной той самой ошибки. Ведь они очень «любят» блокировать установку необходимых обновлений.
Но если с установкой возникают проблемы, то временно отключите встроенный антивирус. Для этого:
- Через «Пуск» откройте панель «Параметры»;
- В левом столбце кликните сначала на пункт «Конфиденциальность и защита», а затем «Безопасность Windows»;
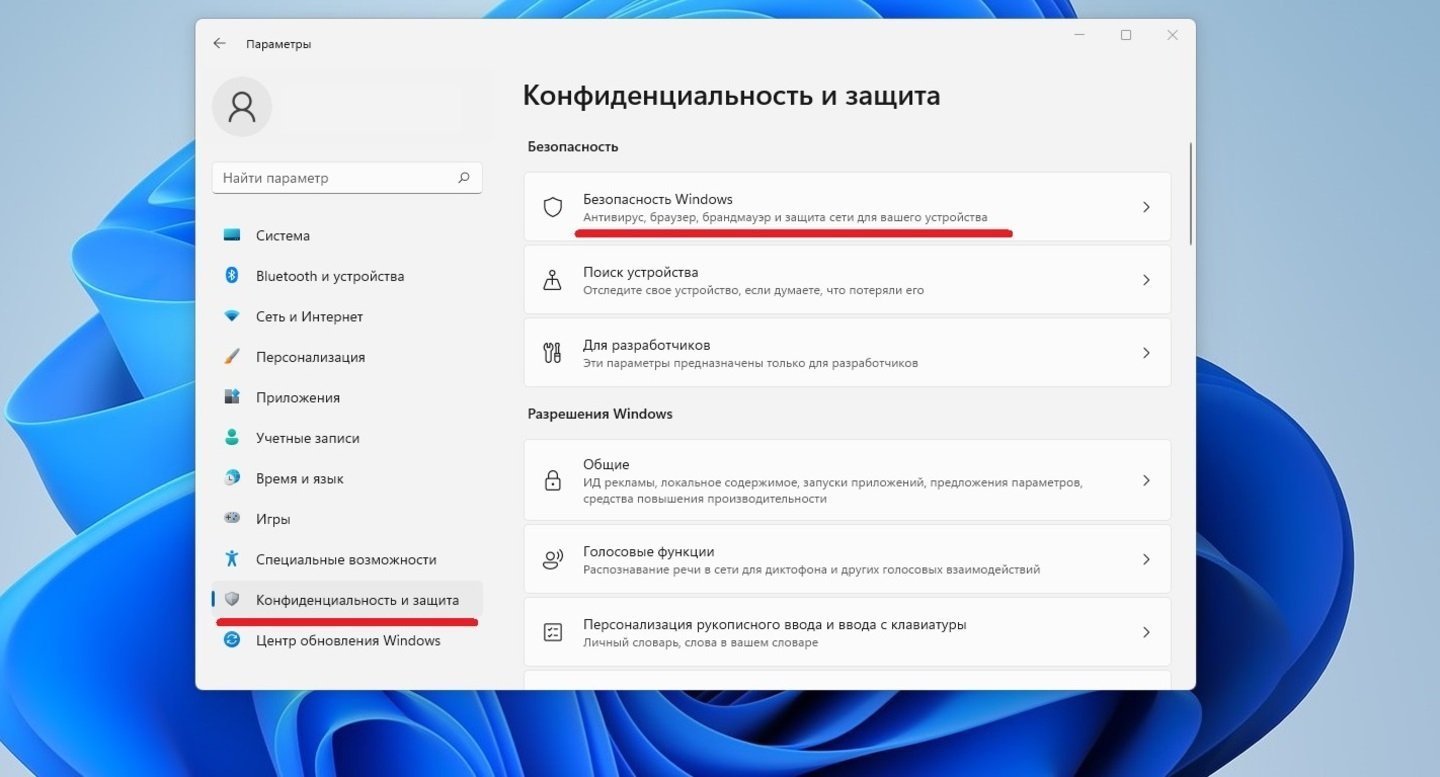
Источники: CQ / Раздел «Безопасность Windows»
- Из появившихся вариантов выберите «Защита от вирусов и угроз»;
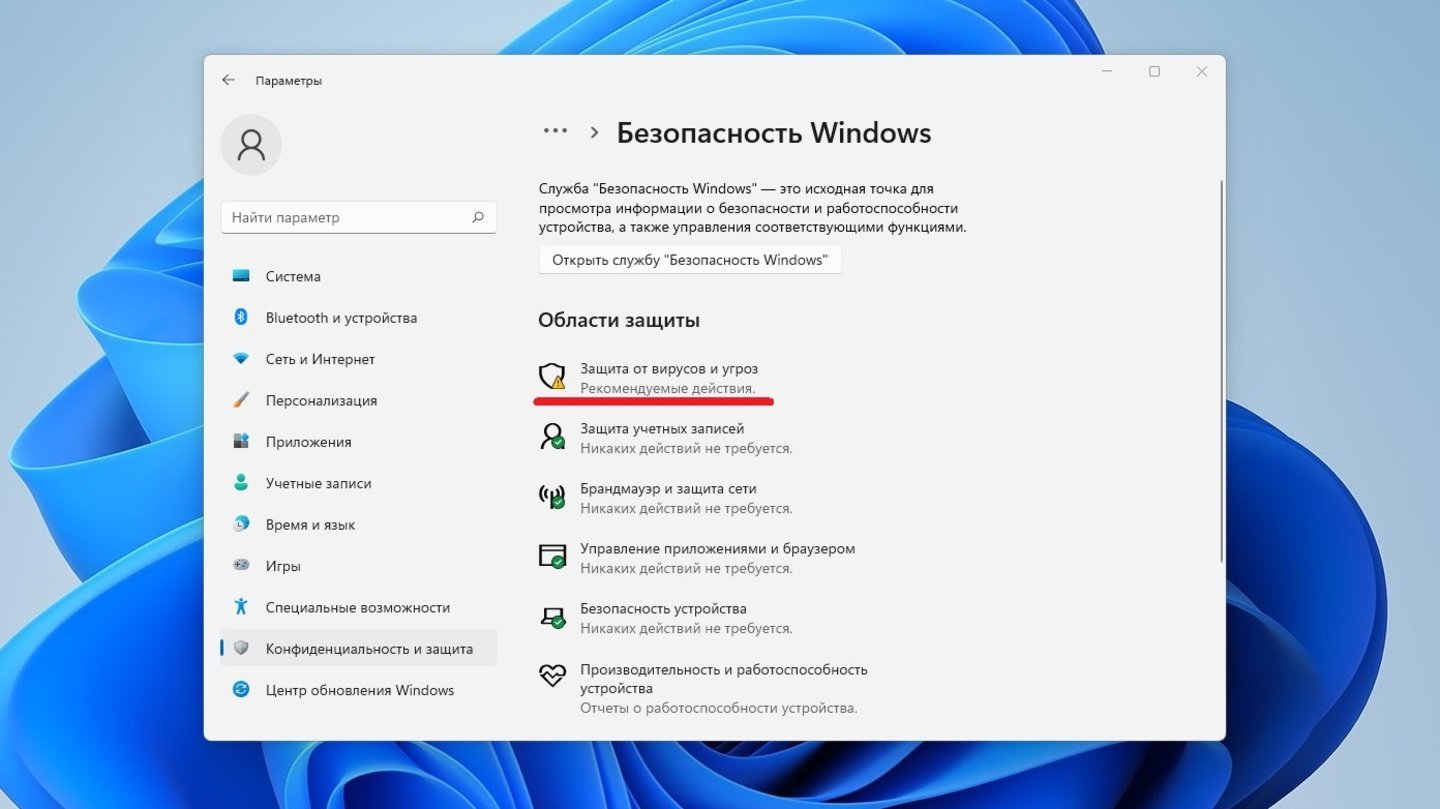
Источники: CQ / Переход во вкладку «Защита от вирусов и угроз»
- В появившемся окне нажмите на кнопку «Управление настройками»;

Источники: CQ / Настройки внутреннего антивируса
- Отключите защиту, просто переключив все тумблеры.
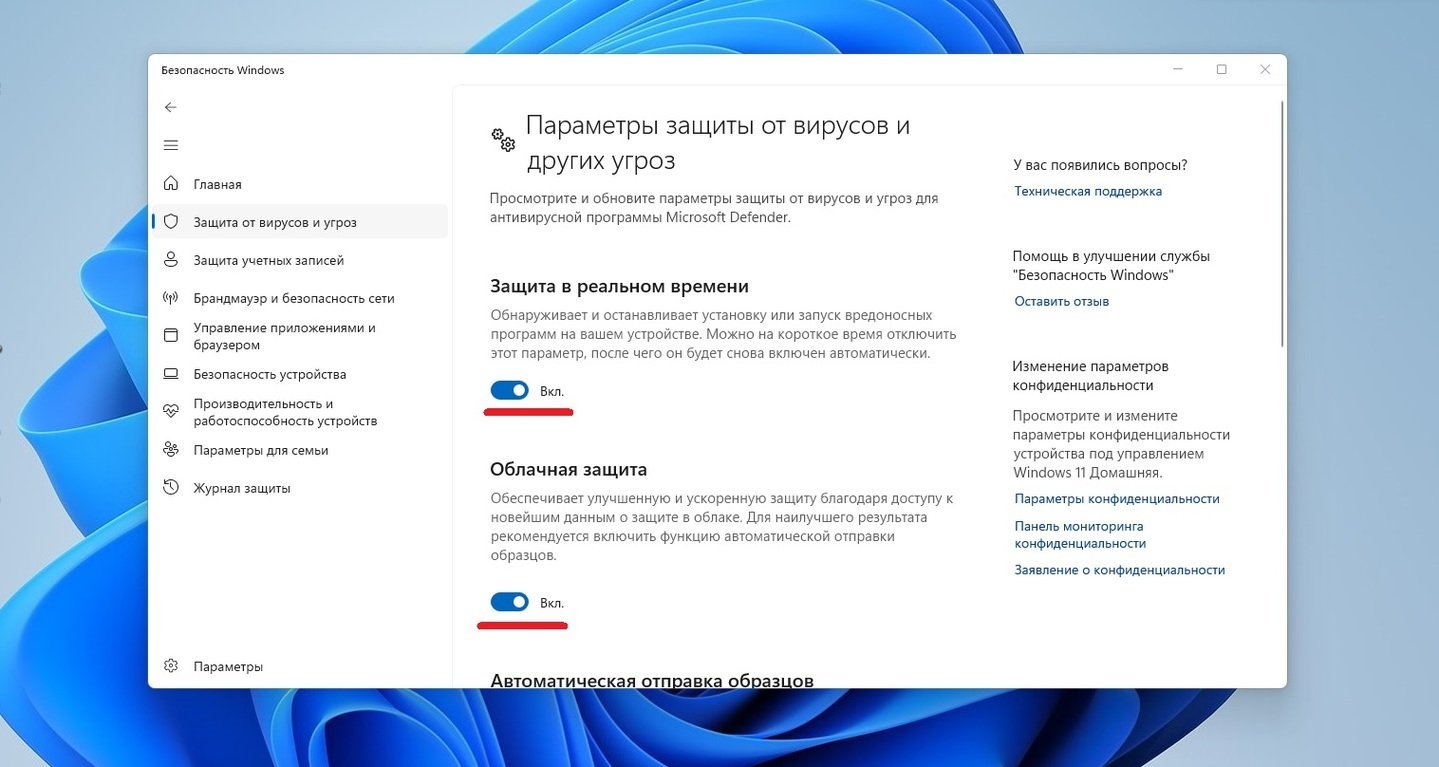
Источники: CQ / Отключение антивируса Windows
Также, на всякий случай, отключите еще и брандмауэр. Алгоритм действий выглядит следующим образом:
- В «Панели управления» откройте вкладку «Система и безопасность»;
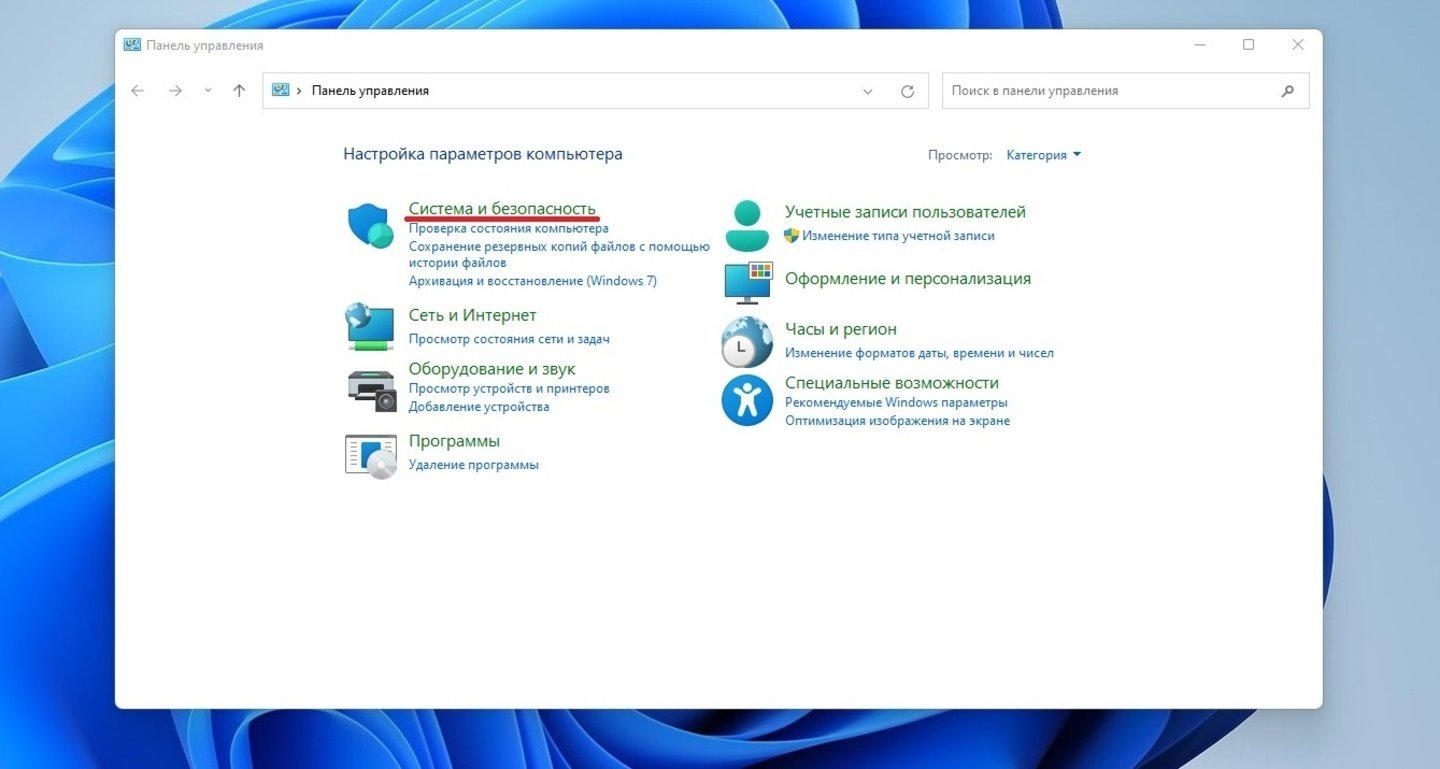
Источники: CQ / Переход во вкладку «Система и безопасность»
- Нажмите на пункт «Брандмауэр Защитника Windows»;
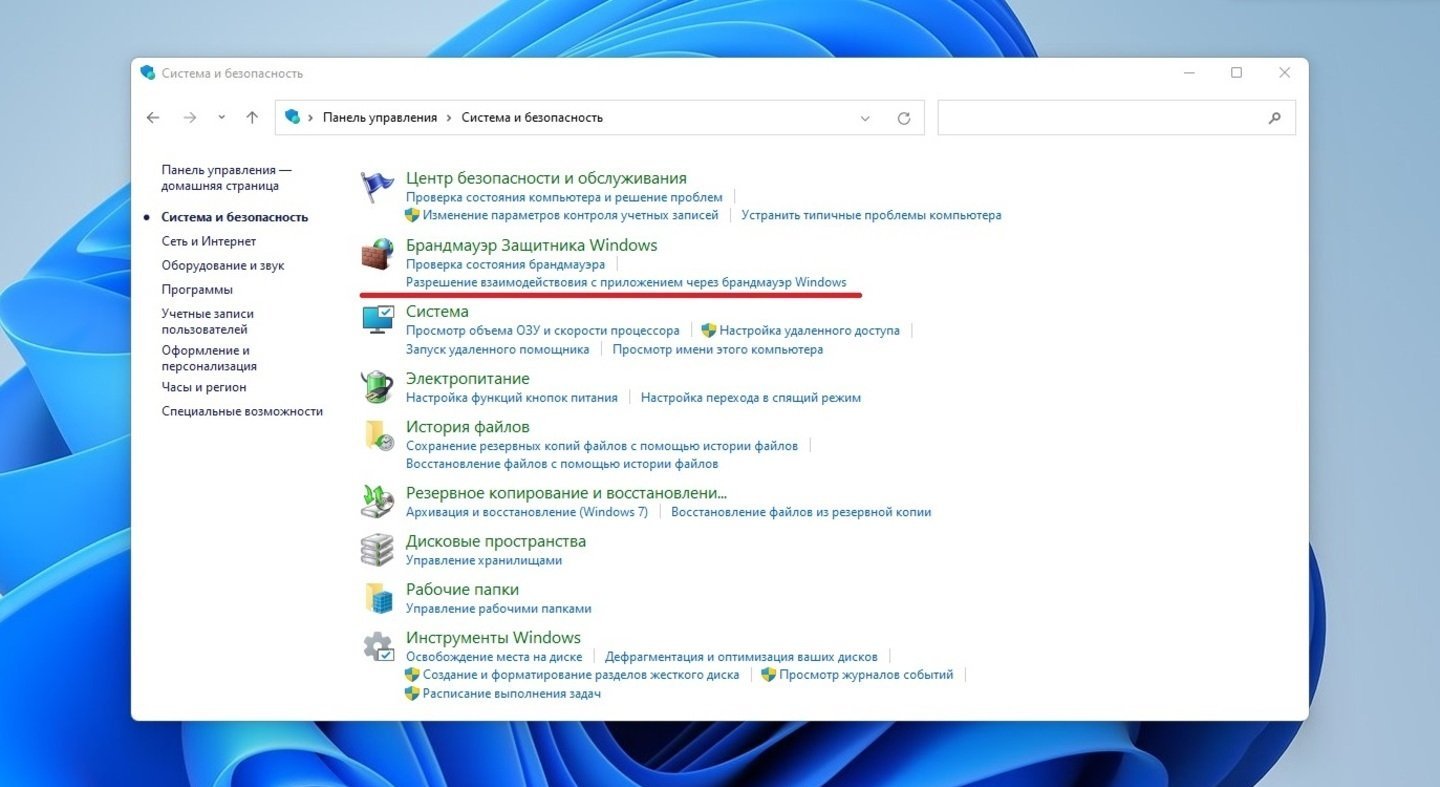
Источники: CQ / Раздел «Брандмауэр Защитника Windows»
- С левой стороны кликните на строчку «Включение и отключение брандмауэра Защитника Windows»;
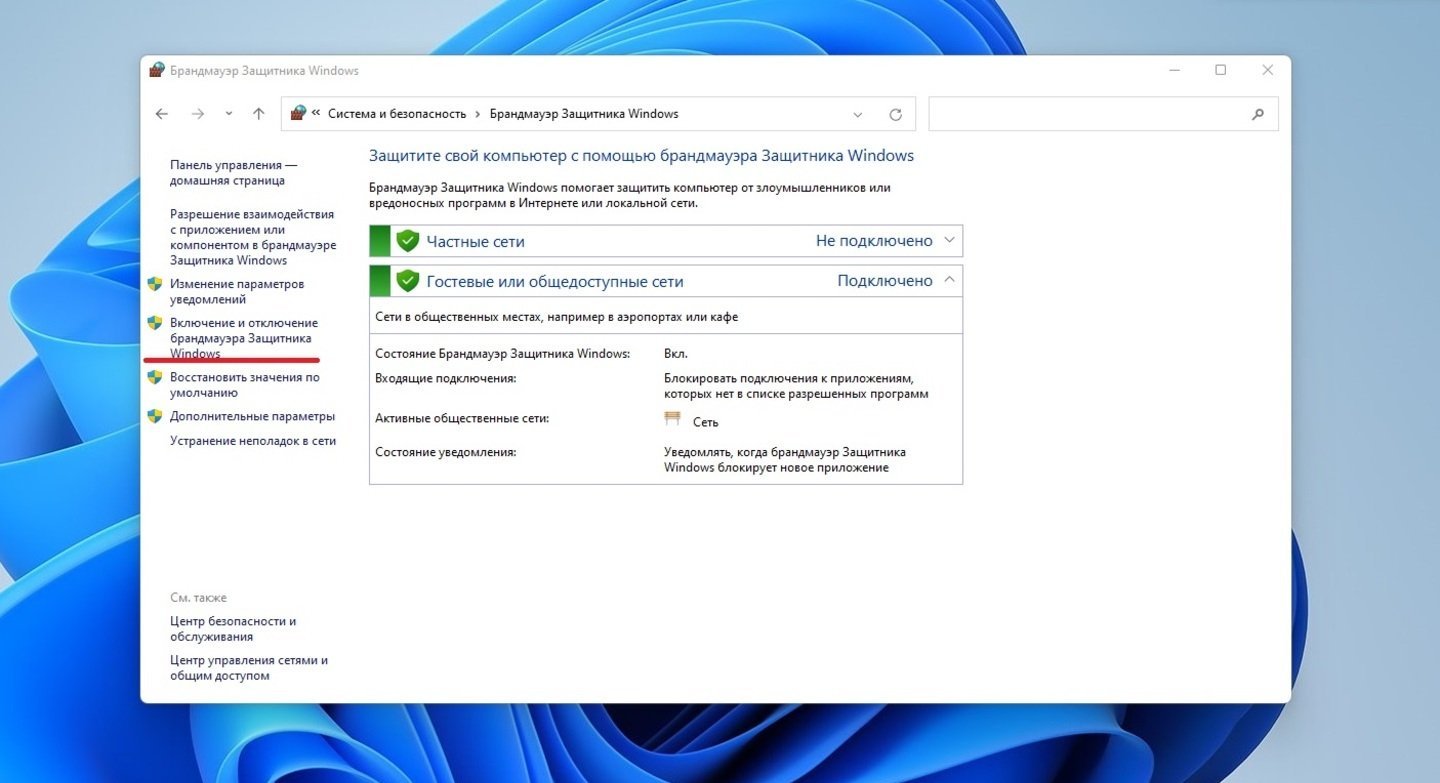
Источники: CQ / Параметры отключения «Брандмауэра Защитника Windows»
- Поставьте галочки напротив пунктов «Отключить брандмауэр Защитника Windows».
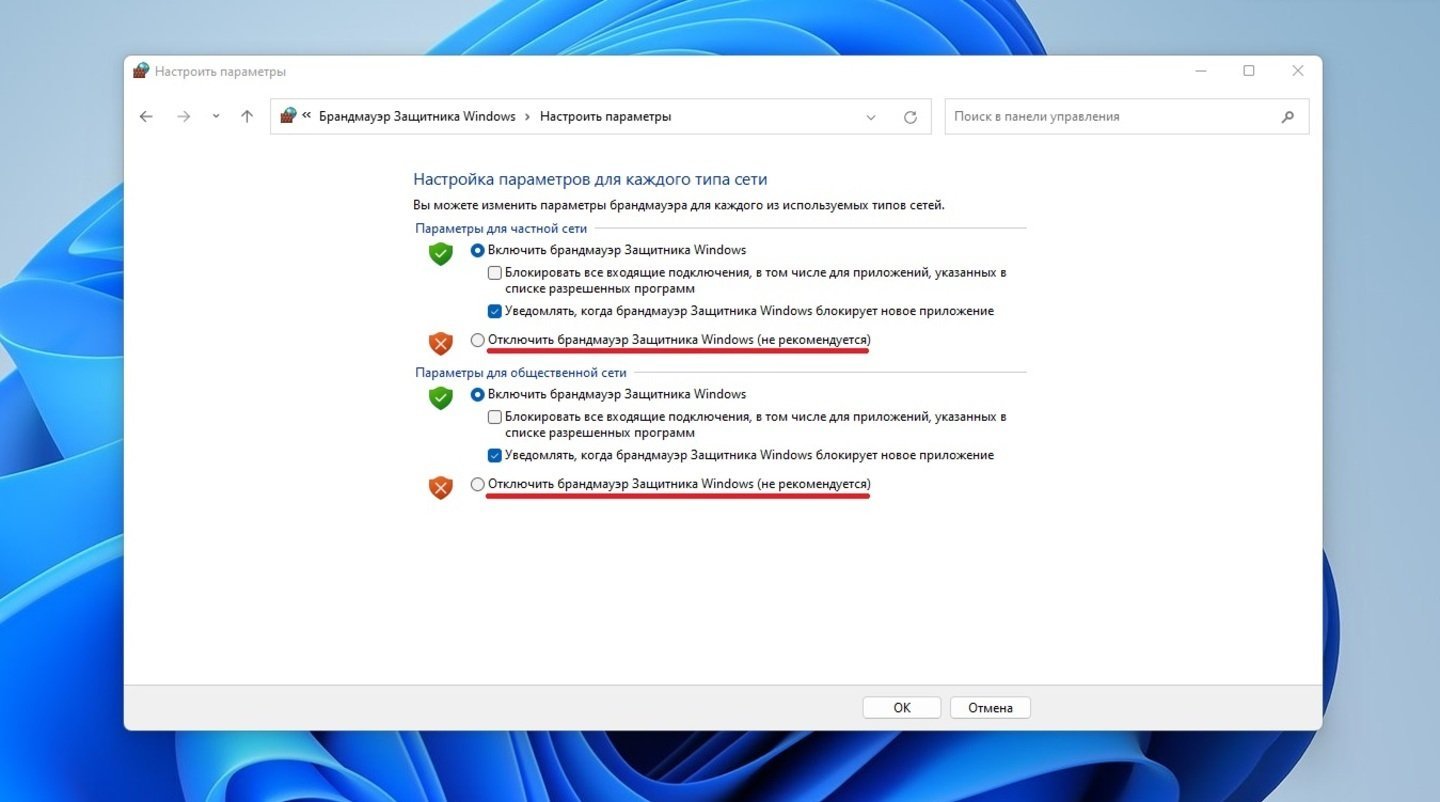
Источники: CQ / Отключения «Брандмауэра Защитника Windows»
Главное, не забыть включить Windows Defender и брандмауэр обратно после завершения установки обновлений. Что касается сторонних антивирусных программ, то они отключаются в «Параметрах» или «Настройках» приложения.
Сброс Windows Update
Если предыдущие варианты не помогли, то придется заняться центром обновления Windows. Именно этот раздел ответственен за установку системных апдейтов.
- Уже знакомым способом запустите «Терминал Windows (Администратор)»;
- В свободном поле наберите команду net stop wuauserv;
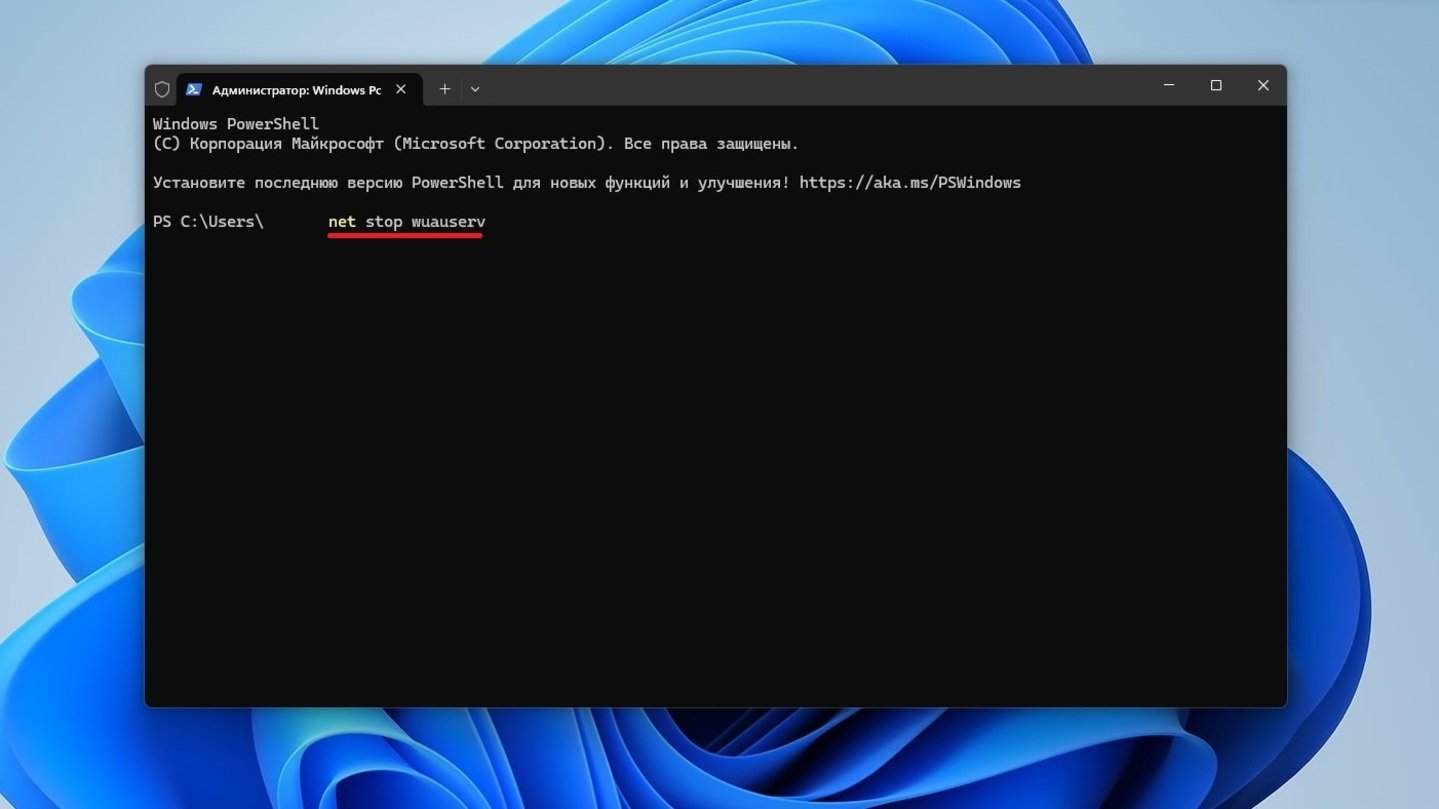
Источники: CQ / Сброс Windows Update
- Перейдите в папку C:\Windows\SoftwareDistribution, где расположены все прошлые апдейты, и удалите ее.
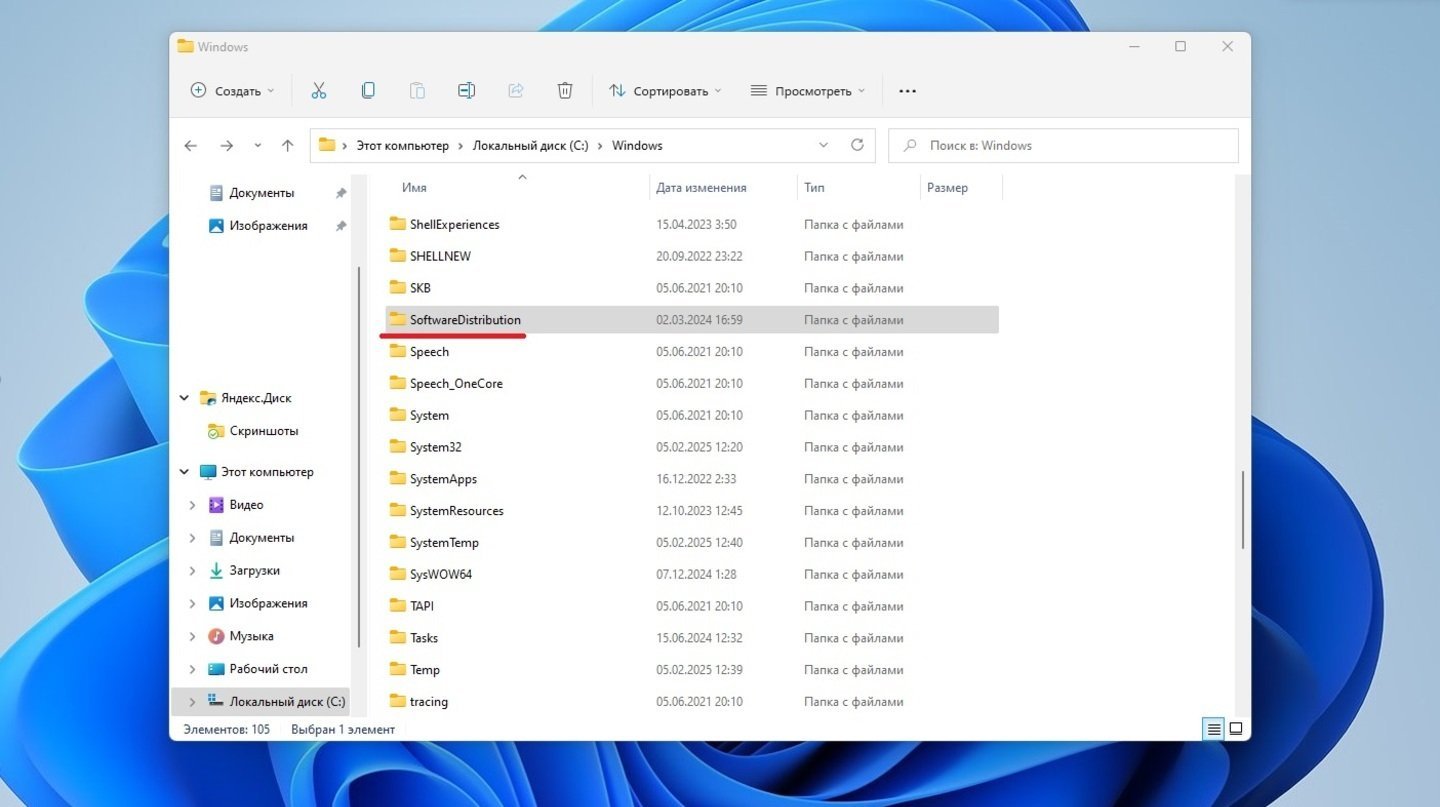
Источники: CQ / Очистка папки SoftwareDistribution
Этот вариант эффективен только в том случае, если причина крылась в повреждении компонентов службы. В других случаях лучше лишний раз туда не соваться, поскольку велик риск навредить операционке.
Включение .NET Framework 3.5
Данный метод работает только в том случае, если ошибка 0x800f081f случилась из-за .NET Framework 3.5. Системный компонент потребуется включить вручную. Делается это так:
- В «Панели управления» кликните на «Программы»;
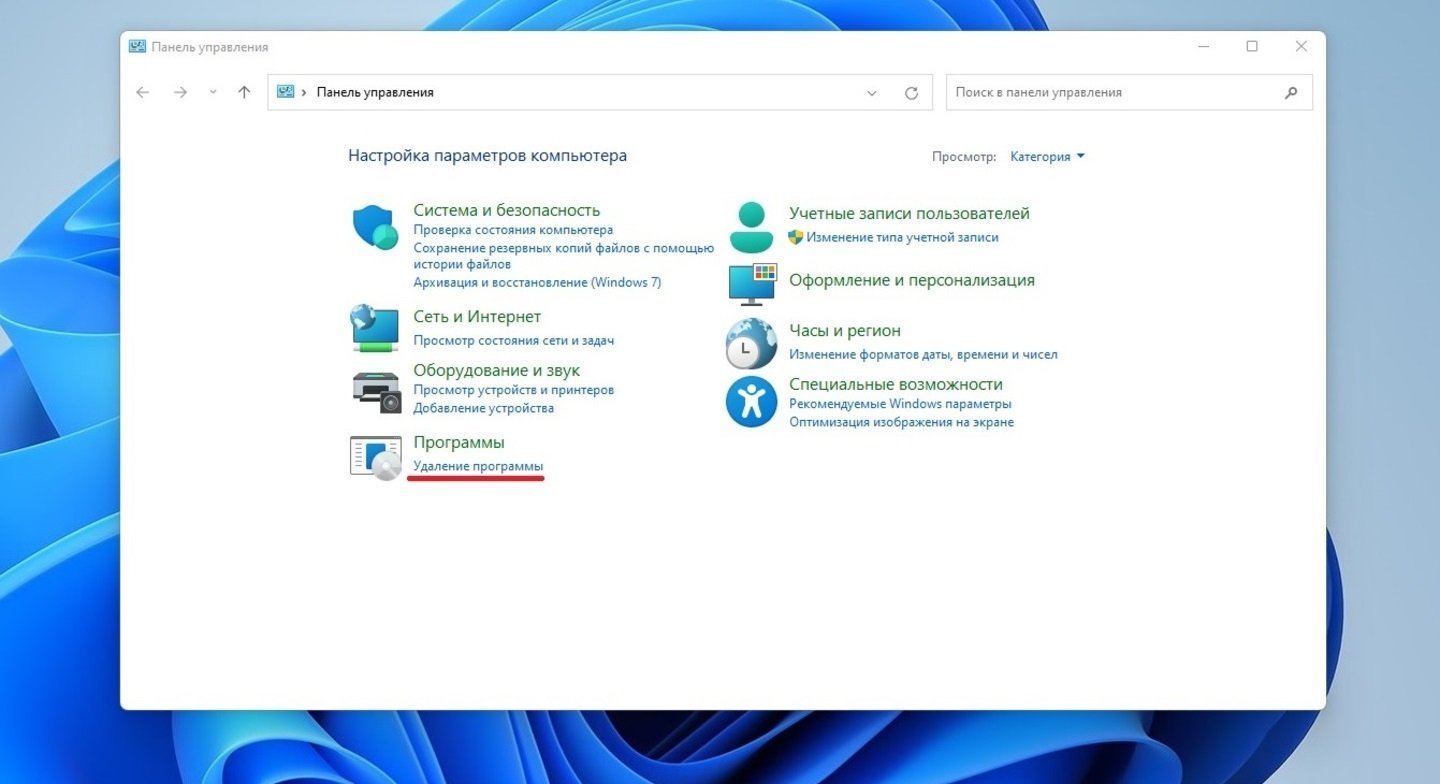
Источники: CQ / Вкладка «Программы» в «Панели управления»
- В новом окне нажмите на «Программы и компоненты»;

Источники: CQ / Вкладка «Программы и компоненты»
- С левой стороны откройте пункт «Включение и отключение компонентов Windows»;
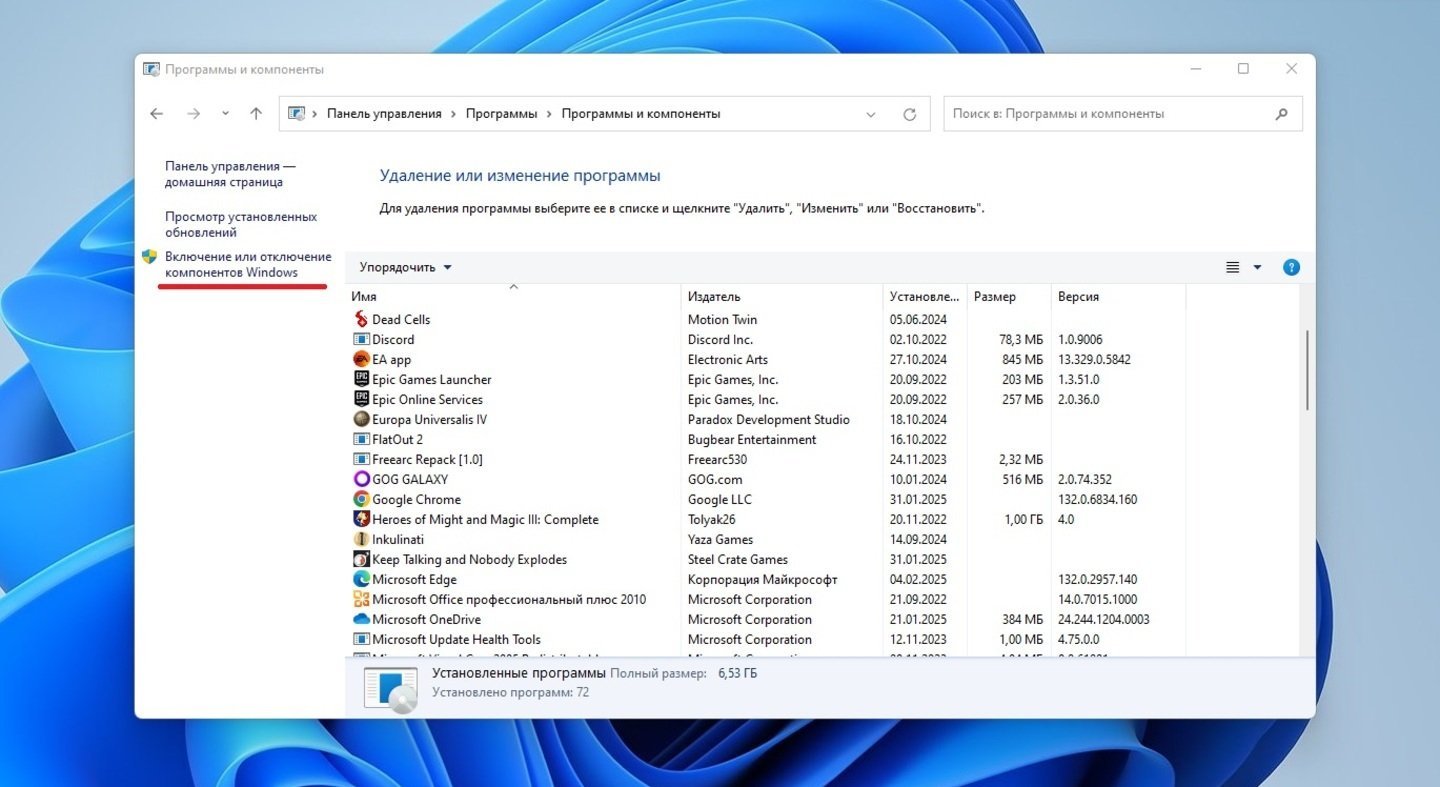
Источники: CQ / Пункт «Включение и отключение компонентов Windows»
- Поставьте галочку напротив «.NET Framework 3.5 (включает .NET 2.0 и 3.0)» и нажмите кнопку «OK».
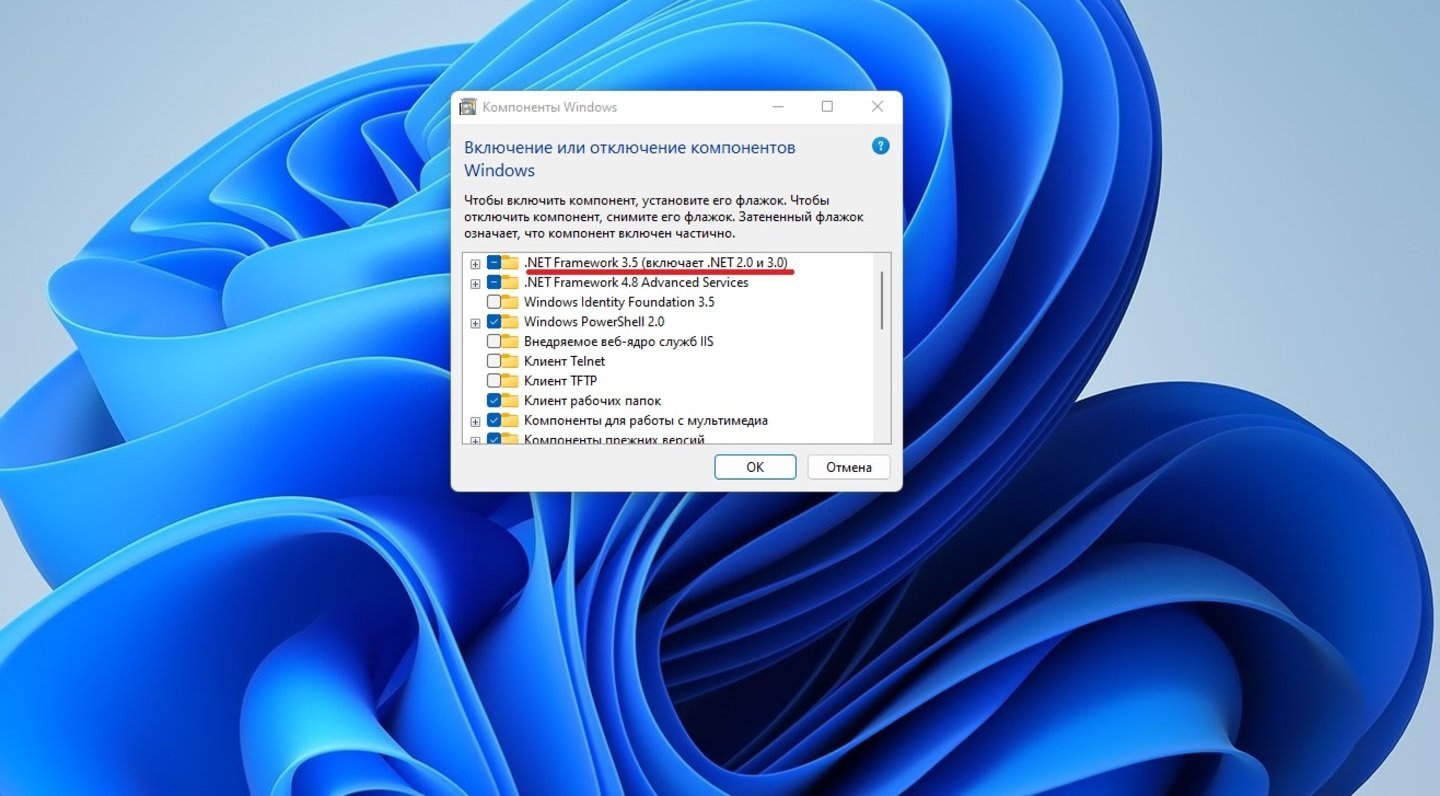
Источники: CQ / Включение .NET Framework 3.5
Когда операционная система попросит, то перезагрузите компьютер. Не забудьте перед началом обеспечить надежное соединение с интернетом.
Заглавное фото: Videvo
Читайте также:
- Ошибка BAD SYSTEM CONFIG INFO в Windows — причины и решения
- Как исправить ошибку 0xc0000225 при загрузке Windows
- Как исправить ошибку 0x80070570 в Windows
- Как исправить ошибку 0x80004005 в Windows
- Как исправить ошибку 0xc0000142 при запуске приложения