Одна из ошибок, с которой пользователь может столкнуться как при чистой установке Windows 10 с флешки или диска, так и при запуске установки в уже имеющейся ОС — ошибка с кодом 0x8007025D «Windows не удается установить необходимые файлы. Убедитесь, что имеются все файлы, необходимые для установки, и перезапустите установку».
В этой инструкции подробно о способах исправить ошибку «Установка отменена» 0x8007025D при установке Windows 10 с флешки или другого накопителя в зависимости от конкретного сценария, когда появляется эта проблема. Схожая по причинам проблема: Ошибка 0x8007045D при установке Windows.
- Основные способы исправить ошибку 0x8007025D
- Дополнительные методы решения
- Видео
Причины ошибки 0x8007025D и способы исправления

Среди основных причин, вызывающих проблему с отменой установки по причине «Windows не удается установить необходимые файлы» с кодом ошибки 0x8007025D можно выделить следующие:
- Невозможность записать необходимые файлы установки на диск (раздел диска), на который устанавливается Windows 10 по причине недостатка места для установки, проблем с записью на диск (например, из-за его повреждения).
- Проблемы с образом или установочным накопителем — т.е. в образе действительно отсутствуют необходимые для установки файлы (причем иногда на другом компьютере с другим оборудованием установка будет проходить успешно), либо их не удается прочитать с загрузочной флешки или диска и иногда причиной этого являются не проблемы с флешкой, а, например, дополнительные подключенные к тому же контроллеру USB устройства.
Это не все возможные варианты (дополнительные сценарии и методы решения будут предложены далее), но чаще всего дело в одном из указанных пунктов.
Какие действия можно предпринять для исправления автоматической отмены установки с кодом ошибки 0x8007025D:
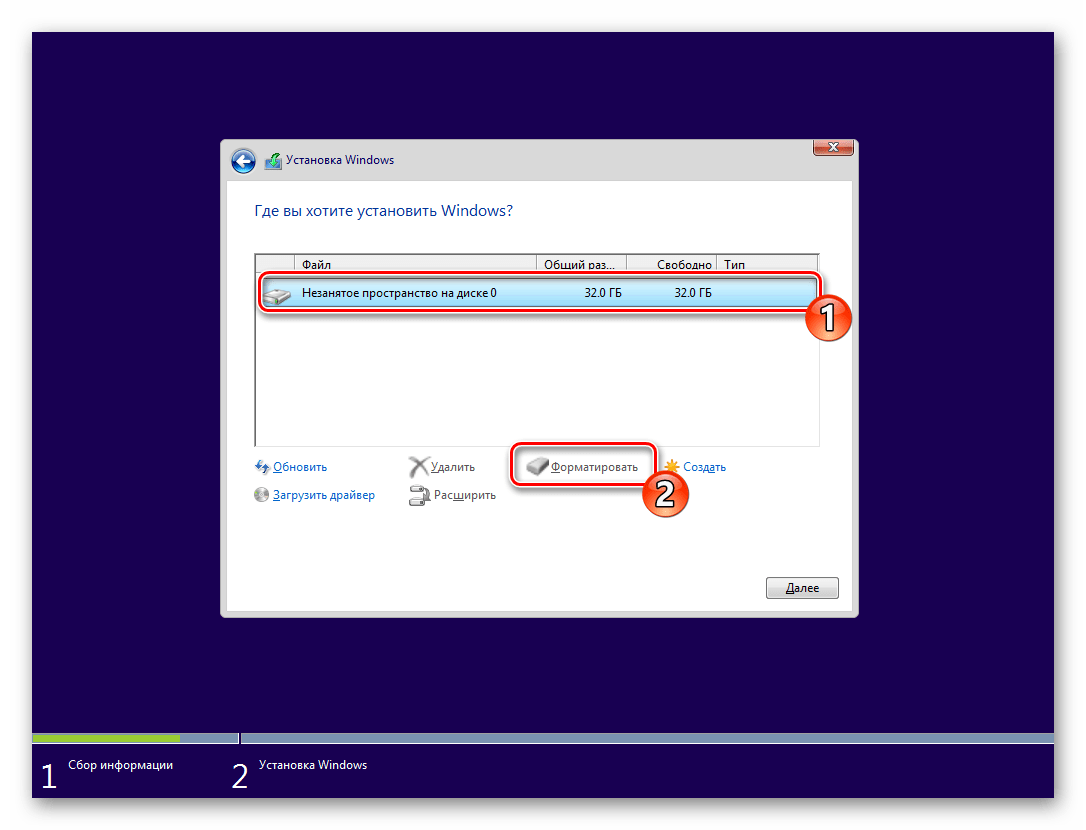
- Убедитесь, что на системном разделе (на том, в который устанавливается Windows 10) достаточно свободного места. При установке с флешки, возможно, стоит удалить раздел вместе с содержимым или расширить его. Достаточно (не для работы, а для успешной установки) по сегодняшним меркам — 15-20 Гб и это для оригинальной системы (если вы используете «сборки», они, потенциально, могут требовать большего пространства).
- Если установка запускается внутри уже установленной ОС, а не с флешки или ошибка возникает при обновлении системы, очистите системный раздел от всего, от чего его можно освободить. При необходимости увеличьте системный раздел диска или воспользуйтесь чистой установкой с форматированием системного раздела.
- Отключите все ненужные USB устройства перед установкой. Если вы устанавливаете Windows 10 на ПК с флешки, и она подключена к передней панели или к какому-либо USB-хабу, подключите к задней панели в ряду, где все USB-разъемы свободны (не заняты мышью или клавиатурой). Если для вас это не сложно, отключите также не нужные на этапе установки внутренние накопители, включая приводы дисков, жесткие диски и SSD.
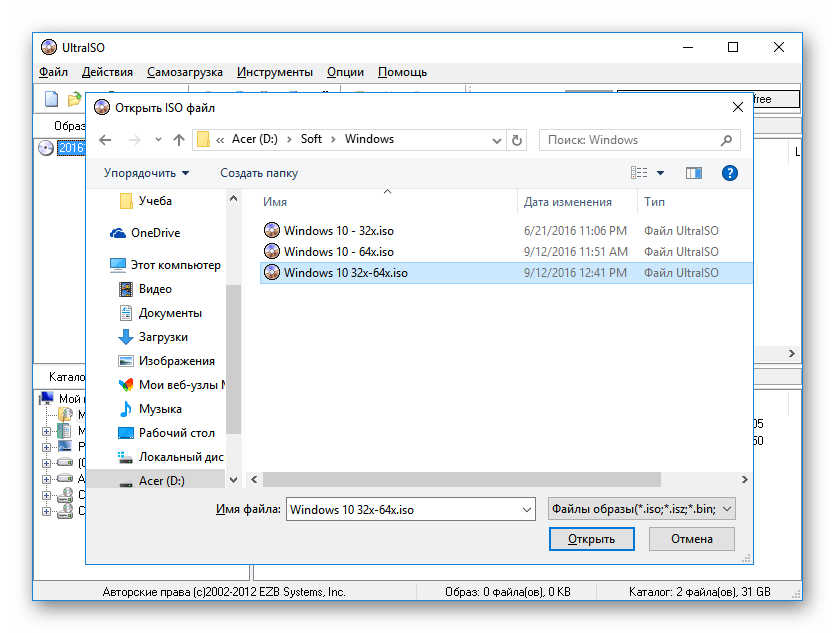
- Попробуйте другой образ (особенно если используется не оригинальный ISO), другую флешку и другую программу для создания загрузочной флешки. Например, было замечено, что ошибка чаще возникает у пользователей, записывающих её с помощью UltraISO.
- Если есть подозрения, что жесткий диск или SSD поврежден, при этом в наличии другой диск — попробуйте отключить потенциально неработающий, оставить только гарантированно рабочий и выполнить установку на него.
Дополнительные методы исправить ошибку 0x8007025D при установке Windows 10 с флешки
Выше были приведены простые варианты, однако в некоторых случаях они не срабатывают, в этом случае проблема может быть с оперативной памятью или параметрами БИОС.
Рекомендую начать с простого варианта: сбросьте параметры БИОС на значения по умолчанию (Load Defaults), отключите Secure Boot и попробуйте повторить установку. Также может иметь смысл обновить БИОС/UEFI при наличии новых версий на сайте производителя (для многих материнских плат возможно обновление с флешки без установленной ОС).
Если это не сработало, а на компьютере более одной планки памяти, попробуйте оставить подключенным только один модуль памяти, в первом слоте. Если установка опять будет отменена с кодом 0x8007025D, замените этот модуль памяти на другой и повторите попытку установки. При наличии лишь одного модуля RAM, выполните проверку оперативной памяти на ошибки.
Ниже — дополнительные варианты исправления ошибки, с которыми мне лично не довелось столкнуться, но если судить по откликам пользователей, у некоторых сработало:
- Попробуйте скачать образ ISO и создать загрузочную флешку не на том компьютере, на котором это делалось — при ошибках оперативной памяти файлы могут загружаться и записываться с повреждениями.
- Если система устанавливается на единственный большой раздел на диске — например, 1 или 2 Тб, попробуйте разбить его в программе установки и выделить меньшее пространство для Windows 10, ориентировочно — около 100 Гб, и установить её в созданный раздел.
- Если производится установка с флешки, а на компьютере или ноутбуке есть как разъемы USB 3.0, так и USB 2.0, попробуйте подключить флешку к другому типу разъема (независимо от типа USB накопителя).
- Производите установку с отключенным Интернет-подключением, а при кабельном подключении — с отключенным Ethernet-кабелем.
Видео
Надеюсь, один из методов поможет решить проблему, а вы оставите комментарий, что именно сработало в вашей ситуации: статистика может оказаться полезной, поскольку эта ошибка — одна из тех, для которых нет единственного четкого решения.
Все способы:
- Исправляем ошибку 0x8007025d при установке Windows 10
- Способ 1: Проверка оперативной памяти
- Способ 2: Перезапись загрузочной флешки или диска
- Вопросы и ответы: 2
Сейчас операционная система Windows 10 является самой новой версией от компании Microsoft. Многие пользователи активно обновляются до нее, переходя с более старых сборок. Однако не всегда процесс переустановки проходит гладко — нередко в ее ходе возникают ошибки разного характера. Обычно при появлении неполадки юзер сразу получит соответствующее уведомление с ее объяснением или хотя бы кодом. Сегодня мы хотим уделить время исправлению ошибки, которая имеет код 0x8007025d. Приведенные ниже рекомендации помогут вам избавиться от этой проблемы без особых трудностей.
Читайте также:
Решение проблемы «Программа установки Windows 10 не видит флешку»
Проблемы установки Windows 10
Исправляем ошибку 0x8007025d при установке Windows 10
Если вы столкнулись с тем, что при инсталляции Виндовс 10 на экране появилось окно с надписью 0x8007025d, не нужно раньше времени паниковать, ведь обычно эта ошибка не связана ни с чем серьезным. Сначала стоит выполнить самые простые действия, чтобы исключить банальные варианты, а уже потом переходить к решениям более сложных причин.
- Отключите все ненужные периферийные устройства. Если к компьютеру подключены флешки или внешние HDD, которые на текущий момент не используются, лучше извлечь их на время установки ОС.
- Иногда в системе присутствует несколько жестких дисков или SSD. На время инсталляции Виндовс оставьте подключенным только тот накопитель, куда и будет ставиться система. Детальные инструкции по извлечению данных накопителей вы найдете в отдельных разделах другой нашей статьи по следующей ссылке.
- Если вы используете жесткий диск, на котором ранее была установлена операционная система или на нем находятся какие-либо файлы, убедитесь в том, что на нем присутствует достаточное количество места для Виндовс 10. Конечно, всегда лучше осуществить форматирование раздела во время подготовительных работ.
Подробнее: Как отключить жесткий диск
Теперь, когда вы провели наиболее легкие манипуляции, перезапустите установку и проверьте, исчезла ли ошибка. В случае повторного появления уведомления потребуется провести следующие руководства. Начать лучше с первого способа.
Способ 1: Проверка оперативной памяти
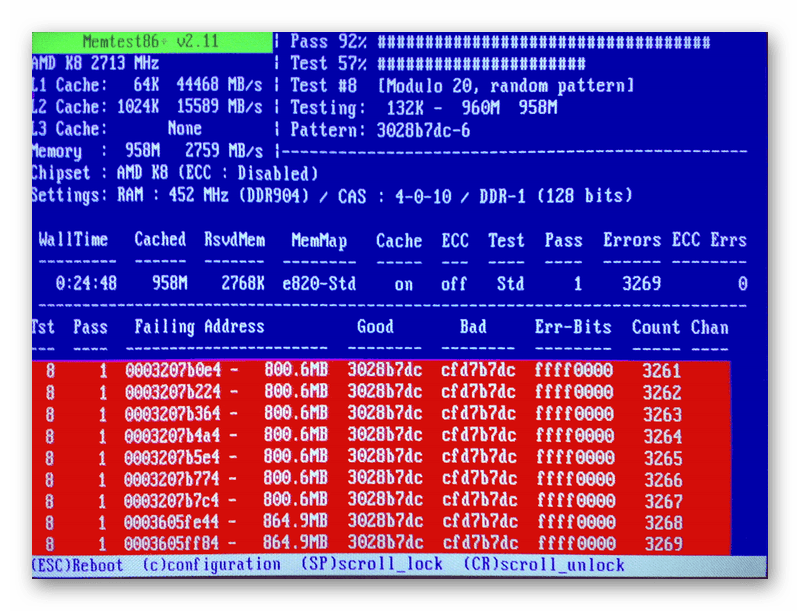
Иногда решить проблему помогает извлечение одной плашки оперативной памяти, если в материнской плате их установлено несколько. Кроме этого можно попытаться провести повторное подключение или поменять слоты, куда ставится ОЗУ. В случае нерезультативности подобных действий нужно выполнить тестирование оперативной памяти при помощи одной из специальных программ. Развернуто об этой теме читайте в отдельном нашем материале.
Подробнее: Как проверить оперативную память на работоспособность
Мы смело можем рекомендовать для использования программное обеспечение под названием MemTest86+. Она запускается из под BIOS или UEFI, и уже потом происходит тестирование и исправление найденных ошибок. Руководство по работе в этой утилите вы найдете далее.
Подробнее: Как протестировать оперативную память при помощи программы MemTest86+
Способ 2: Перезапись загрузочной флешки или диска
Не стоит отрицать тот факт, что многие юзеры используют нелицензионные копии операционной системы Виндовс 10, а поэтому записывают их пиратские копии чаще на флешки и реже — на диски. Часто в таких образах случаются ошибки, приводящие к невозможности дальнейшей инсталляции ОС, появление уведомления с кодом 0x8007025d тоже случается. Конечно, можно приобрести лицензионную копию «Винды», однако делать это хотят далеко не все. Поэтому единственным решением здесь будет — перезапись образа с предварительным скачиванием другой копии. Развернутые инструкции по этой теме читайте ниже.
Подробнее: Создание загрузочной флешки Windows 10
Выше мы постарались рассказать обо всех доступных вариантах устранения возникшей неполадки. Надеемся, хотя бы одно из них оказалось полезным и теперь Windows 10 была успешно установлена на ваш компьютер. Если у вас остались вопросы по теме, пишите в комментарии ниже, мы постараемся предоставить максимально оперативный и подходящий ответ.
Читайте также:
Устранение проблем с установкой обновлений в Windows 10
Установка новой версии Windows 10 поверх старой
Наша группа в TelegramПолезные советы и помощь
While installing the latest Windows 10 updates, if you ever run into the 0x8007025D error, this post will help you. There are a few things that must remain to apply a recent patch to the computer. In this post, we are going to cover all of the causes including solutions to fix any update-related trouble.
The update error code 0x8007025D typically occurs due to the presence of missing system files, damaged Windows Images, or corrupt update components. In quite a few scenarios, running a third-party antivirus might also lead to this bug. Reset Update components, Use Update Troubleshooter, Run SFC, and DISM codes on the computer must solve the underlying cause. In case all of them fail to solve the issue, use system backups or Clean Install Windows. Let’s check out these solutions in detail –

What causes an update error 0x8007025D?
This error may start occurring or appearing when your device meets one or more of the following conditions –
- After installing a problematic third-party application.
- Internal Files/Folders corruption.
- Corrupted Windows Update Components.
- After you install a faulty update on your computer.
How to Fix Installation Error 0x8007025D in Windows 10
No matter why you are receiving the 0x8007025D error, you can fix this by following the below workarounds –
1] Run Windows Update Troubleshooter
In case of getting any update-related issues, one should first attempt running the default troubleshooter. Here’s how to use this tool –
- Click the Windows key and select the Gear icon.
- When the Settings UI comes into view, select Update & Security.
- Subsequently, click Troubleshoot on the left column and move to the adjacent right.
- Now, click Additional troubleshooters.

- Next, click to expand Windows Update and hit “Run the troubleshooter“.

- That’s it, this will immediately look for the culprits resulting in the 0x8007025D error and resolve them (if finds any).
- Do Restart your PC to incorporate the above changes.
Sign back into Windows 10 device and try installing the pending updates. In case the bug re-appears, try the next solution.
2] Reset Windows Update components
In general, the troubleshooter itself is enough to solve any update-related bugs or errors. However, if you still get the 0x8007025D error, this might be due to windows components having become corrupt. The best way to repair these damaged files is to reset them to their factory settings. Here’s how to reset update components –
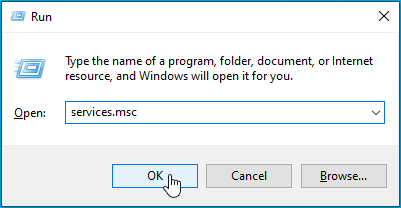
- Press the Win and R shortcut keys to start the Run dialog.
- Inside the text area, type cmd and press Ctrl+Shift+Enter keys altogether.
- If there prompts the UAC window, hit Yes.
- On the elevated console, type the following code sequentially and press Enter at the end of each code –
net stop wuauserv
net stop cryptSvc
net stop bits
net stop msiserver

- Running the above codes will stop the services like Windows Update, MSI Installer, Cryptographic, and BITS.
- Now, rename the Software distribution and Catrool2 folders which are known to prevent Windows updates. To do this, execute the following commands –
ren C:\Windows\SoftwareDistribution SoftwareDistribution.old
ren C:\Windows\System32\catroot2 Catroot2.old
- After renaming the above two folders, restart the basic services that you have previously stopped.
net start wuauserv
net start cryptSvc
net start bits
net start msiserver
After completing the above steps successfully, Restart Windows so that the changes made come into effect.
3] Disable Third-party Antivirus
Sometimes, the presence of a third-party antivirus program may also result in installation error 0x8007025D. This is because the program itself starts interfering with the core system files thus preventing an in-place upgrade. The best thing to do here is to remove the third-party antivirus software and then attempt to install Windows 10 Updates.
Note: Microsoft Defender is a nice security tool and has proven effective in keeping your PC safe and secure. Additionally, this also receives security patches every second Tuesday of a month which no other manufacturers provide.
Here’s how to uninstall or remove the 3rd-party anti-malware program from the computer –
- Jointly Press Win and I hotkey to launch the Settings app.
- Go to the Apps category and head over to the right panel.
- Scroll down and locate the third-party security program that you want to remove.
- Select the application and hit Uninstall available at the top bar.
4] Run SFC and DISM
Many a time, corrupt or missing system files may also prevent a new installation on the device. This is why you must run “sfc/ scannow” command to check whether there lies any corruption inside the system files or not. Here are the essential steps to work upon –
- First of all, launch the Command Prompt having administrative rights.
- When the prompt opens up, copy/paste
sfc/ scannowand hit Enter.

- This usually takes 15-20 minutes to finish the scanning/repairing process, so wait accordingly.
- Once this is over, Reboot the computer so that the changes made come into effect.
The above code only looks for the corruption inside the system files. What if the Windows Image itself has gone corrupt or damaged. Well, to solve this, one may use the DISM tool. Here’s how to run the DISM codes –
- Launch Command Prompt as Admin: Press Win+R to start Run, type cmd, and press Ctrl+Shift+Enter keys together.
- On the elevated console, run the below codes one after another –
Dism /Online /Cleanup-Image /ScanHealth
Dism /Online /Cleanup-Image /CheckHealth
Dism /Online /Cleanup-Image /RestoreHealth
5] Use System Restore
If the error prevails even after performing the above solutions and you do have created system backups in the past, it’s time to use them. Here’s how to revert back PC to an earlier state when everything was running pretty normal.
Note: If you haven’t created any restore points previously, skip this method and follow the next workaround.
- Go to the Search bar and type create a restore point.
- Click the well-matching result.
- When the System Properties window appears up, click System Restore thereafter Next.
- Here, choose the most recent restore point from the list.
- Hit the Scan for affected programs button at the lower section. Doing so will present a list of applications that will be removed after running this backup.

- Click the close button then Next again to proceed further.
- Lastly, click Finish to complete the remaining task.
6] Clean Install Windows
If none of the above solutions work to resolve the 0x8007025D error, you are left with only two options i.e. “Reset this PC” or “Clean Installation of Windows“. Choose whichever method suits you the most.
That’s it, I hope the above set of solutions indeed helps to fix the 0x8007025D error.
Table of contents
- What Does the Error Code 0x8007025D Mean?
- Causes of the 0x8007025D Error
- How to Fix the Error Code 0x8007025D in Windows 10
- Fix 1: Check your connected devices
- Fix 2: Try again after some time
- Fix 3: Run the Windows update troubleshooter
- Fix 4: Reduce the size of your system partition
- Fix 5: Check your BIOS
- Fix 6: Create a bootable Windows 10 image on another flash drive
- Fix 7: Restart the background intelligent transfer service
- Fix 8: Troubleshoot your RAM
- Conclusion
- FAQ
Running into the Error Code 0x8007025D on your Windows 10 or 11 system can be frustrating, as it often prevents important tasks like OS installations or updates.
Fortunately, this guide will walk you through some quick and effective fixes to resolve this error, allowing you to proceed smoothly with your Windows-related tasks.
Let’s dive into the solutions to get your system back on track.
What Does the Error Code 0x8007025D Mean?
The 0x8007025D Windows Setup error is also known as the “The installation was canceled” error. Many users have been getting this error recently when doing a clean installation of Windows 10.
The majority of those who got this error were trying to install Windows 10 cleanly via a USB flash drive, which means that this error is linked to USB.
Also Read: [FIXED] How to Fix MTP USB Device Driver Problem on Windows 10?
However, it also happens when updating Windows 10 to a newer feature build or upgrading Windows from 7 or 8.1 to 10 through a bootable drive.
After the installation begins, but before most of the Windows files have been copied to the PC, the process suddenly stops and displays a white background with the following error message:
The installation was canceled
Any changes made to your computer won't be saved.
Windows Setup
Windows cannot install required files. Make sure all files required for installation are available, and restart the installation. Error code: 0x8007025D
Going by an article by Windows support, the error code 0x8007025D stands for ERROR_BAD_COMPRESSION_BUFFER.
We won’t bore you with the technical jargon. Suffice it to say that this error signifies that an error occurred somewhere during the decoding of the installation data, forcing the process to stop.
Causes of the 0x8007025D Error
Why does the 0x8007025D error occur, especially during Windows 10 installation via a bootable USB drive? There are several possible reasons:
- Corrupt installation file. If any file in the image is corrupt, this can cause the installation process to be interrupted. Windows Setup may find it impossible to decode some files, thus causing this error.
- Bad USB drive. The bootable device itself might be corrupt. There may be an unreadable or bad sector, which means the data stored in that sector cannot be read.
- Bad HDD or SSD sector. Just as the issue may lie with your USB device, your internal storage device may also have problems. If there is a bad sector on your drive, Windows Setup may not be able to copy the necessary files to it, leading to errors like this one.
Also Read: How to Run Hard Drive Diagnostics on Windows PC?
- Damaged or corrupted RAM. One advantage of a clean Windows 10 installation is that it doesn’t compete with other programs for memory space. Since nothing on the machine, not even an OS, the installation can have all the system memory to itself. However, if the memory is bad or damaged in some way, it can render this benefit useless. In such a scenario, Windows Setup stops and throws the 0x8007025D error.
Also Read: How to Check How Much RAM You Have on Windows 10 PC and MAC
How to Fix the Error Code 0x8007025D in Windows 10
The rest of this guide deals with how to fix the “Windows cannot install required files” error. You may have tried some of the fixes described here before, so you can simply jump to whichever solution you think is likely to work for you.
Fix 1: Check your connected devices
The first rule of installing anything on a computer is to make sure that all possible causes of interference are removed.
These include all connected peripheral devices, such as extra USB sticks or Internet cables. Try removing them all before you redo the installation.
If you are installing your OS from a bootable device, Windows copies all the files from the USB flash drive or disk to the computer and then continues the installation process from there.
If the 0x8007025D problem only appears after a certain advanced stage of the installation, you may unplug your USB drive and see what happens.
Chances are it isn’t needed anymore and the rest of the installation process will proceed without a hitch.
Fix 2: Try again after some time
The second rule of installing anything on a computer is patience. Patience takes many forms here. It may mean waiting a long time for the installation to be completed without abruptly canceling it or thinking the process has been stuck.
Another form is attempting it again if it fails the first time.
The 0x8007025D error may just be a glitch that isn’t linked to any big underlying issue. A reboot and another attempt might be all that is needed to successfully install Windows.
So, if you get the error during your first try, don’t be discouraged. Give the installation process another go before you delve into the rest of the fixes given in this guide.
Fix 3: Run the Windows update troubleshooter
If you are still looking for how to fix the “Windows cannot install required files” issue in Windows 10 after trying the above methods, the Windows Update Troubleshooter can help.
You can only run this troubleshooter if you are merely updating Windows with a feature build rather than doing a clean install.
Finding and using the Update Troubleshooter in Windows 10 isn’t hard. Just follow these steps:
- From your desktop, click the Start menu icon. Click the Gear icon and select Settings.
- In the Settings window, select Update & Security.
- On the Update & Security screen, switch to the Troubleshoot tab.
- In the right pane of the Troubleshoot screen, scroll down and select Windows Update.
- In the Windows Update tab, click Run the Troubleshooter.
If you’re seeing the error while trying to run a feature update on Windows 11, these steps will help:
- From your desktop, click the Start menu icon. Click the Gear icon and select Settings.
- When the Settings window opens, scroll down under the System page and click on Troubleshoot.
- Click on the Other Troubleshooters option when you see the System > Troubleshoot page.