
Несмотря на то, что Telnet протокол уже редко используется, что связано с отсутствием шифрования и проверки подлинности данных, у некоторых пользователей могут возникать задачи, требующие подключения с использованием клиента Telnet.
В Windows 11 и Windows 10 клиент для Telnet протокола присутствует, но отключен по умолчанию. При необходимости его можно включить одним из способов, описанных далее.
Компоненты Windows
Клиент Telnet — один из дополнительных компонентов Windows, который может быть включен, как и другие такие компоненты:
- Нажмите клавиши Win+R на клавиатуре (либо нажмите правой кнопкой мыши по кнопке «Пуск» и выберите пункт «Выполнить»), введите appwiz.cpl и нажмите Enter.
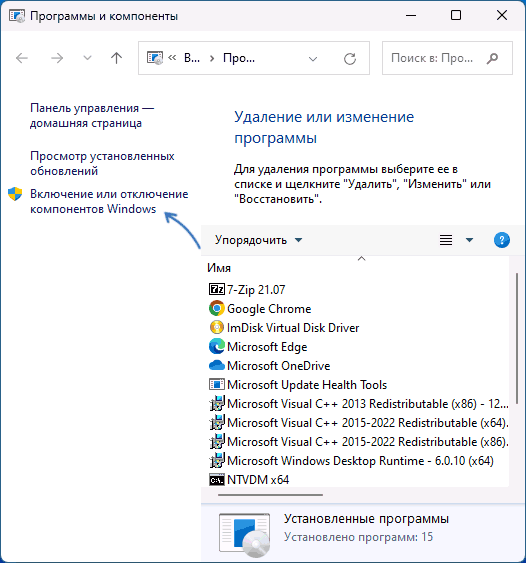
- В открывшемся окне в панели слева нажмите по пункту «Включение или отключение компонентов Windows».

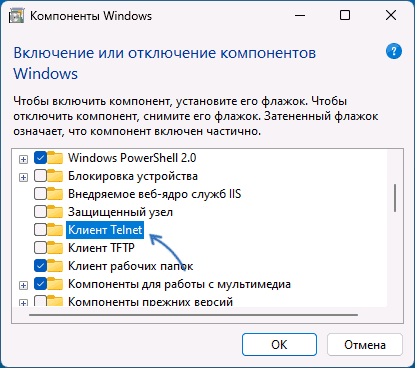
- Отметьте «Клиент Telnet» в списке доступных компонентов и нажмите «Ок».

Останется дождаться, когда клиент Telnet будет установлен.
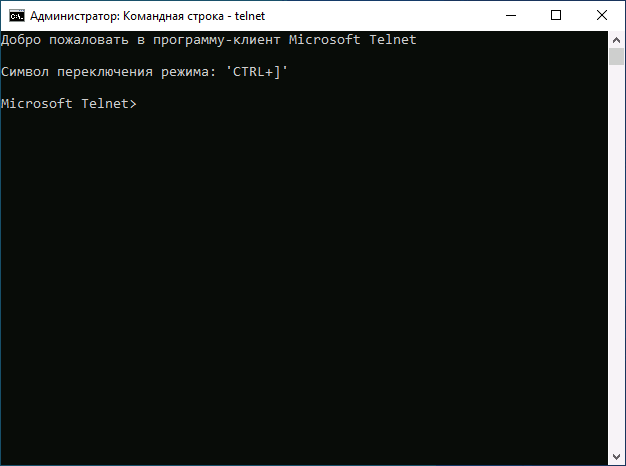
Для начала использования достаточно будет запустить командную строку, ввести команду telnet и нажать Enter.
Командная строка
Вы можете включить Telnet в командной строке, установив компонент с помощью DISM:
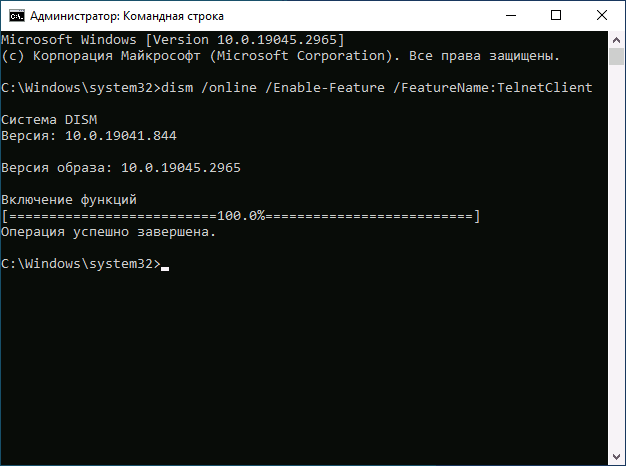
- Запустите командную строку от имени администратора.
- Введите команду
dism /online /Enable-Feature /FeatureName:TelnetClient
и нажмите Enter.

- Дождитесь завершения установки компонента.
Windows PowerShell
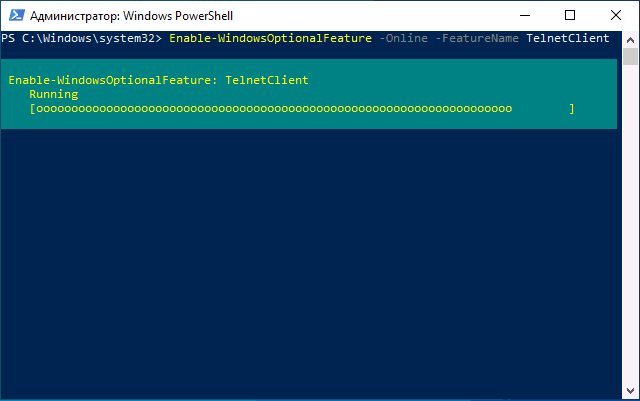
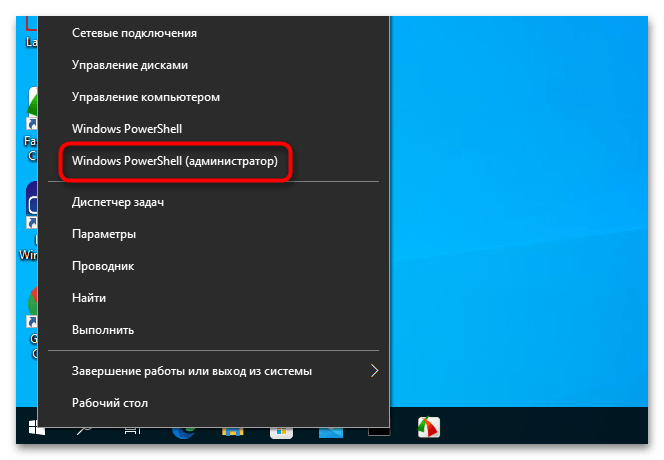
Включить компонент можно и в PowerShell: запустите Windows PowerShell или Терминал Windows от имени администратора, сделать это можно в контекстном меню кнопки «Пуск», после чего введите команду:
Enable-WindowsOptionalFeature -Online -FeatureName TelnetClient
и нажмите Enter. Через короткое время клиент Telnet будет установлен на вашем компьютере.
Завершая статью, поинтересуюсь: для какой цели вам потребовался именно Telnet клиент в наше время SSH, шифрования и защищенных протоколов? Будет отлично, если вы сможете поделиться этим в комментариях.
Introduction
Telnet serves as a protocol that enables users to remotely access and manage other computer systems over the internet or a local network. It has been around for many decades. Also, it is still employed by some systems administrators and network engineers for troubleshooting & configuring network devices.
Telnet is not enabled by default on Windows OS 10 or 11. However, it can easily be enabled by following a few straightforward steps. Under this tutorial, you will get insights into how to enable and install Telnet Windows 10 or 11. Continue reading and get all the details.
What is Telnet and How Does it Work?

As mentioned in the beginning, Telnet refers to a network protocol that permits users to connect to remote computers and devices over the internet or local network. It is employed for remote administration, troubleshooting, and testing of devices & services.
When you begin a Telnet session, the Telnet client application on your computer system designates a connection to the Telnet to Windows server application on the remote device. This connection is typically established over TCP/IP (Transmission Control Protocol/Internet Protocol), which is the standard protocol employed for communication over the Internet.
Once the connection is established, you can communicate with the remote device utilizing a command-line interface provided by the Telnet client application. You can send Telnet commands as well as receive responses from the remote device.
Further, these Telnet commands in Windows can be utilized to perform a variety of tasks like checking the status of services, configuring network settings, or executing commands on the remote device. Also, you must be aware of the fact that Telnet is not a secure protocol & transmits data, including usernames and passwords, in clear text. As a consequence, it is recommended to employ more secure protocols such as SSH (Secure Shell) for remote administration & access.

The below-mentioned are the three different ways with which you can readily enable or install Telnet on Windows. Let’s quickly get a glance at them!
Install Telnet in Windows using Command Prompt
Step 1: Press the Windows key and type “cmd” in the search box.
Step 2: Then, you need to right-click on “Command Prompt” and select “Run as administrator.”
Step 3: In the Command Prompt window, type
"dism /online /Enable-Feature /FeatureName:TelnetClient" and press Enter.
Step 4: The Telnet client will now get installed on your Windows system.
Install Telnet on Windows Using Control Panel
Step 1: Press the Windows key and type “Control Panel” in the search box.
Step 2: Then, you have to search and click on “Control Panel” from the search results.
Step 3: Next, you must click on “Programs” in the Control Panel window.
Step 4: Click on “Turn Windows features on or off.”
Step 5: In the “Windows Features” window, scroll down and locate “Telnet Client.”
Step 6: Check the box next to “Telnet Client” and click “OK.”
Step 7: Now, by this step, you can enable Telnet on Windows.
Install Telnet with Windows Using Powershell
Step 1: Press the Windows key and type “powershell” in the search box.
Step 2: Then, you have to right-click on “Windows PowerShell” and select “Run as administrator.”
Step 3: In the PowerShell window, type
"Enable-WindowsOptionalFeature -Online -FeatureName TelnetClient" and press Enter.
Step 4: By this step, you will get to enable windows install telnet.
Execute Telnet Command in Windows

To execute the Telnet install command in Windows, you can follow the below-mentioned easy steps:
Step 1: Open the Command Prompt or PowerShell as an administrator.
Step 2: Type “telnet” followed by the IP address or hostname of the remote device you wish to connect to, and then press Enter. For instance, in case you need to connect to a device with IP address 192.168.1.1, you would type “telnet 192.168.1.1” and press Enter.
Step 3: If the connection is successful, you will witness a message that says “Microsoft Telnet>”.
Step 4: You can now type Telnet commands to communicate with the remote device. For instance, if you wish to check the status of a service, you can type “status” followed by the name of the service.
Step 5: To exit the Telnet command in Windows, type “exit” and press Enter.
Check Telnet Client Status on Windows

For checking the Telnet client status on Windows, you can follow these steps:
Step 1: Open the Command Prompt or PowerShell as an administrator.
Step 2: Type “telnet” and then, press Enter.
Step 3: In case the Telnet client is installed and running, you will witness a message that says “Welcome to Microsoft Telnet Client” along with the version number.
Step 4: In case the Telnet client is not installed or running, you will witness a message that says “‘Telnet is not recognized as an internal or external command, operable program, or batch file.”
Step 5: You can also inspect the status of the Telnet client by entering the following command in PowerShell.
"Get-WindowsCapability -Name Telnet.Client*" If the Telnet client is installed as well as enabled, you will see “State : Installed.” If it is not yet installed, you will witness “State : NotPresent.” Moreover, if it is installed but disabled, you will see “State : InstalledPendingReboot.”
Summing Up
Enable Telnet Windows 10 or 11 is a simple and quick procedure. It can be done in just a few steps. While Telnet is not utilized as much as it once was, it can still be an extremely helpful tool for managing network devices as well as troubleshooting connectivity issues.
By following the steps outlined in this tutorial, you can quickly enable or install Telnet for Windows and start employing it to administer your network infrastructure. However, you must note that Telnet is an unencrypted protocol. So, it can potentially disclose sensitive information to eavesdropping. Thus, you must take suitable security standards when utilizing it over a network.
В настоящее время протокол Telnet является устаревшим. Использовать его для удаленного управления компьютером небезопасно, поскольку весь трафик передается в незашифрованном виде. В современных версиях Windows вместо протокола Telnet рекомендуется использовать защищенный протокол SSH.
Способ 1: «Программы и компоненты»
Это самый простой и очевидный способ задействовать компонент «Telnet», предназначенный для удаленного управления компьютером. Чтобы открыть оснастку «Программы и компоненты», сделайте следующее:
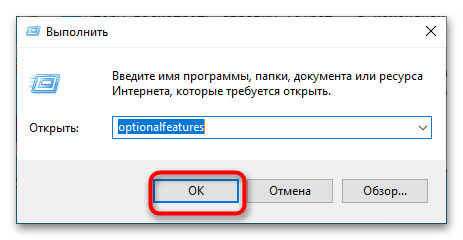
- Вызовите нажатием Win + R окошко быстрого выполнения команд, вставьте в него команду
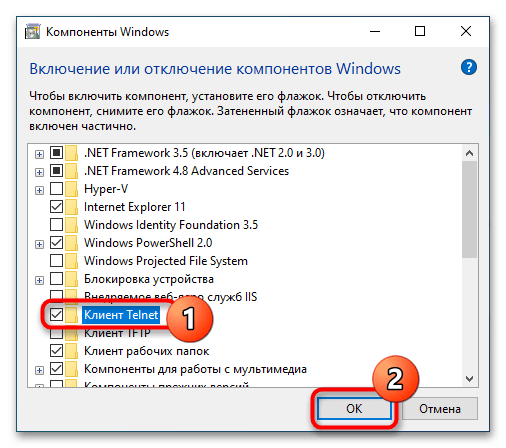
optionalfeaturesи нажмите клавишу ввода. Также открыть оснастку можно через приложение «Параметры», перейдя в раздел «Приложения и возможности» → «Дополнительные компоненты» → «Другие компоненты Windows». - Отыщите в открывшемся окне оснастки пункт «Клиент Telnet», отметьте его флажком и нажмите кнопку «OK».
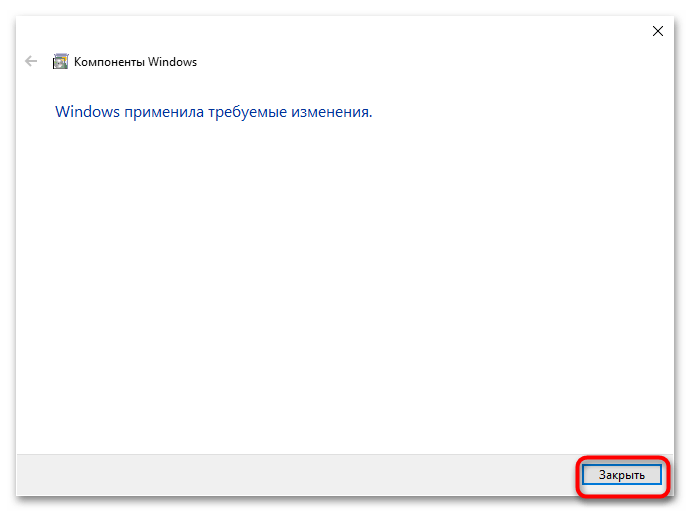
- Windows 10 выполнит поиск необходимых файлов и установит их.
Если Windows попросит перезагрузить компьютер, дайте согласие на перезагрузку.
Способ 2: «Командная строка / «Windows PowerShell»»
Для включения устаревшего клиента «Telnet» можно задействовать классическую «Командную строку» либо же консоль «PowerShell».
- Запустите ту или иную консоль от имени администратора любым удобным вам способом. Например, из контекстного меню кнопки «Пуск».
- Вставьте или введите в консоль команду
dism /online /Enable-Feature /FeatureName:TelnetClientи нажмите клавишу ввода.
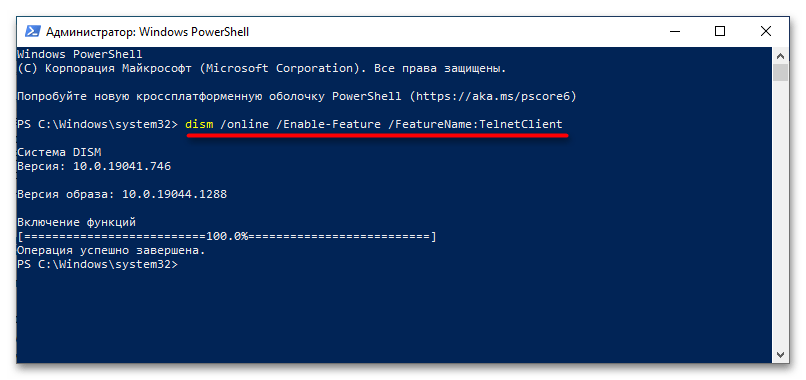
В случае удачного включения компонента команда вернет сообщение «Операция успешно завершена».
Наша группа в TelegramПолезные советы и помощь
Ever heard of “telnet Windows 10”? Read on to know all there is to this technology.
I will be explaining how it works, why it is not being used regularly anymore. I will also give a detailed explanation about how to enable it for anyone who’s interested in old tech.
I will also be explaining a quite useful use of Telnet. Using Telnet in the command prompt to test network connections.
What Is “Telnet Windows 10”?
We all know that Windows 10 is a popular (probably the most popular right now) operating system and chances are, that’s probably the operating system you’re using.
But you might not know what Telnet is because it is really old.
A communications protocol made in the 1960s, Telnet (Teletype Network) basically allows users access to connect to remote hosts and devices.
Through a Telnet client, you can perform many functions like managing files amongst others. There will virtually be no difference between you and the normal regular user.
Telnet has a default port – (Default Port 23)
How Is Telnet Controlled?
In the case of modern browsing, we have other controls like mouses. When using Telnet, you will have to deal with only using the keyboard. No other graphical user interface can be utilized.
To compare Telnet with something modern, you could say it is kind of like Team Viewer.
But an upside to Telnet is that you will be using that remote device through another device but the privileges will be the same.
It would basically be the same thing as exactly using the remote device locally.
Why Isn’t Telnet Used Often Anymore?
Part of the uses of Telnet includes playing very simple games, remotely running some programs, remotely checking mailboxes, and maybe even checking the weather conditions.
This list of impressive uses should be enough to make it worth using except for the part about Telnet not having any sort of encryption at all.
In this day and age where information is key, accessing information through a connection that is literally defenseless is definitely not something you should do.
Everything you do on Telnet is done in plaintext (no encryption) so any information shared can easily be stolen by hackers.
That’s why Telnet has been phased out of common knowledge.
Can Telnet Be Used In Windows 10?
People wondering what is telnet Windows 10 is, might be interested in finding out that Telnet can definitely be used in Windows 10.
It is by default disabled in Windows 10 mainly for the privacy reasons already discussed above but it can still be used as long as the user enables it first.
If you don’t enable it first, you will get error messages like
- “Create Process ‘telnet’ is not recognized (C++)”
Or
- “Telnet is not recognized as an internal or external command”
If you do get any of the above error messages, then the problem is that you haven’t enabled it yet.
You have to first enable (explained below) Telnet before trying to use it.
Do Folks Still Use Telnet Today?
You might be wondering whether Telnet is still used today and the answer is yes, it is still being used. Not as mainstream as maybe 40 or 50 years ago but it is still useful for some folks.
Some of the users of Telnet today include scientists whose equipment is so old that it only accepts Telnet. Some amateur radio operators also still keep the Telnet flame from dying.
But because of its apparent security issue, the number isn’t growing.
Enabling Telnet In Windows 10
If you’re being nostalgic (probably not old enough to have used it well unless you’re 60) or you’re just fascinated by old tech and you want to try out Telnet, then here’s how to enable it in Windows 10.
I’ll be explaining how to enable telnet through the Control Panel menu that can be found either through Settings or maybe searching for it in the search bar.
I’ll also be explaining how to enable it using the Command Prompt or Windows PowerShell below.
How To Enable Telnet Using The Control Panel
The first step, as explained above, is to navigate to the Control Panel menu.
When you’ve opened the Control Panel menu, search for and click on Programs.
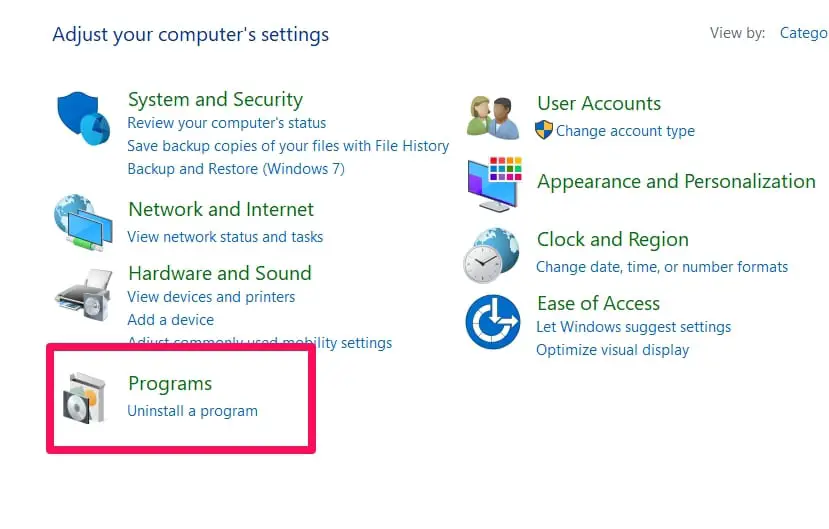
This should open up the menu too. Then in that menu, find the Programs and Features option.
Underneath it, you’ll see the option to Turn Windows Features On or Off. Click on this option because this is where you’ll find Telnet.

In the Windows Features menu that will open up, you’ll see a list of features. All you have to do is scroll down while searching for a folder named Telnet Client.
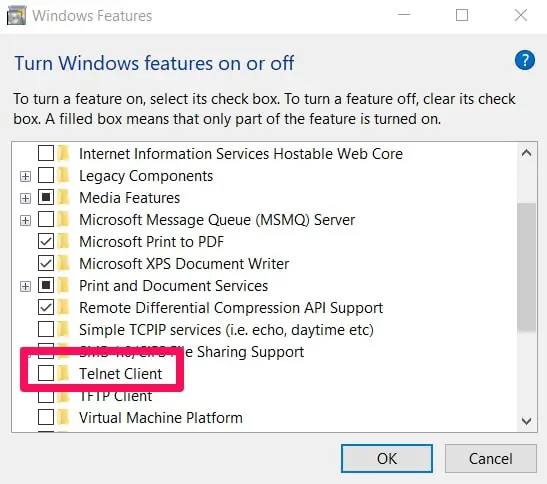
When you find that folder, tick the box to the left of the folder and then click on OK (down, to right of your screen).
How To Enable Telnet Using The Command Prompt
You will first have to open the command prompt and you can do that by using the run box.
All you have to do is type in cmd into the run box and search for it.
Open the Command Prompt (admin) option when the search results come back.
It is important that you open the admin version of the Command Prompt. This version makes it easier to make system-level changes to operations.
When the Command Prompt (admin) window is open, enter the command below at the command line.
pkgmgr /iu:”TelnetClient”
Remember that you have to press the Enter key after inputting the command above to run it.
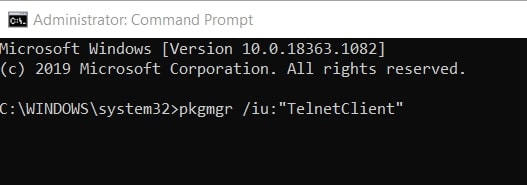
When you follow the above steps correctly, you should be returned back to the command prompt.
If you want to immediately use Telnet, you will have to quit the command prompt window and reopen it back.
How To Enable Telnet Using PowerShell
Use the search box to open PowerShell (admin).
You can do that by typing powershell into the search box and when the search results come back, remember to choose PowerShell (admin).
Like I pointed out earlier, using the (admin) option is important.
When the PowerShell (admin) window is open, input the command below and then press Enter to run the command.
Install-WindowsFeature -name Telnet-Client
Don’t forget to press Enter after inputting the command at the command line.
How to Enable Telnet Client in Windows 10
Checking To See If Telnet Has Been Enabled
Sometimes folks might get something wrong during the enabling process even though it isn’t totally difficult.
To confirm that everything worked out and perhaps to test out Telnet, follow the steps below.
How To Open Telnet
Use the search bar to search for Telnet. Press the Start key. Then type in Telnet in the box.
When the results come, open the application by either clicking on it or clicking on Open to the right of your screen.
What will usually happen is that Telnet will open a Windows PowerShell window that will also show you a list of the supported commands.
You can now connect with other computers that also have enabled Telnet using the commands that were shown to you.
How To Use Telnet In Command Prompt To Test Network Connection
Sometimes folks ask the “telnet Windows 10” question because they have network connection issues and they know that Telnet can be used to test network connections but they don’t know-how.
I will explain how to do that below in easy to follow steps.
Testing Network Connection Using Telnet In Command Prompt
You will first have to open the command prompt and you can do that by using the run box.
All you have to do is type in cmd into the run box and search for it.
Open the Command Prompt (admin) option when the search results come back.
It is important that you open the admin version of the Command Prompt.
When the command prompt is open, input the command below and then press Enter to run the command.
telnet <IP Address> <Port>
<IP Address> – where you input the IP address you’re trying to test.
<Port> – the port you’re trying to test.
For example, below is a command to test an IP address and port. Here’s how it actually looks like.
telnet 192.168.1.12 8081
When you click on Enter after inputting the command complete with the IP address and port you’re testing if the port is open then an empty screen will appear.
If the port is blocked for some reason, then you will get a connection error message.
Note: It is however important to point out that some domains actually stop Telnet based on their security policies so there are a few ports that might be open but still give you connection error messages when you test them.
Conclusion
Telnet is old and it isn’t really used mainstream anymore but it still has it’s own fans and hardcore users who believe in tech of more than 50 years ago.
It does have its uses and very fine uses too, as outlined above. The only problem is that the security risks greatly outweigh its potential benefits.
Whatever your reason might be for asking the “Telnet Windows 10” question, the answer should be above in this article.
If you have more questions, use the comments section below and I’ll get back to you. I hope this article helps answer all your “Telnet Windows 10” questions.
Telnet client allows you to connect to remote hosts over a TCP/IP connection via Telnet protocol. And you need to have the telnet client installed on your computer to use telnet. Besides third-party clients, you can also use Windows’ native Telnet client. But telnet client in Windows 10 is disabled by default. So, you will have to enable telnet client in your Windows 10 PC before you can use it.
Third-party telnet clients provide several additional features, but if you need only basic functionality, Windows native Telnet Client is the best choice for you. However, as mentioned earlier, it is disabled by default. And if you try to use the telnet command before enabling the telnet client, you get the “telnet is not recognized as an internal or external command, operable program or batch file” error. So, for using the telnet client in Windows 10, you need to enable it first in Windows Features.
SEE ALSO: How to Remotely Access your Files via TeamViewer?
Let’s start the process of enabling the telnet client in Windows 10. We will be using the Windows Features utility via Control Panel to enable telnet. Just follow these steps:
Step 1: Open Windows Features from Control Panel
Open the Control panel from the Start menu.
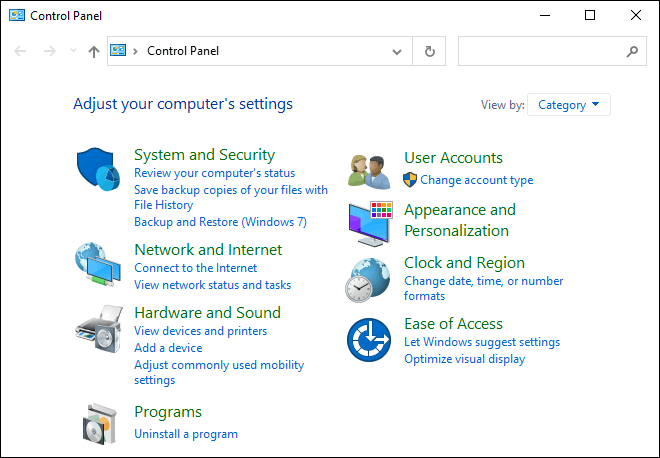
Search for “windows features” in the Control Panel and click on “Turn Windows features on or off” from search results.
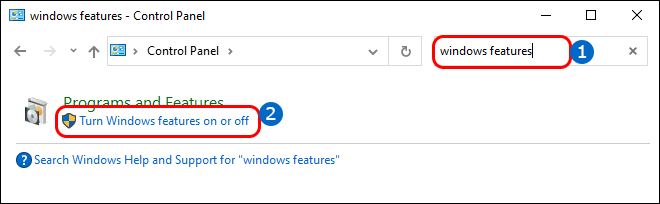
This will open the Windows Features window where you can turn on or off Windows features.
Step 2: Enable Telnet Client from Windows Features
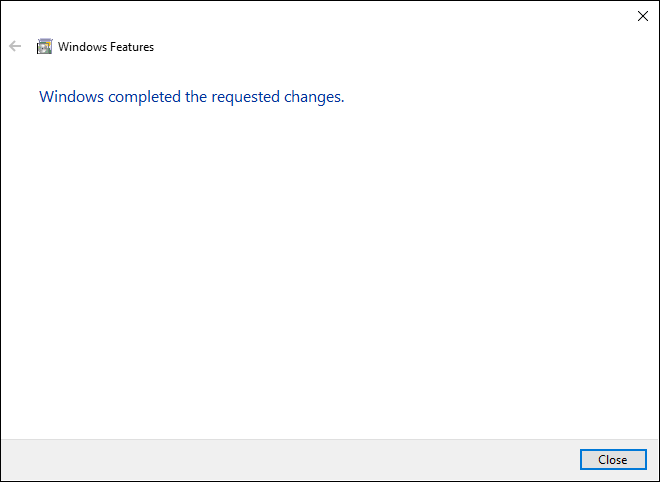
In the Windows Features window, scroll down and check the box next to Telnet Client, and then click on OK. This will enable the Telnet client on your Windows 10 PC.
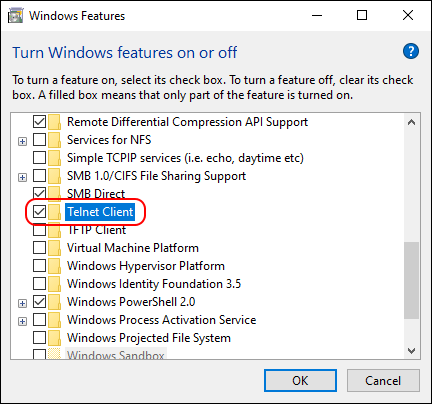
It will take some time for Windows to apply these changes. After successfully enabling the telnet client, click on Close.
Step 3: Test the Telnet Client in Windows 10
After you enable the telnet client, you should test it first. We can easily test the telnet client by running telnet commands in the Command prompt. To use telnet, type the command in the following format CMD window and press Enter.
telnet <hostname/IP address> <port>
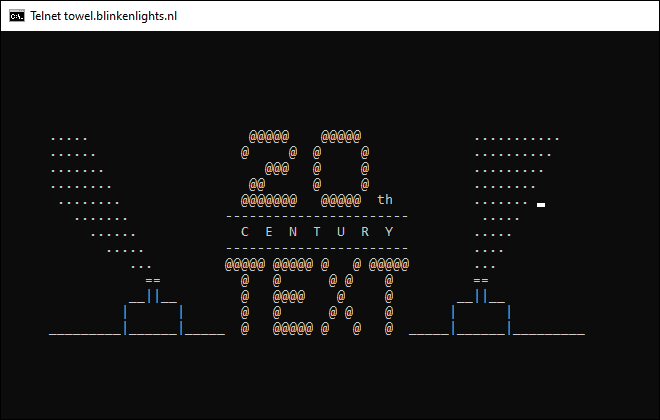
You can avoid providing the port number to use the default port. You can use the following address for example: “towel.blinkenlights.nl“

The above telnet server can be used for watching Star Wars in ASCII mode.
SEE ALSO: Check 10 Cool Command Prompt Tricks You should Know.
Enable and Use Telnet Client in Windows 10
The above tutorial explained how you can enable the telnet client in Windows 10. The process is quite easy. You can easily enable it in Windows Features and you are good to go. Besides, the native telnet client in Windows 10, Putty is also a good choice and is widely used for testing network connectivity.
You can also enable other services using the same process. In case you need to disable telnet in Windows 10, you can go to Windows Features again and disable it from there. Feel free to drop your queries and suggestions in the comment section below.
Hi there, we are the editorial staff at WINDOSPC (former HELLPC). We are a team of funny and technical people. Feel free to get in touch with us via Contact-Us page.