
1 2 3 4 5 6 7 8 9 10 11 12 13 14 15 16 17 18 19 20 21 22 23 24 25 26 27 28 29 30 31 32 33 34 35 36 37 38 39 40 41 42 43 44 45 46 47 48 49 50 51 52 53 54 55 56 57 58 59 60 61 62 63 64 65 66 67 68 69 70 71 72 73 74 75 76 77 78 79 80 81 82 83 84 85 86 87 88 89 90 91 92 93 94 95 96 97 98 99 100 101 102 103 104 105 106 107 108 109 110 111 112 113 114 115 116 117 118 119 120 121 122 123 124 125 126 127 128 129 130 131 132 133 134 135 136 137 138 139 140 141 142 143 144 145 146 147 148 149 150 151 152 153 154 155 156 157 158 159 160 161 162 163 164 165 166 167 168 169 170 171 172 |
#if defined(UNICODE) && !defined(_UNICODE) #define _UNICODE #elif defined(_UNICODE) && !defined(UNICODE) #define UNICODE #endif #include <tchar.h> #include <windows.h> ///----------------------------------------------------------------------------| /// ///----------------------------------------------------------------------------: #include <string> #include <windows.h> #include <gdiplus.h> using namespace Gdiplus; float a = 0.f; void text(Graphics* G) { const wchar_t* s = L"Яша любит Олю."; Font font(L"Courier", 20.f, FontStyleBold); SolidBrush brush(Color(255, 255, 255, 0 )); G->DrawString(s, -1, &font, PointF(10.f, 10.f), &brush); std::wstring ss(L"Угол: "); ss += std::to_wstring(int(a)) + L" градусов."; G->DrawString(ss.c_str(), -1, &font, PointF(10.f, 40.f), &brush); } void Ellips(Graphics* G) { HatchBrush* brush = new HatchBrush( HatchStyleDiagonalCross, Color(255, 0, 0, 255), Color(255, 55, 155, 0 ) ); Pen* pen = new Pen(Color(255, 255, 0, 0), 3); pen->SetDashStyle(DashStyleDash); a += float(1.f); G->RotateTransform ( a, Gdiplus::MatrixOrderAppend); G->TranslateTransform(200.f, 200.f, Gdiplus::MatrixOrderAppend); G->FillEllipse (brush, -100, -50, 200, 100); G->DrawEllipse (pen , -100, -50, 200, 100); } HWND hwnd; void draw() { HDC hdc = GetDC(hwnd); Graphics g(hdc); Rect paintRect; g.GetVisibleClipBounds(&paintRect); Bitmap backBuffer ( paintRect.Width, paintRect.Height, &g); Graphics* G = new Graphics(&backBuffer); G->SetSmoothingMode ( SmoothingModeAntiAlias); ///-----------------------------| /// ГЛАВНЫЙ ЦИКЛ. | ///-----------------------------: //while(true) { G->ResetTransform(); G->Clear(Color(255, 0, 0, 55)); Ellips(G); text (G); g.DrawImage(&backBuffer, 0, 0, 0, 0, paintRect.Width, paintRect.Height, UnitPixel); } delete G; } ///----------------------------------------------------------------------------| /// Тест. ///----------------------------------------------------------------------------: struct Gdiplus_ { Gdiplus_() { GdiplusStartup (&gdiplusToken, &gdiplusStartupInput, NULL); } ~Gdiplus_() { GdiplusShutdown(gdiplusToken); } GdiplusStartupInput gdiplusStartupInput; ULONG_PTR gdiplusToken; }; LRESULT CALLBACK WindowProcedure (HWND, UINT, WPARAM, LPARAM); TCHAR szClassName[ ] = _T("CodeBlocksWindowsApp"); int WINAPI WinMain (HINSTANCE hThisInstance, HINSTANCE hPrevInstance, LPSTR lpszArgument, int nCmdShow) { MSG messages; /* Here messages to the application are saved */ WNDCLASSEX wincl; /* Data structure for the windowclass */ wincl.hInstance = hThisInstance; wincl.lpszClassName = szClassName; wincl.lpfnWndProc = WindowProcedure; /* This function is called by windows */ wincl.style = CS_DBLCLKS; /* Catch double-clicks */ wincl.cbSize = sizeof (WNDCLASSEX); wincl.hIcon = LoadIcon (NULL, IDI_APPLICATION); wincl.hIconSm = LoadIcon (NULL, IDI_APPLICATION); wincl.hCursor = LoadCursor (NULL, IDC_ARROW); wincl.lpszMenuName = NULL; /* No menu */ wincl.cbClsExtra = 0; /* No extra bytes after the window class */ wincl.cbWndExtra = 0; /* structure or the window instance */ wincl.hbrBackground = (HBRUSH) COLOR_BACKGROUND; if (!RegisterClassEx (&wincl)) return 0; hwnd = CreateWindowEx ( 0, /* Extended possibilites for variation */ szClassName, /* Classname */ _T("Code::Blocks Template Windows App"), /* Title Text */ WS_OVERLAPPEDWINDOW, /* default window */ CW_USEDEFAULT, /* Windows decides the position */ CW_USEDEFAULT, /* where the window ends up on the screen */ 544, /* The programs width */ 375, /* and height in pixels */ HWND_DESKTOP, /* The window is a child-window to desktop */ NULL, /* No menu */ hThisInstance, /* Program Instance handler */ NULL /* No Window Creation data */ ); SetTimer (hwnd, 1, 20, 0); ShowWindow(hwnd, nCmdShow); Gdiplus_ gdiplus; UpdateWindow(hwnd); while (GetMessage (&messages, NULL, 0, 0)) { TranslateMessage(&messages); DispatchMessage (&messages); } return messages.wParam; } LRESULT CALLBACK WindowProcedure (HWND hwnd, UINT message, WPARAM wParam, LPARAM lParam) { switch (message) { case WM_TIMER: draw(); break; case WM_DESTROY: PostQuitMessage (0); break; default: return DefWindowProc (hwnd, message, wParam, lParam); } return 0; } |
Последнее обновление: 25.11.2023
Для создания графических приложений на C# можно использовать .NET CLI, но также можно
использовать бесплатную и полнофункциональную среду разработки — Visual Studio Community 2022, которая в ряде случаев облегчает проектирование
приложения. Так, загрузим установщик Visual Studio по адресу:
https://www.visualstudio.com/en-us/downloads.

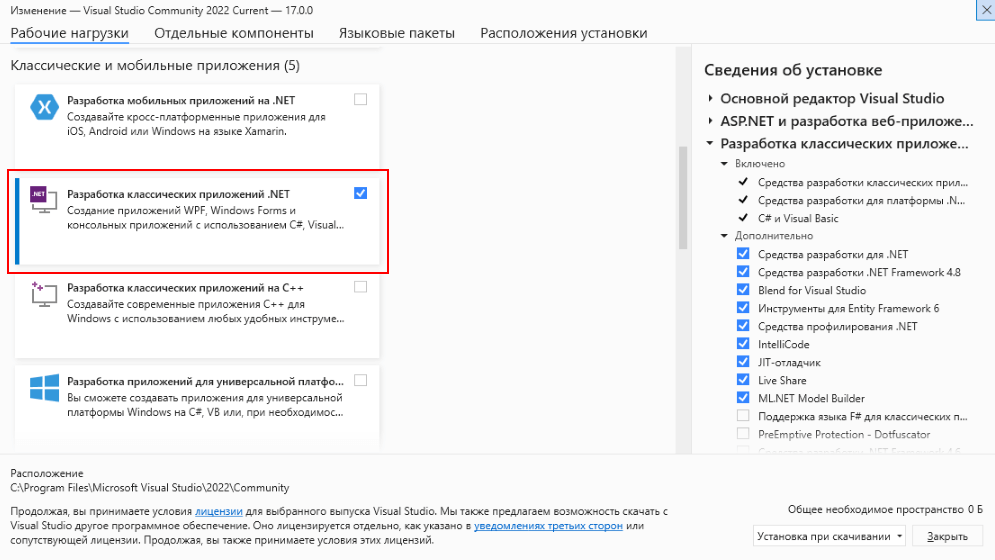
Чтобы добавить в Visual Studio поддержку проектов для Windows Forms и C# и .NET, в программе установки среди рабочих нагрузок нужно
выбрать только пункт Разработка классических приложений .NET. Можно выбрать и больше опций или вообще все опции, однако стоит
учитывать свободный размер на жестком диске — чем больше опций будет выбрано, соответственно тем больше места на диске будет занято.
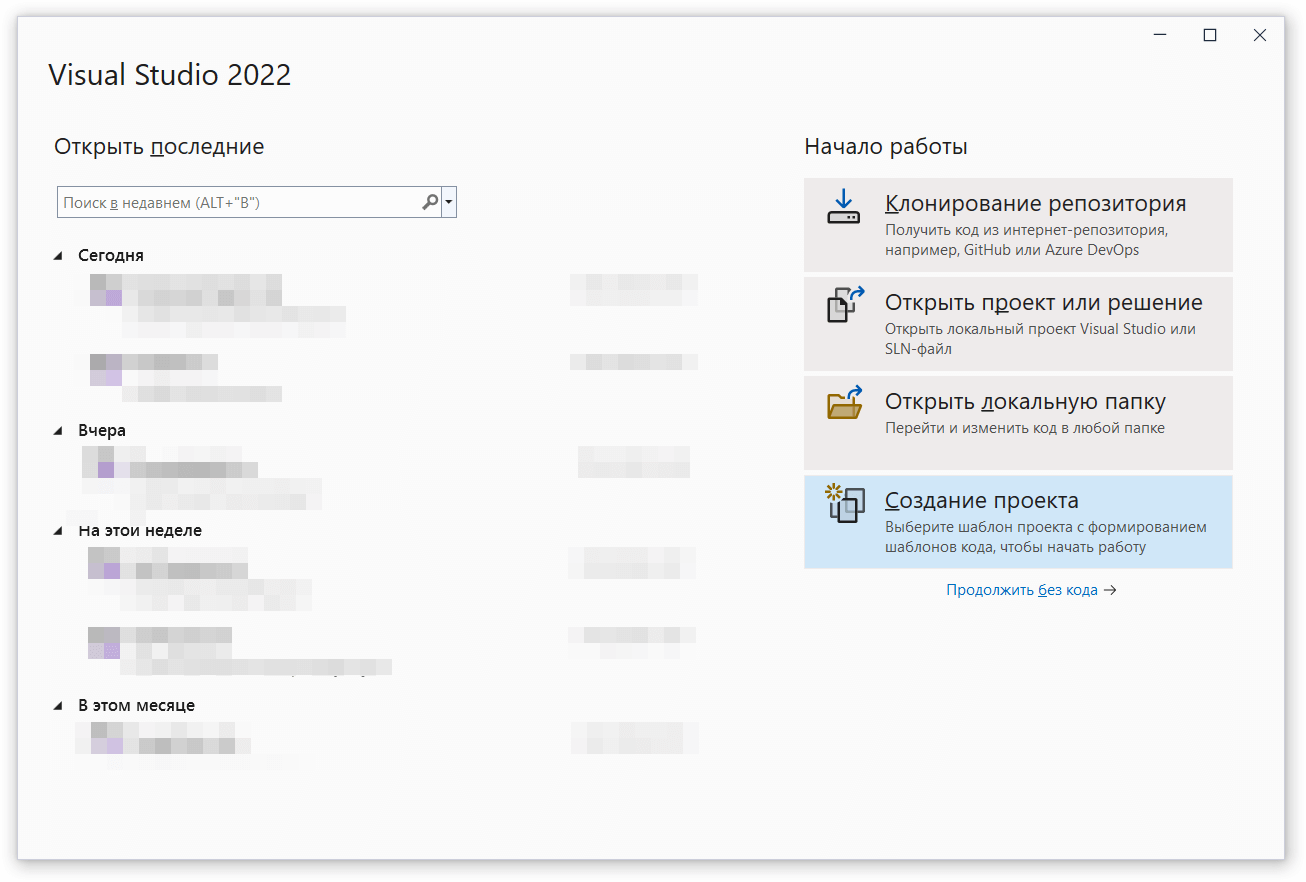
После установки среды и всех ее компонентов, запустим Visual Studio и создадим проект графического приложения.
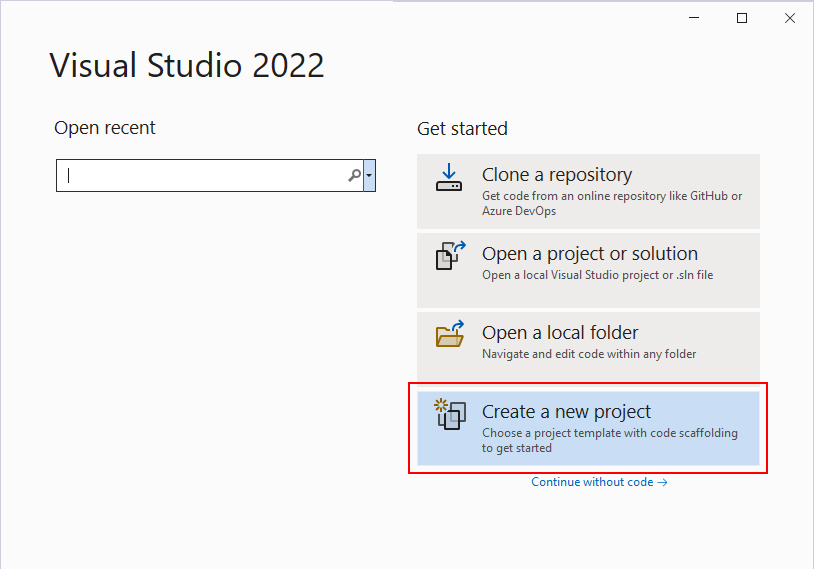
На стартовом экране выберем Create a new project (Создать новый проект)
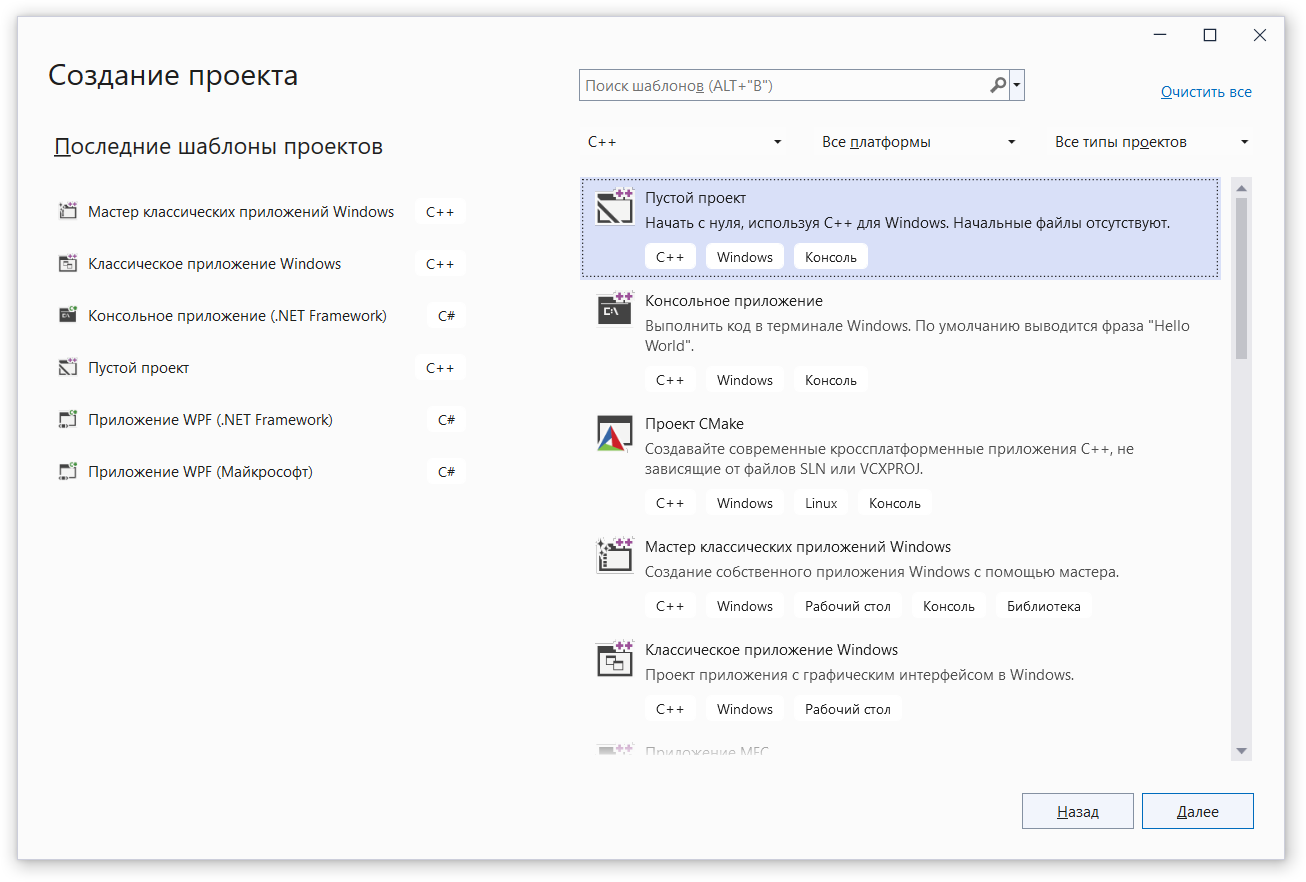
На следующем окне в качестве типа проекта выберем Windows Forms App:

Стоит отметить, что среди шаблонов можно увидеть еще тип Windows Forms App (.NET Framework) — его НЕ надо выбирать, необходим именно тип
Windows Forms App.
Далее на следующем этапе нам будет предложено указать имя проекта и каталог, где будет располагаться проект.
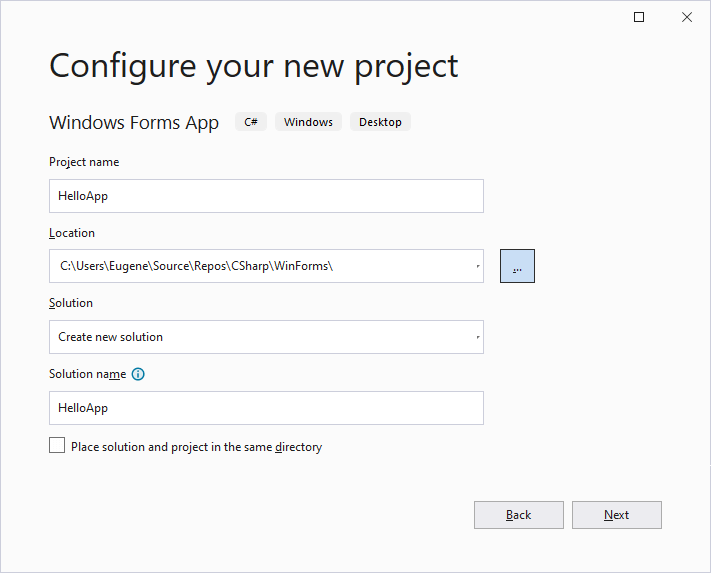
В поле Project Name дадим проекту какое-либо название. В моем случае это HelloApp.
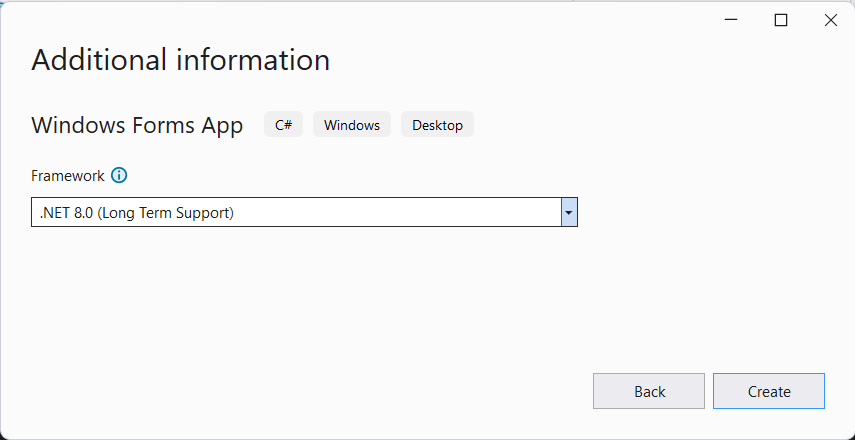
На следующем окне Visual Studio предложит нам выбрать версию .NET, которая будет использоваться для проекта. Выберем последнюю на данный момент версию — .NET и нажмен на кнопку Create (Создать) для создания проекта.
После этого Visual Studio откроет наш проект с созданными по умолчанию файлами:
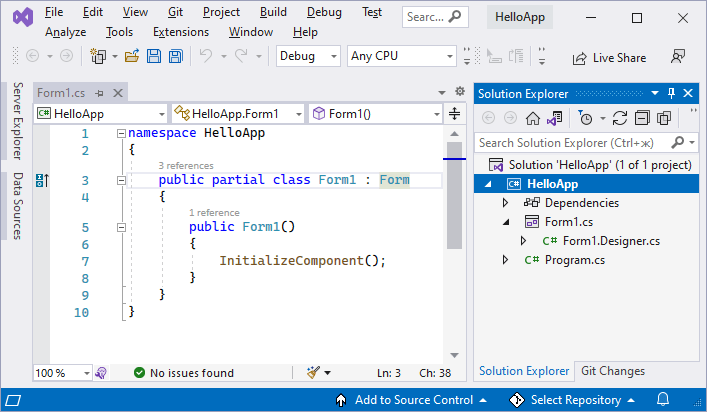
Справа находится окно Solution Explorer, в котором можно увидеть структуру нашего проекта. Практически этот тот же проект, который создается с
помощью .NET CLI:
-
Dependencies — это узел содержит сборки dll, которые добавлены в проект по умолчанию.
Эти сборки как раз содержат классы библиотеки .NET, которые будет использовать C# -
Form1.Designer.cs: он содержит определение компонентов формы, добавленных
на форму в графическом дизайнере -
Далее идет файл единственной в проекте формы — Form1.cs, который по умолчанию открыт в центральном окне.
-
Program.cs определяет точку входа в приложение
Запуск приложения
Чтобы запустить приложение в режиме отладки, нажмем на клавишу F5 или на зеленую стрелочку на панели Visual Studio.
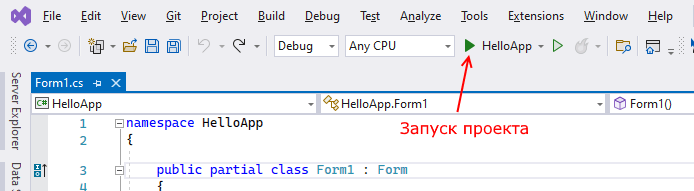
После этого запустится пустая форма Form1 по умолчанию.
После запуска приложения студия компилирует его в файл с расширением exe. Найти данный файл можно, зайдя в папку проекта и далее в каталог
\bin\Debug\net8.0-windows
Рассмотрев вкратце создание проекта графического приложения, мы можем перейти к обзору основных компонентов и начнем мы с форм.
Для создания оконного приложения воспользуемся версией Microsoft Visual Studio Community. Рассмотрим процесс создания приложения на базе версии 2022 года.
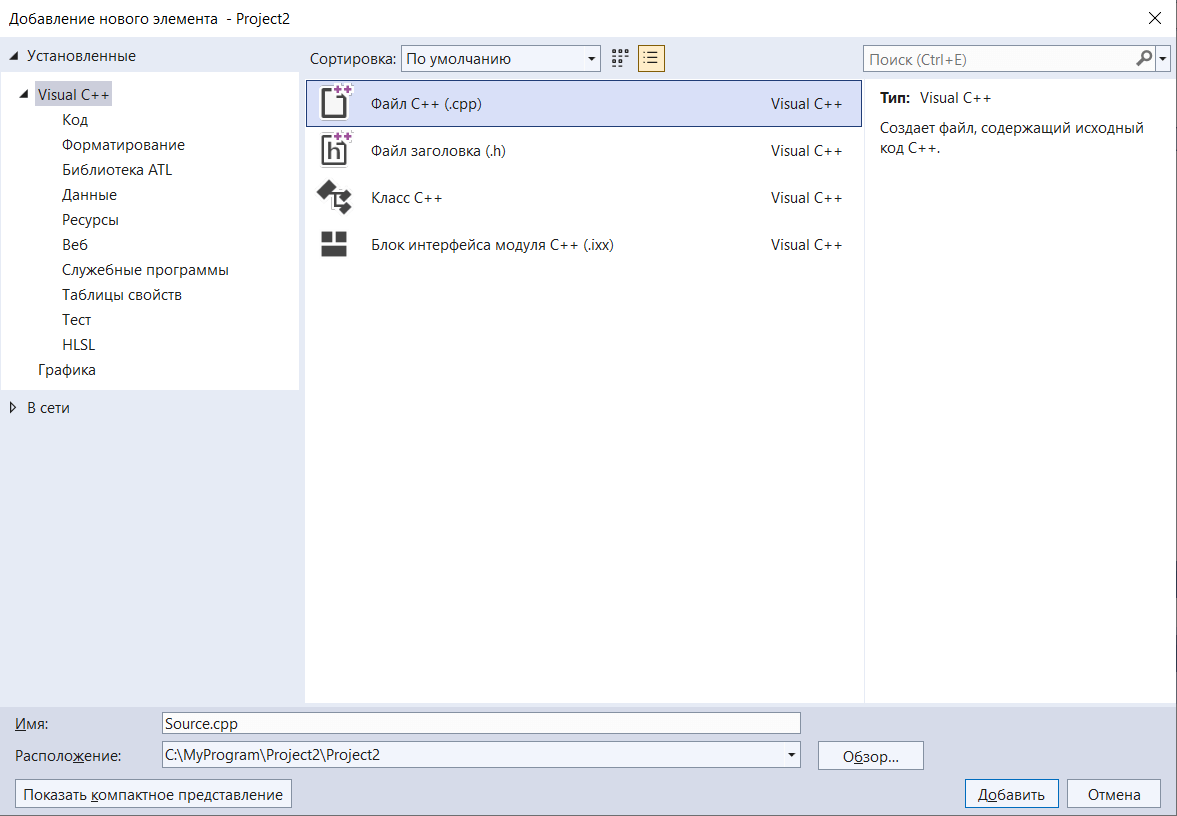
Для создания оконного приложения выберем меню создания пустого проекта:
Далее добавляем файл исходного кода.

Открываем добавленный файл на редактирование и добавляем содержимое файла.
Пример простейшей программы, выводящей окно «Привет всем!» приведен ниже:
1
2
3
4
5
6
7
8
9
#include <windows.h>
#include <tchar.h>
int WINAPI WinMain(HINSTANCE, HINSTANCE, LPSTR, int)
{
MessageBox(NULL, _T(«Привет всем!»),
_T(«Программа»), MB_OK);
return 0;
}
Для успешной компиляции программы необходимо изменить платформу с консоли на Windows. Для этого по правой кнопке мыши заходим в свойства проекта.

Далее в настройках меняем подсистему с консоли на Windows.

Для компиляции программы выбираем меню Сборка → Пересобрать решение.
И после успешной компиляции запускаем программу на выполнение через меню Отладка → Начать отладку.
После запуска программы видим первое диалоговое окно.

Visual Studio 2022 C Cannot Find Compiler Options Window Stack Learn how to create a minimal, traditional windows desktop application using visual studio, c , and the win32 api. In this module, we will write a minimal windows desktop program. all it does is create and show a blank window. this first program contains about 50 lines of code, not counting blank lines and comments. it will be our starting point; later we’ll add graphics, text, user input, and other features.

Visual Studio 2022 C Cannot Find Compiler Options Window Stack In this article, learn to create and show a window. a window class defines a set of behaviors that several windows might have in common. for example, in a group of buttons, each button has a similar behavior when the user selects the button. of course, buttons aren’t completely identical. In vs2019, if you want to create a win32 console application, the steps are similar to in vs2017: 1,from the main menu, choose file > new > project to open the create a new project dialog box. 2,at the top of the dialog, set language to c , set platform to windows, and set project type to desktop. Create your first c gui windows form using visual studio 2022 (getting started) in this session, we will see how we can easily create a c gui windows form application using. Watch this session to learn about the new capabilities in visual studio 2022 for native windows applications. with the side by side support in visual studio 2022, you can start using.

Overview For C Developers Visual Studio Windows Microsoft Learn Create your first c gui windows form using visual studio 2022 (getting started) in this session, we will see how we can easily create a c gui windows form application using. Watch this session to learn about the new capabilities in visual studio 2022 for native windows applications. with the side by side support in visual studio 2022, you can start using. In this video i explain how to create a simple visual c and mfc based app under windows 11 using visual studio 2022 .more. To install other templates, you can open the visual studio installer (open by searching in the windows menu). choose your vs installation, click more then modify. ensure the above option is ticked, then click modify at the bottom. when you open vs, this is the project type you should make. that’s the ticket. good ole desktop development c . Learn how to use visual studio at its simplest form and the process of creating, building, to launching a minimalist win32 api application. The point of this article, specifically, is to show you how i setup the project using cmake for this win32 api c application. i am using visual studio 2022 as my ide.

Create A Windows Forms App With C Visual Studio Windows In this video i explain how to create a simple visual c and mfc based app under windows 11 using visual studio 2022 .more. To install other templates, you can open the visual studio installer (open by searching in the windows menu). choose your vs installation, click more then modify. ensure the above option is ticked, then click modify at the bottom. when you open vs, this is the project type you should make. that’s the ticket. good ole desktop development c . Learn how to use visual studio at its simplest form and the process of creating, building, to launching a minimalist win32 api application. The point of this article, specifically, is to show you how i setup the project using cmake for this win32 api c application. i am using visual studio 2022 as my ide.
В этом руководстве основное внимание будет уделено развертыванию приложения .NET MAUI в первую очередь на вашем локальном компьютере с Windows. Позже у вас будет возможность настроить Android-устройство или эмулятор.
На панели инструментов Visual Studio в качестве целевого объекта отладки по умолчанию указан компьютер с Windows. Нажмите кнопку компьютера с Windows, чтобы выполнить сборку и запуск приложения:

В работающем приложении нажмите кнопку «Нажми меня» несколько раз и убедитесь, что значение счетчика нажатий кнопки увеличивается:
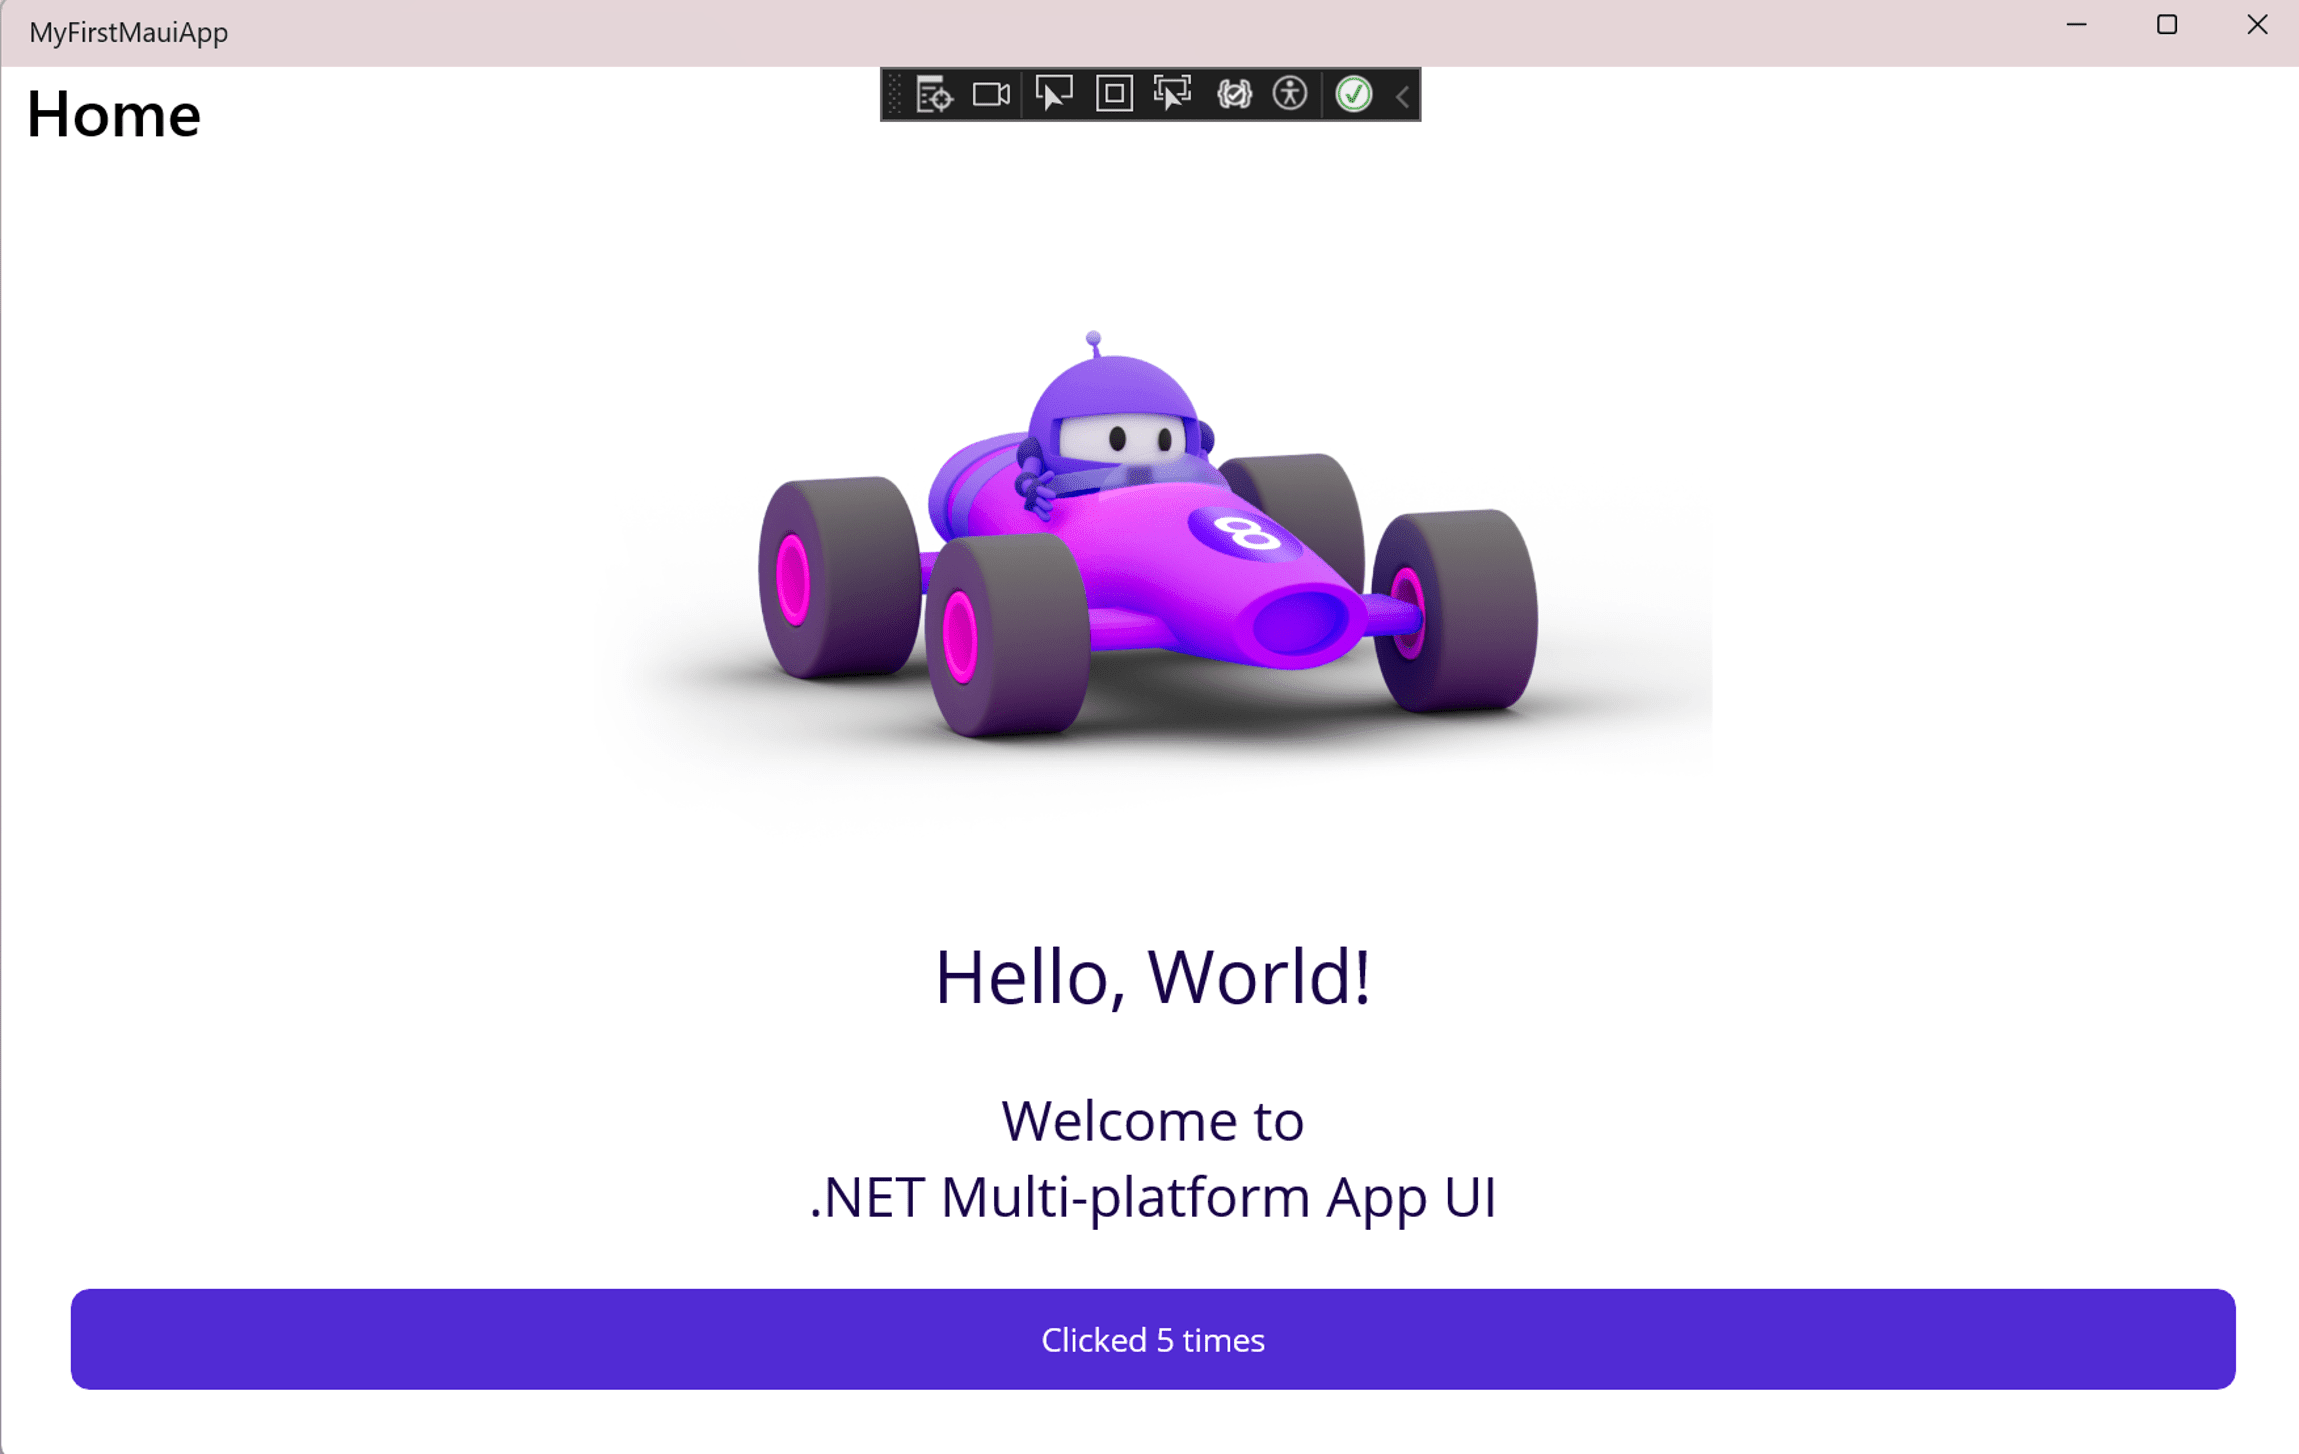
Поздравляем! Вы построили и запустили свое первое приложение .NET MAUI! Оставьте приложение открытым и продолжайте выполнять инструкции руководства.