Blue Screen error KERNEL_THREAD_PRIORITY_FLOOR_VIOLATION in the Windows 10 compels the system to restart time and again without prior noticing. This BSOD issue refers to an illegal operation that was attempted on the priority floor of a particular thread. The problem has a bug check value 0x00000157 and always ends to reboot the affected device automatically.
Once you experience KERNEL_THREAD_PRIORITY_FLOOR_VIOLATION, you might come across error messages while starting an application or closing followed with desktop freezing. Managing the complexities of such a Windows 10 error is for high-level users. This type of error is basically the result of inconsistent and outdated faulty device drivers which causes to crash and restart your machine constantly. When the malicious software or trojans deletes the system resources, you can easily be prey of this error. This mainly happens because of the conflict between similar applications. Along with the memory issues, bad areas in Hard Disk can also be the possible causes of this mess up. Before going beyond the control of the consequences of this issue, let’s dismiss it using the workarounds as following. First of all, have a brief look at the list of the solutions –
KERNEL_THREAD_PRIORITY_FLOOR_VIOLATION
This is how to fix KERNEL_THREAD_PRIORITY_FLOOR_VIOLATION BSOD Error in Windows 10 –
1] Disable Automatic Device Reboot
Once a device is fully affected by KERNEL_THREAD_PRIORITY_FLOOR_VIOLATION Error, you will experience automatic restarting at a quite regular interval. This is one of the most disturbing parts of the Blue screen error. Having this issue, you cannot have enough time to understand what’s happening actually. To implement a resolution will be tougher as well. Therefore, we are considering this problem in the first place and trying to disable the feature. Proceed with the following steps to accomplish the task –
Step-1: First of all, press Win+D simultaneously and head to the desktop area.
Step-2: Do a right-click on This PC icon and select Properties option from the context menu.
Step-3: On the following screen, select Advanced system settings from the left pane.
Step-4: Inside the System Properties wizard, you need to shift to locate the Advanced tab.
Step-5: Get access to Startup and Recovery region and click on the Settings option here.
Step-6: Move to the System failure section and uncheck the box adjacent to ‘Automatically restart‘.
Step-7: Finally, click on the OK button to save the changes.
After these changes are put into effect, you will not experience the automatic restarting anymore. Therefore, you can have enough room to use other workarounds smoothly.
2] Kill Malware to Fix KERNEL_THREAD_PRIORITY_FLOOR_VIOLATION BSOD Error
You all might be well aware of the damage done by the malicious software still incapable to escape from them. These bugs exist throughout on the web and anytime we can be the easiest kill. A regular scanning for viruses in full system is necessary and you can get the best deal from Windows Security app only. This is the built-in anti-malware program powered by Microsoft especially for Windows 10. Here is the process to kill the malware using the default app –
- Press the Windows key from your keyboard.
- Type Virus & threat protection and hit the Enter.
- When the Windows Security page opens, select Scan options to reveal all the available processes.
- On the succeeding page, check the radio button for Full scan and hit the Scan now button.
- After completion of the scanning, select Clean threats option if any malware present and dismiss them.
- Thereafter, on moving to the succeeding page, you will see three options available.
- Select Remove and later on Start actions button to start the removal.
3] Use Windows Blue Screen Troubleshooter for BSOD issues
This tool is able to remove the BSOD problem from the devices. If you are using any version equal or above that then you can easily resolve KERNEL_THREAD_PRIORITY_FLOOR_VIOLATION BSOD Error using this utility. Here are the following instructions to run the troubleshooter –
- Press Win+I and let Windows Settings app appear.
- Choose Update & Security.
- On the subsequent page, choose Troubleshoot subsection from the left layout.
- In the right side of the appearing screen, find out the Blue Screen option.
- Once you located it, select and hit Run the Troubleshooter button.
Once it detects the Blue Screen Troubleshooter error, this will resolve them by itself. In due course, you can get rid of KERNEL_THREAD_PRIORITY_FLOOR_VIOLATION BSOD Error in Windows 10.
4] Take Help from Windows Device Manager and Update Drivers
Among all the problems behind KERNEL_THREAD_PRIORITY_FLOOR_VIOLATION BSOD Error, a defective, outdated and incompatible driver is the most potential reason to cause this. Therefore, here we need to take an immediate step to update them and in that case, Device Manager can be suitable. Outdated drivers are represented with recognizing indication and that makes the task a lot easier. Here is how to update the drivers using the default app –
- Press Win+S hotkey and invoke Taskbar search on display.
- Type Device Manager in the empty field and press the Enter key.
- Take a bit of while and have a proper glance on the devices having an exclamation mark in them.
- If there is any, do a click on that specific device to expand and split the driver list.
- Do a right-click on the drivers and choose Update driver option from the appeared menu.
- Now, follow the on-screen guidance to update the drivers.
- Similarly, do the same with all devices having the mark of exclamation.
Once all the drivers are well up to date, restart the computer normally and after the starting up, check for the error. Hopefully, it will resolve the KERNEL_THREAD_PRIORITY_FLOOR_VIOLATION BSOD Error in Windows 10.
5] Resolve the Memory Problems immediately
If Windows suffers from memory issues, KERNEL_THREAD_PRIORITY_FLOOR_VIOLATION BSOD Error may occur. The same consequence is a must if the Computer’s RAM also suffers from bad areas in it. To solve all these components, Windows Memory Diagnostic come out as rescuer. Here is how to proceed for the tool –
- Press Win and I keys and let the system launch the Settings app.
- Type memory in the search box located on the app UI.
- As you see “Diagnose your computer’s memory problems” in the result, select it immediately.
- Select ‘Restart now and check for problems (recommended)’ option.
- At this time, Windows will undergo restarting with this action. After signing back in, a Blue screen will appear in the display and start detecting RAM issues. Once the process reaches 100%, the system will reboot once again by itself.
- When it Startup again, check the outcomes of the System Tray – Notification area.
Once all these memory issues will sort out, KERNEL_THREAD_PRIORITY_FLOOR_VIOLATION BSOD Error in Windows 10 will fix as well.
6] Install the available Update files and make OS up to date
All the cumulative updates, patches, and major releases hold addressing of existing bugs and problems accompanied with all new features. Once Windows is outdated, it can be easy kill to KERNEL_THREAD_PRIORITY_FLOOR_VIOLATION BSOD Error. We can simply install all the available patches in order to update OS as well as make it stronger. Follow the below instruction to do the task –
Important – Try using speedy internet connection via wireless or Ethernet cable. In the case of using Mobile Hotspot, disable the Metered Connection first or else, the downloading process will not start.
Step-1: Click on the Start button.
Step-2: Select the Settings icon to open it.
Step-3: Click on Update & Security.
Step-4: On the following page, choose Windows Update from the left flank.
Step-5: Move to the right, click on Check for updates button under it.
Step-6: When the entire patches available here, select the Download button.
Step-7: On finishing the process, the installation will start by itself.
Step-8: Be careful about the further instructions coming here.
7] Offer the Additional Hard Drive little rest to Fix KERNEL_THREAD_PRIORITY_FLOOR_VIOLATION BSOD Error
Some people have gone through the worst consequences of KERNEL_THREAD_PRIORITY_FLOOR_VIOLATION BSOD Error just after connecting an additional HDD with PC. Nowadays, we need an extra hard disk for serving vibrant purposes. Fortunately, the fix is simpler than we could ever think. Only disconnecting will do the trick. Follow the below instructions and offer them an instantly break –
- First of all, disconnect the additional hard drive and place it in a safe place with care.
- Now, click on the Start button and Restart Windows 10 PC.
- When Windows completes the cycle of rebooting, perform checking in the system for the existence of the error.
- If nothing comes up, plug in all the separated accessory one by one.
- When the connecting procedure ends, open the web browser from the computer and make a visit to the manufacturer website for the device.
- Download and install again the latest drivers.
8] Rectify Windows System Components issue and Recover missing DLL files
KERNEL_THREAD_PRIORITY_FLOOR_VIOLATION BSOD Error is developed in a system when DLL files go missing and system resources are corrupted. A handy tool named System File Checker can resolve all these issues. To launch the utility, instructions are as follows –
- Open the Taskbar search by pressing Win+S hotkey together.
- In the void, type cmd, and press Ctrl+Shift+Enter together.
- This will launch Elevated Command Prompt.
- Click on the Yes button to give consent once User account control dialog prompts.
- In the following window, type the following command line –
Sfc /scannow
- Press Enter key to activate the System File Checker in it.
- This will recover all the missing DLL files and fix corrupted resources in the system.
- It might take a long time, so wait patiently until finished off.
Finally, restart the device and check if KERNEL_THREAD_PRIORITY_FLOOR_VIOLATION BSOD Error in Windows 10 has resolved.
9] Remove all Similar kinds of Programs staying together in the system
Similar types of programs when staying together in the system, engage in collision with each other. In the end, they delete necessary OS files and KERNEL_THREAD_PRIORITY_FLOOR_VIOLATION BSOD Error rises up. To stop this, uninstalling is the key only. Here is how to uninstall an app from the system –
- Launch Settings app using any handy method as we explained above.
- Click Apps.
- Select Apps & features lying on the left side.
- Jump to the alternate pane and reach to programs colliding with each other once they are available in the list.
- Select the app and hit the Uninstall button.
- If UAC dialog prompts for permission, hit Yes to continue.
- Once the uninstalling finishes following additional guidelines coming to display, restart Windows.
- Prior to signing back, if the error is resolved successfully, download and install these apps if necessary.
10] Fix-up the Poor Hard Disc Sections using Disk Checking Tool
If Hard Disk has bad areas present in it, will definitely suffer from KERNEL_THREAD_PRIORITY_FLOOR_VIOLATION BSOD Error. Disk Checking is a much recommendable tool for fixing these areas in a smooth way. To power up the tool, first, you have to run command in Elevated Command Prompt. The guidelines for that is as follows –
- First of all, press Ctrl+Alt+Del.
- Select Task Manager from the appearing window.
- Once it opens, select File option located at the top left end.
- Choose Run new task from visible options.
- When a dialog appears, type cmd in the blank text area.
- Thereafter, tick the box leading to the option “Create this task with administrative privileges”.
- Select the OK button and let Elevated Command Prompt appear.
- Type the following command and press the Enter key –
chkdsk [Drive:] [parameters] - Disk Checking tool will start showing disk status only.
- Now, arrange the command in following way –
/f /r /x
In the above command line, we have used f for fixing the detected problems in volume.
r for bringing out the bad areas in the Hard disk.
x for making the total volume dismounted before the operation begins.
Accordingly, the final command seems like- chkdsk C: /f /r /x
Here, C: is added as we have installed the OS in this drive. For your case, use any like D:, E: or any based on where you have installed Windows 10.
- Now, hit the Enter button after typing the whole command.
- This process will take a while for finishing up, hold the patience till it gets over completely.
- Once finished, you can reboot the PC and afterward, check whether the workaround has resolved KERNEL_THREAD_PRIORITY_FLOOR_VIOLATION BSOD Error in Windows 10.
11] Clear junk files to have extra space in Disk
Junk files are automatically created by the system for the execution of tasks and they are useful for a temporary period of time. However, they are useless but still stored in Disk space. In due course, they keep piling up and at a time occupy huge space. As a result, the normal functionality of device deteriorates and also cause the KERNEL_THREAD_PRIORITY_FLOOR_VIOLATION BSOD Error. Disk Cleanup tool easily delete them all together once activated. Here is how to free up space using the tool –
- Do a right-click on the Start menu and select the Run option.
- Type cleanmgr in the text box and hit the Enter key.
- From the dialog, select C: from the dropdown menu and press the Enter key.
- This will calculate the recoverable space on Drive C:
- Scroll and click on the Clean up system files option.
- You will see the small popup dialog coming up once again and asking for the desired drive.
- Choose C: again from the menu and also select the OK button.
- At this time, Disk Cleanup for (C:) will disappear after running the calculation.
- Subsequently, check all the items available except Downloads.
- Hit OK from the bottom to initiate the cleanup process.
Note – Prior to commencing the process, carry out a check-in Recycle Bin for necessary files in it. Restore to respective location if you find any.
12] Uninstall Problematic Windows Update Files to Resolve KERNEL_THREAD_PRIORITY_FLOOR_VIOLATION BSOD Error
If the Windows updating process stops at midway, the files become corrupted. It would be the main cause of KERNEL_THREAD_PRIORITY_FLOOR_VIOLATION. Usually, this case is very rare but might happen in case of you. The resolution is to delete them ASAP using below steps –
- Press Win+I together and let Windows Settings appear.
- Click on the Update & Security icon.
- On the subsequent page, choose Windows Update from the left pane.
- Navigating ahead to the corresponding pane, click on the link View update history.
- After that, do a click on the Uninstall updates link.
- This act will open up the Installed Updates window by default. Reach to the last received patch.
- Select it and hit Uninstall option from the top ribbon.
- Follow the upcoming guidelines on display to complete the deleting process.
13] Perform System Restore to take Windows 10 to previous point
You can get KERNEL_THREAD_PRIORITY_FLOOR_VIOLATION BSOD Error after making abnormal changes by installing or uninstalling a program. Performing System Restore will guide you back in the earlier state if you have previously created Restore points. You can use this workaround and probably, can skip the BSOD error. To use the method, the instructions are –
Note – If you have not ever created restore points, bypass this workaround and pass to the next resolution. You cannot accomplish the task without having points created before.
- Open Run dialog using a suitable way as we explained above.
- Type ‘rstrui‘ and press the Enter key.
- Hit Next from the bottom of this appearing wizard.
- On the succeeding window, make a click on Show more restore points if want to see all the previous ones.
- Choose the recent one in the list and hit the Next button again.
- From the window appearing next, select Finish to start the Restoring process.
14] Solve the Windows Image Files to fix KERNEL_THREAD_PRIORITY_FLOOR_VIOLATION BSOD Error
For so many reasons, Windows image files fall into corruption. Unless we fix them, can cause KERNEL_THREAD_PRIORITY_FLOOR_VIOLATION BSOD Error any time. DISM tool very handy application that can easily solve this task. To access the utility, proceed with the following –
- Open Command Prompt as administrator using the above guidelines.
- Once it opens, type following command-line tool –
DISM.exe /Online /Cleanup-image /Restorehealth
- Press Enter.
- The tool will instantly start working and will fix all the defective Windows image files by itself.
- Once the task is finished, reboot the device to make this resolution effective.
Upon returning back to the desktop, check if there is KERNEL_THREAD_PRIORITY_FLOOR_VIOLATION BSOD Error in Windows 10.
15] Remove the Third Party anti-virus Applications
Anti-virus applications are necessary to deal with malware and you cannot really feel safe without one. With time, Windows Security has become the best ever utility in this case. Other Third-party anti-malware programs become unnecessary and can cause KERNEL_THREAD_PRIORITY_FLOOR_VIOLATION BSOD Error also. Thus, you can prevent BSOD issue by deleting these programs. To complete the task, instructions are as following –
- Invoke Run dialog by making a combined press of Win+R.
- Type appwiz.cpl in the text box and click on the OK button.
- When the Programs and Features window appears, move out for Third Party anti-virus Application in the appearing list.
- Do a right-click on it and choose Uninstall option.
- Hit Yes if UAC prompts.
- Follow the guidelines coming afterwards until this app uninstall successfully.
16] Enter Safe Boot Mode
From the very primitive period, during all Windows issues, Booting in Safe Mode came out victorious. In this mode, the OS starts with loading only the basic programs and most of the critical issue disappears with this only. As a well-known workaround, let’s follow the below instructions –
Step#1: Click on the Start button and select the Power icon.
Step#2: Continuously press the Shift key then click on the restart via start menu.
Step#3: Windows will prepare for rebooting initially and then you notice view a blue screen having few options at the Startup.
Step#4: Click on the Troubleshoot.
Step#5: Select Advanced options and click on Startup Settings.
Step#6: Now, restart Windows 10 once more.
Step#7: The startup screen will have options Boot in Safe Mode.
Step#8: Finally, click on the F8 key and head to the Safe Mode next.
So far, we have elaborated all the effective workarounds resolving KERNEL_THREAD_PRIORITY_FLOOR_VIOLATION BSOD Error. As you have come to this point, probably, the issue is no more prevalent in your system. If you still have the same situation like before, we can suggest only last resort – Reinstalling Windows 10. This will be the ultimate solution for all problems if done with perfection.
However, if you have made your mind to go with the workaround, make sure you have saved the backup for all the essential data to avoid loss. Furthermore, to avoid any issue, you can also take help from professional for performing the task.
Methods:
1] Disable Automatic Device Reboot
2] Kill Malware
3] Use Windows Blue Screen Troubleshooter
4] Take Help from Windows Device Manager and Update Drivers
5] Resolve the Memory Problems
6] Install the available Update files
7] Offer the Additional Hard Drive little rest
8] Rectify Windows System Components issue
9] Remove all Similar kinds of Programs
10] Fix-up the Poor Hard Disc Sections
11] Clear junk files
12] Uninstall Problematic Windows Update Files
13] Perform System Restore
14] Solve the Windows Image
15] Remove the Third Party anti-virus Applications
16] Enter Safe Boot Mode
That’s all!!
Contents
- What are the common causes of the «KERNEL_THREAD_PRIORITY_FLOOR_VIOLATION» (0x00000157) error?
- Restore Deleted Files
- Start The Computer in Safe Mode
- Update a Driver With The Device Manager
- Use sfc /scannow To Check All System Files
- Check for Errors The Disk Where Windows Is Installed By Using The Command chkdsk c: /f
- Use The Mode of Compatibility With an Old Version of Windows
- Disable Unnecessary Programs in Windows Startup Menu
- Consult Microsoft Support Service
- Install Latest System Updates
- Scan The System For Viruses
- Test Your RAM
- Make a Clean Installation of Windows
What are the common causes of the «KERNEL_THREAD_PRIORITY_FLOOR_VIOLATION» (0x00000157) error?
The «KERNEL_THREAD_PRIORITY_FLOOR_VIOLATION» (0x00000157) error typically occurs due to the following common causes:
- Outdated or corrupt device drivers: If the device drivers on your system are outdated or corrupted, they may trigger this error.
- System file corruption: Corruption in system files can also lead to this error. This can happen due to malware infections, sudden power outages, or improper shutdowns.
- Incompatible hardware: If you recently installed new hardware that is not compatible with your system, it may cause this error.
- Overclocking: Overclocking your system beyond its capabilities can also trigger this error.
- Software conflicts: Conflicts between different software programs or incompatible software can lead to this error.
- Memory issues: Faulty RAM or insufficient memory can also cause the «KERNEL_THREAD_PRIORITY_FLOOR_VIOLATION» error.
- System updates: Sometimes, Windows updates or patches can introduce bugs that trigger this error.
To resolve this error, you can try updating your device drivers, running system file checker to repair corrupted system files, removing incompatible hardware or software, checking for memory issues, and ensuring that your system is not overclocked.
Also:
-
There is not enough free space in the hard disk of your computer/laptop. For Windows 10 to operate correctly you need to have from 2 to 10 Gb of free space in your system disk.
-
An incompatible version of BIOS was installed or the firmware was damaged.
-
Device drivers incompatible with the OS were installed.
-
Windows registry was damaged or deleted, or cleaning operations accidentally deleted system keys.
-
Antivirus software or viruses may block system files or delete important registry keys.
-
An error occurred in the work of backup software.
-
It can also happen as a result of a Windows update.
Read more how to fix 0x00000157: «KERNEL_THREAD_PRIORITY_FLOOR_VIOLATION» in Windows 11, Windows 10, Windows 8.1, Windows Server 2012, Windows 8, Windows Home Server 2011, Windows 7 (Seven), Windows Small Business Server, Windows Server 2008, Windows Home Server, Windows Vista, Windows XP, Windows 2000, Windows NT.
Here are some ways of eliminating the problem with «KERNEL_THREAD_PRIORITY_FLOOR_VIOLATION»:
Restore Deleted Files
Often BSoD errors cause loss of important files. Files blocked by computer viruses, backup software errors, damaged or overwritten system files, file system errors or bad hard disk sectors – these are only some of the causes that can make your data lost.
Corrections of the corresponding errors will restore the normal operation of your devices, but it does not always restore damaged or lost files. Also, it is not always possible to eliminate an error without formatting the hard disk or clean installation of the operating system, which can also involve loss of files.
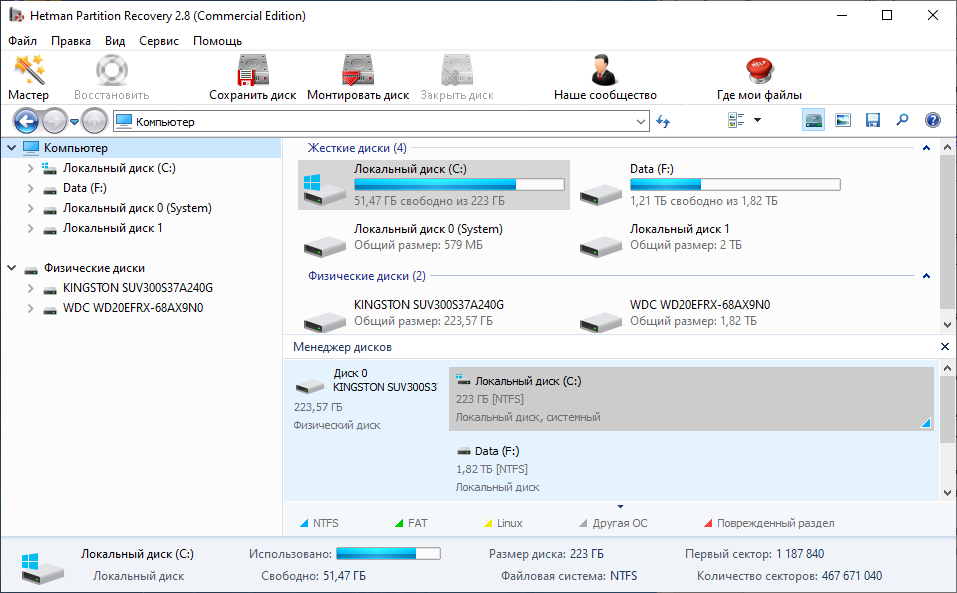
Partition Recovery™ 5.0
The tool recovers data from any devices, regardless of the cause of data loss.
Download for free and scan your device with the help of Hetman Partition Recovery. Learn about the program features and step-by-step guide.

Start The Computer in Safe Mode
If the error «KERNEL_THREAD_PRIORITY_FLOOR_VIOLATION» (0x00000157) occurs when loading Windows and blocks any attempts to work with the system, try loading the computer in Safe Mode. This mode is meant for operating system (OS) diagnostics, but OS functions are very limited in this mode. Safe Mode should only be used if the system is blocked otherwise.

In order to start Safe Mode you should do the following:
-
Go to Start menu and choose Settings.
-
In the settings window that appears go to Update & Security menu and choose the Recovery tab.
-
In the tab Recovery find Advanced startup and click the button Restart now.
-
As your Windows restarts, it will ask you to choose the next step. Choose Troubleshoot.
-
In the Troubleshoot menu click on Advanced Options and then on Startup Settings.
-
Then Windows will inform you that the computer can be restarted with the use of additional settings one of which is Enable Safe Mode. Press Restart.
-
After restarting choose Enable Safe Mode by pressing F4.
Go to view

How to Boot Windows 10 in Safe Mode (All Methods)
Update a Driver With The Device Manager
Have you installed new hardware to your computer? Are you using a new USB device? These can be the causes for the error «KERNEL_THREAD_PRIORITY_FLOOR_VIOLATION». If you installed your device driver from the disk you have found in the device delivery package or if you are using a driver which was downloaded from a place other than Microsoft official website, this can be the core of the problem. You will have to update the device driver to fix it.

You can do it manually in the Windows device manager by taking the following steps:
-
Press Windows button and type device manager on the keyboard.
-
Choose Device Manager from the list.
-
View the list of device categories and click on the arrow nest to the category in which your new device falls. The driver can be marked with a yellow triangle.
-
Right-click on the device name and press Update Driver Software.
-
Then a window of Update Driver Software with two options will appear:
-
Search automatically for updated driver software. Windows will automatically check availability of the best suitable driver for this device.
-
Browse my computer for driver software. Use this option to show the OS where the driver files are kept.
-
Restart the computer after the driver is installed.
Use sfc /scannow To Check All System Files
Damaged or rewritten system files may cause the error «KERNEL_THREAD_PRIORITY_FLOOR_VIOLATION». The command sfc finds damaged Windows system files and replaces them.

-
Press Windows button and enter cmd from the keyboard.
-
Right-click on CMD and launch it as administrator.
-
In the command prompt window, type in sfc /scannow and press Enter.
This process may take several minutes.
Go to view
How to Recover Windows 10, 8, 7 System Files (SFC, DISM)
Check for Errors The Disk Where Windows Is Installed By Using The Command chkdsk c: /f
The blue screen with «KERNEL_THREAD_PRIORITY_FLOOR_VIOLATION» may be caused by a file system error or by bad sectors in your disk. The command CHKDSK will check the disk for file system errors and bad sectors. Using the setting /f will make the program to automatically correct the detected errors, and the setting /r allows finding and fixing problem disk sectors. To launch it, follow these steps:

-
Press Windows, then enter CMD from the keyboard.
-
Right-click on CMD and launch it as administrator.
-
In the command prompt window type chkdsk c: /f and press Enter (use the letter of the drive where your OS is installed).
Wait until the process is over and restart your computer.
Use The Mode of Compatibility With an Old Version of Windows
A error with the code «KERNEL_THREAD_PRIORITY_FLOOR_VIOLATION» may be caused by outdated software. If this error occurs after launching a program, then using Windows compatibility mode can help you get rid of the problem. To fix it, do the following:

-
Find a program executable file (it has .exe extension) and right-click on it.
-
In the quick menu, select Troubleshoot compatibility.
-
At the next stage, you will see the window Program Compatibility Troubleshooter. You will have two troubleshooting options to choose from:
-
Try recommended settings. Select this variant to start a test run of the program using recommended compatibility settings.
-
Troubleshoot program. Select this variant to choose compatibility settings based on what problems you have encountered.
-
-
After testing the program under various versions of Windows and startup settings save the suitable settings for your program.


Go to view
How to Run a Program in Compatibility Mode With Windows 10, 8 and 7
Disable Unnecessary Programs in Windows Startup Menu
The software causing «KERNEL_THREAD_PRIORITY_FLOOR_VIOLATION» (0x00000157) may be written to Windows Startup list so the error occurs immediately after the system starts without any user activity. You can delete programs from Startup by using Task Manager.

-
Load the computer in Safe Mode.
-
Right-click on Task Bar and then on Task Manager.
-
Go to Startup tab.
-
To delete a program from the startup list select it and disable by clicking Disable in the right lower corner of the window.
Consult Microsoft Support Service
Microsoft offers several solutions to eliminate the blue screen error. «KERNEL_THREAD_PRIORITY_FLOOR_VIOLATION» (0x00000157) can be fixed with the help of Windows Update or by addressing Windows Support.

-
Go to Microsoft Support Service.
-
Enter your error code and message into the search field and follow the directions.
-
If you don’t find a ready solution as the community where your query can be answered by a certified system administrator.
Install Latest System Updates
Windows provides updates that extend your driver database and correct errors or security vulnerabilities. Download the latest updates to get rid of the error «KERNEL_THREAD_PRIORITY_FLOOR_VIOLATION» (0x00000157).

You can launch Windows Update like this:
-
Go to Start menu and select Settings.
-
In the Settings window go to Update and Security tab.
-
To install the latest Windows updates click on Check for updates and wait until they are found and installed.

It is recommended to set up automatic download and installation of system updates with the help of Advanced Options.
To enable automatic system update you need to start Windows Update:
-
Go to Start menu and choose Settings.
-
In the Settings window go to the Update and Security menu and select Windows Update. To install the latest Windows updates click on Check for updates and wait until they are found and installed.
-
Go to Advanced Options and choose the mode of update installation — Automatic.
Scan The System For Viruses
The blue screen of death with the error «KERNEL_THREAD_PRIORITY_FLOOR_VIOLATION» 0x00000157 can be caused by computer viruses that infected your system.
To check the computer for viruses launch your antivirus program.
Modern antiviruses allow checking both hard disks and RAM. Run a full system scan.
Test Your RAM
System memory problems may cause errors, loss of data or even make your computer stop working.
Before you start checking RAM, take it out of the slot on the motherboard and then stick it back again. Sometimes the error «KERNEL_THREAD_PRIORITY_FLOOR_VIOLATION» can be caused by the memory stick which was set into the slot incorrectly or not tight enough, and sometimes by the slot contacts covered with dust.
If the above actions did not make things better, you can check your RAM with the means of your operating system – Windows Memory Diagnostic.
JYou can start this tool in two ways:
-
With the help of Control Panel:

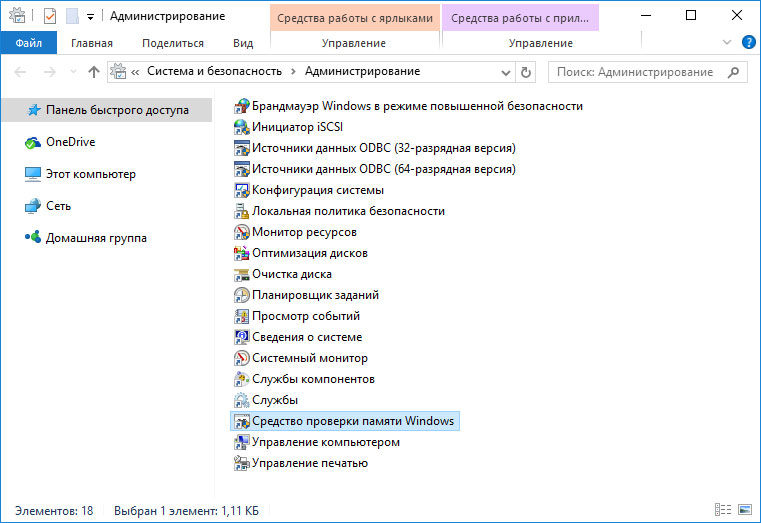
Go to Control Panel / System and Security / Administrative Tools. Launch the application Windows Memory Diagnostic.
-
With the use of Run:

Launch the Run tool with the combination of keys Windows + R. Type in mdsched and press Enter. The Windows Diagnostic tool will start.


To start the checking select one of the suggested variants to decide how your RAM will be tested after the computer is restarted.
If the diagnostic tool finds errors that cannot be corrected, such memory should be replaced (that is, you have to replace the memory stick where errors were found).
Make a Clean Installation of Windows
If none of the methods helped you to get rid of «KERNEL_THREAD_PRIORITY_FLOOR_VIOLATION», try reinstalling Windows. In order to make a clean installation of Windows you need to create a setup disk or another media which you are going to use to install the OS.
Start the computer with the setup disk. To do it you may need to change boot priority in BIOS or UEFI for newer computers.
Following the installer menu stages, specify the disk where you want your Windows installed. You will have to format it then. If you are not satisfied with the number or size of the local disks they can be deleted and repartitioned.
Remember that formatting, deleting or partitioning your disks will destroy all files in the hard disk.
After specifying the disk to install Windows to, the process of copying system files and installing the operating system will start. During the installation, no additional action is required. In the process, the screen will go off for a while several times, and the computer will restart on its own to complete certain stages of installation.
Depending on the version of Windows at one of the stages you may have to select or enter basic personalization settings, choose how the computer works with networks and select settings of your account or create a new one.
As the computer loads the desktop, a clean installation of Windows is finished.
Note. Before you start a clean installation of Windows make sure you have drivers for all your hardware and that your files are safe. Download and save drivers to a separate media, and create a backup copy of important data.
Go to view
How to Reset Windows 10 or 8 PC to Factory Default Settings (All Methods)
Go to view
How to Reset Windows 10 or 8 PC If The Operating System Won’t Boot
Provide feedback
Saved searches
Use saved searches to filter your results more quickly
Sign up
Appearance settings

-
Microsoft Support & Malware Removal
-
BSOD Crashes, Kernel Debugging
You should upgrade or use an alternative browser.
BSOD «Kernel Thread Priority Floor Violation»
-
Thread starter
Thread starterByteSlinger
-
Start date
Start date
- Joined
- Jan 20, 2017
- Posts
- 6
-
-
#1
- OS — Windows 10
- 64 bit
- Original OS / Win 7 (Upgraded during free update period / Fresh install)
- Self built system, desktop, mostly 3 years old (No hardware changes in over a year)
- Win 10 update approximately 4/5 months ago
- CPU — Intel i7-4790K (@4GHz)
- GPU — Nvidia GTX 760
- RAM — 16GB (2x 8GB) Corsair Vengence 1600MHz DDR3
- MoBo — Asus Maximus VII Ranger Z97
- PSU — Corsair CS750M
My computer has always run fantastically up until just a few weeks ago.
The first thing I started noticing is once, maybe twice a day, I’d notice my primary monitor flicker. It would be less than a second and that was it.
Next I had a couple of times where my screens both restarted then when everything came back online, my primary monitor wouldn’t until I restarted the computer.
Most recently (over the last week), I’ve had 4 blue screens. Usually just when browsing the web but twice I wasn’t even actively using the computer, one of which it was locked and wasn’t running anything in the background.
GPU driver is all up to date, as is everything else I can find.
Any help would be greatly appreciated.
Thanks
Attachments
-
SysnativeFileCollectionApp.zip
SysnativeFileCollectionApp.zip -
Perfmon.zip
- Joined
- Jan 20, 2017
- Posts
- 6
-
-
#2
Luckily I restored to a point just before running the versifier. Not sure if that helps at all?
MichaelB
Sysnative Staff, BSOD Kernel Dump Senior Analyst
- Joined
- Dec 3, 2014
- Posts
- 247
- Location
-
Germany
-
-
#3
I’ve just tried running Driver Versifier as recommended on the BSOD posting page and it resulted in me getting a bluescreen as soon as my desktop appeared after login every time I restarted.
Luckily I restored to a point just before running the versifier. Not sure if that helps at all?
not at all, i picked up one dumpfile (biggest one) for a rush
SYSTEM_SERVICE_EXCEPTION (3b)
An exception happened while executing a system service routine.
Arguments:
Arg1: 00000000c0000005, Exception code that caused the bugcheck
Arg2: fffff8030c6fa20a, Address of the instruction which caused the bugcheck
Arg3: ffffe101bc5cc7d0, Address of the context record for the exception that caused the bugcheck
Arg4: 0000000000000000, zero.

Debugging Details:
------------------


DUMP_CLASS: 1

DUMP_QUALIFIER: 400

BUILD_VERSION_STRING:  10.0.14393.693 (rs1_release.161220-1747)

SYSTEM_MANUFACTURER:  ASUS

SYSTEM_PRODUCT_NAME:  All Series

SYSTEM_SKU:  All

SYSTEM_VERSION:  System Version

BIOS_VENDOR:  American Megatrends Inc.

BIOS_VERSION:  1104

BIOS_DATE:  07/16/2014

BASEBOARD_MANUFACTURER:  ASUSTeK COMPUTER INC.

BASEBOARD_PRODUCT:  MAXIMUS VII RANGER

BASEBOARD_VERSION:  Rev 1.xx

DUMP_TYPE:  2

BUGCHECK_P1: c0000005

BUGCHECK_P2: fffff8030c6fa20a

BUGCHECK_P3: ffffe101bc5cc7d0

BUGCHECK_P4: 0

EXCEPTION_CODE: (NTSTATUS) 0xc0000005 - Die Anweisung in 0x%p verwies auf Arbeitsspeicher bei 0x%p. Der Vorgang %s konnte im Arbeitsspeicher nicht durchgef hrt werden.

FAULTING_IP:
nt!ObpCaptureHandleInformation+82
fffff803`0c6fa20a 8a4028          mov     al,byte ptr [rax+28h]

CONTEXT:  ffffe101bc5cc7d0 -- (.cxr 0xffffe101bc5cc7d0)
rax=0000000000000000 rbx=00000000000008f4 rcx=ffffe101bf43e0c8
rdx=ffff99087a6f22c0 rsi=ffffe101bf400050 rdi=fffff8030c6fa188
rip=fffff8030c6fa20a rsp=ffffe101bc5cd1e8 rbp=ffffcd86c469d3d0
 r8=ffffcd86c469d3d0  r9=00000000000008f4 r10=ffffe101bc5cd278
r11=0000000000000434 r12=0000000000000000 r13=ffffe101bc5cd2b8
r14=ffffcd86c108aa40 r15=000000000017fffc
iopl=0         nv up ei pl nz na po nc
cs=0010  ss=0018  ds=002b  es=002b  fs=0053  gs=002b             efl=00010206
nt!ObpCaptureHandleInformation+0x82:
fffff803`0c6fa20a 8a4028          mov     al,byte ptr [rax+28h] ds:002b:00000000`00000028=??
Resetting default scope

CPU_COUNT: 8

CPU_MHZ: fa7

CPU_VENDOR:  GenuineIntel

CPU_FAMILY: 6

CPU_MODEL: 3c

CPU_STEPPING: 3

CPU_MICROCODE: 6,3c,3,0 (F,M,S,R)  SIG: 1E'00000000 (cache) 1E'00000000 (init)

CUSTOMER_CRASH_COUNT:  1

DEFAULT_BUCKET_ID:  [COLOR=#ff0000]CODE_CORRUPTION[/COLOR]

BUGCHECK_STR:  0x3B

PROCESS_NAME:  Steam.exe

CURRENT_IRQL:  0

ANALYSIS_SESSION_HOST:  SKYLAKE1

ANALYSIS_SESSION_TIME:  01-20-2017 20:48:29.0165

ANALYSIS_VERSION: 10.0.14321.1024 amd64fre

LAST_CONTROL_TRANSFER:  from fffff8030c73f94b to fffff8030c6fa20a

STACK_TEXT:
ffffe101`bc5cd1e8 fffff803`0c73f94b : 00000000`000008f4 00000000`00000000 ffff9908`00000000 00000000`00000000 : nt!ObpCaptureHandleInformation+0x82
ffffe101`bc5cd1f0 fffff803`0c6fa100 : fffff803`0c6fa188 ffffe101`bf43e0c8 ffffe101`0017fffc ffffe101`bc5cd324 : nt!ExpSnapShotHandleTables+0x127
ffffe101`bc5cd270 fffff803`0c73d65b : ffffe101`bc5cd324 00000000`0003e090 00000000`0017fffc 00000000`00000000 : nt!ObGetHandleInformation+0x3c
ffffe101`bc5cd2b0 fffff803`0c65a5f9 : 00000000`00000010 00000000`00020000 ffffe101`bf400050 ffff9908`819243c0 : nt!ExpGetHandleInformation+0x53
ffffe101`bc5cd2f0 fffff803`0c51545b : 00000000`00000004 00000000`00000000 ffffffff`ffffffff 00000000`00000002 : nt! ?? ::NNGAKEGL::`string'+0x4e3b9
ffffe101`bc5cdac0 fffff803`0c1e7393 : ffff9908`7c3945c0 00000000`00000000 ffffe101`bc5cdad8 ffff9908`7c3255d0 : nt!NtQuerySystemInformation+0x2b
ffffe101`bc5cdb00 00007ffb`0d376794 : 00000000`00000000 00000000`00000000 00000000`00000000 00000000`00000000 : nt!KiSystemServiceCopyEnd+0x13
00000000`09fce248 00000000`00000000 : 00000000`00000000 00000000`00000000 00000000`00000000 00000000`00000000 : 0x00007ffb`0d376794


CHKIMG_EXTENSION: !chkimg -lo 50 -d !nt
    fffff8030c1371d2 - nt!MiResolvePrivateZeroFault+212
    [ f6:f3 ]
    fffff8030c1371fa-fffff8030c1371fc  3 bytes - nt!MiResolvePrivateZeroFault+23a (+0x28)
    [ 40 fb f6:c0 f9 f3 ]
    fffff8030c137218-fffff8030c137219  2 bytes - nt!MiResolvePrivateZeroFault+258 (+0x1e)
    [ 80 fa:00 81 ]
    fffff8030c1378b9-fffff8030c1378ba  2 bytes - nt!MiCompletePrivateZeroFault+519 (+0x6a1)
    [ 80 fa:00 81 ]
    fffff8030c13794f-fffff8030c137951  3 bytes - nt!MiCompletePrivateZeroFault+5af (+0x96)
    [ 40 fb f6:c0 f9 f3 ]
    fffff8030c15b926 - nt!MmMapLockedPagesSpecifyCache+106 (+0x23fd7)
    [ f6:f3 ]
    fffff8030c15b9c0-fffff8030c15b9c2  3 bytes - nt!MmMapLockedPagesSpecifyCache+1a0 (+0x9a)
    [ 40 fb f6:c0 f9 f3 ]
    fffff8030c1759fb-fffff8030c1759fc  2 bytes - nt!MiCoalesceFreePages+3eb (+0x1a03b)
    [ 80 fa:00 81 ]
    fffff8030c1a004d-fffff8030c1a004e  2 bytes - nt!MiPurgeZeroList+6d (+0x2a652)
    [ 80 fa:00 81 ]
[COLOR=#ff0000]19 errors[/COLOR] : !nt (fffff8030c1371d2-fffff8030c1a004e)

MODULE_NAME: [COLOR=#ff0000]memory_corruption[/COLOR]

IMAGE_NAME:  memory_corruption

FOLLOWUP_NAME:  memory_corruption

DEBUG_FLR_IMAGE_TIMESTAMP:  0

MEMORY_CORRUPTOR:  LARGE

STACK_COMMAND:  .cxr 0xffffe101bc5cc7d0 ; kb

FAILURE_BUCKET_ID:  MEMORY_CORRUPTION_LARGE

BUCKET_ID:  MEMORY_CORRUPTION_LARGE

PRIMARY_PROBLEM_CLASS:  MEMORY_CORRUPTION_LARGE

TARGET_TIME:  2017-01-15T19:51:08.000Z

OSBUILD:  14393

OSSERVICEPACK:  693

SERVICEPACK_NUMBER: 0

OS_REVISION: 0

SUITE_MASK:  784

PRODUCT_TYPE:  1

OSPLATFORM_TYPE:  x64

OSNAME:  Windows 10

OSEDITION:  Windows 10 WinNt TerminalServer SingleUserTS Personal

OS_LOCALE:

USER_LCID:  0

OSBUILD_TIMESTAMP:  2016-12-21 07:50:57

BUILDDATESTAMP_STR:  161220-1747

BUILDLAB_STR:  rs1_release

BUILDOSVER_STR:  10.0.14393.693

ANALYSIS_SESSION_ELAPSED_TIME: 126a

ANALYSIS_SOURCE:  KM

FAILURE_ID_HASH_STRING:  km:memory_corruption_large

FAILURE_ID_HASH:  {e29154ac-69a4-0eb8-172a-a860f73c0a3c}

Followup:     memory_corruption
outdated AsIO AsIO.sys & not needed also in the System, driverdate 2012!
Asus Utilities, uninstall.
memtest should run
Memtest86+ — Advanced Memory Diagnostic Tool
run it several hours, 10 different tests take ~ 4 hours or more (overnight job)
- Joined
- Jan 20, 2017
- Posts
- 6
-
-
#4
outdated AsIO AsIO.sys & not needed also in the System, driverdate 2012!
Asus Utilities, uninstall.memtest should run
Memtest86+ — Advanced Memory Diagnostic Tool
run it several hours, 10 different tests take ~ 4 hours or more (overnight job)
Thanks for getting back to me!
Regarding your first line, «outdated AsIO AsIO.sys & not needed also in the System, driverdate 2012!», where do I go to get the updated versions? Do I just need to download the latest bits from here: http://www.asus.com/uk/Motherboards/MAXIMUS_VII_RANGER/HelpDesk_Download/
I’ve run MemTest86+ for 4 passes and everything was fine, should I run it for much longer then?
- Joined
- Jan 20, 2017
- Posts
- 6
-
-
#5
-
-
#6
There is indeed a newer BIOS: 3003 2015/11/23
Now you’ve got 1104, 16/07/2014.
What can you try before updating bios (that could be risky) and drivers?
1) Load optimized defaults (in your bios) and check if the problem reappears.
2) Try to switch the RAM sticks to the black slots (although the red slots are recommended) and check if the problem reappears.
I can’t check the other drivers, see: MAXIMUS VII RANGER | Motherboards | ASUS Global
You have got a bios usb flashback port: check carefully your manual before updating the BIOS.
There are also other methods (chapter 2.2 and 3.11).
- Joined
- Jan 20, 2017
- Posts
- 6
-
-
#7
Hi ByteSlinger. :welcome:There is indeed a newer BIOS: 3003 2015/11/23
Now you’ve got 1104, 16/07/2014.What can you try before updating bios (that could be risky) and drivers?
1) Load optimized defaults (in your bios) and check if the problem reappears.
2) Try to switch the RAM sticks to the black slots (although the red slots are recommended) and check if the problem reappears.I can’t check the other drivers, see: MAXIMUS VII RANGER | Motherboards | ASUS Global
You have got a bios usb flashback port: check carefully your manual before updating the BIOS.
There are also other methods (chapter 2.2 and 3.11).
Thanks very much for the tips. I’ll try loading optimised defaults in the bios and see what happens.
Failing that I will try swapping RAM but if that’s the solution then I guess I’m going to need to buy a new Mobo as I’d like to add more RAM soon.
-
-
#8
It is most often the root cause of many problems.
- Joined
- Jan 20, 2017
- Posts
- 6
-
-
#9
Have you uninstalled the Asus AsIO/AsIO.sys driver?
It is most often the root cause of many problems.
I think I have already removed them.
Nothing «AsIO» comes up under ‘add / remove programmes’ or in RegEdit — Software
-
-
#10
If you have upload the .dmp file or rerun the data collection app.
Has Sysnative Forums helped you? Please consider donating to help us support the site!
-
Microsoft Support & Malware Removal
-
BSOD Crashes, Kernel Debugging
Skip to content
Как убрать KERNEL_THREAD_PRIORITY_FLOOR_VIOLATION (0x00000157)?
Как убрать « KERNEL_THREAD_PRIORITY_FLOOR_VIOLATION» ( 0x00000157)?
На компьютере или ноутбуке под управлением Windows появился «синий экран смерти»? После появления сообщения «
KERNEL_THREAD_PRIORITY_FLOOR_VIOLATION» (
0x00000157) система перезагружается? Ищите как исправить
0x00000157: «
KERNEL_THREAD_PRIORITY_FLOOR_VIOLATION»?
Как просмотреть информацию об ошибках, исправить ошибки в Windows 10, 8 или 7
Причины появления ошибки
- На жестком диске компьютера или ноутбука не достаточно места. Для правильной работы ОС Windows 10 на системном диске должно быть свободно 2 — 10 ГБ.
- На компьютер был установлен не совместимый BIOS или прошивка была повреждена.
- Установлены не совместимые с ОС драйвера устройств.
- Реестр Windows был поврежден или удален. Возможно в результате очистки были удалены системные ключи реестра.
- Ативирусное программное обеспечение или компьютерные вирусы могут заблокировать системные файлы или удалить важные ключи реестра.
- В результате ошибок в работе программы для резервного копирования.
- В результате обновления ОС Windows.
Актуально для ОС: Windows 10, Windows 8.1, Windows Server 2012, Windows 8, Windows Home Server 2011, Windows 7 (Seven), Windows Small Business Server, Windows Server 2008, Windows Home Server, Windows Vista, Windows XP, Windows 2000, Windows NT.
Вот несколько способов исправления ошибки «
KERNEL_THREAD_PRIORITY_FLOOR_VIOLATION»:
Восстановите удаленные файлы
Часто появление BSoD ошибок приводит к утери важных файлов. Блокировка файлов компьютерными вирусами, ошибки в работе программ для резервного копирования, повреждение или перезапись системных файлов, ошибки файловой системы или наличие битых секторов диска – это не далеко полный список причин удаления данных.
Исправление соответствующих ошибок восстановит работоспособность устройства, но не всегда восстановит повреждённые или утерянные файлы. Не всегда имеется возможность устранить ту или иную ошибку без форматирования диска или чистой установки операционной системы, что также может повлечь за собой утерю файлов.
Загрузите бесплатно и просканируйте ваше устройство с помощью Hetman Partition Recovery. Ознакомьтесь с возможностями программы и пошаговой инструкцией.
Запустите компьютер в «безопасном режиме»
Если ошибка «KERNEL_THREAD_PRIORITY_FLOOR_VIOLATION» (0x00000157) возникает в момент загрузки Windows и блокирует любую возможность работы с системой, попробуйте включить компьютер в «безопасном режиме». Этот режим предназначен для диагностики операционной системы (далее ОС), но функционал Windows при этом сильно ограничен. «Безопасный режим» следует использовать только если работа с системой заблокирована.
Чтобы запустить безопасный режим сделайте следующее:
- Перейдите в меню Пуск и выберите Параметры.
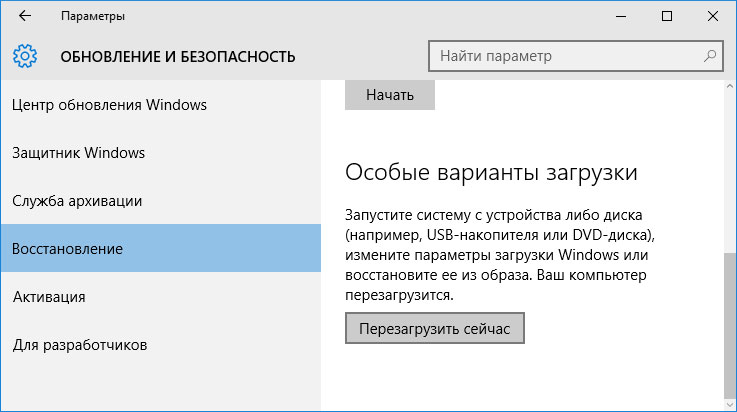
- В открывшемся окне параметров перейдите в меню Обновление и Безопасность и выберите раздел Восстановление.
- В разделе Восстановление найдите Особые варианты загрузки и нажмите кнопку Перезагрузить сейчас.
- После этого Windows перезагрузится и предложит выбрать следующее действие. Выберите Поиск и устранение неисправностей.
- В меню Поиск и устранение неисправностей кликните на Дополнительные параметры, далее — Параметры загрузки.
- Далее Windows уведомит вас о том, что компьютер можно перезагрузить с использованием дополнительных параметров загрузки. Укажите — Включить безопасный режим. Нажмите Перезагрузить.
- После перезагрузки выберите Включить безопасный режим нажав клавишу F4.
Как загрузить Windows в безопасном режиме
Обновите драйвер через Диспетчер устройств
Вы установили новое аппаратное обеспечение на компьютере? Возможно вы начали использовать новое USB-устройство с вашим компьютером. Это могло привести к ошибке «KERNEL_THREAD_PRIORITY_FLOOR_VIOLATION». Если вы установили драйвер устройства используя диск, который поставляется вместе с ним, или использовали драйвер не c официального сайта Microsoft, то причина в нем. Вам придется обновить драйвер устройства, чтобы устранить эту проблему.
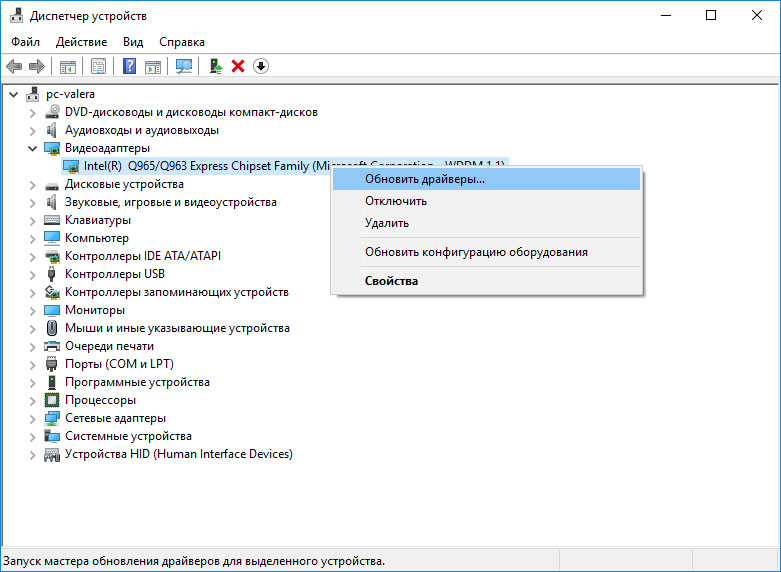
Вы можете сделать это вручную в диспетчере устройств Windows, для того выполните следующие инструкции:
- Нажмите кнопку Windows, затем введите диспетчер устройств с клавиатуры.
- Выберите Диспетчер устройств из списка.
- Просмотрите список категорий устройств, нажмите на стрелочку рядом с категорией вашего нового устройства. Драйвер может быть отмечен желтым треугольником.
- Кликните правой кнопкой мыши на имя устройства и нажмите Обновить драйвер.
- Далее откроется окно Мастера обновления драйверов с двумя опциями:
- Автоматический поиск обновленных драйверов. Windows проверит наличие наиболее подходящего драйвера для этого устройства в автоматическом режиме.
- Выполнить поиск драйверов на этом компьютере. Используйте эту опцию, что бы самостоятельно указать ОС файлы драйвера.
Перезагрузите компьютер после установки драйвера.
Используйте sfc /scannow для проверки всех файлов системы
Повреждение или перезапись системных файлов может привести к ошибке «KERNEL_THREAD_PRIORITY_FLOOR_VIOLATION». Команда sfc находит поврежденные системные файлы Windows и заменяет их.
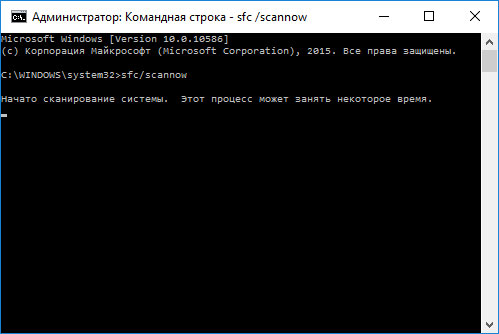
- Нажмите кнопку Windows, затем введите cmd с клавиатуры.
- Правой кнопкой мышки кликните на CMD и запустите от имени администратора.
- В окне командной строки введите sfc /scannow и нажмите Enter.
Этот процесс может занять несколько минут.
Как восстановить системные файлы Windows 10

Проверьте диск с Windows на наличие ошибок командой chkdsk c: /f
Возможно к синему экрану с «KERNEL_THREAD_PRIORITY_FLOOR_VIOLATION» привела ошибка файловой системы или наличие битых секторов диска. Команда CHKDSK проверяет диск на наличие ошибок файловой системы и битых секторов. Использование параметра /f заставит программу автоматически исправлять найденные на диске ошибки, а параметр /r позволяет найти и «исправить» проблемные сектора диска. Для запуска следуйте инструкциям:
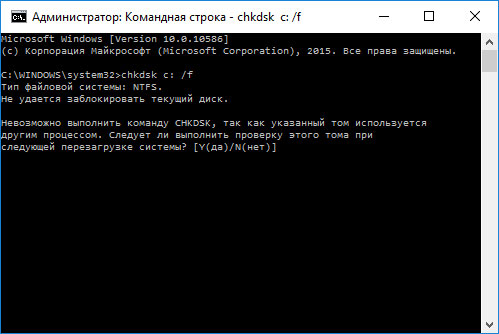
- Нажмите кнопку Windows, затем введите CMD с клавиатуры.
- Правой кнопкой мышки кликните на CMD и запустите от имени администратора.
- В окне командной строки введите chkdsk c: /f и нажмите Enter (используйте ту букву диска, на котором установлена ОС).
Дождитесь окончания процесса и перезагрузите компьютер.
Используйте режим совместимости со старой версией Windows
Отключите лишние программы из автозагрузки Windows
Программное обеспечение, вызывающее «KERNEL_THREAD_PRIORITY_FLOOR_VIOLATION» (0x00000157), может быть прописано в автозагрузку Windows и ошибка будет появляться сразу после запуска системы без вашего участия. Удалить программы из автозагрузки можно с помощью Диспетчера задач.

- Загрузитесь в Безопасном режиме.
- Кликните правой кнопкой мышки на Панели задач, затем на пункте Диспетчер задач.
- Перейдите на вкладку Автозагрузка.
- Чтобы убрать ту или иную программу из автозагрузки выберите её из списка и отключите, нажав кнопку Отключить в правом нижнем углу окна.
Обратитесь в поддержку Microsoft
Microsoft предлагает несколько решений удаления ошибки «голубого экрана». «KERNEL_THREAD_PRIORITY_FLOOR_VIOLATION» (0x00000157) можно убрать с помощью Центра обновления или обратившись в поддержку Windows.
- Перейдите на сайт технической поддержки Microsoft.
- Введите код и сообщение об ошибке в поисковую строку и следуйте найденным рекомендациям.
- Если вы не найдете готового решения, то задайте вопрос в сообществе — возможно вам ответит сертифицированный системный администратор.
Установите последние обновления системы
С обновлениями Windows дополняет базу драйверов, исправляет ошибки и уязвимости в системе безопасности. Загрузите последние обновления, что бы избавиться от ошибки «KERNEL_THREAD_PRIORITY_FLOOR_VIOLATION» (0x00000157).
Запустить Центр обновления Windows можно следующим образом:
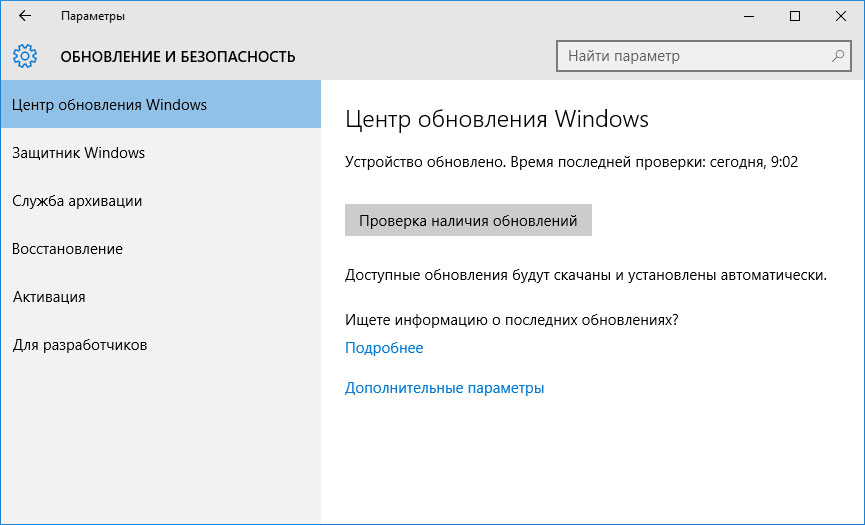
- Перейдите в меню Пуск и выберите Параметры.
- В окне Параметров перейдите в меню Обновление и Безопасность.
- Для установки последних обновлений Windows нажмите кнопку Проверка наличия обновлений и дождитесь окончания процесса их поиска и установки.
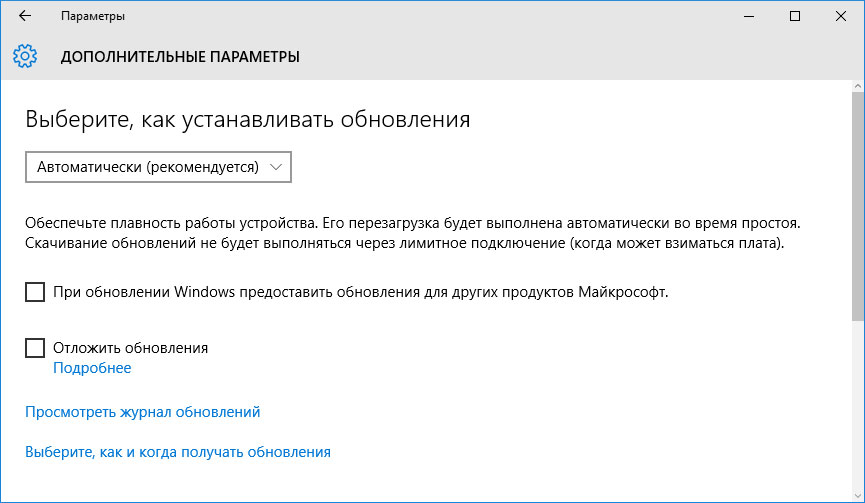
Рекомендуется настроить автоматическую загрузку и установку обновлений операционной системы с помощью меню Дополнительные параметры.
Чтобы включить автоматическое обновление системы необходимо запустить Центр обновления Windows:
- Перейдите в меню Пуск и выберите Параметры.
- В окне Параметров перейдите в меню Обновление и Безопасность и выберите подменю Центр обновления Windows. Для установки последних обновлений Windows нажмите кнопку Проверка наличия обновлений и дождитесь окончания процесса их поиска и установки.
- Перейдите в Дополнительные параметры и выберите, как устанавливать обновления — Автоматически.
Запустите проверку системы на вирусы
«Синий экран смерти» с ошибкой «KERNEL_THREAD_PRIORITY_FLOOR_VIOLATION» 0x00000157 может вызывать компьютерный вирус, заразивший систему Windows.
Для проверки системы на наличие вирусов запустите установленную на компьютере антивирусную программу.
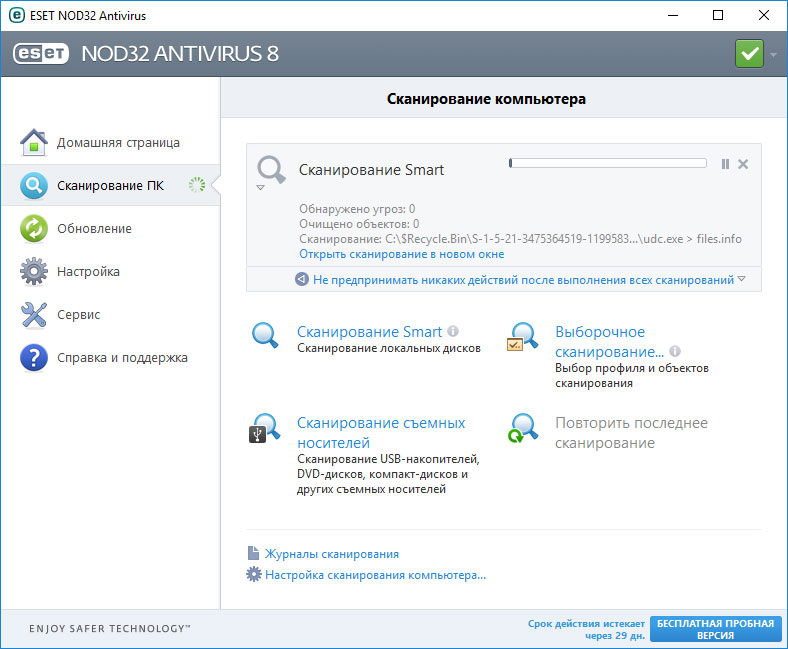
Современные антивирусы позволяют проверить как жесткие диски, так и оперативную память. Выполните полную проверку системы.
Выполните проверку оперативной памяти
Неполадки с памятью могут привести к ошибкам, потере информации или прекращению работы компьютера.
Прежде чем проверять оперативную память, отключите её из разъёма на материнской плате компьютера и повторно вставьте в него. Иногда ошибка KERNEL_THREAD_PRIORITY_FLOOR_VIOLATION» вызвана неправильно или не плотно вставленной в разъём планкой оперативной памяти, или засорением контактов разъёма.
Если предложенные действия не привели к положительному результату, исправность оперативной памяти можно проверить средствами операционной системы, с помощью средства проверки памяти Windows.
Запустить средство проверки памяти Windows можно двумя способами:
- С помощью Панели управления:
Перейдите в Панель управления / Система и безопасность / Администрирование. Запустите приложение Средство проверки памяти Windows.
- С помощью средства Выполнить:

Запустите средство Выполнить с помощью комбинации клавиш Windows + R. Наберите mdsched и нажмите Enter. После чего откроется средство проверки Windows.
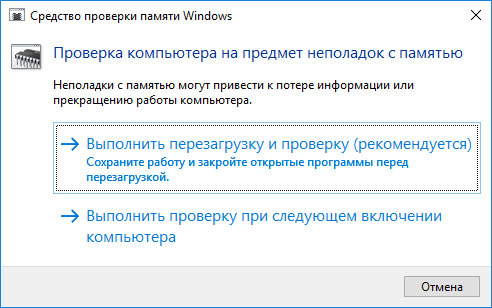
Для начала проверки выберите один из предлагаемых вариантов, проверка оперативной памяти в соответствии с которым будет запущена после перезагрузки компьютера.
Если в результате проверки будут определены ошибки, исправить которые не представляется возможным, то такую память необходимо заменить (замене подлежит модуль памяти с неполадками).
Выполните «чистую» установку Windows
Если не один из перечисленных методов не помог избавиться от KERNEL_THREAD_PRIORITY_FLOOR_VIOLATION», попробуйте переустановить Windows. Для того чтобы выполнить чистую установку Windows необходимо создать установочный диск или другой носитель с которого планируется осуществление установки операционной системы.
Загрузите компьютер из установочного диска. Для этого может понадобиться изменить устройство загрузки в BIOS или UEFI для более современных компьютеров.
Следуя пунктам меню установщика укажите диск, на который вы хотите установить Windows. Для этого понадобится отформатировать его. Если вас не устраивает количество или размер локальных дисков, их можно полностью удалить и заново перераспределить.
Помните, что форматирование, удаление или перераспределения дисков удалит все файлы с жесткого диска.
После указания диска для установки Windows запуститься процесс копирования системных файлов и установки операционной системы. Во время установки от вас не потребуется дополнительных действий. В течении установки экран компьютера будет несколько раз гаснуть на непродолжительное время, и для завершения некоторых этапов установки компьютер будет самостоятельно перезагружаться.
В зависимости от версии Windows на одном из этапов от вас может понадобиться выбрать или внести базовые параметры персонализации, режим работы компьютера в сети, а также параметры учётной записи или создать новую.
После загрузки рабочего стола чистую установку Windows можно считать законченной.
Примечание. Прежде чем приступить к выполнению чистой установки Windows заранее побеспокойтесь о наличии драйверов ко всем установленным устройствам и сохранности ваших файлов. Загрузите и сохраните драйвера на отдельный носитель информации, а для важных данных создайте резервную копию.
Как сбросить Windows 10 к исходному состоянию
Как сбросить Windows 10, 8, 7 если компьютер не загружается