
Getting the KERNEL_MODE_HEAP_CORRUPTION error on your Windows computer? This is a BSOD (Blue Screen of Death) error caused by a problem with how the Windows kernel handles memory. Do not panic, as these issues are pretty standard for a Windows user. This article will show you how you can fix the KERNEL_MODE_HEAP_CORRUPTION error. We’ll walk you through some troubleshooting steps that will help you get rid of this error.
What Causes the KERNEL_MODE_HEAP_CORRUPTION Error?
The KERNEL_MODE_HEAP_CORRUPTION error is one of the many BSOD errors sharing similar causes that include:
- Outdated drivers or software conflict
- Corrupted files
- Damaged or faulty hardware
- Memory leak
Fix KERNEL_MODE_HEAP_CORRUPTION Error in Windows 11/10
There are a few different ways that you can fix the KERNEL_MODE_HEAP_CORRUPTION error on your Windows 10 computer. We’ll walk you through each of them below:
1. Uninstall Programs or Drivers That Are Causing The Problem
If you suspect a program or driver is causing this error, you can try uninstalling it to see if that fixes the problem. To do this:
1. Press the Windows + X keys on your keyboard and select “Device Manager” from the menu that appears.
2. Expand the list of devices and find the one causing the problem.
3. Right-click on the device and select “Uninstall” from the context menu.
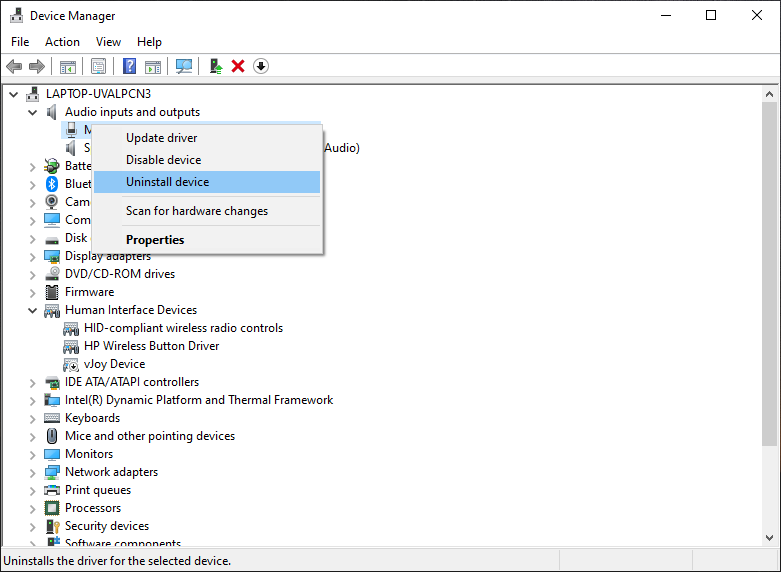
4. Restart your computer and check to see if the problem has been fixed.
2. Update Your Drivers
Another potential cause of this error is outdated or corrupt drivers. To combat this, you need to update your drivers.
1. Press Windows + X on your keyboard and select “Device Manager.”
2. Expand the list of devices and find the drivers that need to be updated.
3. Once found, right-click on the driver and select “Update Driver.”
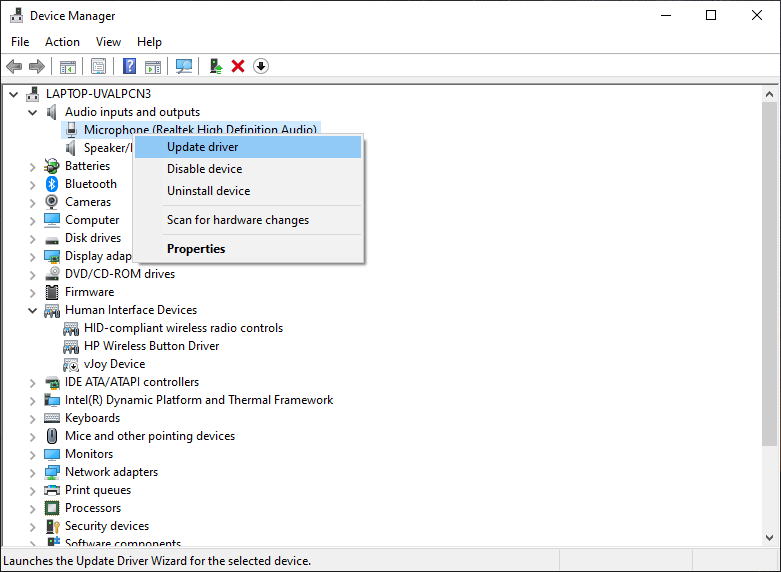
4. On the following screen, select “Search automatically for updated driver software.”

5. Do the same for other drivers as well.
6. Once done, restart your computer.
3. Roll back Corrupted Drivers
If you began encountering the KERNEL_MODE_HEAP_CORRUPTION error after a driver update, rolling it back should help.
1. Press Windows + X on your keyboard and select “Device Manager” from the menu.
2. Expand the list of devices and double-click the driver that could be causing the error.
3. On the properties screen, click “Roll Back Driver” under the “Driver” tab.
4. Click OK, and Windows will automatically install the previous driver version on your system.
5. Once done, restart your computer.
4. Run SFC/DISM Scan To Repair Corrupted Files
Corrupted files on your system can also trigger the KERNEL_MODE_HEAP_CORRUPTION error. To assist you with this, Windows provides two built-in utilities— SFC (System File Checker) and DISM (Deployment Image Servicing and Management). These utilities will scan your system files and repair any corrupted ones on their way.
RUN SFC Scan
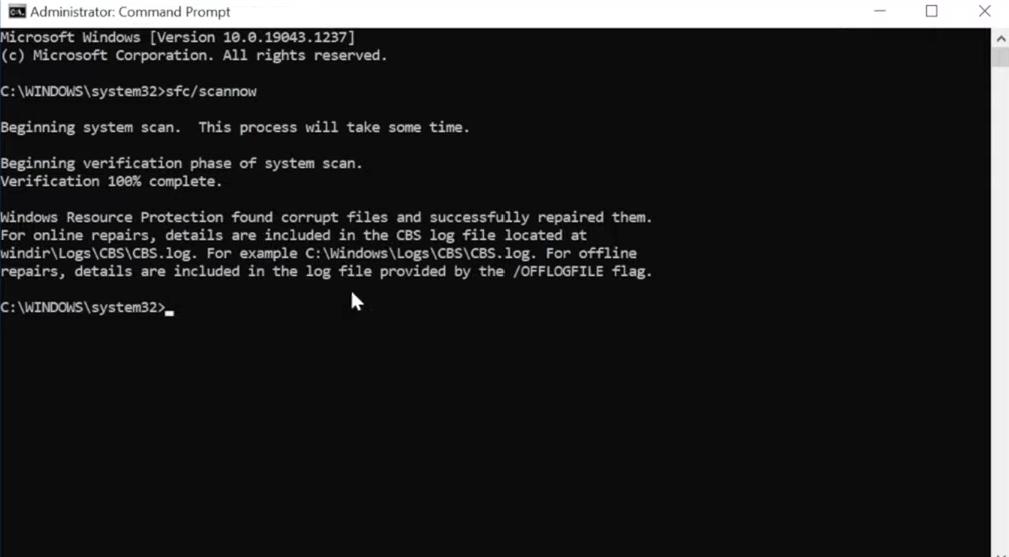
1. Press Windows + X and select “Command Prompt (Admin)” to open an elevated command prompt.
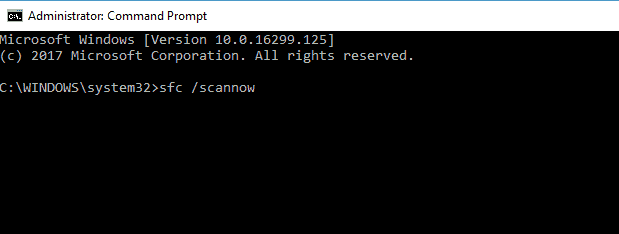
2. Next, type sfc/ scannow in the console and hit Enter.
3. The utility will scan and repair your corrupted system files. Once the process is done, restart your computer.
Run DISM Scan
1. Press Windows + X and select “Command Prompt (Admin)” to open an elevated command prompt.
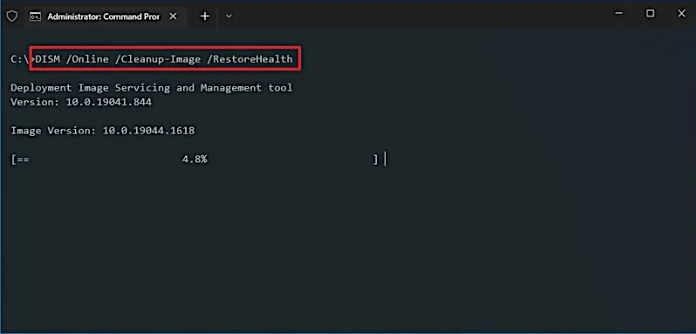
2. Type Dism /Online /Cleanup-Image /RestoreHealth in the console and hit Enter.
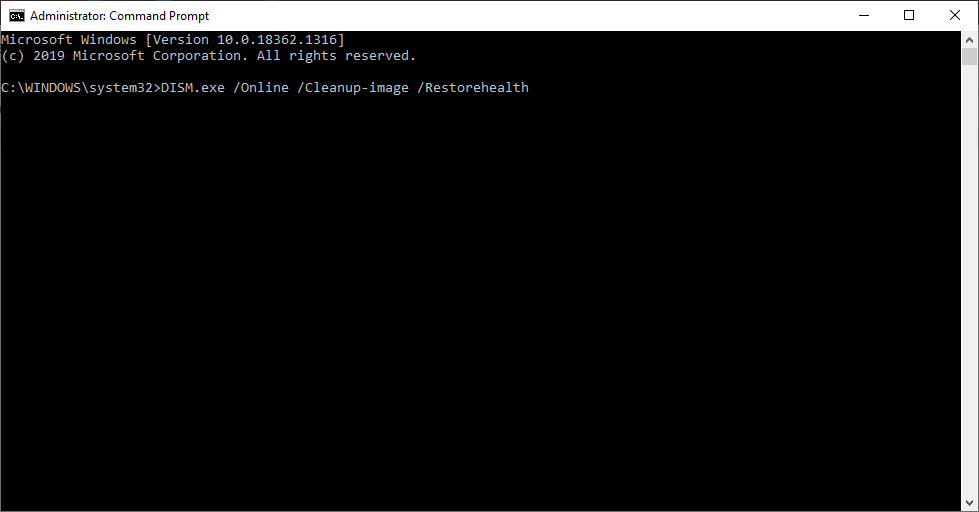
3. Restart your computer once the scan is finished.
5. Run the Windows Memory Diagnostic Tool
The KERNEL_MODE_HEAP_CORRUPTION error may also occur if your computer has memory problems. You can use the Windows Memory Diagnostic Tool to test the memory on your computer and find any errors. This tool is built into Windows, and you can run it by following these steps:
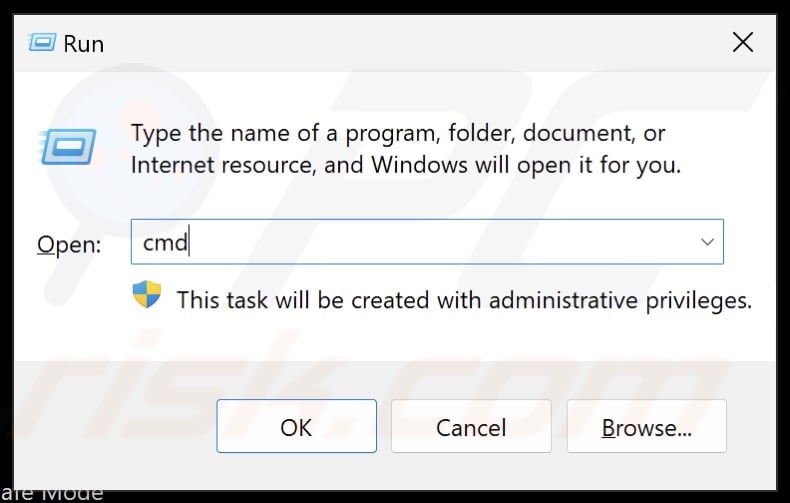
1. Press Windows + R on your keyboard to open the Run dialogue box.
2. Type “mdsched.exe” into the Run dialogue box and press Enter.
3. Click the “Restart now and check for problems (recommended)” option.
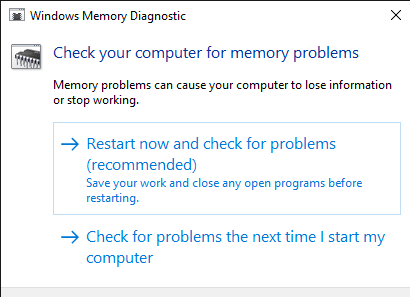
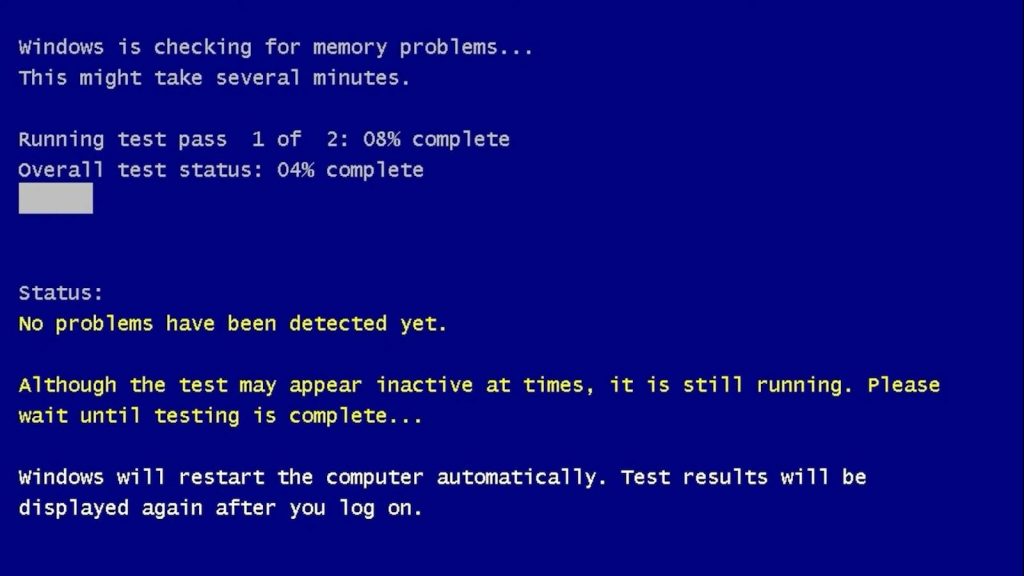
4. Your computer will restart and run the memory diagnostic tool.
5. Once the test is complete, you will see the results. You can try reseating your memory modules or replacing them entirely if there are any errors.
6. Use Safe Mode
If you still can’t fix this error, try booting into Safe Mode. In Safe Mode, only essential programs and services are loaded, so if there is a problem with a program or driver, it should not load in Safe Mode, which can help you narrow down the source of the problem.
With Networking Support
1. Press Windows + R on your keyboard to open the Run dialogue box.
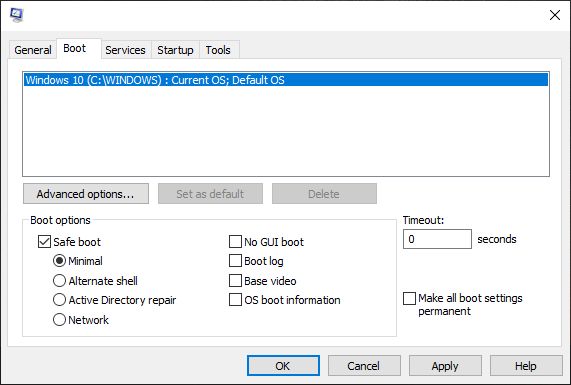
2. Type “msconfig” into the Run dialogue box and press Enter.
3. On the Boot tab of System Configuration, select “Safe Boot.”
4. Select “Network” from the menu.
5. Click “OK” and then restart your computer.

Without Networking Support
1. Follow steps 1-3 from above.
2. On the Boot tab of System Configuration, select “Safe Boot” and “Minimal” from the menu below it.
3. Click “OK” and then restart your computer.
Once in Safe Mode, try running whatever program or driver is causing this error again to see if it still causes problems.
7. Perform A System Restore
If you’ve recently installed a program or driver that is causing this error, you can use System Restore to undo the changes that were made. To do this, follow these steps:
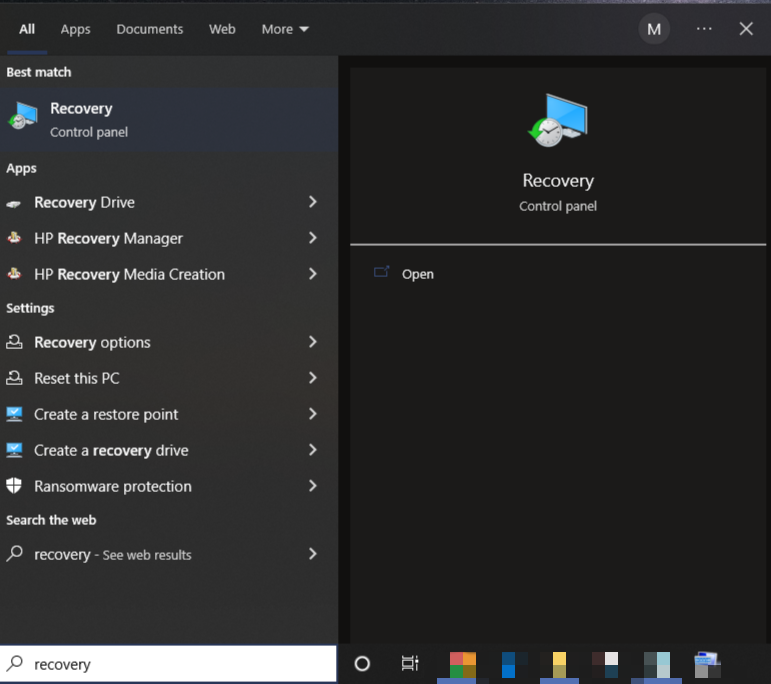
1. Search for “Recovery” and open it.
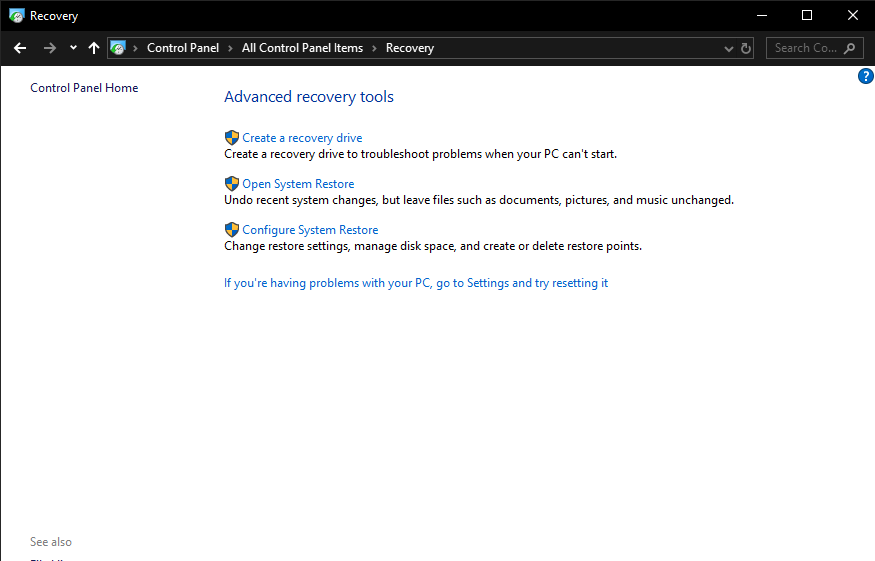
2. Click on “Open System Restore.”
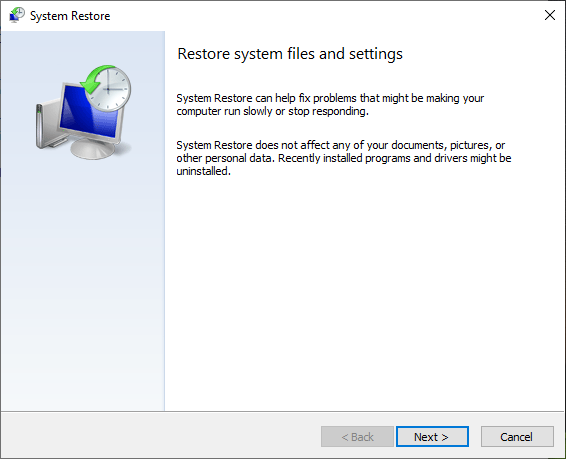
3. Click “Next” on the System Restore Wizard page that appears.
4. Choose a restore point from the list that appears and click “Next.”
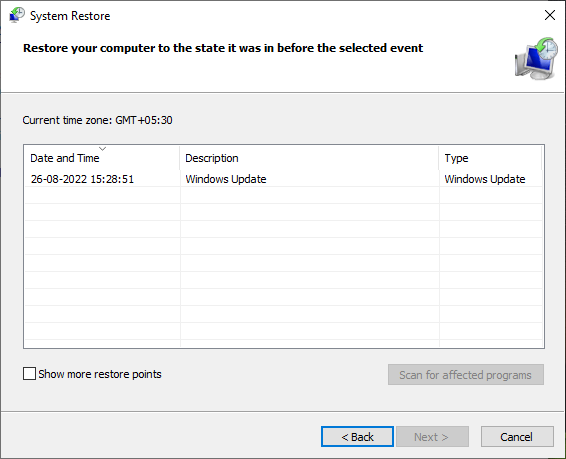
5. On the next page, click “Finish,” and your computer will restart.

Recover Data Lost Due To KERNEL_MODE_HEAP_CORRUPTION
The fixes mentioned above should help you eliminate the KERNEL_MODE_HEAP_CORRUPTION error. Like every BSOD error, the KERNEL_MODE_HEAP_CORRUPTION error occurs all of a sudden. You might be working on your computer, and the sudden shutdown can lead to data loss.
Thankfully, It is possible to recover your lost data. For that, you will need do-it-yourself data recovery software. A bunch of software claims to recover lost data from your computer. But you can’t trust every other software as not every software can fulfill its claims. If you ask us, our recommendation is Stellar Data Recovery Professional.
The software can recover deleted files from Hard disks, SSDs, USB drives, or SD cards. It supports recovering files, photos, videos, documents, emails, and more. You can even restore data from corrupted, encrypted, or formatted drives. Even if your drive is completely crashed or your system is unbootable, Stellar Data Recovery Professional will rescue you.
The software is compatible with the latest Windows 11 and older versions, such as 10, 8, and 7. Most importantly, you can take a preview of your data before saving it on your computer. If you want to try Stellar Data Recovery Professional, the software comes with an easy three-step data recovery process. We have listed the steps to make things even easier for you.
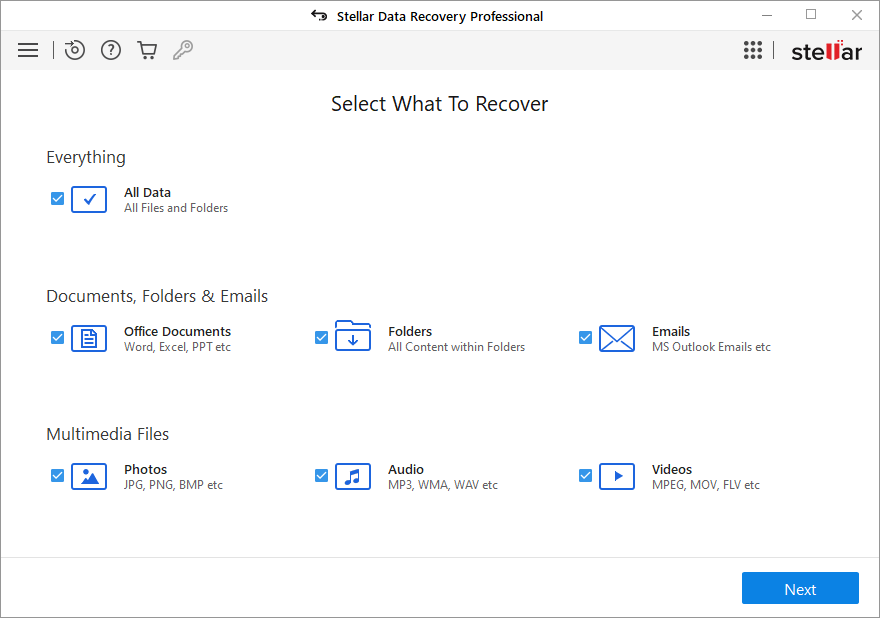
1. Open Stellar Data Recovery Professional on your Windows computer. On the very first screen, it will ask you to select what you want to recover. You can either select the specific files or check Everything. Once done, click on the Next button.
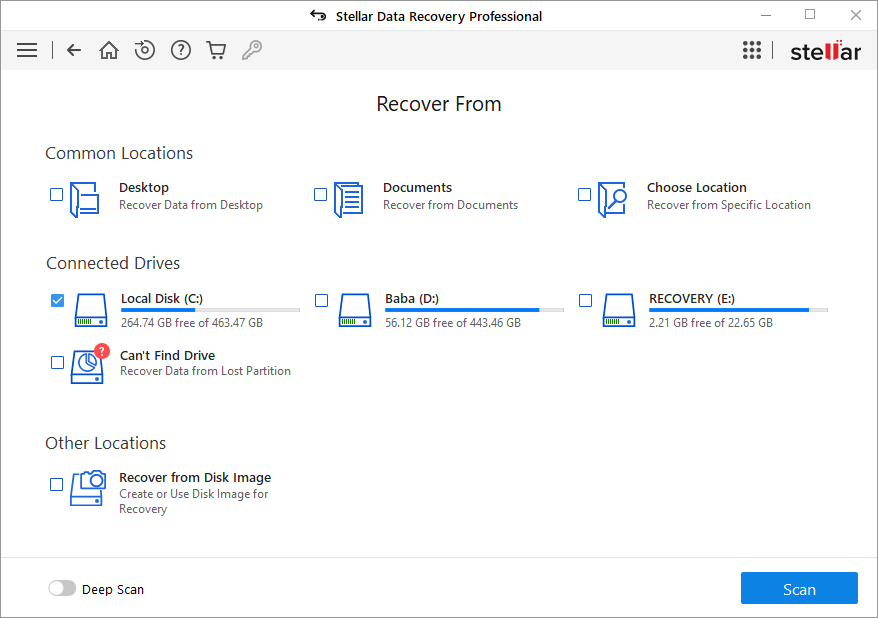
2. On the next screen, the software will ask you to select the drive from which you want to recover your data. Select the drive and tap on the Scan button.
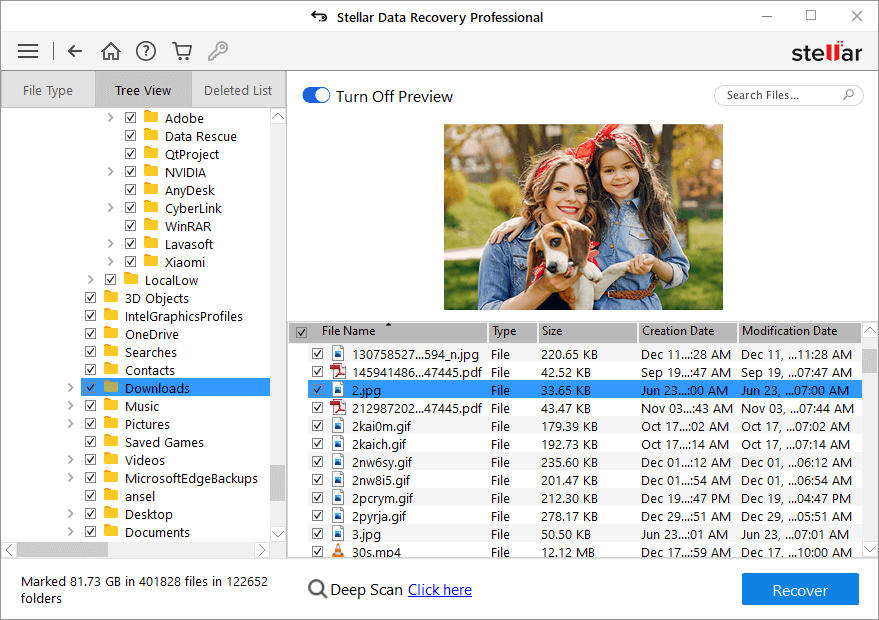
3. Depending on the lost data size, the software will take a few minutes to scan your drive and list the recoverable data. When it appears, go through all the folders and select the files you want to recover. Lastly, click the Recover button to save the files to the desired location on your computer.
Yes, It is that easy to recover your lost data due to the KERNEL_MODE_HEAP_CORRUPTION error using Stellar Data Recovery Professional.
Frequently Asked Questions
Why do I see the KERNEL_MODE_HEAP_CORRUPTION error on my Windows computer?
You see this error because there is a problem with your computer where Windows is unable to handle the memory correctly.
What causes the KERNEL_MODE_HEAP_CORRUPTION error?
This error is caused mainly due to outdated or corrupt drivers. However, other causes like problematic software, corrupt system files, and hardware incompatibility can also trigger this error. We have explained seven solutions to this error in this guide. Check them out to fix this error.
Conclusion
You can fix the KERNEL_MODE_HEAP_CORRUPTION error by taking a number of different steps. The most important thing to do is to update your drivers and Windows. You can also try disabling certain features, fixing corrupt files, or running a memory test. If you follow these steps, you should be able to fix the KERNEL_MODE_HEAP_CORRUPTION error.
Was this article helpful?
YES0
NO
How to Fix KERNEL MODE HEAP CORRUPTION on Windows 11
The KERNEL MODE HEAP CORRUPTION BSoD error can occur for various reasons, mainly memory-related issues, such as faulty RAM. Nevertheless, it can also occur due to driver and software-related.

This error often occurs when launching or after launching video games like Escape from Tarkov, Rainbow Six Siege, DayZ, Rust, Call of Duty Modern Warfare 3, and Valorant, which are very resource-intensive.
What Is KERNEL MODE HEAP CORRUPTION?
The KERNEL MODE HEAP CORRUPTION stop code error indicates that the kernel mode heap manager detected corruption in the heap or a specific data structure. This error is, thus, triggered when your system
What Causes KERNEL MODE HEAP CORRUPTION?
- Insufficient page file size. In most cases, you will get this error due to memory leaks or insufficient page file size. If the RAM module is not bad. increasing the page file size (virtual memory) may fix this error.
- Faulty RAM sticks. RAM sticks seldom go bad, but if they do, they give read/write errors, and you may start getting this error. Test your RAM for defective RAM sticks.
- Outdated or faulty device drivers. Outdated or faulty drivers, particularly graphics card drivers, may cause your system to become unstable and crash with the KERNEL MODE HEAP CORRUPTION error. Update all or as many device drivers as you can, chipset graphics card, network adapter USB, etc.
- Corrupted or missing system files. This error may occur when your system detects missing or corrupted system files that are crucial to system stability. Running Deployment Image & Servicing Management (DISM) and System File Checker (SFC) scans will fix all missing and corrupt files.
- Software conflicts. While rare, this error may be triggered by conflicting software in some cases. To verify that this error is caused by conflicting software, boot up your PC in Clean Boot mode. With Clean Boot mode, you can disable all third-party software and non-essential Windows processes. Also, if you have AMD StoreMI on your PC, uninstall it, as it is known to trigger this error.
If your PC crashes randomly or cannot stay running long enough to perform the fixes, please boot it up in Safe Mode, which disables all but the most necessary operating system components. Your PC will boot into WinRE after two consecutive failed attempts to start Windows.
Video Tutorial on How to Fix KERNEL MODE HEAP CORRUPTION
Table of Contents:
- Introduction
- Method 1. Run the Windows Memory Diagnostic Tool
- Method 2. Run Driver Verifier Manager
- Method 3. Update Device Drivers
- Method 4. Run the Deployment Image & Servicing Management (DISM) and System File Checker (SFC) Scans
- Method 5. Increase Page File Size (Virtual Memory)
- Video Tutorial on How to Fix KERNEL MODE HEAP CORRUPTION
Download Computer Malware Repair Tool
It is recommended to run a free scan with Combo Cleaner — a tool to detect viruses and malware on your device. You will need to purchase the full version to remove infections. Free trial available. Combo Cleaner is owned and operated by Rcs Lt, the parent company of PCRisk.com read more.
Method 1. Run the Windows Memory Diagnostic Tool
If your Random Access Memory (RAM) is faulty, run the Windows Memory Diagnostic tool. The tool will test your RAM for faults. If the scan detects problems, you will need to replace some or all of your RAM modules.
If your PC cannot run long enough to initiate the scan, try booting it in Safe Mode or Safe Mode with Networking. You can boot into Safe Mode by following steps 1-7.
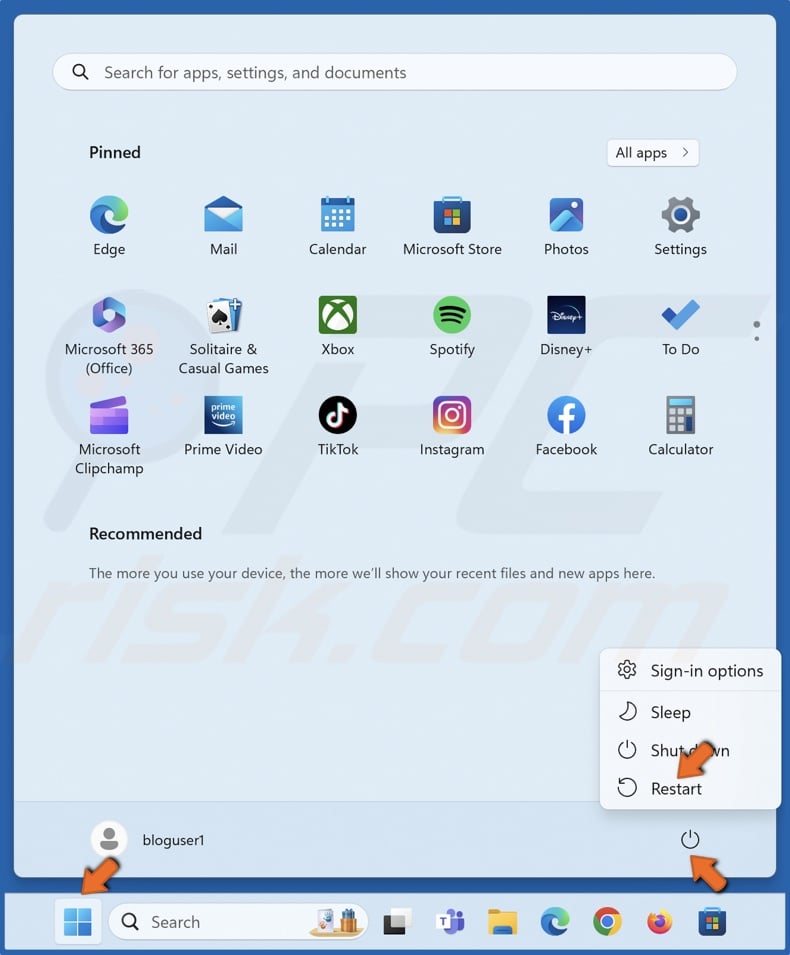
1. Open the Windows Start menu and click the Power button.
2. Hold down the Shift key and click Restart.
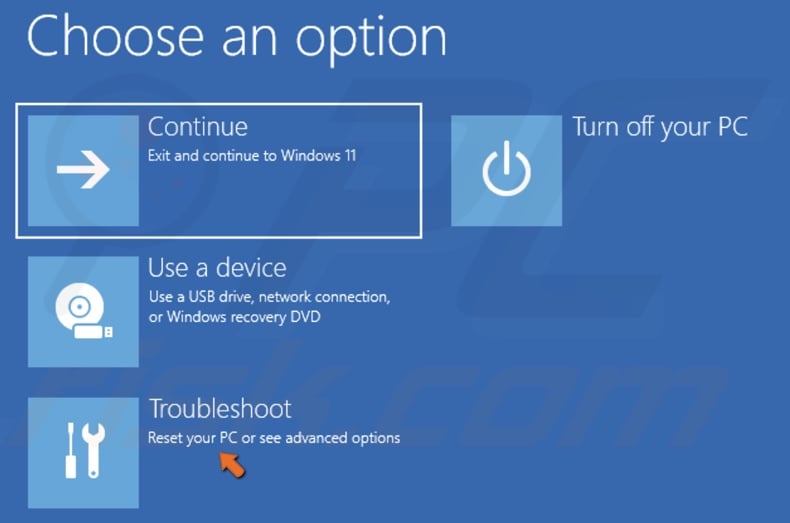
3. Select Troubleshoot.
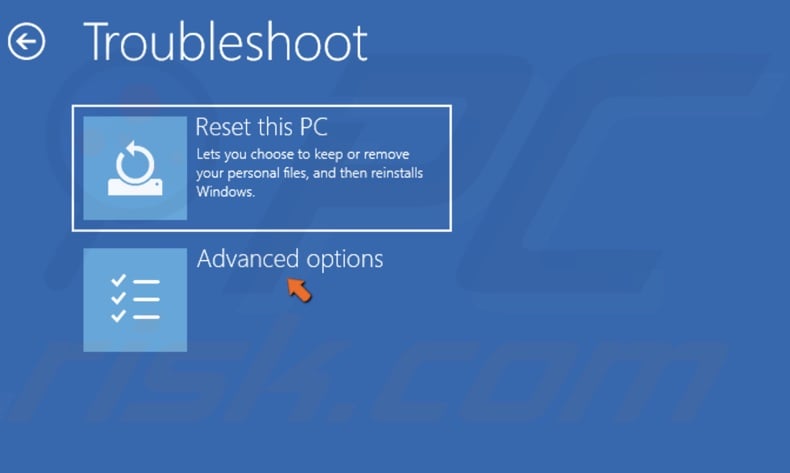
4. Select Advanced options.
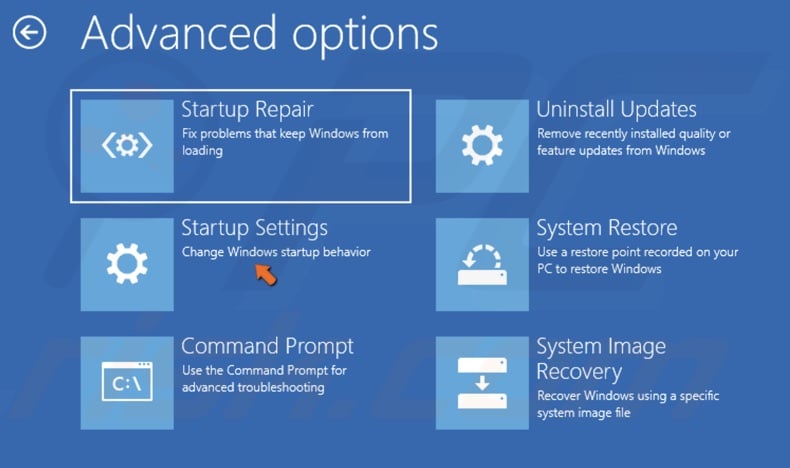
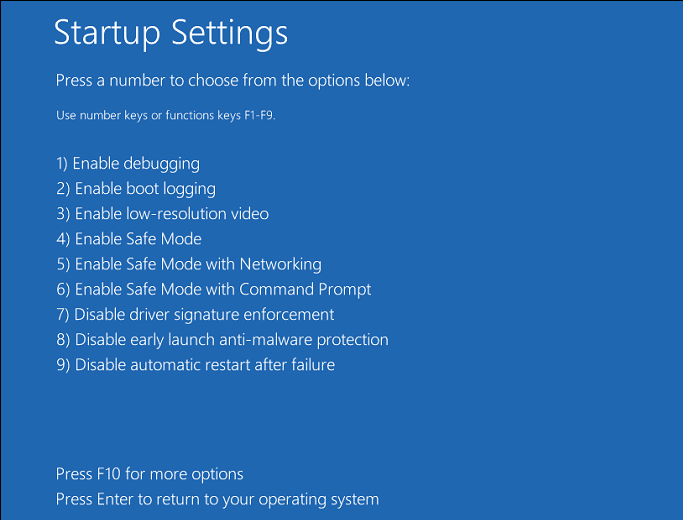
5. Select Startup Settings.
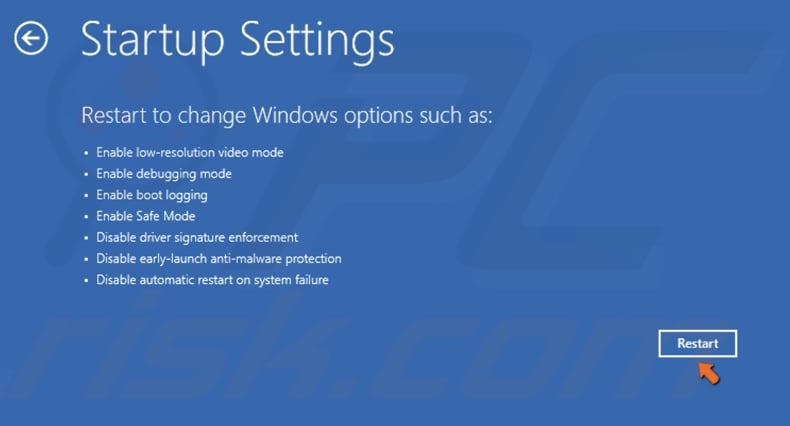
6. Click Restart.

7. Press the 5 or F5 key to boot your PC into Safe Mode with Networking.
8. Hold down Windows+R keys to open Run.
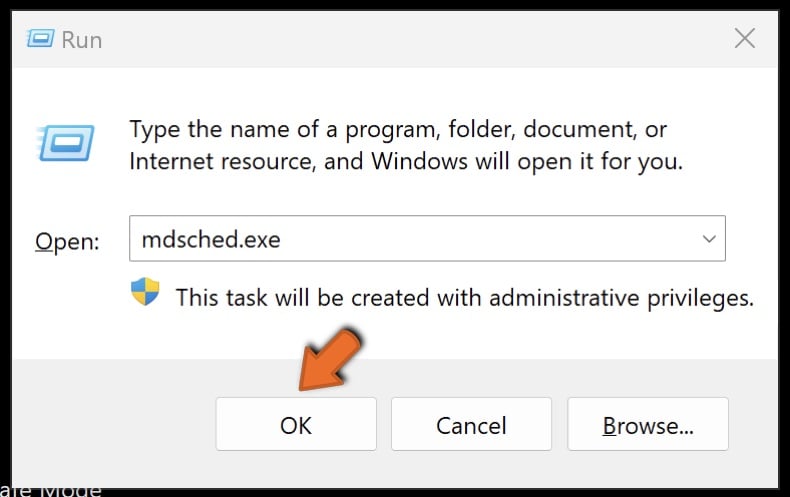
9. Type mdsched.exe in Run and click OK.
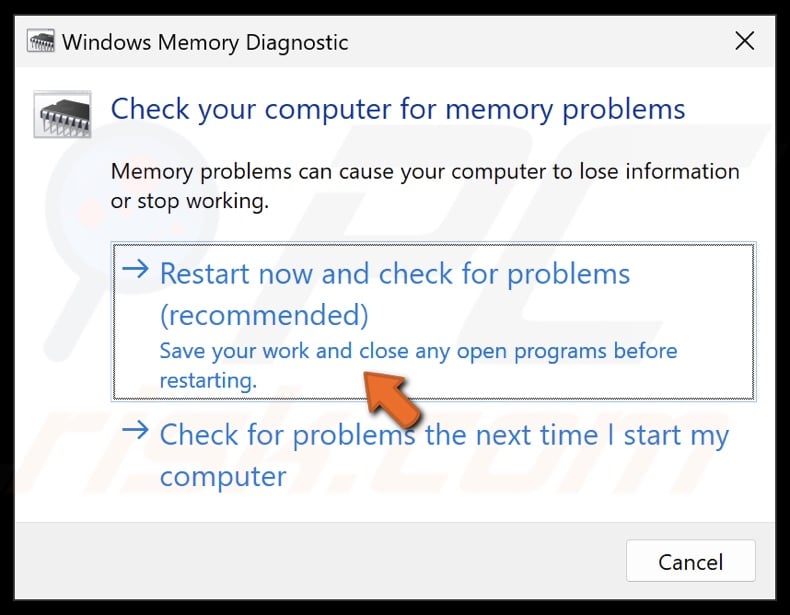
10. In the Windows Memory Diagnostic window, click Restart now and check for problems.
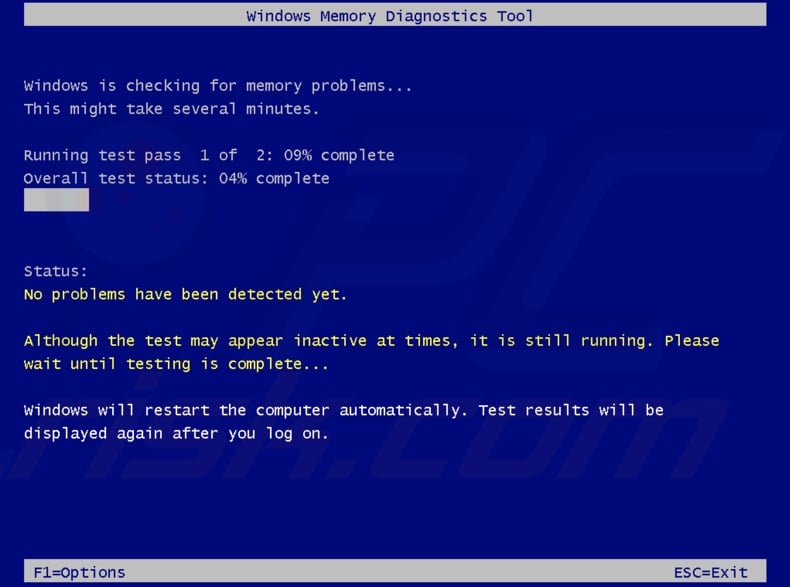
Your PC will restart and diagnose the memory. Once the diagnostic process is complete, your PC will boot up normally.
11. Once your PC boots up, open the diagnosis report. The report will let you know if your memory is faulty.
12. Hold down Windows+R keys to open Run.
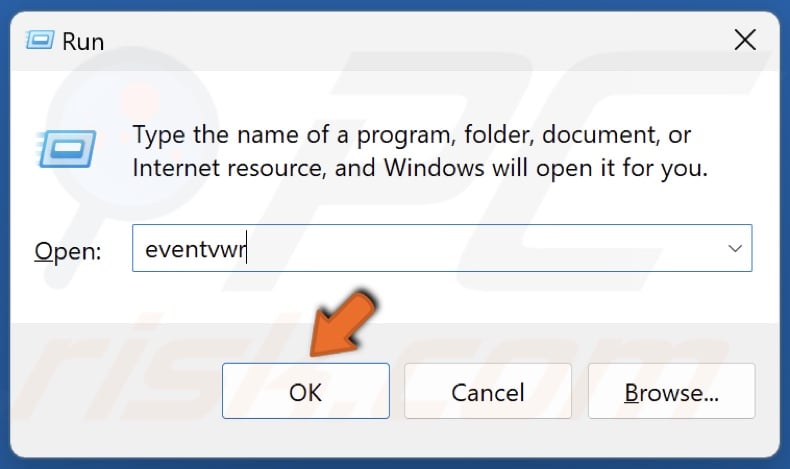
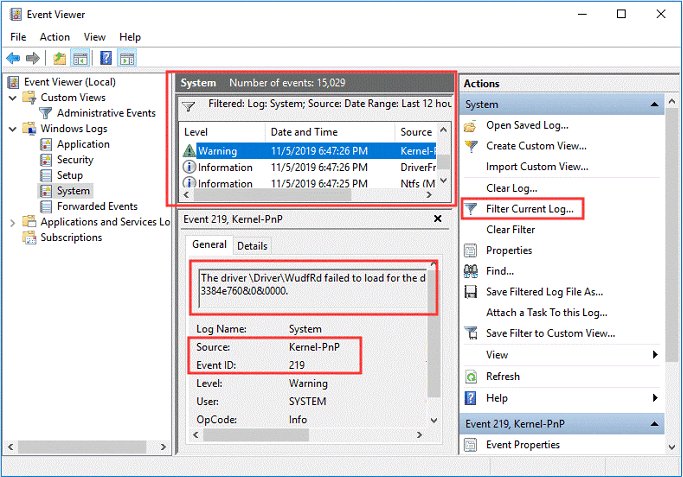
13. Type eventvwr in Run and click OK.
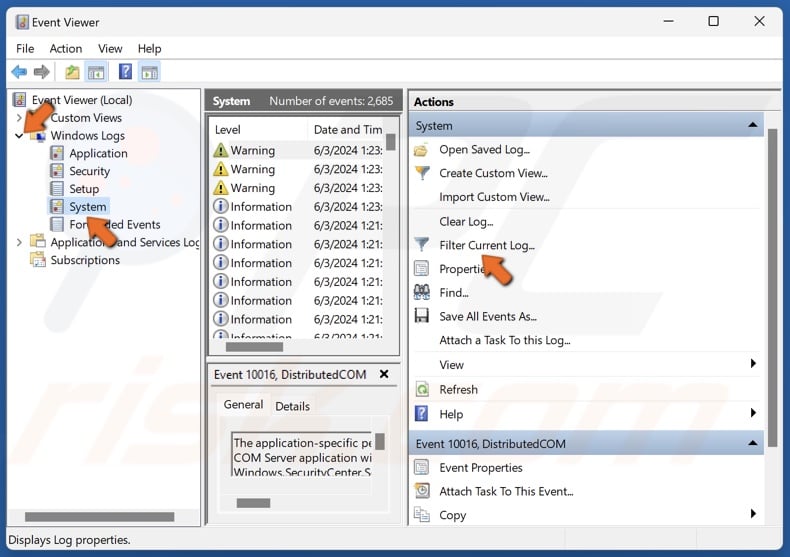
14. In Event Viewer, navigate to Windows Logs > System.
15. In the right pane, click Filter Current Log.
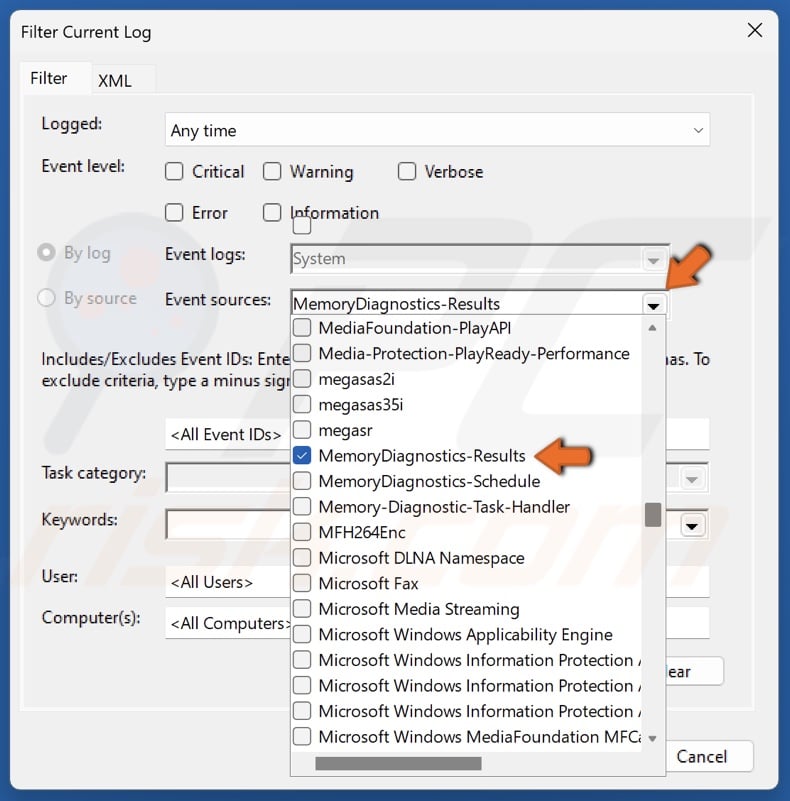
16. Open the Event sources drop-down menu and select MemoryDiagnostics-Results.
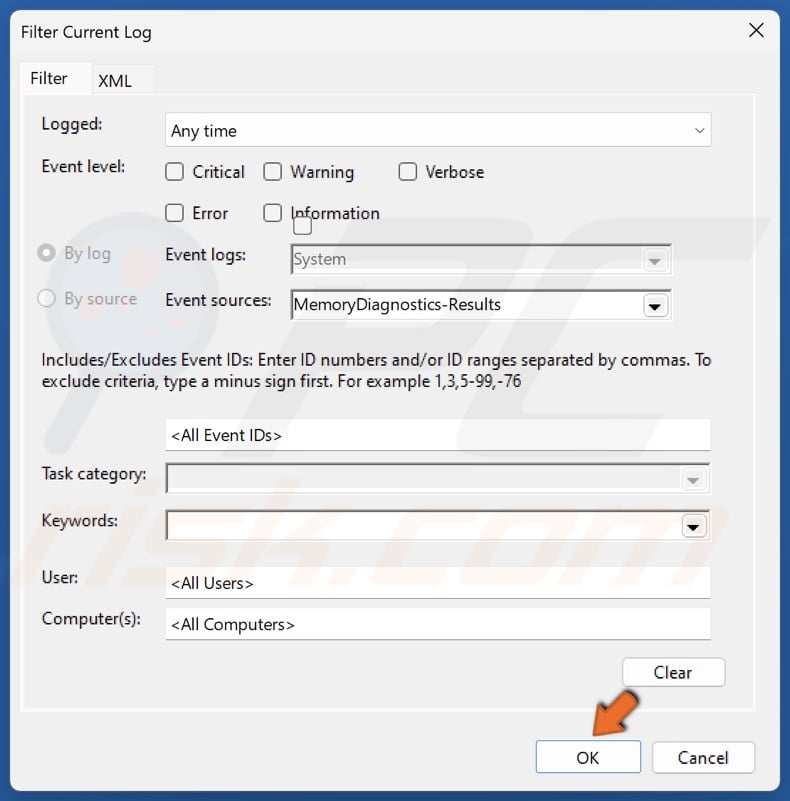
17. Click OK.
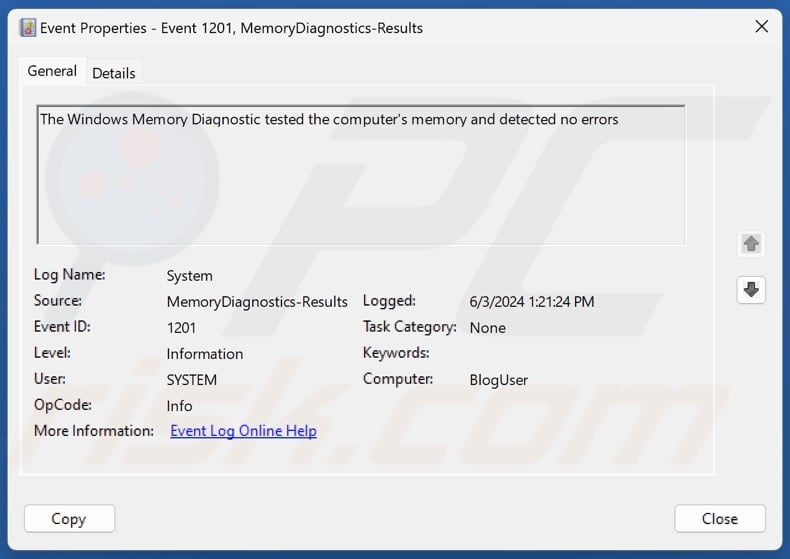
18. Double-click the results log. If there are memory errors, consider replacing your RAM. If there are no memory errors, proceed with the following fixes.
[Back to Table of Contents]
Method 2. Run Driver Verifier Manager
Run Driver Verifier Manager to determine whether the issue causing KERNEL MODE HEAP CORRUPTION is caused by corrupted or incompatible drivers. The Driver Verifier Manager will determine which drivers are faulty, but you will have to manually roll back, reinstall, or update them to fix the error.
1. Hold down Windows+R keys to open Run.
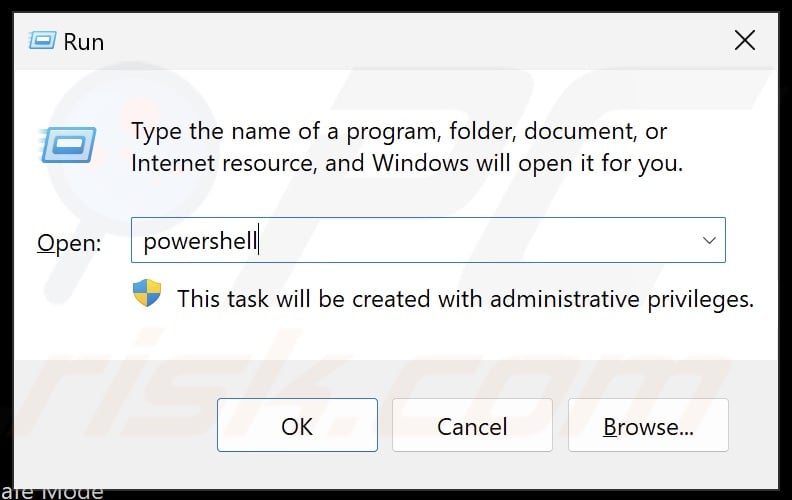
2. Type PowerShell in Run and hold down Ctrl+Shift+Enter keys to open PowerShell as an administrator.
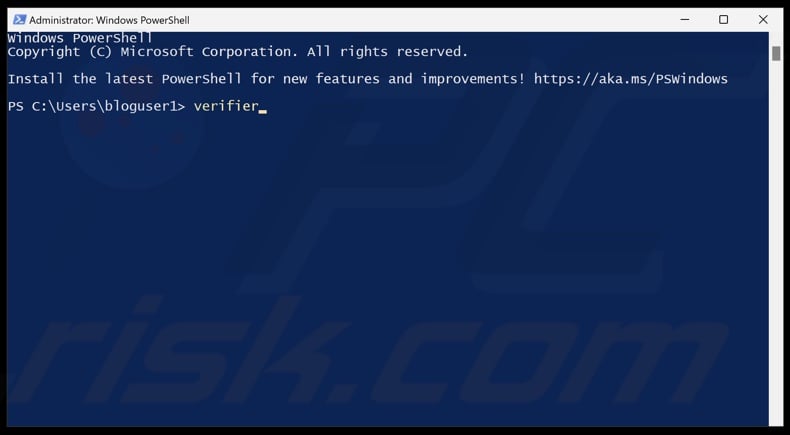
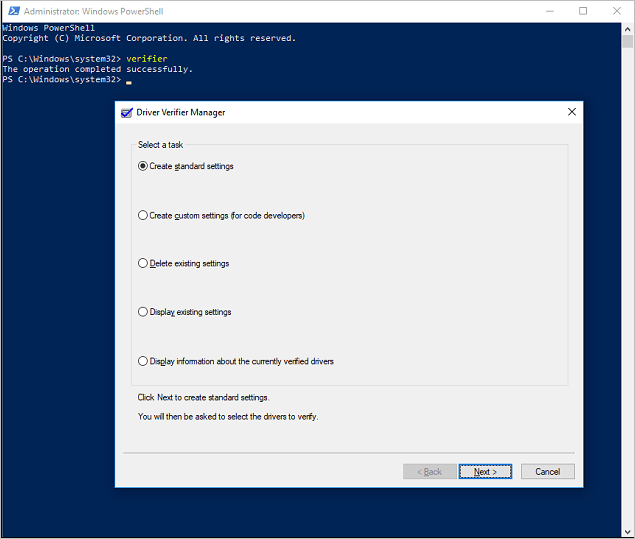
3. In PowerShell, type verifier, and press Enter.

4. Tick Create standard settings and click Next.

5. Then, tick Automatically select all drivers installed on this computer and click Finish.
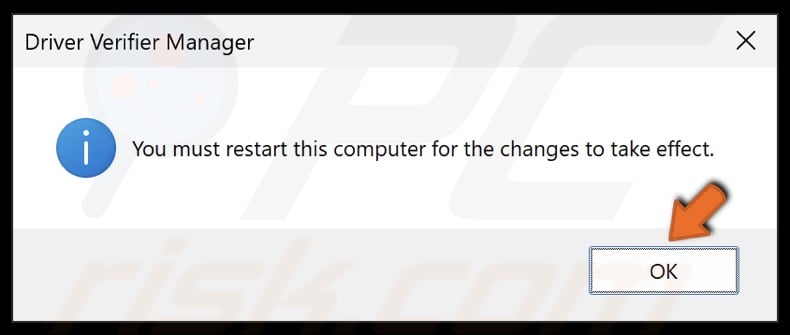
6. Click OK and restart your PC.
7. Hold down Windows+R keys to open Run.
8. Type PowerShell in Run and hold down Ctrl+Shift+Enter keys to open PowerShell as an administrator.
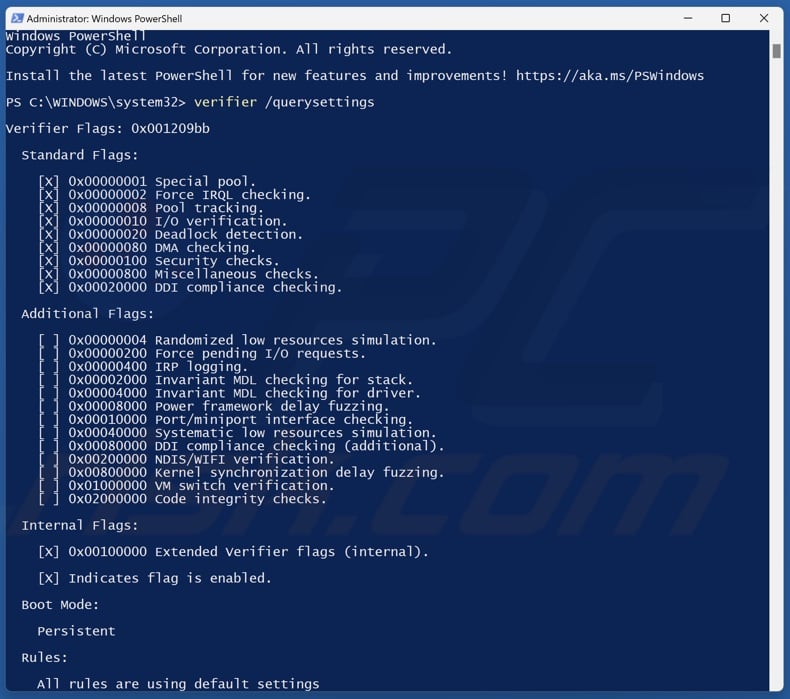
9. In PowerShell, type verifier /querysettings, and press Enter. This command will show you the current Driver Verifier settings.
10. You will need to use your computer with Driver Verifier enabled and wait until it crashes again with the KERNEL MODE HEAP CORRUPTION error. Windows will save the crash information as a DMP file.
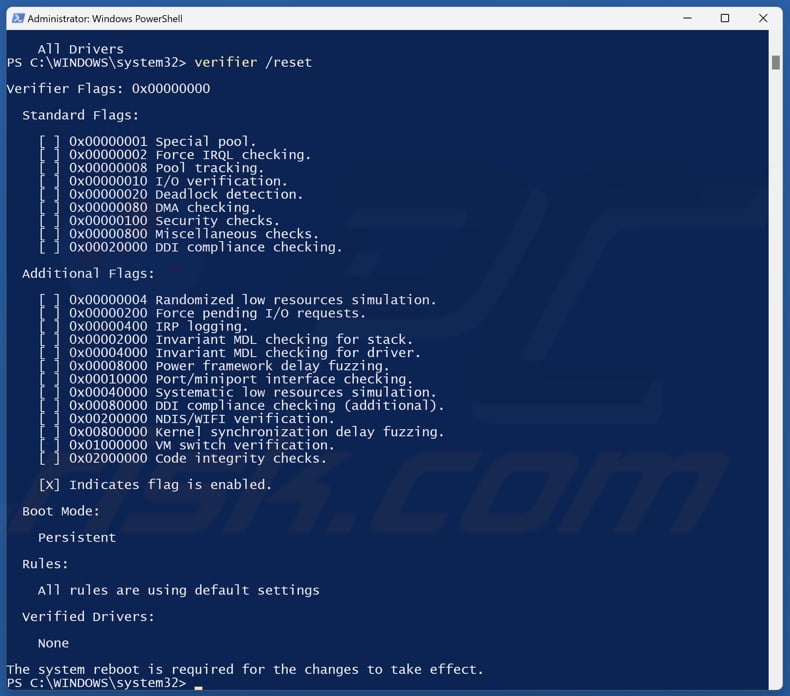
11. After a crash, type in verifier /reset and press Enter. This command will disable the Driver Verifier.
12. Close PowerShell and restart your PC.
13. To determine which driver caused the error, download BlueScreenView to view DMP files.
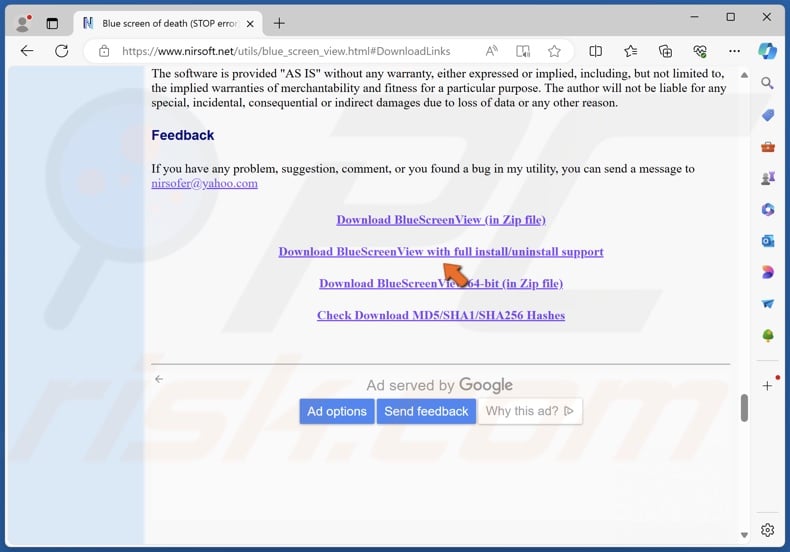
14. Open your web browser and go to the BlueScreenView download page.
15. Click Download BlueScreenView with full install/uninstall support.
16. Run the bluescreenview_setup once it’s downloaded.
17. Follow the installation wizard guide.
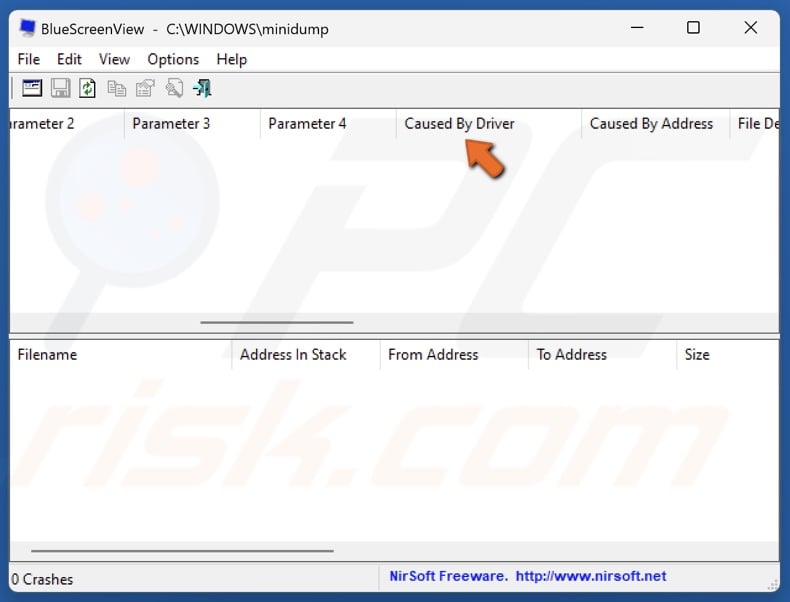
18. Select the most recent file and scroll horizontally to the Caused by Driver column. The file name will allow you to identify which driver caused the crash.
19. Then, proceed to reinstall, update, or roll back the corrupted driver.
[Back to Table of Contents]
Method 3. Update Device Drivers
In many cases, the KERNEL MODE HEAP CORRUPTION error occurs due to a corrupted or incompatible driver, often the GPU driver.
However, updating the GPU driver doesn’t always work. You need to completely remove the driver using DDU (Display Driver Uninstaller) and install the latest driver or downgrade to an older version.

1. Right-click the Windows Start button and select Device Manager.
2. Go through the devices list and look for devices with a yellow triangle and an exclamation mark. This symbol indicates an issue with the device.
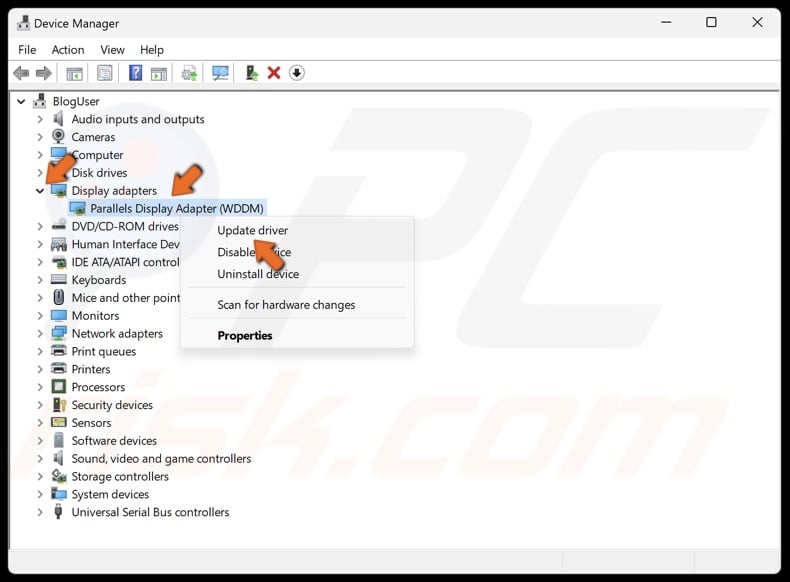
3. Right-click the device and click Update driver.
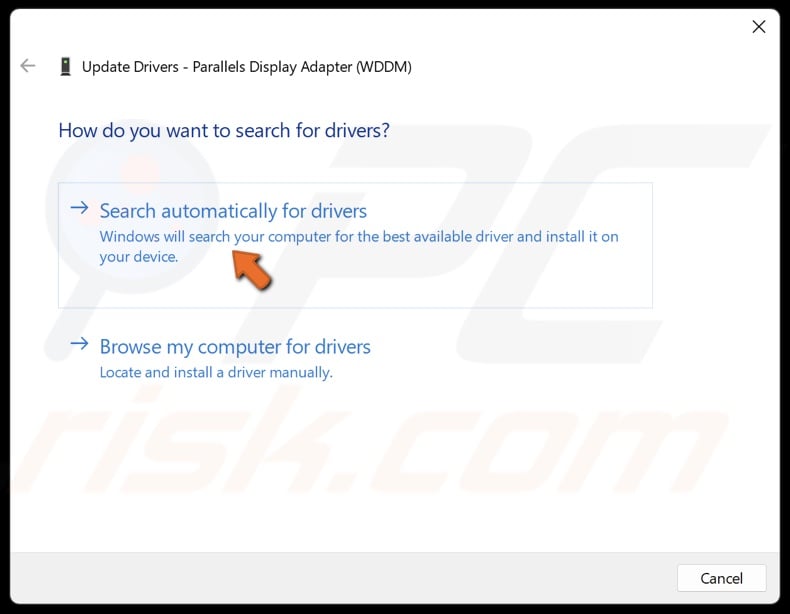
4. Select Search automatically for drivers. Windows will automatically install the best driver available on your computer.

5. Alternatively, select Browse my computer for drivers.
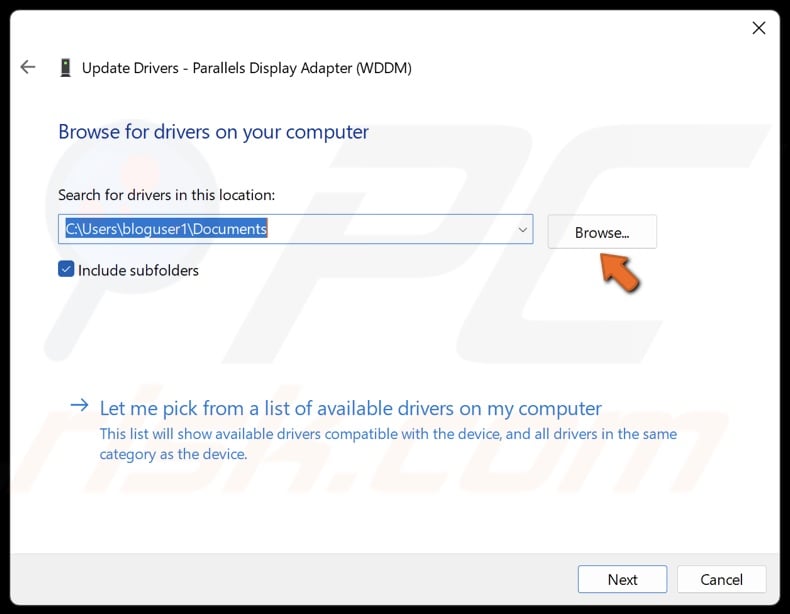
6. Click Browse and select a driver downloaded from the device vendor’s website. You can also download the graphics card drivers for Intel, Nvidia, and AMD manually from their respective websites.

7. Alternatively, select Let me pick from a list of available drivers on my computer.
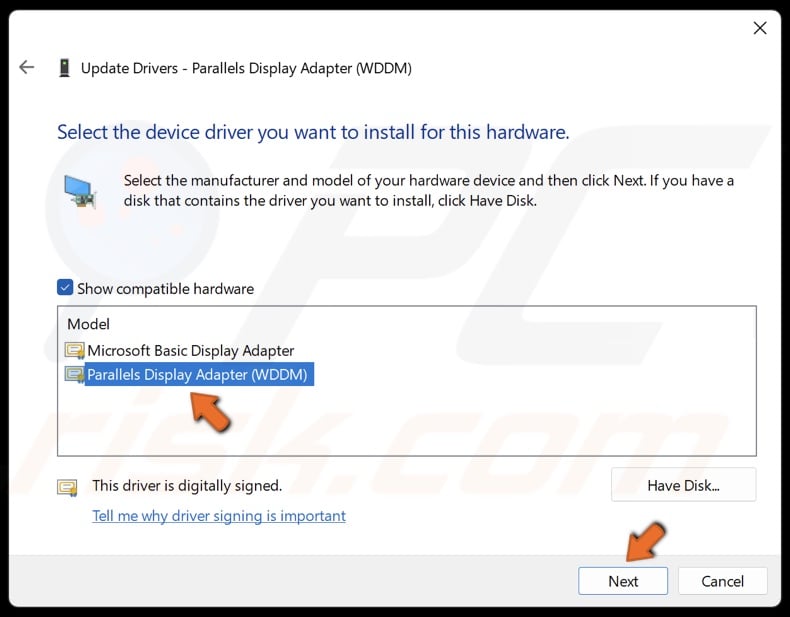
8. Select a compatible driver from the drivers list and click Next.
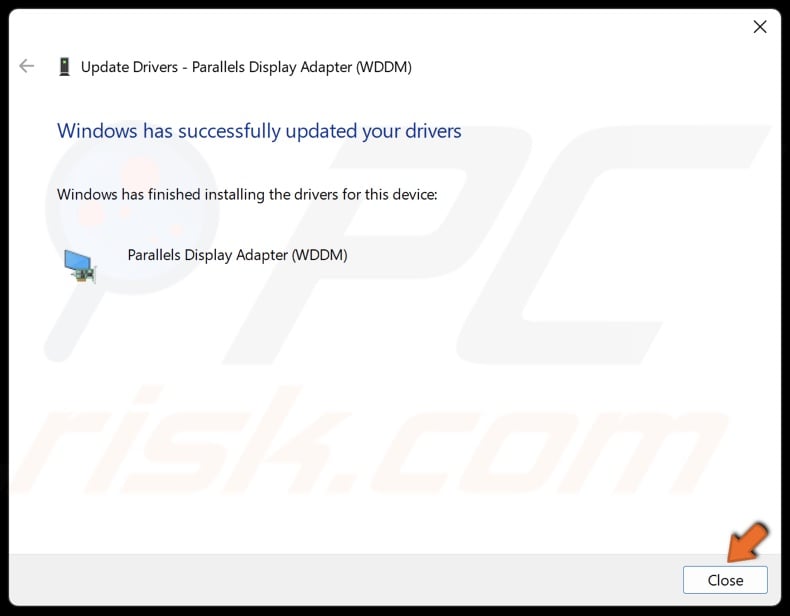
9. Click Close after installing the driver and restart your PC.
However, while likely, your GPU may not be the exact cause for the error, so make sure to update as many device drivers as possible using Device Manager.
[Back to Table of Contents]
Method 4. Run the Deployment Image & Servicing Management (DISM) and System File Checker (SFC) Scans
You may get the KERNEL MODE HEAP CORRUPTION error due to corrupted system files. To repair and replace corrupted and missing system files, run DISM and SFC commands.
Deployment Image Servicing and Management (DISM) is a command-line tool for repairing a damaged or corrupted Windows image. System File Checker (SFC) is a utility for repairing and replacing corrupted Windows system files.
1. Hold down Windows+R keys to open Run.
2. Type in CMD in Run and hold down Ctrl+Shift+Enter keys to open Command Prompt as an administrator.
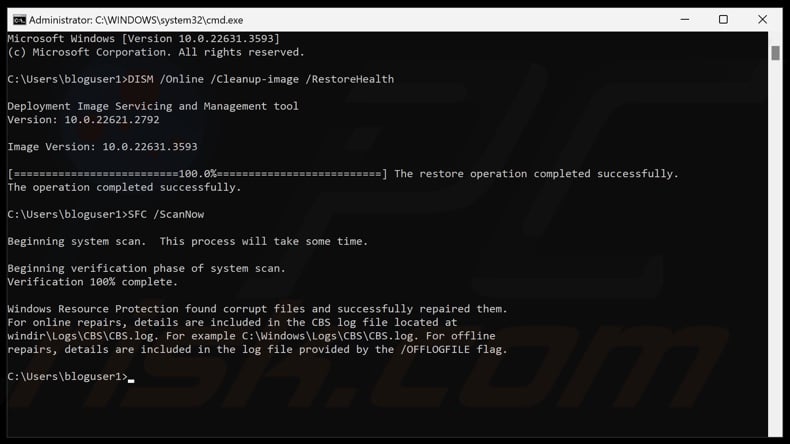
3. Type DISM /Online /Cleanup-Image /RestoreHealth and press Enter.
4. Type SFC /ScanNow and press Enter.
5. Close the Command Prompt and restart your PC.
[Back to Table of Contents]
Method 5. Increase Page File Size (Virtual Memory)
Virtual memory is a cache for data that doesn’t require immediate recall and, thus, doesn’t need to be loaded into RAM. In Windows, virtual memory is adjusted automatically, but it may not be enough. By increasing the virtual memory, you may fix the KERNEL MODE HEAP CORRUPTION error.
1. Hold down Windows+R keys to open Run.
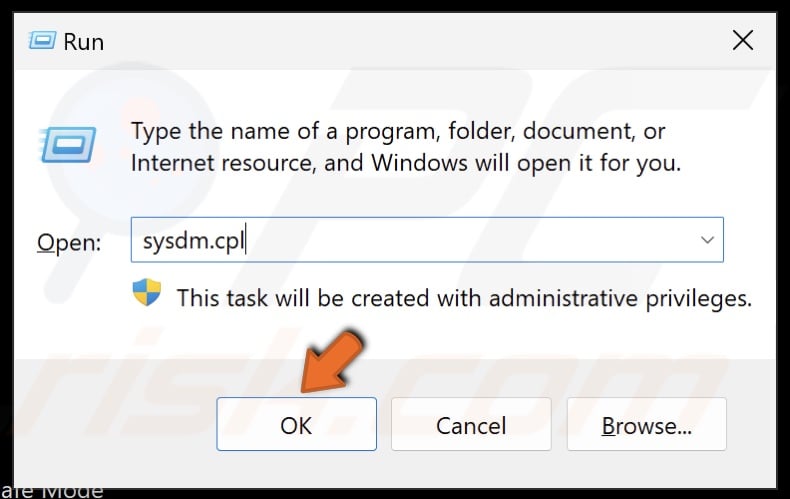
2. Type sysdm.cpl in Run and click OK.
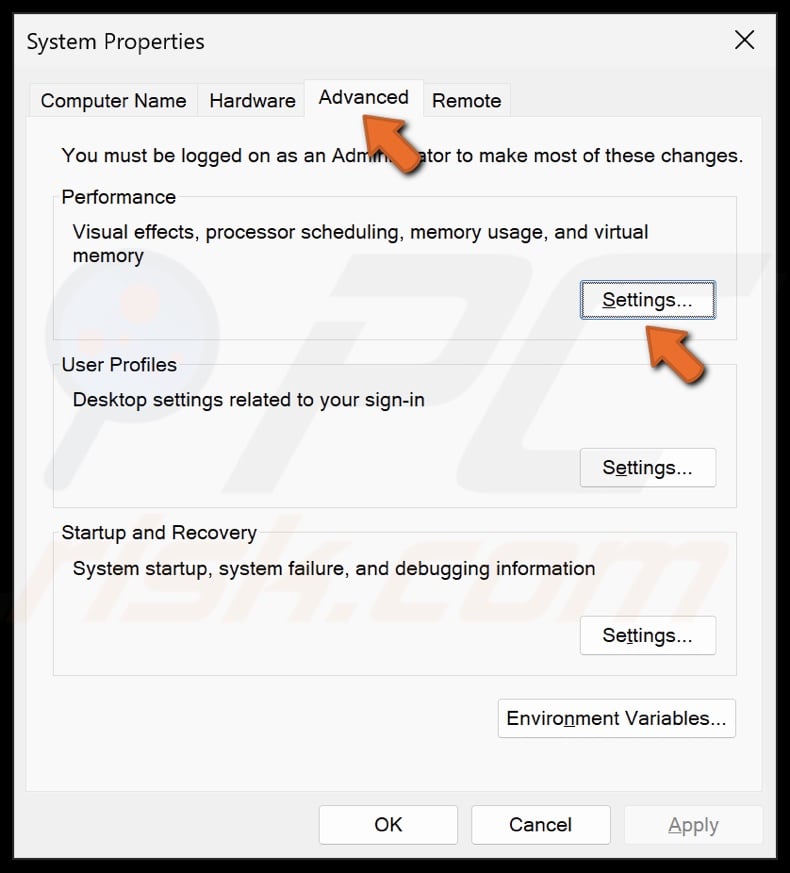
3. In System Properties, select the Advanced tab.
4. Under Performance, click Settings.
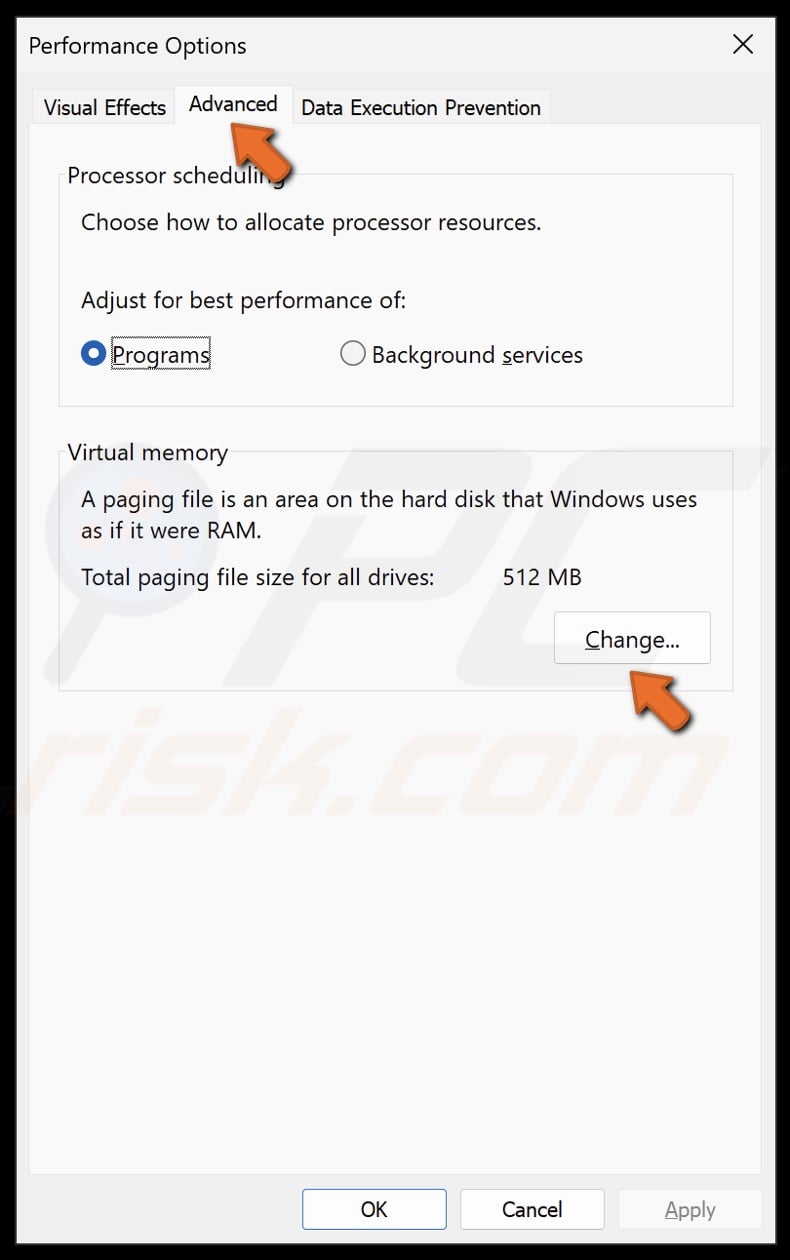
5. In Performance Options, select the Advanced tab.
6. In the Virtual memory section, click Change.
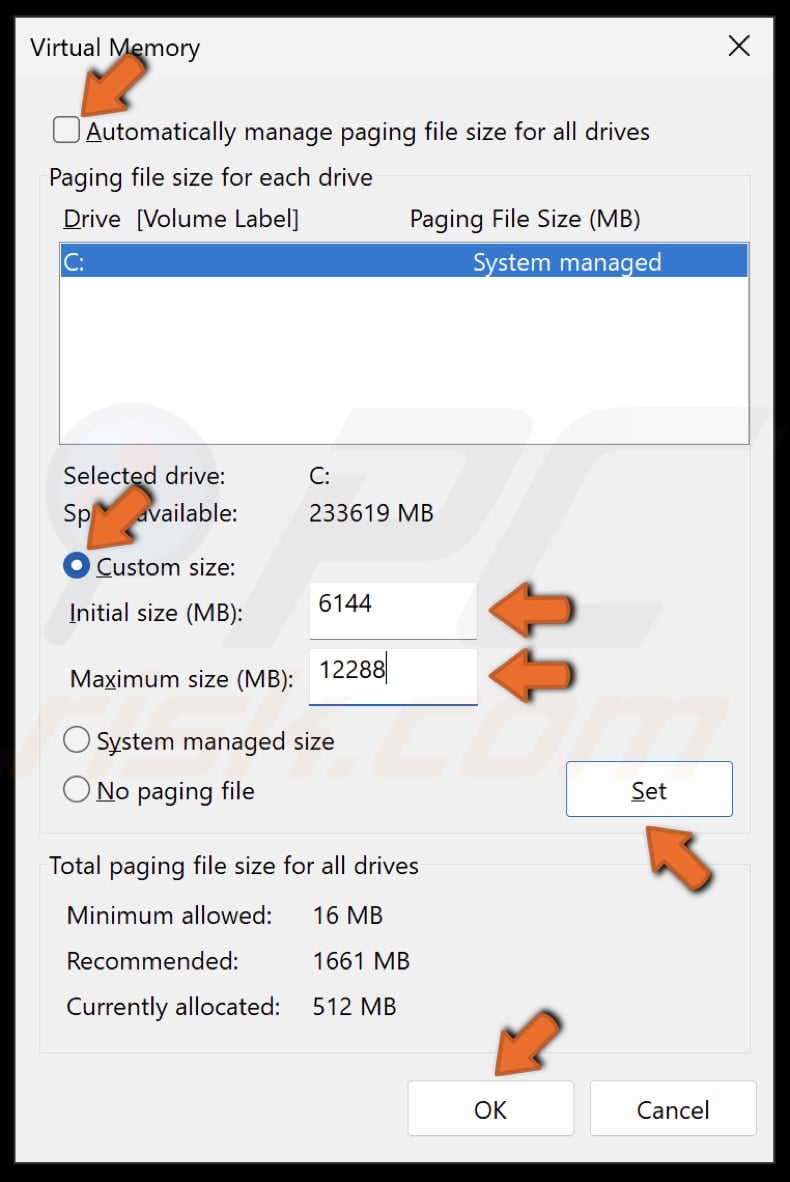
7. Unmark the Automatically manage paging for file size for all drives checkbox.
8. In the Paging file size for each drive section, select the Custom size option.
9. Microsoft recommends setting the Initial size of virtual memory at 1.5 times and the Maximum size of no more than 3 times the total available RAM on the computer. Therefore, if you have 2 GB (2,048 MB) of RAM, the virtual memory can be set to a maximum of 6 GB (6,144 MB).
10. Set the Initial size (MB) and the Maximum size (MB). These settings will define the initial size of disk space to be allocated for virtual memory. The initial size can be matched to the maximum size, or both can be increased.
11. Click Set to save the Initial and Maximum virtual memory size.
12. Click OK to close the Virtual Memory window.
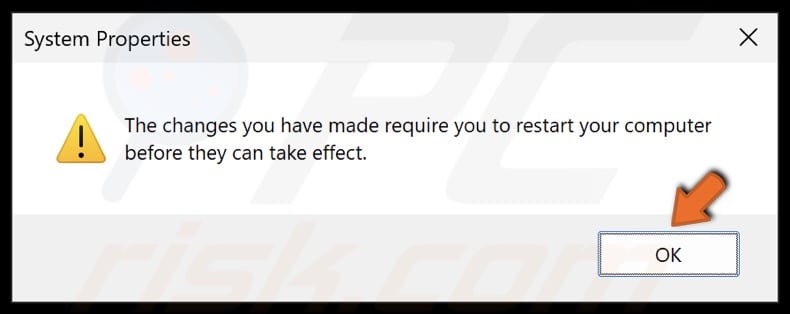
13. Click OK when prompted.
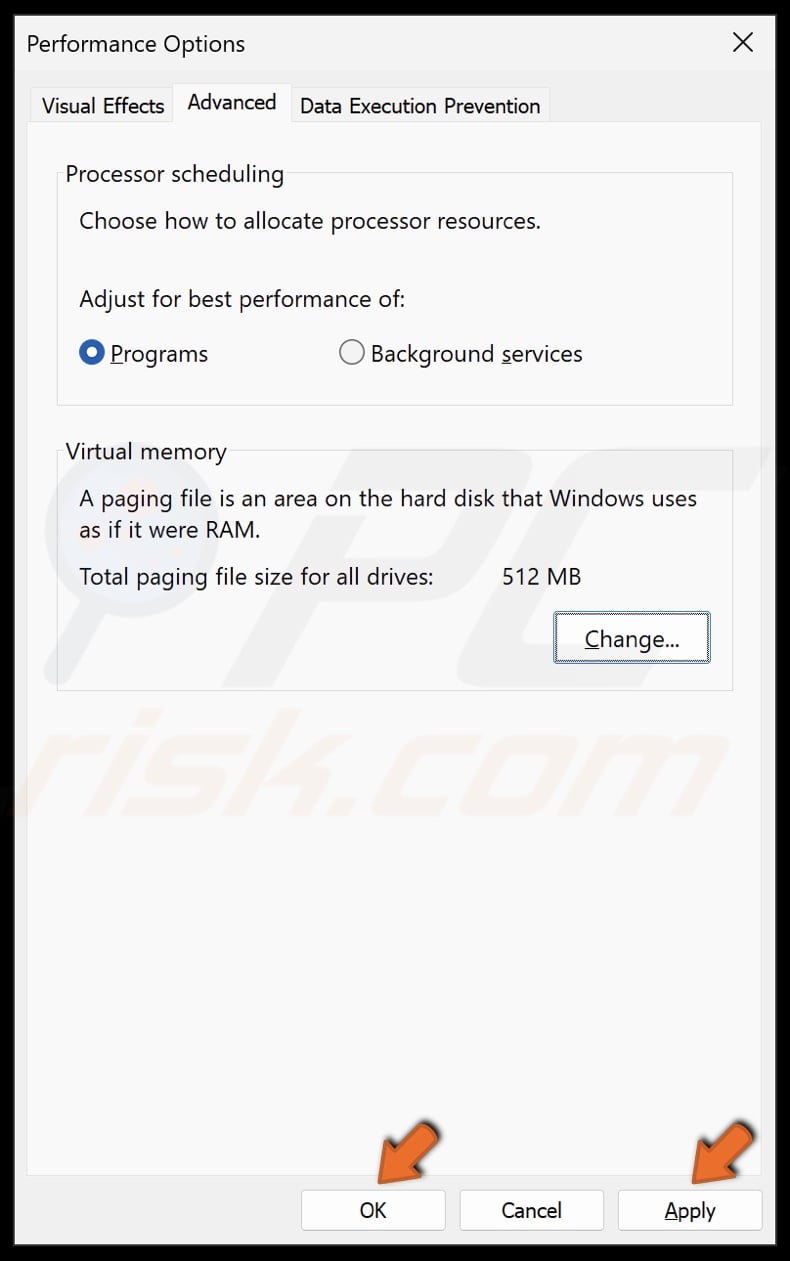
14. Click Apply and click OK.
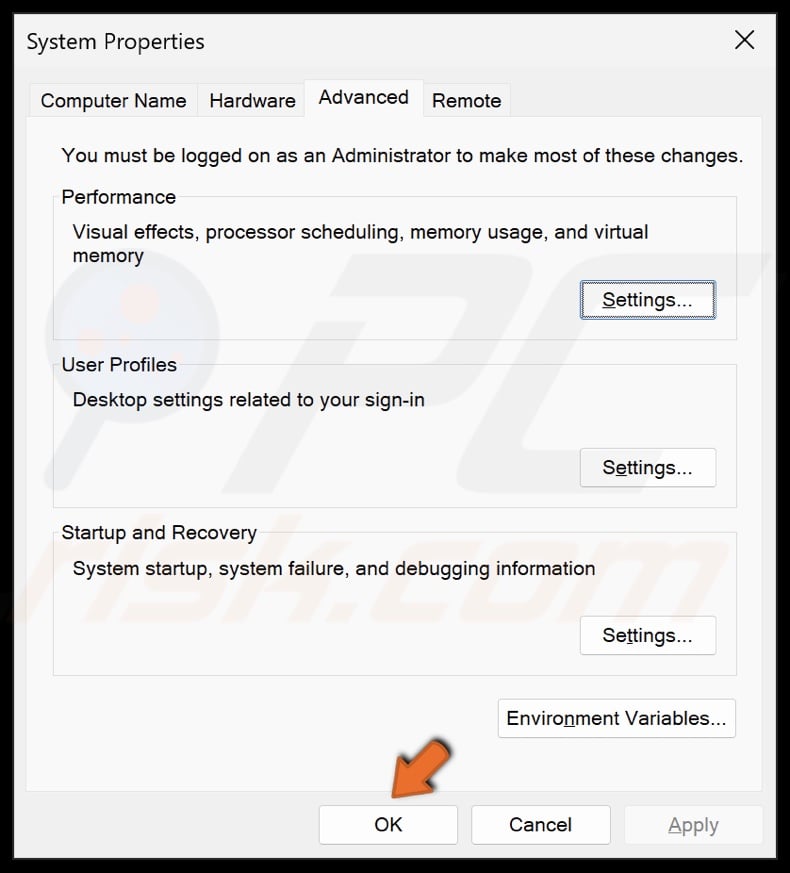
15. Click OK in System Properties.
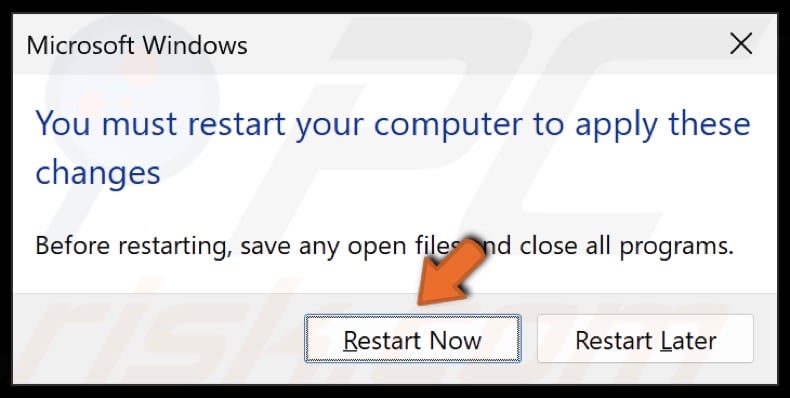
16. Click Restart Now when prompted.
Did this article help you fix KERNEL MODE HEAP CORRUPTION on your PC? Let us know in the Discussion section below.
[Back to Top]
Have you been a Windows user for years? If so, you must have faced BSOD, aka Bluescreen of Death. Because of the critical characteristics of BSOD, kernel mode heap corruption occurs. Moreover, it happens when there is a hardware incompatibility or software conflict.
This BSOD is a general occurrence in the Windows PC, resulting in system crashes. So, don’t be afraid if you see this blue-screen error! In this guide, we will discuss the reasons for this error to happen and 8 diligent ways to fix kernel mode heap corruption on startup.
| Workable Solutions | Step-by-step Troubleshooting |
|---|---|
| 1. Check Event Viewer | Start Windows or an installation DVD twice in a row without success to boot into WinRE…Full steps |
| 2. Check Graphics Drivers | Choose «Device Manager» from the list after right-clicking the start icon…Full steps |
| 3. Update Device Drivers | Press the Windows key and the letter X on your keyboard to access…Full steps |
| 4. Repair Corrupted System Files | To launch the Run dialogue box on your keyboard, simultaneously hit the Windows logo key…Full steps |
| Other Workable Solutions | Check RAM > Run Driver Verifier Manager > Uninstall Incompatible Software…Full steps |
Why Does Kernel Mode Heap Corruption Happen in Windows 11/10?
First, one of the CPU working modes is called a kernel mode (the other is simply the user mode). The ability to control the hardware is unrestricted by default for processes executing kernel mode. However, the following are some of the most frequent reasons.

Corrupted system files
A damaged hard drive’s directory may cause files to seem to flee, which may cause more data loss or degradation.
Calling a component that is not in the index range
This may occur if your computer tries to read an element that is larger than the collection of indexed items.
Defective or deteriorated hardware components
Over time, especially when they are misused, computer parts are prone to degrade. The software can be used to verify your gear, but you can also closely examine its physical condition.
Memory problems in general or memory leaks
This is the outcome of a computer’s RAM being fragmented. It occurs when applications with inadequate programming or design fail to release memory chunks when they are no longer required.
You may also interested in another BSOD issue related to Kernel Mode Heap Corruption BSOD Error:
How to Fix Kernel Security Check Failure Error | 8 Ways
8 Proven Ways to Fix Kernel Mode Heap Corruption BSOD Error
Here are 8 absolute methods that many Windows users have found to be helpful. Therefore, why not attempt the following techniques and resolve the kernel mode heap corruption installing Windows 10 issue yourself before calling a computer technician? Work your way down the list until you discover the one that suits you.
Fix 1. Check Event Viewer to Fix Kernel Mode Heap Corruption
The PC must be able to boot in Safe Mode in Windows 10 to use this procedure. Whenever you face any issue on Windows, checking Event Viewer is the first thing to do! Please follow the instructions below first to enter Safe Mode if your computer can’t launch Windows normally.
- Start Windows or an installation DVD twice in a row without success to boot into WinRE.
- After entering WinRE, go to Troubleshoot > Advanced options.
- To boot into Safe Mode, click Startup Settings and hit the F5 key to select the Enable Safe Mode with networking option.
Please follow the instructions below to verify the Event Viewer after entering Windows 10 Safe Mode.
Step 1. To open the Run box, press the «Windows + R» with complete control, and then type «eventvwr.» Enter to launch Event Viewer next.
Step 2. Open «Windows Logs > System» and look for the Kernel Mode Heap Corruption BSOD report.
Step 3. As soon as you locate the log, pay close attention to the description because it can reveal the issue’s root cause. To further aid in solving this issue, you should also take note of the Source and Event ID information.
You can properly resolve the issue after reviewing the Windows log.
Fix 2. Check Graphics Drivers to Fix Kernel Mode Heap Corruption
Outdated graphics drivers are a cause that begets Kernel Mode Heap Corruption. So, the steps are given below in order to fix this issue.
Step 1. Choose «Device Manager» from the list after right-clicking the start icon from the Taskbar.
Step 2. Right-clicking twice on the graphics card driver in the Display adapters section will bring up the Properties box.
Step 3. Click «Update Driver» or «Roll Back Driver» after visiting the Driver tab.
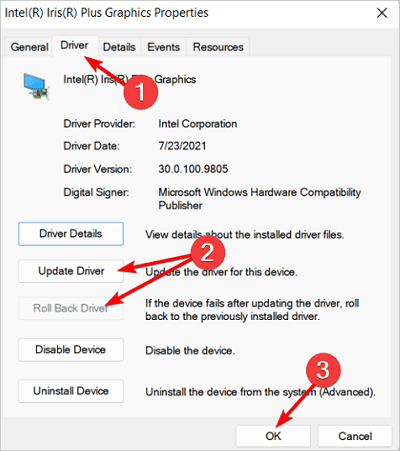
Step 4. Click OK right after the process is over.
Step 5. In case you opt for the «Update Driver» option, hit the «Search automatically for drivers» option after that.
Step 6. Restart the computer and see whether the Kernel Mode Heap Corruption blue screen problem has been resolved.
Fix 3. Update Device Drivers to Fix the BSOD Error
An out-of-date or damaged device driver may be the source of the Kernel Mode Heap Corruption problem. You should check if all of your devices drivers-particularly the drivers for your graphics card are updated. If an out-of-date device driver is causing a BSOD error, do the following steps.
Step 1. Press the Windows key and the letter X on your keyboard to access the Power User menu.
Step 2. Toggle to Device Manager.
Step 3. Increase the issue-causing gadget.
Step 4. Update Driver Software can be found by right-clicking the device.
Step 5. Select automatically check for driver software updates.
Device driver updates through Windows Update take some time to show. As a result, you might need to check the support website of your device’s manufacturer to download and install current drivers if Device Manager was unable to detect any new updates.
Fix 4. Repair Corrupted System Files to Fix Kernel Mode Heap Corruption
System file corruption can occasionally be the reason for this blue screen of death. You should do the following thing to fix them. A built-in program called System File Checker can be used to check for corrupt or damaged system files and, if necessary, restore them. However, this program can only analyze significant system files; it cannot repair a corrupted DLL or an entry in the Windows Registry, for example.
Step 1. Scan with SFC
Windows system file checker utility locates and fixes damaged system files.
- To launch the Run dialogue box on your keyboard, simultaneously hit the Windows logo key and R. Ctrl+Shift+Enter will launch Command Prompt as administrator when you type cmd.
- Hit «Yes» when Windows demands permission to make alterations to your device.
- Type the command. sfc /scannow in the command prompt.
- Press Enter on your keyboard once you have finished inputting the command. The SFC tool will start scanning all system files and replacing those damaged or missing.
- Hold off until the verification procedure is finished. Restarting your computer will make the changes effective.
Step 2. Scan with dism.exe
A built-in Windows utility called Deployment Image Servicing and Management (DISM) may determine whether your Windows installation is faulty and restore it if it is.
To launch the Run dialogue box on your keyboard, hit the Windows logo key and R simultaneously. To launch Command Prompt as administrator, type cmd and hit Ctrl+Shift+Enter.
- If asked for your permission, select Yes.
- Type the following command in the Command Prompt window.
Dism /online /cleanup-image /restorehealth
- Press Enter on your keyboard. The DISM utility will then start scanning for issues and attempting to resolve them.
- Hold off till the procedure is over. When your computer restarts, check if the Kernel Mode Heap Corruption issue persists.
This solution can also resolve the Unexpected Store Exception Error in Windows 10.
Fix 5. Repair Kernel Mode Heap Corruption by Checking RAM
The memory problem is considered another significant reason for kernel mode heap corruption. In order to fix this issue, you must find out and solve RAM problems via Memory Diagnostic. Likewise, this strategy can be implemented only when your PC enters Safe or Windows mode. The steps to repair this error are followed by checking RAM.
Step 1. In the Windows search box, type «Memory Diagnostic.» After that, the best-matched icon must be double-clicked for Windows Memory Diagnostic.
Step 2. Opt for «Restart now and search for problems.»
Step 3. The PC will automatically restart and crosscheck the memory. Moreover, it will boot up once the diagnosis procedure is over. After that, you must see the diagnosis report generated in the Event Viewer via the steps mentioned below.
- Activate Event Viewer.
- Open Windows Logs and select System.
- In the box on the right, select Filter Current Log.
- To view all result logs for the memory test, select MemoryDiagnostics-Results in the Event sources box and click the OK button.
- Double-click the most recent result log to check if the diagnostic was successful.
Fix 6. Run Driver Verifier Manager to Fix the Error
Kernel Mode Heap Corruption Windows 10 can also be caused by other faulty drivers. Therefore, if the preceding solution doesn’t work, you can try Driver Verifier to determine if there are any further problematic drivers. Follow the steps below.
Step 1. You can access Driver Verifier Manager in one of two methods.
- Select Windows PowerShell by simultaneously pressing the «Windows + X» keys (Admin). To launch Driver Verifier Manager, enter the command «verifier» and press the Enter key.
- In the Windows search box, type «cmd,» and then pick Run as administrator by right-clicking the Command Prompt application. Then, to launch Driver Verifier Manager, type «verifier» and press the Enter key.
Step 2. Click the «Next» button after checking «Create Standard Settings.» After that, verify «Automatically choose all drivers installed on this PC» and hit the «Finish» button. Once done, Windows will scrutinize the issues in the drivers and reboot your PC if needed.

Step 3. Once your PC reboots, Windows will demonstrate the drivers, which have flaws. After that, you must update, roll back, or reinstall those.
Fix 7. Uninstall Incompatible Software to Fix Kernel Mode Heap Corruption
Running the program in compatibility mode by following these steps will fix the BSOD if the software clash is caused by it being too old and only compatible with Windows 7/8.
Step 1. Select the Open file location from the context menu when you right-click the desktop. software icon.
Step 2. Select Properties by right-clicking the application executable file.
Step 3. Check the box next to Run this program in compatibility mode by moving to the Compatibility tab and doing so. After that, press OK to save your changes.
You should uninstall the incompatible program using the instructions below if other factors are responsible for the software conflict.
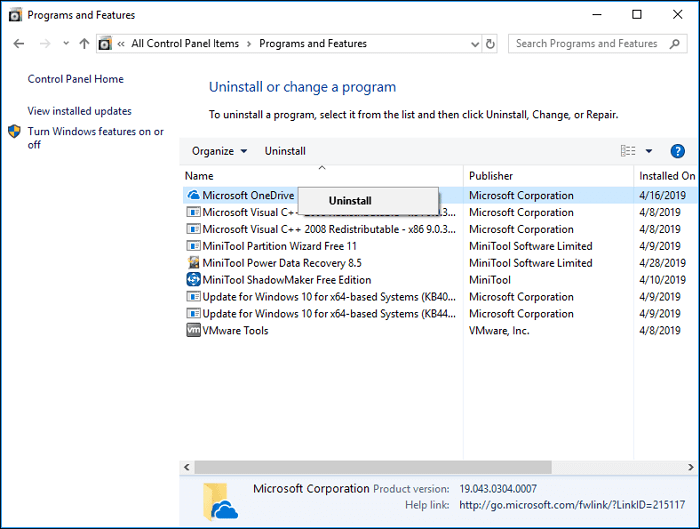
- Run by pressing the Windows + R keys simultaneously.
- The Programs and Features window will open once you enter «cpl» into the Run dialogue box and press Enter.
- Click Uninstall from the context menu of the incompatible application.
Fix 8. Reinstall Windows 10 to Fix the BSOD Error
In case any of the aforementioned solutions don’t work, you might need to reinstall or reset your Windows 10 to resolve Windows 10 BSOD error.
The drive where your system is installed will be completely empty after a clean installation of Windows, including all the apps you’ve installed and your personal data. You’ll need an external storage device, like a USB drive, for the clean installation. The clean installation appears more difficult than the one mentioned before, but it has a greater impact. These are the below-mentioned steps to reinstall Windows 10 to resolve this error.
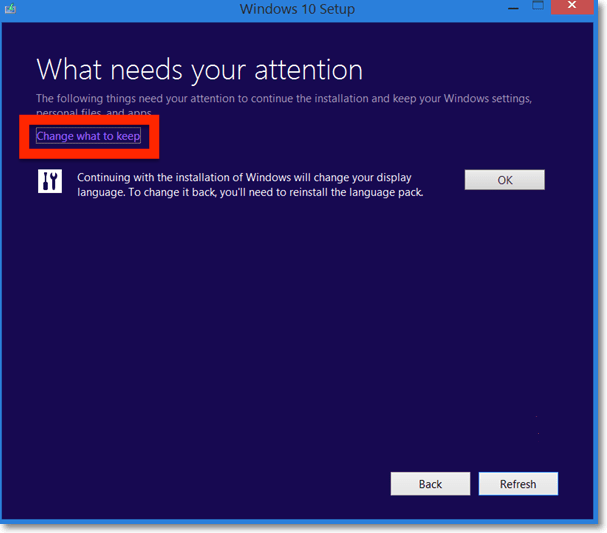
Step 1. Create an installation ISO file with the Windows 11/10 Media creation tool after downloading it.
Step 2. Double-click on the «Setup» file to open it.
Step 3. Select «Download and install updates (recommended).»
Step 4. Follow the onscreen prompts.
Watch this video to obtain more assistance if you still have trouble fixing the kernel mode heap corruption error.
- 0.26 Run CHKDSK scan
- 1.03 Update All Drivers
- 1.26 Conduct an SFC scan
- 2.00 Run hardware and devices troubleshooter
Conclusion
Users may become anxious when encountering the Kernel Mode Heap Corruption blue screen issue; however, these problems are more frequent than you might realize. Running the aforementioned diagnostic steps will usually resolve the issue.
In case you lost your data while resolving this error, downloading EaseUS Data Recovery Wizard will help you recover all of them!
Kernel Mode Heap Corruption on Startup FAQs
The FAQs are the following to understand better this Kernel Mode Heap Corruption on Startup error.
1. What is a kernel mode crash?
A. An operating system crash known as a kernel mode crash (KMC) is triggered by a kernel error. Users that encounter a KMC notice a blue screen and an unforeseen computer breakdown.
2. How to fix kernel data inpage error Windows 10?
A. The best ways to fix kernel data inpage error are the following.
- Repair hard disks
- Conduct a virus scan
- Conduct DISM and SFC scan
- Conduct memory diagnostics
- Crosscheck hardware peripherals
3. How to fix Windows 10 BSOD?
A. These are the methods to fix Windows 10 BSOD.
- Repair Windows 10 BSOD After or During the Windows 10 Update
- Remove BSOD from Windows 10 While Using an App or a Device
4. How do I fix kernel security check failure?
A. These are the ways to fix kernel security check failure.
- Fix system files and damaged sectors that are the root of the Kernel Security Check issue
- System hard disc error check and repair
- To resolve the Kernel Security Check failure issue, run the Memory Diagnostic Tool
- To fix the Kernel BSOD issue, try using System Restore
KERNEL_MODE_HEAP_CORRUPTION is a BSOD error that appears out of nowhere on a PC. It can be annoying to experience, considering it gives you no warning and interrupts whatever you do on the PC.
Generally, the Blue Screen of Death errors interrupt a user’s experience like nothing else, and the stop code Kernel Mode Heap Corruption is no exception. Fortunately, there are ways to avoid this system crash BSOD error. In this post, let us look at these fixes and try to minimize the damage this issue does.
What Triggers Kernel Mode Heap Corruption error Error on Windows
Sometimes, the issue appears on launching a particular application (usually games), while many have encountered it on startup.
This blue screen of death error attacks your PC when a component crucial to operations is no longer running properly. If we talk specifically about the Kernel heap mode corruption stop code, faulty drivers appear to be the root cause.
Whenever a graphic/display driver malfunctions on a PC, the KERNEL_MODE_HEAP_CORRUPTION is triggered, causing the system to stop working. Other than that, many users have shared that software conflicts or an unsupported third-party application can also cause the stop code to appear.
How to Fix Kernel Mode Heap Corruption Error
There are multiple fixes you can try to stay away from such errors. Look at them closely and identify ways to fix stop code Kernel Mode Heap Corruption Error on Windows.
Fix 1 – Update Graphics Drivers on Your PC
To begin troubleshooting the stop code, you must begin with the root cause, the graphics driver. Usually, the driver stops working to its full potential when it becomes outdated. Needless to say, updating the graphics driver will help you avoid the Kernel Mode Heap Corruption stop code.
To update a driver on your Windows PC, you have two options.
The first is to go the manual route and search for driver updates using the Device Manager. The other is to choose a driver updater tool and let it handle everything.
For several users, the first method turns into a tedious task as they are not well-versed in the process and do not know how to update a driver on Windows. Secondly, those who know about the process understand how lengthy the process is.

Therefore, the automatic way to update drivers appears to be the preferred method. If you are also struggling with the Kernel heap mode corruption stop code, you should download the Advanced Driver Updater and update the existing drivers on your PC.
There are only three steps for you to finish –
Step 1 – Download the Advanced Driver Updater on your PC.
Step 2 – Run a scan for outdated drivers by clicking on Start Scan Now.

Step 3 – Once the Scan is over, click Update All to initiate the process for outdated drivers.
Once you have performed these 3 steps on your PC, restart the PC to apply changes. If this does not help fix the stop code kernel mode heap issue. Don’t worry we have other fixes.
Updating drivers usually does the trick for users and stops the PC from crashing again with a BSOD error. In case it does not help, move on to the next fix.
Fix 2 – Run the SFC Scan to Fix System File Issues
If updating the drivers did not help the stop code might appear due to system file errors. The next best thing is to check the system file for errors. Fortunately, Windows has an internal utility that allows you to check and resolve system errors quickly. All you have to do is –
Step 1 – Go to the Start Menu and search for the command prompt.

Step 2 – Once you have found the command prompt, click on Run as Administrator.
Step 3 – In the Command Prompt window, enter the following command SFC /scannow and hit Enter key.
Step 4 – After you have run the command, wait for the scan to finish.
Step 5 – Restart your computer after the scan to let the changes take effect.
This internal system file checker utility helps you resolve system errors that may be causing the stop code KERNEL_MODE_HEAP_CORRUPTION issue.
Fix 3 – Remove Startup Programs
If you have been experiencing the kernel mode heap corruption issue on startup, a start-up application may be causing the error. The ideal solution is to remove these applications from the startup queue, so they are not triggered as soon as the PC turns on.
Check out the steps to help you disable apps from launching at start-up.
Step 1 – Press Ctrl+Shift+Esc to open the Task Manager on your PC.
Step 2 – Expand the left panel to find multiple options.
Step 3 – Click on Start-up apps to find all the apps that are enabled to launch on the startup.

Step 4 – Disable these apps one at a time and keep restarting your PC.
Step 5 – Once you have disabled all the apps, you may find that the stop code kernel mode heap no longer appears after you have just booted your PC.
Removing the startup apps from the queue will also help you boost your startup time, making your PC faster.
Fix 4 – Uninstall Conflicting Software
Consider removing the conflicting application if the above fix cannot fix your problem. Removing the app from startup only helps you avoid the problem, not resolve it. The best solution is to remove the conflicting software from your PC.
When you remove an application from startup and check if the issue is resolved, you identify the origin of the problem. This means now you know exactly what app is causing the error. Also, if the issue lies in the game or an application you manually open, you should remove it immediately.
Here’s what you need to do –
Step 1 – Press Win+R to open the Run search.
Step 2 – Use the command control appwiz.cpl and hit enter to open programs and features.

Step 3 – Spot the software causing the issue according to you.
Step 4 – You can also sort the apps according to the time they were installed if you know when exactly the issue started.

Step 5 – Select the apps on your PC and uninstall them.
Removing these apps should do the job for you.
Fix 5 – Reset Windows
If you still encounter the KERNEL_MODE_HEAP_CORRUPTION issue on your PC after removing the culprit application, the affected program lies in a system process or a system file. In that case, you have no option but to reset your Windows.
You can find the reset option in your System Settings→ Recovery options.

The stop code KERNEL_MODE_HEAP_CORRUPTION can be a lethal issue that affects your PC. Try out these fixes and get rid of them today! Hope you find the information shared helpful. Feel free to ask for assistance if you feel stuck at any step. Thanks for reading. Good luck!
Recommended :
The Ultimate Guide To Fixing Kernel Security Check Failure Error
Fix – LiveKernelEvent 141 Hardware Error
Kernel Mode Heap Corruption is one of the frustrating BSOD issues for Windows 10 and Windows 11 users, ruining your workflow. These kinds of errors generally indicate some sort of problem with the system drivers, hardware issues, or software conflicts. It is, therefore, very important to find out what exactly causes this error and remove it to regain system stability. Now, let’s see what this error is all about, why these kinds of errors occur, and how they can be effectively repaired.
What Is the Windows 10/11 Blue Screen Kernel Mode Heap Corruption?
Kernel Mode Heap Corruption is a BSOD in which some operation goes out of its bounds inside Windows’ kernel mode, responsible for the handling of hardware and process manipulation. It occurs when any process corrupts that part of used memory, called heap utilized by the kernel. If such corruption happens, it will just shut down the system to not allow further damage due to which a BSOD occurs.
This can happen at random times or during event viewings such as gaming, video rendering, or even extreme multitasking. Thus, leading to system crashes and reboots.
What Causes Kernel Mode Heap Corruption Blue Screen in Windows 10/11?
The causes for kernel heap corruption are:
- Incompatible or Corrupted Drivers: The GPU drivers or any system drivers corrupted or outdated.
- Hardware Issues: RAM, a failing GPU, and other components cause memory corruption.
- Overclocking: Most systems could not keep running the components at higher clock frequencies than recommended.
- Software conflict: When different programs and malware conflict with one another, thereby causing a crash of the processes running in a system.
- Windows Updates: Sometimes, updates can cause such incompatibility issues to exhibit themselves through this error.
Knowing these causes identifies and narrows the specific issue that may be affecting your system.
Read about other common Windows Errors:
CRITICAL_PROCESS_DIED Error
DRIVER_POWER_STATE_FAILURE BSOD error
IRQL_NOT_LESS_OR_EQUAL Error
PAGE_FAULT_IN_NONPAGED_AREA Error
DNS_PROBE_FINISHED_NXDOMAIN Error
KMODE EXCEPTION NOT HANDLED Error
How to Fix Kernel Mode Heap Corruption BSOD on Windows 10/11
Start by identifying the likely cause of the error and applying the following solutions:
Method 1: Boot Windows 10/11 into Safe Mode
If you’re unable to access Windows due to the blue screen error, you’ll need to boot into Safe Mode. This mode runs only essential programs and services, preventing conflicts caused by third-party apps.
To enter Safe Mode:
- Hold the Power button for 5 seconds to turn off your computer.
- Repeat this process 2-3 times until the Preparing Automatic Repair screen appears.
- Let the system find the problem and click Advanced options.
- Go to Troubleshoot > Advanced options > Startup Settings and click Restart.
- After your computer restarts, Press F5 for Safe Mode with Networking.
Activate the Safe Mode with Networking since it opens up access to the internet that will come in handy during further troubleshooting or downloading fixes.
Method 2: Roll Back Your Graphics Card Drivers
Well, this is easily done in case it is a recently updated graphics driver-that is, it will roll back to its previous version. Here’s how:
- Press Windows + R to open Run, type in
devmgmt.mscand press OK. Now, in Device Manager, double-click on Display adapters to expand the list. - Right-click your graphics card, then select Properties. Now, go into the Driver Tab, then click Roll Back Driver.
- If the option is grayed out: In that case, that would mean no previous driver available for roll back. Otherwise, follow other methods.
- Choose a reason for rollback then click Yes.
- Restart your computer to take effect changes.
After the driver roll back, check that the Kernel Mode Heap Corruption error was resolved or not. If it does, proceed with other below troubleshooting method.
Method 3: Update or Reinstall Drivers
Often, this is due to corrupted or outdated GPU drivers. Run through Device Manager to check for updates or reinstall the drivers. Certain tools like Outbyte Driver Updater make sure drivers are updated and compatible with Windows 11.
In our Driver library you can find the most suitable GPU drivers for your OS and a short guide on how to install it.
Read also about other popular Graphic cards Drivers:
NVIDIA GeForce 8600 GT drivers
NVIDIA GeForce GTX 1650
Intel UHD Graphics drivers
Method 4: Check Graphics Card for Problems
Since display drivers are one of the main causes of this error, checking if there is any problem with your graphics card is essential. Go through the following steps to discover and fix possible problems:
- Press Win + R hotkeys to open Run dialog.
- Type
devmgmt.mscand press Enter or click OK. - Click on Device Manager and expand it to Display Adapters to see your graphic card.
- Right-click on the video card, updating the driver.
- Then, Windows will automatically search for any available update and download and install it.
In case no updates were found, or there is some error at any point in time, go to your manufacturer’s website and manually download the latest driver for the graphics card.
After updating the driver, please restart your computer and check if the error is gone.
Method 5: Use Driver Verifier Manager
Driver Verifier Manager is a utility tool that could be employed in finding those problematic drivers causing this Kernel Mode Heap Corruption error in Windows 10/11. Here’s how:
- Run Admin Windows PowerShell.
- Type
verifierand press Enter to start the Driver Verifier Manager. - In the Verifier window, select Create Standard Settings and click Next.
- Choose Automatically select all drivers installed on this computer and click Finish.
- Restart your PC when prompted to allow the tool to scan for corrupted or outdated drivers.
After the reboot, Windows will list any drivers with errors. Update, roll back, or reinstall these drivers to resolve the issue.
Method 6: Use the Windows BSOD Troubleshooter (For Windows versions earlier than 1809)
The Blue Screen Troubleshooter diagnoses and fixes hardware, drivers, memory and a lot of other problems. You won’t have access to it if you’re running Windows 10 version 1809 or later but if you’re using an earlier version you can fire up the tool:
- Open Control Panel > Troubleshooting
- Click View all in the left-hand menu
- Right-click Blue Screen > Run as administrator
- Click Advanced > check the box for Apply repairs automatically > Next.
It now opens the troubleshooter to find any issues related to the blue screen. If it finds any, proceed by following the on-screen commands to resolve them.
See Microsoft’s support page entitled “Troubleshoot blue screen errors,” for newer versions of Windows.
Method 7: Use Windows Memory Diagnostic Tool
The Windows Memory Diagnostic tool will check problems on your computer with RAM. To do this, follow these actions below:
- Press Windows + R and open the Run dialog.
- In the field, type in
mdsched.exeand press Enter. - Click Restart now and check for problems (recommended) to run the test straight away or Check for problems the next time I start my computer to schedule it.
- Save your work because the tool will restart your PC right away by choosing Immediate restart.
When the tool finishes running, you will see in the number of passes with the percentage completed. If, after all this process, it doesn’t show errors, then your RAM is OK otherwise you need to consider replacing the RAM or contact your hardware manufacturer for more support.
Method 8: Repair Corrupted System Files
Corrupted system files can cause the Kernel Mode Heap Corruption error. To repair these, use the following two tools:
1. System File Checker (SFC)
- Press Windows + R, type
cmd, and press Ctrl + Shift + Enter to open Command Prompt as administrator. - Type
sfc /scannowand press Enter. The SFC tool will then look for corrupted or missing system files and repair or replace them. Once it’s done, restart your computer to apply changes.
2. DISM Tool
If the above doesn’t work, then implement the DISM tool, which is short for Deployment Image Servicing and Management:
- Do the above to open the Command Prompt as an administrator.
- In the prompt that says, ‘Type’ the following command:
dism.exe /online /cleanup-image /restorehealth, press Enter. - It will then start searching for system problems that it knows it can identify and fixes them.
- Once that’s done, reboot the computer to find the error has vanished.
Method 9: Resolve Software Conflicts
Software conflicts can cause the Kernel Mode Heap Corruption error, especially after installing new apps or running certain programs like games. Resolving these conflicts involves identifying and managing problematic software.
Check for Software Conflicts
Close unnecessary programs and background processes to see if the error persists:
- Press Windows + X and select Task Manager.
- Under the Processes tab, select a program and click End Task to close it. Save your work first if needed.
- Avoid closing unfamiliar programs, as they may be critical system processes.
If the error continues, it’s likely not caused by software conflicts. If it stops, a recently closed program is likely the cause.
Identify Problematic Programs
To track the conflicting program:
- Restart each program one by one and wait to see if the error shows up again.
- If the error happens, this last program restarted is probably the cause.
Leave the suspected program open, if need be, and recreate the steps with other apps to see if there is a conflict.
Manage Conflicting Programs
By identifying the problem, you can
1.De-prioritising the Program
- Press the Windows + R, type in
taskmgr, and press Enter. - Open Task Manager, then Details, look for the program, right-click on it.
- Click Set Priority > Low.
- Avoid changing priorities for system-critical processes.
2. Disable the Program
- Open Task Manager and end the task for the program.
- Prevent it from starting with Windows:
- Press Windows + R, type
msconfig, and hit Enter. - In the Startup tab, click Open Task Manager, select the program, and click Disable.
3. Uninstall the Program
- Press Windows + R, type
appwiz.cpl, and press Enter. - In Programs and Features click the program and then click Uninstall.
After managing the conflicting program, restart your computer to see if the error is resolved. If the issue persists, consider trying additional fixes.
Method 10: Check for Hardware Issues, Including Overheating
Hardware issues, including overheating, can cause the Kernel Mode Heap Corruption error. Diagnosing these problems may require disassembling your computer to inspect components such as the CPU, RAM, or GPU. If you’re unfamiliar with hardware troubleshooting, it’s best to seek help from a local technician.
If no problem in the hardware was found, or if a problem existed but the error refused to go away you will have to reinstall Windows.
Method 11: Reset or Reinstall Windows
If other fixes haven’t worked, resetting or reinstalling Windows can resolve stubborn errors.
Resetting Windows
Resetting returns your PC to its default state, removing installed apps but allowing you to keep or delete personal files. Here’s how to reset:
- Open Settings and go to Update & Security > Recovery.
- Under Advanced Startup, click Restart Now.
- Select Troubleshoot > Reset this PC > Remove everything.
- If prompted, insert Windows installation media.
- Choose whether to remove files from all drives or just the Windows drive.
- Select Just remove my files for a quick reset or Fully clean the drive for a more secure erase.
- Click Reset to start the process. Once complete, follow the on-screen instructions to set up your computer.
Clean Installing Windows
A clean install erases everything on the system drive, requiring a USB or DVD installation media. Steps to perform a clean install:
- Create installation media using the Microsoft Media Creation Tool.
- Insert the media and restart your computer.
- Access the Boot Menu by pressing the appropriate key (e.g., F12 for Dell, F9 for HP).
- Select the installation media to boot from. Follow the installation prompts, selecting the Custom option when asked. Select the primary partition to install to and continue.
Once installed, activate Windows with your product key or run slmgr.vbs /ato through Command Prompt. Both Windows reset and reinstall will remove system errors; however, clean installs are deeper, particularly where the problems remain constant.
FAQs
What is a kernel mode heap corruption?
That is the condition when Windows has problems with the memory of the kernel mode, and some kind of process corrupted the heap that led to this crash.
Is kernel mode heap corruption a common problem on Windows 11?
Yes, this error can occur both in Windows 10 and 11 because of similar issues with drivers or hardware.
How do I fix kernel mode heap corruption on my PC?
Update the drivers, look for hardware issues, and deactivate overclocking. Scanning for malware and employing System File Checker should help.
Could this error be a result of outdated GPU driver?
Outdated/ Faulty GPU driver is the most generalized reason behind kernel mode heap corruption Windows 11 errors.
Is disabling Overclocking to fix this issue safe?
By disabling overclocking, your system will be stabilized, and this is advisable when overclocking has caused instability.