
The HP Accelerometer is a software component of HP 3D DriveGuard. If you have encountered errors with the HP Accelerometer, this article is what you need. In this article, we are going to show you how to fix the HP Accelerometer error after Windows 10 update.
Solution 1. Uninstall the HP 3D DriveGuard driver
- Right-click on the Start or Home button and select Device Manager.
- Navigate to the HP 3D DriveGuard driver, right-click on it and select Uninstall device.
- You will get a warning message which informs you that you are about to uninstall the device;select Uninstall to proceed.
- Now, restart your PC.
- Once your PC is restarted, Windows will automatically install the device with the correct and updated drivers
Solution 2. Update your device drivers
Method 1. Download and install Auslogics Driver Updater
This tool is one of the best tools which you can use to update your drivers automatically. It is very easy and fast to use and will update all the drivers in just one click. It checks your computer for missing or outdated drivers and installs the manufacturer-recommend versions. Another good thing about Auslogics Driver Updater is that you do not have to worry about downloading the wrong driver. You do not even need to know the name or version of the device whose driver you want to update. Here is how to download and install Auslogics Driver Updater:
- Follow this link to download the setup file to your computer.
- When the download is complete, run the setup file to begin the installation process.
- When the installation is done, the Auslogics Driver Updater software will open automatically and start scanning your PC for missing drivers.
- Once it is done, you will be able to update all the missing drivers it has found.
Method 2. Download the graphics drivers from the manufacturer’s site
This is also a good way to get your graphics driver. In this case, you need to go to HP’s website. You will find the drivers in the support section of the site. Once on the website, you will have to select your operating system and its architecture. Now, you will be able to see the HP 3D DriveGuard driver. Note that downloading and installing the wrong driver version may not work. Once the driver is downloaded, navigate to the download folder and run the setup file. Finish the installation by following the instructions of the wizard. When it is completed, you will not experience the problem again.
Method 3. Update the HP 3D DriveGuard, using Device Manager
The Device Manager gives you information about all the devices which are installed on your PC. If you want to know if a device is working properly or not, you should go to Device Manager. Usually, when a device is not functioning properly, you will see a yellow triangle with an exclamation mark beside it. Using the Device Manager, you will be able to download and install your drivers. Use the following steps:
- Press the Windows logo key + X on the keyboard and select Device Manager from the pop-up menu.
- In the Device Manager window, you will see the list of devices installed on your PC.
- Right-click on HP 3D DriveGuard and select Update driver.
- In the next window, choose the option to search and download the driver from the internet.
- Windows will now download and install the best driver for your device.
Solution 3. Update your Windows operating system
Microsoft often releases updates for your operating system These updates are to improve your operating system or add new features to it. Also, they include useful files such as driver updates. If you are using Windows 10, the updates are supposed to be downloaded and installed automatically, but sometimes they may be delayed due to geographical reasons. So, it is up to you to force your operating system to download and install the available updates by manually initiating it. Here is how to do it:
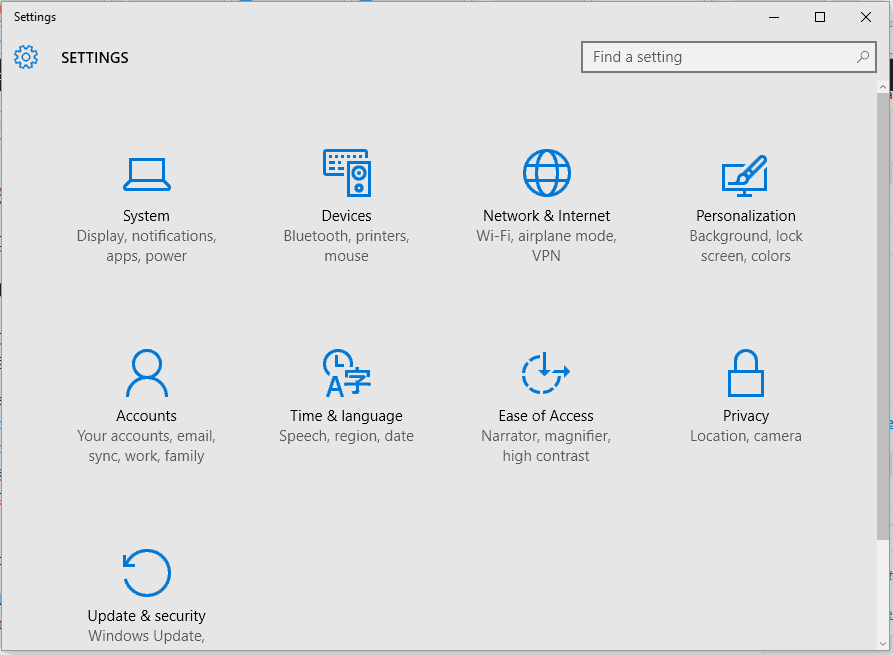
- Press the Windows logo key + I on your keyboard to open the Settings app.
- Click on Update and Security from the available options.
- Navigate to the Windows update tab and click Check for updates.
- Windows will now look for the available updates for your system and install them.
- Hopefully, they contain the HP 3D DriveGuard driver updates.
We hope that this article has resolved the HP Accelerometer app not working problem. Share it with others who experience similar issues.
We appreciate your ideas and comments, and we are ready to answer all your questions regarding the above topic.
Several users are encountering the “HP accelerometer doesn’t work on this version of Windows” error at every Windows Startup. Some affected users reported that the Accelerometer was working normally until a Windows 10 update. As it turns out, the Windows 10 Fall Creators Update (RS3) is responsible for the error.

What is causing the “Hp accelerometer doesn’t work with this version of Windows. An updated app may be available” error?
The Hewlett Packard’s HP accelerometer is designed to boost HDD protection. If it detects high-speed movement, it will instantly disengage the read head. This significantly reduces the change of your HDD is damaged.
We investigated this particular issue by looking at various user reports and the solutions that they used to get the issue resolved. Based on what we gathered, there are several fairly common scenarios that will trigger this particular error message:
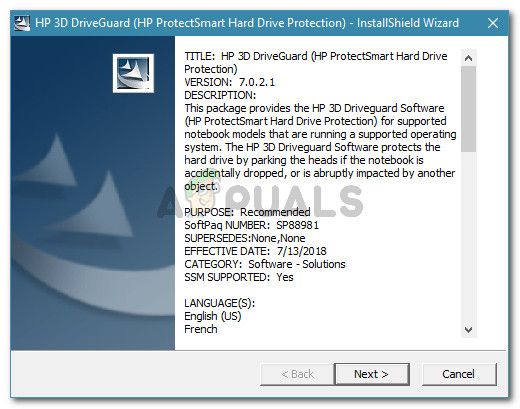
- Outdated version of HP 3D Driveguard – Based on HP’s official documentation, this issue might occur if the machine is using an outdated version of 3D DriveGuard. Several users encountering the same issue have reported that the issue was fixed once they installed the latest version available.
- Windows 10 Update is interfering with the HP accelerometer – A particular Windows 10 update released at the end of 2017 is known to cause this particular error message. Users speculate that it’s somehow interfering with the HP accelerometer driver.
If you’re struggling to resolve this particular issue, this article will provide you with a collection of verified troubleshooting steps. Below you have a collection of methods that other users in a similar situation have used to get the issue resolved.
For the best results, follow the methods below in order until you encounter a fix that is effective in your particular scenario. Let’s begin!
Method 1: Applying HP’s SoftPaq fix
Since the issue is over one year old, HP has already addressed the issue by offering a fix. You can try to resolve the issue by installing HP’s SoftPaq update to repair the damage done by Windows 10 Fall Creators Update (RS3).
Several users finding themselves in a similar situation have reported that the issue was addressed after performing the steps below:
- Visit this link (here) to download the SoftPaq update (the fix released by HP).
- Open the update installer (sp88981.exe) and follow the on-screen prompts to install the fix.

Installing Hp SoftPaq - Once the fix has been installed, restart your computer and see if the issue has been addressed at the next startup.

If you’re still seeing the “HP accelerometer doesn’t work on this version of Windows” error, move down to the next method below.
Method 2: Installing the latest version of HP 3D Driveguard
The majority of users that have been encountering this issue have managed to fix it by updating HP 3D Driveguard to the latest version. Apparently, older versions of this software are known to trigger the “HP accelerometer doesn’t work on this version of Windows” error.
Most affected users have managed to resolve the error by uninstalling the current version of HP 3D DriveGuard and installing the latest version available. Here’s a quick guide on how to do this:
- Press Windows key + R to open up a Run dialog box. Then, type “appwiz.cpl” and press Enter to open Programs and Features.
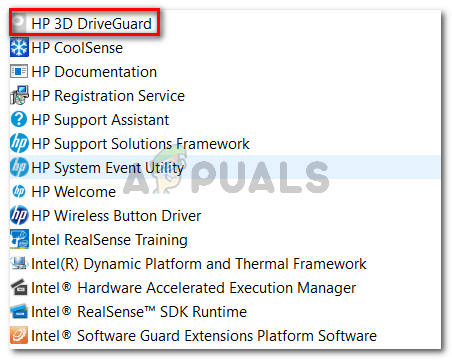
Run appwiz.cpl - Inside Programs and Features, scroll down through the application list, right-click on HP 3D DriveGuard and click Uninstall. Then, follow the on-screen prompts to uninstall the software from your system.

Uninstalling HP 3D DriveGuard - Once HP 3D DriveGuard has been uninstalled, reboot your computer. The “HP accelerometer doesn’t work on this version of Windows” error should no longer occur at the next startup.
- Visit this link (here) to download the latest version of HP 3D DriveGuard and install it to your system.
Kevin Arrows
Kevin Arrows is a highly experienced and knowledgeable technology specialist with over a decade of industry experience. He holds a Microsoft Certified Technology Specialist (MCTS) certification and has a deep passion for staying up-to-date on the latest tech developments. Kevin has written extensively on a wide range of tech-related topics, showcasing his expertise and knowledge in areas such as software development, cybersecurity, and cloud computing. His contributions to the tech field have been widely recognized and respected by his peers, and he is highly regarded for his ability to explain complex technical concepts in a clear and concise manner.
Readers help support Windows Report. We may get a commission if you buy through our links.
Read our disclosure page to find out how can you help Windows Report sustain the editorial team. Read more
Do you receive the Accelerometer error on start-up on your HP device? If you are, don’t worry as this is a minor problem related to some drivers and which can be easily addressed.
There are a few ways in which you can try to fix the Accelerometer error in Windows 10 and everything is being detailed and discussed in the following guidelines and steps.
Usually, this warning message is displayed after your Windows received a new update, especially if that was a Windows 10 update. As already outlined, the error is talking about a driver who is not running properly.
It can be a file corruption or an outdated driver, thus the troubleshooting solutions will focus on resolving these particular aspects, as described below:
Fix HP accelerometer errors in Windows 10
- Check for Windows updates.
- Update existing drivers.
- Remove corrupted drivers and reinstall them manually.
1. Check for Windows updates
- On your computer press the Win+I hotkeys.
- From System Settings choose Update & Security.

- Under Windows Update (from the left panel) you can verify if there is any update waiting for your approval.
- Apply all available patches and restart your Windows 10 device in the end.
2. Update existing drivers
- Right-click on the Windows start icon.
- From the list that’s displayed click on the Device Manager entry.
- In Device Manager find the HP 3D DriveGuard driver.

- Right-click on it and choose Update.
- Restart your Windows 10 system in the end.

Nonetheless, there is third-party software that can do the job on your behalf. We also recommend using a specialized tool that can automatically download all out-of-date drivers to your PC in a few clicks.
With a dedicated driver update, you will efficiently manage all your drivers from your PC and resolve this type of trouble.
Therefore, using this software means you can benefit from up-to-date drivers for each one and optimize your driver devices at peak capacity.
3. Remove corrupted drivers and reinstall them manually
If updating the driver isn’t fixing the Accelerometer error, try to uninstall and reinstall it manually afterward:
- You can remove the driver from Device Manager – access Device Manager as already explained, then right-click on the HP 3D DriveGuard driver and choose ‘uninstall’.
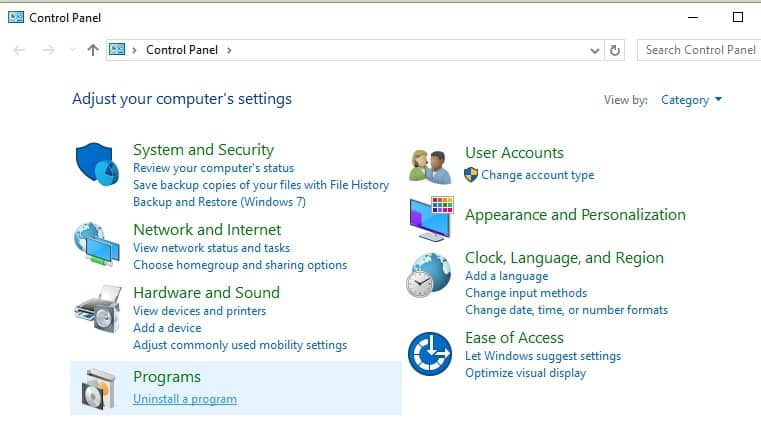
- Alternatively: go to Control Panel, switch to Category and under Programs click on Uninstall. Find the HP 3D DriveGuard software and remove it from your Windows 10 device.

- Hint: for accessing Control Panel just right-click on the Windows start icon and select ‘Control Panel’.
- Restart your device and then access this link. From there you can download the latest HP 3D DriveGuard driver.
- Afterwards, install the driver by running the executable file that was just downloaded and follow on-screen prompts.
The methods explained above should help you fix the HP Accelerometer error in Windows 10.
You can share your own experience with us and with the other users who are planning to use this step-by-step guide. The easiest way in which you can get in touch with us will be through the comments area that’s available below.
Andrew Wafer
Andrew is not just trying to bring you closer to Windows, but he’s truly interested in this platform. He just happens to be passionate about sharing that knowledge with our readers and that’s what makes his presence here, at WindowsReport, such a valuable one.
He specializes in writing about the best products for this operating system and Windows 10 fixes. Determined and creative, Andrew also loves coffee, country music, and Sunday mornings.
Все способы:
- Способ 1: Стандартные средства
- Способ 2: Сторонние средства
- Вариант 1: Logitech Gaming Software
- Вариант 2: THRUSTMASTER Control Panel
- Вариант 3: Внутриигровые настройки
- Вопросы и ответы: 0
Способ 1: Стандартные средства
Наиболее простой способ калибровки руля в Windows 10 заключается в использовании встроенной утилиты, напрямую меняющей параметры драйвера устройства, что в результате оказывает влияние на управление в любых других приложениях. Существенным преимуществом данного решения является независимость от производителя руля и возможность комбинации со сторонними средствами, которые будут рассмотрены далее по ходу инструкции.
Читайте также: Как правильно подключить руль к компьютеру
- Перейти к настройкам руля как игрового устройства можно несколькими способами, воспользовавшись специальной командой или посетив категорию «Устройства и принтеры» в «Панели управления» или «Параметрах». Мы остановимся на первом варианте, где необходимо просто нажать сочетание клавиш «WIN+R» на клавиатуре, во всплывающем окне указать представленную ниже команду и воспользоваться кнопкой «ОК» или клавишей «ENTER».
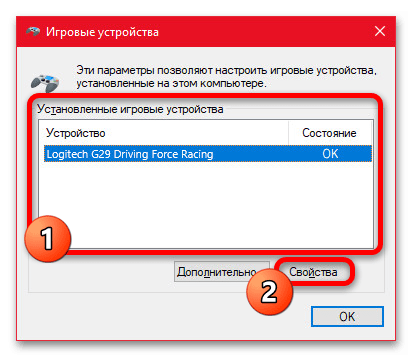
joy.cpl - Оказавшись во всплывающем окне «Игровые устройства», в рамках представленного списка найдите заранее подключенный руль и нажмите «Свойства» на нижней панели. Если по каким-то причинам нужное устройство отсутствует, обязательно попробуйте повторно подключить контроллер и установить драйвера, как правило, иногда идущие в комплекте отдельно.
- Теперь с помощью верхней панели перейдите на вкладку «Параметры» и в рамках категории «Калибровка игрового устройства» нажмите кнопку «Восстановить», чтобы прежде всего сбросить прежние параметры. После этого воспользуйтесь расположенной рядом кнопкой «Откалибровать» для запуска системного средства калибровки игровых устройств.
- В рамках окна «Калибровка игрового устройства» выполните действия, описанные в заголовке, будь то удержание руля и нажатие кнопки, полный оборот или перемещение отдельной оси. Для получения более подробной информации на протяжении калибровки можете установить галочку «Отображение данных», что никак не повлияет на результат.
- Средство калибровки, что важно учитывать, не требует обязательного соблюдения требований – некоторые шаги вполне можно пропустить на свое усмотрение, но это может негативно отразиться на управлении в играх. Как бы то ни было, выполняйте предлагаемые рекомендации вплоть до экрана «Калибровка завершена», где нужно просто нажать «Готово» для выхода из настроек.


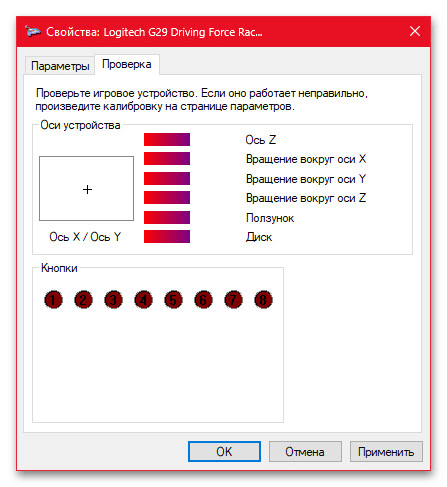
Помимо непосредственно самой калибровки, встроенная утилита в Windows 10 позволяет производить проверку устройства на работоспособность. Для этих целей в рамках окна «Свойства» перейдите на вкладку «Проверка» и протестируйте различные элементы руля. В данном случае точное количество кнопок и возможностей будет напрямую зависеть от модели вашего игрового устройства.
Способ 2: Сторонние средства
Основной и единственной альтернативой стандартным средствам Windows 10 могут стать сторонние программы, как правило, предназначенные для рулей определенных производителей и значительно отличающиеся друг от друга. В рамках данного раздела мы лишь вкратце рассмотрим несколько наиболее известных вариантов, тогда как подробности о других моделях лучше уточнять отдельно.
Вариант 1: Logitech Gaming Software
Фирменная программа от Logitech для настройки игровых устройств данного бренда позволяет, в том числе, управлять поведением рулей разных моделей и производить калибровку. Для этих целей необходимо выбрать руль на отдельной панели, перейти к параметрам и по необходимости в ручном режиме протестировать кнопки и непосредственно сами оси.
Скачать Logitech Gaming Software с официального сайта
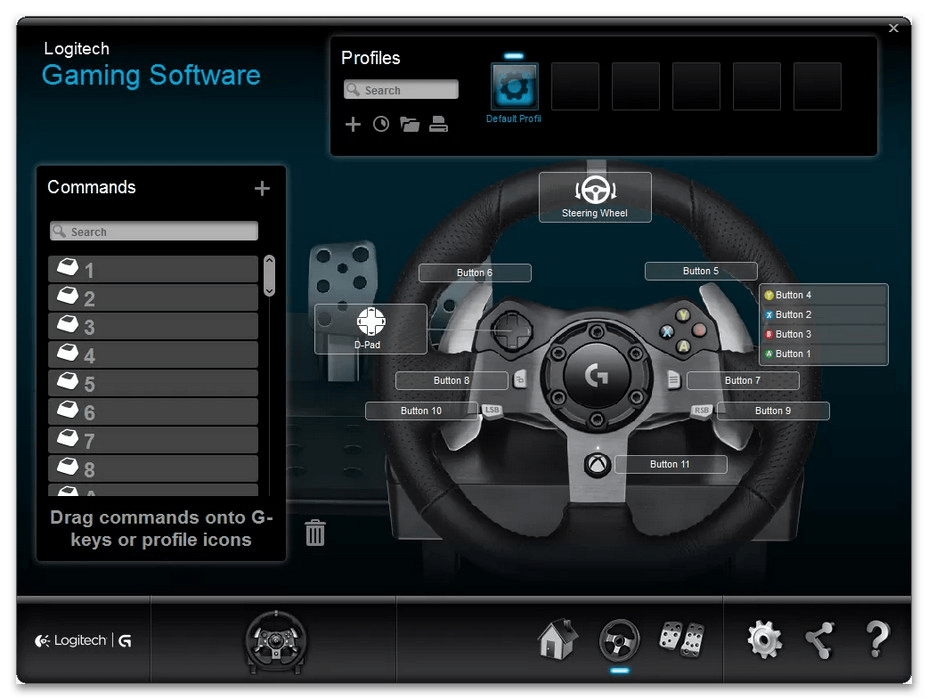
При работе с осями вполне можно корректировать чувствительность поворота, тогда как автоматические настройки в данном случае не предусмотрены. При этом, еще во время установки данной программы будет доступна калибровка с использованием описанных ранее системных средств, а потому Logitech Gaming Software можно считать средством для ручной настройки.
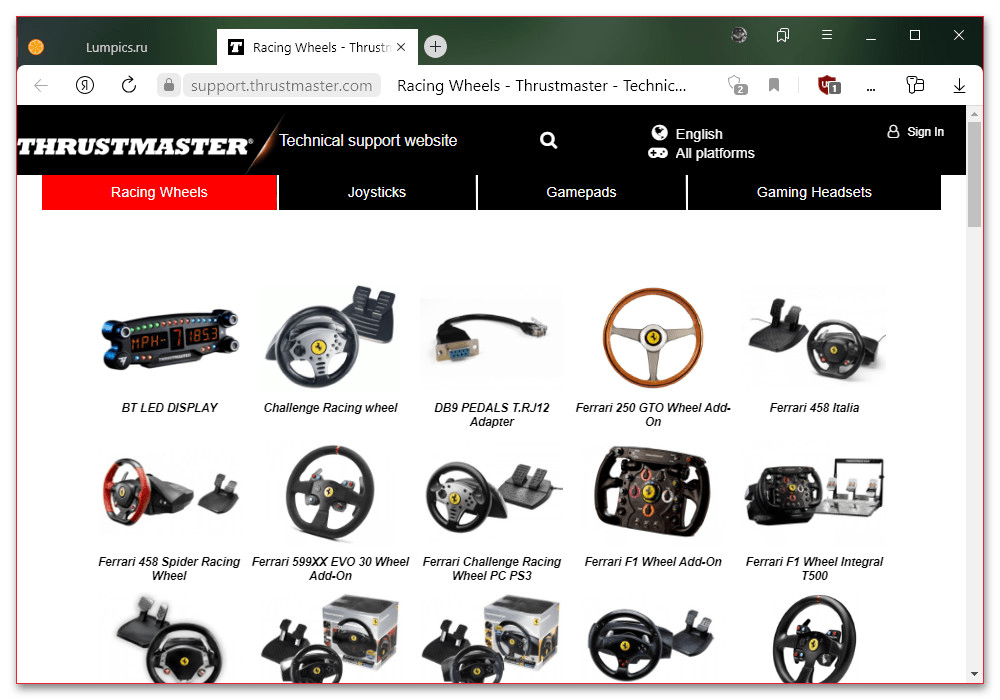
Вариант 2: THRUSTMASTER Control Panel
Следующая, опять же, фирменная утилита для рулей производства THRUSTMASTER представляет собой небольшую панель управления, интегрируемую напрямую в системное средство управления игровыми устройствами. В отличие от предыдущего варианта, в данном случае необходимо заранее правильно выбрать модель вашего руля на официальном сайте и только после этого скачать драйвер из соответствующей категории.
Скачать THRUSTMASTER Control Panel с официального сайта
После установки достаточно будет повторить описанные в самом начале инструкции действия, а именно, в рамках окна «Игровые устройства» выбрать руль и воспользоваться кнопкой «Свойства». Если все было сделано правильно и устройство корректно функционирует, на экране вместо классического средства калибровки отобразится фирменная THRUSTMASTER Control Panel.
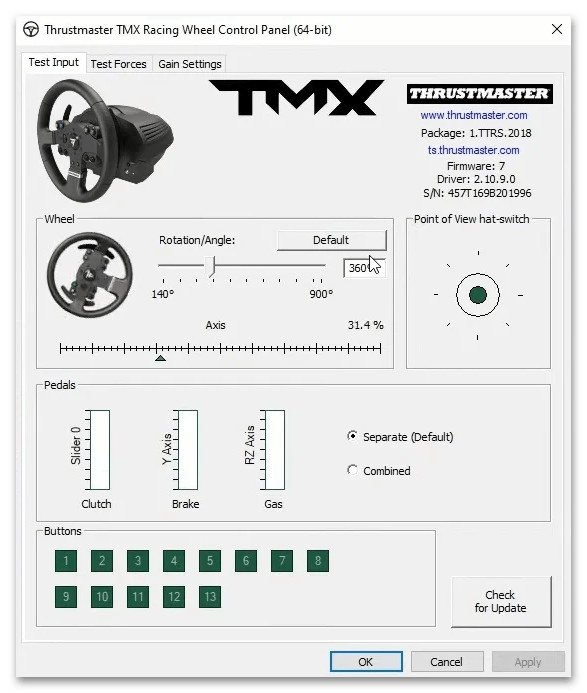
Здесь на первых двух вкладках можно вручную произвести проверку работоспособности, будь то тест основного управления или усиления. Основной вкладкой в рамках калибровки является последняя, так как позволяет вручную менять параметры силы. При этом данные настройки необходимо менять только в том случае, если вы ощущаете дискомфорт во время управления как в целом, так и в отдельно взятых играх.
Вариант 3: Внутриигровые настройки
Последний в рамках инструкции вариант включает в себя внутренние настройки, доступные практически в каждой игре, поддерживающей управление с помощью руля. В этих случаях, как правило, нет полноценной автоматической калибровки, тогда как доступные параметры сводятся к изменению осей, силы, уровня вибрации и многих других показателей.
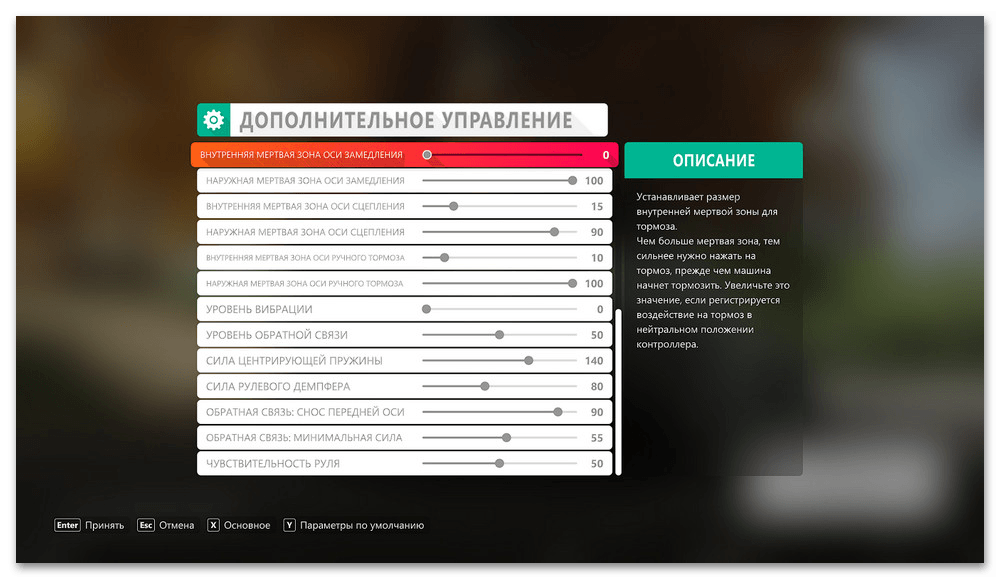
Выставленные таким образом настройки будут работать только внутри выбранной игры, отдельные примеры которых мы рассматривать не будем. Стоит также помнить, что рассмотренные ранее параметры имеют наивысший приоритет над внутриигровыми настройками, и потому прежде всего следует воспользоваться системными средствами и официальной утилитой от производителя руля.
Наша группа в TelegramПолезные советы и помощь
Несколько пользователей сталкиваются с «Акселерометр HP не работает в этой версии Windows» ошибка при каждом запуске Windows. Некоторые затронутые пользователи сообщили, что акселерометр работал нормально до обновления Windows 10. Как оказалось, Windows 10 Fall Creators Update (RS3) несет ответственность за ошибку.
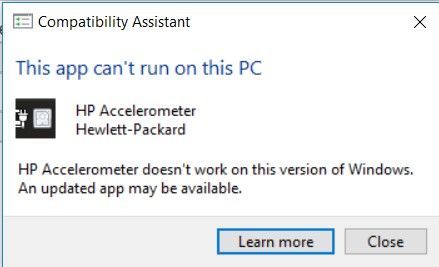
Hp акселерометр не работает с этой версией Windows. Обновленное приложение может быть доступно.
Что вызывает «Hp акселерометр не работает с этой версией Windows. Обновленное приложение может быть доступно »ошибка?
Акселерометр HP Hewlett Packard разработан для усиления защиты жесткого диска. Если он обнаруживает высокоскоростное движение, он мгновенно отключает считывающую головку. Это значительно снижает вероятность повреждения вашего жесткого диска.
Мы исследовали эту конкретную проблему, просмотрев различные пользовательские отчеты и решения, которые они использовали для решения проблемы. Исходя из того, что мы собрали, есть несколько довольно распространенных сценариев, которые вызывают это конкретное сообщение об ошибке:
- Устаревшая версия HP 3D Driveguard — Согласно официальной документации HP, эта проблема может возникнуть, если на устройстве установлена устаревшая версия 3D DriveGuard. Несколько пользователей, столкнувшихся с той же проблемой, сообщили, что проблема была устранена после установки последней доступной версии.
- Обновление Windows 10 мешает работе акселерометра HP — Известно, что конкретное обновление для Windows 10, выпущенное в конце 2017 года, вызывает именно это сообщение об ошибке. Пользователи предполагают, что это как-то мешает работе драйвера акселерометра HP.
Если вы пытаетесь решить эту конкретную проблему, эта статья предоставит вам набор проверенных шагов по устранению неполадок. Ниже представлен набор методов, которые другие пользователи в аналогичной ситуации использовали для решения проблемы.
Для достижения наилучших результатов следуйте приведенным ниже методам, пока не встретите исправление, эффективное в вашем конкретном сценарии. Давай начнем!
Способ 1. Применение исправления HP SoftPaq
Поскольку этой проблеме более одного года, HP уже решила ее, предложив исправление. Вы можете попытаться решить эту проблему, установив обновление HP SoftPaq для устранения ущерба, нанесенного Обновление создателей Windows 10 Fall (RS3).
Несколько пользователей, оказавшихся в аналогичной ситуации, сообщили, что проблема была устранена после выполнения следующих действий:
- Посетите эту ссылку (Вот) загрузить обновление SoftPaq (исправление, выпущенное HP).
- Откройте установщик обновлений (sp88981.exe) и следуйте инструкциям на экране для установки исправления.
Установка Hp SoftPaq
- После того как исправление установлено, перезагрузите компьютер и посмотрите, была ли проблема решена при следующем запуске.
Если вы все еще видите «Акселерометр HP не работает в этой версии Windows» Ошибка, перейдите к следующему способу ниже.
Способ 2. Установка последней версии HP 3D Driveguard
Большинству пользователей, которые столкнулись с этой проблемой, удалось исправить ее, обновив HP 3D Driveguard до последней версии. По-видимому, более старые версии этого программного обеспечения, как известно, вызывают «Акселерометр HP не работает в этой версии Windows» ошибка.
Большинству уязвимых пользователей удалось устранить ошибку, удалив текущую версию HP 3D DriveGuard и установив последнюю доступную версию. Вот краткое руководство о том, как это сделать:
- Нажмите Windows ключ + R открыть диалоговое окно «Выполнить». Затем введите «appwiz.cplИ нажмите Войти открыть Программы и особенности.
Запустите appwiz.cpl - внутри Программы и особенности, прокрутите список приложений, щелкните правой кнопкой мыши HP 3D DriveGuard и нажмите Удаление. Затем следуйте инструкциям на экране для удаления программного обеспечения из вашей системы.
Удаление HP 3D DriveGuard
- После удаления HP 3D DriveGuard перезагрузите компьютер. «Акселерометр HP не работает в этой версии Windows» ошибка больше не должна возникать при следующем запуске.
- Посетите эту ссылку (Вот) загрузить последнюю версию HP 3D DriveGuard и установить ее в свою систему.
