
Среди частых вопросов пользователей, особенно после того, как они сталкиваются с тем, что какая-то из библиотек DLL отсутствует в Windows 10, Windows 11 или других версиях системы — как зарегистрировать DLL в соответствующей версии ОС.
В этой инструкции подробно о способах регистрации библиотек DLL в Windows x64 и x86 (32-бит) с помощью regsvr32.exe (и кратко о regasm.exe), о возможных нюансах и проблемах, которые могут возникнуть в процессе.
Регистрация библиотеки DLL в Windows 10, Windows 11 и предыдущих версий системы
Дальнейшие шаги описаны в предположении, что DLL, которую нужно зарегистрировать, уже находится в нужном расположении: папке C:\Windows\System32, C:\Windows\SysWOW64 или, в некоторых случаях — отдельных папках программ, к которой относится соответствующая библиотека, например, для 1С — C:\Program Files\1cv8\номер_версии\bin (или Program Files x86 в случае 32-битной версии).
Прежде чем приступить к регистрации библиотеки, учитывайте следующие моменты:
- В x64 версиях Windows 64-битные DLL хранятся в System32, а 32-битные — в SysWOW64 (у некоторых начинающих пользователей бывает обратное предположение исходя из имён папок).
- Файлы DLL x64 и x86 (32-бит) — это разные файлы. И если прямого указания на разрядность в месте загрузки файла нет, то чаще это 32-битный файл (что не мешает ему работать в x64 системе), но это не всегда так.
- Для регистрации библиотеки DLL используется системный инструмент regsvr32.exe, который также доступен в двух версиях, которые лежат в папках System32 и SysWOW64 (в случае 64-битных систем). По умолчанию при описываемых далее действиях запускается x64 версия.
- 32-битным программам и играм (по умолчанию устанавливаются в Program Files x86 в 32-битных системах) для работы нужны 32-битные DLL, не зависимо от разрядности Windows.
Сам процесс регистрации в общем случае состоит из следующих шагов:
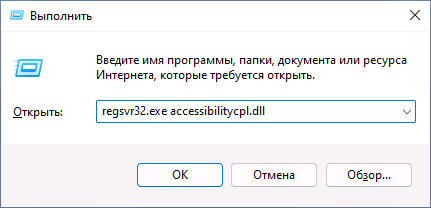
- Нажмите клавиши Win+R на клавиатуре (Win — клавиша с эмблемой Windows). Также можно нажать правой кнопкой мыши по кнопке «Пуск» в Windows 11 или Windows 10 и выбрать пункт контекстного меню «Выполнить».
- Введите команду regsvr32.exe путь_к_файлу (если путь к файлу содержит пробелы, возьмите весь путь в кавычки), например, для регистрации библиотеки DLL COMCNTR.DLL в 1С (для 64-бит) команда может иметь вид:
regsvr32.exe "C:\Program Files\1cv8\8.3.19.1150\bin\comcntr.dll"
Если DLL находится в System32, полный путь указывать не обязательно, достаточно простого имени файла, как на изображении ниже.

- Нажмите Ок или Enter.
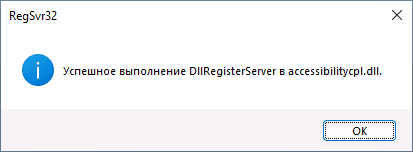
- При успехе вы получите сообщение вида «Успешное выполнение DllRegisterServer в имя_файла.dll» или «Успешное выполнение DllRegisterServer и DllInstall в имя_файла.dll».

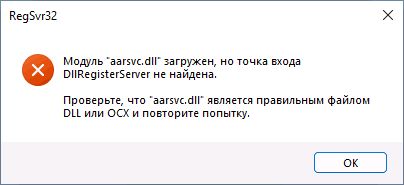
Возможна и неудача — сообщение об ошибке «Модуль dll загружен, но точка входа DllRegisterServer не найдена. Проверьте, что файл является правильным файлом DLL или OCX и повторите попытку». Подробнее об ошибке — в следующем разделе статьи.
Дополнительно: для регистрации классов из библиотек DLL .NET Framework в COM с созданием необходимых записей в реестре используется regasm.exe из .NET SDK, причем базовая команда регистрации DLL выглядит тем же образом, что и в случае с regsvr32.exe. Подробнее по использованию regasm — https://docs.microsoft.com/ru-ru/dotnet/framework/tools/regasm-exe-assembly-registration-tool.
Почему не удается зарегистрировать DLL
Ошибка при регистрации с помощью regsvr32 вида «Точка входа DllRegisterServer не найдена» говорит о том, что эта библиотека DLL не поддерживает регистрацию описанным методом. Можно попробовать использовать вариант команды:
regsvr32 /i /n путь_к_файлу.dll
но с большой вероятностью и это не поможет.
У большинства домашних пользователей такая проблема возникает при регистрации файлов DLL для игр и программ, часто не вполне лицензионных, которые сообщили, что нужный файл DLL не обнаружен или отсутствует. Причем сами библиотеки DLL обычно скачаны со сторонних сайтов (и чаще всего имеют имена начинающиеся с «vc», «msvc» или «d3d»). А решение, как правило, простое — выяснить, частью какого набора компонентов является эта DLL и установить эти компоненты с помощью их собственного установщика. Более подробно проблема и подходы к решению описаны в инструкции Точка входа DllRegisterServer не найдена — причины и возможные решения.
Видео
Надеюсь, цель достигнута, а количество вопросов, связанных с регистрацией DLL в Windows, уменьшилось.
Here, in this article, we are going to discuss ways to Register DLL File in Windows 11 or 10 64 and 32 bit. Many users come across a situation where they face a Windows problem and need to register a DLL file. Usually, this task is effective to fix startup issues for certain programs and optimize PC performance by loading and running different applications.
DLL stands for Dynamic link library. Its working principle is similar to that of executable files in Windows which contains a combination of codes and data. A DLL file includes a combination of multiple files and it is very helpful when an application is running on the PC. It also carries files for remote access and memory space in the system.
Register DLL File in Windows 11 and 10
Here are how to register DLL File in Windows 10 64 and 32 bit
Way-1: Using Run command
Step-1: Press Win + R.
Step-2: Now type the command as shown below in the Run dialog.
regsvr32 “C:\Windows\System32\myfile123.dll”
Note: Replace myfile123 with the exact file name.
Here “regsvr” signifies to register the file and 32 shows using the 32-bit version. Next, the extending command indicates the specific location of your PC where you are going to install the DLL file.
Step 3: Click the OK.
Step-4: You will get a confirmation message like DLL file is successfully registered on the system. Restart the Windows 11/10 PC. This will Register DLL File in Windows 11 or 10 whether it is 64-bit or 32-bit and the same will be added to the registry right away.
Important: In the 64-bit Windows version, 32-bit DLL files exist in Windows\SysWOW64 whereas 64-bit DLL files are in Windows\System32. But in 32-bit Windows version, the DLL files only stay in Windows\System32 folder. Here, there will be no SysWOW64 folder.
Way-2: Through Command Prompt
First of all, launch an elevated Command Prompt by using any of your preferable procedures. However, you can follow this easy method –
- Click – Start.
- Type – cmd.
- Select – ‘Run as administrator’.
- If UAC prompts up, click Yes.
For 32-bit Windows
- Type cd\ and hit Enter key.
- Next, type in or copy-paste the given line of command and hit Enter –
regSvr32 fileName.dll
Note: Replace fileName with the actual name of the DLL that you wish to register.
To Register 32-bit DLL in 64-bit Windows
- Copy-paste or type the following command and press Enter.
cd \Windows\SysWOW64
- Next, input this command and ensure to press Enter to continue.
regSvr32 fileName.dll
Note: Substitute fileName in the above command with the original name of the DLL file.
How to register DLLs File in 64-bit Windows
If you are using a 64-bit system and want to register a DLL file which is 32 bit, you can follow the below written steps –
Step-1: At first, open File Explorer and navigate to the given location.
%systemroot%\System32
Step-2: Once you have reached System32 folder, copy the DLL file and then paste it to the folder –
%systemroot%\SysWoW64
Step-3: Moving ahead, launch Run using the shortcut key i.e. “Win+R”. Now type the command –
C:\Windows\SysWOW64\REGSVR32
Step-4: Lastly, click on the OK button and reboot your system.
Note: If you skip the first two steps and start from the third step instead you might get an error like this:
• The module failed to load
• The specified module could not be found.
In case the DLL file is not registered in the PC and giving an error “The attempt to register dll file failed”, you need to disable the User Account Control (or in short UAC) in Windows 10.
For reference, read How to Stop User Account Control / UAC on Windows 10.
For a substantial number of users, turning off this feature usually fixes the register error of 32-bit DLL files in the system.
So, that’s all about the ways to Register DLL File in Windows 11 and 10 64 and 32 bit.
DLL files are library files. They help apps find the right libraries to use for whatever the app needs to do. The libraries themselves are often already installed on your system, and the DLL files just need to point the apps to them. Sometimes when you install an app, the DLL files don’t register or, during an update, the link between them and the app they belong to breaks.
The quickest way to fix this problem is to register or re-register the DLL files.
There are two ways to register or re-register a DLL file. The first method allows you to register them all at once. Use this method to register DLL files when you do not know the name of the file that is giving your problems. The second method targets a particular DLL file, and you should use it if you know which file is causing problems.
Register all DLL files
Follow the steps below to re-register or register DLL files.
- Open Command Prompt with admin rights.
- Run the following command. This command will register DLL files that are located at the path in the command.
for %x in (c:\windows\system32\*.dll) do regsvr32 %x
- If you want to register or re-register any and all DLL files, regardless of where they are located on the Windows drive, run the following command with admin rights.
for %1 in (*.dll) do regsvr32 /s %1
Register single DLL file
If you have the name of the file you want to register, i.e., the one that’s giving you trouble, you can register just that one file alone.
- Open Command Prompt with admin rights.
- Run the following command and replace the path and name part with the actual path and name of the DLL file you want to re-register.
regsvr32 /u "path & filename of dll"
Other solutions
Registering a DLL file isn’t going to fix all problems with it. Sometimes, the DLL file isn’t the cause of the problem, it’s just how it manifests. The problem might be with the library itself or with the app. In that case, you should try uninstalling and reinstalling the app or removing and installing the library that it uses again.
It can also help to update the library if a newer version of it is available. Finally, check if the version of the library is the right one for the app. You can check the app’s requirements to see what libraries or frameworks are needed to run it.

Fatima Wahab
Fatima has been writing for AddictiveTips for six years. She began as a junior writer and has been working as the Editor in Chief since 2014.
Fatima gets an adrenaline rush from figuring out how technology works, and how to manipulate it. A well-designed app, something that solves a common everyday problem and looks
Все способы:
- Варианты решения проблемы
- Способ 1: OCX/DLL Manager
- Способ 2: Меню «Выполнить»
- Способ 3: Командная строка
- Способ 4: Открыть с помощью
- Возможные ошибки
- Вопросы и ответы: 16
После установки различных программ или игр можно столкнуться с ситуацией, когда при включении возникает ошибка «Запуск программы произвести невозможно, так как требуемой DLL нет в системе». Несмотря на то, что ОС семейства Windows обычно регистрируют библиотеки в фоновом режиме, после того, как вы скачаете и поместите ваш DLL файл в соответствующее место, ошибка все равно возникает, и система просто его «не видит». Чтобы это исправить, нужно зарегистрировать библиотеку. Как это можно сделать, будет рассказано далее в этой статье.
Варианты решения проблемы
Имеется несколько методов, позволяющих устранить данную проблему. Рассмотрим каждый из них подробнее.
Способ 1: OCX/DLL Manager
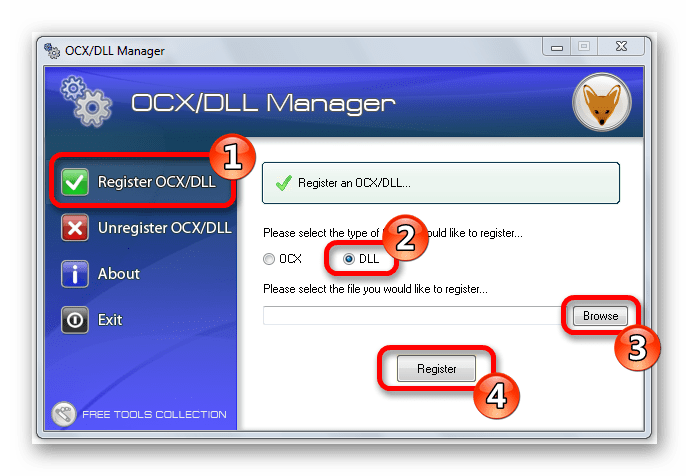
OCX/DLL Manager – это маленькая программа которая может помочь зарегистрировать библиотеку или файл OCX.
Загрузить программу OCX/DLL Manager
Для этого вам нужно будет:
- Нажать на пункт меню «Register OCX/DLL».
- Выбрать тип файла, который будете регистрировать.
- При помощи кнопки «Browse» указать местоположение DLL.
- Нажать на кнопку «Register» и программа сама зарегистрирует файл.
OCX/DLL Manager также умеет отменять регистрацию библиотеки, для этого понадобится выбрать в меню пункт «Unregister OCX/DLL» и в последствии проделать все те же операции, как и в первом случае. Функция отмены может вам понадобиться для сравнения результатов при активированном файле и при отключенном, а также в процессе удаления некоторых компьютерных вирусов.
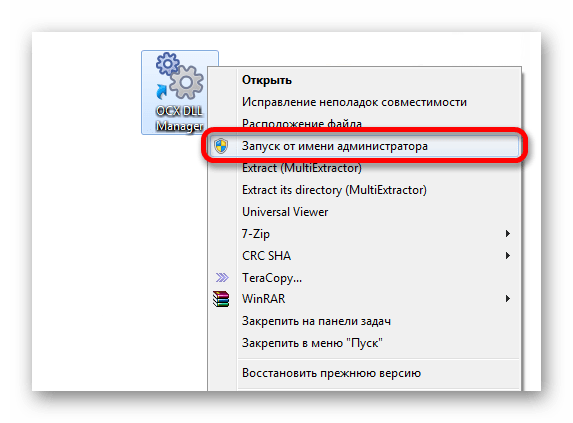
В процессе регистрации, система может выдать вам ошибку, говорящую о том, что требуются права администратора. В таком случае, нужно запустить программу нажав на неё правой кнопкой мыши, и выбрать «Запуск от имени администратора».
Способ 2: Меню «Выполнить»
Можно зарегистрировать DLL, используя команду «Выполнить» в стартовом меню операционной системы Windows. Для этого нужно будет произвести следующие действия:
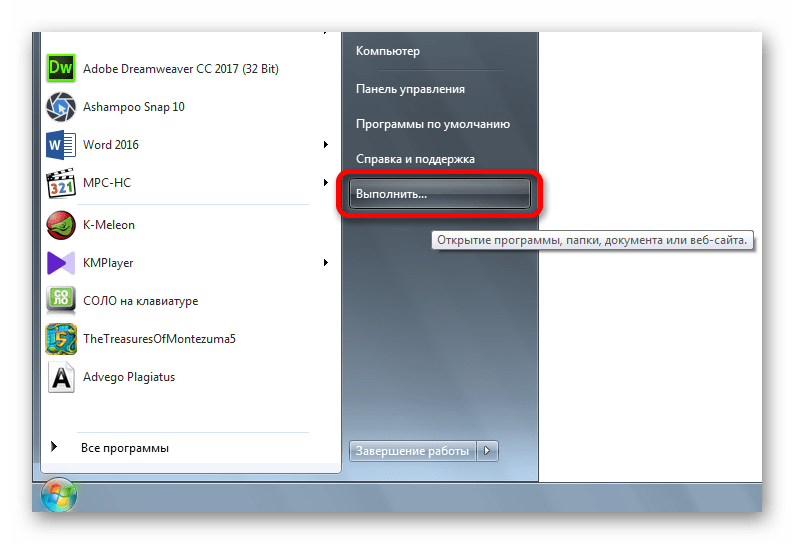
- Нажать клавиатурную комбинацию «Windows + R» или выбрать пункт «Выполнить» из меню «Пуск».
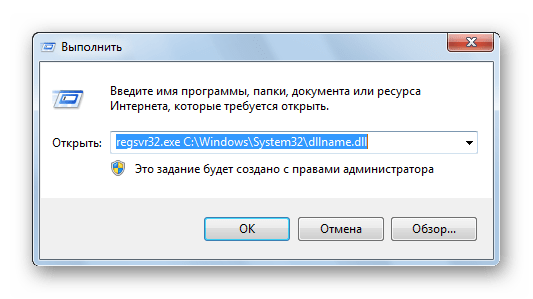
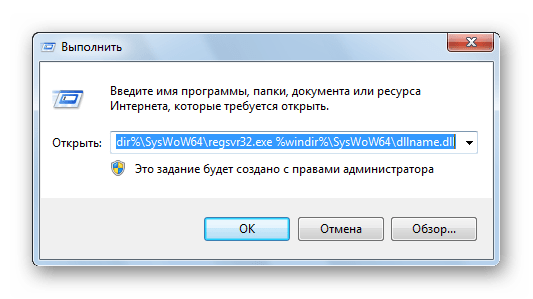
- Ввести имя программы, которая будет регистрировать библиотеку — regsvr32.exe, и путь, по которому размещен файл. В итоге должно получиться так:
- Нажмите «Enter» или кнопку «OK»; система выдаст вам сообщение о том, успешно или нет была зарегистрирована библиотека.
regsvr32.exe C:\Windows\System32\dllname.dll
где dllname — это имя вашего файла.
Этот пример подойдёт вам в том случае, если операционная система установлена на диск С. Если она находится в другом месте, то нужно будет поменять букву диска или воспользоваться командой:
%systemroot%\System32\regsvr32.exe %windir%\System32\dllname.dll
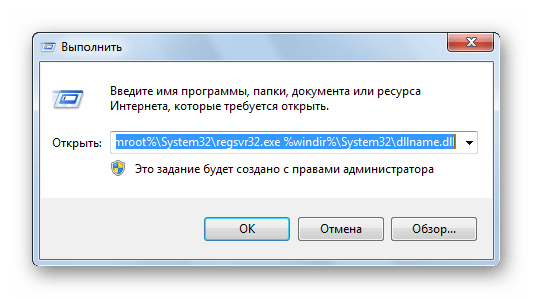
В таком варианте программа сама находит папку где у вас установлена ОС и запускает регистрацию указанного DLL файла.
В случае с 64-разрядной системой у вас будет две программы regsvr32 — одна находится в папке:
C:\Windows\SysWOW64
и вторая по пути:
C:\Windows\System32
Это разные файлы, которые используются раздельно для соответствующих ситуаций. Если у вас 64-битная ОС, а файл DLL 32-битный, тогда сам файл библиотеки должен быть помещен в папку:
Windows\SysWoW64
и команда будет выглядеть уже так:
%windir%\SysWoW64\regsvr32.exe %windir%\SysWoW64\dllname.dll
Способ 3: Командная строка
Регистрация файла через командную строку не сильно отличается от второго варианта:
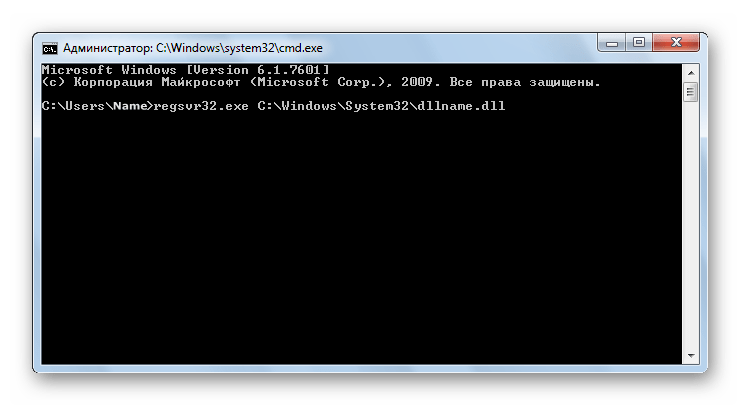
- Выберите команду «Выполнить» в меню «Пуск».
- Впишите в открывшемся поле для ввода cmd.
- Нажмите «Enter».
Перед вами появится окно, в котором нужно будет вводить те же команды, что и во втором варианте.
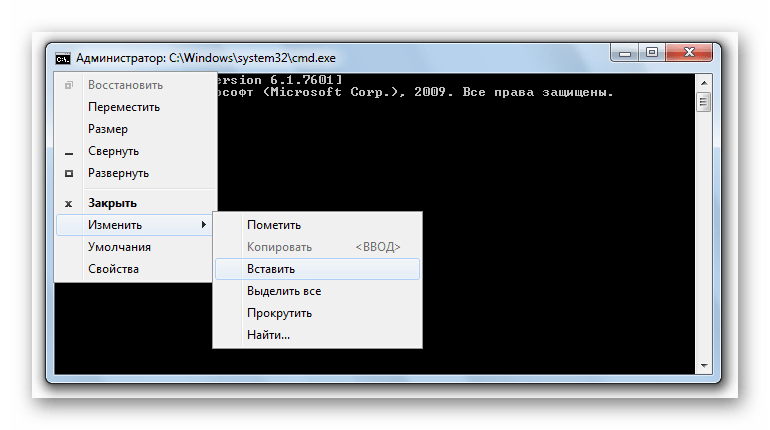
Надо отметить, что у окна командной строки имеется функция вставки скопированного текста (для удобства). Найти это меню можно, нажав правой кнопкой на пиктограмме в левом верхнем углу.
Способ 4: Открыть с помощью
- Откройте меню файла, который будете регистрировать, нажав по нему правой кнопкой мыши.
- Выберите «Открыть с помощью» в появившемся меню.
- Нажимаете «Обзор» и выберете программу regsvr32.exe из следующей директории:
- Откройте DLL с помощью этой программы. Система выдаст сообщение об успешной регистрации.
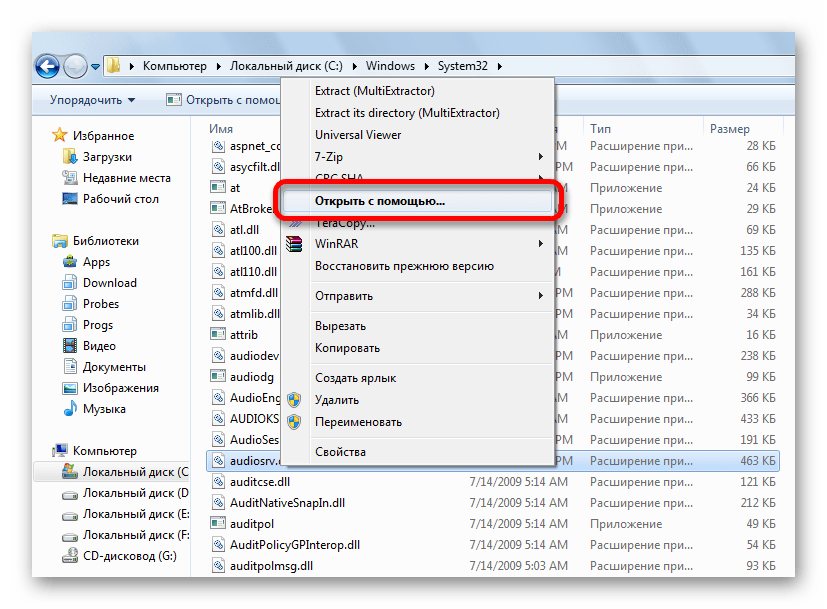
Windows/System32
или в случае, если вы работаете в 64-битной системе, а файл DLL 32-разрядный:
Windows/SysWow64
Возможные ошибки
«Файл не совместим с установленной версией Windows» — это означает, что вы, скорее всего, пытаетесь зарегистрировать 64-разрядную DLL в 32-битной системе или наоборот. Воспользуйтесь соответствующей командой, описанной во втором способе.
«Точка входа не найдена» — не все библиотеки DLL можно зарегистрировать, некоторые из них просто не поддерживают команду DllRegisterServer. Также, возникновение ошибки может быть вызвано тем, что файл уже зарегистрирован системой. Существуют сайты, распространяющие файлы, которые в реальности не являются библиотеками. В таком случае, естественно, зарегистрировать ничего не выйдет.
В заключение нужно сказать, что суть всех предложенных вариантов одна и та же — это просто разные методы запуска команды регистрации — кому как удобнее.
Наша группа в TelegramПолезные советы и помощь
How to Register/Re-register DLL Files in Windows 10 and Windows 11
Sometimes users experience problems such as running certain applications and need to register a DLL file or multiple DLL files manually. This article will show you how to register DLL files in Windows 10 (64 and 32-bit versions) and Windows 11.
DLL stands for Dynamic Link Library. A DLL file includes a combination of multiple files. DLLs help applications find the right libraries to perform the operations they were designed to perform.
In most cases, the libraries are already on your system, and the DLL files direct the application to the libraries. DLL files are created to prevent duplicate files with the same functions.
However, most DLL files don’t support registration or are already registered. You can’t register DLL files that came pre-installed on Windows because Windows updates fix all outdated and corrupted DLLs.
Third-party libraries and DLL files are registered during installation. Unfortunately, when you install an application, its DLL files may not register and prevent the application from accessing the libraries via DLLs. Registering DLL files can fix startup problems of applications or games that require specific DLL files to work.
Registering DLL files means storing the DLL file information into the Windows registry. DLL files can be registered using the Regsvr32 tool.
The Regsvr32 tool is a command-line utility used for registering and un-registering DLL and OCX files. The tutorial found below will help you register DLL files in Windows 11, Windows 10, in 32-bit and 64-bit versions.
Video Tutorial on How to Register DLL Files in Windows
Table of Contents:
- Introduction
- Register a DLL File in Windows 32-bit
- Register a DLL File in Windows 64-bit
- Re-register All DLL Files on Your System
- Video Tutorial on How to Register DLL Files in Windows
Download Computer Malware Repair Tool
It is recommended to run a free scan with Combo Cleaner — a tool to detect viruses and malware on your device. You will need to purchase the full version to remove infections. Free trial available. Combo Cleaner is owned and operated by Rcs Lt, the parent company of PCRisk.com read more.
Register a DLL File in Windows 32-bit
1. Hold down Windows+R keys to open Run.
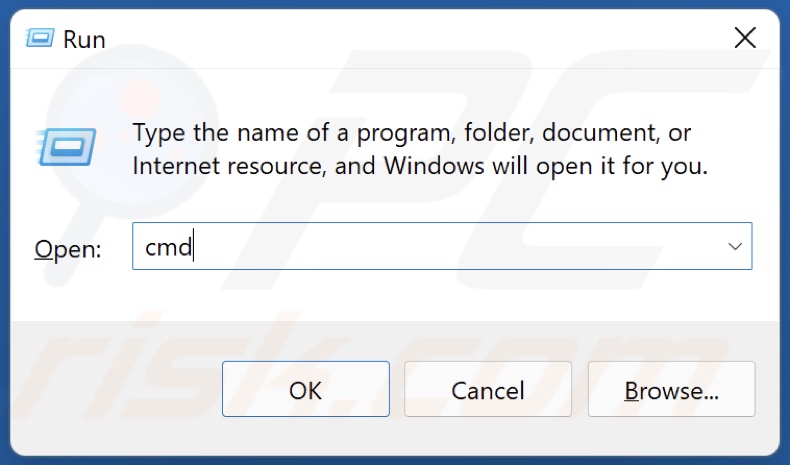
2. In the Run dialog box, type in CMD and hold down Ctrl+Shift+Enter keys to open the Command Prompt as an administrator.
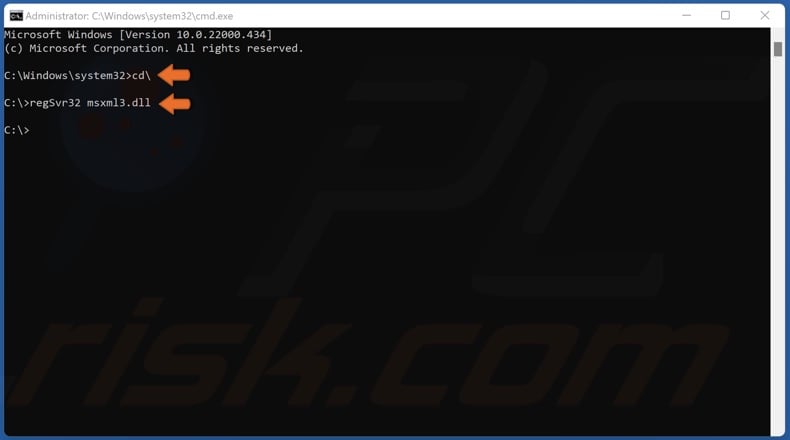
3. In the Command Prompt window, type in cd\ and press the Enter key.
4. Then, type in regSvr32 FileName.dll and press Enter. Substitute “FileName” with the name of the DLL file you want to register. For example, to register the “msxml3.dll” file, type in regSvr32 msxml3.dll and press Enter.
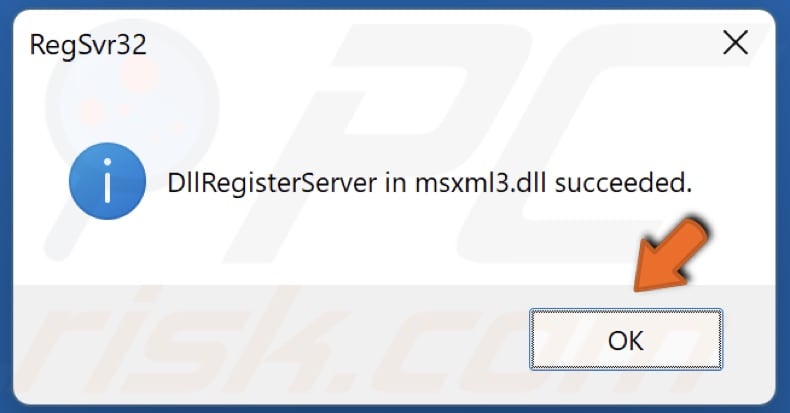
5. Click OK.

6. To unregister a file type in regSvr32 /u FileName.dll and press Enter.
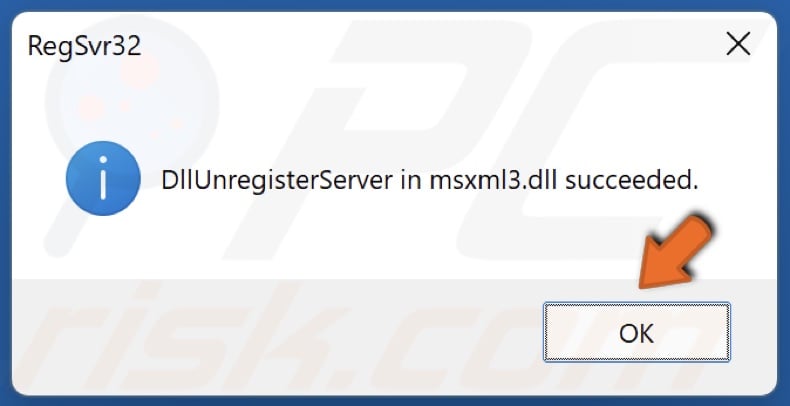
7. Click OK.
Note, if you get “The module “FileName.dll” was loaded but the entry point dllRegisterServer was not found error, it means that the file doesn’t need to be registered.
[Back to Table of Contents]
Register a DLL File in Windows 64-bit
1. Hold down Windows+R keys to open Run.
2. In the Run dialog box, type in CMD and hold down Ctrl+Shift+Enter keys to open the Command Prompt as an administrator.
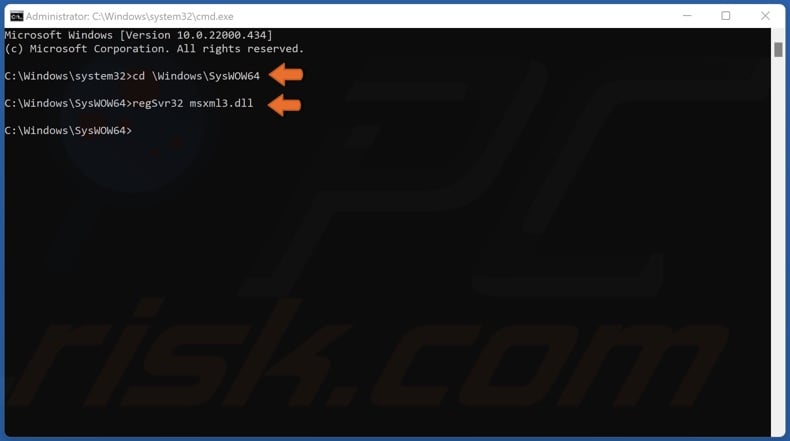
3. in the Command Prompt window, type in cd \Windows\SysWOW64 and press the Enter key.
4. Then, type in regSvr32 FileName.dll and press Enter. Substitute “FileName” with the name of the DLL file you want to register.
5. Click OK.
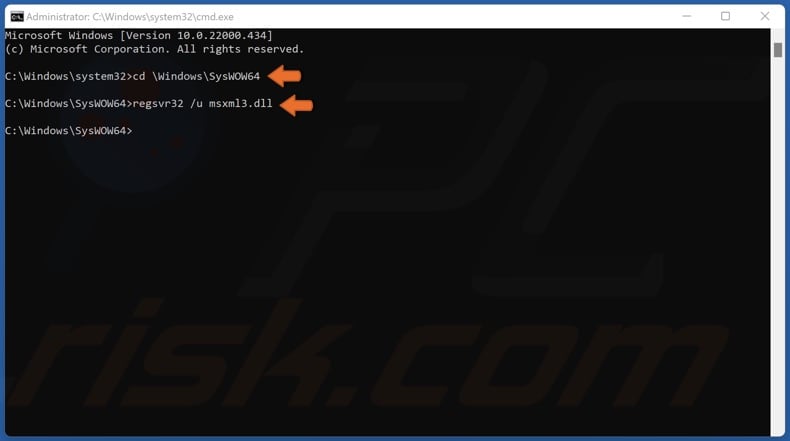
6. To unregister a file type in regSvr32 /u FileName.dll and press Enter.
7. Click OK.
[Back to Table of Contents]
Re-register All DLL Files on Your System
1. Hold down Windows+R keys to open Run.
2. In the run dialog box, type in CMD and hold down Ctrl+Shift+Enter keys to open the Command Prompt as an administrator.
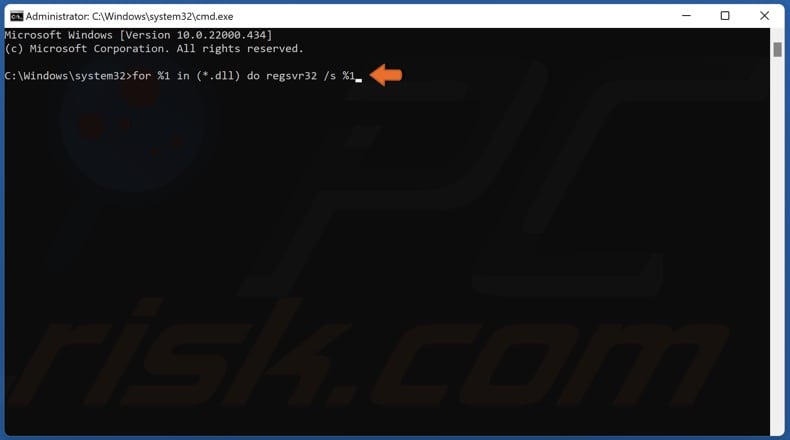
3. In the Command Prompt window, type in for %1 in (*.dll) do regsvr32 /s %1 and press Enter. Re-registering all .dll files will take some time.
[Back to Top]