
Applies ToWindows 11 Windows 10
Important:
Updated February 04, 2025
This support article was originally published on September 30, 2021, when Windows 11 was first released to the public. At the time of publication and still today, the intention behind this support page is to detail ways of installing Windows 11 on devices that meet system requirements for Windows 11. If you installed Windows 11 on a device not meeting Windows 11 system requirements, Microsoft recommends you roll back to Windows 10 immediately.
Windows 11 minimum system requirements remain unchanged and can be found in the article Windows 11 specs, features, and computer requirements.
Before installing Windows 11, make sure the device where Windows 11 is being installed meets the minimum system requirements. If the device is currently running Windows 10, Microsoft recommends verifying the minimum system requirements using the PC Health Check app. It isn’t recommended to install Windows 11 on a device that doesn’t meet requirements. For more information, see Installing Windows 11 on devices that don’t meet minimum system requirements.
Recommended method to install Windows 11
If upgrading from Windows 10 to Windows 11, Microsoft recommends waiting until Windows Update notifies that the upgrade is ready for the device. To check if Windows 11 is ready for a device using Windows Update, follow these steps:
-
Right-click on the Start menu and then select Settings > Update & Security > Windows Update .
Or
Select the following Windows Update shortcut:
Open Windows Update
-
In the Windows Update window that opens, select the Check for updates button.
Note: If there are updates available for the current version of Windows, the Windows 11 upgrade might not be made available until those updates are installed. Install any updates for the current version of Windows, restart the device, and then try checking for the Windows 11 upgrade again.
-
If Windows 11 is ready to be installed on the device, a message is displayed in the Windows Update window showing that Windows 11 is ready. Select the Download and install button to start the Windows 11 upgrade.
-
In the Software License Terms window that opens, select the Accept and install button.
-
The Windows Update window refreshes and Status: shows the progress of the Windows 11 upgrade downloading and installing.
-
Once the installation portion of the Windows 11 upgrade is done in Windows 10:
-
The Windows Update window refreshes and changes to Restart required. The Status: also updates to Pending restart.
-
A Windows Update notification is displayed in the notification area with the message Restart to install the newest Windows feature update.
To continue the Windows 11 upgrade, restart the device by selecting the Restart now button in the Windows Update window or Restart now in the Windows Update notification.
-
-
The device restarts and the Windows 11 upgrade process continues. The device restarts automatically a few more times to finish installing Windows 11.
-
The Windows sign-on screen is displayed once the Windows 11 upgrade is done. Sign into the device to complete the upgrade.
If a message isn’t displayed in the Windows Update window that Windows 11 is ready, it could be for one of the following reasons:
-
The device meets the hardware requirements for Windows 11, but the Windows 11 upgrade isn’t ready to install yet.
-
The device meets the hardware requirements for Windows 11, but there might be a known compatibility issue with the device and Windows 11. The Windows 11 upgrade is eventually offered if the compatibility issue is resolved. For more information, see The notification «What needs your attention» displays during a Windows upgrade.
-
The device doesn’t meet the hardware requirements for Windows 11. To check the device’s Windows 11 hardware compatibility, use the PC Health Check app available at the following link:
How to use the PC Health Check app
The Windows Update window might also instead display the following message:
-
Get ready for Windows 11
To see if this PC can run Windows 11, check the hardware requirements or visit your PC manufacturer’ website.
Other methods to install Windows 11
The Windows 11 Installation Assistant is an app that provides assistance with upgrading to Windows 11. Microsoft recommends waiting until a device is offered the Windows 11 upgrade via Windows Update before using the Windows 11 Installation Assistant app. However, the Windows 11 Installation Assistance app can be used before Windows Update offers the Windows 11 upgrade.
When the Windows 11 Installation Assistant is run, one of the following options is displayed in the Windows 11 Installation Assistant window:
-
Install Windows 11 — If the Windows 11 Installation Assistant determines that the device meets the hardware requirements for Windows 11, it offers to install it. To proceed with the install, in the Windows 11 Installation Assistant window:
-
Select the Accept and install button to start the upgrade to Windows 11.
-
When the Windows 11 upgrade process prompts to restart, select the Restart now button.
-
The device restarts and the Windows 11 upgrade process continues. The device restarts automatically a few more times to finish installing Windows 11.
-
The Windows sign-on screen is displayed once the Windows 11 upgrade is done. Sign into the device to complete the upgrade.
-
-
Use the PC Health Check app to check compatibility — The Windows 11 Installation Assistant needs more information to determine if the device meets the hardware requirements for Windows 11. Run the PC Health Check app to check if the device meets the minimum hardware requirements. For more information, see How to use the PC Health Check app.
After running the PC Health Check app, select the Refresh button in the Windows 11 Installation Assistant window to update status. The updated status should show if Windows 11 is available for install or if the device doesn’t meet the minimum hardware requirements to install Windows 11.
-
This PC doesn’t meet the minimum system requirements to install Windows 11 — The device doesn’t meet the hardware requirements to upgrade to Windows 11. Microsoft recommends leaving the device on Windows 10.
Support for Windows 10 will end in October 2025
After October 14, 2025, Microsoft will no longer provide free software updates from Windows Update, technical assistance, or security fixes for Windows 10. Your PC will still work, but we recommend moving to Windows 11.
Learn more
The Windows 11 installation media is an alternate method of installing Windows 11. Installation media is normally used to install Windows 11 on a device that doesn’t already have Windows installed on it. However, it can also be used to upgrade existing installations of Windows to Windows 11.
For details on where to obtain the Windows 11 installation media and how to create it, see the article Create installation media for Windows.
Once the installation media is created, it can be used to upgrade an existing installation of Windows to Windows 11 using one of the following two methods:
-
Run the installation media in the current version of Windows.
-
Boot from the installation media to install a fresh copy of Windows 11.
Run the installation media in the current version of Windows
Windows 11 installation media can be used in the current version of Windows, for example Windows 10, to upgrade to Windows 11:
-
Sign into Windows on the device being upgrade to Windows 11.
-
Insert the Windows 11 installation media into the Windows device. For example, if the Windows 11 installation media was created on a USB flash drive, attach the USB flash drive to the Windows device.
-
A pop-up notification window should appear asking what to do with the inserted media. Select Run setup.exe.
If a pop-up notification doesn’t appear:
-
Right-click on the Start menu and then select File Explorer .
-
When File Explorer opens, in the navigation bar, select This PC.
-
In the results pane under Devices and drives, right-click on the Windows 11 installation media and select Install or run program from your media.
Note: If the User Account Control window appears, select the Yes button. If the User Account Control window asks for an admin user name and password, enter a user name and password of an account that has administrator privileges. Once the user name and password are entered, select the Yes button.
-
-
The Windows 11 Setup window opens. Step through the Windows 11 Setup pages, following instructions at each step.
-
At the Ready to install page, the default is to Keep personal files and apps. However, selecting the Change what to keep link gives the following options:
-
Keep personal files and apps — Personal files, apps, and Windows settings are all kept and migrated to the new Windows 11 install. This option is the default option.
-
Keep personal files only — Personal files are kept and migrated to the new Windows 11 install, but apps and Windows settings are deleted.
-
Nothing — Everything is deleted, including personal files, apps, and Windows settings. If this option is selected and personal files are needed, they should first be backed up, for example to OneDrive or an external backup device.
Select the desired option or accept the default of Keep personal files and apps. To start the upgrade, finish stepping through the Windows 11 Setup pages.
-
-
The device is upgraded to Windows 11.
Boot from the installation media to install a fresh copy of Windows 11
Windows 11 installation media can be booted from on an existing Windows device to upgrade to Windows 11:
Warning:
-
This method completely wipes the contents of the hard drive and the existing installation of Windows and installs a fresh copy of Windows 11. All files and installed apps on the device are lost. Make sure that any necessary files are backed up before proceeding, for example to OneDrive or to an external backup device.
-
Although this method does check to make sure the device meets some of the minimum system requirements for Windows 11, it isn’t as thorough as the PC Health Check app or using Windows Update. Microsoft recommends running the PC Health App in the current installation of Windows to verify that the device meets all requirements to run Windows 11. Running the PC Health App should be done before attempting to use the installation media to install a fresh copy of Windows 11. For more information on how to use the PC Health App to check if the device meets the minimum requirements for Windows 11, see How to check if your device meets Windows 11 system requirements after changing device hardware.
-
Insert the Windows 11 installation media into the Windows device. For example, if the Windows 11 installation media was created on a USB flash drive, attach the USB flash drive to the Windows device.
-
Turn on the device that is being upgraded to Windows 11 and then initiate the device’s boot menu. The boot menu is initiated by selecting an appropriate key on the keyboard when the device first boots. This key varies by device manufacturer and model but is usually one of the function keys (F1 — F12) at the top of the keyboard or the DEL key. For more information, see the device’s documentation or the device manufacturer’s website.
-
From the device’s boot menu, select the Windows 11 installation media.
-
Once the device boots from the Windows 11 installation media, the Windows 11 Setup window appears. Step through the Windows 11 Setup and follow the on-screen instructions.
-
The device is upgraded to Windows 11 and a fresh copy of Windows is installed.
Related articles
-
Can I upgrade to Windows 11?
-
Getting ready for the Windows 11 upgrade.
-
Create installation media for Windows.
-
Upgrade to Windows 11: FAQ.
-
Installing Windows 11 on devices that don’t meet minimum system requirements.
-
How to check if your device meets Windows 11 system requirements after changing device hardware.
-
The notification «What needs your attention» displays during a Windows upgrade.
Need more help?
Want more options?
Explore subscription benefits, browse training courses, learn how to secure your device, and more.
Windows 11, доступная как бесплатное обновление для совместимых компьютеров и ноутбуков с Windows 10, была официально выпущена. Обновление уже сейчас можно установить несколькими способами.
В статье подробно о том, как обновиться до Windows 11 с помощью официальных инструментов, предлагаемых Майкрософт. В первую очередь об установке системы на полностью совместимых системах, а затем — об установке на устройствах, характеристики которых не соответствуют минимальным. В контексте темы может быть полезным: Как обновиться до Windows 11 на неподдерживаемом компьютере, Как узнать, совместим ли компьютер с Windows 11.
Обновление через Центр обновлений
Обновление до Windows 11 будет доступно через Центр обновлений Windows 10, но только для полностью совместимых устройств и не сразу, а по прошествии некоторого времени.
Согласно имеющейся информации Майкрософт, обновление будет выходить «волнами», скорость распространения которых будет зависеть от оценки совместимости конкретных устройств с новой ОС. Также есть сведения, что обновление через Центр обновлений станет доступным лишь с начала 2022 года.
Для тех пользователей, у которых отсутствует необходимость срочной установки обновления, оптимальным вариантом, возможно, будет дождаться получения обновления в Центре обновлений — с большой вероятностью, к этому моменту многие первоначальные недочеты и баги Windows 11 будут исправлены, а проблем после обновления будет меньше. Рассуждения автора на эту тему: Стоит ли обновляться до Windows 11.
Как обновиться, используя Помощник по установке Windows 11
Сразу после выхода Windows 11 на официальном сайте Майкрософт появилась страница, которая позволяет скачать:
- Помощник по установке Windows 11 — для обновления текущей Windows 10 до Windows
- Средство создания установочного накопителя Media Creation Tool — утилиту для создания установочного накопителя Windows Как и раньше, позволяет создать образ ISO, но возможность установки обновления с помощью утилиты отсутствует (в предыдущих версиях такая функция присутствовала).
- Образ ISO Windows 11, который также можно использовать для обновления.
В этом разделе рассмотрим обновление до Windows 11 с помощью утилиты Помощник по установке Windows 11 (Windows 11 Installation Assistant):
- Скачайте Помощник по установке Windows 11 с официального сайта https://www.microsoft.com/ru-ru/software-download/windows11
- Внимание: для выполнения следующих действий необходимо, чтобы на системном разделе диска было не менее 9 Гб свободного места (лучше — больше), а установленная версия Windows 10 была не старше 2004. Также должен быть включен доверенный платформенный модуль TPM 2.0. Не выполняйте обновление при питании ноутбука от батареи. Не выключайте компьютер в процессе.
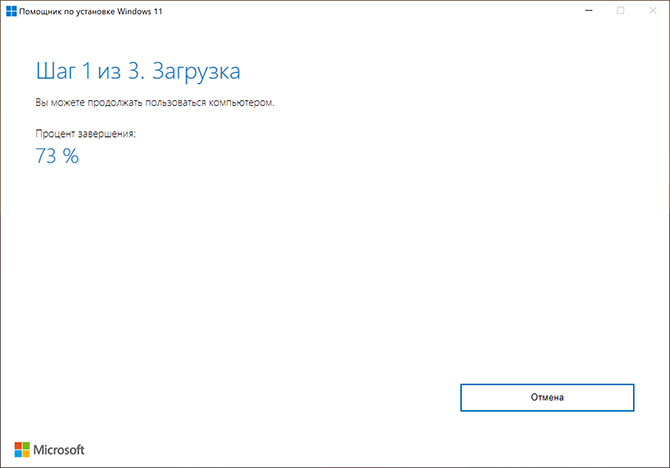
- Запустите Помощник по установке. После принятия лицензии начнется автоматическая загрузка файлов, необходимых для обновления. В случае несовместимости компьютера вам будет предложено скачать утилиту проверки совместимости или вы сразу увидите сообщение «Этот компьютер не соответствует минимальным требованиям к системе для установки Windows 11».

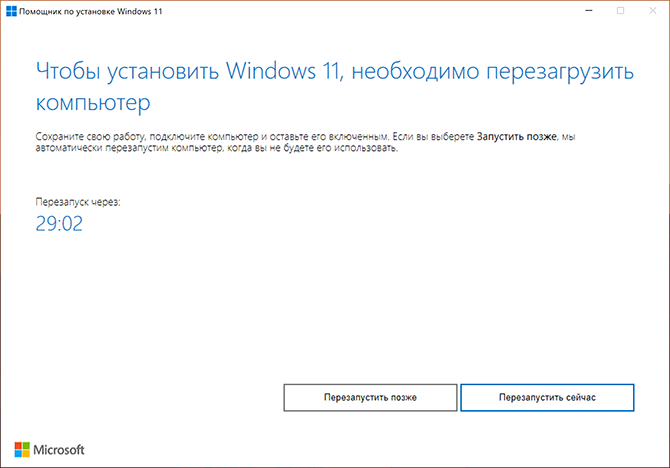
- Шаги по загрузке, подготовке и установке необходимых файлов будут выполнены автоматически. После завершения третьего шага вам будет предложено перезагрузить компьютер для продолжения установки.
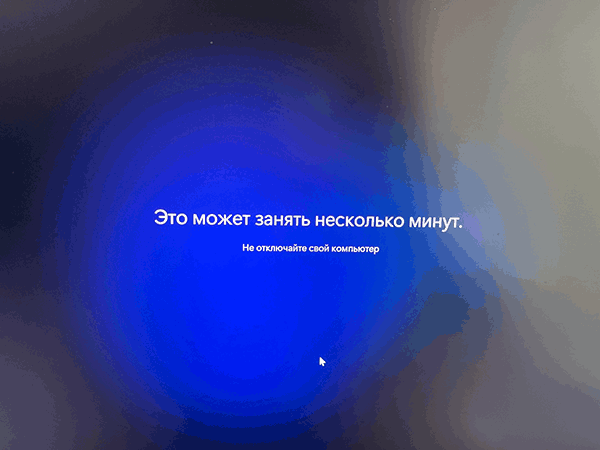
- После перезагрузки на черном экране будет выполняться «Работа с обновлениями», которая может занять продолжительное время, а компьютер может несколько раз перезагрузиться.

- В итоге вы попадете на экран входа в систему, после входа будет выполнена подготовка к запуску системы.

- После завершения установки обновления вы окажетесь на рабочем столе установленной Windows 11 — можно приступать к работе.

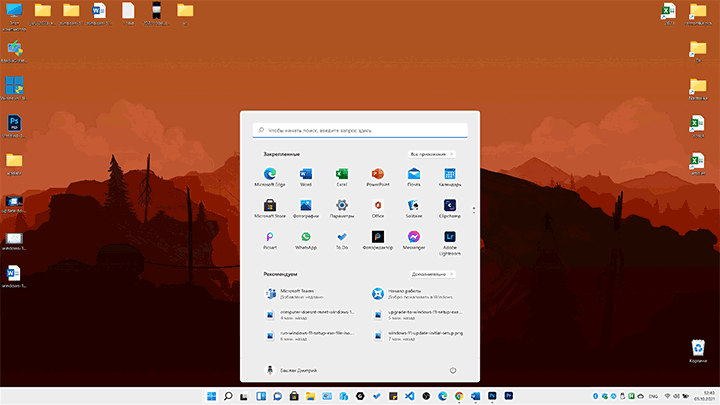
Все системные настройки и установленные программы должны работать, как и прежде: однако, с учетом того, что мы имеем дело с первым выпуском новой ОС, гарантировать этого нельзя.
Обновление до Windows 11 с использованием ISO образа (без чистой установки)
Существует возможность выполнить обновление до Windows 11 без использования рассмотренной выше утилиты, а с помощью смонтированного образа с системой. Порядок действий:
- С официальной страницы https://www.microsoft.com/ru-ru/software-download/windows11 скачайте образ с системой.
- Смонтируйте его в системе: обычно в Windows 10 это происходит автоматически при двойном клике по файлу образа. Если образ открывается иначе (например, в архиваторе), нажмите по нему правой кнопкой мыши и выберите пункт «Подключить».
- Подключенный образ отобразится в проводнике как DVD-дисковод, откройте его и запустите файл setup.exe

- Откроется окно «Установка Windows 11», в нём достаточно будет нажать «Далее» и подождать, пока будет выполнена «Проверка наличия обновлений». Возможно, программа установки будет автоматически перезапущена.

- На следующем этапе будет выполнена проверка совместимости компьютера с Windows 11. Если компьютер совместим, обновление будет продолжено примерно тем же образом, как описано в предыдущем разделе. Иначе вы получите информацию, о том, какие именно характеристики компьютера не отвечают требованиям Windows 11.


Интересно, что несмотря на то, что ранее сообщалось об отсутствии необходимости наличия доверенного платформенного модуля TPM 2.0 для пользователей из России, установка описанным методом при его отсутствии не происходит с сообщением «Этот компьютер не отвечает к требованиям к системе для Windows 11».
Установка обновления на неподдерживаемых компьютерах
В случаях, когда встроенные инструменты проверки совместимости системы с Windows 11, предусмотренные Майкрософт, обнаружат несовместимость по каким-либо характеристикам, выполнить обновление описанными выше способами не удастся.
Однако, при необходимости, вы можете либо использовать способы обхода проверки совместимости или выполнить чистую установку Windows 11 с флешки, используя для её создания Средство создания установочного накопителя (Installation Media Creation Tool) или доступный на официальном сайте образ ISO для создания загрузочной флешки с помощью сторонних программ. Однако, при установке образа, наличие модуля TPM проверяется, чтобы все равно выполнить установку, пригодится инструкция Как создать ISO образ или флешку Windows 11 для чистой установки без проверки TPM. Сам процесс установки пошагово описан в статье Как установить Windows 11 с флешки.
Учитывайте, что по информации Майкрософт, при установке Windows 11 на неподдерживаемых компьютерах и ноутбуках, пользователь не будет получать обновлений системы. Не знаю, насколько это соответствует действительности, но со временем станет известно точно.
Installing Windows 11 can be a headache for some people, but it doesn’t have to be if you use the official installation assistant provided by Microsoft. Keep reading to find out how to make use of it.
What is a Windows 11 installation assistant?
Windows 11 installation assistant is a tool developed by Microsoft with the sole purpose of making it easier to upgrade the current PC to Windows 11. However, this software won’t work if your PC is running on ARM architecture.
As a tech enthusiast, I have already used this application to install Windows on both my desktop and laptop, so don’t worry, I will explain everything step-by-step. All you have to do is just read without any distractions.
So, grab some drinks and start reading. I also suggest not skipping any parts if you don’t want to be confused later.
What are the Ways to Install Windows 11?
The ways to install Windows 11 include using the installation assistant, creating a Windows 11 installation USB flash drive, or using a pre-built Windows 11 installation CD. You can also install Windows by mounting a Windows iso and using the setup inside.
I know the list of options to choose for installing Windows 11 can be overwhelming, but you only need to use the one that’s most suitable for you.
All the methods except the installation CD involve downloading a Windows 11 pre-built ISO file. This needs to be done manually if you plan to flash to a USB drive or install Windows from the ISO itself.
On the other hand, the Windows 11 installation assistant takes care of everything, including downloading the ISO file automatically.
The only place I recommend you to download Windows ISOs is from the official Microsoft website because several third-party websites contain modified Windows ISOs that can contain viruses and malware.
Some ISOs online are also modified to remove all the Windows bloatware and reduce the installation size to reduce overall RAM usage and increase Windows performance.
However, using these might cause problems with specific Windows features, and you might also lose some features completely. If you want to avoid using Windows ISOs altogether, your best bet is to use the Windows 11 installation assistant or a Windows CD.
You can find a Windows CD in any computer shop, but the installation process using that might be a little complicated for you. If you don’t do it right, you might end up deleting all your files when you upgrade.
There is no risk of that if you use the installation assistant instead, so let’s find out how to actually use that software.
Follow our guide to Fix cFosSpeed Driver Preventing Windows 11 Installation.
I will discuss the step-by-step process to use this tool now, but before that, you need to make sure the PC you want to install Windows 11 on is running Windows 10 and has the necessary specifications to run Windows 11.
If the specifications don’t match, the installation assistant won’t work.
Here are the steps to use the Windows 11 installation assistant:
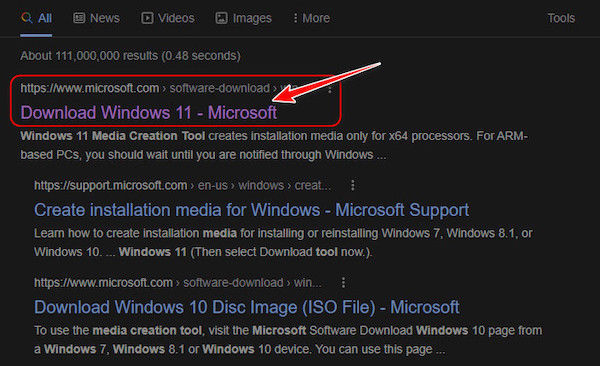
- Visit the Google homepage from any browser on your PC.
- Type ‘Windows 11 Installation Tool’ on the Google search bar and click on the Google Search button.
- Once the search results appear, click on the one from Microsoft.

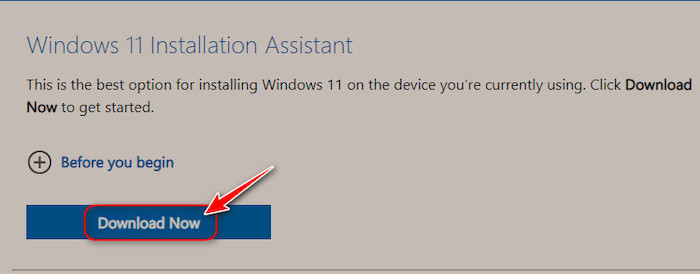
- Look for the Windows 11 installation assistant section and click on the Download Now button below that.

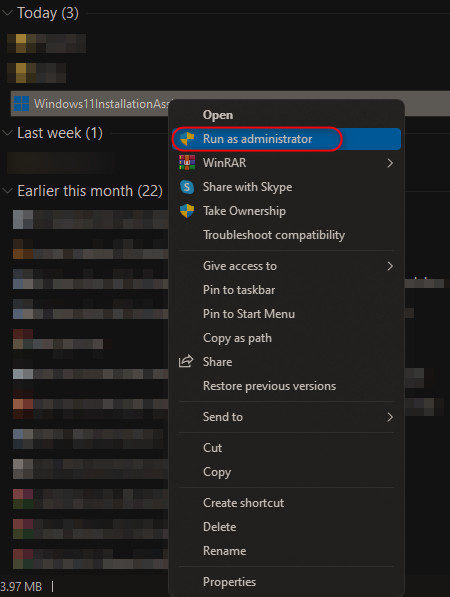
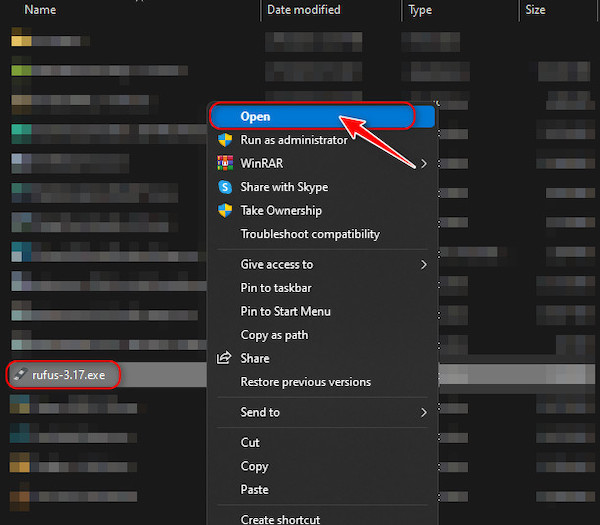
- Open the folder where you downloaded the file, right-click on the file named ‘Windows11InstallationAssistant.exe’ and click on Open File.

- The tool will check if your system supports minimum Windows 11 requirements, and if it’s not compatible, you should see a message stating that.
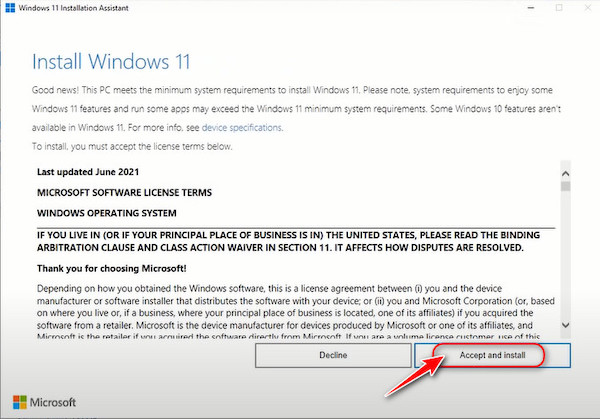
- If your system is compatible, terms and agreement text will appear. Verify that your PC is connected to the internet and click the Accept and Install button.

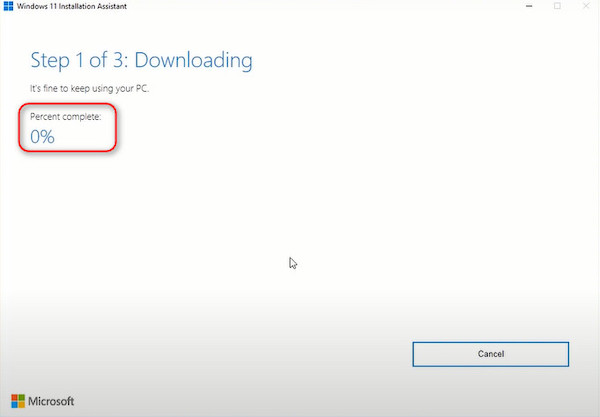
- The program will immediately start downloading the latest Windows 11 iso file from official Windows servers. This iso file is only accessible to the program, so if you want to use it, you need to download it from the Microsoft website.

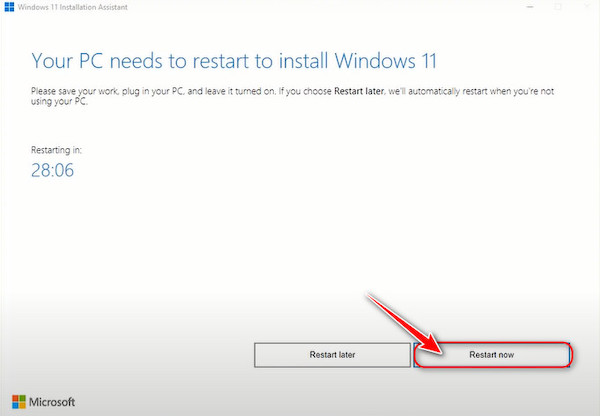
- Once the download reaches a hundred percent, the program will offer you to choose between rebooting now or after thirty minutes. Check if your laptop has more than 90 percent battery, and click on the ‘Restart Now’ button if you want to upgrade right away.

- The installation process will begin after that, so make sure not to turn off your computer or disconnect the power supply by any means. The computer will repeatedly restart to install Windows.
- Once the installation is completed, you will need to sign in normally using your credentials if you have any and start discovering all the new features. Notice that none of your personal files, apps and settings were removed.

Check out the easiest way to Fix When Windows 11 Won’t Install.
How to Make a Bootable USB Drive for Windows 11
You can make a bootable USB drive for Windows 11 using a third-party tool like Rufus or balenaEtcher, and both tools require you to download and use an ISO file to create the bootable USB flash drive.
Before creating a bootable disk, some critical points to consider are ensuring the ISO you downloaded is reliable and does not contain any viruses. The best way to do this is to download it from the official website.
You also need to have a minimum of 8GB flash drive connected to your PC.
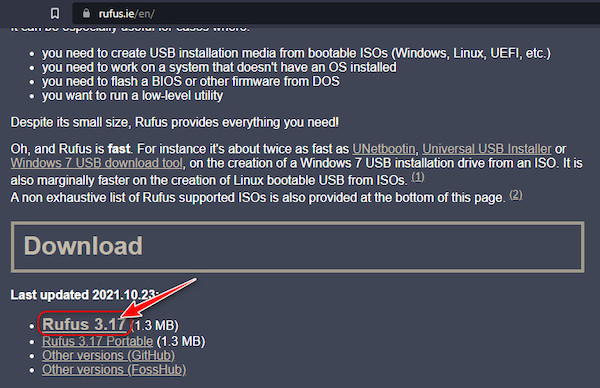
Here are the steps to make a bootable USB drive for Windows 11 using Rufus:
- Launch your browser and go to google.com.
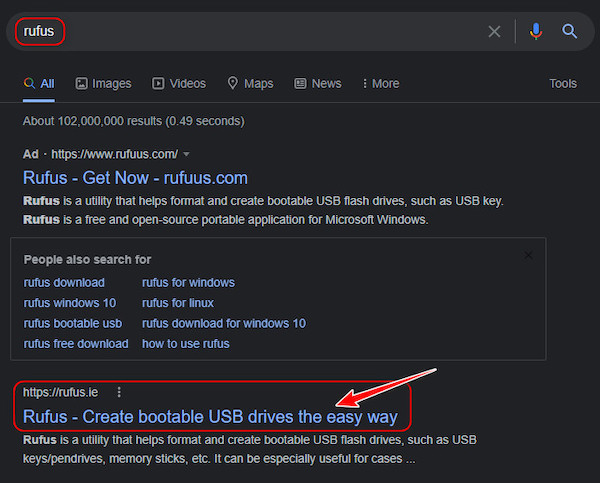
- Search for Rufus and click on the first result below all the sponsored results.

- Scroll down until you get to the Download section and click on the latest version of Rufus to download it.

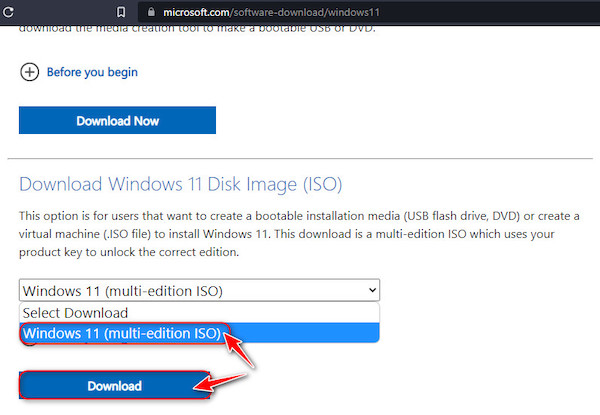
- When that finishes downloading, go back to Google, search for windows 11 iso, and click on the first result from Microsoft.
- Scroll to the Windows 11 Disk Image section, click on the Select Download drop-down menu, and select Windows 11. Then, click on the Download button.

- Go to the downloads folder once both files have finished downloading. Launch the Rufus exe file.

- Go to Start, search for System Information and click on the first result.
- Note what the text next to BIOS mode says on a piece of paper.

- Switch to Rufus and select your USB drive first. Then, click on Select and choose the ISO file you downloaded earlier. After that, if the BIOS mode was legacy, click on MBR under Partition scheme. Otherwise, select GPT and click on Start.
- After the flashing process is completed, you have successfully created a bootable USB drive for installing Windows 11.

FAQ
Should I install Windows 11 using an installation assistant?
Yes, you should install Windows 11 using installation assistant since it keeps all your music, videos, documents, apps, and settings intact while upgrading Windows if you are already on Windows 10.
How long does the Windows 11 installation assistant take?
The Windows 11 installation assistant takes around 20 minutes to download the required files, and once that’s done, it takes an additional 40 to 60 minutes for the installation process to complete.
Does Windows 11 installation assistant delete everything?
No, the Windows 11 installation assistant doesn’t delete everything. All your files and settings will remain untouched during the installation. However, if you use other methods for installing Windows 11, you might lose files.
Is Windows 11 upgradation free?
Yes, Windows 11 upgrade is free for all users who are running the latest build of Windows 10. Also, your Windows must be activated for the free upgrade. Otherwise, you will need to enter a product key while upgrading.
Final Thoughts
Despite there being a multitude of options for installing Windows, the logical and risk-free method to install Windows is to use official tools provided by Microsoft themselves, which are the Windows 11 installation assistant and Windows 11 media creation tool.
Other tools might cause compatibility issues or errors during installation, and depending on the circumstances, you might also end up unexpectedly losing access to the Windows you already have installed.
I hope this article was helpful, and do check out our other article on media creation tools if you are interested.

Windows 11 has been released to the public and Microsoft has released a new personalized assistant to help you get on board. Windows 11 brings along numerous changes including the ability to install and use Android apps, new frosted glass UI, new stock apps, better security, and a lot more.
As such everyone seems to be itching to get their hands on the new OS, and if you too are looking to install Windows 11 on your system, then here’s how you can use the ‘Installation Assistant’ to your advantage.
Related: First 10 Things to Do on Windows 11
What is the Windows Installation Assistant?
Windows 11 Installation assistant is a dedicated tool that can help you upgrade to Windows 11 on your PC. It is the recommended way from Microsoft to get Windows 11 up and running on your system.
The Windows Installation Assistant has a few requirements just like Windows 11 and you can check them using the following section below.
Checks to perform before running the Installation Assistant
Window Installation Assistant has a few requirements. Additionally, you need to make sure that you are running the correct version of Windows to upgrade to Windows 11. Perform the necessary checks below to ensure your eligibility to use the Installation Assistant.
- Ensure that you are on Windows 10 v2004 or higher.
- Ensure that you meet the basic requirements for installing Windows 11 on your system.
- Ensure that you have at least 9GB of free disk space on your system so that you can download Windows 11 on your local storage using the Assistant.
- Ensure that you run the Installation Assistant as an administrator.
As such we have also listed the basic requirements for installing Windows 11 on your system. You can check them out below.
Requirements for Windows 11
Here are the basic requirements for installing Windows 11 on your system.
- Processor: 1GHz or faster with 2 or more cores.
- RAM: 4GB or higher
- Graphics: DX12 compatible with WDDM 2.0 driver
- Disk Space: 9GB for downloading installation files.
- System: UEFI, with Secure Boot
- TPM: 2.0 or higher
- Display: 720p @ 8bits or higher
If your PC meets the basic requirements, you can continue with the guide below to upgrade using the Windows 11 Installation Assistant.
- Windows 11 Installation Assistant: Download Link
Download the Windows Installation Assistant using the link above. Once downloaded, right-click on the file and select ‘Run as administrator’.
Select ‘Yes’ to allow the app if you get the prompt.

Select ‘Accept and Install’.
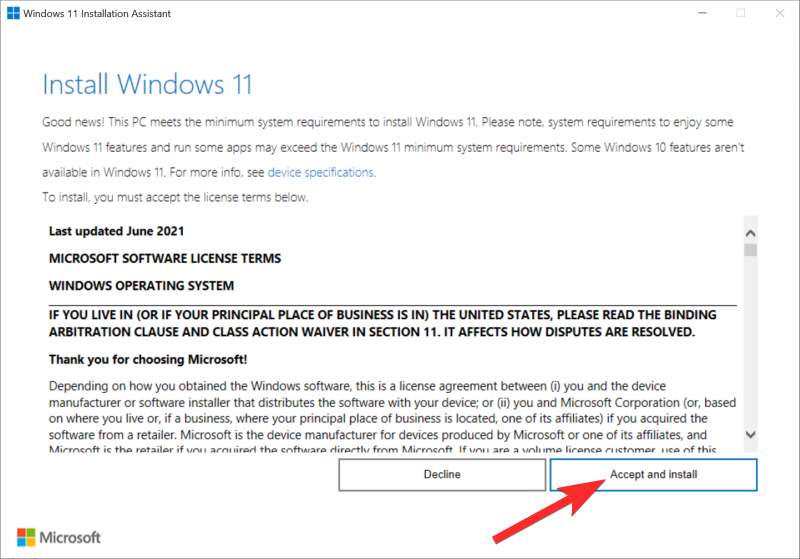
Note: You may need to scroll to the bottom of the license agreement to unlock this option.
The Assistant will now go ahead and download the necessary files to your local storage. This could take some time depending on your network speed.

Once downloaded, the files will be verified in the background. The installation process should automatically begin once the files have been verified.

Click on ‘Restart now’ once the installation process completes.
Your PC will now restart. Log in to your account when you are at the lock screen and Windows should now continue with the setup. Once complete, you will be automatically taken to your desktop. All your data should be preserved, and all your installed apps should be intact.
Do you need to be subscribed to the Insider preview to use the Installation Assistant?
No, Windows 11 has been officially released to the public, and the Installation Assistant has been introduced to accompany the same. You can directly download and use the assistant on your PC without the need to be subscribed to Windows Insider Program.
If you are on the Beta or Dev channel, then you can leave the Insider Program to get yourself started. Depending on your installation, you might be required to reinstall Windows 11 stable version on your PC from scratch.
Windows 11 Installation Assistant Error: Use the PC Health Check app to check compatibility
Don’t worry, you can easily fix this by performing a check using the PC Health Check app. Find the link below for the app’s download link and a guide on how to fix this error.
Read: How to Fix ‘Use the PC Health Check App to Check Compatibility’ error
We hope you were able to use the Windows 11 Installation Assistant as intended. If you face any issues, feel free to drop a comment below.
Related:
- How to Disable CSM to install Windows 11
- ‘Antimalware Service Executable’ High CPU Issue: How to Fix
- How to Upgrade to Windows 11: 4 Ways Explained With Step-by-step Guides
- How to Facetime Windows Users: Complete Step-by-step Guide
- How to Enable TPM 2.0 in BIOS in HP Envy and Pavilion Laptops and Computer
- Windows 11: Show File Extensions Easily in 6 Ways
Read Next
Subscribe to Newsletter
Join me on this exciting journey as we explore the boundless world of web design together.

UPDATED 10/31/2023: On computers running the original release of Windows 11 or Windows 10, it’s possible to use the “Installation Assistant” to upgrade to Windows 11 23H2 when the feature update is not downloading from the Windows Update settings.
The Installation Assistant is a tool designed to update computers to the new version of Windows 11 when there are problems with Windows Update or another unknown reason that doesn’t include any hardware or software compatibility issue. However, you can also use it to force (in this case) the Windows 11 2023 Update installation.
Although it’s never recommended to upgrade a device during the early days of the rollout or when the computer isn’t getting the update automatically through Windows Update because it might indicate that the hardware isn’t fully compatible, you can use the steps below to upgrade:
-
Download the Installation Assistant from the “Windows 11 Installation Assistant” section by clicking the “Download Now” button from the Microsoft software support download page.
-
Double-click the Windows11InstallationAssistant.exe file to launch the tool.
-
Click the “Accept and install” button to begin the installation.

-
Once the tool confirms that the hardware and software configuration are compatible, the Windows 11 23H2 files will download to the computer. Then click the Restart button to complete the installation.

The Installation Assistant should take less than an hour to complete the process on your desktop, laptop, or tablet.
Also, before proceeding, use this guide to avoid problems and errors during the upgrade process. In addition, while the tool offers a non-destructive installation process, creating a full backup before making system changes is recommended.
Update September 25, 2023: The update available on September 26, 2023, only enables some of the features for version 23H2 (including Copilot, Windows Backup, redesigned File Explorer, updated Settings, Dynamic Lighting, and others). However, the system will continue to show version 22H2 on the About settings page. Once Microsoft completes this rollout, at a later time, before the end of 2023, another update will become available to finish deploying the rest of the feature update and switch the system from version 22H2 to 23H2. After this point, the company is expected to update the Media Creation Tool, Installation Assistant, and ISO file. Also, devices with older releases of the operating system may be able to update directly to version 23H2 from Windows Update.
Update October 31, 2023: Microsoft is now rolling out version 23H2, and you can use the Installation Assistant to perform the update.
Mauro Huculak is a
Windows How-To Expert and founder of
Pureinfotech
(est. 2010). With over 21 years as a technology writer and IT Specialist,
Mauro specializes in Windows, software, and cross-platform systems such as Linux, Android, and macOS.
Certifications:
Microsoft Certified Solutions Associate (MCSA),
Cisco Certified Network Professional (CCNP),
VMware Certified Professional (VCP),
and
CompTIA A+ and Network+.
Mauro is a recognized Microsoft MVP and has also been a long-time contributor to Windows Central.
You can follow him on
YouTube,
Threads,
BlueSky,
X (Twitter),
LinkedIn and
About.me.
Email him at [email protected].