
Последние версии образов Windows 11 требуют обязательного подключения к Интернету при установке и максимально затрудняют использование локальной учётной записи вместо аккаунта Майкрософт, однако способы обойти ограничения есть.
В этой инструкции подробно о том, выполнить чистую установку Windows 11 без доступа в Интернет и использовать при этом локальную учётную запись. Также существуют способы использовать локальную учётную запись при наличии доступа в интернет, подробнее: Создание локальной учетной записи Windows 11 при установке и после неё.
Принудительное создание локальной учетной записи на этапе OOBE
После процесса копирования файлов Windows 11 и первой перезагрузки вы попадёте на экран OOBE (Out Of the Box Experience) для настроек. В любой момент на этом экране, даже в самом начале вы можете инициировать создание локальной учётной записи, в том числе и без наличия Интернет-подключения. Шаги будут следующими:
- Нажмите клавиши Shift+F10 на клавиатуре, на некоторых ноутбуках может потребоваться нажать Shift+Fn+F10.
- Откроется окно командной строки, нажмите по нему: по умолчанию оно не активно сразу после открытия).
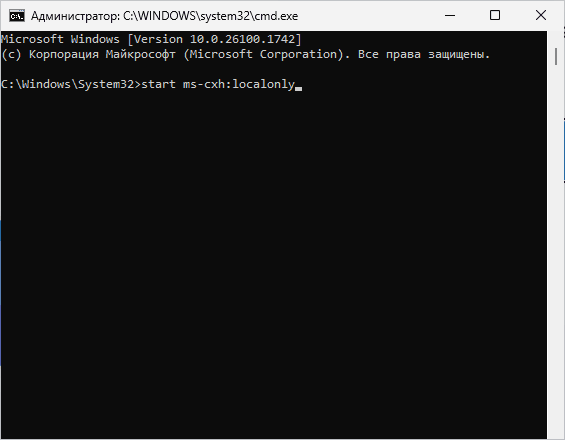
- Введите команду
start ms-cxh:localonly
и нажмите Enter.

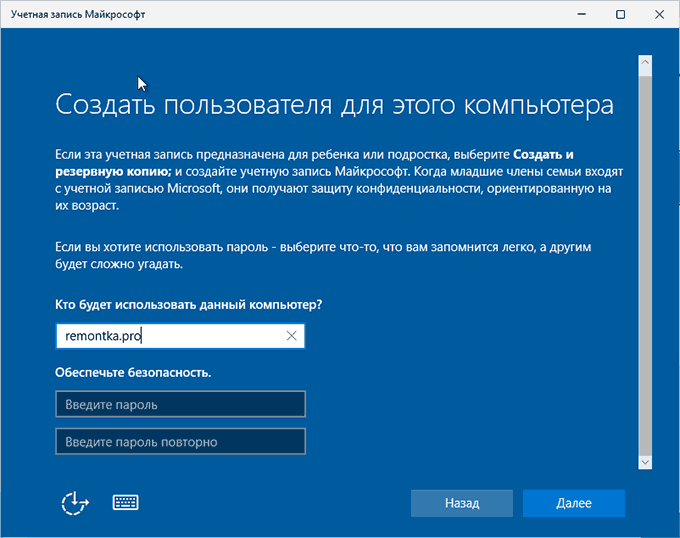
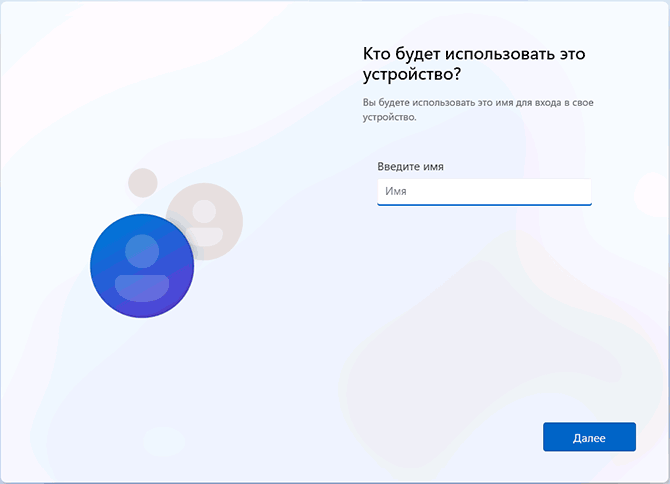
- Появится окно создания локальной учётной записи, введите нужные данные: имя пользователя и, если требуется — пароль с подтверждением.

- Нажмите «Далее».
На этом всё, локальная учетная запись будет создана и дальнейшие шаги в OOBE, включая обязательное подключение к Интернету, проделывать не потребуется.
Вы увидите экран подготовки системы к первому запуску:

После чего вам будет предложено настроить базовые параметры конфиденциальности, и вы окажетесь в свежеустановленной Windows 11 с вашей локальной учётной записью.
Отключение требований Windows 11 на доступ к Интернету и включение возможности создания локального пользователя
Начать следует с простой установки Windows 11, как это описано в инструкции Установка Windows 11 с флешки, если у вас прямое кабельное подключение к Интернету (не Wi-Fi и не требуется авторизация), заранее отключите кабель, выполняем все действия по установке до первой перезагрузки и появления окна базовой настройки системы.
Затем, чтобы отключить обязательное требование к наличию Интернет-подключения при установке Windows 11, потребуется выполнить следующие шаги:
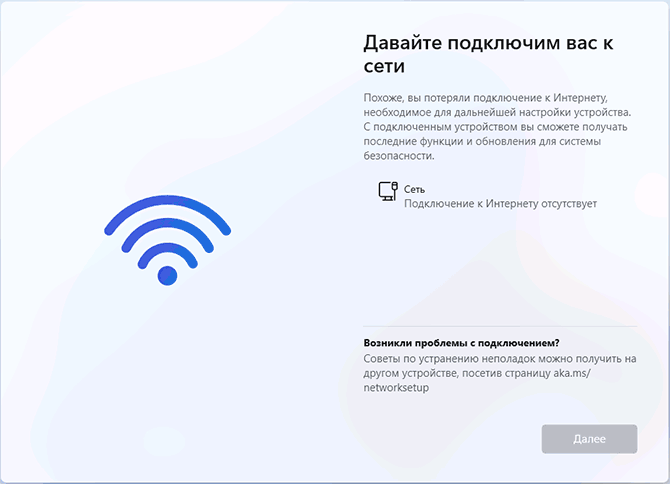
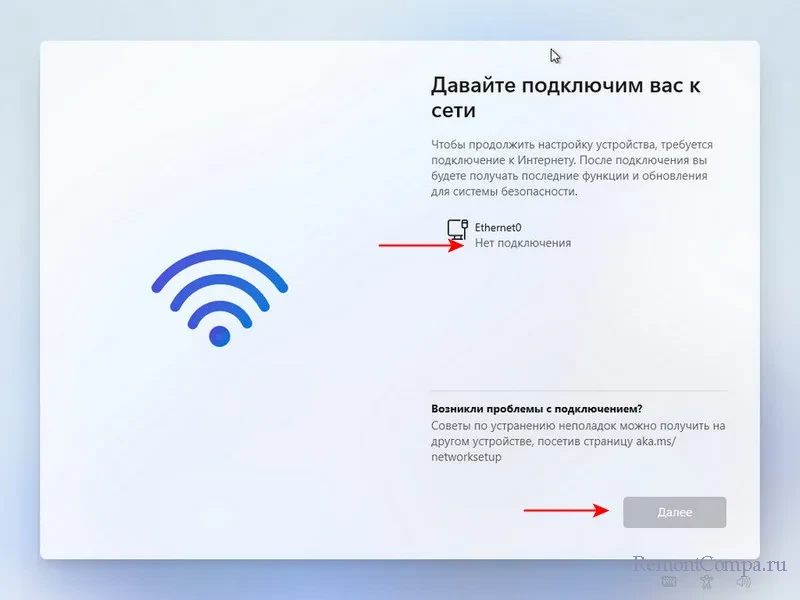
- Дойдя до экрана «Давайте подключим вас к сети» не подключайтесь к Интернету (при кабельном подключении стоит заранее отключить кабель), а нажмите клавиши Shift+F10 (на некоторых ноутбуках — Shift+Fn+F10), это откроет командную строку (по умолчанию окно не активно, нажмите по нему, чтобы вводить текст). В принципе, Shift+F10 можно использовать и на первом экране настроек, не доходя до этого окна, если вы уверены, что Интернет отключен.

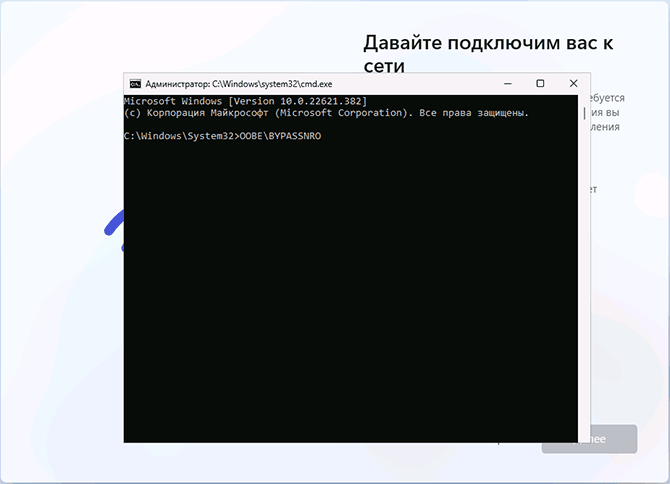
- В командной строке введите команду (переключение языка по Alt+Shift):
oobe\bypassnro
и нажмите Enter. В последних предварительных сборках команда может не работать, в таком случае используйте следующий вариант из двух команд:
reg add HKLM\SOFTWARE\Microsoft\Windows\CurrentVersion\OOBE /v BypassNRO /t REG_DWORD /d 1 /f
shutdown /r /t 0
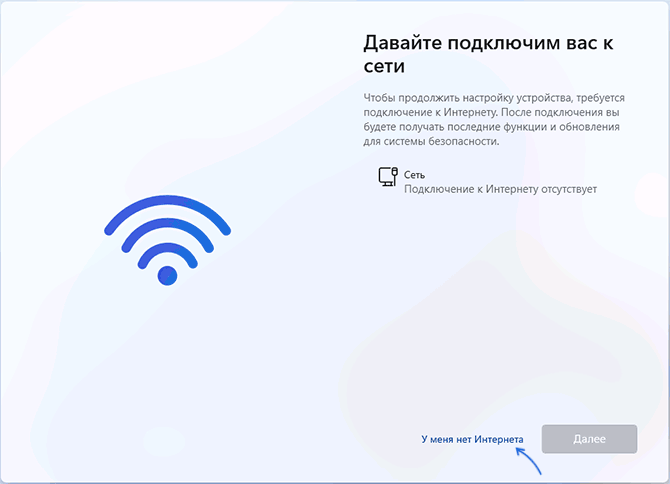
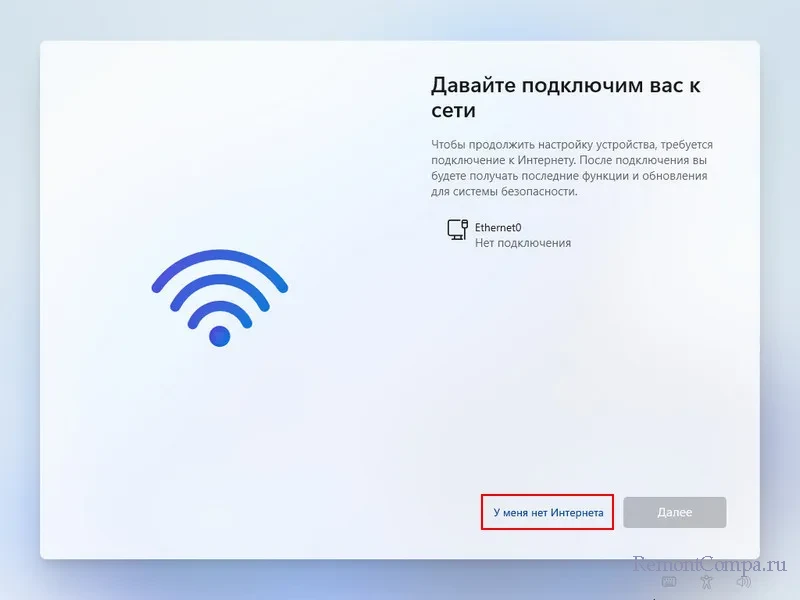
- Компьютер перезагрузится, и вы снова попадете на экран первоначальной настройки Windows 11, но теперь, дойдя до экрана с предложением подключиться к Сети, вы увидите пункт «У меня нет Интернета» — нажмите по нему.
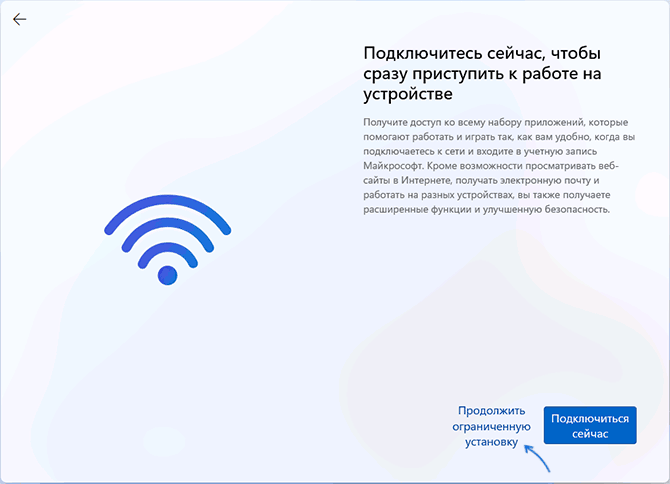
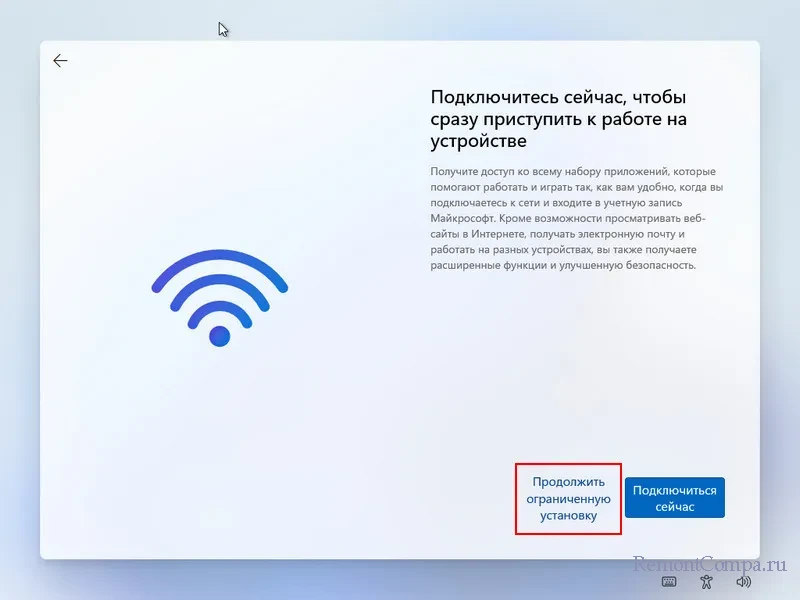
- Нажмите «Продолжить ограниченную установку».
- Продолжайте установку, теперь — с созданием локальной учётной записи вместо учётной записи Майкрософт.


По завершении процесса вы получите полностью работоспособную Windows 11 с локальной учётной записью, теперь можно смело подключаться к Интернету для загрузки обновлений, драйверов и других целей.
Чтобы обойти требование обязательного подключения к Интернету при установке Windows 11, выполните следующие действия:
1 этап
На этапе «Давайте подключим вас к сети» не подключайтесь к Интернету. Если используется проводное подключение, убедитесь, что кабель отключён заранее. Затем нажмите сочетание клавиш Shift+F10 (на некоторых ноутбуках — Shift+Fn+F10) для вызова командной строки.
👉 Примечание: командную строку можно открыть и на первом экране настройки, если вы уверены, что доступ к Интернету полностью отключён.

2 этап
В появившемся окне командной строки введите следующую команду:
oobe\bypassnro
Нажмите Enter.
3 этап
Компьютер автоматически перезагрузится. После перезагрузки снова начнётся процесс настройки системы, но теперь на этапе подключения к сети появится опция «У меня нет Интернета». Выберите её.
4 этап
Продолжите установку, создав локальную учётную запись вместо учётной записи Microsoft.
Заключение
После завершения установки вы получите полностью рабочую Windows 11 с локальной учётной записью. Теперь можно подключиться к Интернету для загрузки обновлений, драйверов и использования всех доступных функций.
Updated on Apr 28, 2025
According to Microsoft, users need to ensure that their computers have an active network connection to finish installing Windows 11. Before using your newly installed Windows operating system, Microsoft will ask you to log into your Microsoft account to get important updates and additional new functions.
Thus, it would be a unique challenge if you want to log into the local account or don’t have internet when installing and setting up Windows 11. But fear not. EaseUS will provide four workarounds and step-by-step instructions for Windows 11 setup without internet. Check this table for more comprehensive information:
| ⏱️Duration | More than 10 Minutes |
| 💻Goal | Install and Set Up Without the Internet |
| 🧰Required Tool | Windows 11 Installation Media Tool — EaseUS Partition Master |
| 🔒Ways & Difficulty |
1️⃣Way 1. Offline Windows 11 Installation and Setup Tool [Easy] 2️⃣Way 2. Bypass OOBE Internet Requirement [Complex] 3️⃣Way 3. End Network Connection [Medium] 4️⃣Way 4. Skip Internet Requirement via Alt + F4 [Medium] |
Why Does Windows 11 Setup Require an Internet Connection?
From version 22H2, Windows 11 requires an Internet connection to finish the setup of Home and Pro editions (OOBE). Why does the Windows 11 setup require an internet connection? Microsoft wants to ensure you get the latest security updates when installing and setting up Windows 11. However, users may want to bypass this restriction when they want to log in with a local user account (not a Microsoft account), or the internet access may be limited or unavailable.
- For Windows 10 and Windows 11 Pro edition users, you can perform Windows 11 setup without the Internet by selecting the «I don’t have Internet» option to create a local user account and finish the setup.
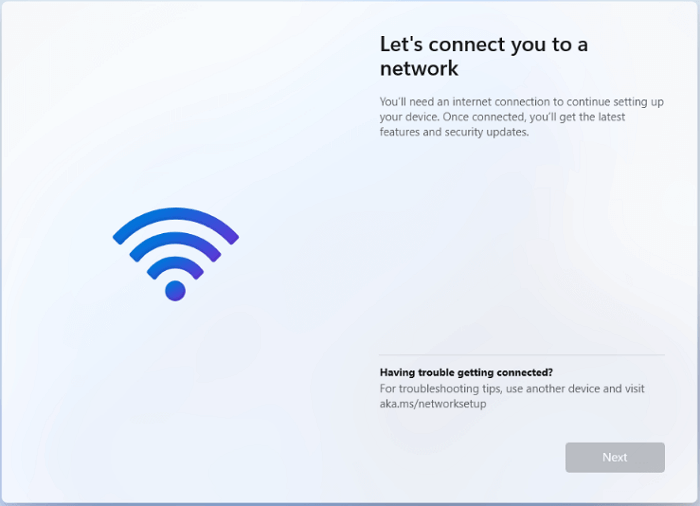
- For Windows 11 and 11 Home Edition users, you will stop at «Let’s connect you to a network» with the «Next» button greyed out.
Don’t worry. We will discuss how to install and set up Windows 11 without connecting to the active network as follows. Don’t hesitate to share this helpful tutorial with people in need:
In this section, you will learn four solid ways to install and set up your Windows 11 operating system without an internet connection. If you want to complete this task quickly and effectively, EaseUS Partition Master is what you are looking for.
Way 1. Offline Windows 11 Installation Media Tool
EaseUS Partition Master Professional, an all-in-one tool, is the best solution for anyone looking to streamline their Windows installation process. It offers a superb remedy for users to download Windows ISO files and create a bootable USB to set up the Windows Operating System seamlessly. Before starting, download this free ISO burner.
Prework: Please prepare a USB and format it to FAT32 by following the detailed steps below:
Then, refer to this guide to download the Windows 11 ISO image file and create a bootable media to set up Windows 11 offline:
Step 1. Connect the USB flash drive firmly to your computer. Run EaseUS Partition Master and find and click the «Bootable Media» option on the left.
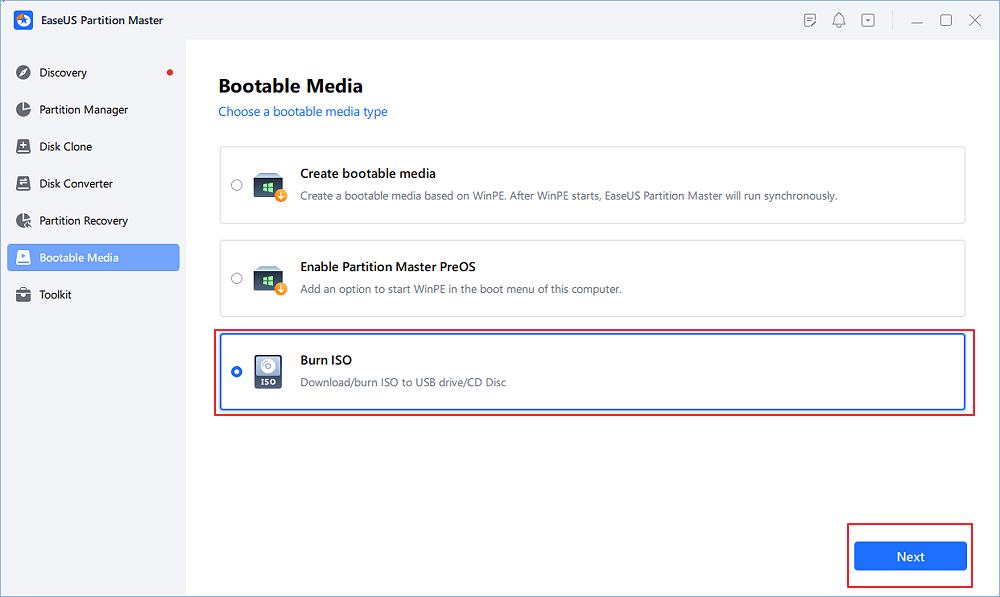
Step 2. Go to «Burn ISO» > «Download ISO from Microsoft,» and select Windows 11 and the specific version.
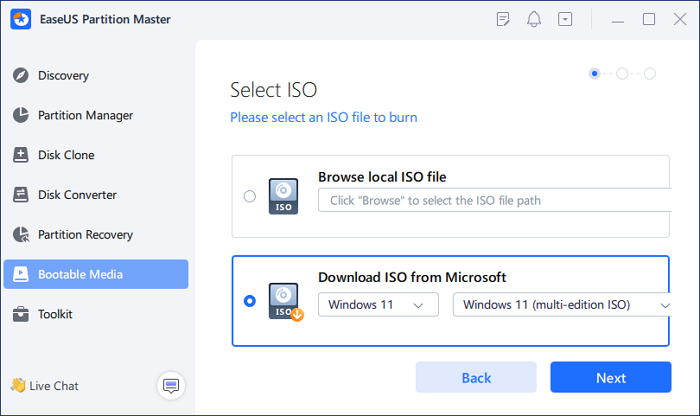
Step 3. Select the FAT32 USB to save the ISO file. Once you have decided, click on the «Open» > «Create» button to get started.
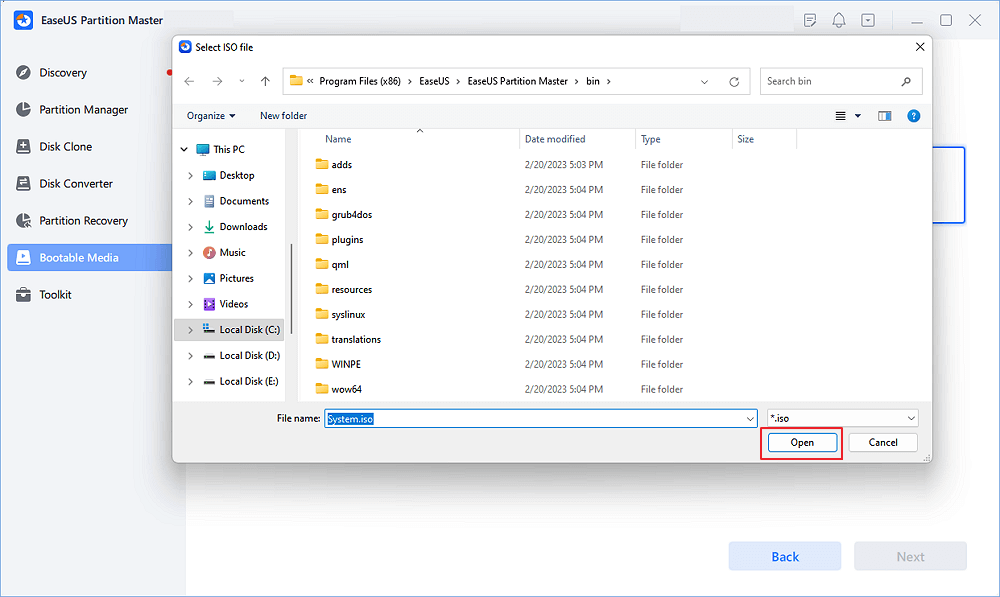
Step 4. Check the Warning notice and press the Yes button. When the operation is complete, you will have created an EaseUS Partition Master offline Windows 11 installation bootable drive.
Various Other Useful Features
- Install Windows 10 on a new PC without the Operating System
- Resolve Windows 11 Won’t Install from USB
- Burn the Windows 10 ISO to USB
- Fix Unable to Download Windows ISO
- Install Windows 10 Without the Product Key
Say goodbye to complicated and time-consuming setups and hello to a smooth and hassle-free experience with EaseUS Partition Master. Download it today and see the difference for yourself!
Way 2. Bypass OOBE Internet Requirement
Running the OOBE \BYPASSNRO command in the Command Prompt can help you bypass the «Let’s connect you to a network» screen. It modifies the Windows registry using bypassnro.cmd, which is kept in the System32 folder. (an existing CMD script). This allows you to install Windows 11 without a network connection.
Step 1. Remove the Internet connection and boot your computer using Windows installation media. Skip to Step 7 if you are on the «Let’s connect you to a network» screen.
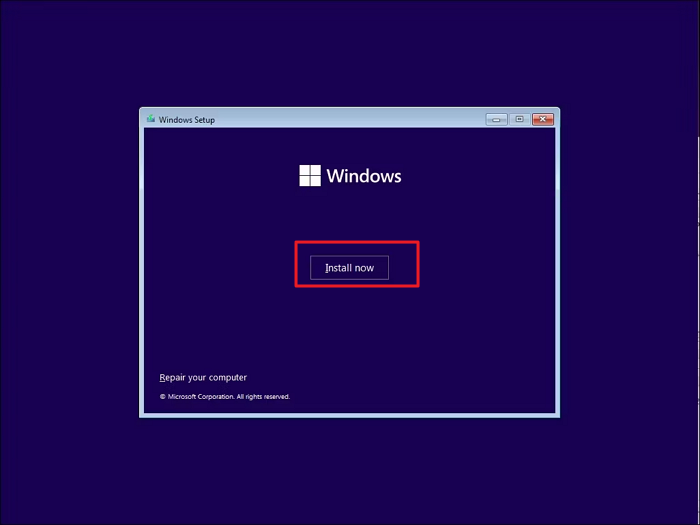
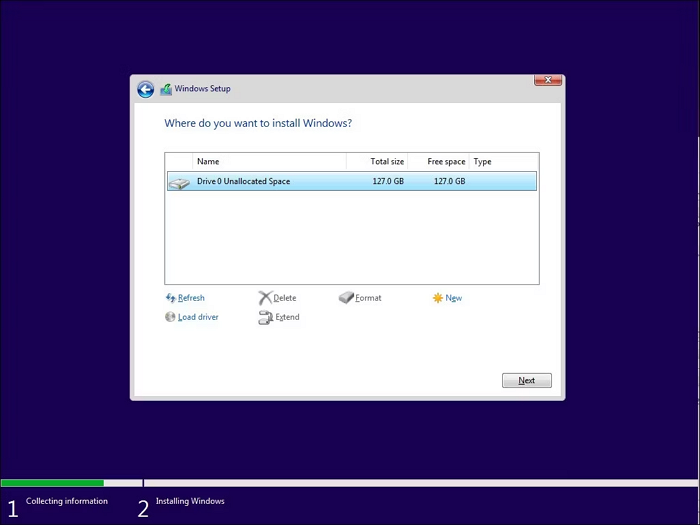
Step 2. Choose your preferred language, time zone, and keyboard layout when the «Windows Setup» dialog box displays, then click «Next.» Click «Install Now.»
Step 3. Enter your product key. If you don’t have a product key, click the «I don’t have a product key» link or check the following post.
- Tip
- The operating system will automatically detect and confirm the Windows product key associated with your computer hardware if you are upgrading from Windows 10 to Windows 11 after having previously installed Windows 11.
Step 4. Then, select the Windows 11 version to install. To accept the terms, check the box and select «Next.»
Step 5. Select «Custom: Install Windows Only (Advanced)» to choose the installation drive and hit «Next.» After Windows installation, restart your computer.
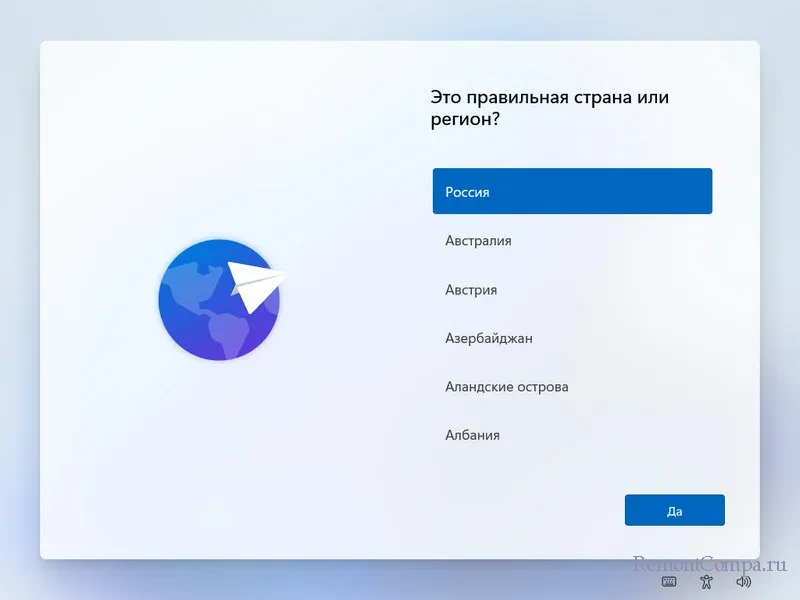
Step 6. In the setup screen, select your region and keyboard layout.
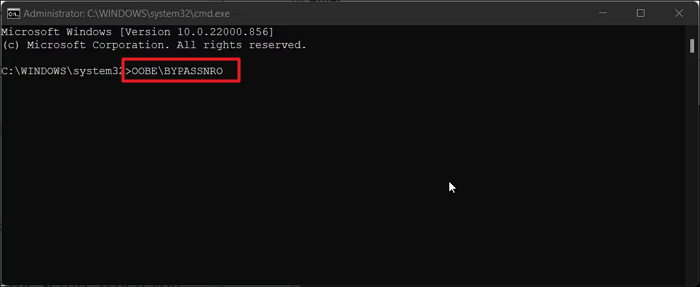
Step 7. When you enter «Let’s connect you to a network,» press «Shift + F10» to launch the Command Prompt. Type OOBE\BYPASSNRO and press «Enter.»
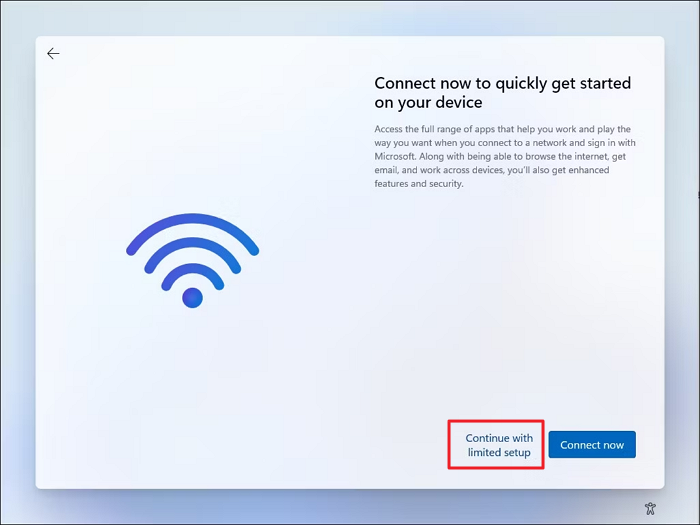
Step 8. Click «I don’t have Internet» when you return to the «Let’s connect you to a network screen.» option. Go ahead and select «Continue with limited setup.»
Step 9. Accept the «License Agreement» before creating your local user account.
Step 10. Add security questions to recover your local user account when you forget the password.
Way 3. End Network Connection
To skip the network connection requirement of Windows 11 setup, you can kill or end the network connection via Task Manager or Command Prompt:
Option 1. End Network Connection via Task Manager
Step 1. In the «Let’s connect you to a network screen» screen, hold «Shift + F10» to open the Command Prompt.
Step 2. Type taskmgr and hit the «Enter» key to launch Task Manager, or you can use the «Ctrl + Shift + Esc» shortcut keys.
Step 3. Click «More Details» to expand Task Manager to the full version. Navigate to the «Network Connection Flow» tab under «Processes.»
Step 4. Right-click it and choose the «End task» option. When this process is finished, type exit in the CMD and quit.
Option 2. Kill Network Connection via Command Prompt
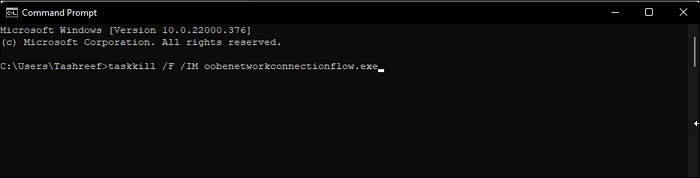
Step 1. When you are in the «Let’s connect you to a network» screen, hold «Shift + F10» to bring up the Command Prompt.
Step 2. Type the taskkill /F /IM oobenetworkconnectionflow.exe and hit «Enter» to begin.
Way 4. Skip Internet Requirement via Alt + F4
As we know, «Alt + F4» keys can help you close windows or run apps on your desktop. Thus, if you really have nothing to do, you can try your luck with this way. In the «Let’s connect you to a network» screen, hold «Alt + F4» to close the required window for the mandatory Internet connection.
If you’re not confident about completing these steps on your own, our support experts can guide you through each stage of the process.
EaseUS experts are available to provide you with 1-on-1 manual services (24*7) and help fix different Windows configuration issues. Our experts will offer you FREE evaluation services and efficiently diagnose and resolve Windows update errors, Windows installation, or daily OS issues using their decades of experience.
- 1. Fix Windows update errors, such as update failure, unable to upgrade Windows, etc.
- 2. Serve to download and install the latest Windows operating system on PC with success.
- 3. Provide fixes for daily Windows system errors with drivers, permission, account settings, etc., issues.
Conclusion
In conclusion, installing and setting up Windows 11 without an internet connection is possible with the right approach. Using the four effective methods outlined in this article, you can install and configure Windows 11 without connecting to the Internet via Windows built-in tools, an offline installation media, or a shortcut key.
EaseUS Partition Master stands out as the most reliable solution for setting up your operating system without needing an internet connection. Download this tool and follow our comprehensive guide. You can navigate the installation process with confidence and enjoy all the features and benefits that Windows 11 has to offer, no matter where you are.
FAQs About Windows 11 Setup Without Internet
To learn more or resolve your remaining questions about how to install and set up Windows 11 without a network connection, consult the following frequently asked questions.
1. Will Windows 11 installation require internet?
An online connection during Windows 11 PC setup guarantees you receive the most recent security updates. An internet connection is required to complete the Windows 11 Home device setup.
2. How do I skip the internet check when installing Windows 11?
When you get the «Connection required» prompt, hit Shift + F10 to launch Command Prompt. After entering OOBE\BYPASSNRO, hit ENTER. This time, the procedure will start over, and an «I don’t have internet access» button will appear.
3. How do I set up an offline account on Windows 11?
To disable the network connection, press Shift + F10 again and enter ipconfig /release after the reboot. Press the Enter key now, and your internet should be turned off. Go ahead and create a local account: If you select the «I don’t have internet» option during setup, a prompt to establish a local account will appear.
В этой публикации, друзья, рассмотрим такой вопрос: как установить Windows 11 без Интернета и учётной записи Microsoft. Windows 11 22H2 с интегрированным ежегодным обновлением за 2022 год привнесла не только функциональные улучшения, но также ограничения – невозможность установки с локальной учётной записью. Чтобы установить Windows 11, необходим Интернет и веб-аккаунт Microsoft. Ранее это ограничение касалось только младшей редакции Home. Но теперь вот добралось и до Pro. Благо, пока что существует способ обойти этой ограничение. Что ж это за способ?
Как установить Windows 11 без Интернета и учётной записи Microsoft
Итак, друзья, процесс установки Windows 11. Изначально он предусматривал три способа авторизации пользователя в операционной системе:
- Ключ безопасности;
- Учётная запись Microsoft;
- Локальная учётная запись.
В первой версии Windows 11 21H2 в редакции Pro мы могли на этапе первичных настроек установленной операционной системы использовать неприметную опцию параметров входа. И создать локальную пользовательскую учётную запись для работы с компьютером. В версии же Windows 11 22H2 создание локальной учётной записи более недоступно. Можем использовать только ключ безопасности и учётную запись Microsoft.
Трюк с отключением Интернета не работает. Сразу же после указания региональных настроек Windows 11 потребует от нас Интернет-подключение. И далее этого шага мы не пройдём.
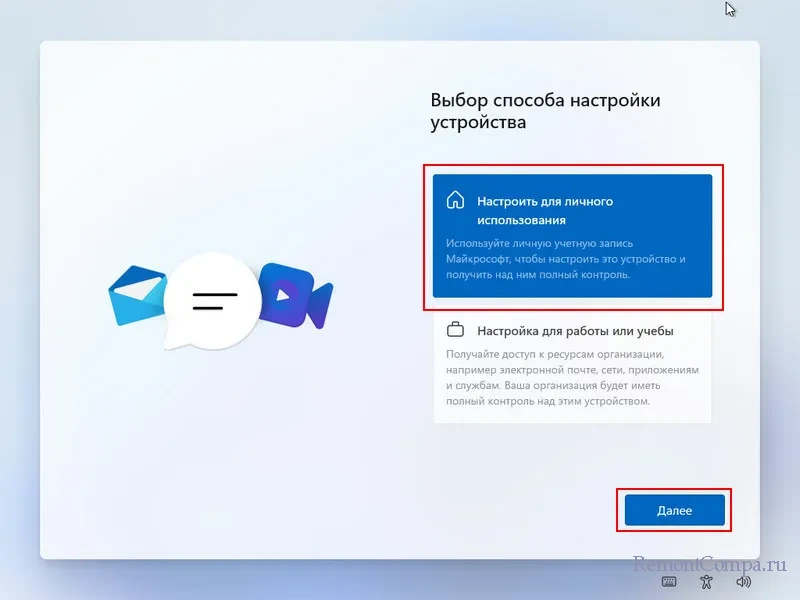
Поэтому Интернет мы не отключаем до самого момента авторизации. Т.е. задаём региональные настройки, выбираем «Настроить для личного использования».
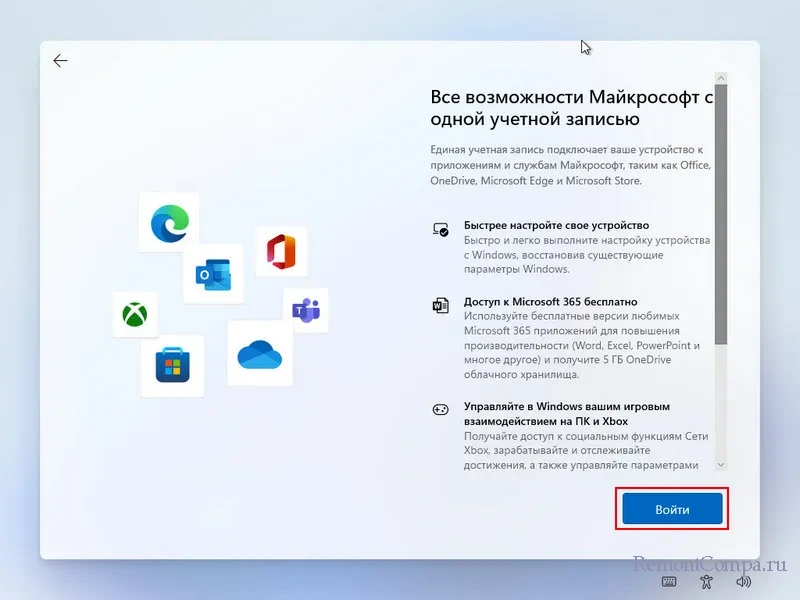
Жмём «Войти».
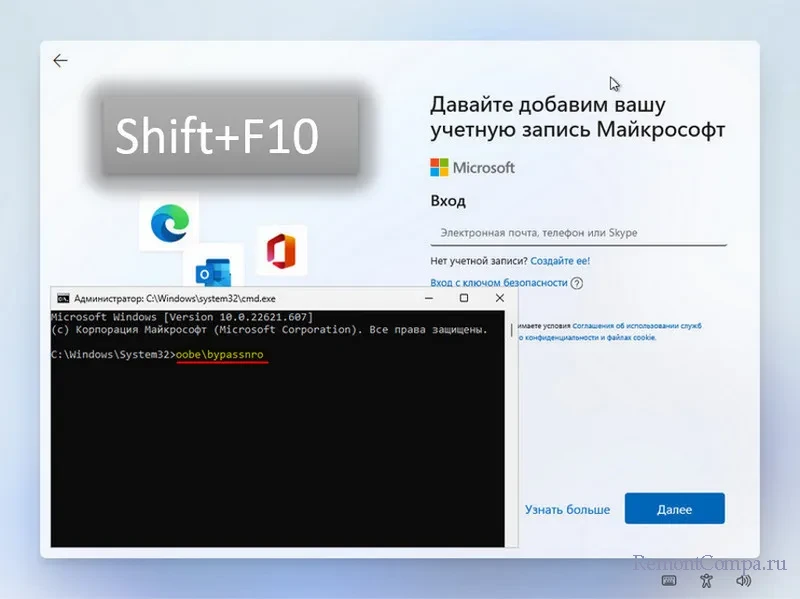
И только на этапе непосредственно входа в Windows 11 либо с ключом безопасности, либо с учётной записью Microsoft мы отключаем Интернет. Далее жмём клавиши Shift+F10 для вызова командной строки. В неё вписываем:
oobe\bypassnroИ жмём Enter.
Компьютер перезагрузится. Проходим первичные настройки заново. Задаём региональные настройки.
Теперь у нас на шаге Интернет-подключения есть опция «У меня нет Интернета». Жмём её.
Жмём «Продолжить ограниченную установку».
И создаём локального пользователя.
