
MSC в Windows расшифровывается как Microsoft System Console, еще проще это окна или как их еще называют оснастки, для управления теми или иными функциями операционной системы. Ранее я вас уже знакомил с методом создания удобной оснастки mmc, в которой мы добавляли все, что нужно системному администратору для повседневного администрирования.
И вы наверно спросите, а при чем тут командная строка и все такое, а вот при чем. Представим себе ситуацию, у вас в организации существует домен Active Directory, рядовые пользователи не имеют прав локального администратора на своих рабочих станциях, все идет и работает как часы, случается ситуация, что например вам нужно у пользователя поменять какие либо настройки, и сделать нужно сейчас, так что искать эти настройки в групповой политике нет времени. Что делать заходить под собой не вариант, так как нужно произвести изменения в другом профиле пользователя, и как открыть например оснастку Управление компьютером или Система.
Во тут нам и поможет знание названия msc windows оснасток и командная строка. Все что вам нужно это открыть командную строку от имени администратора (найти, набираем cmd и правой кнопкой выбираем “Запустить от имени администратора”),
далее ввести нужное название msc оснастки в командной строке. Ниже представлен список. Как видите открыв командную строку cmd.exe я для примера ввел значение открывающее панель управления с правами администратора системы.

Элементы оснастки Консоли управления msc
- appwiz.cpl — Установка и удаление программ
- certmgr.msc — Сертификаты
- ciаdv.msc — Служба индексирования
- cliconfg — Программа сетевого клиента SQL
- clipbrd — Буфер обмена
- compmgmt.msc — Управление компьютером
- dcomcnfg — Консоль управления DCOM компонентами
- ddeshare — Общие ресурсы DDE (на Win7 не работает)
- desk.cpl — Свойства экрана
- devmgmt.msc — Диспетчер устройств
- dfrg.msc — Дефрагментация дисков
- diskmgmt.msc — Управление дисками
- drwtsn32 — Dr.Watson
- dxdiag — Служба диагностики DirectX
- eudcedit — Редактор личных символов
- eventvwr.msc — Просмотр событий
- firewall.cpl — настройки файерволла Windows
- gpedit.msc — Групповая политика
- fsmgmt.msc — Общие папки
- fsquirt — Мастер передачи файлов Bluetooth
- chkdsk — Проверка дисков (обычно запускается с параметрами буква_диска: /f /x /r)
- control printers — Принтеры и факсы — запускается не всегда
- control admintools — Администрирование компьютера — запускается не всегда
- control schedtasks — Назначенные задания (планировщик)
- control userpasswords2 — Управление учётными записями
- compmgmt.msc — Управление компьютером (compmgmt.msc /computer=pc — удаленное управление компьютером pc)
- lusrmgr.msc — Локальные пользователи и группы
- mmc— создание своей оснастки
- mrt.exe — Удаление вредоносных программ
- msconfig — Настройка системы (автозапуск, службы)
- mstsc — Подключение к удаленному рабочему столу
- cleanmgr — Очистка диска
- ncpa.cpl — Сетевые подключения
- ntmsmgr.msc — Съёмные ЗУ
- mmsys.cpl — Звук
- ntmsoprq.msc — Запросы операторов съёмных ОЗУ (для XP)
- odbccp32.cpl — Администратор источников данных
- perfmon.msc — Производительность
- regedit — Редактор реестра
- rsop.msc — Результирующая политика
- secpol.msc — Локальные параметры безопасности (Локальная политика безопасности)
- services.msc — Службы
- sfc /scannow — Восстановление системных файлов
- sigverif — Проверка подписи файла
- sndvol — управление громкостью
- sysdm.cpl — Свойства системы
- syskey — Защита БД учётных записей
- taskmgr — Диспетчер задач
- utilman Диспетчер служебных программ
- verifier Диспетчер проверки драйверов
- wmimgmt.msc — Инфраструктура управления WMI
- timedate.cpl — Оснастка «Дата и время»

Список msc оснасток для Windows Server
Давайте рассмотрим как запускаются Административные оснастки Windows из командной строки cmd.exe
- domain.msc — Active Directory домены и доверие
- dsa.msc — Active Directory Пользователи и компьютеры (AD Users and Computers)
- tsadmin.msc — Диспетчер служб терминалов (Terminal Services Manager)
- gpmc.msc — Консоль управления GPO (Group Policy Management Console)
- gpedit.msc — Редактор объектов локальной политики (Group Policy Object Editor)
- tscc.msc — Настройка терминального сервера (TS Configuration)
- rrasmgmt.msc — Маршрутизация и удаленый доступ (Routing and Remote Access)
- dssite.msc — Active Directory Сайты и Доверие (AD Sites and Trusts)
- dompol.msc — Политика безопасности домена (Domain Security Settings)
- dсpol.msc — Политика безопасности контроллера домена (DC Security Settings)
- dfsgui.msc — Распределенная файловая система DFS (Distributed File System)
- dnsmgmt.msc — DNS
- iscsicpl.exe — Инициатор ISCSI
- odbcad32.exe — Администратор источника данных ODBC 32 бита
- odbcad64.exe — Администратор источника данных ODBC 64 бита
- powershell.exe -noexit -command import-module ActiveDirectory — Модуль powershell Active Directory
- dfrgui.exe — Оптимизация дисков
- taskschd.msc /s — Планировщик заданий
- dsac.exe — Центр администрирования Active Directory
- printmanagement.msc — Управление печатью
- vmw.exe — Средство активации корпоративных лицензий
- eventvwr.msc /s — Просмотр событий
- adsiedit.msc — Редактор ADSIedit
- wbadmin.msc — Система архивации данных Windows Server
- ServerManager.exe — Диспетчер серверов
- dhcpmgmt.msc — DHCP сервер
- Inetmgr.exe — Оснастка IIS
- dfsmgmt.msc- DFS менеджер
Как видите msc windows оснастки очень полезные инструменты системного администрирования. Мне даже некоторые оснастки быстрее открыть чем щелкать мышкой по куче окон, особенно если сервер или компьютер тормозит или нет мышки. Да и в любом случае знать такие вещи всегда полезно. Большая часть всего, что мы используем хранится в c:\Windows\System32. Если вы пройдете в эту папку то сможете обнаружить очень много интересного.
nbtstat -a pc — имя пользователя работающего за удаленной машиной pcnet localgroup group user /add — Добавить в группу group, пользователя usernet localgroup group user /delete — Удалить пользователя из группыnet send pc ''текст '' — отправить сообщение пользователю компьютера pcnet sessions — список пользователейnet session /delete — закрывает все сетевые сессииnet use l: \\имя компа\папка\ — подключить сетевым диском l: папку на удаленном компьютереnet user имя /active:no — заблокировать пользователяnet user имя /active:yes — разблокировать пользователяnet user имя /domain — информация о пользователе доменаnet user Имя /add — добавить пользователяnet user Имя /delete — удалить пользователяnetstat -a — список всех подключений к компьютеруreg add — Добавить параметр в реестрreg compare — Сравнивать части реестра.reg copy — Копирует из одного раздела в другойreg delete — Удаляет указанный параметр или разделreg export — Экспортировать часть реестраreg import — Соответственно импортировать часть реестраreg load — Загружает выбранную часть реестраreg query — Выводит значения заданной ветки реестраreg restore — Восстанавливает выбранную часть реестра из файлаreg save — Сохраняет выбранную часть реестраreg unload — Выгружает выбранную часть реестраshutdown — выключение компьютера , можно удаленно выключить другой.SystemInfo /s machine — покажет много полезного об удаленной машине
Списка команд элементов Панели управления Windows
- control /name Microsoft.AutoPlay — Автозапуск
- control /name Microsoft.OfflineFiles — Автономные файлы
- control /name Microsoft.AdministrativeTools — Администрирование
- control /name Microsoft.BackupAndRestore — Архивация и восстановление
- control /name Microsoft.WindowsFirewall — Брандмауэр Windows Windows
- control /name Microsoft.Recovery — Восстановление
- control /name Microsoft.DesktopGadgets — Гаджеты рабочего стола
- control /name Microsoft.DateAndTime — Дата и Время
- control /name Microsoft.DeviceManager — Диспетчер устройств
- control /name Microsoft.CredentialManager — Диспетчер учетных данных
- control /name Microsoft.HomeGroup — Домашняя группа
- Windowscontrol /name Microsoft.WindowsDefender — Защитник Windows
- control /name Microsoft.Sound — Звук
- control /name Microsoft.NotificationAreaIcons — Значки области уведомлений
- control /name Microsoft.GameControllers — Игровые устройства
- Keyboardcontrol /name Microsoft.Keyboard — Клавиатура
- control /name Microsoft.Mouse — Мышь
- control /name Microsoft.TaskbarAndStartMenu — Панель задач и меню «Пуск»
- control — Панель управления
- control /name Microsoft.Fonts — Папка «Fonts»
- control /name Microsoft.IndexingOptions — Параметры индексирования
- control /name Microsoft.FolderOptions — Параметры папок
- control /name Microsoft.PenAndTouch — Перо и сенсорные устройства
- control /name Microsoft.Personalization — Персонализация
- control /name Microsoft.RemoteAppAndDesktopConnections — Подключения к удаленным рабочим столам
- control /name Microsoft.GetPrograms — Получение программ
- control /name Microsoft.GettingStarted — Приступая к работе
- control /name Microsoft.ProgramsAndFeatures — Программы и компоненты
- сontrol /name Microsoft.DefaultPrograms — Программы по умолчанию
- control /name Microsoft.SpeechRecognition — Распознавание речи
- control /name Microsoft.ParentalControls — Родительский контроль
- control /name Microsoft.InternetOptions — Свойства обозревателя
- control /name Microsoft.TextToSpeech — Свойства речи
- control /name Microsoft.System — Система
- control /name Microsoft.ScannersAndCameras — Сканеры и камеры
- control /name Microsoft.PerformanceInformationAndTools — Счетчики и средства производительности
- control /name Microsoft.PhoneAndModem — Телефон и модем
- control /name Microsoft.ColorManagement — Управление цветом
- control /name Microsoft.Troubleshooting — Устранение неполадок
- control /name Microsoft.DevicesAndPrinters — Устройства и принтеры
- control /name Microsoft.UserAccounts — Учетные записи пользователей
- control /name Microsoft.MobilityCenter — Центр мобильности
- control /name Microsoft.WindowsUpdate — Центр обновления
- control /name Microsoft.ActionCenter — Центр поддержки
- control /name Microsoft.SyncCenter — Центр синхронизации
- control /name Microsoft.EaseOfAccessCenter — Центр специальных возможностей
- control /name Microsoft.NetworkAndSharingCenter — Центр управления сетями и общим доступом
- control /name Microsoft.BitLockerDriveEncryption — Шифрование диска
- control /name Microsoft.Display — Экран
- control /name Microsoft.PowerOptions — Электропитание
- control /name Microsoft.RegionAndLanguage — Язык и региональные стандарты
- control folders — параметры проводника
Unlock the power of the Microsoft Management Console (MMC) and take control of your Windows OS! Here’s how to open it:
- Click on the Start menu and search for ‘mmc’.
- Click on the MMC app in the results to open.
- You’ll then notice a blank console window – don’t be intimidated! The real strength lies in adding snap-ins.
- Go to the File menu and select ‘Add/Remove Snap-in’.
- Pick the snap-ins you need from the list.
- Then, click ‘OK’ and you’ll see them in the console window.
- Now you can control system services and manage local users and groups.
- Make the most of this chance to optimize your computing experience.
- Open the Microsoft Management Console today and unlock its full potential!
What is Microsoft Management Console?
Microsoft Management Console (MMC) is an effective tool for managing and configuring Windows operating systems. It provides a single interface to access and control multiple system tools, services, and applications. Thus, users save time and effort in managing multiple tasks.
Users can create custom consoles, called snap-ins, in MMC. They contain specialized administrative tools. Snap-ins can be added or removed from the console. This enables a personalized management experience.
MMC provides a framework for Microsoft and third-party applications to integrate their management tools. This eliminates the need to switch between utilities and makes the admin process simpler.
MMC is extensible. Administrators can develop custom snap-ins to meet their particular needs. This makes sure that MMC is adaptable to changing business requirements and provides a tailored management solution.
Did you know that the first version of MMC was released in 1996? It came with Windows NT 4.0. Initially, it was just a basic shell for administrative tools. But it evolved quickly into a more functional console. With each new Windows version, MMC has been updated with better features and user interfaces.
Step 1: Accessing the Start Menu
To access the Start Menu and open Microsoft Management Console, follow these steps:
- Click on the Windows icon located in the bottom left corner of your screen.
- A menu will pop up, displaying various options and programs.
- Scroll through the menu until you find the option labeled “Start” or “Start Menu”.
- Click on the “Start” or “Start Menu” option to open it.
- Once the Start Menu is open, you can search for and select Microsoft Management Console to access it.
It’s important to note that the Start Menu may vary slightly depending on the version of Windows you are using.
Pro Tip: You can also access the Start Menu by pressing the Windows key on your keyboard.
Please note that these instructions are for accessing the Start Menu specifically to open Microsoft Management Console. Keep in mind that the steps may differ for accessing other programs or features on your computer.
Click once on the Windows icon, because no one ever said opening software was as easy as opening a can of worms.
Click on the Windows icon in the bottom left corner of your screen to open the Start menu.
Gain access to the Start menu with a single click! Look for the iconic Windows logo in the bottom left corner of your screen. Move your cursor over the logo, pressing either the left or right mouse button. This will reveal a world of possibilities and features. Alternatively, press the Windows key on most keyboards or use Windows-specific keyboard shortcuts. Plus, customize your Start menu by right-clicking any app or program. Pin important and frequently used items for quick access!
Step 2: Searching for Microsoft Management Console
To search for the Microsoft Management Console (MMC), follow these steps:
- Press the Win + R key combination to open the Run dialog box.
- Type “mmc” in the Open field and click OK or press Enter.
- The MMC will open, allowing you to access various management tools.
- To create a shortcut for easier access in the future, right-click on the MMC icon in the taskbar and select “Pin to Taskbar” or “Pin to Start Menu.”
- You can now launch the MMC from the taskbar or Start Menu whenever needed.
When searching for the Microsoft Management Console, it is important to note that it is a powerful tool that provides access to various management utilities on your Windows computer. By following these steps, you can quickly locate and open the MMC, making it easier to manage and configure various settings.
How to open Microsoft Management Console… because who needs human interaction when you can manage your IT problems with a click of a button?
In the search bar at the bottom of the Start menu, type “Microsoft Management Console.”
The Start menu is a great way to quickly access features and programs on your computer. One of these is the Microsoft Management Console (MMC), which helps manage and configure system components. To find this tool, search in the bottom of the Start menu. Here’s a step-by-step guide:
- Click the Windows icon at the bottom left of your screen to open the Start menu.
- Type “Microsoft Management Console” in the search bar.
- A list of suggested results will appear. Find “Microsoft Management Console” and click it.
- The MMC window should now open, displaying various management tools and snap-ins.
- Customize the MMC by adding or removing snap-ins. To add one, click “File” in the top-left corner of the MMC window, then select “Add/Remove Snap-in.” You can search the list of available snap-ins or browse for more.
These steps can help you access the Microsoft Management Console easily. To further enhance your experience, consider creating shortcuts for frequently used management tasks or saving configurations as console files. It’s also helpful to pin or create desktop shortcuts for specific snap-ins. All of these suggestions can streamline your workflow and improve efficiency when managing system components.
As you type, you will see the Microsoft Management Console app appearing in the search results.
When you type in the search bar, watch for the Microsoft Management Console app. It’ll start showing up in the search results. This app helps you manage different parts of Microsoft software and operating system.
Here’s a step-by-step guide for how the Microsoft Management Console appears in the search results:
- Click on the Windows icon at the bottom left corner of your screen. Open the Start menu.
- Type “Microsoft Management Console” in the search bar.
- Relevant suggestions will start to appear as you type.
- Among these, you’ll see the Microsoft Management Console app stands out.
- When you spot it, you can either click it or use arrow keys to select it and press Enter.
- The Microsoft Management Console app will launch and give you access to its management tools.
Plus, the Microsoft Management Console provides a single hub for managing Windows administrative tools and system settings.
It’s interesting that the Microsoft Management Console started with Windows NT 4.0. And now it’s an essential part of Windows operating systems, such as Windows 10.
Step 3: Opening Microsoft Management Console
To open Microsoft Management Console, follow these steps:
- Press the Windows key + R to open the Run dialog box.
- Type “mmc” in the box and click OK.
- In the Microsoft Management Console, click on the File menu.
- Select “Add/Remove Snap-in” from the menu.
- Choose the desired snap-in from the list and click Add.
- Click OK to add the snap-in and open the Microsoft Management Console.
Once you have opened the Microsoft Management Console, you can customize the snap-ins according to your requirements.
Avoid using ordinal adverbs and sequencing adverbs as they can disrupt the flow of information.
For optimal usage, consider these suggestions:
- Pin the Microsoft Management Console to the taskbar for quick access.
- This suggestion works because it allows you to open the console directly from the taskbar, improving efficiency.
- Create custom MMC consoles with your preferred snap-ins.
- This suggestion works because it enables you to have a customized console with all the necessary tools readily available.
By following these steps and applying the suggestions, you can efficiently open and use Microsoft Management Console for your management needs. Whether you prefer the direct click or the intricate arrow dance, get ready to unveil the mysterious and powerful Microsoft Management Console app.
Once you see the Microsoft Management Console app in the search results, you can either click on it directly or use the arrow keys to navigate to it and press Enter to open it.
In order to open the Microsoft Management Console app, here’s a step-by-step guide:
- Start searching for it.
- Look through the results until you find it.
- Choose to click on it or use the arrow keys to navigate to it.
- If you choose the arrow keys, highlight the app and press Enter.
For a better experience, here are a few tips:
- Use keyboard shortcuts whenever possible.
- Customize your search settings to prioritize relevant apps.
- Keep an eye out for updates or new versions of the Microsoft Management Console app.
By following these instructions and suggestions, you will have no problem opening the Microsoft Management Console app.
Exploring the Microsoft Management Console Interface
Exploring the Interface of Microsoft’s Management Console
Microsoft’s Management Console (MMC) provides a centralized platform for managing and configuring various aspects of a Windows operating system. With its flexible and extensible design, the MMC allows administrators to access and control various system utilities and specialized tools. Let’s delve into the details of this powerful interface.
Table: Exploring the Microsoft Management Console Interface
| Column 1 | Column 2 | Column 3 |
|---|---|---|
| Purpose | Features | Benefits |
| Control | Unified management | Streamlined system administration |
| Configuration | Customizable | Efficient utilization of resources |
| Accessibility | Remote administration | Simplified management across multiple systems |
The MMC offers a range of unique features. Firstly, it provides unified management through a single interface, allowing administrators to access diverse system utilities and tools cohesively. Secondly, it offers extensive customization options, enabling users to tailor the console to their specific needs. Lastly, the MMC facilitates remote administration, empowering administrators to manage systems from a centralized location, thereby enhancing efficiency and productivity.
To make the most of the MMC, consider the following suggestions. Firstly, familiarize yourself with the available snap-ins, as they expand the console’s functionality by adding specific tools and utilities. Secondly, create custom MMC consoles tailored to different administrative tasks, improving workflow and reducing clutter. Lastly, leverage the ability to export and import console configurations, making it easier to share setups across systems or backup essential configurations.
By exploring the features and customization options of the Microsoft Management Console interface, administrators can optimize their system administration workflows and enhance overall efficiency. With its streamlined approach, the MMC provides a comprehensive platform for managing and configuring Microsoft Windows systems.
How to open Microsoft Management Console – because managing your computer should be as fun and painless as removing a tooth without anesthesia.
Overview of the main window and its components.
The Microsoft Management Console’s (MMC) main window is key for managing your system. It provides all the tools and options you need for configuring and monitoring.
The navigation pane, on the left, shows a hierarchy of snap-ins and tools. This lets you quickly locate and access the one you need.
The details pane, on the right, gives info on the selected tool or snap-in.
At the top is a toolbar with shortcuts to commonly used commands and actions, like saving, printing, or launching tasks. Plus, there’s a menu bar with extra options and settings to customize.
To get the most out of MMC, here are some tips:
- Customize the layout. Right-click for console tree or taskpad views, so you can always access the relevant info.
- Use keyboard shortcuts. Learn common shortcuts like Ctrl+C, Ctrl+V, and Ctrl+S to make navigating and doing tasks faster.
- Take advantage of drag-and-drop. Move objects between folders or reorder lists by simply dragging them with your mouse.
By following these tips, you can manage your system more easily and make the most of MMC.
Understanding the different options and features available in Microsoft Management Console.
MMC provides users with snap-ins catering to specific admin needs, such as Device Manager, Disk Management, and Services Configuration. It can be tailored to individual requirements with the addition or removal of snap-ins. Remote access is also supported with RDP, enabling remote connection to other machines in the network – saving time and increasing productivity.
Integration with Active Directory enables group policy management, making user account and access control across multiple domains easy. Event Viewer consolidates system logs, aiding analysis and troubleshooting.
An example of its effectiveness is seen in a large enterprise network with Windows servers in different locations. Group Policy Management snap-in and Active Directory integration allowed the organization to enforce standardized policies throughout, improving security compliance and streamlined admin processes.
Conclusion
Exploring ways to open Microsoft Management Console? It is a great tool! It helps users manage and monitor system components. Whether IT expert or regular user, this console offers a central platform to effectively customize systems.
User-friendly interface with snap-ins makes it easy to access administrative tools and services. From managing local/remote systems to monitoring performance or configuring settings, MMC is an invaluable asset.
Windows provides built-in snap-ins. But, users can install third-party extensions too! That makes the console’s functionality customizable.
Pro Tip: Create custom MMC consoles with frequently used snap-ins for quick access. This will help you smoothly navigate admin tasks and keep a neat workspace.
Tips and Troubleshooting
Double-check that you have admin privileges on your PC. Without these, accessing the Microsoft Management Console might be blocked. If you have issues opening the console, try rebooting your PC. A simple restart can often resolve any temporary problems.
Verify that all services related to the Microsoft Management Console are running properly. Enable or restart any that are not working. If you still face difficulties, update your OS and make sure you have the latest version of the Microsoft Management Console installed. Outdated software can cause compatibility issues.
For further help, consult the official Microsoft documentation or contact their support team.
Remember, every computer system has unique configurations that can affect the MMC. Being aware of your system can help overcome any obstacles.
Utilize these helpful tips and troubleshooting techniques to access the Microsoft Management Console with ease. Unlock a world of possibilities!
Additional Resources
Find out more about Microsoft Management Console (MMC) in the ‘Additional Resources’ section! Get acquainted with the tools and features. Get tips and tricks to customize and navigate MMC effortlessly. Tutorials and guides will help you perform tasks. Need help? Join forums and ask questions from other users. To gain a comprehensive understanding, explore the documentation and online resources provided by Microsoft. Make use of keyboard shortcuts for quick access to MMC features.
Microsoft Windows contains a host of ways to manage and maintain your system. One such interface is the Microsoft Management Console (MMC), which helps you change administrative settings and perform other functions. While using the MMC, you can access various Windows utilities such as the Device Manager, or tools provided by other software providers for Windows.
MMC isn’t new either, it has been around since Windows 2000. So, here is all you need to know about the Microsoft Management Console:
How to Launch the Microsoft Management Console (MMC)
There are several ways to open the MMC. Feel free to use whichever method feels more convenient to you.
How to Launch MMC Using the Run Command
To launch the MMC using the Windows Run command:
- Press Win + R to launch the Run application.
- Type mmc in the text box and hit Enter.
- You will need to be logged in as an administrator to open MMC.
- The Microsoft Management Console window will open.
Launch MMC Using Command Prompt (CMD)
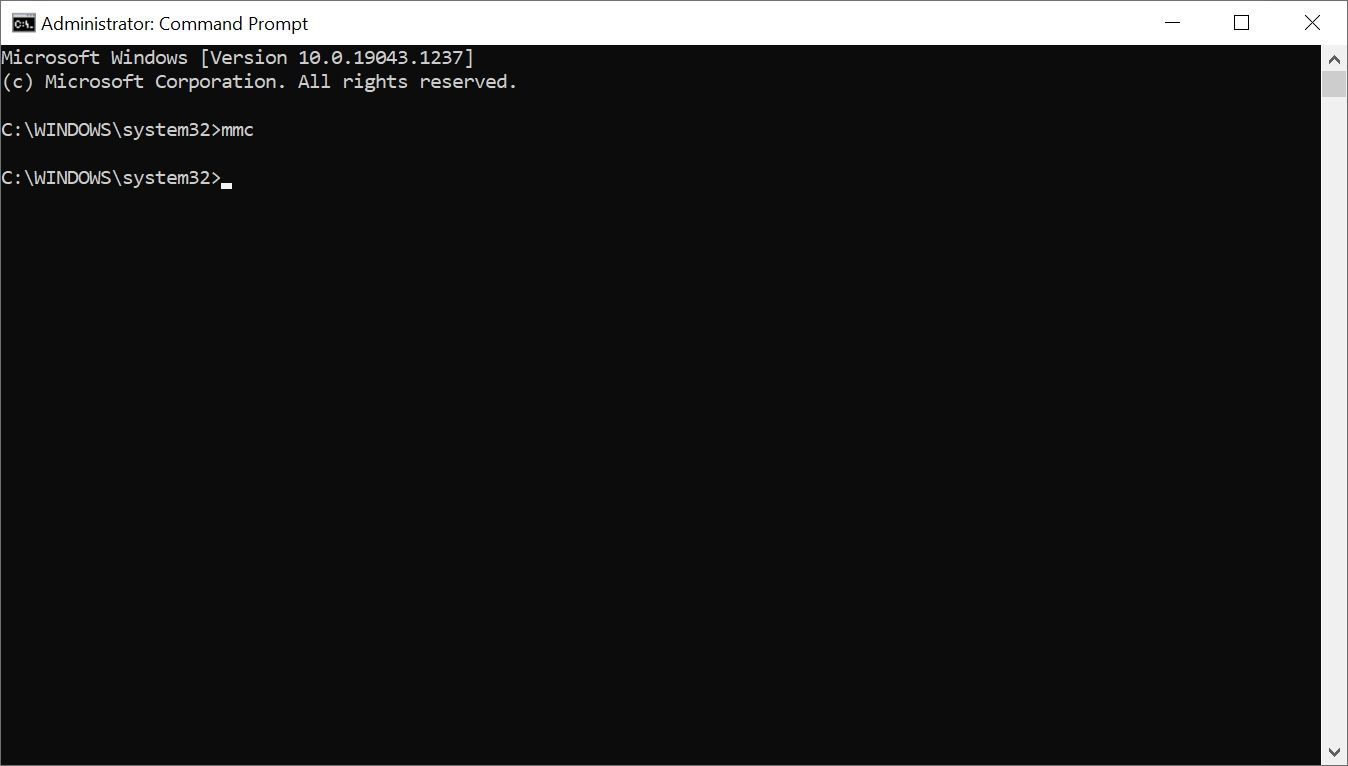
For the Command Prompt:
- In the Start menu search bar, type cmd.
- From the search results, right-click on Command Prompt > Run as Administrator.
- In the CMD console, type mmc and hit Enter to launch the Microsoft Management Console.
Launch MMC Using Windows PowerShell
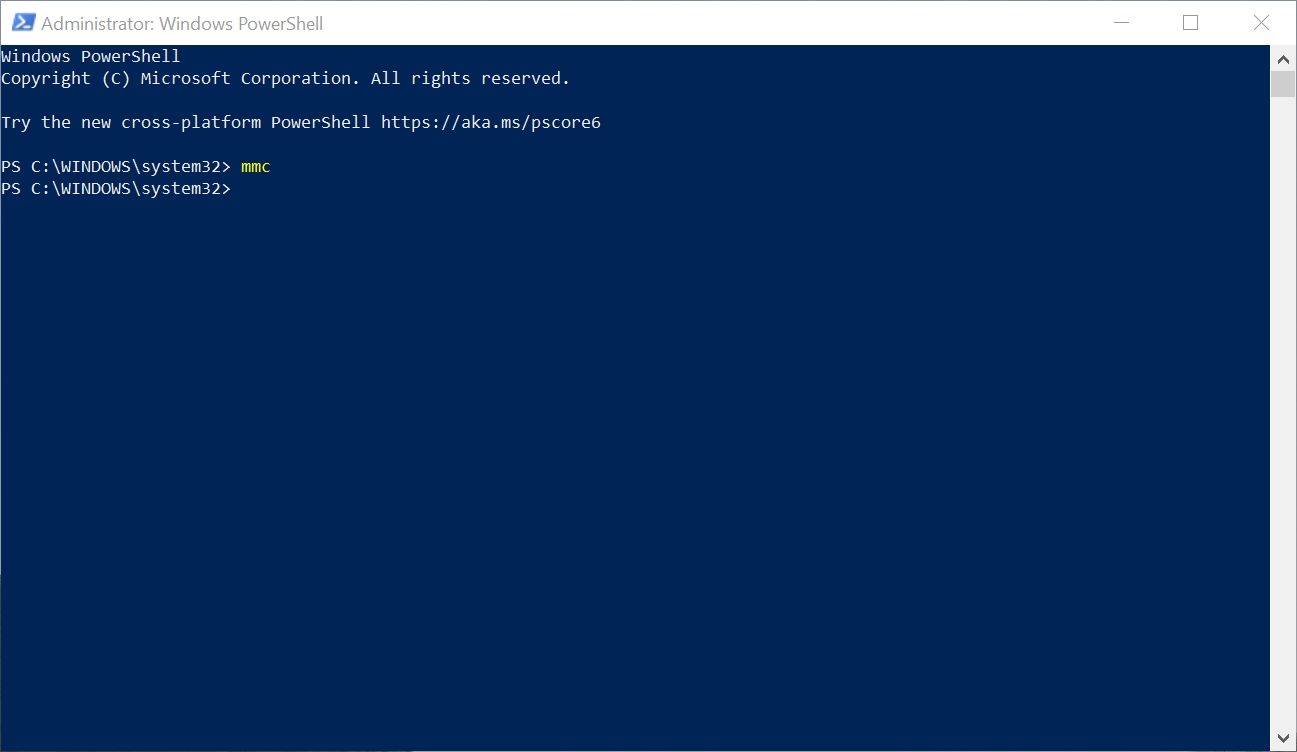
Here’s how to launch the MMC using Powershell:
- In the Start menu search bar, type PowerShell.
- Right-click on Windows PowerShell from the search results. Choose Run as Administrator.
- In the PowerShell console, type mmc and press Enter to launch the Microsoft Management Console.
Create a Desktop Shortcut for MMC
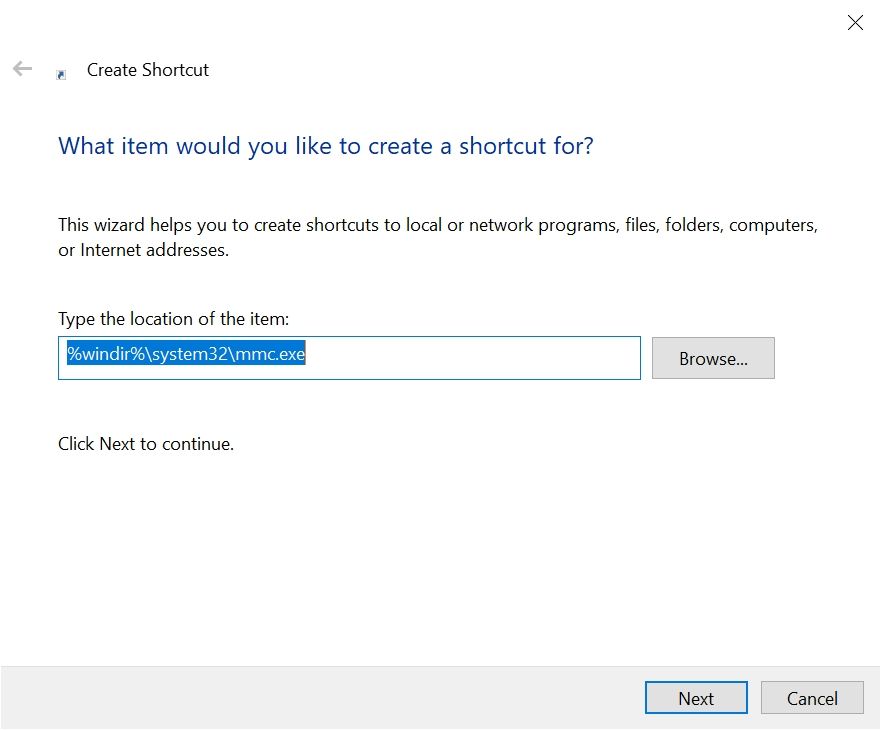
Using a one-time process, you can also create a desktop shortcut for MMC that’ll make launching the service easier.
- Right-click on a blank area on the desktop. Navigate to New > Shortcut.
- On the Create Shortcut window, enter %windir%\system32\mmc.exe in the address text box. Click Next.
- On the next screen, assign a name to the shortcut and click Finish.
- Launch MMC using the newly created shortcut
How to Use and Navigate the Microsoft Management Console (MMC)
At first, the MMC interface may seem a little confusing. The interface is mostly blank because you need to individually add the Windows tools you plan to access using the Microsoft Management Console. Each shortcut is referred to as a «snap-in.» These snap-ins are the actual administrative tools that you can use to configure your computer and its software components.
You can also create consoles that contain a specific set of snap-ins that are related to each other. For example, you could create a console that helps you manage your hardware components. It could contain tools such as the Device Manager and Event Viewer and can act as another way to open the Disk Management utility.
How to Add or Remove Snap-Ins
When you launch MMC for the first time, there will be no snap-ins added to the Console Root folder on the navigation bar on the left. Adding or removing snap-ins is a breeze, just follow these steps:
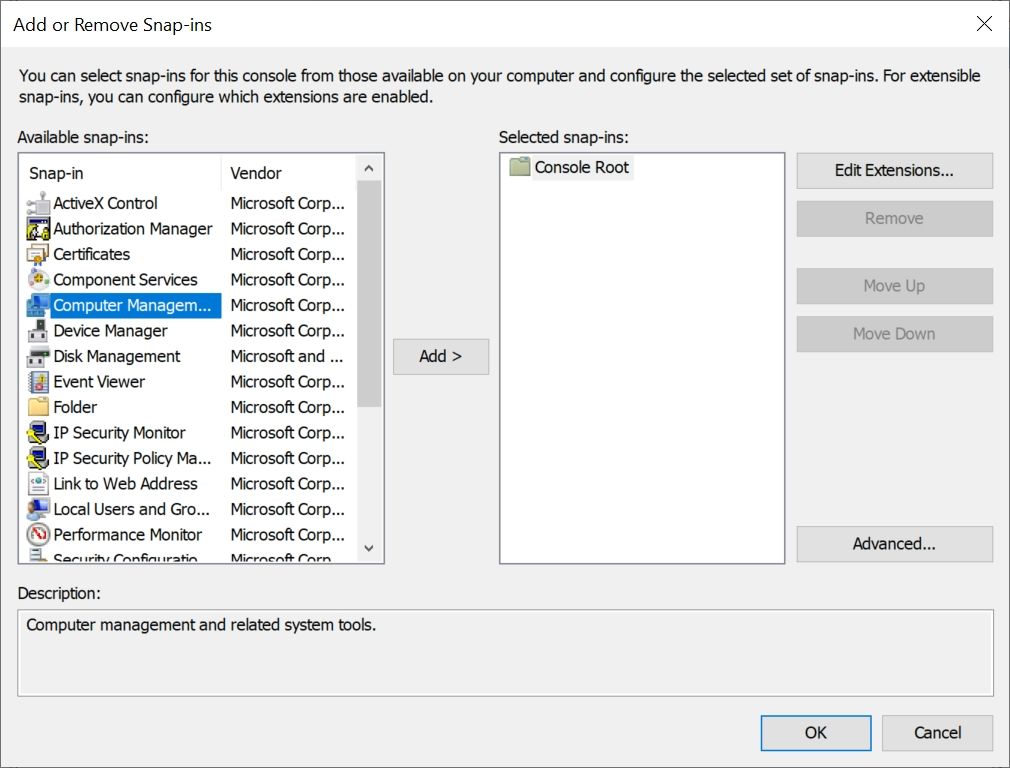
- Launch Microsoft Management Console (MMC).
- Click on File, below the title bar.
- Click on Add/Remove snap-in or you can use the shortcut CTRL + M.
- On the next window, select the snap-in from the list of available snap-ins.
- Click on Add.
- In the next window, choose whether you want the snap-in to manage this computer or another computer.
- Be sure to check the option: Allow the selected computer to be changed when launching from the command line.
- Click on Finish.
- Click on OK.
To remove snap-ins:
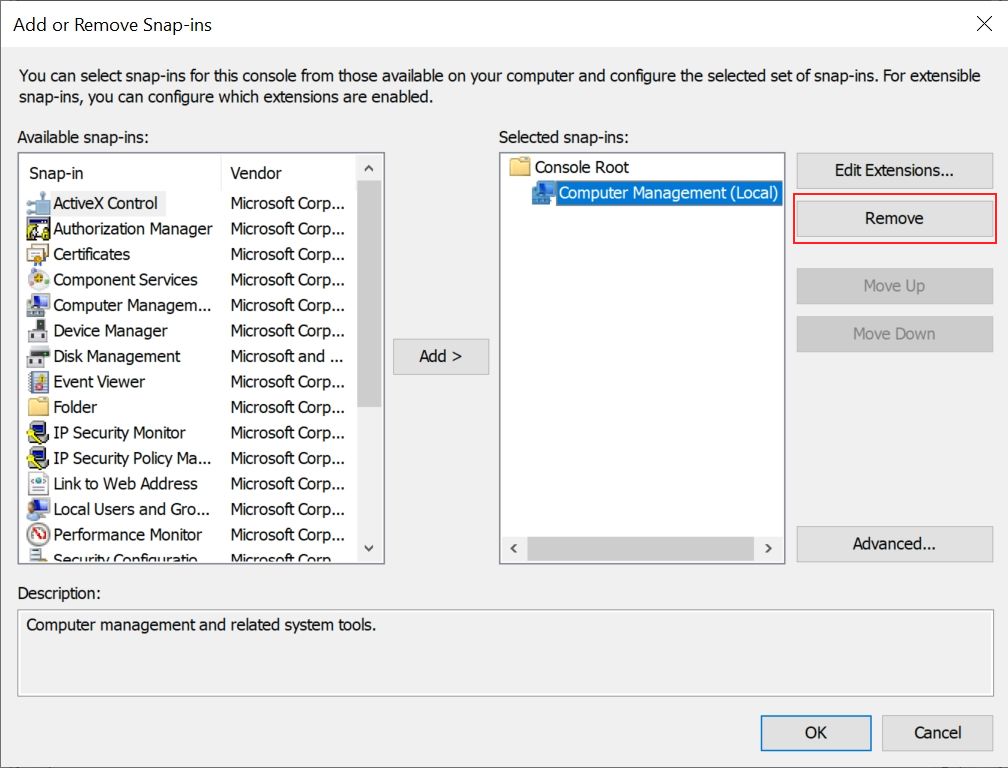
- Navigate to File > Add/remove snap-in… or press CTRL+M.
- In the window that opens, click on the snap-in you want to remove. You can find your added snap-ins under the Selected snap-ins: section.
- Now, click on Remove, next to the section.
- The snap-in will be removed.
How to Edit Snap-In Extensions
Most snap-ins will contain various extensions that help you manage different aspects of the snap-in. For example, the Computer Management snap-in contains various extensions such as the Performance Monitor, Disk Management, Event Viewer, and many more. However, you may not want to use all of them.
In this case, you can edit, or remove these extensions:
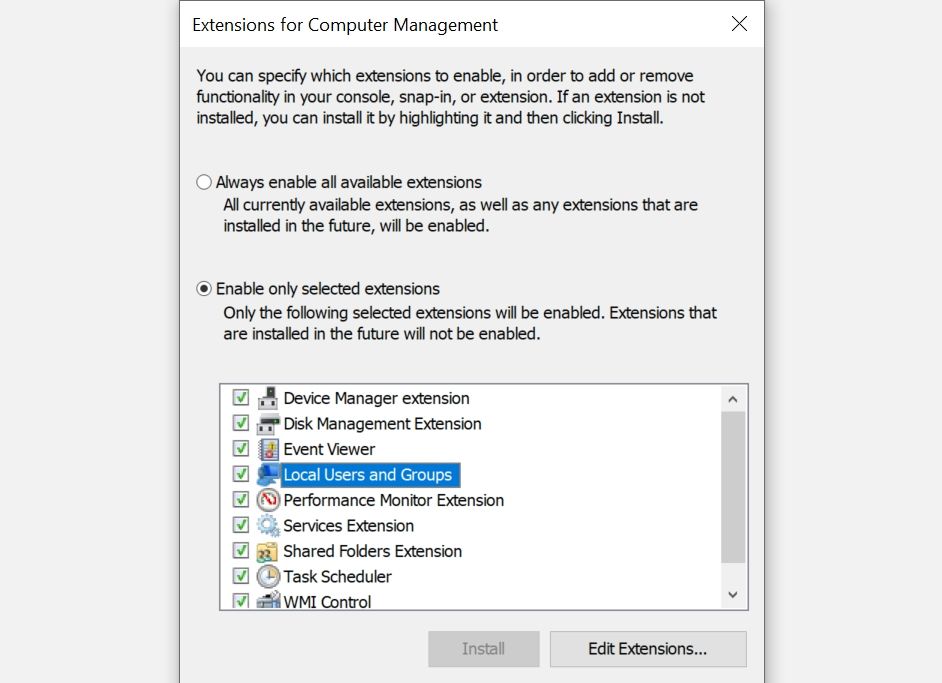
- Go to File > Add/remove snap-in.
- Under the Selected snap-ins section, select the snap-in you want to change.
- Click on Edit Extensions.
- In the new window, choose the Enable only selected extensions option.
- Select or unselect the extensions from the list, and then click OK.
- Again, click OK on the Add/remove snap-ins window.
Sometimes, the extensions themselves may have sub-extensions. To enable or disable these sub-extensions, select the extension from the list, and click on Edit Extensions at the bottom of the window.
Using Snap-Ins to Manage Your Computer
After adding snap-ins, it’s fairly easy to use them to manage different aspects of your computer. Everything happens withing the MMC window itself, so you don’t have to deal with new windows when switching to other snap-ins.
To use snap-ins, just do the following:
- Simply click on any snap-in under the Console Root folder in the navigation pane.
- You can either expand the snap-in by clicking on the drop-down arrow, or choose the sub options by double-clicking clicking them in the window on the right.
- The selected snap-ins will open within the Microsoft Management Console itself.
- You can also use the navigation buttons above the Console Root folder to show or hide the console tree, go up one level, etc.
- Additionally, the Actions tab on the right replaces the options bar if you were to open the snap-in separately.
Essentially, all snap-ins function as they would if you accessed them independently.
A Single Interface to Manage Your Computer
As is evident by this article, the Microsoft Management Console (MMC) helps you access most Windows settings in a single interface. More importantly, MMC allows you to create customized management consoles that contain similar snap-ins. Additionally, you can also create custom consoles for other computers or users on your local network.
Despite being so useful, MMC is not widely used by the average Windows user. It is indeed one of the most overlooked features in Windows 10.
Windows включает в себя консоль различных инструментов, которые используются для управления и обслуживания системы. Консоль называется Microsoft Management Console (MMC), в которой размещаются и отображаются инструменты администрирования, созданные Microsoft и другими поставщиками программного обеспечения для Windows. Эти инструменты принято называть – оснастками. Используются они для управления оборудованием, сетевыми компонентами Windows и программным обеспечением.
Как открыть «Консоль управления Microsoft» в Windows 10
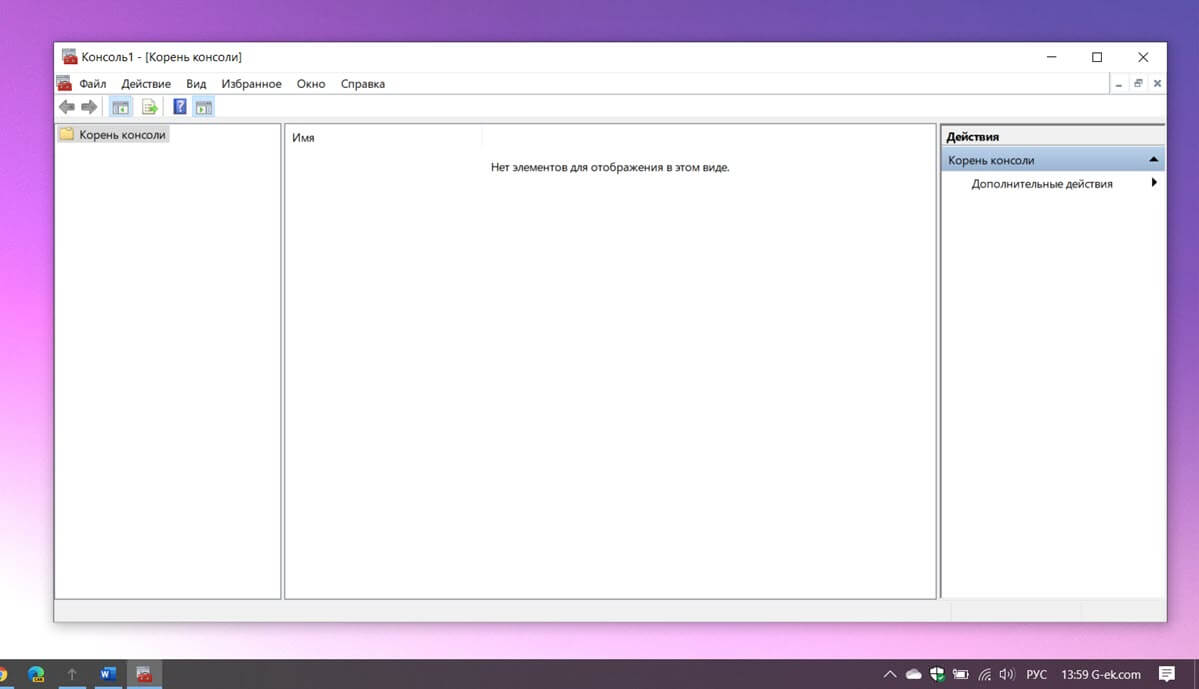
Если вы введете MMC в строке «Выполнить» или в адресной строке проводника файлов и нажмете клавишу Enter.
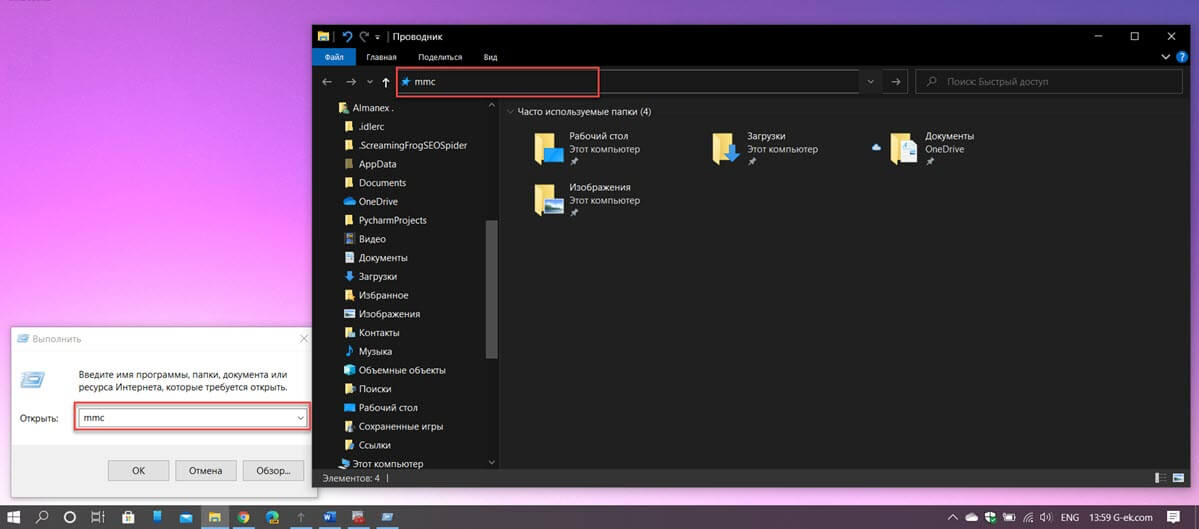
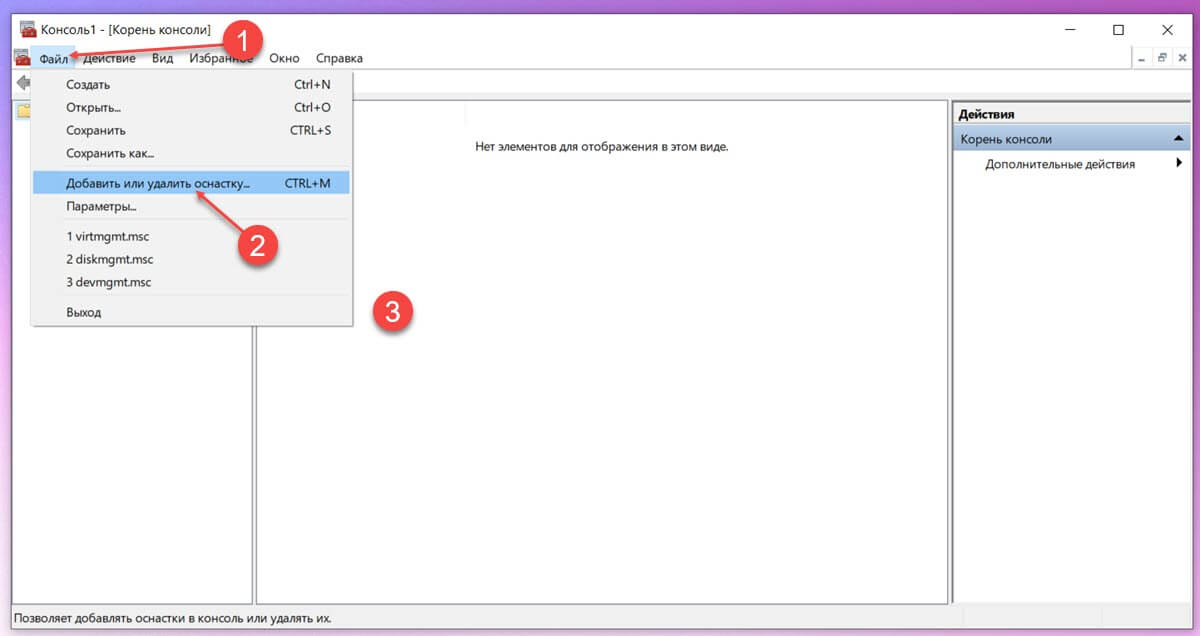
Результат может сбить с толку. Это будет пустой экран с панелями. Но если вы нажмете «Файл» → «Добавить или удалить оснастку…», это все изменит. MMC — это место, куда вы можете добавить различные инструменты Windows, такие как Управление дисками, Управление компьютером, Монитор производительности, Управление печатью и т. Д.
Инструмент достаточно мощный, чтобы выполнять эти операции на другом компьютере в той же сети.
Как добавить / удалить оснастки MMC
Кликните меню «Файл», а затем нажмите «Добавить или удалить оснастку…», чтобы открыть селектор.
Затем выберите нужную оснастку и нажмите кнопку «Добавить».
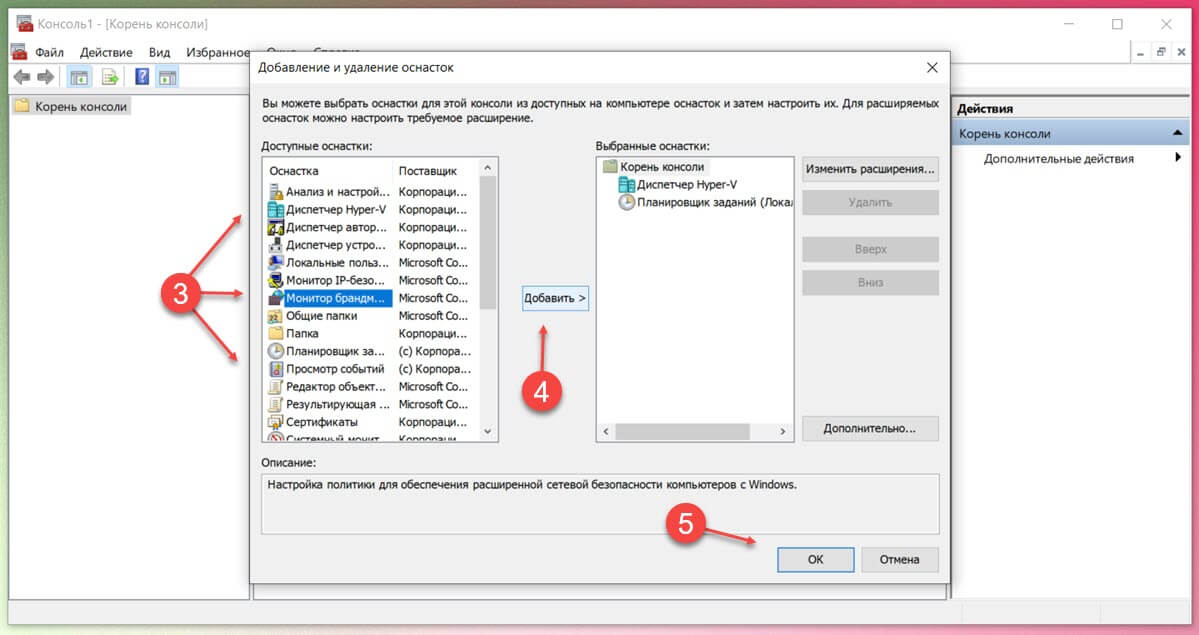
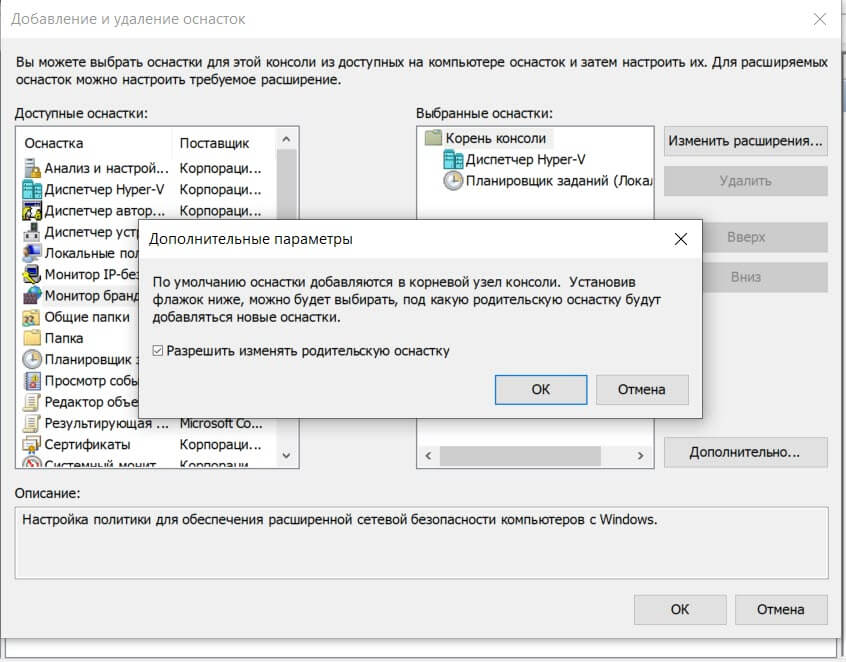
Вы можете нажать кнопку «Дополнительно…», где можно установить родительскую оснастку, то есть ту, которая будет в верхней части списка.
Нажмите «ОК», а затем обязательно сохраните внесенные изменения нажав в меню «Файл» «Сохранить» или с помощью сочетания клавиш CTRL S.
Это позволит вам быстро получить доступ к набору часто используемых инструментов. Хотя эти инструменты рассчитаны для профессионалов, даже обычные пользователи могут использовать эти инструменты, например — Групповая политика, Планировщик задач и др..

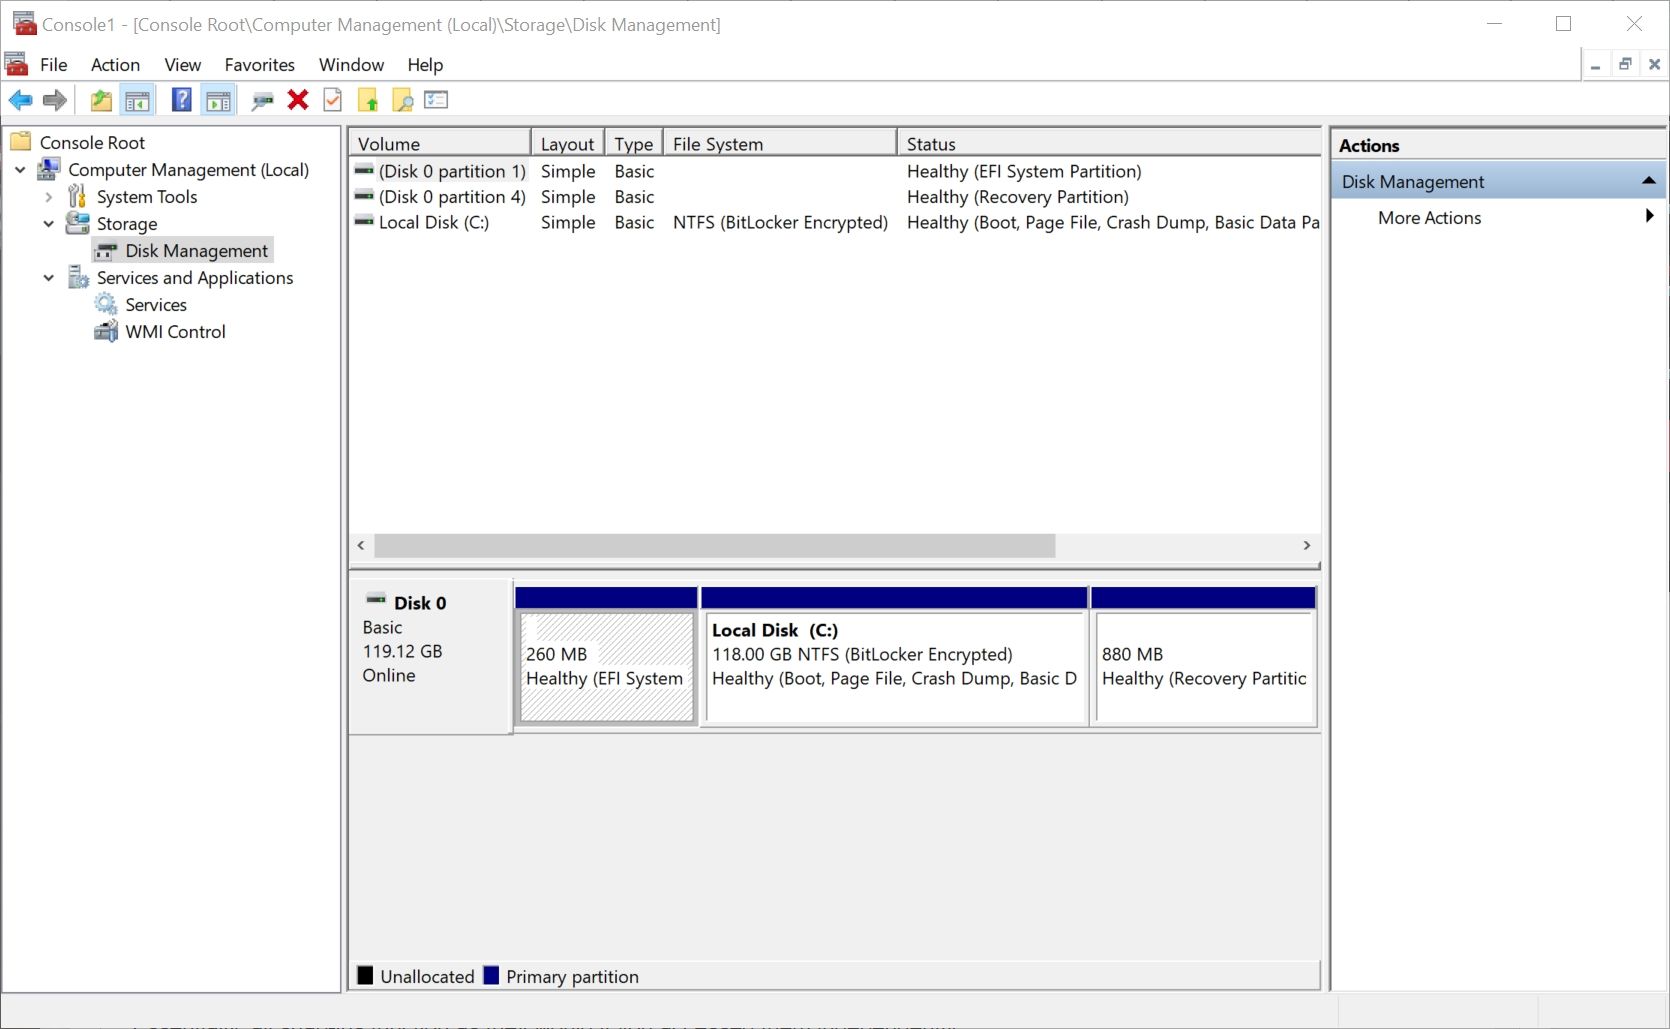
Одним из самых больших преимуществ использования MMC является то, что вы можете получить доступ к функциям выбранных инструментов прямо внутри него. Например, когда я кликну «Управление дисками», оснастка будет запущена в том же окне.
MMC — отличный инструмент для управления оборудованием, программным обеспечением и сетевыми компонентами операционной системы Windows.
«Управление компьютером» в Windows — специальная консоль для доступа к основным инструментам администрирования локального компьютера, а при необходимости — и удаленных компьютеров. Оснастка доступна во всех актуальных версиях системы.
В этой инструкции для начинающих о способах открыть Управление компьютером в Windows 11 и Windows 10, большинство из которых сработают и в предыдущих версиях системы.
Контекстное меню кнопки «Пуск»
Один из самых быстрых способов перейти к утилите «Управление компьютером» — использовать контекстное меню кнопки «Пуск».
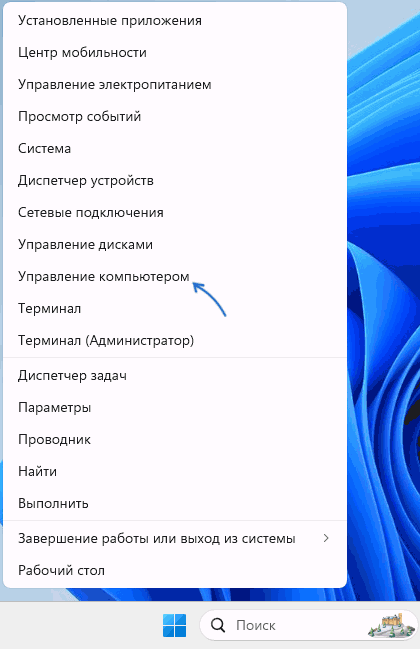
Достаточно нажать правой кнопкой мыши по кнопке «Пуск», после чего выбрать соответствующий пункт в появившемся меню.
Это же меню можно вызвать не только с помощью мыши, но и используя сочетание клавиш Win+X на клавиатуре, где Win — клавиша с эмблемой Windows, а X — клавиша с соответствующей латинской буквой.
Поиск Windows
Второй быстрый метод, который я рекомендую использовать во всех случаях, когда вы не знаете, как открыть тот или иной встроенный инструмент Windows — использовать встроенные функции поиска.

Начните набирать «Управление компьютером» в поиске на панели задач и, когда нужный элемент найдётся, откройте его.
Окно «Выполнить»
Вы можете использовать диалоговое окно «Выполнить» для запуска управления компьютером:
- Нажмите клавиши Win+R на клавиатуре.
- Введите compmgmt.msc в открывшемся окне и нажмите «Ок» или клавишу Enter.


В результате нужный элемент управления будет открыт. В этом контексте вас могут заинтересовать и другие полезные команды диалогового окна «Выполнить».
Значок «Этот компьютер»
Следующая возможность — использовать значок «Этот компьютер» на рабочем столе (если включено его отображение) или аналогичный значок в Проводнике.

Нажмите правой кнопкой мыши по значку «Этот компьютер» и выберите пункт «Управление» для запуска управления компьютером. В Windows 11 после нажатия правой кнопкой мыши потребуется нажать «Показать дополнительные параметры», чтобы появилось классическое контекстное меню с нужным элементом.
В разделе «Все приложения» в меню «Пуск», а также в панели управления Windows 11 присутствует папка «Инструменты Windows».

Она, в свою очередь, содержит ярлыки для запуска большинства встроенных системных инструментов, включая «Управление компьютером».
Помимо указанных методов, вы можете использовать запуск compmgmt.msc из командной строки, диспетчера задач, путем создания ярлыка, или ручным запуском файла
C:\WINDOWS\system32\compmgmt.msc
Если при попытке запуска оснастки «Управление компьютером» вы видите сообщение об ошибке, связанной с тем, что она ограничена политикой (подробнее на тему: Консоль управления MMC не может создать оснастку), вы можете:
Если у вас остаются вопросы, касающиеся рассмотренной темы, вы можете задать их в комментариях ниже — я постараюсь дать ответ.