
Чем может быть полезна эта статья?
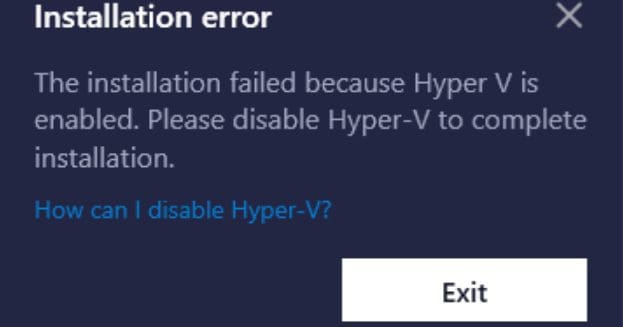
Когда вы запускаете версию BlueStacks 5, которая не поддерживает Hyper-V, на ПК, на котором включен Hyper-V, вы увидите сообщение, показанное на изображении ниже.

Чтобы продолжить использование BlueStacks 5 на вашем компьютере, вам необходимо
- Установить версию BlueStacks 5, поддерживающую Hyper-V.
- Отключить Hyper-V на своем ПК.
Как установить версию BlueStacks 5 для Hyper-V?
Если вы не можете запустить BlueStacks 5 из-за того, что на вашем компьютере включен Hyper-V, вы можете удалить его и установить версию BlueStacks 5, которая поддерживает Hyper-V. Следующие шаги покажут вам, как это сделать.
1. Сначала удалите BlueStacks 5 с вашего ПК, следуя инструкциям, приведенным здесь.
ПРИМЕЧАНИЕ: Удаление BlueStacks 5 приведет к удалению всех ваших приложений, экземпляров и игровых данных. Если вы не хотите этого делать, вы можете просто отключить Hyper-V и продолжить использовать текущий BlueStacks 5, установленный на вашем компьютере.

2. Посетите нашу официальную страницу загрузки BlueStacks 5. Здесь нажмите кнопку «Загрузить BlueStacks», как показано ниже.

3. Программа установки или BlueStacks 5, поддерживающий Hyper-V, автоматически начнет загрузку. После загрузки запустите установщик, дважды щелкнув по нему

4. Теперь нажмите кнопку «Установить сейчас», чтобы начать установку BlueStacks 5, поддерживающего Hyper-V, на ваш компьютер.

После завершения установки вы можете запустить BlueStacks 5 с включенным Hyper-V на своем ПК и наслаждаться любимыми играми для Android
Как отключить Hyper-V?
Вы можете использовать версию BlueStacks 5, установленную на вашем ПК, отключив настройки, связанные с Hyper-V, в параметре «Функции Windows». Следующие шаги покажут вам, как это сделать.
1. Перейдите в Панель управления → Программы → Включение или отключение компонентов Windows

2. Теперь вам нужно будет снять отметку с различных функций Windows для вашей версии Windows.
Для Windows 8 снимите флажок «Hyper-V», как показано ниже.

Для Windows 10 или Windows 11 будут доступны различные функции Windows в зависимости от их версий. Снимите флажки со всех перечисленных ниже функций Windows, которые доступны в вашей версии ОС Windows
- Hyper-V
- Windows Hypervisor Platform
- Windows Sandbox

- Virtual Machine Platform

- Windows Subsystem for Linux

ПРИМЕЧАНИЕ: Если «Платформа виртуальной машины» и «Платформа гипервизора Windows» недоступны в вашей версии Windows 10, используйте параметр «Целостность памяти», выполнив следующие действия.
3. После того, как вы уберете отметку со всех функций Windows, применимых к вашему ПК, нажмите «ОК».

4. Windows потребует перезагрузить компьютер, чтобы применить запрошенные изменения. Нажмите «Перезагрузить сейчас«, чтобы продолжить.

Другие способы отключения Hyper-V
Если вы все еще не можете запустить BlueStacks 5 после того, как вы отключили Hyper-V с помощью описанного выше метода, обратитесь к следующей статье, в которой вы узнаете, как это сделать.
- Как отключить Hyper-V в Windows для корректной работы BlueStacks 5
Мы ценим, что вы с нами. Надеемся, вам нравится опыт использования BlueStacks. По любым вопросам пишите на support@bluestacks.com. Большое спасибо и успешной игры!
When you try to install BlueStacks or update your BlueStacks version, you may sometimes get an error message that says, “The installation failed because Hyper V is enabled.” You’re then asked to disable Hyper-V to complete the installation process. Let’s see how you can quickly do that and solve the problem.
Contents
- 1 Fix: BlueStacks Won’t Install, Hyper V Is Enabled
- 1.1 Disable Hyper V
- 1.2 Force-Stop All Hyper V Services
- 1.3 Install the Latest OS and Driver Updates
- 1.4 Repair System Files
- 1.5 Conclusion
Fix: BlueStacks Won’t Install, Hyper V Is Enabled
Disable Hyper V
First things first, disable Hyper V and try to install BlueStacks again.
- Click on the Windows Search icon.
- Select Turn Windows features on or off.
- Untick the Hyper V checkbox to disable this feature.
- Save the changes and check if you can install BlueStacks.
If the issue persists, go back to Turn Windows features on or off and disable the following features: Windows Hypervisor Platform, Windows Sandbox, Virtual Machine Platform, and Windows Subsystem for Linux.
Force-Stop All Hyper V Services
If you’re still getting the same error, open the Services App and turn off all the Hyper V services still running in the background.
- Click on the Windows Search icon.
- Type services and double-click on the Services App.
- Locate all the Hyper V services.

- Then, right-click on each service and select Stop.
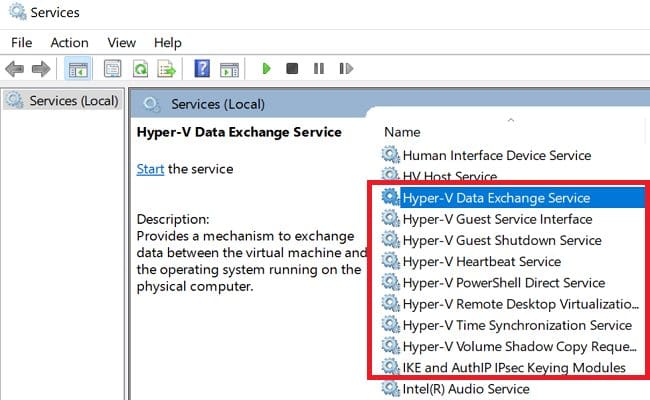
Depending on your current configuration, you may need to stop the following services:
Hyper-V Data Exchange ServiceHyper-V Guest Service InterfaceHyper-V PowerShell Direct ServiceHyper-V Time Synchronization ServiceOther Hyper-V services
Install the Latest OS and Driver Updates
Be sure to update your OS and drivers to the latest version. Go to Settings, select Windows Update, and hit the Check for updates button.
Outdated graphics drivers often cause various errors and glitches on your computer. Launch the Device Manager, and expand the list of Display Drivers. Right-click on your graphics driver and select Update driver.
If there’s an exclamation mark next to other drivers, repeat the steps above to update them.
Repair System Files
Corrupted system files may sometimes prevent you from installing new programs or changing your settings. Launch Command Prompt with admin rights, and run DISM and SFC to repair your files.
Use the commands below to get the job done: DISM.exe /Online /Cleanup-Image /Restorehealth and sfc /scannow. Restart your machine and try again.
After following all the steps above, contact BlueStacks Support if the issue persists.
Conclusion
If BlueStacks won’t install because Hyper V is enabled, disable the service. Additionally, launch the Services app and force-stop all the Hyper V services running in the background. Then, update your OS and driver to the latest version. You can also run DISM and SFC to repair faulty system files.
Did you manage to disable Hyper V and install or update BlueStacks? Let us know in the comments below.
Bluestack helps run Android games on non-android devices; we have covered a detailed step-by-step guide on how to install Bluestack on Hyper-V virtual machine in this article.

Contents
- 1 How to install Bluestack on Hyper-V virtual machine?
- 2 What are the benefits of installing Bluestack on a Hyper-V virtual machine?
- 3 How to set up a Hyper-V virtual machine for Bluestack?
- 4 What are the system requirements for Bluestack on a Hyper-V virtual machine?
- 5 How to troubleshoot errors when installing Bluestack on a Hyper-V virtual machine?
- 6 How to uninstall Bluestack from a Hyper-V virtual machine?
- 7 How to use Bluestack on a Hyper-V virtual machine?
- 8 What are the known issues when using Bluestack on a Hyper-V virtual machine?
- 9 How to get support for Bluestack on a Hyper-V virtual machine?
How to install Bluestack on Hyper-V virtual machine?
Installing Bluestack on a Hyper-V virtual machine is easy. You need to follow these simple steps:
- First, you need to enable the Intel VT-x or AMD-V in BIOS
- Then, you need to create a new virtual machine in Hyper-V and specify the operating system as Windows 7 or later.
- After that, you must allocate at least 2GB of RAM and 20GB of storage space to the virtual machine.
- You can install Bluestack on the virtual machine by following the on-screen instructions.
What are the benefits of installing Bluestack on a Hyper-V virtual machine?
There are a few benefits of installing Bluestack on a Hyper-V virtual machine. One advantage is that you can use Hyper-V to take snapshots of your device, which can be helpful if you need to roll back changes or if you want to save a particular state of your machine.
Another benefit is that you can use Hyper-V’s networking features to connect your virtual machine to the internet, which can be helpful if you want to use Bluestack for web development or testing purposes.
How to set up a Hyper-V virtual machine for Bluestack?
Bluestack is an Android emulator that allows you to run Android apps on your PC. You can use it for gaming, work, or other purposes.
To use Bluestack on a Hyper-V virtual machine, you must set up the VM and install the emulator. Here’s how:
- Create a new virtual machine in Hyper-V Manager.
- Select the operating system that you want to install Bluestack on. We recommend using a 64-bit version of Windows 10 for the best performance.
- Give the virtual machine a name and choose where you want to store it.
- Configure the virtual machine’s settings as follows:
- Processor: 2 or more virtual processors
- Memory: 4 GB or more of RAM
- Network: Internal network or bridge connection
- Display: 1024×768 or higher resolution
- Storage: 40 GB or more of space
- If you’re using an Intel processor, enable Intel VT-x and EPT in the VM settings. For AMD processors, enable AMD-V and IOMMU. It will allow you to use hardware acceleration features in Bluestack.
- If using an Nvidia graphics card, enable SLI in the VM settings. It also will improve graphics performance in Bluestack. You may also need to increase the video memory allocation to 128 MB or more.
- If you want to use a webcam with Bluestack, add a USB controller to the VM and connect your webcam to it. In the VM settings, select the USB controller and check “Allow enhanced session mode.”
What are the system requirements for Bluestack on a Hyper-V virtual machine?
To install Bluestack on a Hyper-V virtual machine your system must meet the following requirements:
- Your computer must be running Windows 8.1 or later.
- Your computer must have an Intel or AMD processor that supports hardware virtualization.
- You must have at least 4 GB of RAM.
- You must have at least 100 GB of available storage space.
How to troubleshoot errors when installing Bluestack on a Hyper-V virtual machine?
If you’re having trouble installing Bluestack on your Hyper-V virtual machine, here are a few troubleshooting tips that may help:
- Make sure your Hyper-V virtual machine is configured correctly. Check the settings and make sure everything is set up correctly.
- If you’re using a 64-bit version of Windows, make sure you’re also using a 64-bit version of Bluestack. 32-bit versions will not work.
- Try reinstalling Bluestack. Sometimes it can help to start from scratch.
- Make sure your computer meets the minimum system requirements for Bluestack. You can find these listed on Bluestack’s website.
- If all else fails, try contacting Bluestack support for help. The support may be able to offer additional troubleshooting tips or assistance.
How to uninstall Bluestack from a Hyper-V virtual machine?
If you need to uninstall Bluestack from a Hyper-V virtual machine for any reason, you can do so by following the steps below.
- Open the Hyper-V Manager and select the virtual machine from which you want to remove Bluestack.
- Right-click on the virtual machine and select “Settings.”
- In the “Settings” window, click on the “Storage” tab.
- Expand the “Hard Drives” section and select the drive that contains Bluestack.
- Click on the “Remove” button.
- Confirm that you want to remove Bluestack by clicking on the “OK” button.
How to use Bluestack on a Hyper-V virtual machine?
Bluestack is an Android emulator that allows you to run Android apps on a PC or Mac. You can use Bluestack to play Android games, use Android apps, and run Android apps on a PC or Mac. Bluestack is free to download and use.
What are the known issues when using Bluestack on a Hyper-V virtual machine?
- You may not be able to hear any audio when using Bluestack on a Hyper-V virtual machine.
- Bluestack may not be able to access the internet when using a Hyper-V virtual machine.
- You may experience lag when using Bluestack on a Hyper-V virtual machine.
How to get support for Bluestack on a Hyper-V virtual machine?
If you are using Bluestack on a Hyper-V virtual machine, you may need support from the company to ensure that everything works correctly.
While Bluestack does have some support for Hyper-V, it is not as comprehensive as it could be.
As such, you may need to contact their customer support to get answers to your questions or help with any problems you are having.
Conclusion
After following the steps in this article, you should now have Bluestack installed on your Hyper-V virtual machine.
If you run into any issues during the installation process, please get in touch with the Bluestack support team for assistance.
While using BlueStacks, there are many who has experienced a different problem. Back then most of the errors had no solution whereas, now you can repair any kind of error on BlueStacks related to Hyper-V. Before we start any of the operations, let’s make sure you are having the required specs to run the BlueStacks app needs.
Requirement for BlueStacks
For running BlueStacks on your system, you will need the following specs:
OS: Windows 10 (version 1903), earlier versions of Windows OS as Windows 8.1 and 8 also supports the emulator.
Processor: Intel or AMD processor
Memory: 2 GB of RAM memory or more
Storage: 5 GB of free storage.
The virtualization feature should be enabled in the BIOS of your system. Hyper-V also should be enabled on your system. You should also add the users (system users) to Hyper-V Administrators.
net localgroup "Hyper-V Administrators" <username> /addAlso, make sure that your graphics drivers are up to date. Having outdated graphic drivers can also cause problems.
Related: How to Enable Virtualization in BIOS?
Common Issues/errors experienced on BlueStacks and Hyper-V

These are the most common error experienced on BlueStacks. If you are experiencing any of the problems below then you can use the methods to fix them too.
Stuck Loading Screen- while you start your BlueStacks on your Hyper-V or OS, the app can’t skip the loading phase.
Slow loading- you are experiencing slow loading or slow performance by BlueStacks.
Error message- while starting the application, you will experience different error messages that include “BlueStacks cannot start when Hyper-V is enabled”.
Here are some methods that can help you to fix BlueStacks errors on Hyper-V.
Fix BlueStacks error with CMD

Run Start menu and open CMD (command prompt) as admin.
Now, paste the following command in CMD and press Enter.
netsh advfirewall firewall add rule name="BlueStacks Service" dir=in action=allow remoteip=10.0.2.0/24 localport=2860-2892 protocol=TCP enable=yes
wait until the OK appears on your screen, then close the CMD. Restart your system.
Disable Hyper-V for BlueStacks
Disabling the Hyper-V for avoiding errors in BlueStacks is also valid for users. Here is how to disable Hyper-V.
Go to Control Panel, where you will find the Program and features. Select Program and Features.
Select Turn Windows Features On or Off. Once selected, another window will appear. There you will navigate for Hyper-V.
Expand Hyper-V, there you will find the Hyper-V platform. Inside you will find Hyper-V Hypervisor, uncheck this box to disable Hyper-V.
Disable with PowerShell
If you find the method above challenges, then you can use PowerShell to disable the feature too.
Open PowerShell by typing the name in Start. Run PowerShell as administrator and use the command below;
Disable-WindowsOptionalFeature -Online -FeatureName Microsoft-Hyper-V-HypervisorDownload Hyper-V version
If you are using BlueStacks inside the Hyper-V, then you might experience some issues. The reason behind the issue can be due to not download the compatible version of BlueStacks. There is a specific version of BlueStacks that is used on Hyper-V.
Все способы:
- Способ 1: Запуск от имени администратора
- Способ 2: Обновление эмулятора
- Способ 3: Выключение Hyper-V
- Способ 4: Параметры электропитания
- Способ 5: Переустановка BlueStacks
- Дополнительные рекомендации
- Вопросы и ответы: 0
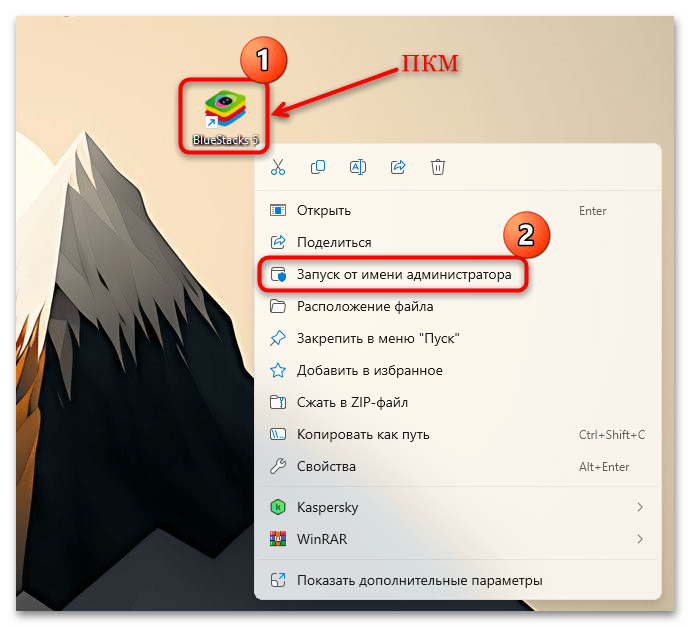
Способ 1: Запуск от имени администратора
Наиболее распространенное решение рассматриваемой ошибки предполагает запуск эмулятора с правами администратора. Для этого достаточно кликнуть по иконке BlueStacks правой кнопкой мыши и выбрать соответствующий пункт из контекстного меню.
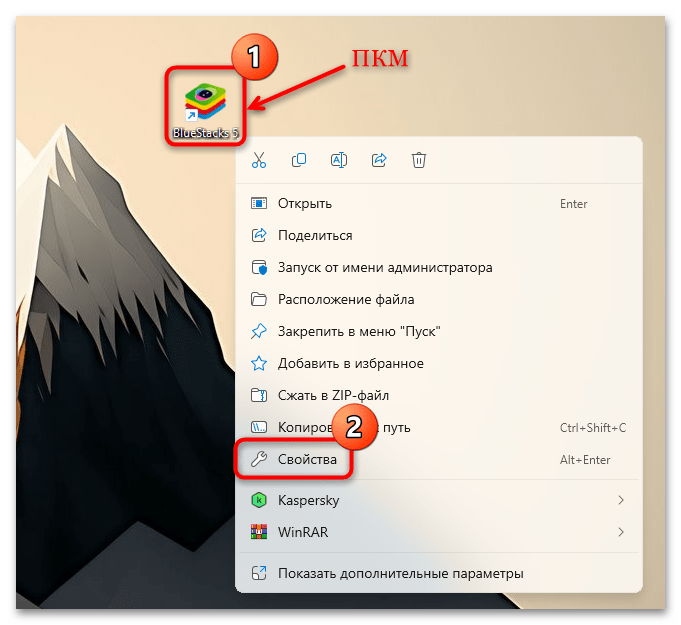
Если способ сработал, то можно активировать опцию, при которой программа будет запускаться с расширенными правами по умолчанию:
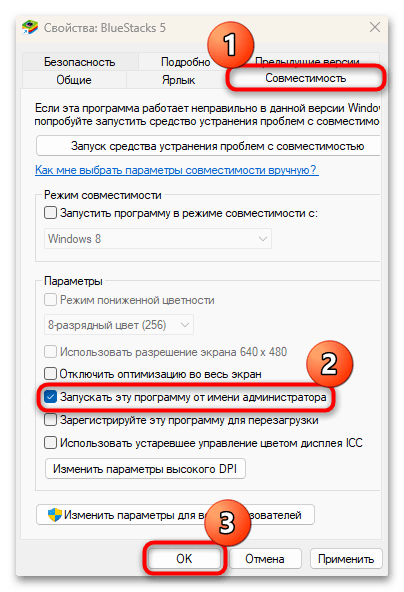
- Вызовите контекстное меню нажатием правой кнопкой мыши по ярлыку или исполняемому файлу и выберите «Свойства».
- Перейдите на вкладку «Совместимость», затем в блоке «Параметры» отметьте пункт «Запускать эту программу от имени администратора» и сохраните настройки.
Способ 2: Обновление эмулятора
Чаще всего ошибка, сообщающая о несовместимых настройках Windows при запуске игры через BlueStacks, появляется из-за устаревшей версии самого Android-эмулятора. Для решения проблемы в первую очередь самостоятельно обновите версию софта:
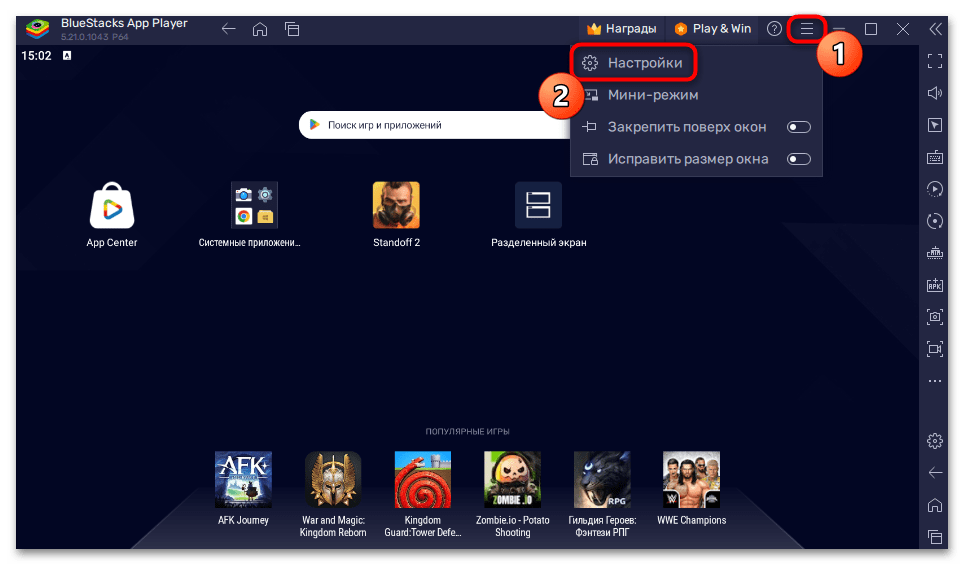
- Запустите эмулятор и кликните по трем горизонтальным полоскам вверху, чтобы открыть главное меню, затем выберите пункт «Настройки».
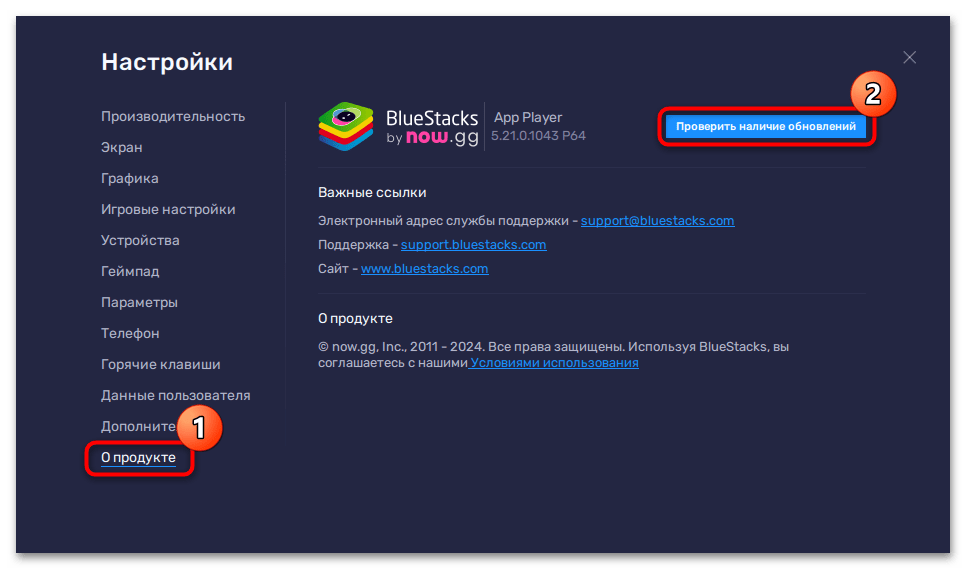
- В появившемся окне переключитесь на вкладку «О продукте», затем в центральной части окна нажмите на кнопку «Проверить наличие обновлений».
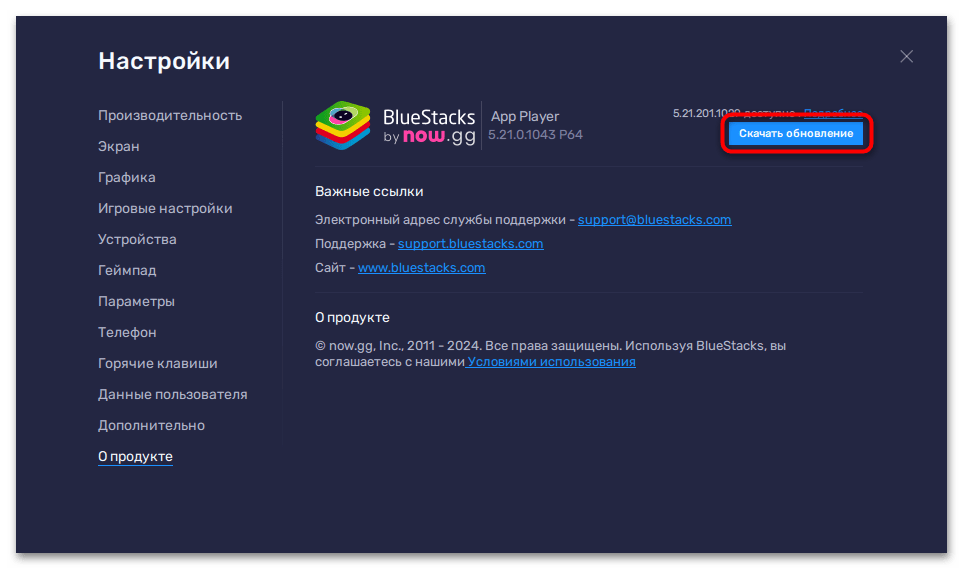
- Программа обратится к серверам разработчика, после чего отобразится уведомление о том, какая версия используется. Если доступны апдейты, появится соответствующая кнопка – нажмите на нее и дождитесь окончания установки обновлений.
После успешного завершения операции перезагрузите эмулятор и проверьте, решена ли ошибка совместимости.
Способ 3: Выключение Hyper-V
Hyper-V – это технология виртуализации, позволяющая создавать и запускать виртуальные машины на компьютере с Windows. Она предустановлена в таких ОС, как Windows 8, 8.1, 10 и 11, и иногда вызывает проблемы при работе Android-эмулятора. Если технология включена, это может стать причиной проблем с запуском программы и игр или приложений в ее среде.
«Панель управления»
Через это встроенное приложение дополнительно деактивировать некоторые компоненты системы, чтобы исправить ошибку с несовместимыми настройками Windows.
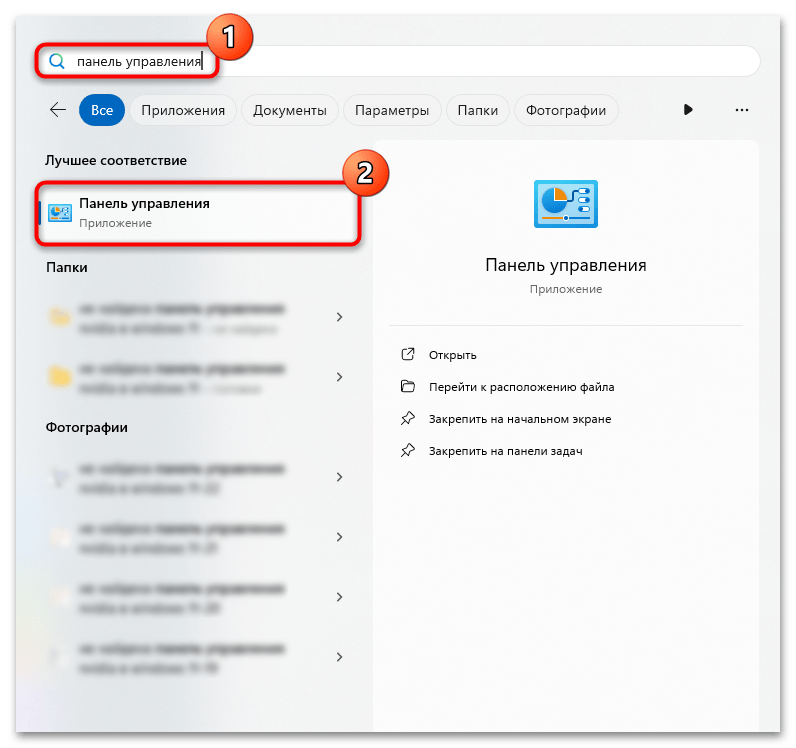
- Запустите классическую «Панель управления», отыскав ее через строку системного поиска или в главном меню.
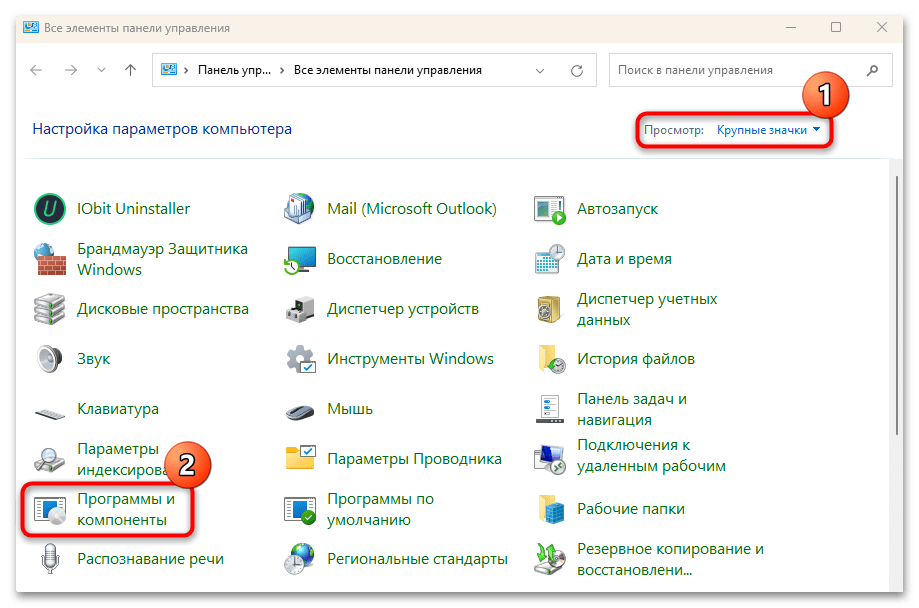
- В качестве просмотра разделов для удобства выставьте «Мелкие значки» или «Крупные значки», затем кликните по строке «Программы и компоненты».
- В открывшемся окне на панели слева нажмите по ссылке «Включение и отключение компонентов Windows».
- Отобразится список компонентов системы. Уберите отметки у следующих пунктов: «Песочница Windows», «Платформа виртуальной машины» и «Подсистема Windows для Linux». Нажмите на «ОК» для подтверждения деактивации этих средств.

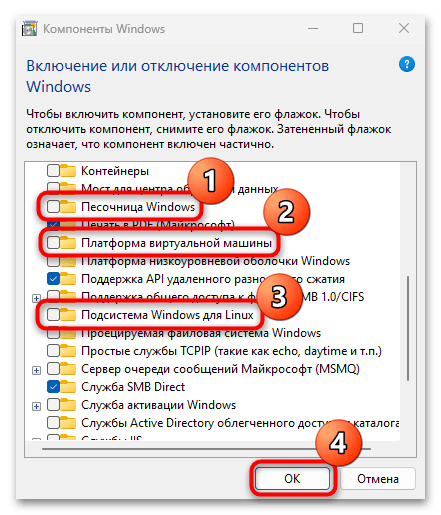
Следует отметить, что «Песочница Windows» недоступна в домашней редакции операционной системы Windows.
Как только все системные компоненты будут выключены, перезагрузите компьютер и проверьте работу эмулятора.
Если с управлением такого компонента, как «Платформа виртуальной машины», возникают проблемы, следует отключить изоляцию ядра. Сделать это достаточно просто:
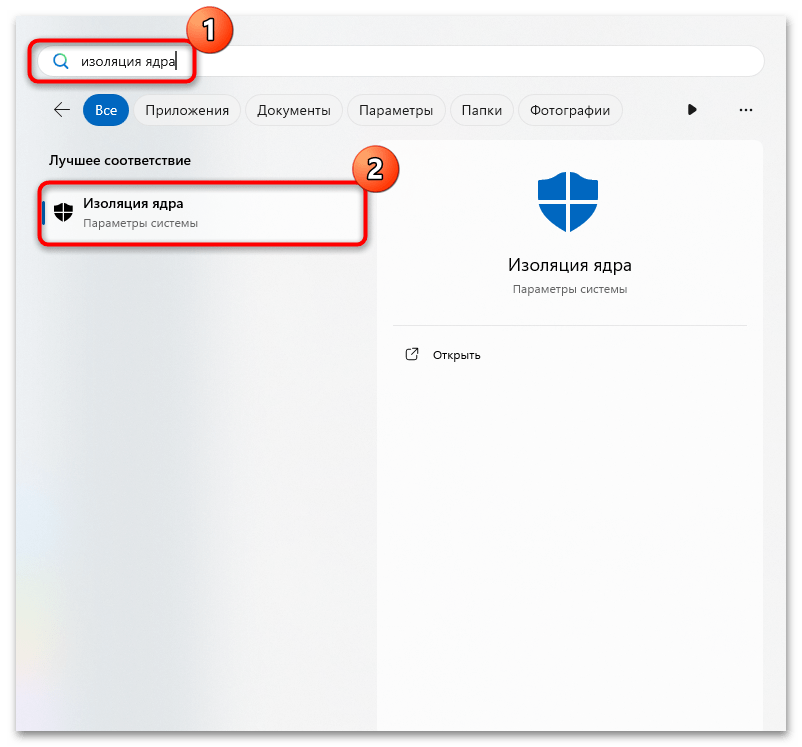
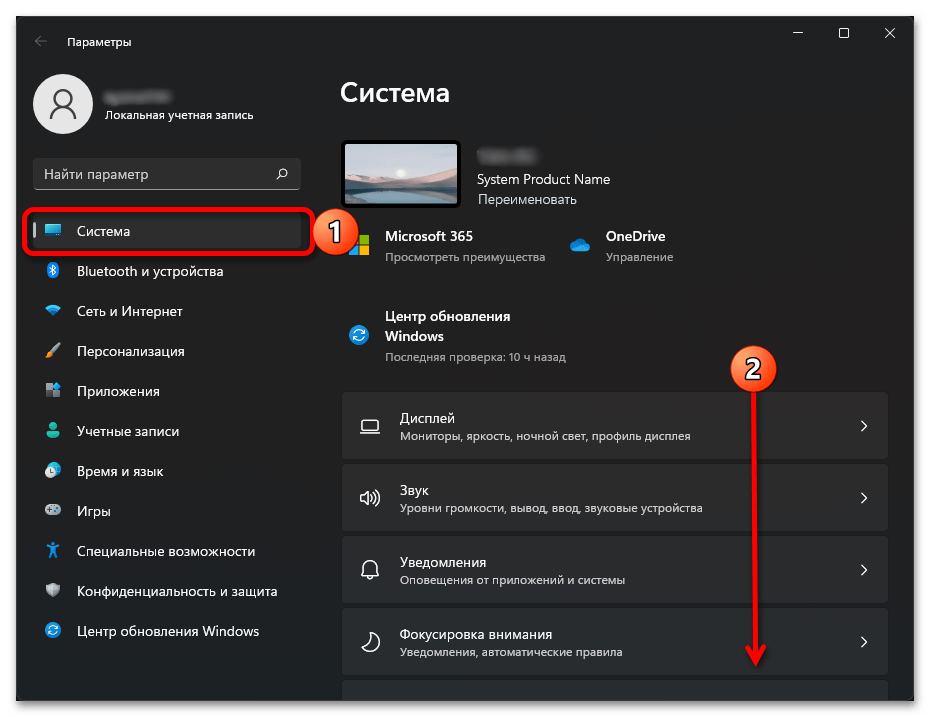
- В строке поиска системы введите запрос «Изоляция ядра», чтобы сразу перейти к соответствующему разделу штатных «Параметров».
- Отобразится окно, где на вкладке «Безопасность устройства» отключите целостность памяти, использовав тумблер у соответствующего пункта, и подтвердите действие.
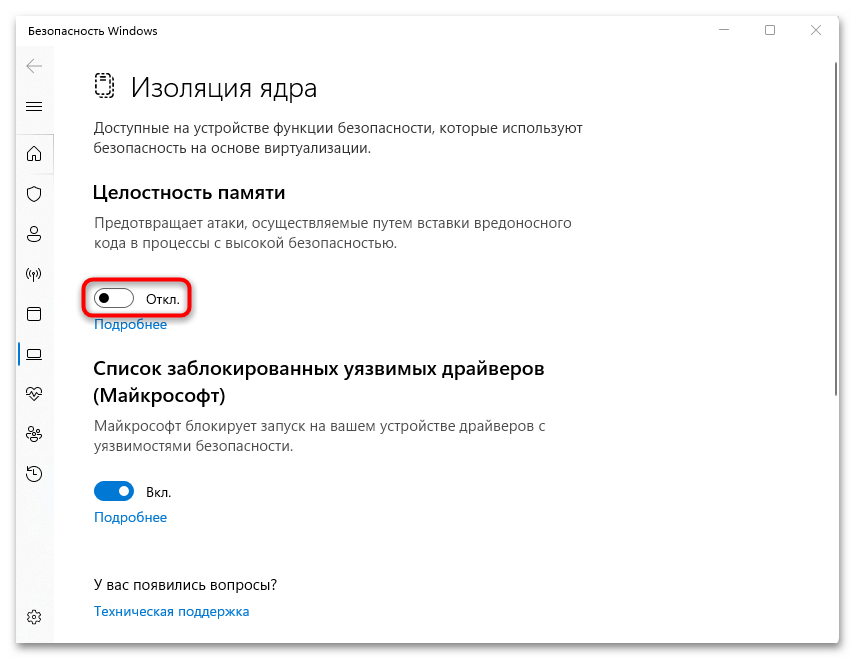
Несмотря на то что функция обеспечивает безопасность, предотвращая различные вирусные атаки, иногда отключение таких компонентов защиты позволяет решить некоторые проблемы в работе различного стороннего софта.
«Командная строка»
Выключить Hyper-V можно и альтернативным методом, а именно с помощью консоли, к примеру «Командной строки»:
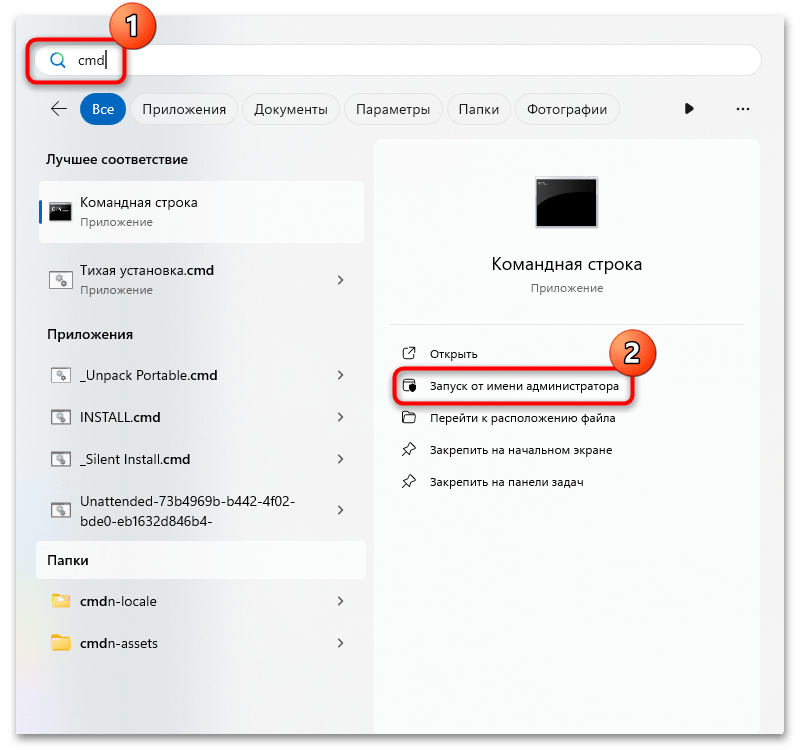
- Запустите консоль от имени администратора. Для этого можно ввести запрос
cmdв строке поиска и выбрать соответствующий тип запуска. - В открывшемся окне введите команду
DISM /Online /Disable-Feature:Microsoft-Hyper-Vи нажмите на клавишу «Enter».
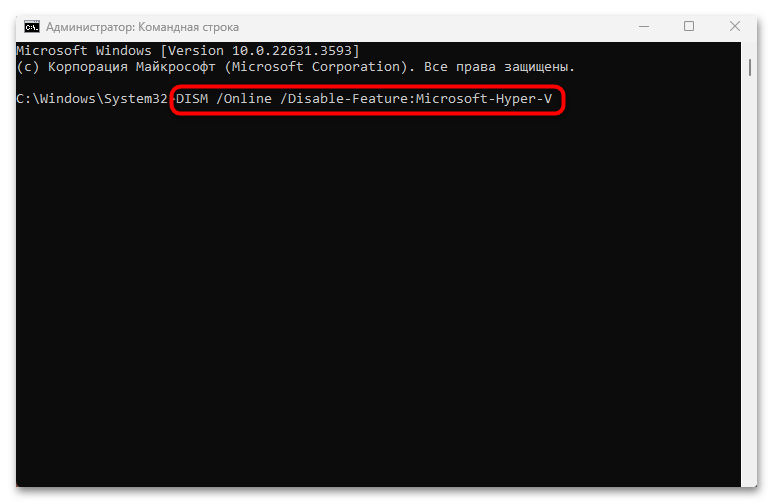
Об успешном отключении компонента внутри «Командной строки» отобразится уведомление, после получения которого закройте консоль и перезагрузите компьютер.
Способ 4: Параметры электропитания
Также следует проверить настройки электропитания и убедиться, что в системе выставлен высокопроизводительный режим, поскольку для стабильной и корректной работы эмулятора нужен именно он.
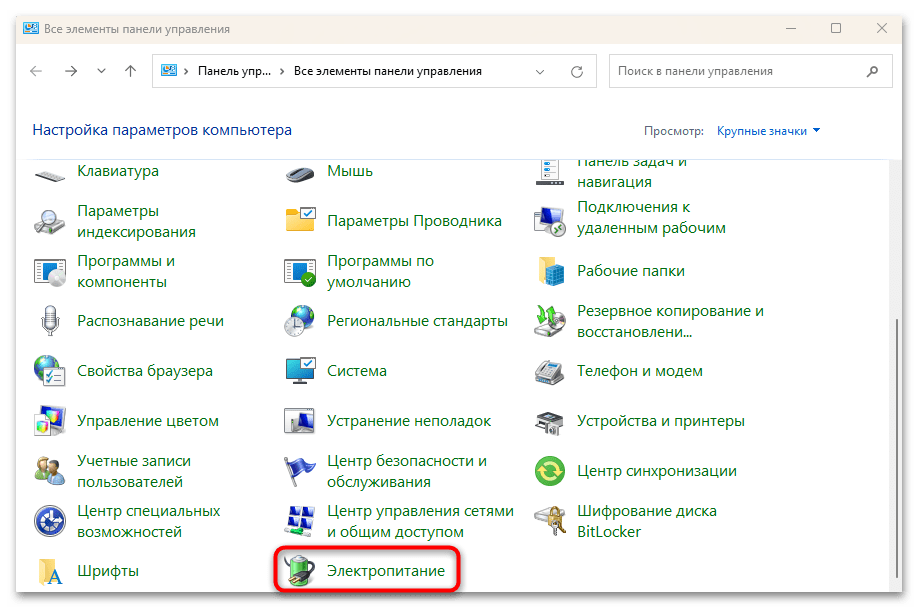
- Через «Панель управления», выполнив первые два шага инструкции из Способа 3, но на этот раз перейдите в раздел «Электропитание».
- В открывшемся окне среди схем электропитания найдите высокопроизводительную и выберите ее, если она есть.
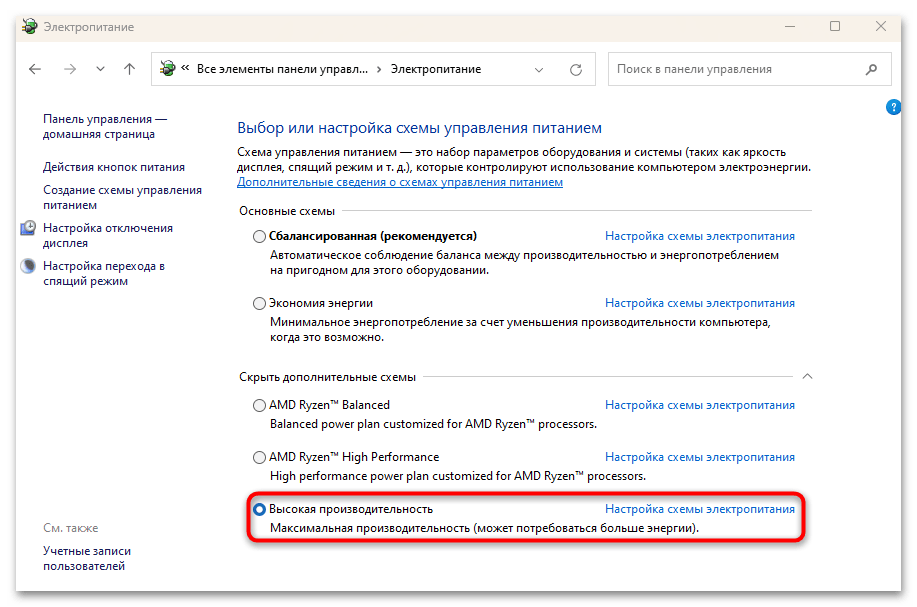
При необходимости можно дополнительно настроить энергопотребление для любой схемы или создать свой режим, выставив оптимальные параметры для использования таких ресурсозатратных программ, как Android-эмулятор.
Способ 5: Переустановка BlueStacks
Если основные способы статьи не помогли, может потребоваться полностью переустановить эмулятор, предварительно удалив все его файлы с компьютера во избежание возможных конфликтов при инсталляции.
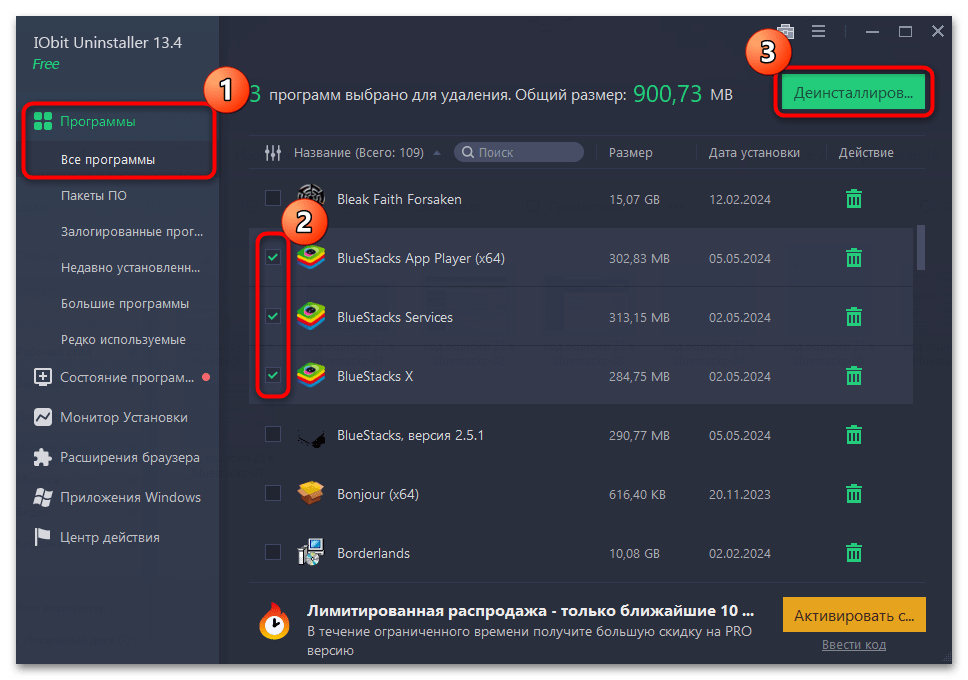
Для полного удаления эмулятора потребуется также почистить реестр и папки с временными данными от следов BlueStacks. Поскольку это ручной и довольно трудоемкий процесс (помимо стандартного способа удаления потребуется еще самостоятельно проверить реестр и файлы), рекомендуем воспользоваться специализированными средствами от сторонних разработчиков – программами для полного удаления софта и всех связанных с ним файлов и ключей реестра. Одним из таких решений является IObit Uninstaller, которое очищает ОС от основной программы и любых ее остаточных файлов:
Скачать IObit Uninstaller
- Инсталлируйте утилиту, затем запустите ее и на панели слева разверните меню «Программы», потом «Все программы». В центральной части окна найдите компоненты BlueStacks, выделите их и нажмите на кнопку деинсталляции, расположенную вверху.
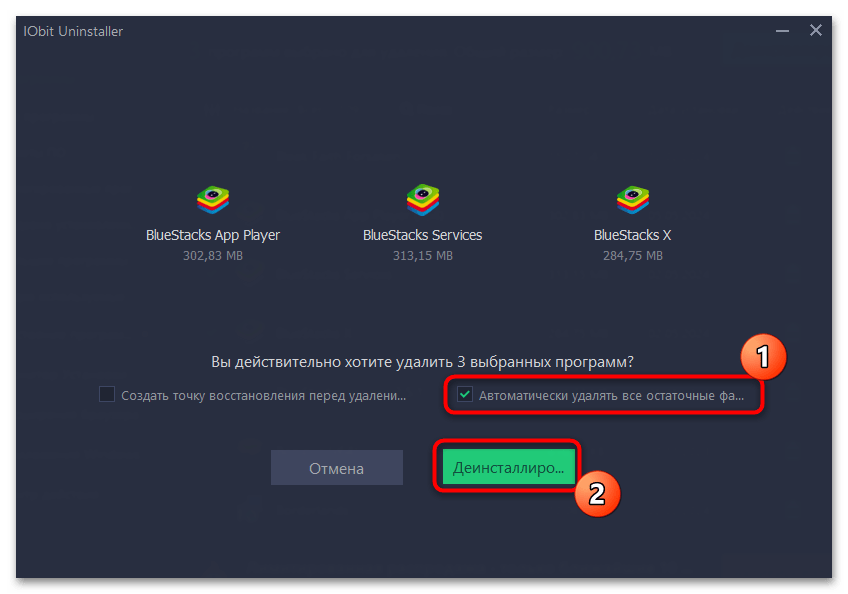
- Далее отметьте пункт «Автоматически удалять все остаточные файлы» и подтвердите процедуру деинсталляции.
Как только все файлы эмулятора будут удалены, перезагрузите компьютер и вновь установите его, скачав актуальную версию с официального сайта. Чтобы избежать возможных проблем в дальнейшем, предварительно деактивируйте технологию Hyper-V перед инсталляцией BlueStacks (Способ 3).
Скачать BlueStacks
Дополнительные рекомендации
Приведем несколько дополнительных рекомендаций, которые иногда позволяют решить некоторые проблемы, связанные с запуском стороннего софта, в частности эмулятора BlueStacks:
- Удостоверьтесь в актуальности операционной системы. Помимо апдейтов для драйверов оборудования и устройств, для программных компонентов, в том числе для динамических библиотек могут также выходить обновления, что обеспечит стабильность работы приложений.
Подробнее: Обновление до последней версии Windows 11 / Windows 10
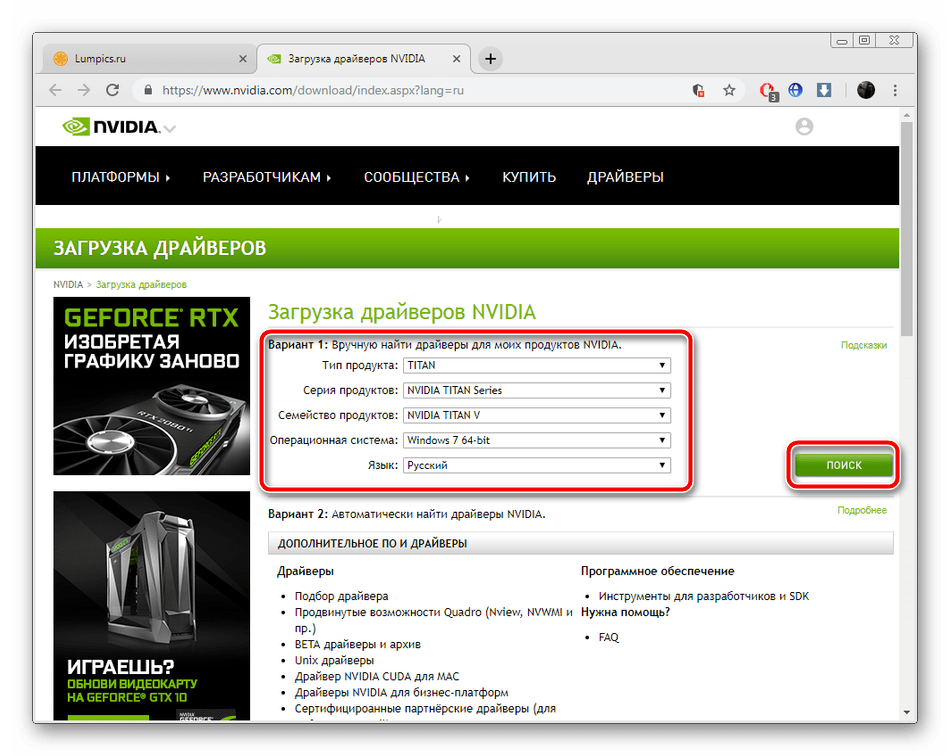
- Также отдельно проверьте наличие обновлений для драйвера видеокарты.
Подробнее: Установка драйверов на видеокарту
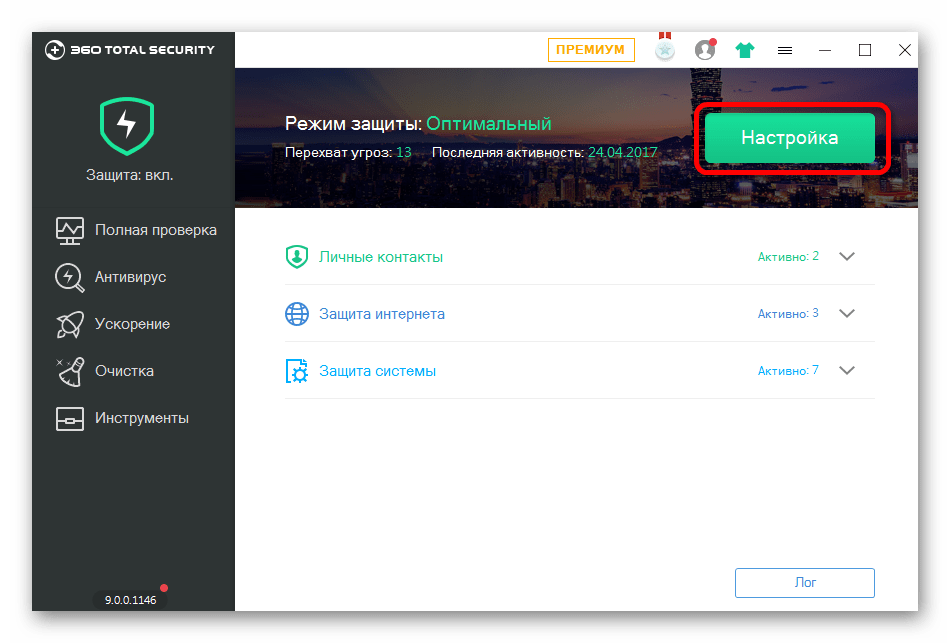
- Редко, но случается, что антивирусное программное обеспечение считает деятельность эмулятора подозрительной, поэтому блокирует его работу. Для начала попробуйте отключить такой софт, чтобы проверить, так ли это, а при необходимости BlueStacks можно добавить в список исключений антивируса или встроенного «Защитника Windows», чтобы его действия больше не контролировались.
Подробнее:
Отключение антивируса
Добавление программы в исключения антивируса
Добавление исключений в Защитнике Windows 11 / Windows 10
Наша группа в TelegramПолезные советы и помощь