
Все способы:
- Способ 1: Поиск в меню «Пуск»
- Способ 2: «Панель управления»
- Способ 3: «Проводник»
- Способ 4: Утилита «Выполнить»
- Способ 5: «Терминал Windows»
- Способ 6: Пользовательский ярлык
- Вопросы и ответы: 0
Перед началом разбора следующих методов отметим, что окно с элементами под названием «Администрирование» в Windows 11 было переименовано на «Инструменты Windows». Его содержимое практически не изменилось и оно используется для все тех же функций — перехода к конкретным настройкам или приложениям операционной системы. Как раз следующие методы и будут сосредоточены на том, чтобы перейти к окну «Инструменты Windows».
Способ 1: Поиск в меню «Пуск»
Самый простой и быстрый метод перехода к необходимому окну в Windows 11 — использование для этого поиска через меню «Пуск». Оно реализовано таким образом, что позволяет по названию отыскать классические приложения и запустить их в отдельном окне. Это позволит справиться с поставленной задачей, а наглядно весь процесс выглядит следующим образом:
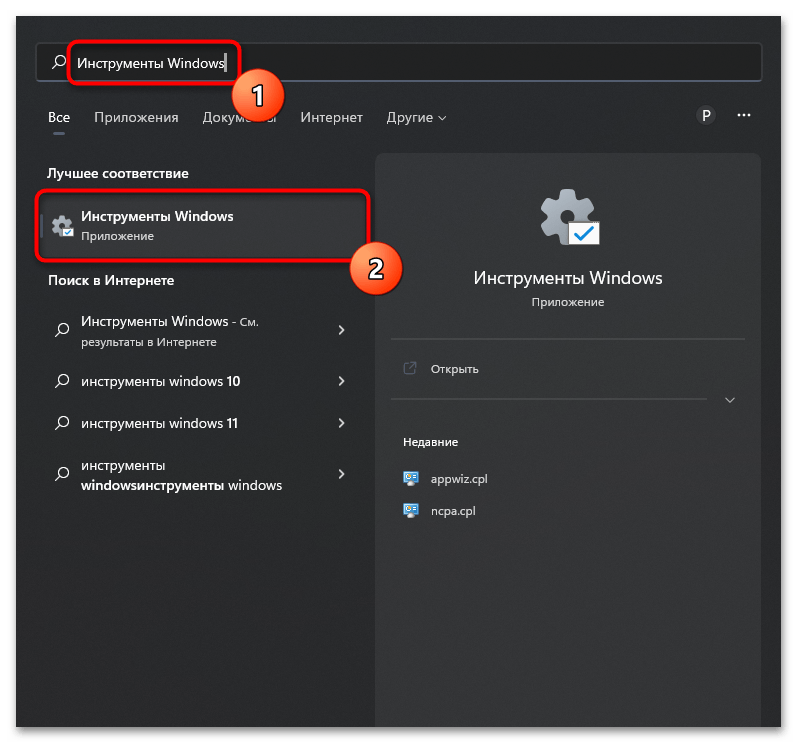
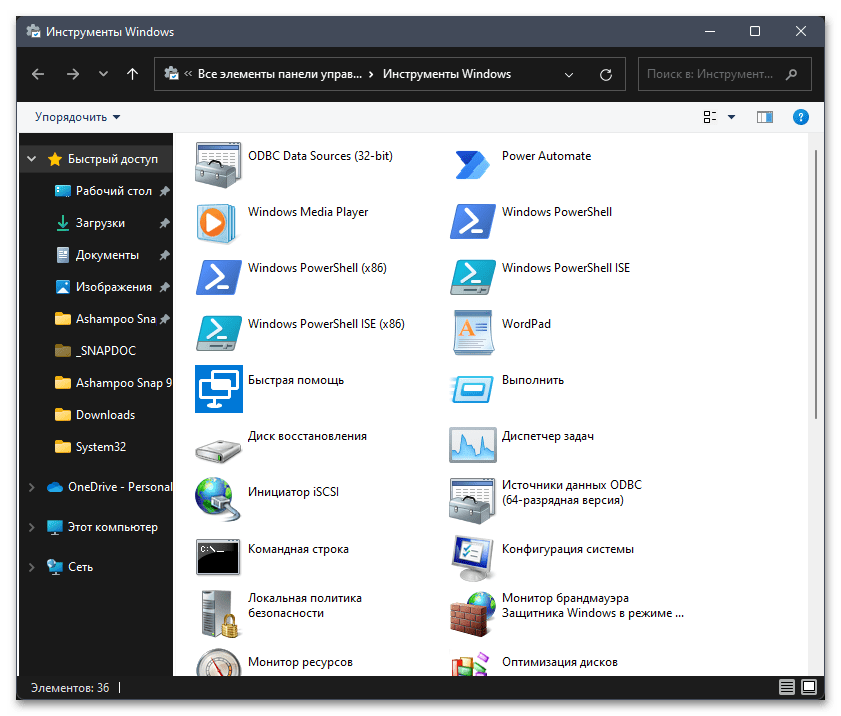
- Откройте меню «Пуск», активируйте строку поиска, впишите там название «Инструменты Windows» и щелкните левой кнопкой мыши по появившемуся соответствию.
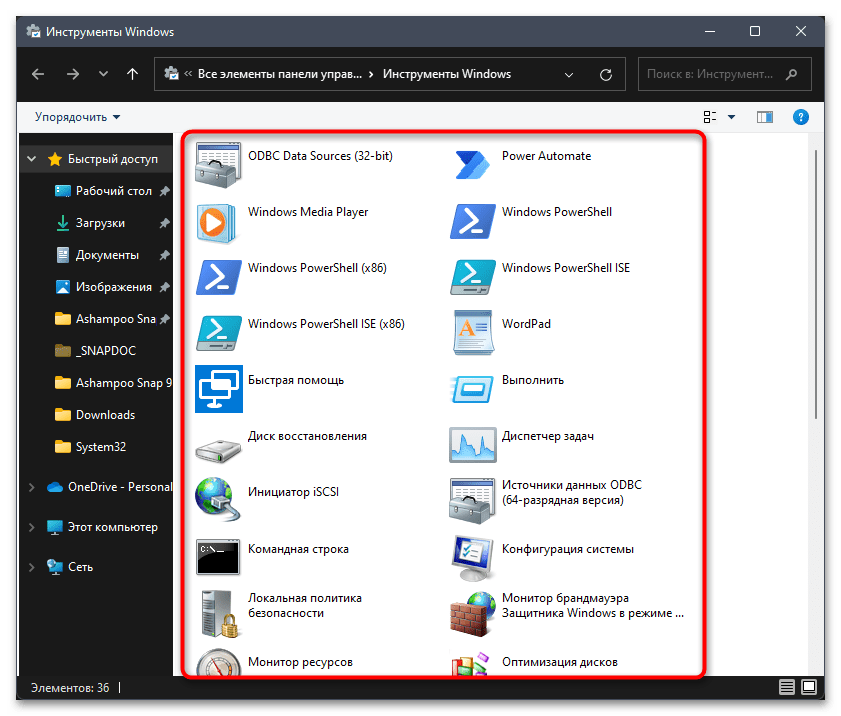
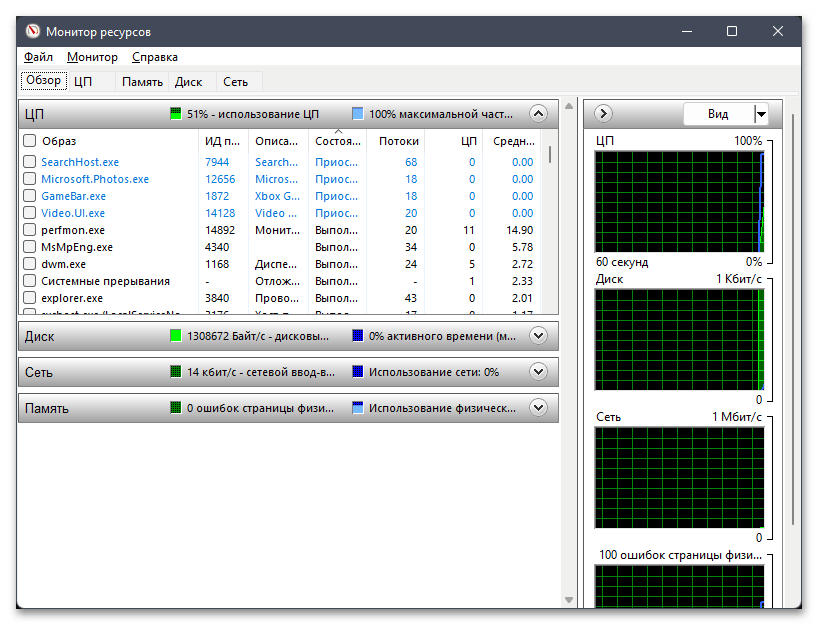
- Через секунду на экране отобразится окно с перечнем всех доступных инструментов, многие из которых ранее были представлены в окне «Администрирование». Кликните дважды ЛКМ по любому из них, чтобы перейти к использованию.
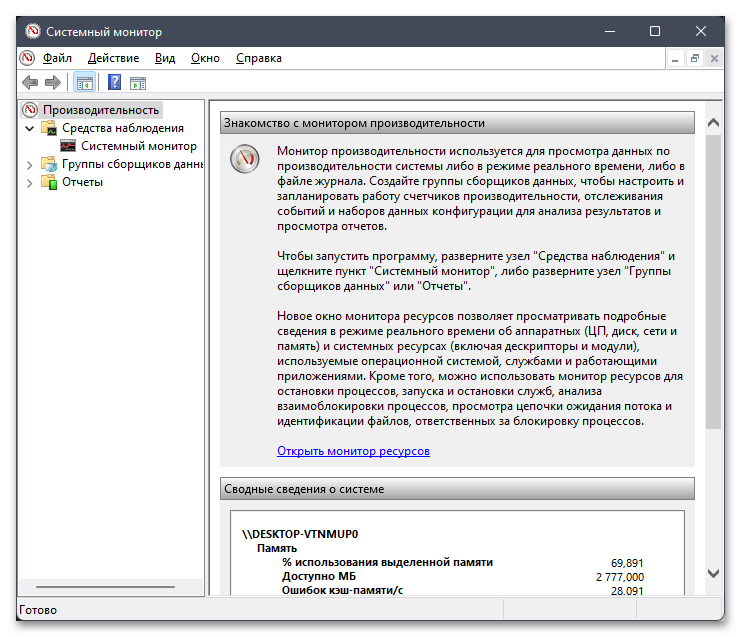
- Отображающееся на экране окно зависит исключительно от того, какой инструмент вы выбрали. Разбирать предназначение всех приложений, находящихся в списке инструментов, в этой статье мы не будем.
Способ 2: «Панель управления»
В предыдущих Windows для перехода к «Администрированию» чаще всего пользователи задействовали «Панель управления». В Виндовс 11 ничего, помимо названия, не изменилось. В этом же приложении можно найти соответствующий значок, который и позволит перейти к необходимому меню.
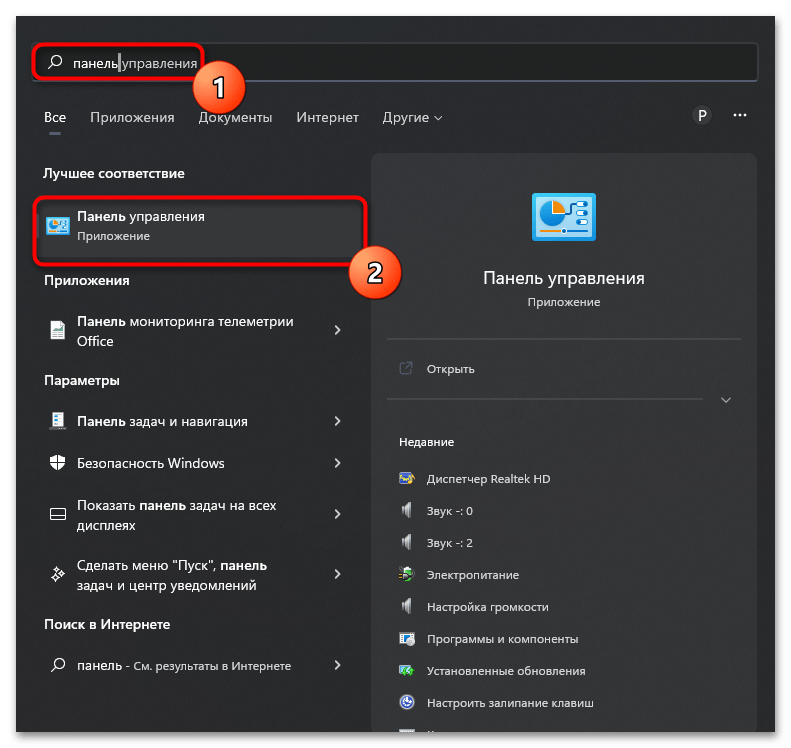
- Сначала откройте «Пуск», впишите в нем «Панель управления» и перейдите к данному классическому приложению.
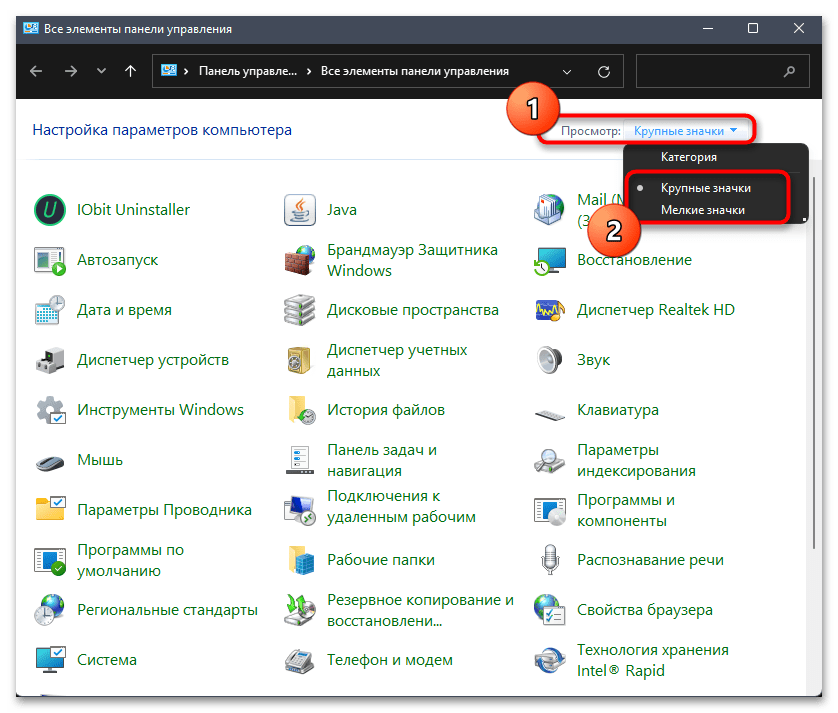
- В его окне обратите внимание на настройку «Просмотр» и установите тип просмотра «Крупные значки» или «Мелкие значки», чтобы получить подходящее представление меню.
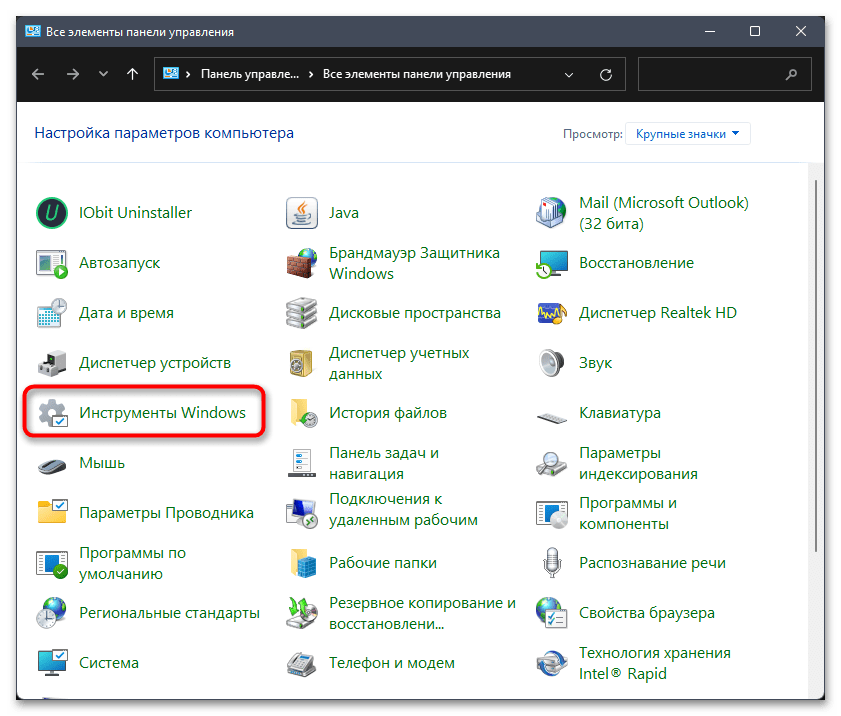
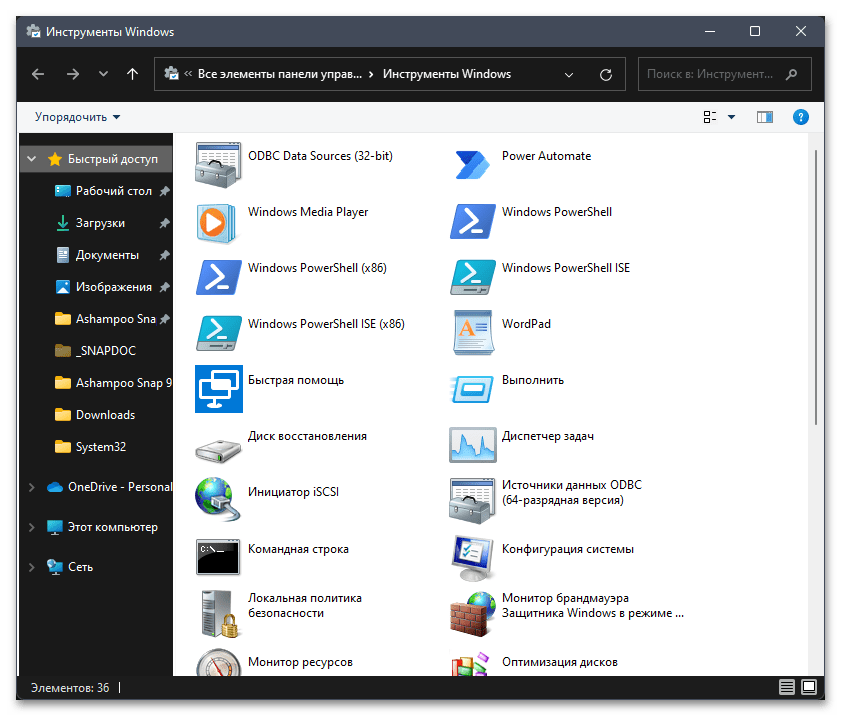
- Отыщите пункт с названием «Инструменты Windows» и нажмите по нему дважды левой кнопкой мыши для вызова параметров администрирования.
- Отобразится такое же окно, о котором говорилось в предыдущем методе. Можете переходить через него к другим инструментам и взаимодействовать с ними для своих целей.

Способ 3: «Проводник»
По сути, окно с инструментами Windows отображает в графическом интерфейсе значки для запуска исполняемых файлов, которые и позволяют переходить к необходимым системным параметрам, утилитам или различным мониторам. У каждого из этих значков есть свой ярлык, который нужен для корректного запуска приложения. Список этих ярлыков можно отыскать вручную через «Проводник» и использовать каталог для запуска средств администрирования.
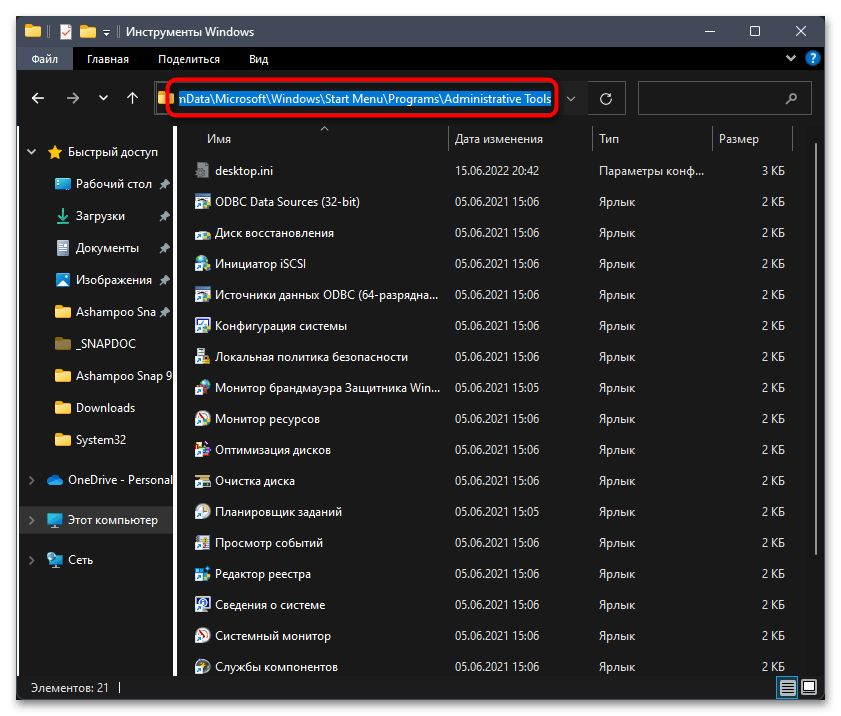
- Откройте «Проводник» любым удобным для вас методом и перейдите в нем по пути
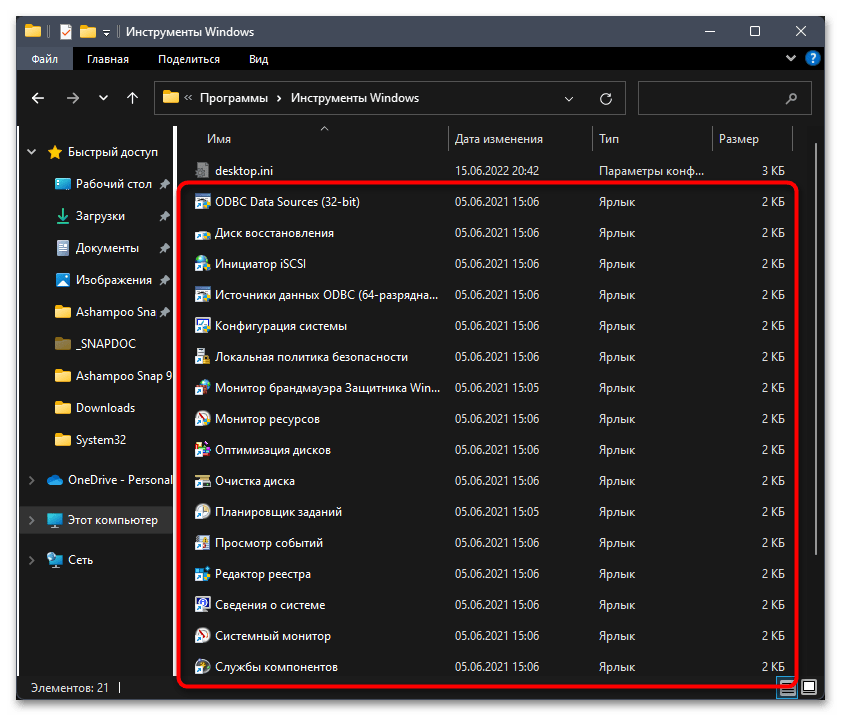
C:\ProgramData\Microsoft\Windows\Start Menu\Programs\Administrative Tools. - Обратите внимание на список ярлыков в этом каталоге. Щелкните по любому из них дважды для запуска соответствующего системного инструмента.
- Как и обычно, появится отдельное окно с различными параметрами, мониторами и другими функциями, подразумевающими различное взаимодействие с операционной системой.
Способ 4: Утилита «Выполнить»
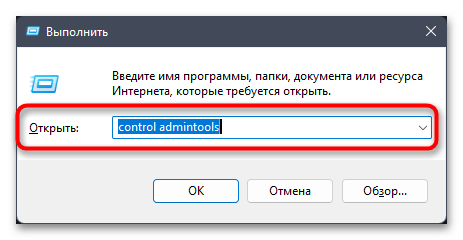
Известная многим утилита «Выполнить» в Windows 11 часто используется для вызова различных оснасток и быстрого перехода к системным настройкам. В нашем случае она тоже подойдет, поскольку позволяет открыть «Инструменты Windows» путем ввода всего одной команды. Сама утилита запускается при помощи стандартного сочетания клавиш Win + R. В поле ввода понадобится ввести control admintools и нажать Enter для перехода к нужному окну.
На следующем скриншоте вы видите, что после активации команды запустилось требуемое окно «Инструменты Windows». Теперь можете ознакомиться со всеми пунктами, после чего запустить требуемые приложения для дальнейшей работы с ними.
Способ 5: «Терминал Windows»
Предлагаем остановиться еще на одном методе, который подразумевает использование команды для перехода к окну «Инструменты Windows». Однако в данном случае она будет иметь немного другой вид, а для ее активации понадобится воспользоваться PowerShell, что осуществляется так:
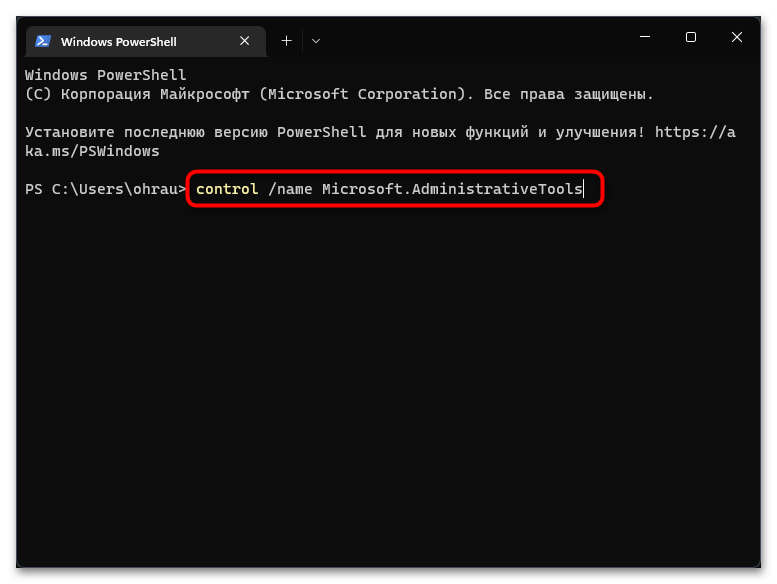
- Щелкните правой кнопкой мыши по кнопке «Пуск» и из появившегося контекстного меню выберите «Терминал Windows».
- После запуска консоли вставьте в поле ввода команду
control /name Microsoft.AdministrativeToolsи нажмите Enter для ее активации. - Спустя секунду на экране появится уже знакомое окно, которое вас и интересует. В нем вы найдете все нужные средства администрирования.
Способ 6: Пользовательский ярлык
Некоторые пользователи заинтересованы в частом переходе к инструментам Windows и желают делать это максимально быстро. Согласимся, что предыдущие способы и так подразумевают выполнение минимального количества действий, но открыть необходимое окно можно еще быстрее, создав для этого специальный ярлык на рабочем столе.
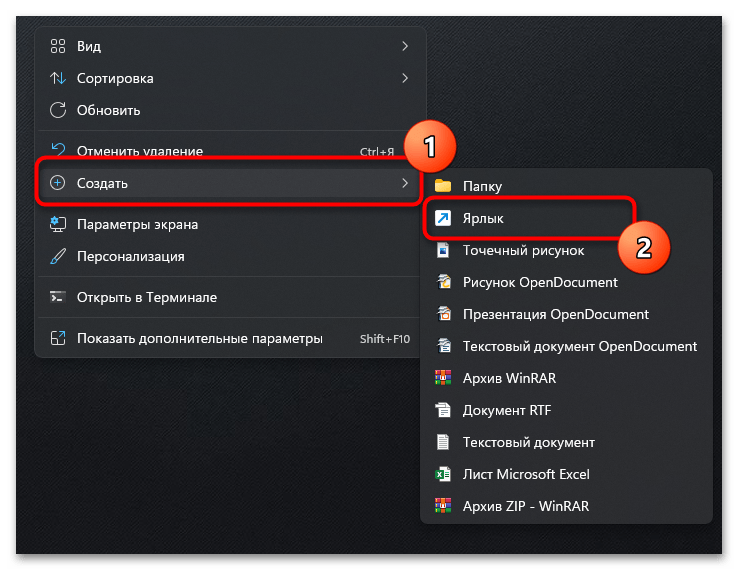
- Щелкните в любом удобном месте на рабочем столе правой кнопкой мыши, наведите курсор на пункт «Создать» и из появившегося меню выберите «Ярлык».
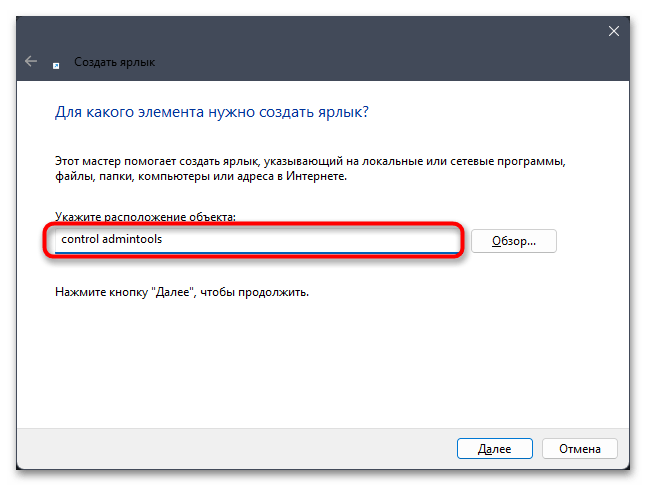
- Обычно указывается путь к ярлыку, но мы будем использовать просто команду
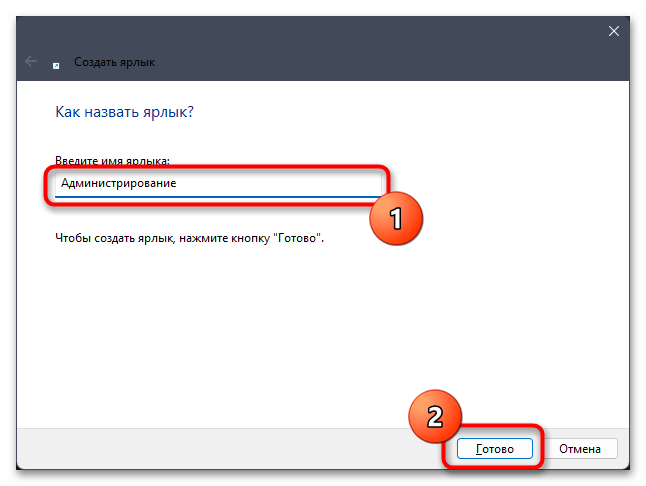
control admintools, которую нужно вставить в единственное доступное поле. Нажмите «Далее» для перехода к следующему шагу. - Вы можете указать совершенно любое название для ярлыка, чтобы всегда знать, за переход к какому меню он отвечает. После переименования нажмите по «Готово», подтверждая тем самым добавление ярлыка.
- Теперь достаточно просто дважды кликнуть по нему левой кнопкой мыши, чтобы быстро перейти к тому же самому окну, которое неоднократно фигурировало в статье.
Наша группа в TelegramПолезные советы и помощь
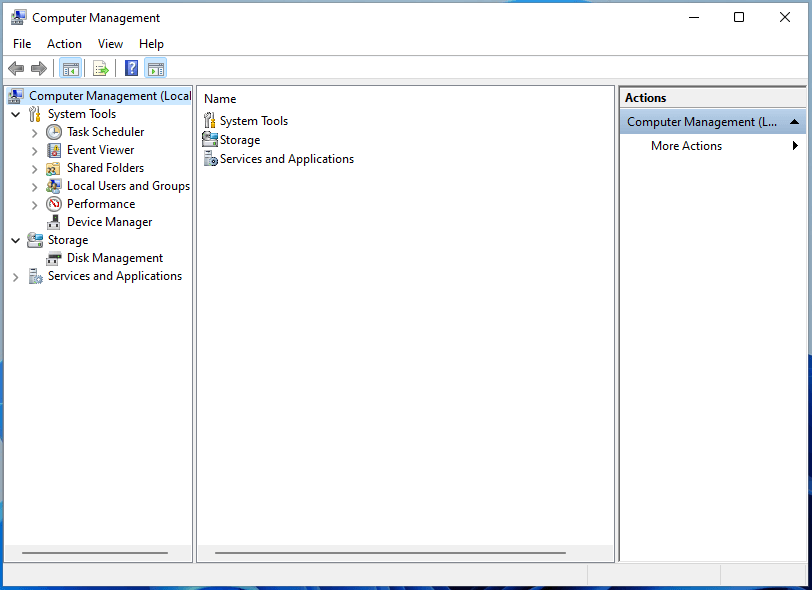
«Управление компьютером» в Windows — специальная консоль для доступа к основным инструментам администрирования локального компьютера, а при необходимости — и удаленных компьютеров. Оснастка доступна во всех актуальных версиях системы.
В этой инструкции для начинающих о способах открыть Управление компьютером в Windows 11 и Windows 10, большинство из которых сработают и в предыдущих версиях системы.
Контекстное меню кнопки «Пуск»
Один из самых быстрых способов перейти к утилите «Управление компьютером» — использовать контекстное меню кнопки «Пуск».
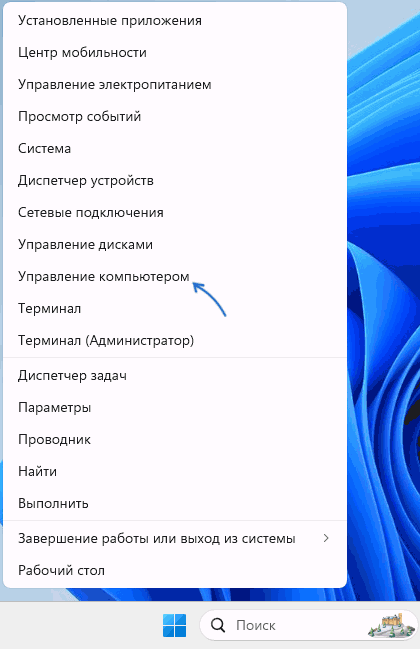
Достаточно нажать правой кнопкой мыши по кнопке «Пуск», после чего выбрать соответствующий пункт в появившемся меню.
Это же меню можно вызвать не только с помощью мыши, но и используя сочетание клавиш Win+X на клавиатуре, где Win — клавиша с эмблемой Windows, а X — клавиша с соответствующей латинской буквой.
Поиск Windows
Второй быстрый метод, который я рекомендую использовать во всех случаях, когда вы не знаете, как открыть тот или иной встроенный инструмент Windows — использовать встроенные функции поиска.

Начните набирать «Управление компьютером» в поиске на панели задач и, когда нужный элемент найдётся, откройте его.
Окно «Выполнить»
Вы можете использовать диалоговое окно «Выполнить» для запуска управления компьютером:
- Нажмите клавиши Win+R на клавиатуре.
- Введите compmgmt.msc в открывшемся окне и нажмите «Ок» или клавишу Enter.


В результате нужный элемент управления будет открыт. В этом контексте вас могут заинтересовать и другие полезные команды диалогового окна «Выполнить».
Значок «Этот компьютер»
Следующая возможность — использовать значок «Этот компьютер» на рабочем столе (если включено его отображение) или аналогичный значок в Проводнике.

Нажмите правой кнопкой мыши по значку «Этот компьютер» и выберите пункт «Управление» для запуска управления компьютером. В Windows 11 после нажатия правой кнопкой мыши потребуется нажать «Показать дополнительные параметры», чтобы появилось классическое контекстное меню с нужным элементом.
В разделе «Все приложения» в меню «Пуск», а также в панели управления Windows 11 присутствует папка «Инструменты Windows».

Она, в свою очередь, содержит ярлыки для запуска большинства встроенных системных инструментов, включая «Управление компьютером».
Помимо указанных методов, вы можете использовать запуск compmgmt.msc из командной строки, диспетчера задач, путем создания ярлыка, или ручным запуском файла
C:\WINDOWS\system32\compmgmt.msc
Если при попытке запуска оснастки «Управление компьютером» вы видите сообщение об ошибке, связанной с тем, что она ограничена политикой (подробнее на тему: Консоль управления MMC не может создать оснастку), вы можете:
Если у вас остаются вопросы, касающиеся рассмотренной темы, вы можете задать их в комментариях ниже — я постараюсь дать ответ.
In this article, you’ll learn how to enable Windows 11 administrator account. You can enable or disable administrator account in Windows 11 using multiple methods.
When you install Windows 11, by default, the built-in administrator account is disabled. You don’t know what Windows 11 administrator password is.
Windows 11 is the latest operating system by Microsoft and if you are upgrading from Windows 10, wait until you are notified through Windows Update that the upgrade is ready for your PC.

Note: Before installing, please refer to the PC Health Check app to confirm your device meets the minimum system requirements for Windows 11. Also check the Windows release information status for known issues that may affect your device.
This article covers multiple methods to enable administrator account in Windows 11. The same methods will also work if you want to enable administrator account on Windows 10.
Read: Multiple methods to upgrade to Windows 11
Why is the Windows 11 administrator account disabled?
The built-in administrator account on Windows 11 is disabled because it is not required and enabling it could impose a security risk.
Many organizations disable administrator account via group policy to secure their infrastructure. However, advanced users such as system administrators and network administrators may sometimes need the account to troubleshoot problems and manage system settings.
Even when you install Windows 11 on your laptop or home PC, the administrator account is disabled. You are required to create a new user account to log in to Windows 11. This user account is automatically added to local administrators group and gives you Windows 11 administrator permission.
Learn: How to Add User or Groups to Local Admin in Intune
Whether you have Windows 11 Pro, Enterprise or Home edition, you can use any of the methods covered in this guide to enable Windows 11 Administrator account.
Enable Administrator Account in Windows 11 using Command Prompt
The easiest method to enable the Windows 11 administrator account is by using the Command Prompt. Here are the steps:
1. Type Command Prompt on the Windows search box, select Run as Administrator.

2. On the CMD prompt window, enter the command net user administrator to check the status of Administrator account.
The Account Active = No confirms that the administrator account is disabled. Proceed to next step to enable the account.

3. Now enter the command net user administrator /active:yes. This command enables the administrator account on Windows 11 PC. The command completed successfully.

4. Now let’s check the status of Administrator account by running the command net user administrator. The Account Active = Yes means the Administrator account is now enabled on Windows 11 PC.

5. You have successfully enabled an Administrator account, but you don’t know that password for this account. To reset the Administrator account password, run the following command:
net user administrator *
The above command resets the administrator account password. You have to enter the new password twice, and you are done. That was easy, isn’t it?

Tip: In case you want to disable the built-in Administrator account run the command net user “Administrator” /active:no.
Enable administrator account in Windows 11 using Local Users and Groups
Windows Administrative Tools provides numerous options that can only be accessed by the administrator. Using the Local Users and Groups, you can enable administrator account in Windows 11:
1. On your Windows 11 PC, run the command lusrmgr.msc. This is a shortcut command to launch Local Users and Groups.
2. In the Local users and groups console, click Users folder. On the right-hand side, you will find a list of all users present on your Windows 11 PC.
3. Right-click Administrator account and select Properties.

4. On the Administrator Properties window, select the General tab and uncheck the option “Account is disabled“. This will enable the Administrator account on Windows 11 PC.

After you enable the local administrator account, you can now reset Windows 11 administrator account password. Right-click Administrator account and click Set Password.

On Set Password for Administrator window, enter the new password for the account and click OK. Log off from your current account, and you can now sign in with Administrator account.

Enable Windows 11 Administrator account using PowerShell
To enable the Administrator account with PowerShell on Windows 11 Pro or Home, use these steps:
- On Windows 11 PC, click Start and search Windows PowerShell.
- Launch the PowerShell with Run as Administrator.
- Run the following command to enable the built-in Windows 11 Administrator account.
- Get-LocalUser -Name “Administrator” | Enable-LocalUser

After you complete the above steps, the default Administrator account will be enabled, and available from the Windows 11 Sign-in screen.
Tip: If you want to disable the administrator account using PowerShell, run the command Get-LocalUser -Name “Administrator” | Disable-LocalUser.
Enable Administrator Account in Windows 11 Using Group Policy Editor
You can use the Group policy editor to enable an Administrator account in Windows 11.
- On Windows 11 PC, Press Windows+R to open the Run Command box.
- Type gpedit.msc and hit the enter key to open the Group Policy Editor.
- Navigate to the following path: Computer Configuration > Windows Settings > Security Settings > Local Policies > Security Options.
- Right-click Accounts: Administrator account status policy setting and select Enabled.

Once you complete the steps, log off from your computer. The built-in Administrator local account on Windows 11 will be available from the Sign-in screen.
Still Need Help?
If you need further assistance on the above article or want to discuss other technical issues, check out some of these options.
Are you struggling to login as an administrator in Windows 11? It can be frustrating when you need to access certain settings or programs only available to administrators. But fear not, as there are simple steps you can take to regain control. By following these instructions, you’ll be able to login as an administrator and have full control over your Windows 11 system.
To login as the administrator in Windows 11, you need to first ensure that your account has administrative privileges. This can be done by going to the «Settings» menu, selecting «Accounts,» and then clicking on «Your Info.» From here, you can check if your account is an administrator or make changes to grant it administrative rights. Once you’ve confirmed your account’s status, you can easily login as an administrator by simply selecting the «Sign In» option and entering your credentials. It’s as simple as that!
To login as the Administrator in Windows 11, follow these steps:
- Power on your Windows 11 computer.
- On the login screen, click on the «Other user» option.
- Now, type «Administrator» in the username field.
- Enter the password associated with the Administrator account.
- Click on the «Sign in» button.
By following these steps, you can login as the Administrator in Windows 11 and access administrative privileges.

Enhanced Security Measures for Administrator Login in Windows 11
Windows 11 introduces enhanced security measures for administrator login, ensuring better protection against unauthorized access and potential security breaches. These measures are designed to safeguard sensitive data and provide users with a secure computing experience. In this article, we will explore the various methods and steps to log in as an administrator in Windows 11 and understand the security features in place to protect your system.
Method 1: Using the Local Administrator Account
The first method to log in as an administrator in Windows 11 is by using the local administrator account. This account is created during the initial setup of Windows 11 and has elevated privileges that allow you to perform administrative tasks on your system.
Step 1: Accessing the Sign-in Options
To log in as the local administrator, start by accessing the sign-in options. On the Windows 11 login screen, click on the power button located at the bottom right corner. Press and hold the Shift key on your keyboard and then click on the Restart option. This will take you to the Advanced Startup menu.
In the Advanced Startup menu, select Troubleshoot, followed by Advanced options. From the list of advanced options, choose Startup Settings. Finally, click on the Restart button to reboot your system and access the Startup Settings.
In the Startup Settings, you will see various options. Press the number key that corresponds to the option labeled «Enable Safe Mode.» Windows 11 will now boot into Safe Mode.
Step 2: Logging in as the Local Administrator
Once in Safe Mode, you will be presented with the login screen. Click on the Administrator account to log in as the local administrator. If you have set up a password for the local administrator account during the initial setup, enter it when prompted.
After successfully logging in as the local administrator, you will have full administrative privileges to perform various tasks on your Windows 11 system.
Step 3: Returning to Normal Mode
To return to normal mode, simply restart your system. Windows 11 will boot back into the regular login screen, where you can log in using your regular user account.
Method 2: Using the Command Prompt
If you prefer using the Command Prompt, you can log in as an administrator in Windows 11 through this method as well. The Command Prompt allows you to execute various commands and perform administrative tasks.
Step 1: Accessing the Command Prompt
To access the Command Prompt, boot your Windows 11 system into the Advanced Startup menu. Follow the same steps as mentioned in Step 1 of Method 1, where you access the Troubleshoot > Advanced options > Startup Settings.
In the Startup Settings, press the number key corresponding to the option labeled «Enable Safe Mode with Command Prompt.» Windows 11 will now boot into Safe Mode with Command Prompt.
Step 2: Logging in as an Administrator
Once in Safe Mode with Command Prompt, you will see a Command Prompt window. Type the command «net user administrator /active:yes» (without quotes) and press Enter. This command enables the built-in administrator account.
Next, restart your system. On the login screen, you will now see the Administrator account available. Click on it to log in as the administrator.
Step 3: Performing Administrative Tasks
Upon logging in as the administrator, you can now utilize the Command Prompt to execute various administrative tasks, such as managing user accounts, changing passwords, or performing system maintenance.
Method 3: Using the Microsoft Management Console (MMC)
The Microsoft Management Console (MMC) provides a centralized platform for managing system configuration and performing administrative tasks in Windows.
Step 1: Opening the Microsoft Management Console
To open the Microsoft Management Console, press the Windows key + R on your keyboard to open the Run dialog box. Type «mmc» (without quotes) and press Enter.
Step 2: Adding the Local Users and Groups Snap-in
In the Microsoft Management Console, go to the File menu and select Add/Remove Snap-in. In the Add or Remove Snap-ins window, scroll down and double-click on Local Users and Groups.
From the Local Users and Groups window, click on the Browse button and select the Users folder. In the Users folder, right-click on the Administrator account and choose Properties. In the Properties window, uncheck the «Account is disabled» option and click on OK.
Step 3: Logging in as the Administrator
Restart your system. On the Windows 11 login screen, you will now see the Administrator account. Click on it to log in as the administrator.
Method 4: Using the Windows PowerShell
The Windows PowerShell is a powerful command-line tool that allows users to automate system tasks and perform administrative functions. You can use it to log in as the administrator in Windows 11 as well.
Step 1: Opening Windows PowerShell
To open the Windows PowerShell, press the Windows key + R on your keyboard to open the Run dialog box. Type «powershell» (without quotes) and press Enter.
Step 2: Enabling the Built-in Administrator Account
In the PowerShell window, type the command «net user administrator /active:yes» (without quotes) and press Enter. This command enables the built-in administrator account.
Step 3: Logging in as the Administrator
Restart your system. On the login screen, you will now see the Administrator account. Click on it to log in as the administrator.
Conclusion
Logging in as an administrator in Windows 11 is essential for performing various administrative tasks and managing system settings. Whether it’s using the local administrator account, Command Prompt, Microsoft Management Console, or Windows PowerShell, these methods provide you with the necessary access and privileges to carry out administrative functions on your Windows 11 system. It’s important to keep in mind that administrative tasks should be performed with caution and within the scope of your responsibilities to ensure system stability and security.
Logging in as Administrator in Windows 11
Logging in as an administrator on Windows 11 allows you to access and manage advanced system settings, install applications, and make changes that require administrative privileges. Here’s how to do it:
Method 1: Using the Settings App
1. Click on the «Start» icon in the taskbar and select «Settings.»
2. In the Settings menu, click on «Accounts» and then select «Accounts» again in the left pane.
3. Click on «Family & other users» on the right side and then select your account from the list.
4. Under your account name, click on «Change account type» and select «Administrator.» Confirm any prompts that appear.
Method 2: Using the Command Prompt
1. Press the «Windows» key + «R» to open the Run dialog box.
2. Type «cmd» and press «Enter» to open the Command Prompt.
3. In the Command Prompt, type «net user administrator /active:yes» and press «Enter.»
4. You should see a message saying «The command completed successfully.» Restart your computer.
Once you have completed these steps, you can log in as an administrator on Windows 11 by selecting the administrator account on the login screen. Remember to use the administrator account responsibly, as it has full control over the system.
Key Takeaways — How to Login as Administrator in Windows 11
- Press the Windows key and search for «Command Prompt» to open it.
- Right-click on Command Prompt and select «Run as Administrator.»
- Enter the Administrator password and press Enter to log in as Administrator.
- If you don’t remember the Administrator password, reset it through the built-in Administrator account.
- Use the «net user» command followed by the Administrator username and desired password to reset the Administrator password.
Frequently Asked Questions
Here are some common questions about logging in as Administrator in Windows 11.
1. How can I log in as Administrator in Windows 11?
To log in as Administrator in Windows 11, you can follow these steps:
1. On the login screen, click on the «Other user» option.
2. Type in «Administrator» as the username and leave the password field blank.
3. Press Enter or click on the arrow button to log in as Administrator.
Please note that this method will only work if you have enabled the Administrator account in Windows 11.
2. How do I enable the Administrator account in Windows 11?
To enable the Administrator account in Windows 11, you can follow these steps:
1. Open the Command Prompt as an administrator. You can do this by right-clicking on the Start button and selecting «Command Prompt (Admin)».
2. In the Command Prompt window, type in the following command and press Enter: «net user administrator /active:yes».
3. After executing the command, the Administrator account will be enabled.
Please note that it is recommended to create a strong password for the Administrator account for security purposes.
3. Can I log in as Administrator if I forgot my Windows 11 password?
If you have forgotten your Windows 11 password, you will not be able to log in as Administrator or any other user. In this case, you can follow these steps to reset your password:
1. Restart your computer and press the F8 key repeatedly to access the Advanced Boot Options menu.
2. Select the «Safe Mode» option and press Enter.
3. On the login screen, you will see a new user account named «Administrator». Click on that account to log in.
4. Once logged in, go to the Control Panel and open the User Accounts settings.
5. Select your user account and click on «Change Password». Follow the on-screen instructions to set a new password.
After resetting your password, you can log in as Administrator or your own user account using the new password.
4. What should I do if the Administrator account is disabled?
If the Administrator account is disabled in Windows 11, you will need to enable it using a different user account with administrative privileges. Here’s how:
1. Log in to Windows 11 with another user account that has administrative privileges.
2. Open the Command Prompt as an administrator.
3. Type in the following command and press Enter: «net user administrator /active:yes».
4. After executing the command, the Administrator account will be enabled.
Please note that you will need to know the password for the other user account to perform these steps.
5. Can I change the Administrator password in Windows 11?
Yes, you can change the Administrator password in Windows 11. Here’s how:
1. Log in to Windows 11 as Administrator.
2. Press the Ctrl + Alt + Del keys together and click on «Change a password».
3. Follow the on-screen instructions to set a new password for the Administrator account.
In summary, logging in as an administrator in Windows 11 is a straightforward process that can be done by following a few simple steps. First, you need to ensure that you have the necessary administrator credentials or permissions. If you don’t, you may need to contact your system administrator or use an existing administrator account. Once you have the required credentials, you can easily switch to the administrator account by accessing the Windows 11 login screen and selecting the administrator account from the available options.
Remember to exercise caution when working in the administrator account, as it grants you full control over the system. Be mindful of the changes you make and always adhere to best practices to ensure the security and stability of your computer. By following these steps, you can effectively log in as an administrator in Windows 11 and carry out administrative tasks with ease.
-
Home
-
News
- How to Open Windows 11 Computer Management Console in 7 Ways?
By Helen | Follow |
Last Updated
This essay summarized by MiniTool Software mainly teaches you how to open Windows 11 Computer Management with Windows Search, Quick Link menu, Run dialog, command prompt, PowerShell, File Explorer, Control Panel, as well as a desktop shortcut.
What Is Windows 11 Computer Management?
Computer Management is a collection of Windows administrative tools that you can use to manage local or remote computers. The tools are organized into a single console, which makes it easy to view administrative properties and gain access to the tools that are necessary to carry out your computer-management tasks.
Tips:
Do not mistake Computer Management with Microsoft Management Console (MMC).
Windows 11 Computer Management refers to the Computer Management in the latest Windows 11 system. Next, let’s see how to open Windows 11 MMC in multiple methods.
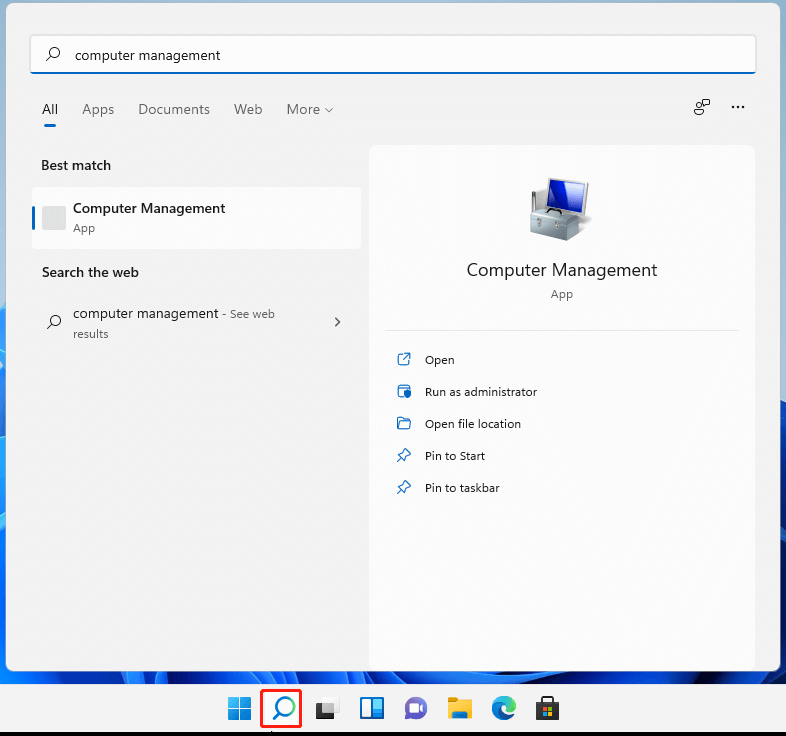
#1 Open Windows 11 Computer Management Through Search
The easiest way to open Computer Management Windows 11 is to search it through the Windows Search feature. Click on the magnifier icon on the taskbar and type “computer management” “compmgmt.msc”, or “compmgmt”. Then, click on the best match.
Secondly, you can reach CMM from the Windows Quick Link menu. Generally, press Windows + X shortcut to trigger the Quick Link menu and click Computer Management to open it. You can also bring up the User Menu by right-clicking on the Start icon.
#3 Access Windows 11 Computer Management with Run Box
Thirdly, you are able to reach Win11 Computer Management through the Windows Run command. Press Windows + R hotkey to open Windows 11 Run command, input “compmgmt.msc”, and press Enter or click OK to finish.
#4 Open Windows 11 Computer Management from Command
Also, you can access Win 11 Computer Management relying on commands. To achieve that, first of all, you need to launch one command platform, CMD or PowerShell. Then, type “compmgmt.msc” or “compmgmt” to complete.
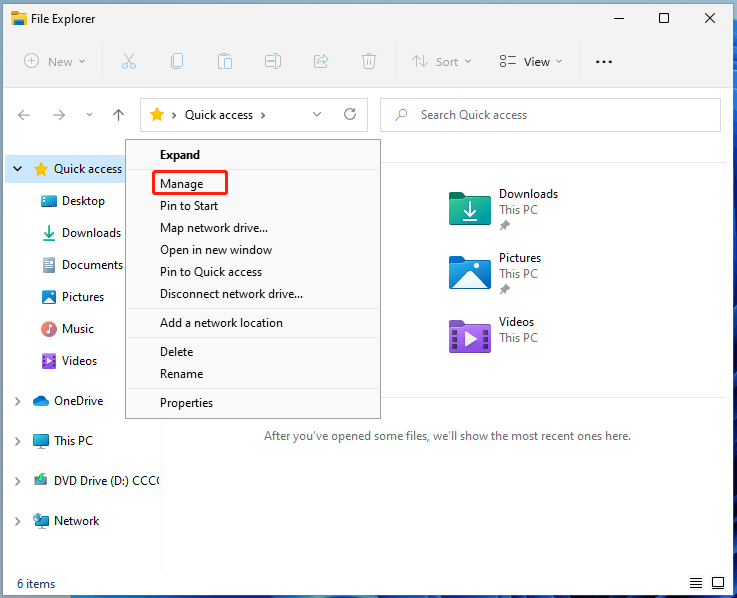
#5 Get Windows 11 Computer Management Using File Explorer
Next, you can trigger Computer Management within Windows Explorer. Open Windows File Explorer using Windows + E keys. Right-click on “This PC” on the left panel and select Show more options. In the new pop-up menu, just select Manage.
#6 Launch Windows 11 Computer Management via Control Panel
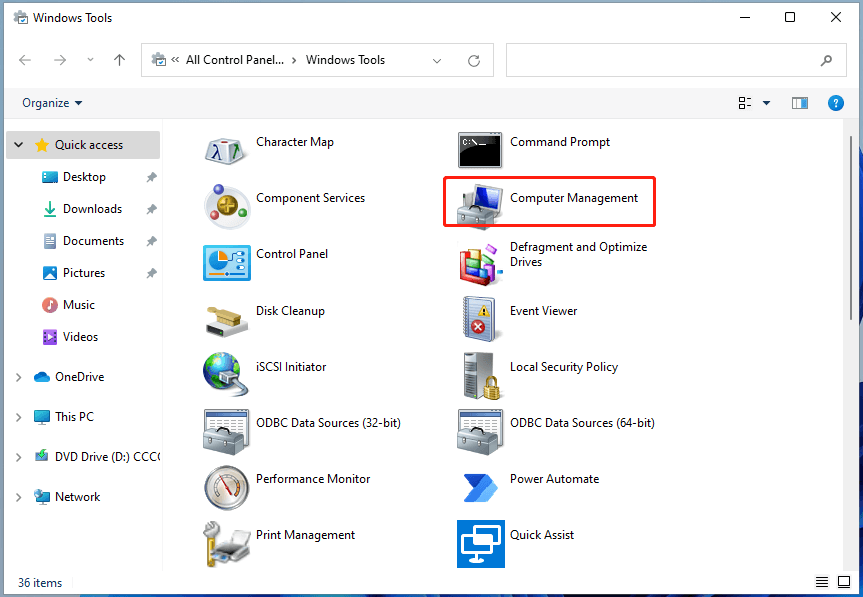
Still, you are allowed to arrive at Computer Management starting from Windows 11 Control Panel. Just open Control Panel in Win11, view its items in individual icons, find and open Windows Tools. In the Windows Tools window, find and launch Computer Management.
#7 Open Windows 11 Computer Management by Desktop Shortcut
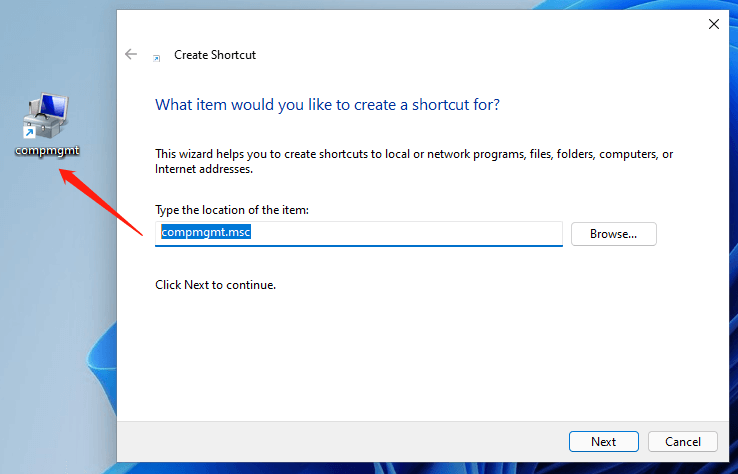
Finally, you can launch Win11 MMC with its desktop shortcut. To enable that function, you have to first create a shortcut of Computer Management. This is easy. Right-click on the Desktop and choose New > Shortcut. Then, type “compmgmt.msc” and name the new shortcut (or just keep the default name). At last, click the Finish button.
Windows 11 Assistant Software Recommended
The new and powerful Windows 11 will bring you many benefits. At the same time, it will also bring you some unexpected damages such as data loss. Thus, it is strongly recommended that you back up your crucial files before or after upgrading to Win11 with a robust and reliable program like MiniTool ShadowMaker, which will assist you to protect your increasing data automatically on schedules!
MiniTool ShadowMaker TrialClick to Download100%Clean & Safe
Also read:
- Best ND Filter for Video: Variable/DSLR/Budget/Most-Used
- [5 Ways] How to Edit Photos in Windows 11/10/8/7?
- 120 FPS Video: Definition/Samples/Download/Play/Edit/Cameras
- How to Transfer Photos from Camera to Computer Windows 11/10?
- [2 Ways] How to Crop Someone out of a Photo by Photoshop/Fotor?
About The Author
Position: Columnist
Helen Graduated from university in 2014 and started working as a tech editor in the same year. Her articles focus on data backup & recovery and disk management. Through an in-depth exploration of computer technology, Helen has successfully helped thousands of users solve their annoying problems.