
Install Android USB Driver, ADB, and Fastboot on Windows 10/11 (2025) – Step-by-step instructions to install the Android USB driver and set up ADB/Fastboot using winget on Windows 10/11. Perfect for Android development and troubleshooting.
Credit: ph33nx
Manual Installation Guide for Android USB Driver & ADB/Fastboot (Windows 10/11)
This guide provides simple, direct steps to manually install the Google USB Driver and ADB/Fastboot binaries using winget on Windows 10/11.
1. Install the Google USB Driver Manually
-
Download the Driver
- Download the Google USB Driver and extract the ZIP to a folder (e.g.,
C:\usb_driver).
- Download the Google USB Driver and extract the ZIP to a folder (e.g.,
-
Update Driver in Device Manager
- Open Device Manager.
- Locate your Android device (often listed under «Unknown Devices»).
- Right-click the device and select Update driver.
- Choose Browse my computer for driver software.
- Click Let me pick from a list of available drivers on my computer.
- Click Have Disk… and navigate to the folder where you extracted the driver.
- Select
android_winusb.infand follow the prompts (ignore any unsigned driver warnings if necessary).
2. Install ADB and Fastboot Binaries via Winget
-
Open Command Prompt or PowerShell
- Execute the following command to install the binaries:
winget install Google.PlatformTools
- Execute the following command to install the binaries:
-
Verify Installation
- Check ADB version:
- Check Fastboot version:
You’re all set!
Keywords: Windows 10, Windows 11, Android, ADB, Fastboot, Google USB Driver, Platform Tools, winget, device driver, manual installation
How to Set Up ADB on Windows 11
Android Debug Bridge (ADB) is a versatile command-line tool that allows you to communicate with an instance of an Android device. It enables a variety of tasks, from debugging applications to running shell commands on your phone or tablet. Setting up ADB on Windows 11 can seem daunting for some, but with the right steps, it can be accomplished smoothly. This article will guide you through the entire process step by step.
Introduction to ADB
ADB is an integral part of the Android SDK (Software Development Kit). It acts as a bridge between your development environment and the Android device, facilitating communication with it. Whether you’re a developer trying to debug apps or a tech enthusiast wanting to install software manually, ADB is an invaluable tool.
You can perform a variety of functions with ADB, including:
- Installing and uninstalling apps
- Running shell commands on an Android device
- Transferring files between the computer and the Android device
- Accessing logs from Android
Prerequisites
Before proceeding with the setup, ensure you have the following:
- A Windows 11 Computer: Ensure your system is up to date, as this can prevent any compatibility issues.
- An Android Device: You need a device to connect to your computer.
- USB Cable: This will allow you to connect your Android device to the PC.
- Minimal Technical Knowledge: Having a basic understanding of command-line operations will be beneficial.
Step 1: Enable Developer Options on Your Android Device
The first step in setting up ADB is enabling Developer Options on your Android device.
- Open the Settings app on your Android device.
- Scroll down and select About phone.
- Look for the Build number entry. Tap it multiple times (usually seven) until you see a message that says, «You are now a developer.»
- Go back to Settings, and you should see a new option called Developer options.
Once you’ve enabled Developer Options, you’ll need to turn on USB debugging.
- Select Developer options from the Settings menu.
- Scroll down and find USB debugging. Toggle it on and confirm any warnings that may appear.
Step 2: Download ADB and Fastboot
Now that your Android device is ready, you’ll need to download the ADB package.
- Open a web browser and navigate to the Android SDK Platform Tools download page. The link is available on the official Android developer website.
- Download the appropriate ZIP file for Windows. You’ll generally find it under «Download Options.»
- Extract the ZIP file to a location that is easy to access, such as
C:adb.
Step 3: Set Up Environment Variables
Setting Up Environment Variables allows you to run ADB commands without having to navigate to the installation directory each time.
- In the Windows search bar, type Environment Variables and select Edit the system environment variables.
- In the System Properties window, click on Environment Variables.
- In the System Variables section, find and select the variable named Path, then click Edit.
- Click on New and add the path to the extracted ADB folder, which should look something like
C:adb. - Click OK to save changes and close all dialog boxes.
Step 4: Connect Your Android Device
With ADB installed and set up, it’s time to connect your Android device.
- Use the USB cable to connect your Android device to your Windows 11 PC.
- When prompted on your Android device, select File Transfer or find and enable USB Debugging again.
- On your device, you may also see a prompt asking for permission to allow USB debugging. Ensure to select Always allow from this computer and tap OK.
Step 5: Verify ADB Installation
Once your device is connected, it’s essential to verify that ADB is properly configured and can communicate with your device.
- Press
Win + Sto open the Windows search bar, typecmd, and hit Enter to open the Command Prompt. - Type
adb devicesand press Enter.
If ADB is properly installed and your device is connected, you should see a list of connected devices showing something like:
List of devices attached
0123456789ABCDEF    device
If you see a message indicating unauthorized, you may need to disconnect your device and reconnect it, ensuring that you have authorized your computer by checking the Always Allow box.
Step 6: Using ADB Commands
With everything set up, you can now use ADB commands. Below is a brief introduction to some fundamental commands that you might find useful:
-
Installing an App: To install an APK file from your computer, use the following command:
adb install path_to_apk_file.apk -
Uninstalling an App: To uninstall an app, use:
adb uninstall package_name -
List Connected Devices: To list all connected devices:
adb devices -
Accessing Shell: To access the device’s shell:
adb shell -
Logcat: To view device logs:
adb logcat
Step 7: Troubleshooting Common Issues
While the setup process is generally straightforward, you may run into some common problems. Here are a few solutions for issues you may encounter:
Device Not Recognized
If your device isn’t recognized, try the following:
- Ensure that USB debugging is enabled.
- Use a different USB cable or port.
- Restart both your Android device and the computer.
- Ensure that drivers for your Android device are installed.
ADB Unauthorized
If you see an “unauthorized” message after running adb devices, ensure that you:
- Check your Android device for a prompt asking for permission.
- Revoke USB debugging authorizations by going into Developer Options and then try reconnecting.
ADB Command Not Found
If the command prompt returns an error saying the command isn’t recognized, ensure that:
- The path to the ADB folder is correctly set in your environment variables.
- You’ve opened a new command prompt window after making changes.
Step 8: Advanced Tips
Once you’re familiar with the basic commands and settings, consider diving into some advanced features:
- ADB Scripting: For developers and power users, ADB supports scripting, allowing you to execute a series of commands automatically.
- Wireless ADB: You can connect ADB over Wi-Fi. First, connect your device via USB, then run
adb tcpip 5555, and connect wirelessly usingadb connect device_ip_address:5555. - Backup & Restore: You can back up your application data using
adb backupand restore it withadb restore.
Conclusion
Setting up ADB on Windows 11 is essential for developers and tech enthusiasts alike. By following the steps outlined in this article, you should have a fully operational ADB setup that enables you to interact with your Android device effectively. As you grow more proficient with ADB commands and functionalities, you’ll find that it enhances your experience with Android devices immensely, whether you are developing applications or simply exploring the capabilities of your device.
Remember always to keep your tools updated, and periodically check for new features and commands that might be added to ADB. The Android ecosystem is continually evolving, and staying up to date will help you leverage its full potential. Happy debugging!
How to Set Up Android Debug Bridge (ADB) on Windows 11
Android Debug Bridge (ADB) is an essential tool for developers and enthusiasts who wish to communicate with Android devices. It allows users to perform various operations on their devices, including installing applications, debugging, and accessing device capabilities. Although setting up ADB may seem daunting at first, with a clear guide, you can get everything up and running in no time. In this article, we will walk you through the process of setting up ADB on Windows 11 step-by-step.
What is Android Debug Bridge (ADB)?
ADB is a command-line tool that facilitates communication between a computer and an Android device. It acts as a bridge to send commands and communicate with an Android device connected via a USB cable or over a Wi-Fi network. Developers use ADB to debug applications and perform various administrative functions on Android devices.
Some functionalities that ADB provides include:
- Installing and uninstalling applications
- Copying files between devices and computers
- Running shell commands on Android devices
- Accessing device logs
Prerequisites
Before you begin setting up ADB, make sure that you have the following:
- A Windows 11 PC.
- An Android device (smartphone or tablet).
- USB cable to connect your Android device to the PC.
- Basic familiarity with command-line tools.
Step 1: Install Android SDK Platform Tools
The first step is to download the Android SDK Platform Tools, which include ADB and other necessary tools.
-
Download the Platform Tools:
- Visit the official Android developer website: Android SDK Platform Tools.
- Choose the Windows version and download the ZIP file. It typically has a name like
platform-tools_rXX.0.0-windows.zipwhereXXrepresents the version number.
-
Extract the ZIP File:
- Locate the downloaded ZIP file in your Downloads folder.
- Right-click the ZIP file and choose
Extract All…. - Choose a destination folder. It’s recommended to extract it to a location you can easily access, such as
C:adb.
Step 2: Enabling Developer Options on Your Android Device
To use ADB with your Android device, you need to enable Developer Options and USB Debugging.
-
Enable Developer Options:
- Open the Settings app on your Android device.
- Scroll down and tap on About phone.
- Look for the Build number entry—tap it 7 times. You might need to enter your device’s PIN or password. You’ll see a message indicating that Developer Options have been enabled.
-
Enable USB Debugging:
- Go back to the Settings menu.
- Scroll down and tap on System (or just scroll down, depending on your device).
- Tap on Developer options.
- Find and toggle on USB debugging. You will see a prompt asking for confirmation; click on
OK.
Step 3: Connect Your Android Device to Your Windows 11 PC
Connect your Android device to the Windows 11 computer using a USB cable. You may need to change the USB connection mode if necessary.
-
Change the USB Mode:
- After connecting the device, you should see a notification on your Android device regarding the USB connection.
- Tap on the notification and select File Transfer (MTP) or Transferring files.
- This setting allows ADB to communicate with your device.
-
Allow USB Debugging:
- The first time you connect your device to your PC, you may see a dialog on your Android device asking you to allow USB debugging. Check the box for Always allow from this computer and click
OK.
- The first time you connect your device to your PC, you may see a dialog on your Android device asking you to allow USB debugging. Check the box for Always allow from this computer and click
Step 4: Add ADB to System PATH (Optional)
Adding ADB to your Windows PATH is optional but recommended, as it allows you to run ADB commands from any command prompt window without navigating to the ADB installation folder.
-
Open System Properties:
- Right-click on the Start button and select System.
- Click on About on the left sidebar.
- Scroll down and click on Advanced system settings.
-
Environment Variables:
- In the System Properties dialog, click on the Environment Variables button.
- In the Environment Variables dialog, look for Path in the «System variables» section and select it.
- Click on
Edit….
-
Add ADB Path:
- In the Edit Environment Variable dialog, click on
Newand enter the path where you extracted Platform Tools (for example,C:adb). - Click
OKto save the changes.
- In the Edit Environment Variable dialog, click on
-
Verification:
- To verify the setup, open a Command Prompt window by pressing
Win + R, typingcmd, and hittingEnter. - In the Command Prompt, type
adb versionand pressEnter. - You should see the ADB version information displayed. If you do, you have successfully set up ADB.
- To verify the setup, open a Command Prompt window by pressing
Step 5: Testing ADB Installation
Now that you have ADB installed, it’s time to test it to ensure everything is working correctly.
-
Open Command Prompt:
- Press
Win + R, typecmd, and hitEnter.
- Press
-
Check Connected Devices:
- In the Command Prompt, type the following command and hit
Enter:adb devices - This command will list all connected Android devices. You should see a device listed along with a unique device identifier. If it says «unauthorized,» revisit Step 3 and ensure you’ve allowed USB debugging.
- In the Command Prompt, type the following command and hit
-
Running a Simple Command:
- To further confirm your connection, you can run a simple shell command. Type:
adb shell - If successful, you’ll see a shell prompt. Type
exitto leave the shell.
- To further confirm your connection, you can run a simple shell command. Type:
Step 6: Running Common ADB Commands
Now that you have ADB set up, it’s time to explore some common commands you can use:
-
Install an APK File:
- If you have an APK file that you want to install, use the command:
adb install path_to_your_apk_file.apk - Replace
path_to_your_apk_file.apkwith the actual path to the APK file you want to install.
- If you have an APK file that you want to install, use the command:
-
Uninstall an App:
- To uninstall an app, use:
adb uninstall package_name - Replace
package_namewith the app’s package name (e.g.,com.example.myapp).
- To uninstall an app, use:
-
Copy Files from Your Device:
- To copy a file from your device to your PC:
adb pull /path/on/device /path/on/pc - Replace
/path/on/devicewith the file path on your Android device and/path/on/pcwith the destination path on your PC.
- To copy a file from your device to your PC:
-
Copy Files to Your Device:
- To push a file from your PC to your device:
adb push /path/on/pc /path/on/device
- To push a file from your PC to your device:
-
View Device Logs:
- To view logs from your device for debugging purposes, you can use:
adb logcat
- To view logs from your device for debugging purposes, you can use:
Troubleshooting Common Issues
-
Device Not Listed:
- If your device doesn’t show up in ADB, ensure that USB debugging is enabled and that the device is connected correctly.
-
Unauthorized Device:
- If you receive an «unauthorized» message, check your Android device for the USB debugging authorization prompt and allow it.
-
ADB Not Recognized:
- If you encounter an error saying «adb is not recognized as an internal or external command,» ensure that you added ADB to your system PATH correctly.
-
Older Versions of Windows:
- Ensure that Windows 11 has the latest updates installed, as older versions may contain bugs that could affect ADB functionality.
Conclusion
Setting up ADB on Windows 11 allows developers and Android enthusiasts to unlock the full potential of their devices. With ADB, you can install applications, access log files, and run commands that improve your workflow and enhance your Android experience.
This guide provided a comprehensive overview of the setup process, from downloading the necessary tools to testing and executing common commands. Whether you are a seasoned developer or a casual user, being proficient with ADB can help you leverage the vast array of features available on Android devices.
Now that you know how to set it up, you can explore deeper functionalities that ADB offers, debugging your applications, and troubleshooting your devices like a pro!
Table of contents
- How to Install Android Debug Bridge for Windows 10?
- Step 1: Check if you already have the ADB driver installed on your PC
- Step 2: Get the ADB driver file
- Step 3: Activate USB debugging on your Android device
- Step 4: Open Device Manager and install the ADB driver
- Pro Tip: Update your Drivers for Better Performance
- Downloading and Installing ADB in Windows 11
- Conclusion
Those who are familiar with the Android Debug Bridge (ADB) already know the benefits it can give.
The feature allows them to side-load apps that they cannot acquire from the Google Play Store.
For instance, they can use the ADB to record their phone’s screen via their computer. Basically, the ADB is a command line tool that allows users to control their Android device on their Windows PC using a USB cable.
If you’re still wondering about this feature and how you can add it to your PC, you’ve come to the right place! In this article, we will teach you how to install Android Debug Bridge for Windows 10.
Read the article to get bonus tips to enhance your user experience!
How to Install Android Debug Bridge for Windows 10?
In general, you must go through the following steps to install the ADB on your computer:
- Check if you already have the ADB driver installed on your PC.
- Get the ADB driver file.
- Activate USB Debugging on your Android device.
- Open Device Manager and install the ADB driver.
You will see the detailed instructions below. Make sure you follow them carefully to be able to set up the ADB correctly.
Step 1: Check if you already have the ADB driver installed on your PC
The first thing you have to do is check if your computer already has the ADB driver installed. Simply perform a test via Chrome to see if your PC can recognize your Android device and communicate with it. To do that, follow the steps below:
- Use a USB cable to connect your Android device to your computer.
- Open Google Chrome.
- Inside the URL bar, type chrome://inspect, then press Enter.
If the test fails, you do not have the ADB driver installed on your PC yet. On the other hand, if you see the name of your Android device, then it means that you already have the ADB driver on your computer.
Step 2: Get the ADB driver file
Of course, before you can add the ADB driver to your PC, you have to get the installation file first.
Typically, your Android device’s manufacturer provides the ADB driver file. Download the installation file from the official website.
Step 3: Activate USB debugging on your Android device
Once you’ve downloaded the ADB driver file, you must enable the USB Debugging function on your Android device. You can only enjoy the full potential of the ADB when the USB debugging function is activated.
Here are the steps:
Note
By default, the USB Debugging option is hidden for Android 4.2 and newer versions.
- Open Settings on your Android device.
- Scroll down, then tap About Phone or About.
- Enable the Developer options by tapping the Build number seven times.
- Remember to set the toggle at the top to On.
- Enable USB Debugging.
- Plug your Android device into your computer. On your Android device, you will see a message saying, Allow USB Debugging? Select the box beside the Always allow from this computer option, then tap OK.
Step 4: Open Device Manager and install the ADB driver
You can open Device Manager to install the ADB driver. In this article, we are going to use Google Nexus 7 because the steps are quite similar for all other Android devices. Once you’re ready, just follow the instructions below:
- Plug your Android device into your computer.
- Open the Run dialog box by pressing
Windows Key + Ron your keyboard. - Type
devmgmt.msc, then hit Enter. This should bring up Device Manager. - Look for your Android device.
- Right-click it, then select Properties from the options. If the driver is not installed properly, you will see a yellow warning icon beside your Android device.
- Go to the Driver tab, then click Update Driver.
- A new window will pop up. Select the Browse my computer for driver software option.
- Search for the ADB driver file you previously downloaded by clicking Browse.
- Select the box beside Include Subfolders, then click Next. Device Manager will automatically install the ADB driver.
If you do not need this feature, you might ask, “Where can I uninstall the ADB driver?” You can do that via Device Manager. You just need to follow the first four steps, then select Uninstall Device.
Fix this issue quickly
You can try using a safe and totally free tool developed by the Auslogics team of experts.
A few simple steps to troubleshoot the issue:
Download the tiny Auslogics TroubleShooter tool.
Run the application (no installation is needed).
The app will check for the issue mentioned in the article. When the scan is done, check that this is the issue you were looking to solve and click ‘Apply now’ to apply the recommended fix.
You can use the app to troubleshoot other malfunctions for free by simply typing in a brief description of the issue your PC is experiencing. Or you can scan your PC for performance issues using the My Scanner tab.
Pro Tip: Update your Drivers for Better Performance
We suggest updating all your drivers to ensure that you can use the ADB without any hassle.
You can manually do this, but the process can be tedious and time-consuming. Moreover, it can be risky. If you download and install the wrong driver, you might cause system instability issues on your PC.
So, if you do not have the patience and tech skills to update your drivers manually, we recommend using Auslogics Driver Updater.
Once you activate this program, it will automatically identify your system version. That said, Auslogics Driver Updater will locate the latest manufacturer-recommended drivers compatible with your system.
Downloading and Installing ADB in Windows 11
If you know what you are doing, you can easily download and install ADB in Windows 11. To do so, you have to access the Android Studio developer site to download the required file, after which you can add the driver to your machine.
Here are simple steps to follow to help download the driver on your Windows 11 machine:
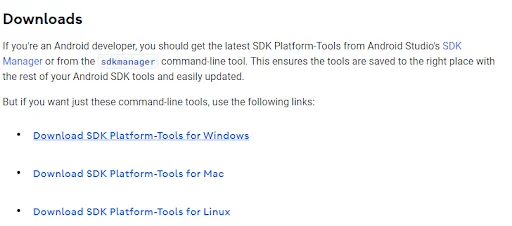
- Visit the Android Studio site on your computer.
- Next, scroll down the page to find the download options. Then click the “Download SDK Platform-Tools for Windows” option to download the Android Debug Bridge driver on your PC.
- Accept the terms and conditions.
- Next, click the Download button, then wait for the download process to finish.
- Copy the downloaded file and paste it into the C drive.
- After extracting the copied file, right-click the newly extracted folder and choose Open in Terminal.
- Launch Windows PowerShell and execute the following commands one by one:
cmd
ADB devices
- Allow for debugging when the USB debugging prompt window appears on your phone screen.
- Run the “adb devices” command again to view the list of all devices connected to your computer.
- Now, run the ADB command on your connected device.
Conclusion
Throughout this article, we’ve explained how to install ADB drivers on your Windows 10 and 11 PC. Go through the steps to download, install, connect, and control your Android devices from your computer.
Was this article helpful? Share it with your friends and colleagues, and share your thoughts in the comments below!

