
Самый лучший способ сделать так, чтобы никто из домочадцев не испытывал интерес к вашему личному компьютеру – купить каждому из них по своему компьютеру. Но, увы, не каждая семья может себе позволить такую роскошь. Ведь если покупать не ноутбук, а десктоп, нужно ещё и позаботиться об обустройстве компьютерного места в доме. Если своё виртуальное пространство всё же приходится делить с близкими, чтобы не накалять обстановку, тогда как хотя бы защитить его? Как минимум от ненамеренных действий детей или взрослых людей, но полных новичков. Ниже рассмотрим 5 способов такой защиты, реализуемых в среде Windows 10. Итак…
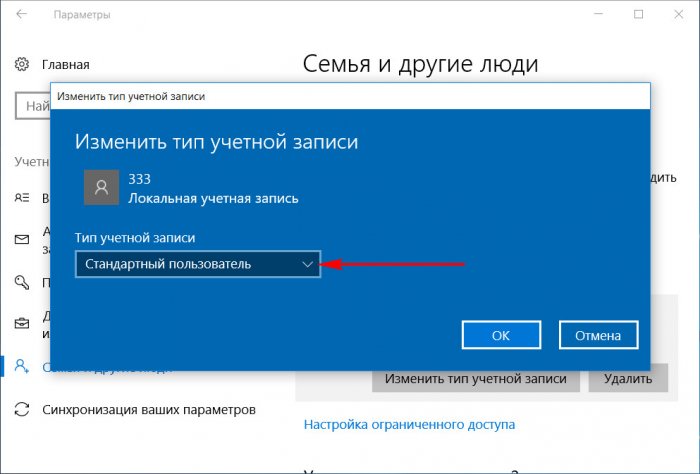
При установке любой версии Windows всегда создаётся учётная запись администратора, а внутри неё уже можно формировать сколь угодно учётных записей типа «Стандартный пользователь». Именно посредством таких и нужно делить компьютер с неопытными домочадцами. В Windows 10 создать другим пользователям отдельную среду для работы с компьютером можно в приложении «Параметры», в разделе «Учётные записи».

Тогда как с учётной записи администратора с Windows можно делать практически всё – устанавливать и запускать какой угодно софт, вносить в систему свои настройки, удалять любые, даже некоторые системные файлы, с учётной записи стандартного пользователя эти действия будут блокироваться. Стандартный пользователь сможет работать с Интернетом и программами, запуск которых неограничен получением разрешения на запрос UAC.
Подробнее о создании учётных записей в среде Windows 10 читайте здесь.
Такой подход не решит всех проблем, которые порождает совместное использование технологий в доме, но как минимум снизит риск заражения компьютера вирусами. И в части случаев предотвратит сбой работы Windows. По всем вопросам запуска программ, требующих прав администратора, стандартному пользователю придётся обращаться к вам. И вы сможете контролировать действия того, кому доверили своё устройство.
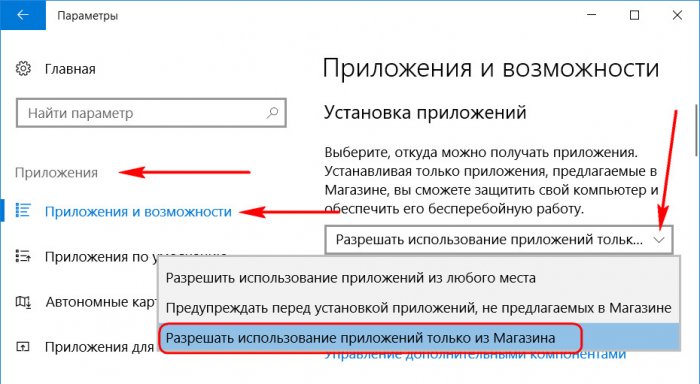
Права стандартного пользователя в актуальной версии Windows 10 (обновлённой до Creators Update) можно ещё больше ограничить, запретив установку в систему десктопного ПО. В учётной записи администратора открываем приложение «Параметры» и проходим в раздел «Приложения». В первой вкладке раздела нам нужна функция «Установка приложений». В её выпадающем перечне выбираем опцию, разрешающую установку на компьютер только универсальных приложений из магазина Windows Store.
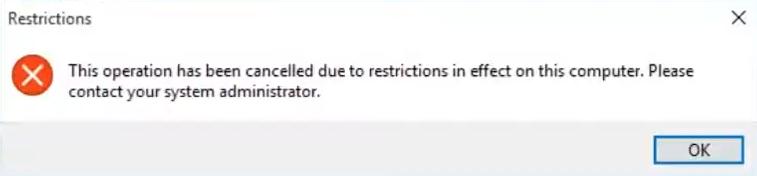
Для администратора это ограничение действовать не будет. А вот стандартный пользователь теперь не сможет установить в Windows ни одну десктопную программу. Как только он запустит инсталлятор, увидит такое вот сообщение.
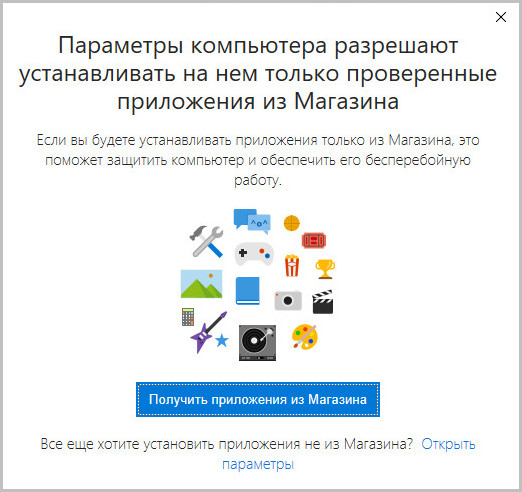
В плане исследования новинок ему придётся довольствоваться только выбором контента из Windows Store. Ну или искать портативные программы, не требующие разрешения UAC.
Свести совсем уж к минимуму возможности стандартного пользователя можно, ограничив его работу только с одним универсальным приложением. Редакция Windows 10 Pro предусматривает доступ к одному из приложений только из числа универсальных. А вот в редакциях системы Enterprise и Education в качестве единственного окна доступа учётной записи можно назначать браузер или десктопную программу. Такое ограничение настраивается в разделе управления учётными записями внутри приложения «Параметры».
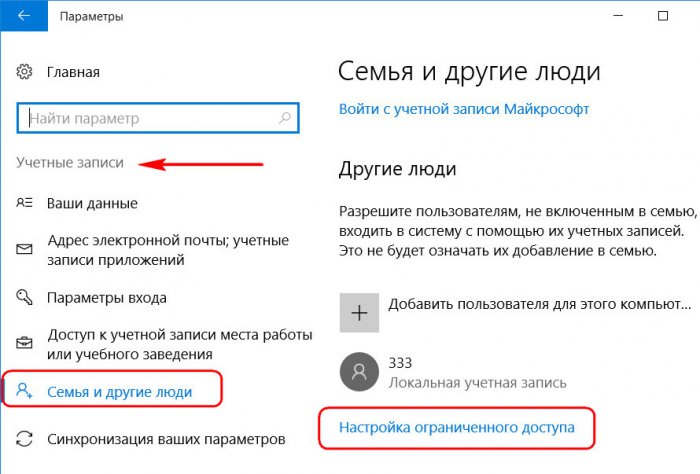
В настройках ограниченного доступа необходимо указать учётную запись стандартного пользователя и единственное доступное ему приложение.
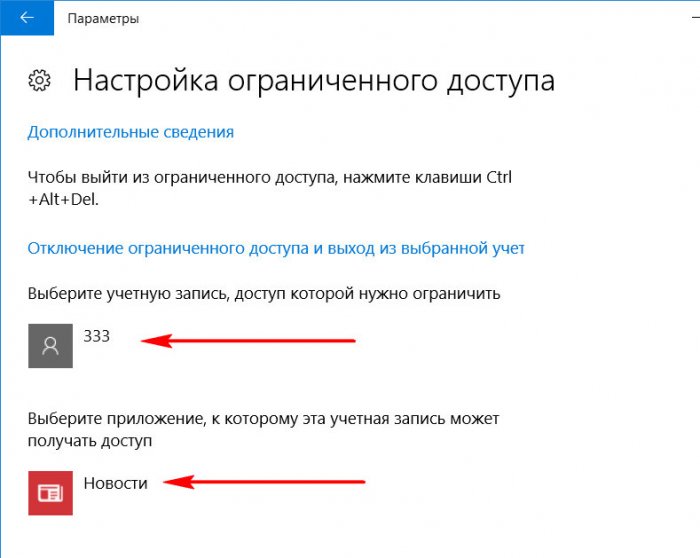
Выход из учётной записи, работающей в режиме ограничения, осуществляется клавишами Ctrl+Alt+Del.
Примечание: друзья, в предыдущих версиях Windows существовал ещё один тип учётной записи — «Гость». Microsoft её специально предусмотрела для случаев временной работы встречных-поперечных пользователей, которым владелец компьютера вынужден давать его на время попользоваться, чтобы не прослыть скупердяем. В версии системы 10 этот тип учётной записи упразднён, но при желании её всё же можно организовать. Как это делается, читайте в этой статье.
Более гибкие настройки ограничения использования Интернета может предложить ПО типа «Родительский контроль», в том числе и штатный функционал Windows 10, который будет рассмотрен ниже. Пока же такое ПО в системе не настроено, от случая к случаю ограничивать стандартных пользователей в работе с Интернетом можно за счёт отключения сетевой карты или Wi-Fi адаптера и правки файла hosts. Включение/отключение сетевых устройств и замена редакции файла hosts требуют наличия прав администратора. Следовательно, стандартному пользователю без пароля администраторской учётной записи эти ограничения никак не удастся обойти.
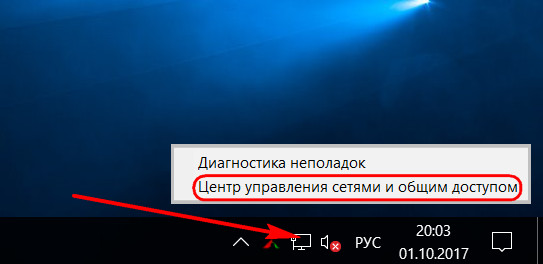
Чтобы полностью отключить Интернет на компьютере, на значке сети в системном трее вызываем контекстное меню и отправляемся раздел сетевых настроек системы.
Переключаемся на раздел «Изменение параметров адаптера» и с помощью контекстного меню отключаем активность сетевой карты или Wi-Fi.
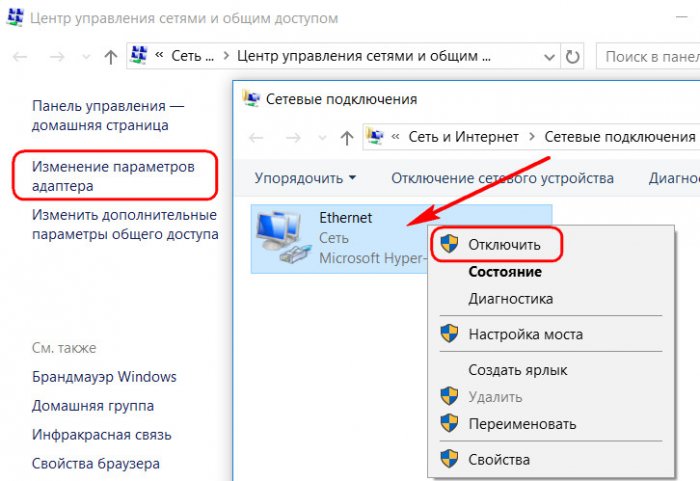
Включаем, соответственно, обратным способом.
Больше возможностей по отключению Интернета может предложить утилита Net Disabler. Она предлагает простой способ отключения сетевой карты или Wi-Fi адаптера, отключение Интернета путём изменения настроек DNS и создания правила в брандмауэре Windows.
Чтобы ограничить доступ только к отдельным интернет-сайтам, жмём клавиши Win+R, вводим:
%systemroot%\system32\drivers\etc

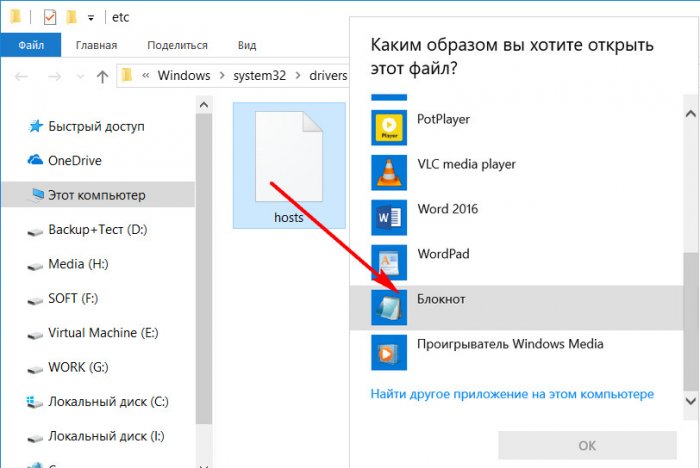
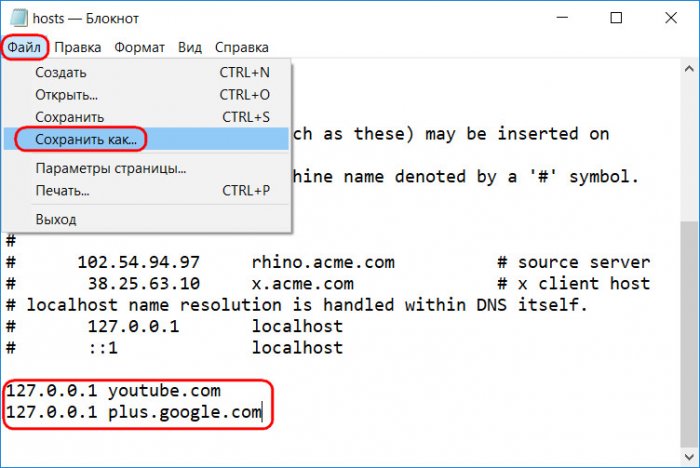
После нажатия «Ок» в системном проводнике обнаружим путь хранения файла hosts. Открываем его с помощью любого редактора TXT-файлов, например, штатного блокнота.
В самом низу файла вносим записи блокировки сайтов по типу:
Домен указывается через пробел после цифровых значений, как показано на скриншоте. После чего сохраняем файл как текстовый в любом месте компьютера.
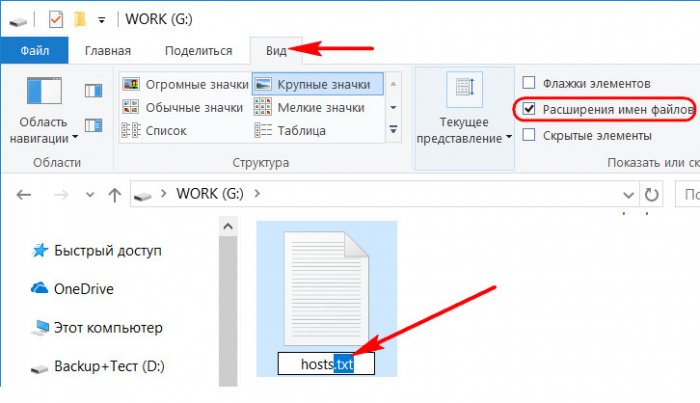
Включаем в проводнике отображение расширений файлов и переименовываем (клавиша F2) — убираем из имени «hosts.txt» расширение, то есть часть имени «.txt». Жмём Enter.
Теперь отправляемся по пути нахождения исходного файла hosts, удаляем его (или перемещаем куда-нибудь для хранения в качестве резервной копии), а на его место переносим только что отредактированный файл hosts с заблокированными сайтами. Для возврата настроек системы в исходное состояние либо возвращаем на место первую редакцию файла hosts, либо таким же образом правим текст существующей редакции и удаляем значения блокировки сайтов.
Примечание: друзья, работать с файлом hosts также можно с помощью сторонних программ, например, BlueLife Hosts Editor. Для частого использования они предлагают больше удобств.
Каждое ПО, реализуемое в среде Windows функцию родительского контроля, имеет свои особенности. Возможности такой функции в составе Windows 10 позволяют гибко устанавливать и снимать ограничения для детских учётных записей, причём ещё и удалённо по Интернету — из веб-интерфейса учётной записи Microsoft. Правда, без Интернета управлять этой функцией нельзя. Применение к учётной записи родительского контроля позволит гибко ограничивать пользователя в действиях:
- Разрешать или запрещать доступ к определённому перечню сайтов;
- Запрещать покупку приложений из Windows Store;
- Разрешать доступ к компьютеру по графику;
- Блокировать запуск отдельного ПО (причём как универсальных приложений, так и десктопных программ);
- Отслеживать действия пользователя и т.п.
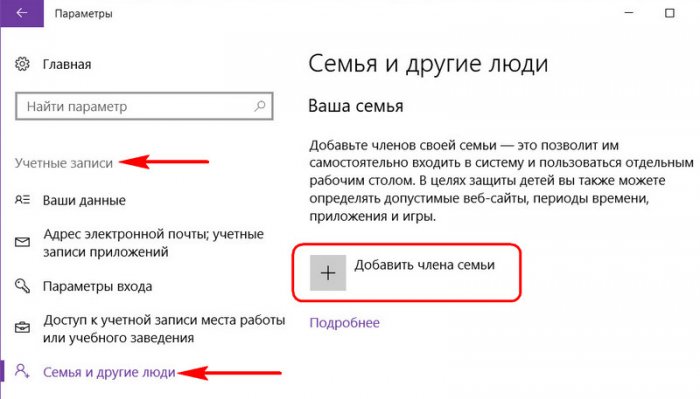
Для использования штатной функции родительского контроля и у родителя, и у ребёнка должны быть зарегистрированы учётные записи Microsoft. И, соответственно, с помощью последней должен быть выполнен вход в систему. В разделе управления семейными учётными записями добавляем нового члена семьи.
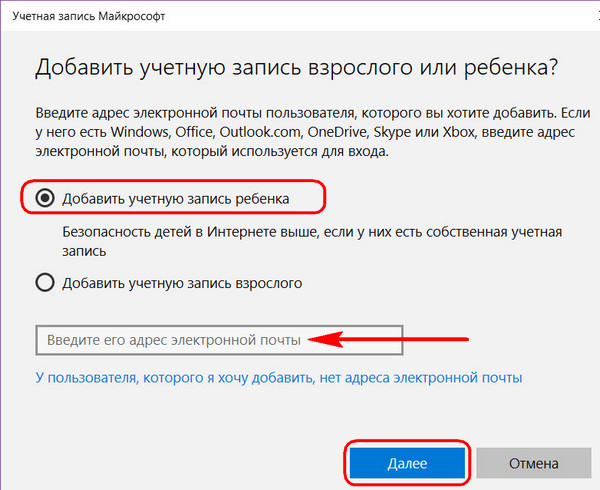
Указываем, что это ребёнок, вводим адрес электронной почты, к которой подвязана его учётная запись Microsoft.
Затем заходим в почтовый ящик ребёнка и по ссылке в письме от Microsoft подтверждаем его присоединение к семье. После этого в разделе «Семья» веб-интерфейса учётной записи Microsoft взрослого откроется доступ к настройкам родительского контроля ребёнка.
Locking certain applications on your PC is a good practice. It helps prevent unauthorized access to apps containing private data. In addition, locking apps like games helps with parental controls and productivity. This article will show you how to lock apps in Windows 10 and 11 with an app lock for PC.
- How to lock apps on Windows 10/11 PC
- A comparison of these app lockers for PC
Cisdem AppCrypt
The Best App Lock for Windows 10/11
- Lock individual apps with password
- Offer an option to automatically relock apps after a period of inactivity
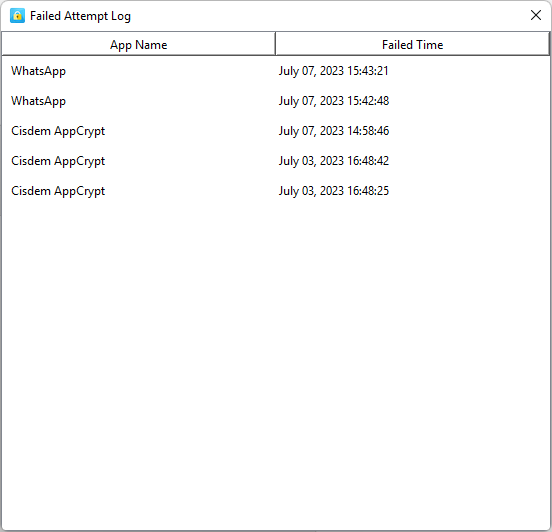
- Record failed attempts to open locked apps
- Also block websites on Chrome, Edge and more with password
- Let you block specific sites and pages, URLs with certain words, or all sites except a few
- Let you block all porn sites with 1 click
- Let you lock apps and block websites permanently or at scheduled times
- Easy to use
- Hard to bypass
- Help with privacy protection, productivity and parental controls
- Compatible with Windows 11, 10 or earlier
- Also available for Mac, Android and iPhone
How to lock apps in Windows 10, Windows 11
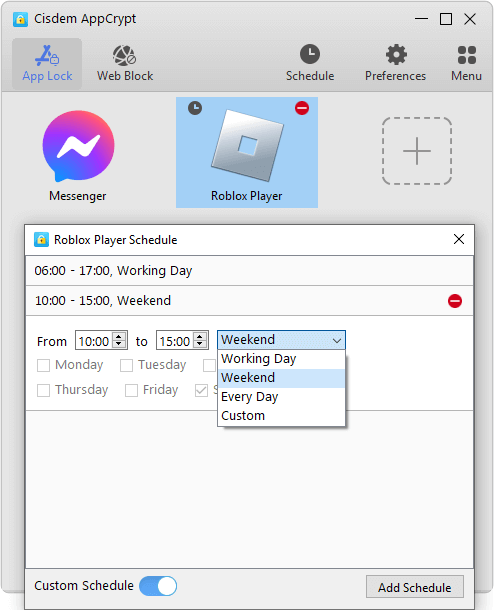
Method 1. Use Cisdem AppCrypt, the best app lock for PC
Cisdem AppCrypt is an easy-to-use app to effectively password lock apps on PC. It’s compatible with Windows 7 or later (64-bit only). This app lock is the best of its kind with high performance and ease of use. You can use it to password protect certain apps permanently or to prevent access to certain apps during certain times.
Below are the steps to lock apps in Windows using it.
1. Download and install AppCrypt.
Free Download Windows 11/10/8/7
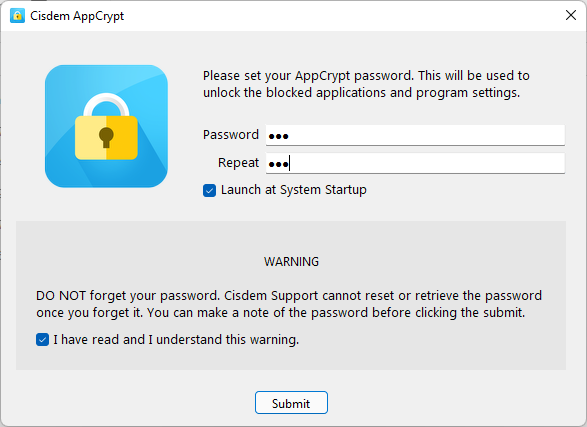
2. When you open it for the first time, set a password. (It is recommended to select the Start at System Startup checkbox so that the lock remains active even after restarting the computer.)
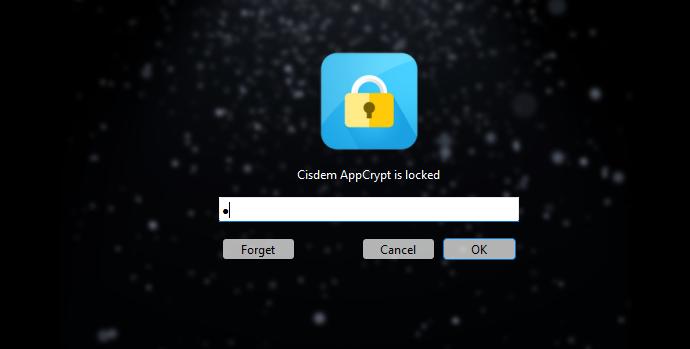
3. On the taskbar, click its icon. Alternatively, right-click the icon and choose Open Main Window.
4. Enter the password to access the main window.
5. Under the App Lock tab, add the apps that you want to lock. There are two situations.
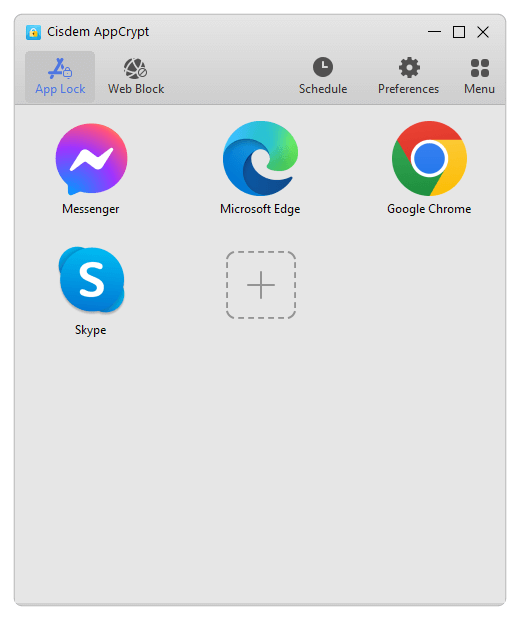
- If you installed this app using the installer you downloaded from its official website or elsewhere, it’s very likely that a desktop shortcut for this app was created during the installation. Simply drag the desktop shortcut of this app into the App Lock tab.
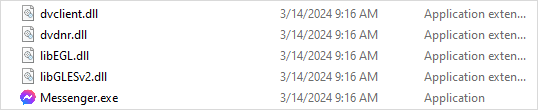
- If there’s no desktop shortcut icon, you can use the Plus button. Click it and find the app’s EXE file from File Explorer. Select it and click Open. Can not find the EXE file? Please see this detail this detail.
Now the apps are locked permanently as long as AppCrypt is running. (You can set AppCrypt to run automatically when your computer starts, and it requires the password to quit AppCrypt.) When one tries to open a locked app, one will be prompted to enter the password. If the password entered is correct, the app will be unlocked.
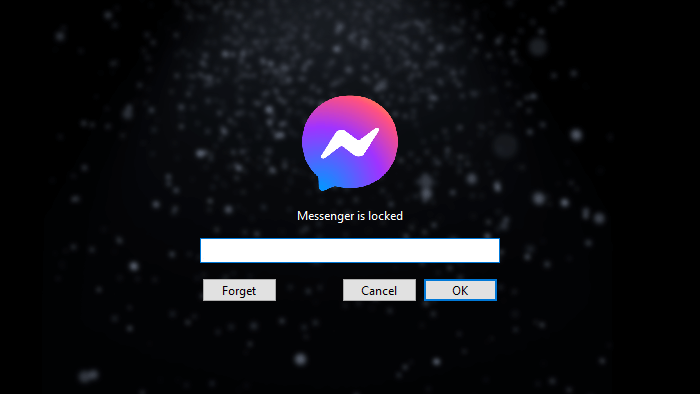
If the password entered is wrong, the app will stay locked. Also, the failed attempt will be recorded.
To remove the lock from an app, you need to go to the main window (which requires the password), select the app and press the Delete key.
Tip 1
This tip tells you how to find the .exe file in step 5.
- If you installed the app from the Microsoft Store, its EXE file is most likely stored in a folder called “WindowsApps”. Open File Explorer. Go to C:\Program Files\WindowsApps. Find the folder that contains «_x64__» in its name. Open this folder to find the EXE file. (If you can’t find the EXE file, try looking for it in the subfolders of the said folder. If you still can’t find it, try using the search feature in File Explorer.) Now, drag the EXE file into the App Lock tab.
- If the app is not installed from the Microsoft Store, its EXE file will be stored in other location. To locate it, click the Windows logo in the taskbar to open the Start menu. Search for the app. Then right click it from the result and select “Open file location”. A File Explorer window will open, showing up the app’s shortcut file. You can directly drag it to the App Lock tab. Alternatively, right-click on the shortcut and select “Open file location”. Then you can find the EXE file.
Tip 2
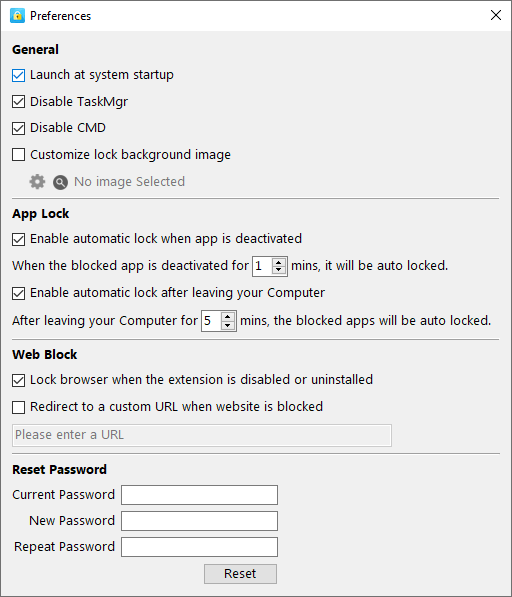
To make this app lock more effective, it’s highly recommended go to Preferences to turn on “Disable TaskMgr” and “Disable CMD”. Because some technical users know how to bypass the locking using these two tools in PC. Also, it’s a good idea to enable the automatic lock feature. Once enabled, this feature will automatically lock unlocked apps after they are inactive for an amount of time specified by you.
Tip 3
If you want to lock a certain app (like a game app) only at certain times, you can use the Schedule feature. Select the app in the App Lock tab. Click the clock icon and set a desired schedule.
Method 2. Use My Lockbox, a simple folder locker app to lock certain application folders
My Lockbox is not designed to put app lock but can definitely help with this purpose. It’s compatible with Windows 11 and Windows 10. There is a free version, which allows you to lock one app. To use it without limits, you need to pay.
Its Auto-lock feature is worth mentioning. It has 4 options. You can enable one or more options, depending on your needs.
Below are the steps.
1. Download and install My Lockbox.
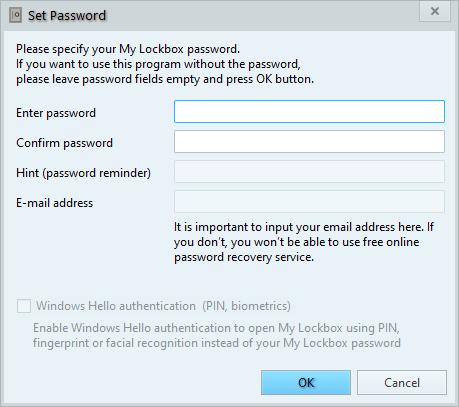
2. The first time you open it, you will be asked to set a password. Click OK.
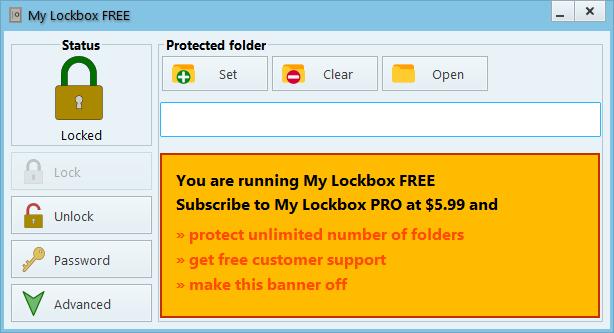
3. The My Lockbox Free main window will appear, reminding you to subscribe to the Pro version. You can ignore it. Then click the Set button.
4. To lock an app, select the folder where this app is installed.
Typically, you can find the folder in C:\Program Files or C:\Program Files (x86). If the app was installed from Microsoft Store, you will find it in C:\Program Files\WindowsApps.
5. Click OK.
Alternatively, you can use drag and drop in steps 3 and 4.
Now the app is locked and protected by a password. If one tries to open a protected app, one will see an error message. The app will remain locked even if you quit My Lockbox.
To unlock an app, you need to open My Lockbox with password. Click Open My Lockbox Control Panel. Click Unlock. By default, an unlocked app will remain accessible until you click Lock. It’s a good idea to turn on the Auto-lock feature. To completely remove the lock, just click Clear.
As you can see, this method doesn’t allow you directly lock an app itself. But it’s useful and easy to follow.
Method 3. Use ExeLock, a good app to password protect EXE files on Windows
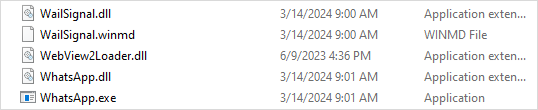
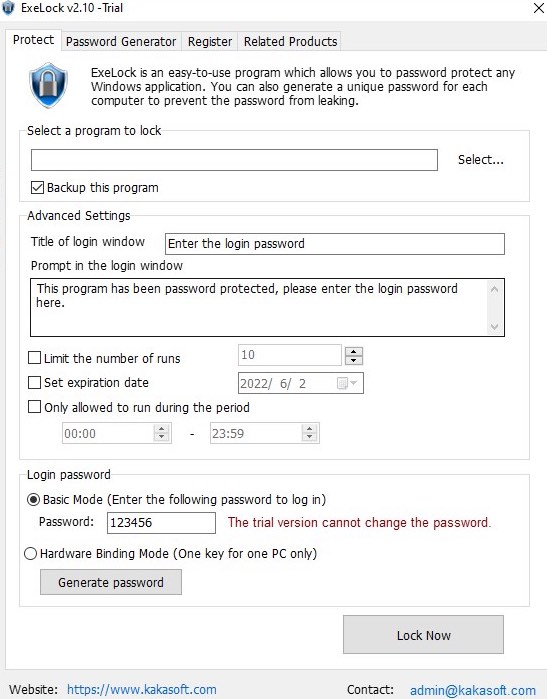
KakaSoft ExeLock can be an effective app lock for PC. It’s dedicated to locking the EXE file. For example, to lock the WhatsApp app, just lock WhatsApp.exe. ExeLock puts app lock by modifying the EXE file.
But there is a drawback. According to my experience, there isn’t a way to remove the lock from an app (or more precisely undo the modification to the EXE file). I also did some searches online but in vain. You can easily unlock an app by entering the password though.
Note: There is a free version, with which you can’t change the default password. The default password is 123456 and is very easy to guess. This means that the free version is almost useless. To effectively lock apps, one needs to get the paid version.
Below are the steps.
1. Download and install ExeLock. Open it.
2. You will be presented with the Protect tab. There, click Select.
3. Navigate to Program Files to select app that you want to protect and click Open.
For example, to lock WhatsApp, you need to select WhatsApp.exe.
In most cases, you can find the EXE file in Program Files. If you can’t find it, use File Explorer to search for it.
4. Change the default password to something more secure.
5. Click Lock Now.
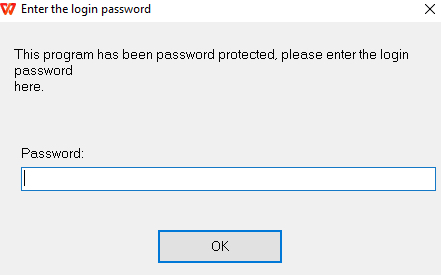
Now you will see a message telling you that the app is locked successfully. If you double-click the app, it won’t open, and an Enter the login password window will appear, allowing you to enter the password to unlock the app.
Method 4. Use Microsoft Family Safety, a built-in and free solution
If you’re a parent who wants to prevent children from accessing certain apps by locking the apps, you can try Microsoft Family Safety, which is free and included with most Windows PCs, including Windows 10 Home. If you can’t find this app on your computer, download it from the Microsoft Store.
Family Safety is a tool for parents to monitor and manage child’s online activities. It allows you to lock unwanted apps on child’s device. The disadvantage is it can only lock apps that have already been used on this account. In addition, it only works on non-administrator’s account.
Here are steps on how to lock apps in Windows 10 through Family Safety.
1. Go to Window 10 Start menu. Search for Family Safety.
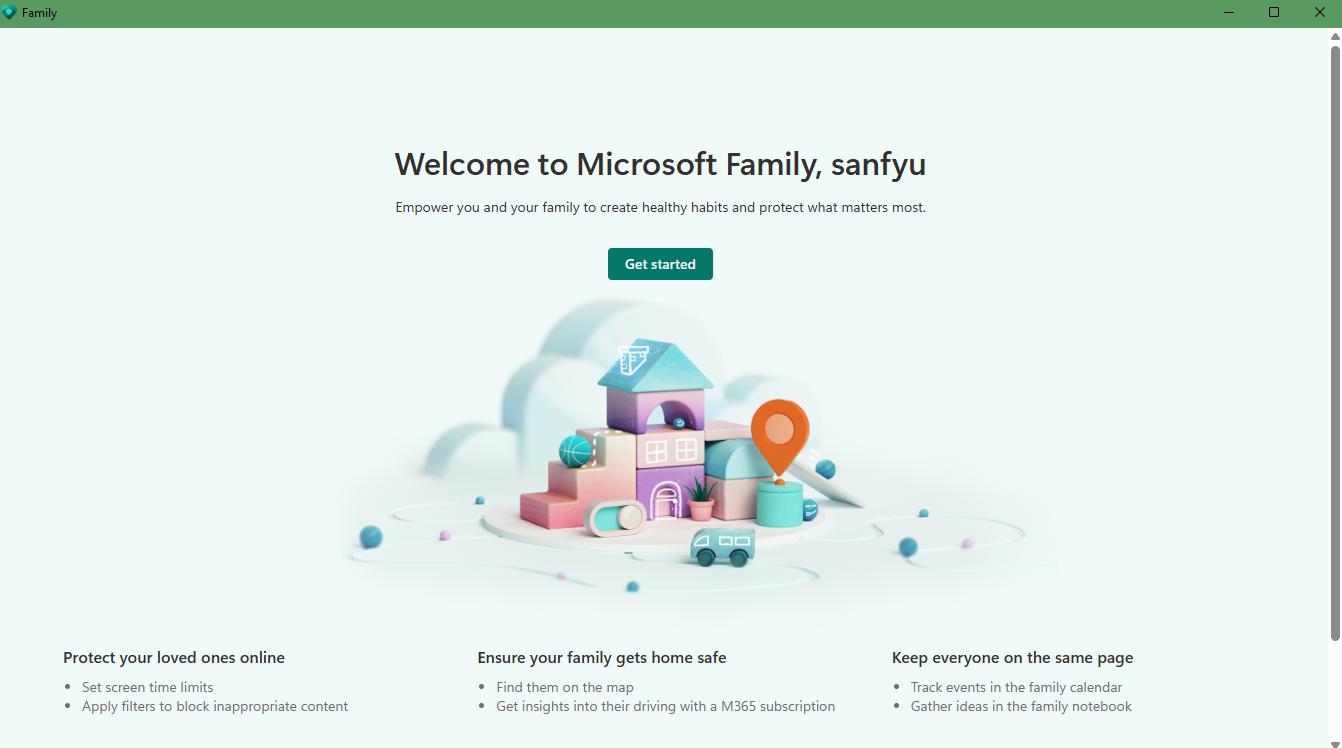
2. Open it. Click Get Started.
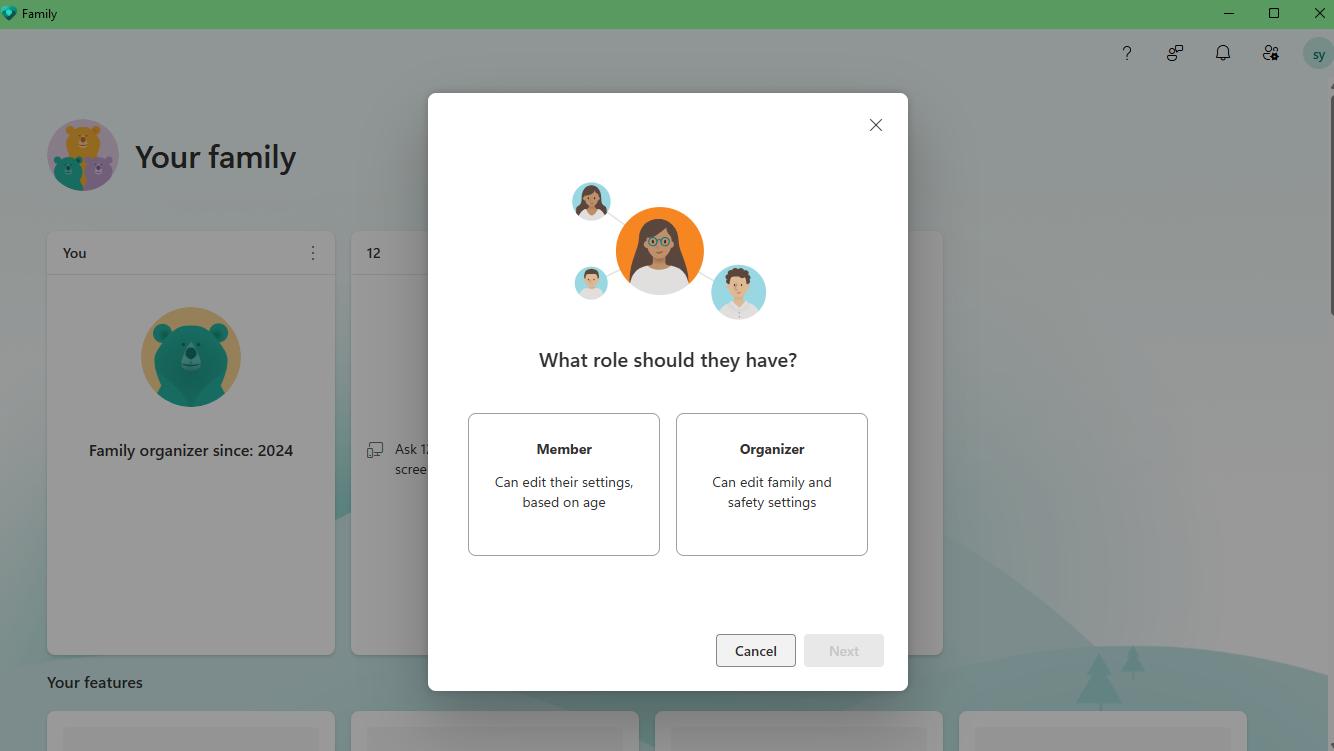
3. On the Family window. Click Add a family member > Member. Click Next.
4. Enter your child’s email address and some other information. If you child doesn’t have an email, create one for him and make sure he can only sign in his own account.
5. Back to the Family window, you’ll see your child’s account has been added. Click on his/her profile picture.
6. Then the parental controls page will pop up. Scroll down and tap on App and games under Screen Time.
7. Turn on the Time limits option and select the app you want to block. Use the slide under this app and set the daily limit to 0 min.
Method 5. Use Group Policy, a solution for Windows Pro, Enterprise, and Education editions
Group Policy is a free utility ships with Windows Pro, Enterprise and Education editions that allows you to configure group policy settings. As network administrator, you can define how you or other users can use this PC such as blocking specific app. Now let’s look at how to lock apps in Windows 11 Pro via Group Policy.
1. Press Windows + R on the keyboard. Enter gpedit.msc. Click OK.
2. Then the Local Group Policy Editor window will appear. Navigate to User Configuration > Administrative Templates > System.

3. Under Settings, find and double-click on Don’t run specific Windows applications.
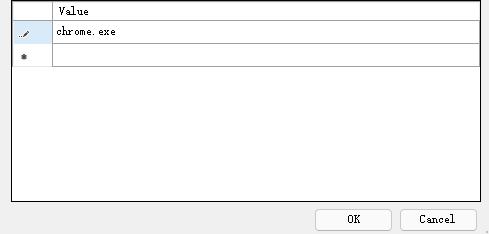
4. Select Enabled. Click the Show button next to List of disallowed applications.
5. Add the app you want to lock to the disallowed list. For example, to lock the Chrome app, enter chrome.exe.
6. Click OK. Then click Apply.
After above settings, the application will be disabled on your Windows computer.
A comparison of these app lockers for PC
Above are 5 app lockers for Windows 11, 10. After reading my detailed introduction, you may have already found the one that suits you best. If you’re still unsure, the comparison table below may help you:
Conclusion
This article talks about five ways on how to lock apps in Windows computers, using app lock for PC from third-party developers or using built-in solutions. Compared to the last two methods, the first three methods are easier and more widely applicable. Regardless of the app lock you use, it’s important to set a strong password so that the lock is harder to bypass.
Do you want to keep your apps secure by adding a passcode? If you have a Windows 10 device, putting a password on your apps is easy! This article shows you how to put a password on an app on Windows 10. We’ll go over the steps needed to set up a passcode and the benefits of doing so. You’ll also learn details on choosing a passcode that will be secure for your apps. With just a few minutes of time, you’ll be able to ensure that your apps are protected with a password. Your search for tips on how to put a password on an app for Windows 10 is over!
1. Protecting Your Apps with a Password on Windows 10
Protecting your applications on Windows 10 is important for ensuring safety and security. Thankfully, Windows 10 has a variety of security features to protect your apps. One of the most important layers of protection is setting a password for your apps.
It’s easy to set a secure password for your apps. Here’s how:
- Go to the Windows Start Menu and open Settings.
- Click on Accounts.
- Select Sign-in Options.
Next, set a secure password that is unique and hard to guess. Here are some tips:
- Include upper and lowercase letters, as well as numbers
- Avoid using your name, birth date, or other predictable information
- Don’t use commonly used passwords like ‘12345’ or ‘password’
Finally, you’ll also want to remember or write down your password as a backup.
2. Learn How to Lock Down Your Apps for Security
Protecting Your Apps with Advanced Security Settings
Every app may come with a different level of security pre-installed, so it’s important to learn the security options and lock down your apps’ settings. Adjusting the privacy settings for each app individually can help you better manage and protect your personal data. Here are some effective ways to secure your apps:
- Always log out from your apps once you’re done using them. Use two-factor authentication, so if someone else attempts to log into your apps, they will need a code from an approved device.
- Be aware of the sites and platforms that offer in-app purchases and set up a strong password that’s hard to guess. Consider using a multi-layered password for added protection.
- Check your app settings to see if an option to limit or restrict location tracking is available. Disable this feature if you don’t wish to share your current location.
It’s also important to get familiar with the data your apps collect and how it is used. See if the app provides an option to opt out of data collection or re-consent to avoid any unwanted activity. Furthermore, make sure to check if the app’s developer has appropriate privacy and data storage procedures in place. Setting up the best security for app authentication, tracking, and data collection will help to secure your data and make your online experience safer.
3. A Step by step-by-step guide to Password Protecting Apps on Windows 10
Anybody who relies on their computer for their livelihood must take steps to stay safe. Password protection should be the first line of defense for Windows 10 users. Let’s take a look at what is needed to secure an application with a password. Here’s a step-by-step guide to password-protecting apps on Windows 10.
- Start by opening ‘Task Manager’
- Open ‘Task Manager’ by right-clicking the taskbar and selecting ‘Start Task Manager.’
- Select the app you want to protect and click ‘End Task’ at the bottom right of the window.
- Now you can select ‘Advanced Options’ at the top of the window.
When the ‘Advanced Options’ window opens, enter a password and click on ‘OK’. The password you have entered will now be used for that particular app every time you launch it. You can also choose to add a hint, which will be displayed if you forget the password. The app will now be password protected and you can use it as normal.

4. Keep Your Private Information Secure with Password Protection for Windows 10 Apps
Windows 10 is a robust operating system packed with powerful security features. Among them, the ability to protect Windows 10 apps with password protection is invaluable. With this feature, you can ensure that nobody else can access your important data, preventing the risk of unauthorized intrusions.
Here are the steps to password-protect any Windows 10 app:
- Open Windows Settings > Accounts > Sign-in options – This will open the security settings page for your account. Make sure that the “Require sign-in” option is checked.
- Enable Password Protection for your apps – Scroll down to the “Password Settings” section and check the box for “Require sign-in when an app is not in use”. This will prompt you to type a secure, unique password.
- Choose the apps you want to Password Protect – In the “App Passwords” section, select the apps you want to password-protect. Then you will be prompted to enter a unique, secure password for each selected app.
By following these simple steps, you can further secure your Windows 10 apps from unauthorized access. Protecting your data with password protection is an invaluable security measure and should be done on all-important apps.
In Windows 10, users have the option to put a password on their apps to add an extra layer of security. This can be particularly useful for restricting access to certain applications, especially in shared or family devices. To set a password for an app, users can follow a few simple steps. First, they need to navigate to the app settings or control panel and locate the option for app locking or password protection. From there, users can choose a strong password that includes a mix of uppercase and lowercase letters, numbers, and special characters. It is important to select a password that is secure and not easily guessed by unauthorized users. Additionally, users can set up a password hint to help them remember their password if they forget it. Some built-in features in Windows 10, such as the App Locker service, can also help in securing apps with a password. For more advanced security measures, users can explore third-party software options like Smart-X AppLocker software. By taking these steps, users can ensure that their apps are protected and their data remains secure. Sources: techarival.com
Password Protection Methods
| Password Protection Method | Description |
|---|---|
| Strong Password | Creating a password with a mix of uppercase letters, lowercase letters, numbers, and symbols. |
| App Locking | Using software to lock specific applications on a device with a password. |
| Parental Controls | Setting up restrictions on a device to control access for children or other users. |
| Password Manager | Software that securely stores and manages passwords for various accounts. |
| Software Restriction Policy | Enforcing restrictions on software installation and execution to prevent malicious activity. |
| Multi-Layered Password | Using multiple layers of passwords for added security. |
| Privacy Settings | Configuring settings to protect privacy and data on a device or application. |
| Extension Control | Managing browser extensions to ensure secure browsing and prevent malware. |
Q&A
Q: How do I put a password on an app in Windows 10?
A: To create a password on an app in Windows 10, you will need to open the app, select ‘Settings’, and look for the ‘Security’ or ‘Privacy’ section. In the Security/Privacy section, you should see an option to ‘add password’ or something similar. Select this and follow the on-screen prompts to create a secure password for the app.
Q: How can I put a password on an app in Windows 10?
A: To put a password on an app in Windows 10, you can use the built-in feature of the operating system called AppLocker. AppLocker allows you to restrict access to certain applications by setting up rules and policies. Here are the steps to put a password on an app in Windows 10 using AppLocker:
1. Go to the Control Panel and click on “System and Security.”
2. Under “Security,” click on “Allow an app through Windows Firewall.”
3. Click on “Change Settings” and then “Allow another app.”
4. Browse to the location of the app you want to password-protect and select it.
5. Choose the “Private” or “Public” network for which you want to apply for password protection.
6. Click “Add” to save the changes.
By following these steps, you can secure your apps on Windows 10 with a password.
Sources: Microsoft Support: Configure AppLocker Policies, Rohit Bagchi’s article on AppLockers for Windows 10
Conclusion
Locking your apps with secure passwords is a simple yet effective way to secure your data. The most efficient and cost-effective way to create and manage your passwords in Windows 10 is to sign up for a free LogMeOnce account. It provides a high level of encryption and its password manager features are comprehensive yet easy to use, ensuring you get the best password protection. Moreover, you can securely protect your app passwords and ensure all your data is protected with one encrypted password. So secure your data now by using secure passwords and creating a FREE LogMeOnce account for putting passwords on apps in Windows 10.
Reference: How To Put A Password On An App Windows 10?
Gloria’s background in electrical and electronics engineering provides her with a deep understanding of the technical aspects of her projects. This technical acumen, coupled with her skills in financial analysis and business intelligence, allows her to approach projects with a unique perspective, balancing technical feasibility with financial viability. Gloria’s writing is not just informative but also engaging, making complex subjects accessible and understandable.
Встроенные возможности операционной системы не предусматривают возможности установки пароля на приложение, поэтому для этого придется воспользоваться сторонними программами.
Способ 1: Game Protector
Одним из наиболее простых и действенных решений является программа Game Protector. Несмотря на название, оно предназначено для исполняемых файлов, поэтому подойдет и для приложений в Windows 10. Помимо установки пароля на софт, она предусматривает несколько дополнительных опций и при этом распространяется бесплатно.
Скачать Game Protector с официального сайта
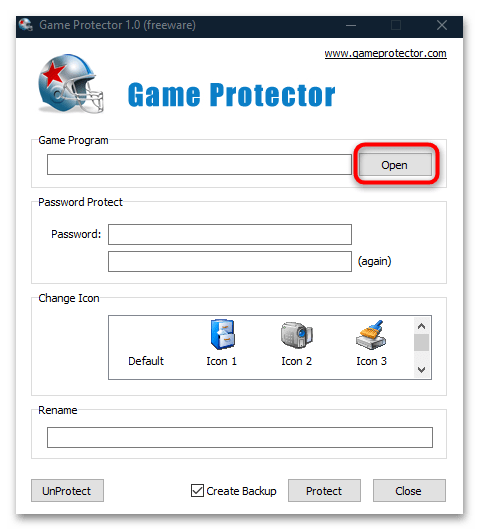
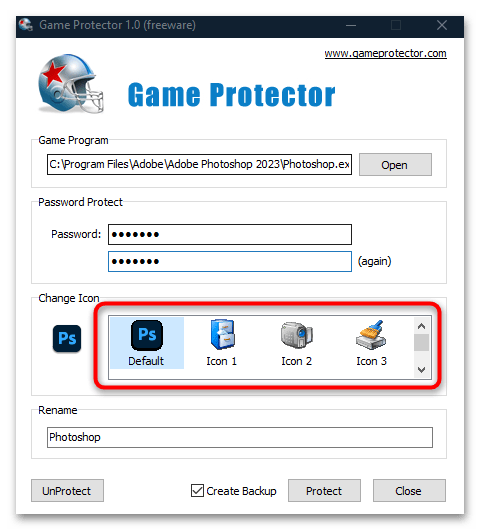
- Скачайте и установите Game Protector, следуя подсказкам пошагового мастера. После запуска отобразится интерфейс, где нужно нажать на кнопку «Open».
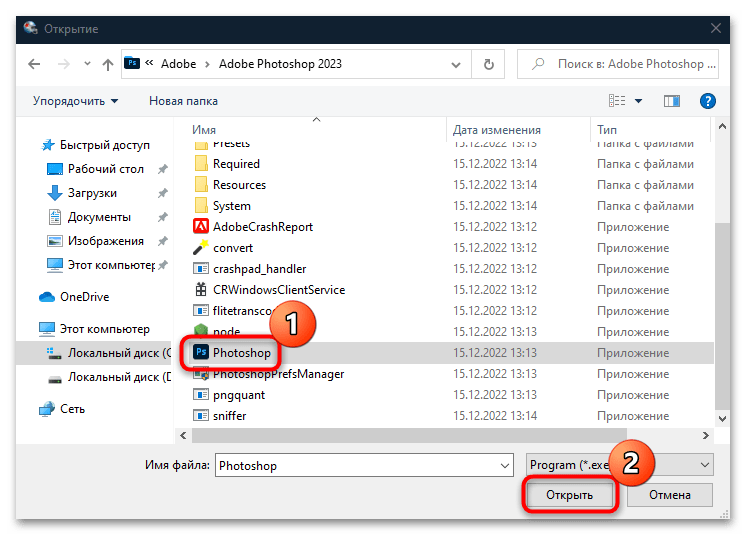
- Укажите путь к ярлыку или исполняемому файлу приложения в окне отобразившегося системного «Проводника», затем нажмите на кнопку «Открыть».
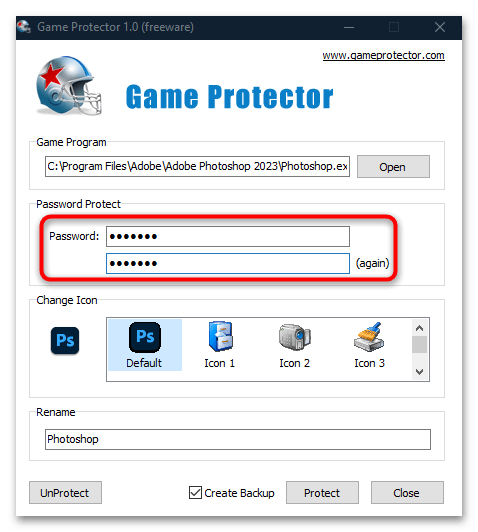
- Далее нужно установить непосредственно сам пароль. Напишите его в строке «Password», затем в поле ниже снова введите его, чтобы подтвердить.
- В поле «Change Icon» доступна возможность сменить иконку приложения на одну из предложенных.
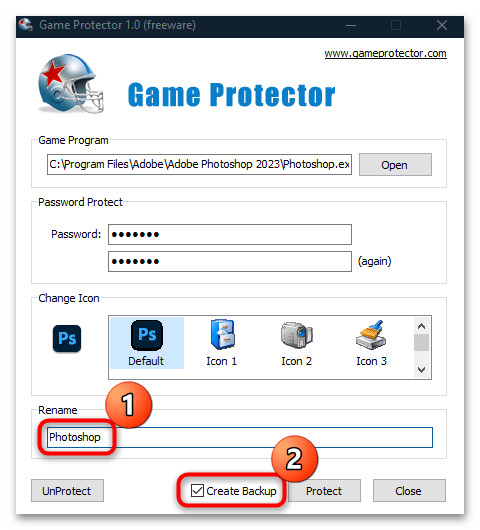
- Также можно переименовать исполняемый файл, прописав имя в строке «Rename». Если вы потеряете пароль, то EXE-файл можно будет вернуть в исходное состояние, если поставь галочку у пункта «Create Backup».
- Нажмите на кнопку «Protect» внизу, чтобы установить пароль на приложение.
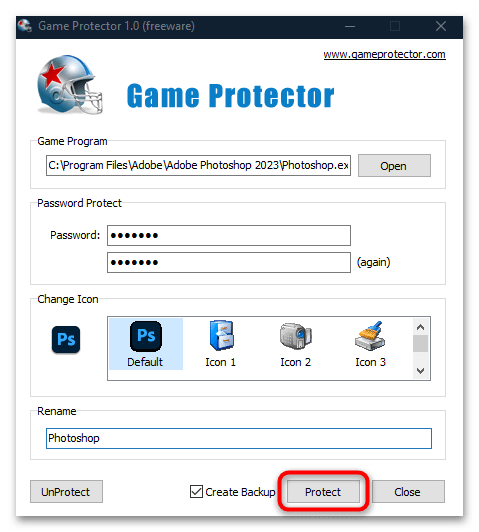
Отобразится окошко, где появится уведомление о том, что установка пароля прошла успешно. В случае если была создана резервная копия, вы увидите путь, где он сохранен. В результате после попытки запуска запароленного приложения появится окно с требованием ввести комбинацию символов. При неправильном вводе использовать софт не получится.
Чтобы снять пароль, через Game Protector выберите приложение, введите пароль к нему, затем нажмите на кнопку «UnProtect».
Способ 2: PELock
Платный, но довольно эффективный вариант – это инструмент PELock, который предусматривает большое количество возможностей для защиты файлов и папок. На официальном сайте разработчика есть возможность скачать пробную версию софта, чтобы ознакомиться со всеми его функциями. Он предусматривает и установку пароля на исполняемые файлы приложений.
Скачать PELock с официального сайта
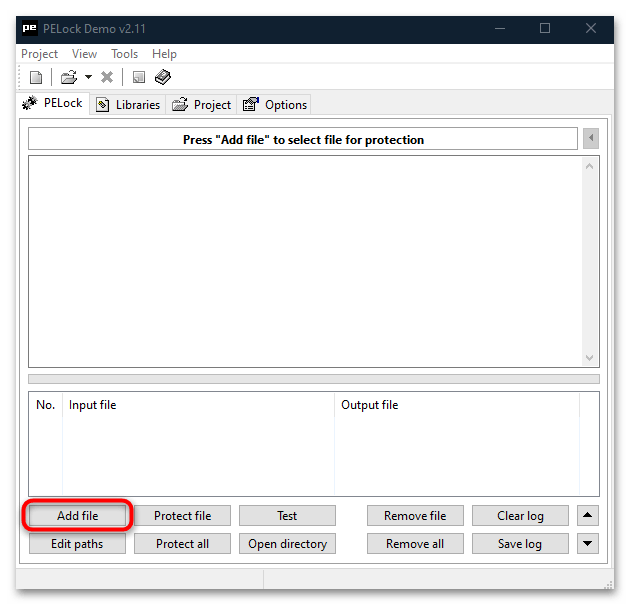
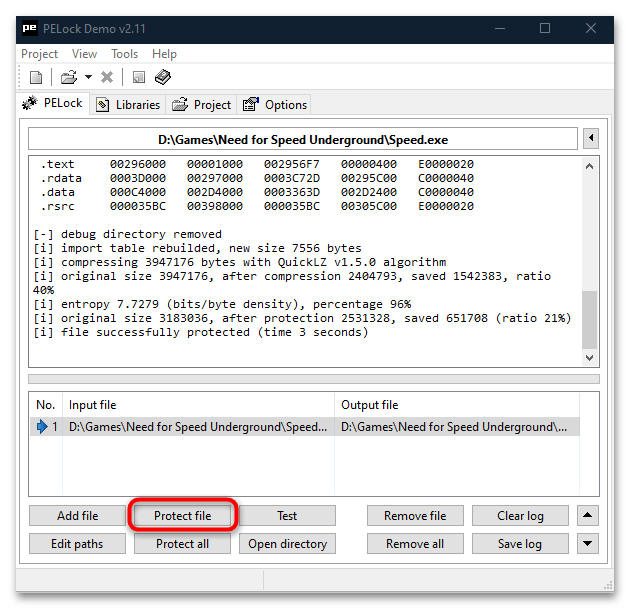
- После инсталляции запустите программу и в главном окне щелкните по кнопке «Add file».
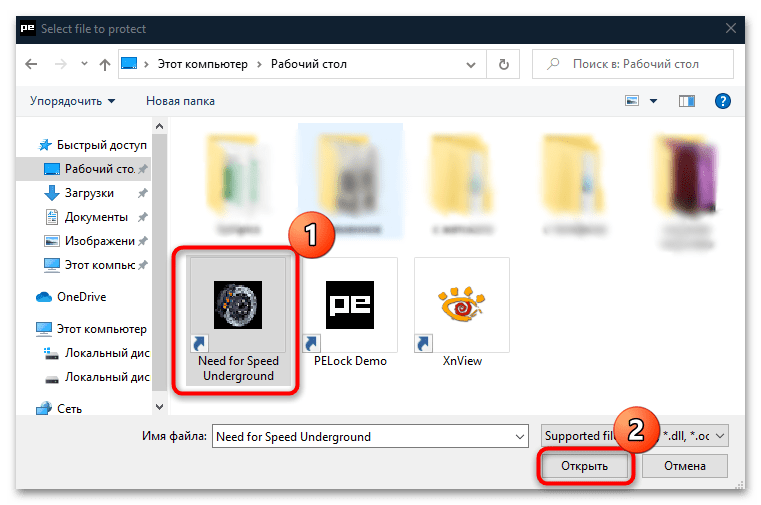
- Запустится системный «Проводник», где нужно указать путь к элементу, на который желаете установить пароль. Для подтверждения не забудьте кликнуть по кнопке «Открыть».
- Перейдите на вкладку «Options». В новом окне на панели слева разверните папку «Protection» и выберите «Password», в центральной части отметьте пункт «Password protection», а ниже введите пароль.
- Чтобы установить защиту, нажмите на кнопку «Protect file».

На этом установка защиты завершена. После попытки запуска приложения отобразится окно с требованием ввести пароль, иначе открыть его не удастся.
Способ 3: My LockBox
В качестве альтернативы можно воспользоваться решением под названием My LockBox, но его отличие от предыдущих в том, что устанавливается блокировка, а не пароль, и причем не на исполняемый файл, а на всю папку, где хранятся файлы программы. Другими словами, попытка запуска приложения из каталога блокируется. Если вам подходит такой вариант, переходите к инструкции ниже.
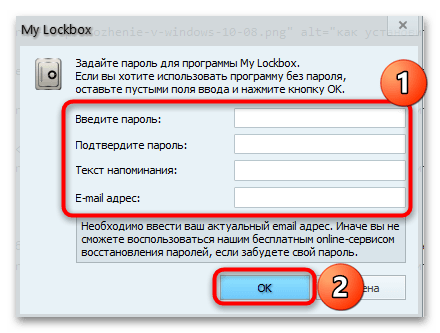
- Установите софт. На первом этапе после запуска рекомендуется ввести пароль, подсказку и адрес действующей электронной почты, которые помогут восстановить доступ, если вы забудете секретный код.
- В следующем окне под полем «Защищаемая папка» кликните по кнопке «Выбрать», чтобы указать путь к каталогу, на который нужно установить пароль. После выбора щелкните по «ОК» внизу.

После этого при попытке запуска заблокированного файла отобразится системное окно с уведомлением об ошибке.
В бесплатной версии программы можно добавлять только одну папку в список защищенных. Но предлагаем небольшой совет, помогающий обойти такое ограничение: добавьте все приложения, запуск которых нужно заблокировать, в один каталог, затем установите на него защиту через My LockBox.
Ограничить доступ к приложениям и играм можно и с помощью встроенной функции Windows 10 – «Родительский контроль». Она не предусматривает шифрование программы, но позволяет задать время, доступное для использования, а также установить блокировку на тот или иной софт. Более подробная информация есть в нашем отдельном материале.
Подробнее: Особенности «Родительского контроля» в Windows 10
Наша группа в TelegramПолезные советы и помощь