
Context
I have Windows 11 installed in the internal SSD of a Lenovo Yoga 710 laptop and Ubuntu is installed on an external USB SSD.
Lenovo UEFIs are known by having lots of bugs and vulnerabilities. One of the bugs is that Lenovo’s UEFI won’t boot from USB drives even when it is configured in the Firmware.
That creates a scenario in which every time I wanted to boot Linux from USB I had to boot into windows, reboot into advanced boot mode, select Ubuntu, and reboot again. These are too many steps for a simple task!
So, I decided to replace Windows Bootloader with GRUB2 to be able to select USB boot or Windows boot directly when computer boots.
Next you have the steps I did to replace the Windows bootloader with Grub2 in the internal SSD.
Steps
Note: These steps have been tested in Ubuntu 22.04.1 LTS.
Windows installs the bootloader in a special partition that contains the EFI system. To locate it execute execute fdisk -l /dev/xxxx where xxxxx is the hard drive that contains Windows bootloader.
In this example Windows bootloader is in disk ‘/dev/sda’:
root@ubuntu-builder:~# fdisk -l /dev/sda
Disk /dev/sda: 465,76 GiB, 500107862016 bytes, 976773168 sectors
Disk model: Samsung SSD 860
Units: sectors of 1 * 512 = 512 bytes
Sector size (logical/physical): 512 bytes / 512 bytes
I/O size (minimum/optimal): 512 bytes / 512 bytes
Disklabel type: gpt
Disk identifier: 2E3258621-234G-4452-9851-5AGY98O8C0P8

Device         Start       End   Sectors  Size Type
/dev/sda1       2048   1085439   1083392  529M Windows recovery environment
/dev/sda2    1085440   1288191    202752   99M EFI System
/dev/sda3    1288192   1320959     32768   16M Microsoft reserved
/dev/sda4    1320960 877888002 876567043  418G Microsoft basic data
/dev/sda5  975566848 976771071   1204224  588M Windows recovery environment
Output shows that EFI System partition is /dev/sda2
Now let’s check if EFI partition is mounted with the command mount -l | grep /dev/yyyyy where yyyyy is EFI System partition
Example:
root@ubuntu-builder:~# mount -l | grep sda2
root@ubuntu-builder:~#
If the output of the command does not show anything it means that partition is not mounted. Create a folder and mount it.
Example:
root@ubuntu-builder:~# mkdir /mnt/efi
root@ubuntu-builder:~# mount /dev/sda2 /mnt/efi
And check it again:
root@ubuntu-builder:~# mount -l | grep sda2
/dev/sda2 on /mnt/efi type vfat (rw,relatime,fmask=0022,dmask=0022,codepage=437,iocharset=iso8859-1,shortname=mixed,errors=remount-ro)
Add the line GRUB_DISABLE_OS_PROBER=false at the end of the file /etc/default/grub. You can edit the file with any text editor like nano /etc/default/grub or vi /etc/default/grub
Example:
# If you change this file, run 'update-grub' afterwards to update
# /boot/grub/grub.cfg.
# For full documentation of the options in this file, see:
#   info -f grub -n 'Simple configuration'

GRUB_DEFAULT=0
GRUB_TIMEOUT_STYLE=hidden
GRUB_TIMEOUT=0
GRUB_DISTRIBUTOR=`lsb_release -i -s 2> /dev/null || echo Debian`
GRUB_CMDLINE_LINUX_DEFAULT="quiet splash"
GRUB_CMDLINE_LINUX=""

# To add an entry for Windows 11 using os-prober
GRUB_DISABLE_OS_PROBER=false
Now execute the command os-prober. It will detect the Windows Bootloader and prepare the configuration file for GRUB2:
root@ubuntu-builder:~# os-prober
/dev/sda2@/EFI/Microsoft/Boot/bootmgfw.efi:Windows Boot Manager:Windows:efi
Create a backup of EFI System partition with dd command: dd if=/dev/sda2 of=./efi_backup.image
Example:
root@ubuntu-builder:~# dd if=/dev/sda2 of=./efi_backup.image
202752+0 records in
202752+0 records out
103809024 bytes (104 MB, 99 MiB) copied, 0,438207 s, 237 MB/s
It’s a good idea to copy the file efi_backup.image to a pendrive to be able to restore the partition easily. See ‘Rollback’ section at the end of this page for details.
Install GRUB2 to EFI System partition with grub-install --target=x86_64-efi --efi-directory=/mnt/efi /dev/yyyyy
Example:
root@ubuntu-builder:/mnt/efi# grub-install --target=x86_64-efi --efi-directory=/mnt/efi /dev/sda2
Installing for x86_64-efi platform.
Installation finished. No error reported.
Execute grub-mkconfig -o /mnt/efi/EFI/ubuntu/grub.cfg to create GRUB2 boot menu:
Example:
root@ubuntu-builder:/mnt/efi/EFI/ubuntu# grub-mkconfig -o /mnt/efi/EFI/ubuntu/grub.cfg
Sourcing file `/etc/default/grub'
Sourcing file `/etc/default/grub.d/init-select.cfg'
Generating grub configuration file ...
Found linux image: /boot/vmlinuz-5.15.0-43-generic
Found initrd image: /boot/initrd.img-5.15.0-43-generic
Found linux image: /boot/vmlinuz-5.15.0-30-generic
Found initrd image: /boot/initrd.img-5.15.0-30-generic
Memtest86+ needs a 16-bit boot, that is not available on EFI, exiting
Warning: os-prober will be executed to detect other bootable partitions.
Its output will be used to detect bootable binaries on them and create new boot entries.
Found Windows Boot Manager on /dev/sda2@/EFI/Microsoft/Boot/bootmgfw.efi
Adding boot menu entry for UEFI Firmware Settings ...
done
Reboot you computer and it will show the GRUB2 boot menu. In case it didn’t, do a rollback as explained next.
Rollback
Boot the computer with an Ubuntu Live USB.
Insert the pendrive with the file efi_backup.image that you created in backup step, mount it, and go to the directory where file is stored.
Next execute the command to restore the EFI Partition with the backup dd if=./efi_backup.image of=/dev/yyyyy
Example:
root@ubuntu-builder:~# dd if=./efi_backup.image of=/dev/sda2
202752+0 records in
202752+0 records out
103809024 bytes (104 MB, 99 MiB) copied, 1,52248 s, 68,2 MB/s
Reboot you computer and it will use again the Windows bootloader.
-
Home
-
News
- 2 Ways to Replace GRUB with Windows Boot Manager
By Amy | Follow |
Last Updated
If you are going to replace GRUB with Windows Boot Manager, this post is what you need is it offers you a full tutorial. It collects 2 available methods. Explore the content with MiniTool Partition Wizard now!
Why Do You Need to Replace GRUB With Windows Boot Manager
GRUB is often set as the bootloader when you dual-boot a Linux distro with Windows. This can ensure that there’re no conflicts between the two operating systems in the load-up process. Though GRUB is a versatile and easy-to-use bootloader, you may still want to set Windows Boot Manager as the default because of errors like GRUB not showing in dual boot setup or something else.
Here comes the question: how to switch from GRUB to Windows Boot Manager. Well, you don’t have to worry about it. This post would illustrate the whole process for you.
Further reading:
Windows Boot Manager (BOOTMGR) is a small piece of software that is loaded from the volume boot code. It enables you to boot operating systems including Windows Vista/7/8/10. However, it can prompt you with various errors.
For instance, you will receive errors like BOOTMGR is missing, Boot Manager failed to find OS loader, BOOTMGR is compressed, etc. If you are bothered by issues like that, try using MiniTool Partition Wizard to fix them.
MiniTool Partition Wizard DemoClick to Download100%Clean & Safe
This free partition manager enables you to rebuild MBR, set the partition as active, check the hard drive for errors, copy disks, and perform other operations that are related to partitions or disks.
How to Replace GRUB With Windows Boot Manager
There are 2 methods to switch from GRUB to Windows Boot Manager for you.
Method 1: Change the Boot Priority Order
A simple way to switch from GRUB to Windows Boot Manager is to change the boot priority order in the UEFI settings of the motherboard. The following steps will show you how to do that in detail.
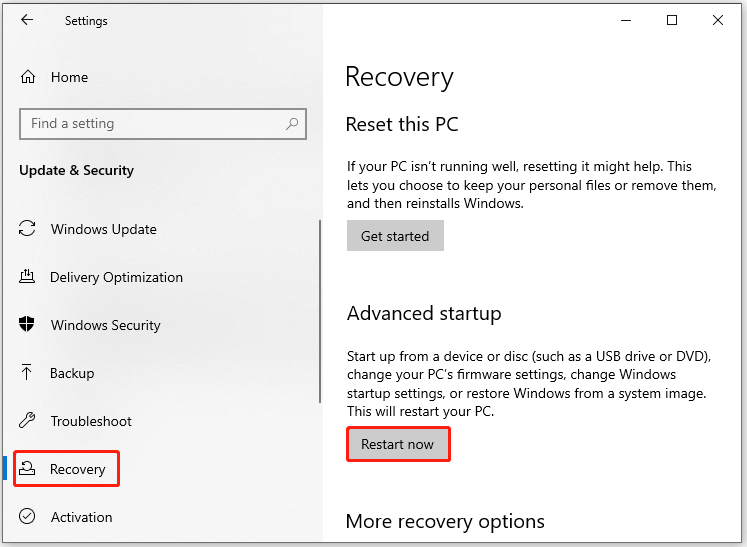
Step 1: Open Settings by pressing Windows and I keys.
Step 2: Then click Update & Security > Recovery > Restart now (under the Advanced startup section).
Step 3: Click on Troubleshoot > Advanced options > UEFI Firmware Settings and tap Restart.
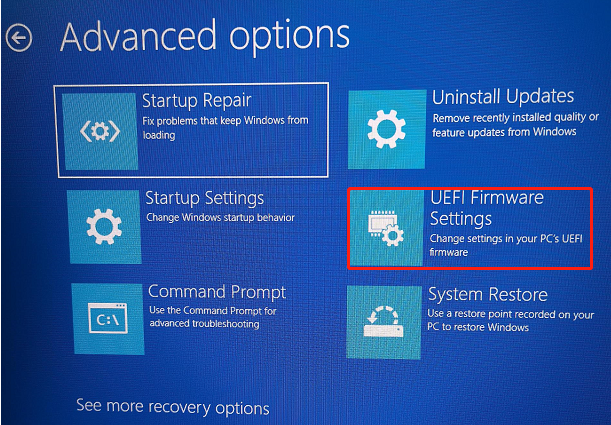
Step 4: After the computer restarts, it will enter the UEFI/BIOS setup utility.
Step 5: Navigate to the Boot section and set Windows Boot Manager as the first boot. To do that, click on Windows Boot Manager and keep pressing the “+” key until the option is placed at the first order.
Step 6: Then press F10 and Enter keys to confirm the change and exit the utility.
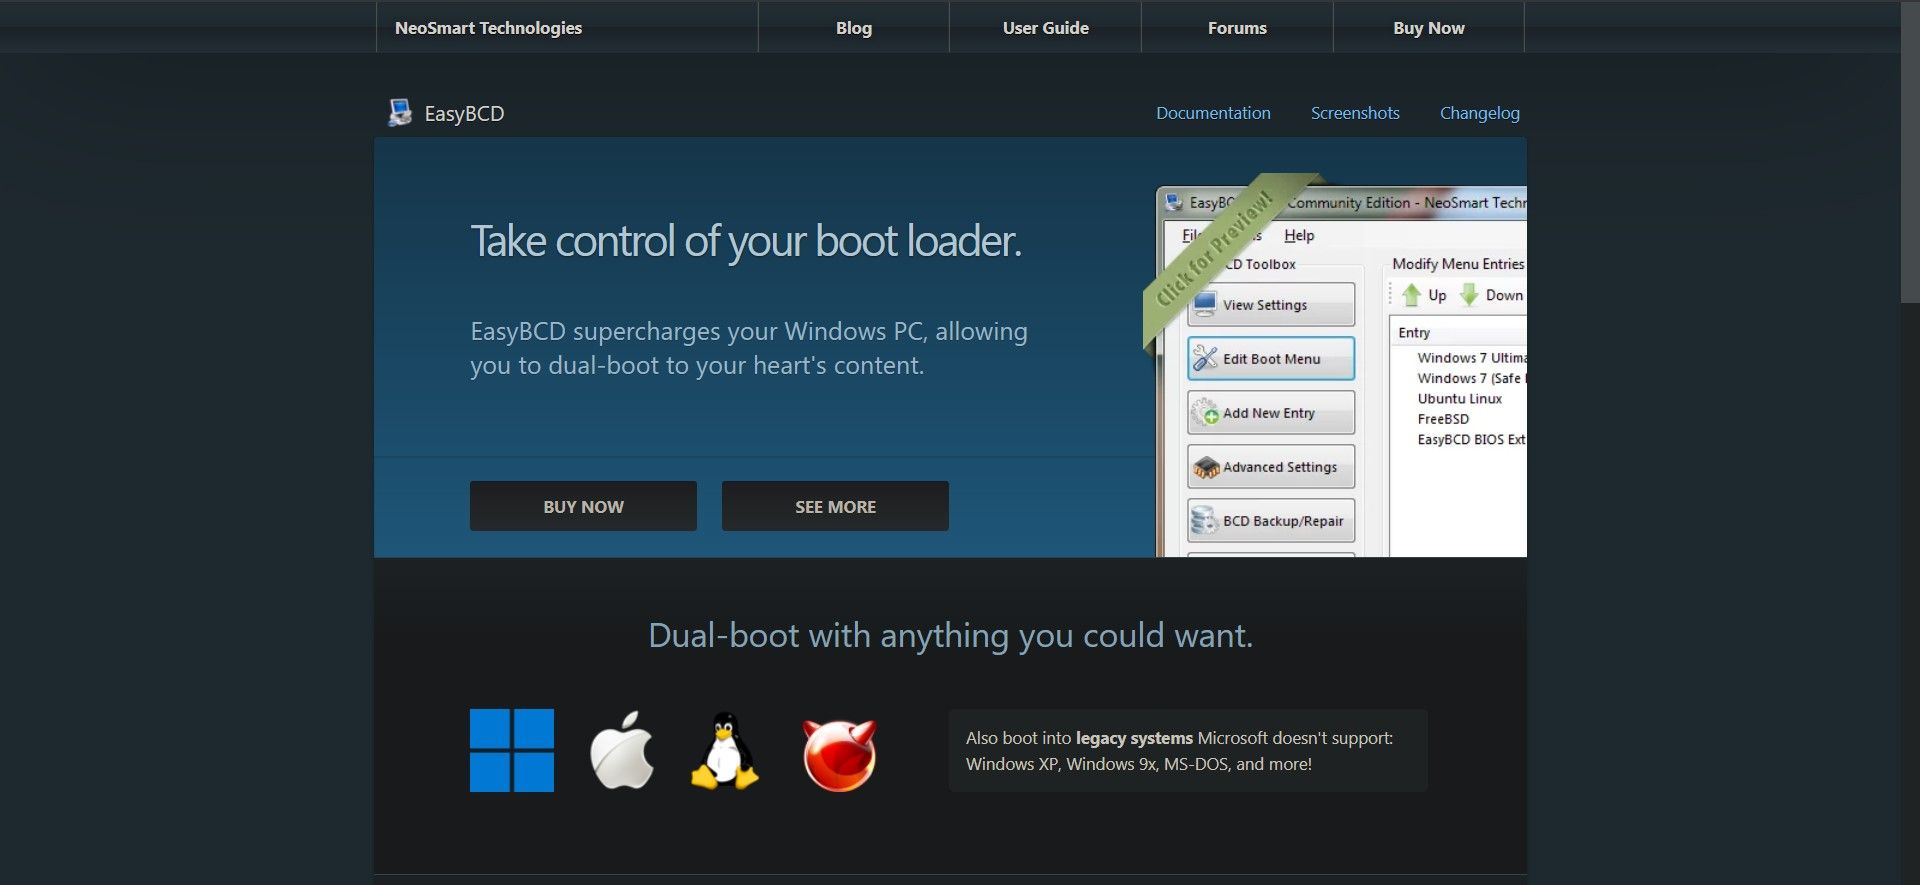
Method 2: Use EasyBCD to Add Linux to Windows Boot Manager
You can also replace GRUB with Windows Boot Manager via EasyBCD. It is a tool that is capable of controlling your system’s boot process. To be specific, you are able to modify bootloader settings through EasyBCD.
Step 1: Download and install EasyBCD on your computer.
Step 2: Run EasyBCD to enter its main interface and click the Add New Entry option.
Step 3: Click the Linux option under the Operating System tab.
Step 4: Choose GRUB2 in the Type field and type in the name of your Linux distro.
Step 5: Under the Drive tab, select the Linux partition where your Linux system resides. You need to take care because choosing the wrong drive will cause data loss.
Step 6: Tap on the Add (“+” icon) button to confirm your settings and add the Linux distro to the Windows Boot Manager.
Step 7: Restart your computer.
How to replace GRUB with Windows Boot Manager? This post has collected 2 available methods for you. Simply choose one from them to switch from GRUB to Windows Boot Manager.
About The Author
Position: Columnist
Having writing articles about computer tech for a long time, I am rather experienced especially on the aspect of computer optimization, PC enhancement, as well as tech terms explanation. The habit of looking through tech forums makes me a great computer issues collector. And then, many articles related to these issues are released, which benefit plenty of users. Professional, effective, and innovative are always the pursuit of an editing worker.
When you dual-boot a Linux distro alongside Windows, the installer sets up a bootloader, generally GRUB, to ensure there are no conflicts between the two operating systems during the boot-up processes.
While GRUB is a versatile and easy-to-use bootloader, you might want to switch to using the Windows Boot Manager as your default. Let’s learn how you can use Windows Boot Manager instead of GRUB.
An easy way to boot from Windows Boot Manager instead of GRUB is to simply head over to the UEFI settings of your motherboard and switch up the boot priority order.
Generally, during boot, you can press the F12 or Delete key to open up the UEFI control center. There you should find a specific setting where the boot hierarchy is laid out.
You should find GRUB on top, followed by Windows Boot Manager. Simply exchange their positions by dragging or any means necessary (it differs from one motherboard to another).
Once you’re done with switching their positions, simply save the changes and exit out of the UEFI settings panel. You should now be booting from Windows Boot Loader.
2. Add Linux to Windows Boot Manager Using EasyBCD
EasyBCD is a free software that helps you take control of your system’s boot process by allowing you to modify bootloader settings. It is a very potent and effective tool, so much so that we recommend using it as a last resort. You can accidentally end up corrupting your system’s boot process if you aren’t familiar with the technical side of things.
Download: EasyBCD (commercial edition available)
Here’s how to replace GRUB with Windows Boot Manager using EasyBCD:
- Fire up the EasyBCD application and click on the Add New Entry option.
- Next, select Linux from under the Operating System tab.
- Select GRUB2 in the Type field and type in the name of your Linux distro.
- Under the Drive tab, select the Linux partition i.e. the drive where your Linux system resides. Proceed with caution because selecting the wrong drive will lead to unsolicited data loss.
- Click on the Add (a plus sign) button to confirm your settings and add your Linux distro to the Windows Boot Manager.
Restart your PC, and you should find your Linux distro added to Windows Boot Manager. Now you should be able to boot into either of your installed OSes from there.
Now You Can Boot From Windows Boot Manager Instead of GRUB
Following the aforementioned steps should help you set up your dual-boot system to boot from Windows Boot Manager instead of the GRUB bootloader. While dual-booting has its advantages, it does bear some risks that can affect performance in the long run.
Как вернуть меню выбора ОС после установки Windows рядом с Linux? Рассказываем о двух способах восстановления загрузчика GRUB — для новичков (с утилитой boot-repair) и для продвинутых пользователей (с помощью chroot).
Поставили Windows рядом с Ubuntu, и теперь можете запустить только ОС от Майкрософт? Рассказываем, как восстановить загрузчик GRUB после установки Windows 10 или 11 — вам хватит 20 минут, даже если вы новичок в администрировании VPS.
Аренда VPS/VDS виртуального сервера от AdminVPS — это прозрачная и честная услуга с доступной ценой
Представьте: вы установили Ubuntu, настроили систему, а потом решили поставить Windows рядом. Но после перезагрузки вместо привычного меню GRUB (grand unified bootloader) вы увидите только загрузчик Windows. Это происходит потому, что Windows не дружит с альтернативными загрузчиками: при установке она перезаписывает главную загрузочную запись (MBR) или заменяет файлы в разделе EFI. И если GRUB, стандартный загрузчик для Linux, может работать с несколькими ОС, то загрузчики NTLDR (Windows 11) и Bootmgr (Windows 10) не умеют. Когда вы ставите Windows после Ubuntu, они просто «не видят» ОС, установленную первой.
Что нужно знать перед восстановлением GRUB
Прежде всего разберёмся с базовыми понятиями — это поможет избежать ошибок и сэкономит время.
UEFI или BIOS
Современные компьютеры используют два типа firmware (микропрограммы для управления железом):
- BIOS — это устаревший стандарт, загрузчик записывается в первый сектор диска (mbr);
- UEFI — современная замена BIOS, работает с разделом EFI (fat32), где хранятся файлы загрузчиков в формате .efi.
Чтобы проверить, какой режим на вашем компьютере, зайдите в bios/uefi (нажмите клавишу del, f2 или f12 при запуске). Если в настройках есть пункты Secure Boot, UEFI Mode — значит, у вас используется UEFI.
Или выполните в Linux:
ls /sys/firmware/efi Если директория существует — система загрузилась через UEFI.
Live USB с Linux
Чтобы восстановить GRUB, понадобится загрузочная флешка с любым дистрибутивом (Ubuntu, Fedora, Mint).
Как создать Live USB:
- Скачайте iso-образ с официального сайта ОС.
- Создайте Live USB с помощью специальных программ:
- Rufus (на Windows) — выберите «GPT для UEFI» или «MBR для BIOS» в зависимости от прошивки вашего компьютера;
- BalenaEtcher (на Linux/Mac).
- Проверьте целостность образа после записи (в некоторых программах есть опция «verify»).
Как восстановить GRUB из-под Windows: два способа
Восстановление через boot-repair (для новичков)
Если вы не хотите работать в терминале, воспользуйтесь утилитой boot-repair. Она автоматизирует 90 % работы.
Шаг 1. Загрузка с Live USB
- Вставьте флешку, перезагрузите компьютер.
- Нажмите клавишу выбора загрузочного устройства (обычно f12, ESC или f8).
- Выберите флешку в меню.
Если у вас UEFI, загружайтесь в режиме UEFI, а не в Legacy! Иначе раздел EFI не будет обнаружен.
Шаг 2. Установка boot-repair
- Откройте терминал в Live-системе.
- Добавьте репозиторий и установите утилиту (далее все команды выполняются в режиме суперпользователя):
add-apt-repository universe   # добавляйте репозиторий в Ubuntu до версии 22.04
apt update
apt install -y boot-repair
Шаг 3. Запуск и настройка
- Запустите boot-repair:
boot-repair - Выберите «recommended repair».
- Следуйте инструкциям на экране: утилита сама определит установленные ОС, восстановит GRUB и обновит конфигурацию.
Если возникли ошибки:
- проверьте подключение к Интернету (boot-repair иногда скачивает дополнительные пакеты);
- убедитесь, что live-система загружена в правильном режиме (uefi/bios).
Ручное восстановление через chroot (для продвинутых пользователей)
Если первый метод не сработал или вы хотите понять процесс изнутри, восстановите GRUB вручную.
Шаг 1. Определение разделов
- Загрузитесь с Live USB.
- Откройте терминал и узнайте список дисков:
fdisk -l или
lsblk -f Команда lsblk -f показывает типы файловых систем и точки монтирования.
- Пример вывода lsblk:
NAME  FSTYPE LABEL   UUID  MOUNTPOINT
sda
├─sda1 ntfs Windows ABCD-1234
├─sda2 ext4 Ubuntu 5678-90AB
└─ sda3 vfat  ESP CDEF-1234
Обратите внимание на:
- корневой раздел Linux (ext4, btrfs и т. д.) — нам нужен именно он;
- раздел EFI (vfat) — если система на UEFI;
- раздел подкачки (swap) — не нужен для восстановления.
Шаг 2. Монтирование разделов
- Создайте точку монтирования:
mkdir /mnt/Linux - Примонтируйте корневой каталог с Ubuntu:
mount /dev/sda2 /mnt/Linux Для UEFI примонтируйте каталог EFI:
mount /dev/sda3 /mnt/Linux/boot/efi Если у вас отдельный раздел /boot, монтируйте его:
mount /dev/sdaX /mnt/Linux/boot Шаг 3. Вход в chroot
Chroot (change root) — это команда, которая изменит видимый корневой каталог, чтобы вы вошли в систему из live-окружения.
- Привяжите системные директории:
mount --bind /dev /mnt/Linux/dev
mount --bind /proc /mnt/Linux/proc
mount --bind /sys /mnt/Linux/sys - Войдите в среду chroot:
chroot /mnt/Linux Шаг 4. Установка GRUB
- Если прошивка BIOS (MBR):
grub-install /dev/sda  # здесь sda — диск, а не раздел
update-grub - Если прошивка UEFI (GPT), убедитесь, что пакет grub-efi установлен:
apt install grub-efi-amd64Перед grub-install нужно обновить загрузочный список в efibootmgr, иначе в некоторых UEFI-системах GRUB не будет загружаться:
efibootmgr -c -d /dev/sda -p 1 -L "GRUB" -l "\EFI\GRUB\grubx64.efi"Здесь -d /dev/sda — диск, -p 1 — номер EFI-раздела (уточните их с помощью lsblk).
Установите GRUB в раздел EFI:
grub-install --target=x86_64-efi --efi-directory=/boot/efi --bootloader-id=GRUB- Обновите конфигурацию:
update-grub - После update-grub в выводе должны появиться строки «found Windows» или «found os probe entries».
Шаг 5. Выход и перезагрузка
- Выйдите из chroot:
sync  # запись данных
exit - Отмонтируйте разделы:
sudo umount -R /mnt/Linux- Перезагрузите компьютер.
Возможные проблемы и их решение
Даже если вы всё сделали правильно, могут возникнуть проблемы.
GRUB не видит Windows
Причина: os-prober не активирован (утилита для автоматического обнаружения установленных ОС).
Решение. В /etc/default/grub раскомментируйте строку:
GRUB_DISABLE_OS_PROBER=false Установите os-prober:
apt install os-prober Обновите загрузчик (update-grub).
Ошибка «grub-install: error: cannot find efi directory»
Причина: неправильно указан путь к разделу EFI.
Решение. Проверьте, примонтирован ли раздел EFI в /boot/efi. Проверьте тип раздела: он должен быть vfat (FAT32).
Загрузчик установился, но система не загружается
Причина: неверный порядок загрузки в uefi/bios или повреждённые файлы GRUB. Также включённый Secure Boot может блокировать работу GRUB.
Решение. Зайдите в настройки UEFI/BIOS и выберите GRUB в качестве первого загрузочного устройства. Отключите Secure Boot в UEFI. Если это не помогло — переустановите GRUB через chroot.
Как избежать проблем в будущем
- Если планируете устанавливать две операционные системы, то сначала установите Windows, потом Linux.
- Создайте резервную копию EFI/MBR.
Для BIOS:
dd if=/dev/sda of=backup.mbr bs=512 count=1 Для UEFI — просто скопируйте содержимое раздела EFI в место для хранения.
- Создайте отдельный раздел EFI для Linux. Это минимизирует конфликты с Windows.
Заключение
Восстановить загрузчик GRUB после установки Windows — задача, которая кажется сложной только на первый взгляд. Даже если вы новичок, boot-repair справится за пару кликов. Для тех, кто хочет глубже разобраться в процессе, подойдёт ручной способ через chroot.
Наши технические специалисты помогут вам определиться с конфигурацией и настроят ваш VPN-сервер под ключ, если это будет необходимо.
Читайте в блоге:
- Как поменять TTL для раздачи Интернета: настройка Default TTL и изменение значения на 64 или 65
- Что такое директория в Linux
- Как сменить владельца папки и изменить права доступа в Linux
Все чаще и чаще на форумах возникают вопросы:
Как удалить Ubuntu и восстановить загрузчик для Windows?
Как заменить grub на загрузчик Windows?
Установка Ubuntu рядом с Windows 8?
Ubuntu рядом с Win 8, загрузчик Windows не видит Ubuntu.
В связи с этим, решил написать заметку, о восстановлении загрузчика grub, о том, как нужно правильно удалять linux, восстанавливать загрузчик Windows и MBR.

1 способ. У нас есть live-cd/usb с дистрибутивом Linux.
1. Записываем live-cd, live-usb практически любого дистрибутива linux, будь то ubuntu, mint или еще что-то там.
2. Загружаемся с live-cd/usb, открываем терминал (Ctrl+T) и смотрим таблицу разделов диска:
$ sudo fdisk -l

Помимо fdisk, еще существует много различных утилит для просмотра и редактирования таблицы разделов: gparted, cfdisk например.
По таблице видно, что linux установлен на разделе /dev/sda1, напротив него стоит звездочка, это признак того, что раздел загрузочный.
3. Теперь этот раздел нужно смонтировать:
$ sudo mount /dev/sda1 /mnt
4. Раздел смонтирован, следовательно мы имеем доступ к нему.
Сейчас нам нужно восстановить MBR.
Для этого нужно установить grub на жесткий диск (НО НЕ НА РАЗДЕЛ ЖЕСТКОГО ДИСКА!), так как мы восстанавливаем MBR:
$ sudo grub-install —root-directory=/mnt /dev/sda
где /mnt — это рутовый каталог, который мы смонтировали, /dev/sda — имя жесткого диска.
После этого MBR восстановлен, grub установлен.
Ситуация:
у вас на машине стоит три системы например: Windows 7 Ultimate, Windows XP Professional и Linux Mint 14.
Windows вам надоела, вы ее снесли и по каким-либо причинам, в списке grub’а остались разделы Windows.
Если случилась такая ситуация, то необходимо сгенерировать новый конфигурационный файл загрузчика. Он заново просканирует систему, определит установленные операционные системы на компьютере и сгенерирует конфиг с новыми параметрами меню загрузчика.
1. В консоли пишем:
$ sudo update-grub —output=/mnt/boot/grub/grub.cfg
где update-grub — обновляет конфиг загрузчика, параметр —output указывает на файл конфигурации grub’а.
2. После проделанных операций, можно перезагрузиться и загрузиться с жесткого диска (естественно заходим в BIOS).
Ну и все собственно.
Вот например как выглядит мое меню grub’а, установлен только Debian:

Второй способ, в этом случаем используем окружение chroot.
1. Опять же, загружаемся с live-cd/usb, смотрим разделы:
$ sudo fdisk -l
2. Монтируем раздел, на котором установлен linux и еще некоторые важные для работы разделы:
$ sudo mount /dev/sda1 /mnt
$ sudo mount —bind /dev /mnt/dev
$ sudo mount —bind /proc /mnt/proc
$ sudo mount —bind /sys /mnt/sys
!!! Если раздел /boot на отдельном разделе диска, то его тоже нужно примонтировать, например:
$ sudo mount —bind /boot /mnt/boot
3. Скопируем дефолтный файл grub’а (этот шаг можно пропустить):
$ sudo cp /etc/resolv.conf /mnt/etc/resolv.conf
4. Теперь нужно перейти в среду chroot:
$ sudo chroot /mnt
5. Устанавливаем grub:
# grub-install /dev/sda
Если возникла ошибка, поможет команда:
# grub-install —recheck /dev/sda
6. Выходим из chroot, отмонтируем разделы и перезагружаемся:
# exit
$ sudo umount /mnt /dev
$ sudo umount /mnt/proc
$ sudo umount /mnt
$ sudo umount /mnt/boot #если требуется
$ sudo reboot
Ситуация:
у вас нет второго компьютера чтобы записать live-cd/usb, соотвественно нужно как-то выкручивать (у самого была такая ситуация после экспериментальной установки windows 8).
Передо мной лишь черный экран и :
grub>
Это восстановление наиболее сложное (Rescue Mode), но если делать по инструкции, все должно пройти нормально.
В rescue mode доступно всего четыре команды:
ls
set
unset
insmod
1. Нам нужно посмотреть, какие разделы видит наш grub:
> ls
появится что-то типа:
(hd0) (hd0,msdos2) (hd0,msdos1) (hd1) (hd1,msdos2) (hd1,msdos1)
2. Кое-как криво Rescue Grub нам вывел разделы диска, якобы с файловой системой msdos.
Но это не важно.
Счет дисков у grub начинается с нуля, а разделов — с единицы.
По нашему выводу можно определить, что на первом диске у нас два раздела и на втором тоже два.
Экспериментальным путем угадывания будем определять, где же находится наш установленный linux.
3. Допустим раздел (hd0,1) — это именно то что нам нужно (приставку msdos можно опустить).
Пишем:
> set prefix=(hd0,1) /boot/grub
> set root=(hd0,1)
Таким образом мы получаем доступ к диску.
4. Пишем команду:
> ls /boot/grub
если будет какой-то вывод файлов, то все получилось, если же ничего нет, то мы промахнулись разделом, нужно смотреть другие, например (hd1,0).
5. Теперь пишем:
> insmod ext2
> insmod normal
> normal
6. После этого загружается grub, определяет операционные системы и практически восстановление завершено.
7. Загружаем linux, в терминале пишем:
$ sudo grub install /dev/sda
Все. grub прописывается в MBR и дальнейших проблем возникать не должно.
Ситуация:
нам надоело закапывать красные глаза из-за linux и мы решили вернуться на Windows.
Windows предварительно у нас установлена, мы с нее загружаемся, и с помощью Acronis Disk Director или еще какой-нибудь программы сносим разделы Linux.
С огромной радостью перезагружаемся, да не тут-то было, linux мы удалили, а grub — нет (ведь он установлен на сам диск, а не на его раздел). Что делать?
1. Записываем установочный диск/флешку (например с Windows XP).
2. Загружаемся с диска/флешки:
Если увидели это:

не надо нажимать F2, это не то, это автоматическое восстановление, а нам нужно ручное.
3. Немного подождав появляется такое:

Нажимаем R, попадаем консоль восстановления.
4. Нам предлагают выбрать копию Windows, которую нужно восстановить:

5. Вводим пароль админа:

6. Вот собственно консоль восстановления:

7. Вводим команду:
fixmbr
соглашаемся со всем что он от нас хочет, эта команда восстанавливает MBR.
8. Пишем:
fixboot
эта команда, записывает новый загрузочный сектор.
9. Выходим из консоли восстановления:
exit
10. Перезагружаемся.
Ситуация.
если же под рукой не XP, а Windows 7, то делаем то же самое, но вводить не
fixmbr
и
fixboot,
а
bootrec /fixmbr
и
bootrec /fixboot
Ссылки:
- Использование средства Bootrec.exe в среде восстановления Windows для устранения неполадок при запуске Windows
- Восстановление grub в rescue mode
- Тут можно почитать подробнее о rescue mode
- Восстановление grub2
- Настройка внешнего вида загрузчика grub
- Туториал по grub’у
- Восстановление grub