
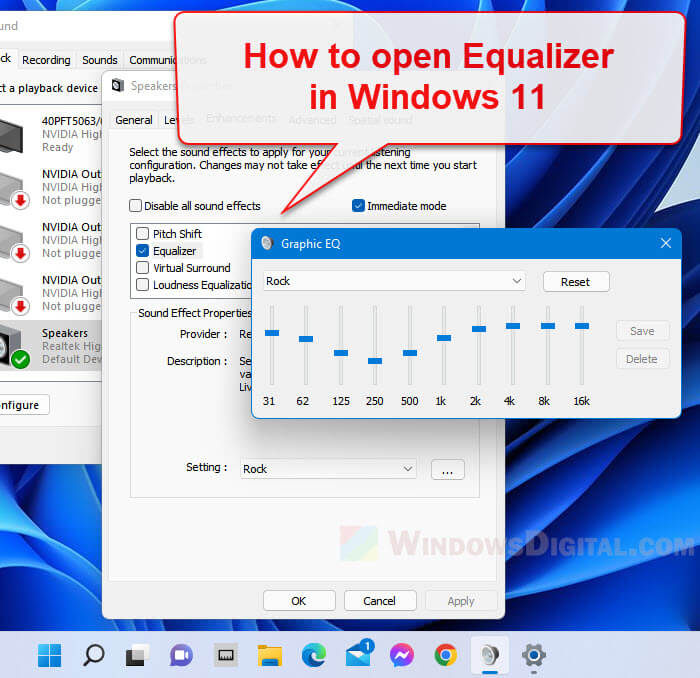
Windows 11 comes with several new audio features and settings including the new Enhanced Audio setting that is able to automatically improve sound quality when turned on. It also includes several audio enhancements such as Bass Boost, Virtual Surround, Room Correction and Loudness Equalization. However, Sound Equalizer enhancement is not included in Windows 11 by default.
This guide will show you how to add the audio Equalizer Settings in Windows 11 Sound Control Panel. We will also show you 2 other popular third party sound equalizer software for Windows 11 you can use if the former doesn’t work.
Also see: How to Boost Volume Above 100% in Windows 11
How to open sound equalizer settings in Windows 11
To add the Equalizer enhancement (as shown in the screenshot above) to the Sound Control Panel in Windows 11, follow the steps below.
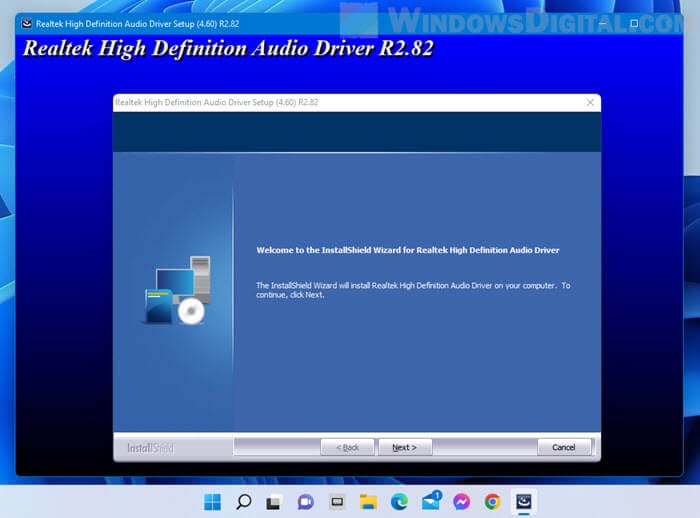
1. You need to first download and install Realtek HD Audio Codecs Software Driver. On the download page, select the setup with the description that best matches your Windows version (Windows 10 version will work for Windows 11, and Windows 11 are usually 64-bit). If the download is too slow, you can download from an alternative source instead at: https://realtek-download.com/download-hd/.
See also: How to Update Realtek Drivers in Windows 11
2. Once downloaded, run the installer to install the Realtek High Definition Audio Codecs Software Driver. When the installation has completed, restart your computer.
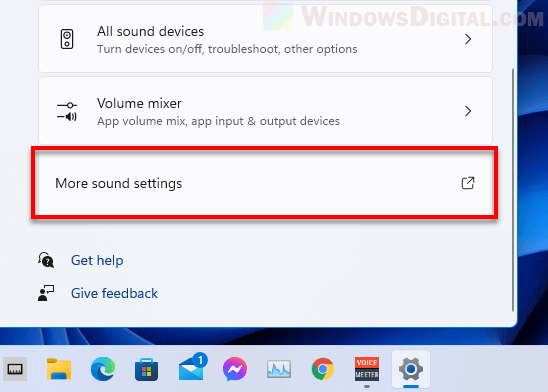
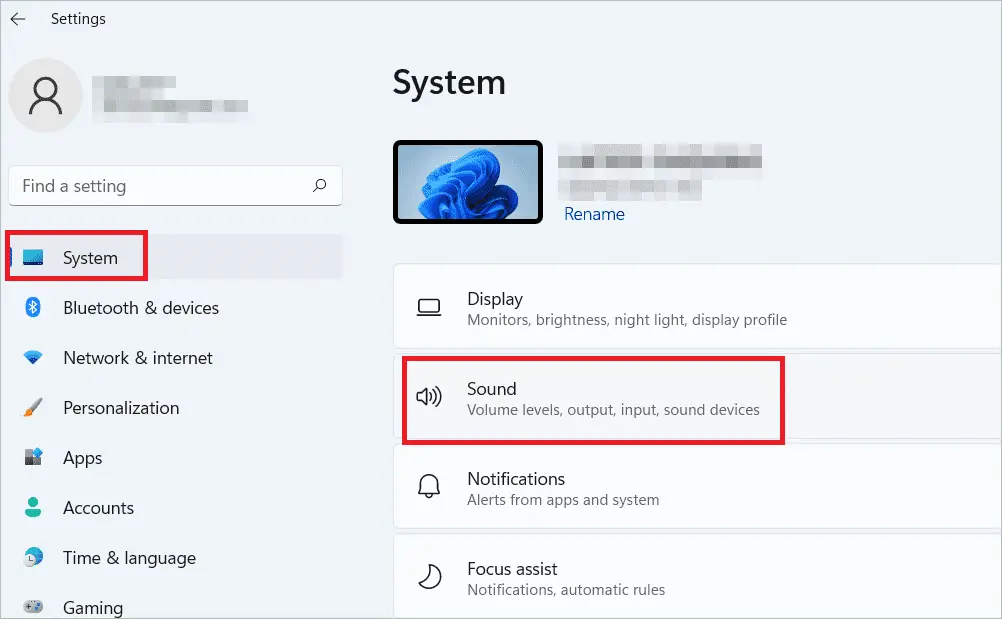
3. Once restarted, to open the sound equalizer settings in Windows 11 via Advanced Sound Settings, right-click the Sound icon from the taskbar and select Sound settings.
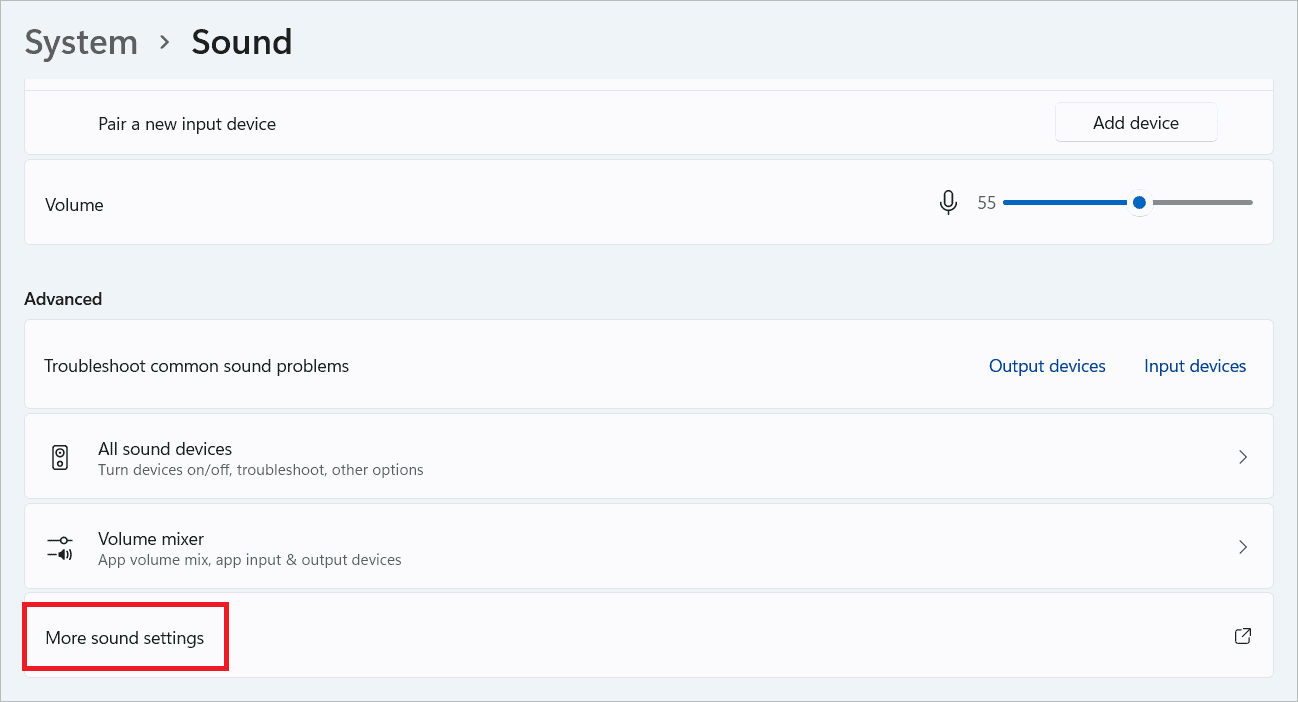
4. In the Sound settings window, scroll down and look for “More sound settings” option and select it.
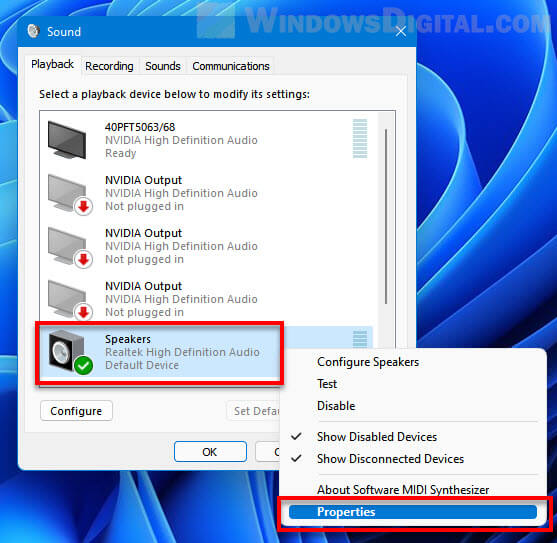
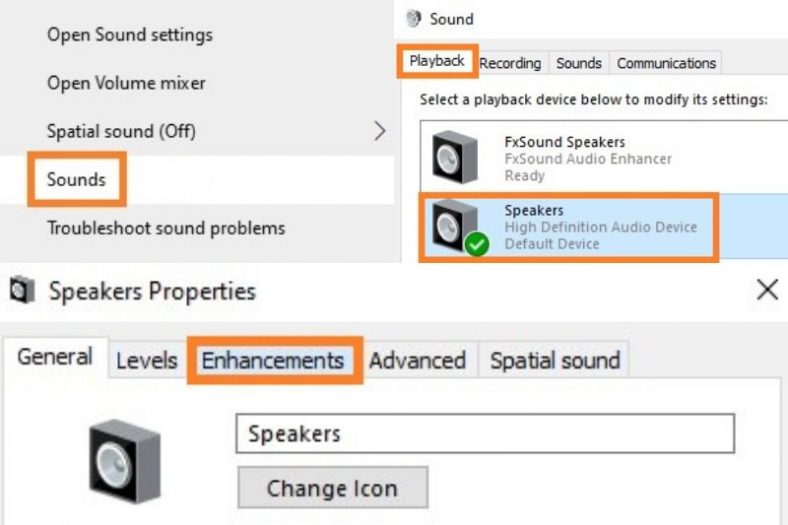
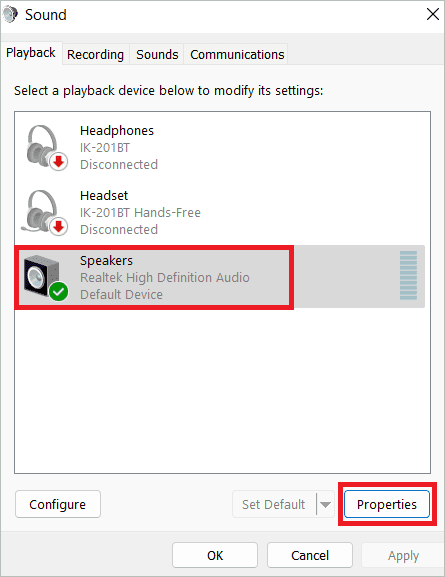
5. In the Sound control panel window, right-click the Speaker or Headphones you are currently using, and then select Properties.
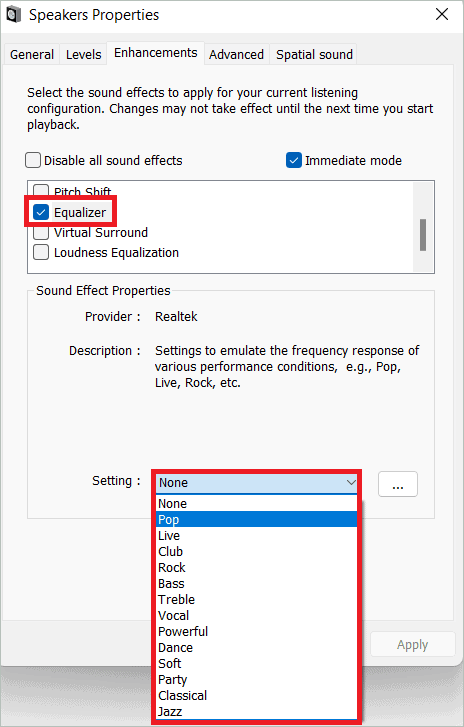
6. Next, select the Enhancements tab. Make sure “Disable all sound effects” option is disabled (otherwise you will not be able to enable any audio enhancement including the equalizer settings). In the list of enhancements, enable Equalizer. While selecting Equalizer, you can change the Windows 11 sound equalizer setting to a preset setting such as Rock, Live, Pop, Classical, Bass, Treble, Powerful, etc.
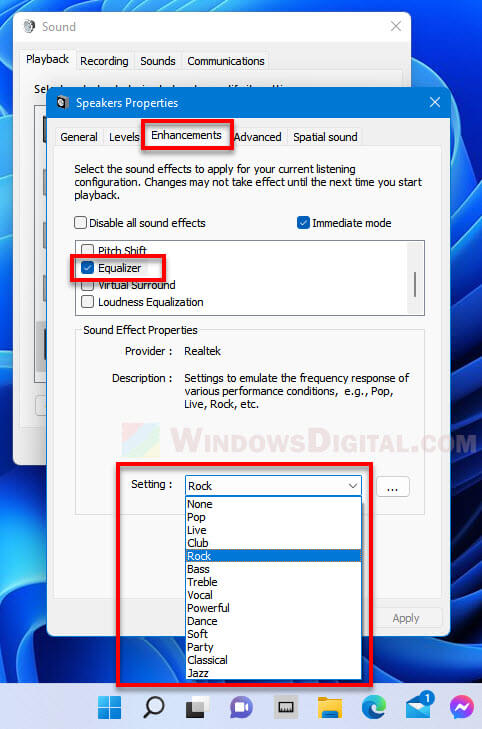
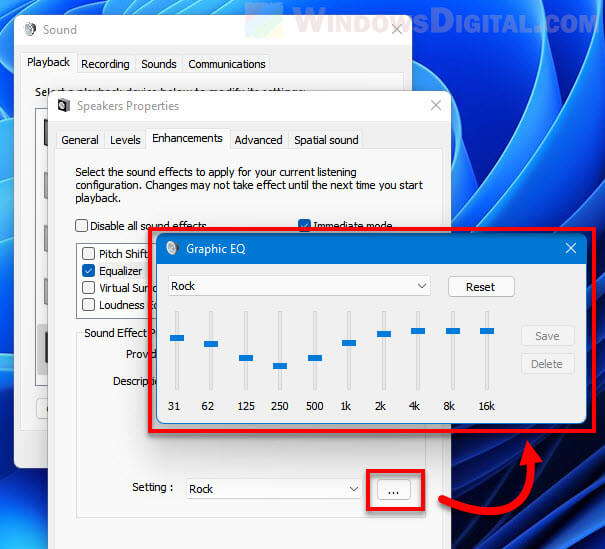
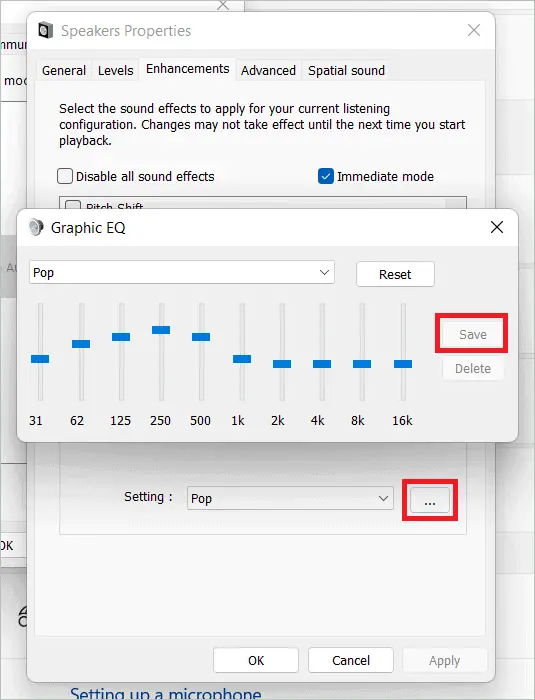
To manually customize your own sound equalizer setting, click the triple dotted option button next to the preset Setting to open the graphical equalizer (Graphic EQ) window. From there you can adjust the audio equalizer settings to your preference in Windows 11.
Also read: How to Change Volume of Different Apps on Windows 11
Other audio equalizer software for Windows 11
Since there is no built-in sound equalizer in Windows 11, we will have to rely on a third party audio equalizer software. The easiest way to get sound equalizer settings in Windows 11 is by installing Realtek HD Audio Driver as shown in the instructions above.
If that doesn’t work or if the audio equalizer by Realtek does not satisfy your need, you can try to use other audio equalizer software instead. Listed below are 2 of the most popular and free sound equalizer software for Windows 11.
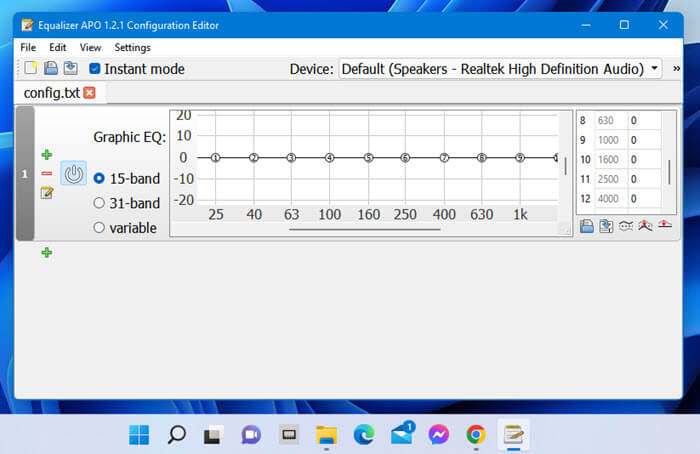
Equalizer APO
While there are many audio enhancer software that provides graphical equalizer feature for Windows 11, most of these software are usually not free. However, there is a simple equalizer tool that is actually open-source and free to use, and is one of the most popular sound equalizer tools for Windows. It is called Equalizer APO.
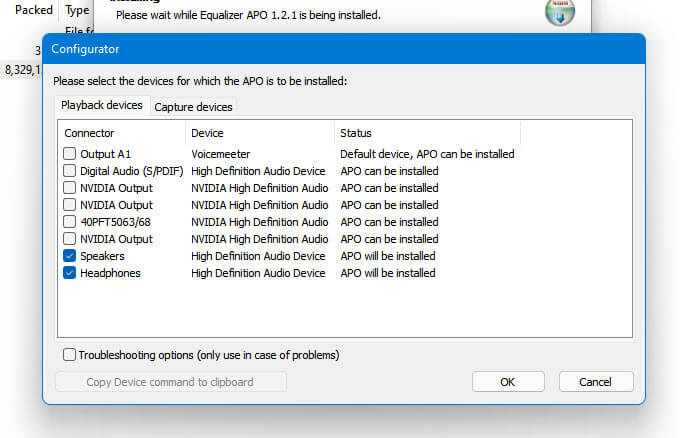
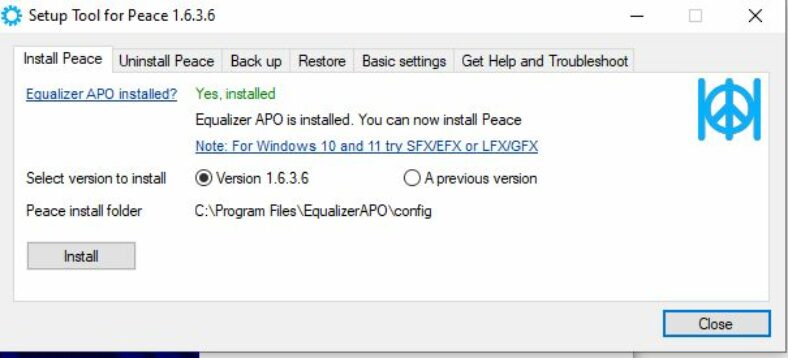
You can get Equalizer APO from https://equalizerapo.com/download.html. When you install the software, the setup will prompt you to select the playback devices you want to use with APO.
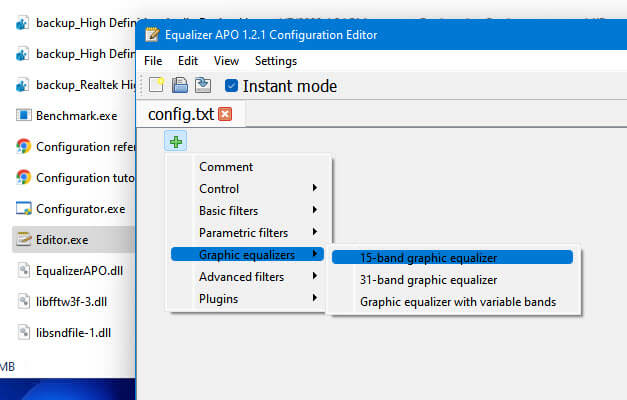
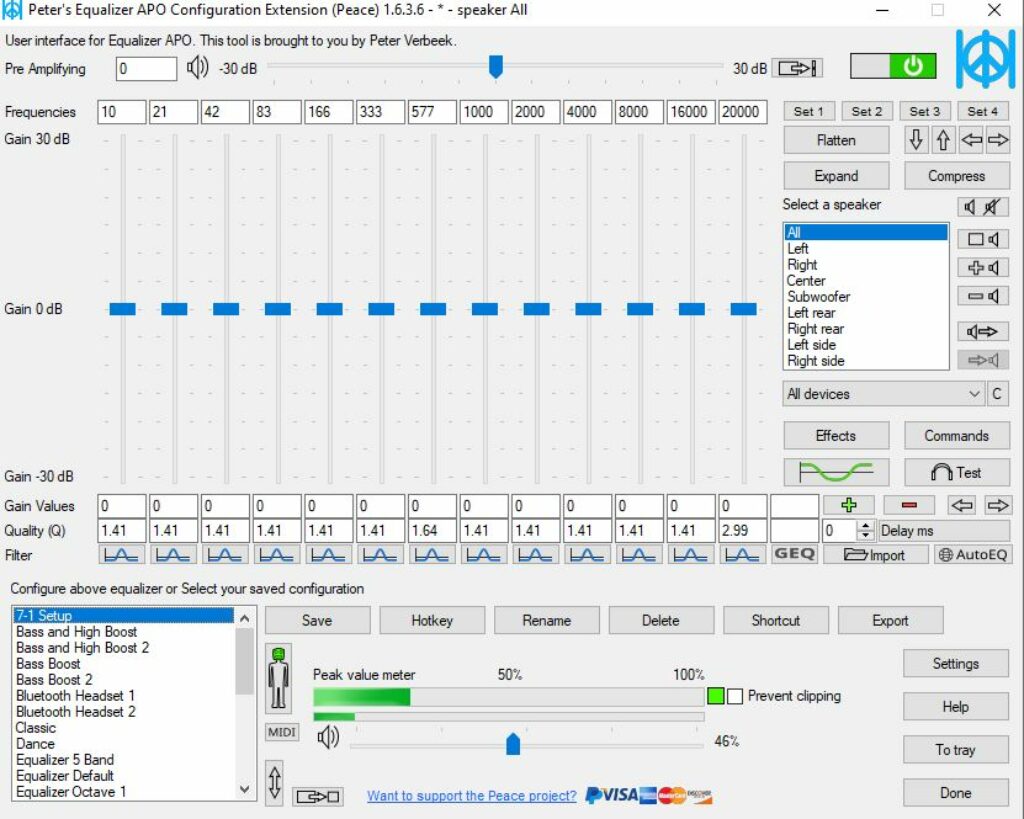
Once installed, to open the graphical equalizer in APO, go to its installation folder (usually at “C:\Program Files\EqualizerAPO“) and open the Editor.exe file. In the Equalizer APO Configuration Editor window, click the add button (plus) and select Graphic equalizers > 15-band, 31-band, or graphic equalizer with variable bands (whatever you prefer).
From there you can adjust the sound equalizer for Windows 11. Once you have done adjusting the sound equalizer, Click File > Save in the Equalizer APO Configuration Editor window to save the changes.
Related: How to Increase or Boost Microphone Volume in Windows 11
FxSound
FxSound is another extremely easy to use and free audio enhancer software that also provides graphical equalizer for Windows 11. It provides a very user-friendly interface that even users who are not very computer-literate would be able to use the tool. You can get FxSound from https://www.fxsound.com/.
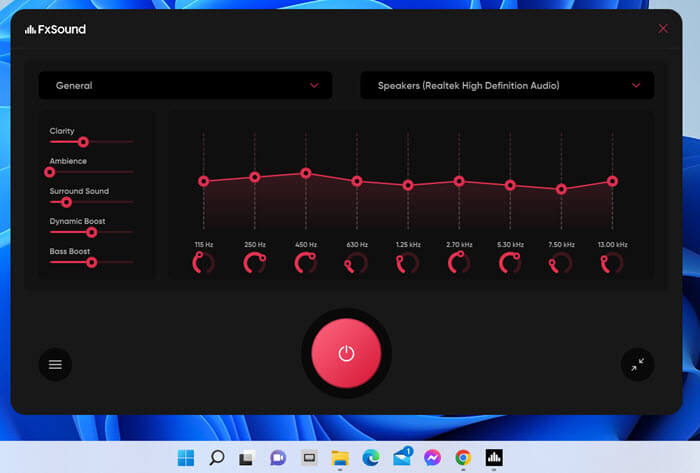
There is no specific guide needed for this tool. As soon as you open the tool, you will immediately see all the available sound enhancement options and graphic EQ on the main interface of the app. You just need to choose the speaker or headphones you want to apply the settings to and then click the power button to activate the changes.
Frequently Asked Questions
How do I change the equalizer in Windows 11?
You need to install the required audio codec software driver first, and then access the equalizer settings via Sound Control Panel in Windows 11.
How do I adjust bass and treble in Windows 11?
After installing the required audio codec, you can use the equalizer settings via Sound Control Panel to adjust the bass and treble in Windows 11.
Where is the equalizer in Windows 11?
The equalizer settings in Windows 11 can be found via Sound Settings > More Sound Settings > Speaker Properties > Enhancements > Equalizer, after you’ve installed the required audio codec driver.
Last Updated:
June 11, 2023
Accessing the integrated Windows 11 equalizer is simple by navigating to your sound settings. Just head to Sounds > Playback > Speakers > Properties, then click on the Advanced tab and choose Enable Audio Enhancements. However, if you’re looking for a more advanced equalizer or if your device doesn’t have this, consider installing the free software EQ APO and Peace GUI, or some other third-party EQ software.
The audio equalizer is a powerful tool for adjusting the audio parameters of your sound system. It allows you to enhance the bass, treble, and other frequencies to achieve optimal sound output. However, not all PCs have this feature available due to variations in audio devices, drivers, and other factors. In such cases, third-party EQ software can serve as a viable alternative.
Note: Using an EQ may not always be the best solution. If you’re merely attempting to enhance your audio experience, minor adjustments might suffice. However, excessive tweaking can result in poor sound quality. Learn more in our article about the best equalizer settings.
Continue reading to learn how to use the Windows 11 equalizer and maximize its benefits. We’ll also explain how to install EQ APO and Peace GUI and how to use them if the standard Windows 11 EQ isn’t available.
Contents
- How to Use the Windows 11 Equalizer
- EQ APO and Peace GUI
- Best Ways to Use the Windows 11 Equalizer
- Conclusion
How to Use the Windows 11 Equalizer
To check if your system has an equalizer that you can access by default, then follow these steps:
1. Right-click the speaker icon in the taskbar and select “Sounds.”
2. Choose your audio device in the “Playback” tab.
3. Right-click your audio device and select “Properties.”
4. In the Properties window, click on the “Enhancements” tab. From there, you may see some EQ-related settings that you can adjust.
While there may be instances where an “enhancements” option is available based on your hardware, it is generally recommended to use a standalone application for equalization purposes. Use software such as EQ APO and Peace GUI can greatly enhance the audio quality of your computer.
EQ APO and Peace GUI
For a better EQ experience on Windows, you can install EQ APO and then Peace GUI as a user-friendly interface for the EQ. Ensure you install EQ APO first, or the Peace GUI installation will fail.
After installing EQ APO, you may need to restart your computer.
The Peace GUI setup is quick and straightforward.
Other potential options to try include FxSound, Boom 3D, Audio Equalizer – EQ, and DeskFX Audio Enhancer. However, we only tested EQ APO and Peace GUI, which worked well for our purposes.
Best Ways to Use the Windows 11 Equalizer
Look into our article on the best equalizer settings to learn more about using an EQ. Often, it’s better not to adjust the EQ at all, as it can distort the original recording’s intended sound. But, in some cases, there are instances where modifying the EQ can be useful, such as adapting it to your speaker setup or making sound adjustments.
Some common EQ use cases for listening to music include boosting the bass for more impact. Recently, I’ve been using the EQ on my Windows machine to reduce the bass on my home studio monitors, as excessive bass was traveling around the house even at relatively low volumes.
Conclusion
An equalizer can be a very handy tool for adjusting your audio output’s frequencies and customizing the sound to your preferences. If your audio device doesn’t support the built-in Windows 11 equalizer, you can try any third-party sound EQ tool. I achieved good results by combining EQ APO and Peace GUI, both of which are free tools.

Sound is a fundamental part of the computer experience, whether you’re enjoying music, watching movies, or playing games. video games. However, Windows 11 It doesn’t have a built-in equalizer as accessible as previous versions, which can make customizing your audio difficult. If you’re looking to improve the sound quality on your PC with Windows 11, here you will find all the available options.
In this article, we are going to explore different ways to activate and improve a equalizer in Windows 11, from using native tools to third-party apps that can give you more advanced audio control. We’ll also cover additional tweaks that can make a difference in your listening experience.
Why doesn’t Windows 11 have a default equalizer?
Unlike previous versions, where drivers Realtek offered a built-in equalizer, Windows 11 has left this functionality in the hands of the manufacturers of hardware and third-party software. This means that, depending on the device, you may find an equalizer built into your system or you may need to resort to alternative solutions.
How to activate an equalizer in Windows 11

There are several ways to improve audio in Windows 11 using an equalizer. Below, we show you some effective methods.
1. Use Realtek Audio Control
If your PC uses audio drivers Realtek, you can activate an equalizer by installing Realtek Audio Control. Follow these steps:
- Access the Microsoft Store and search Realtek Audio Control. Download it and install it.
- If the app doesn’t appear or isn’t working properly, check your motherboard or laptop manufacturer’s website to download the correct version.
- Once installed, open it and look for the section equalizer to adjust the sound to your preferences.
2. Use the Windows Media Player equalizer
Windows 11 includes a equalizer integrated into its Media player. However, this only applies changes to content played in the app.
- Open the Media player of Windows 11.
- Click the button three points in the lower right corner.
- Select the option Equalizer and adjust the soundtracks to suit your needs.
3. Third-party applications to equalize sound
If the above options are not enough, there are programs that can improve the sound of the entire system:
- Equalizer APO: An advanced equalizer with multiple filters and surround sound support.
- Peace Equalizer: A graphical interface for Equalizer APO which facilitates its use.
- PC Equalizer: Another option that provides detailed settings for system sound.
- FXSound: : Allows you to improve audio quality with preconfigured profiles and quick settings.

Related article:
How to equalize Windows 10 sound? – Audio settings
Other ways to improve sound in Windows 11
Activate spatial sound
If you want a more immersive audio experience, Windows 11 offers the option to turn on windows sonic for headphones:
- Go to Start > Settings > System > Sound.
- Select your output device in the section Output devices.
- En Properties, choose Windows Sonic for Headphones in the option of Spatial sound.
You can also try Dolby Atmos o DTS SoundUnbound, available in the Microsoft Store.
Using the Windows Volume Mixer
The operating system allows you to adjust the volume of each application independently:
- Right-click the volume icon on the taskbar.
- Choose Open volume mixer.
- Adjust the volume of each application according to your preferences.

Related article:
Six tools that can improve the bass sound of Windows 10 computers [2019 LIST]
Optimize system settings
To ensure the best sound quality:
- Use one sound card dedicated if you want better performance.
- Make sure the drivers audio They are updated.
- Check the audio format settings within the properties of the playback device.
Improving audio in Windows 11 is possible through various methods, whether it’s enabling system options, using third-party software, or simply configuring your hardware correctly. Depending on your needs, you can choose the solution that best suits you and enjoy optimized sound on your PC.
Related article:
How to enable dual audio outputs in Windows 11
Passionate writer about the world of bytes and technology in general. I love sharing my knowledge through writing, and that’s what I’ll do on this blog, show you all the most interesting things about gadgets, software, hardware, tech trends, and more. My goal is to help you navigate the digital world in a simple and entertaining way.
Key Takeaways:
- An audio equalizer boosts the frequency range for the best sound experience.
- You can access the audio enhancements in your PC if the equalizer is in-built.
- Or, you can download and install third-party audio equalizer software to change the equalizer settings.
Windows 11 was introduced with a bunch of new, exciting features, including audio features. The audio enhancements are like the icing on the cake. Don’t worry about not finding the feature on your OS; you can still have the best equalizer settings in Windows 11. The secret to accessing the sound equalizer enhancement is to add it by downloading the right software.
Listening to music, playing games, and video streaming; anything you do on your PC demands high-quality audio. The sound effects may differ for different situations, like playing songs, gameplay, and others. Customization options in the equalizer are inevitable, giving you the right audio experience for the right sound. So, check out some great sound equalizers for download. Before anything, ensure that you opt for the best Windows 11 power settings for proper power management on your PC.
What is an Audio Equalizer?
An audio enhancer modifies audio frequencies is called an audio/sound equalizer. Besides highlighting specific frequencies, it can enhance audio features, remove unwanted noises and tweak many other audio settings. Adding bass to music and enhancing the treble tones are examples of what audio equalizers can do. Making adjustments in an equalizer thus improves sound quality and produces output sound in the best possible frequency.
7 Audio Equalizers For Best Equalizer Settings In Windows 11
If your PC has already got the audio equalizer, you can easily do the best equalizer settings in Windows 11. If not, you may have to install Realtek HD Audio Codecs Software Driver or rely on third-party equalizer software solutions. Here are a few options to improve the quality of music and other sounds from your playback devices. You can change the settings in the software of your choice in addition to changing the sound settings on Windows 11.
1. Realtek HD Audio Codecs Software
The earlier versions of Windows had the Realtek EQ as the default equalizer. But for Windows 11, you must install it separately to change the audio output settings. It is possible to add the equalizer option to the Sound Control Panel using Realtek HD Audio Codec Software Driver. Once done, you can opt for the best equalizer settings in Windows 11.
Go to the Realtek HD Audio Codecs Software Driver page. First, download the Windows 10 version, which is also compatible with Windows 11. Now, install the driver software and restart your PC.
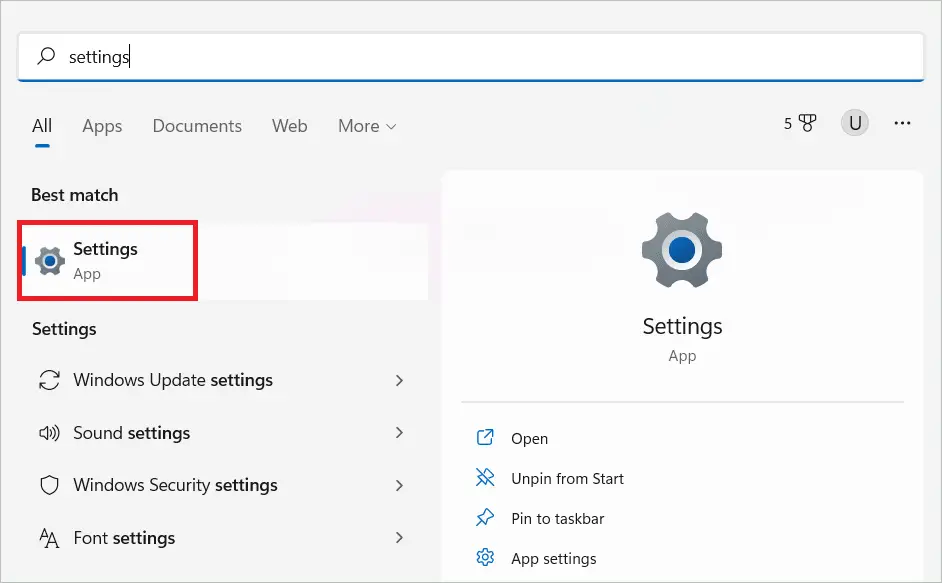
Type “Settings” in the search bar and open the Settings app.
Select “System” in the left pane and “Sound” in the right. Alternatively, right click on the speaker icon and open sound settings.
In the sound settings window, scroll down and select “More sound settings” under Advanced.
Select your current audio output device in the next window and click the “Properties” button.
In the Enhancements tab, uncheck “Disable all sound effects.” You will now be able to select the Equalizer feature from the list below.
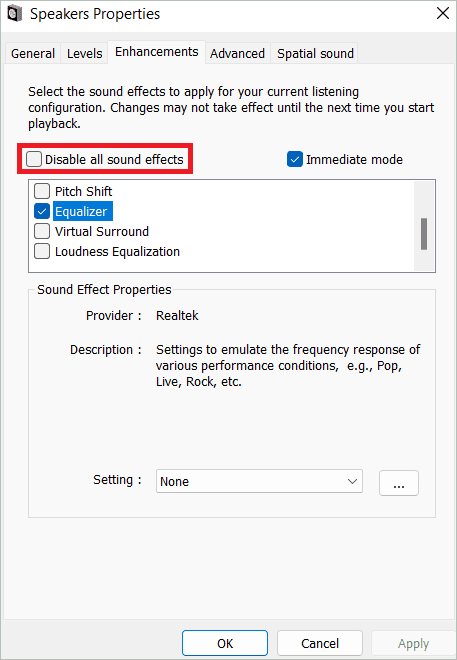
When you check “Equalizer,” you can select any audio equalizer settings from the preset modes available in the drop-down menu. These include Pop, Live, Club, and many others.
Once you have selected an option, click on the three dots next to it to open the Graphic EQ window. Here you can adjust your equalizer settings and click “Save.”
Caption:
Now, enter a name for your preset and click “OK.” Finally, click the Apply button. You have successfully changed the sound equalizer settings now.
What we liked:
- Works well with many sound cards
- Headphone virtualization and virtual surround features
- Suitable for home theater systems
- Several environment effects are available.
- Speaker configurations possible for external speakers
2. Equalizer APO
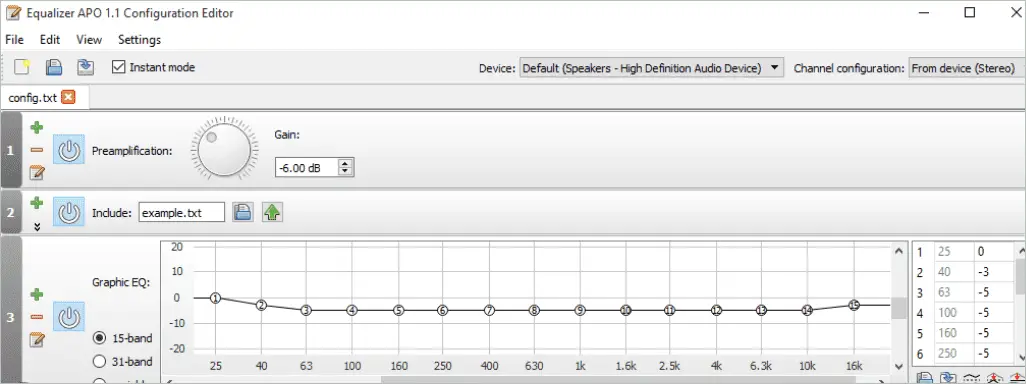
Equalizer APO is open-source and makes for an excellent choice for the best equalizer settings in Windows 11. The sound equalizer app is updated frequently, and users get amazing features to work with. You can choose between the 15-band and 31-band equalizer, or opt for one with variable bands. It also provides an option to build custom equalizers by adding bands on the graphs. The interface is easy to work with, and you will find the proper settings at your fingertips.
What we liked:
- Features an array of parametric filters
- Supports multiple channels
- Uses fewer resources of your PC
- Negligible latency
Get Equalizer APO
3. Viper4Windows
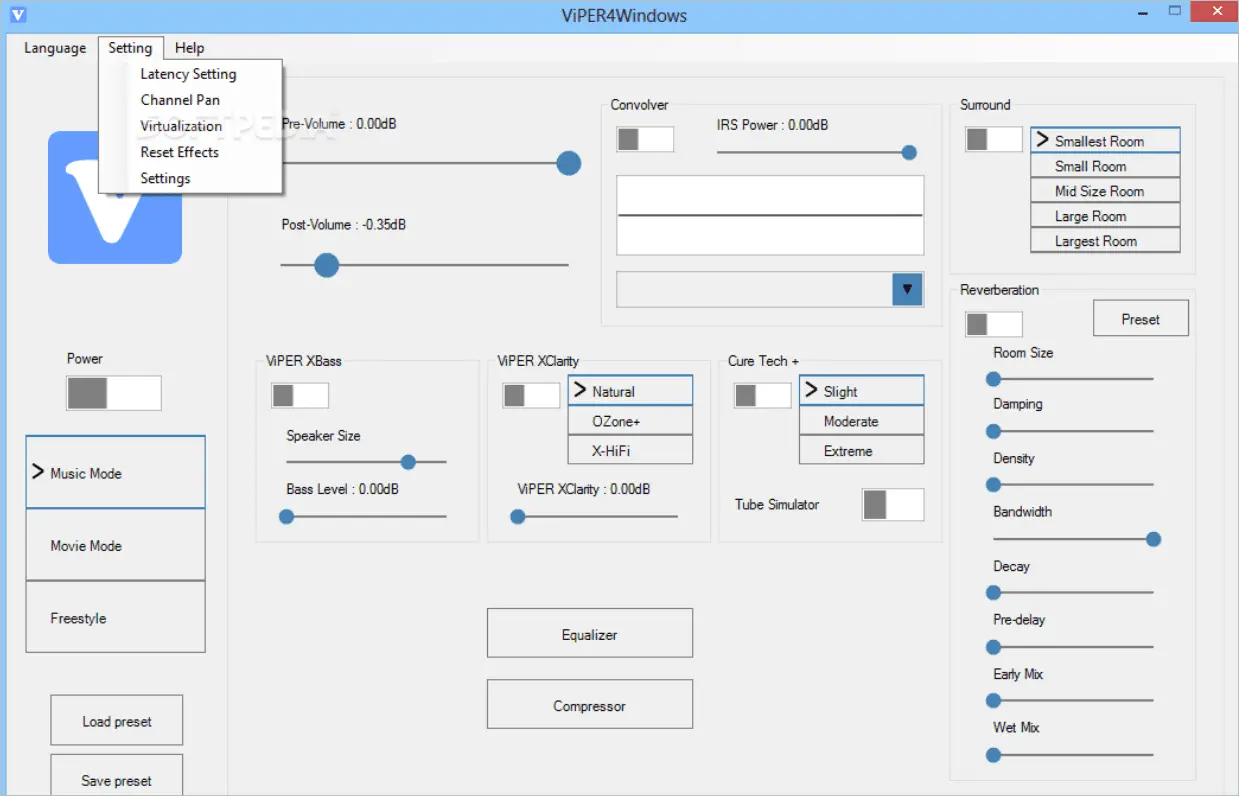
Again a free audio equalizer software for the best equalizer settings in Windows 11, Viper4Windows comes with key features like pre-volume and post-volume functions. Audiophiles love the tool, for it gives an entertainment experience as if in a movie hall. It has a 3D surround sound feature where you can choose room sizes like smallest, small, mid-size, large, and largest. In addition, it comes with several customization options and sound effects.
What we liked:
- Supports bass boost
- A compressor is available to select the pitch
- Equalizer preset options available – soft bass, super bass, classical, etc
- You can save customizable presets
Get Viper4Windows
4. FxSound
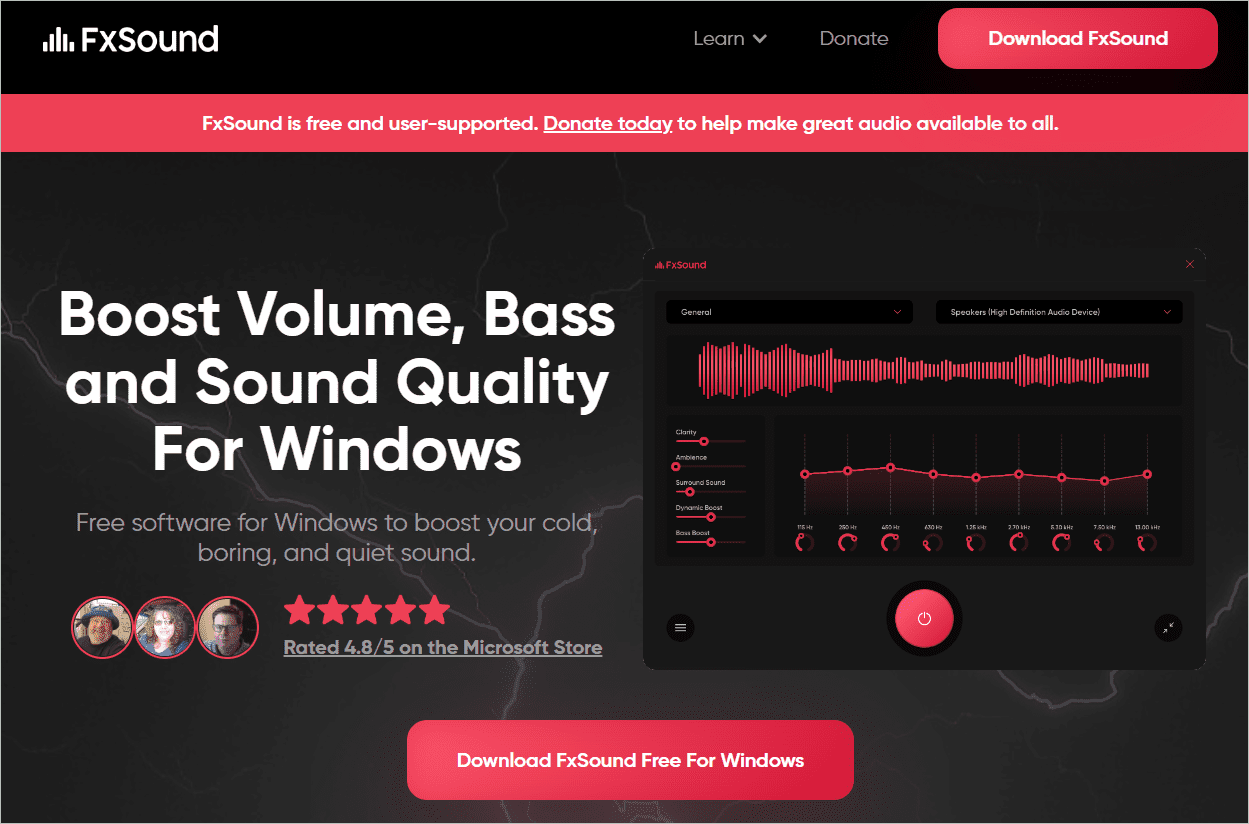
FxSound is a 9-band equalizer that fine-tunes the sound from your audio device with the best equalizer settings in Windows 11. Anyone can easily handle the interface, as all the available options are on the home page. You get a range of presets to change between gaming, music, and streaming video.
The surround sound effect and the bass-boosting capability make it stand out. Choose your audio devices, change the settings and click the power button to have the best surround sound setup and audio quality. You can also use a keyboard shortcut instead of clicking the power button.
What we liked:
- Simple to use interface
- Free download of the software
- Choose from various sound effects
- Different sound profiles for different sound situations
- Compatible with any playback device
Get FxSound
5. Boom 3D
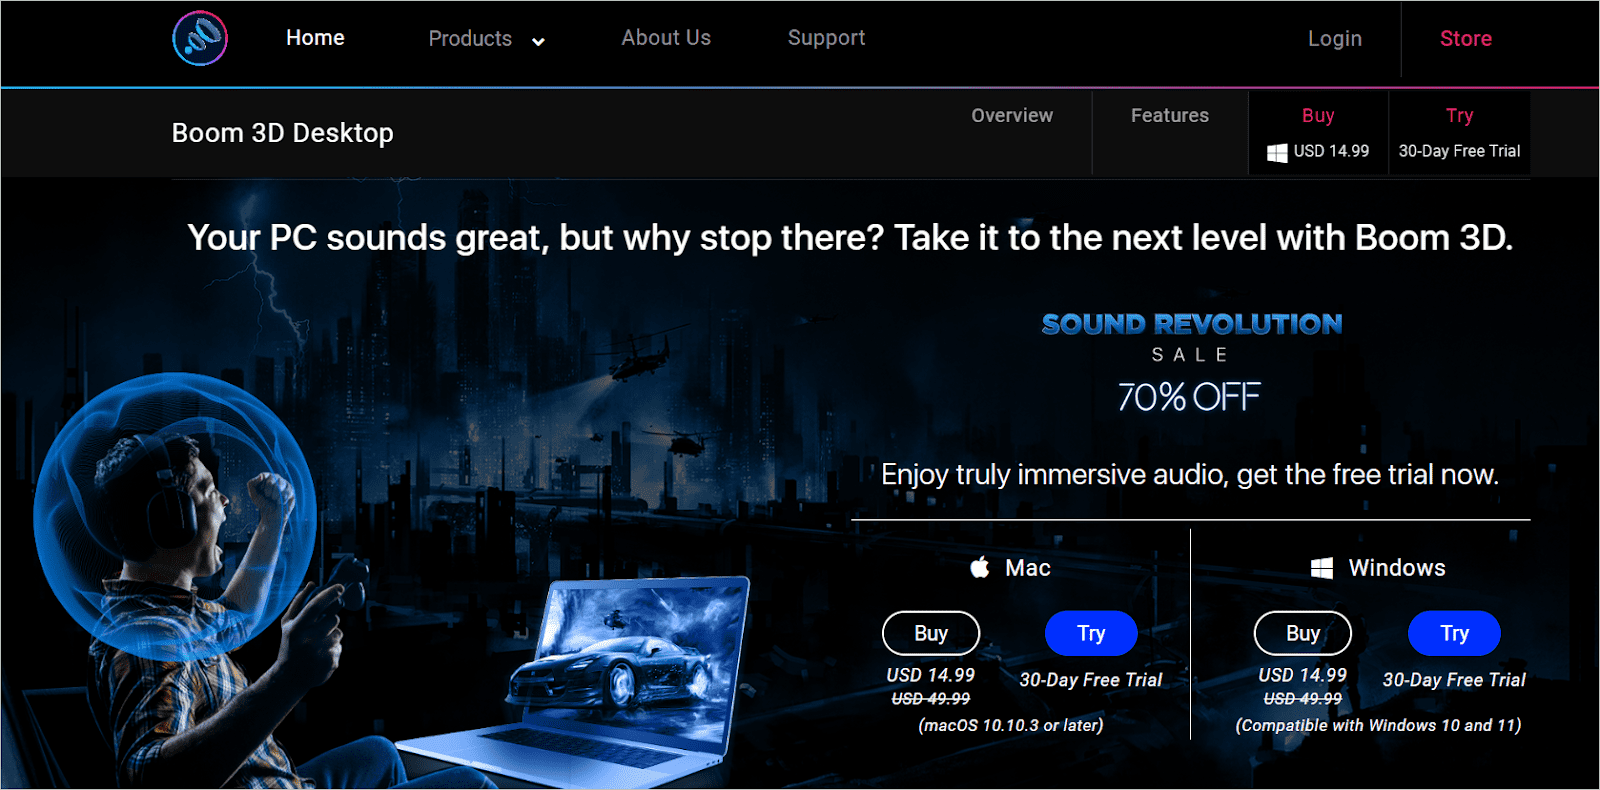
Call it an audio manager app, a 31-band equalizer, or an audio player; Boom 3D will give you the best equalizer settings in Windows 11. The software has an excellent 3D surround sound feature that can be edited to change the strength and position of the 3D sound. So whether you are into gaming or listening to music, the 3D sound experience will take you to a new place.
The equalizer slider lets you choose from a number of presets to enable immersive audio, reduce harsh sounds, and many others. Luckily, you get a 30-day free trial period for the software, after which you have to get a paid plan to use the basic and advanced mode. During this period, you get many audio equalizing features.
What we liked:
- Excellent audio booster
- Aesthetically appealing and easy-to-use EQ settings interface
- Many effects like pitch and ambiance can be added
- In-build radio and audio player
- Equipped with an apps volume controller
Get Boom 3D
6. EqualizerPro
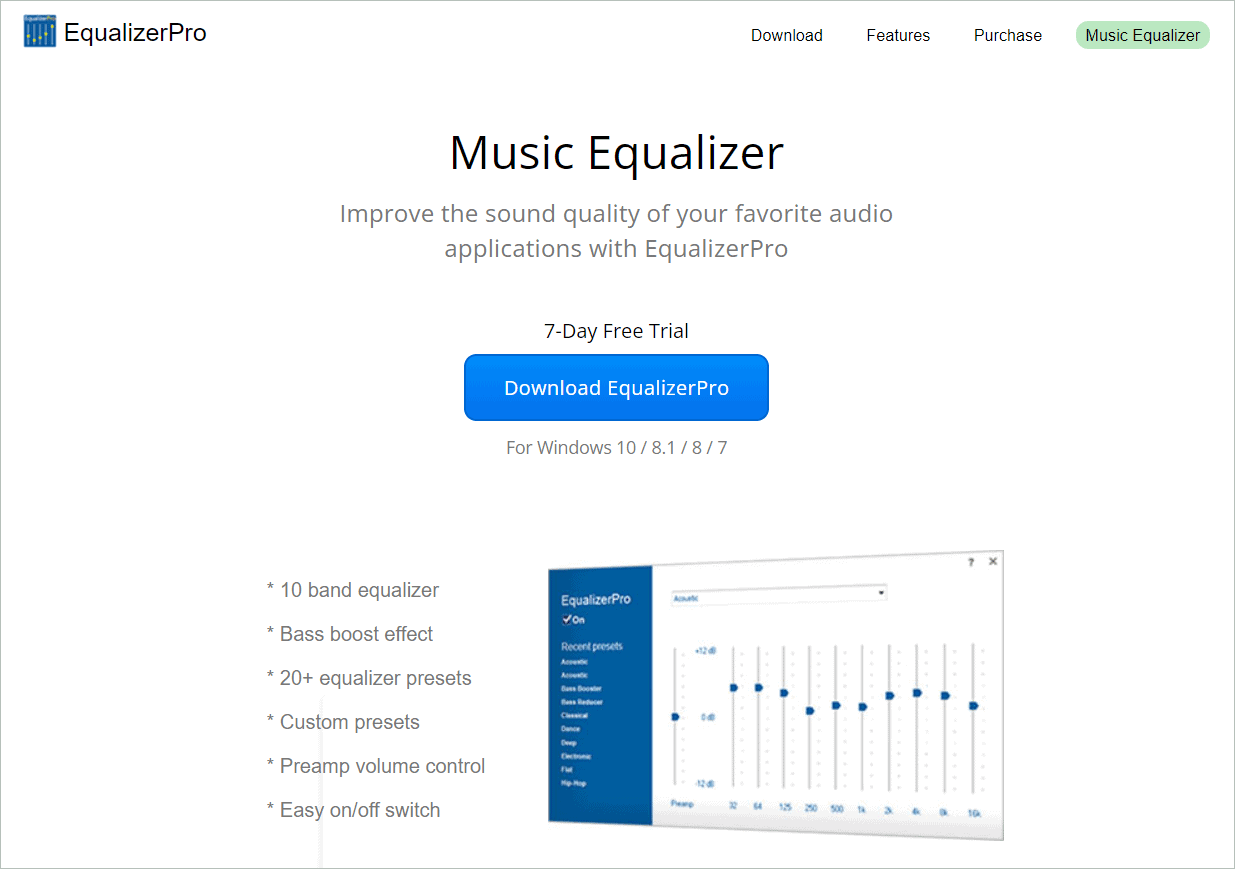
With a simple interface and easily adjustable sliders, the audio enhancements in EqualizerPro allow the best equalizer settings in Windows 11. The equalizer app has ten bands and adjustable presets between -12 and 12dB. Equalizer Pro is good at controlling the audio files’ tone and pitch.
The bass-boosting technology amplifies low-frequency sounds to give sharp and clear sound output. You can avail of the 7-day free trial option to see if the audio enhancer software suits the different genres of music you like to hear.
What we liked:
- Strong bass boost effect
- More than 20 equalizer built-in presets are available
- Preamp volume control
- Build your custom presets for varying needs
- Handy on/off switch
Get EqualizerPro
7. Graphic Equalizer Studio
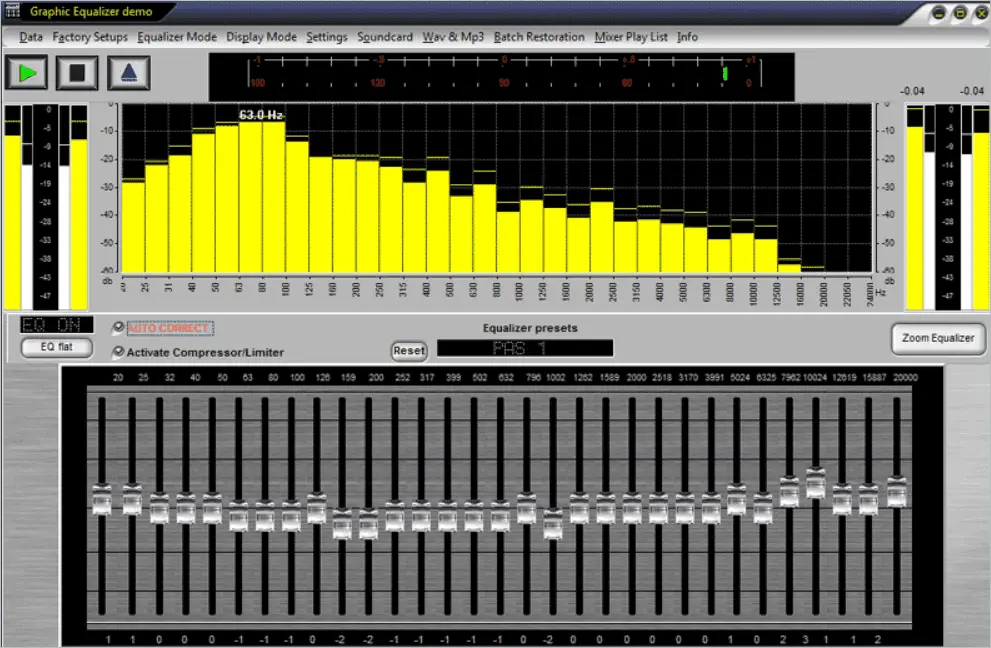
Having some prior audio processing knowledge would help you configure the best equalizer settings in Windows 11 using Graphic Equalizer Studio. You can use it as an integrated compressor, mixer, limiter, or enhancer. It has the configurations saved in two places.
The unique features that make it different from other equalizers are the real time equalization of digital audio and automated equalization of live audio. In fact, the tool comes with many additional settings for gaming. These additional options make your gaming experience unforgettable.
What we liked:
- Produces consistent audio for the best sound quality
- Refresher and MP3 player available
- Automatic calculator of band frequencies
- Adjustable Q-factor to fine-tune separate configurations
- Top-notch audio equalization options
Get Graphic Equalizer Studio
Final Thoughts On Best Equalizer Settings
You will find multiple ways to enhance the sound quality of your PC for a better auditory experience. The audio customization interface offers some amazing features to change speaker and microphone settings in Windows 11. Apart from enabling “Enhance audio” and “Spatial sound,” you can have the best equalizer settings in Windows 11 for the best sound output.
Amplifying sound using third-party software is just like using an in-built equalizer for the same purpose. This should solve your audio issues. Your first option is Realtek Audio Manager, which is widely used for Windows operating systems. For advanced features, you can download and install equalizer apps that let you use a number of presets, add sound effects, balance the frequency and do much more.
При просмотре телешоу или фильмов на компьютере иногда громкость увеличивается, а иногда становится очень низкой, из-за чего нам становится трудно слышать.
Этот тип проблемы со звуком возникает, когда эквалайзер звука отключен. Теперь вы можете спросить, что такое эквалайзер звука в Windows 11 и что он делает?
Что такое эквалайзер звука в Windows 11?
Эквалайзер звука или выравнивание громкости — это функция Windows 11, которая выравнивает уровни звука на вашем компьютере. Предполагается, что эта функция сбалансирует колебания уровня громкости на вашем компьютере или ноутбуке с Windows 11.
Выравнивание громкости является частью параметров улучшения звука в Windows 11, и его можно включить в настройках звука.
Как включить эквалайзер звука в Windows 11?
Эквалайзер звука или громкости можно включить в настройках Windows 11. Вот как включить функцию эквалайзера звука в Windows 11.
1. Чтобы начать работу, нажмите кнопку «Пуск» в Windows 11 и выберите «Настройки» .

2. Когда откроется приложение «Настройки», перейдите на вкладку «Система» .
3. С правой стороны нажмите «Звук» .

4. Затем в разделе «Настройки звука» прокрутите вниз и нажмите «Дополнительные настройки звука» .

5. Теперь выберите подключенный динамик и нажмите «Свойства» .
6. В свойствах динамика перейдите на вкладку «Улучшения» .
7. Далее в разделе «Улучшения» отметьте « Выравнивание громкости» .
8. После внесения изменений нажмите «Применить» , а затем «ОК» .
Вот и все! Это включит эквалайзер громкости на вашем компьютере с Windows 11.
Как отключить улучшения звука в Windows 11
Хотя включение улучшений звука, таких как выравнивание громкости, в Windows 11 может потребовать прохождения нескольких диалоговых окон, отключить их очень просто. Вот как отключить улучшения звука в Windows 11.
1. Нажмите кнопку «Пуск» Windows 11 и выберите «Настройки» .

2. Когда откроется приложение «Настройки», переключитесь на « Система» .
3. С правой стороны нажмите «Звук» .

4. Затем выберите динамик в разделе «Выход» .

5. Прокрутите вниз до раздела «Улучшения звука». Затем щелкните раскрывающийся список рядом с пунктом «Улучшения звука» и выберите «Выкл.» .

Вот и все! Выбор параметра «Выкл.» немедленно отключит все улучшения звука на ПК с Windows 11.
Итак, вот как легко включить эквалайзер звука на компьютере с Windows 11. Если вам нужна дополнительная помощь по нормализации звука в Windows 11, сообщите нам об этом в комментариях. Кроме того, если это руководство окажется для вас полезным, не забудьте поделиться им с друзьями.