
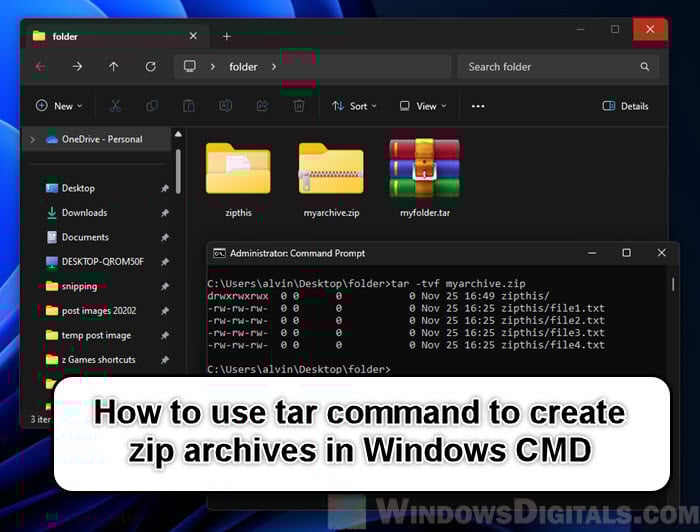
The tar command, which is very common in Unix and Linux systems for archiving and compressing files (also known as zipping), is also available in Windows 11 and Windows 10. It mainly helps you pack many files and folders into one file, called a tarball. In this guide, we’ll show you how to use the tar command in Windows to make ZIP archives.
Also see: How to Open or Extract .Gz, Tar.gz or .Tar File in Windows 11/10
Check if you have tar installed in Windows 11
Before we start making ZIP files with the tar command, make sure you have all the needed tools on your Windows 11 or Windows 10 PC. Starting with Windows 10’s Fall Creators Update and also in Windows 11, the tar command is built-in and you can use it from Command Prompt or PowerShell. Below is how you can check if tar is on your computer and install it if it’s not.
- Open Command Prompt or PowerShell.
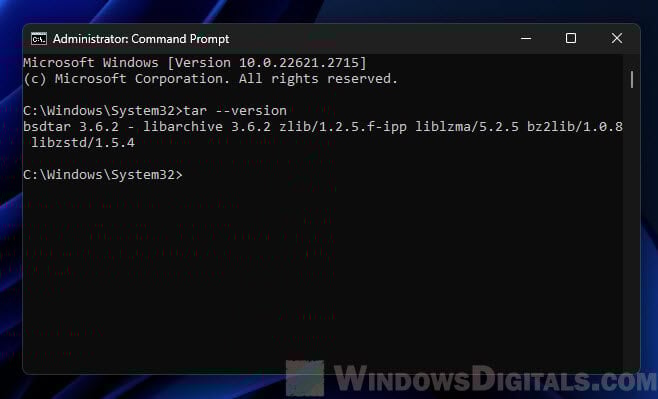
- Type
tar --versionand press Enter. - If you see a version number, tar is already on your computer. If you get an error or the command doesn’t work, you need to install it.

- If tar is not on your computer, the simplest way to install it is by turning on the Windows Subsystem for Linux (WSL).
- Go to the Windows search bar, type “Turn Windows features on or off”, and click on it.
- In the Windows Features window, tick the box for “Windows Subsystem for Linux” and click OK.
- Restart your computer when asked.
- After restarting, you can install the Linux version you like from the Microsoft Store, like Ubuntu.

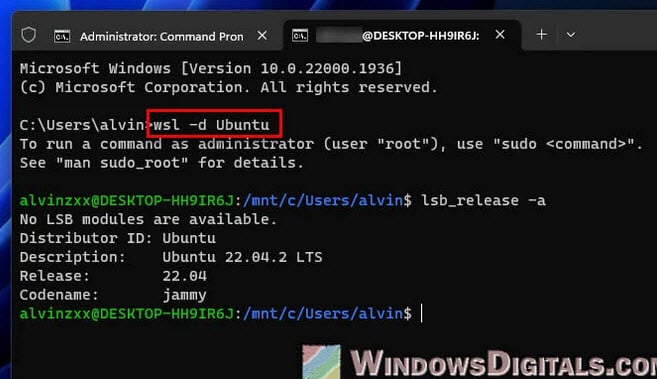
- Once you have WSL with your chosen Linux version installed, you can use tar by starting the Linux app from the Start menu.
- You can also use tar directly in Windows Command Prompt or PowerShell.
With tar ready to use on your Windows machine, you can now start making ZIP archive files. In the next part, we’ll go through the basic commands and how to use them.
Suggested read: How to Zip Files and Folders in Windows 11/10 Without Any Software
Create ZIP archives with tar command
Now that you have tar ready on your Windows computer, let’s see how to use it to make ZIP archive files. It’s quite simple and uses basic command line steps.
- Start Command Prompt or PowerShell, whichever you like more.
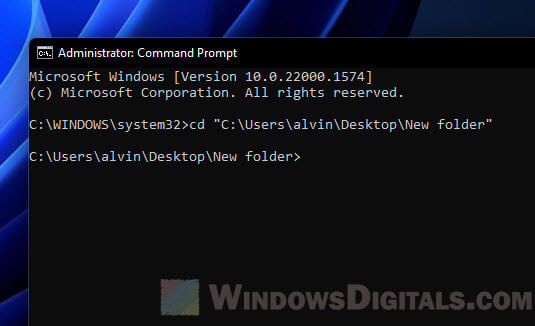
- Move to the folder where your files are by using the
cdcommand. For instance,cd C:\Users\Username\Desktop\.
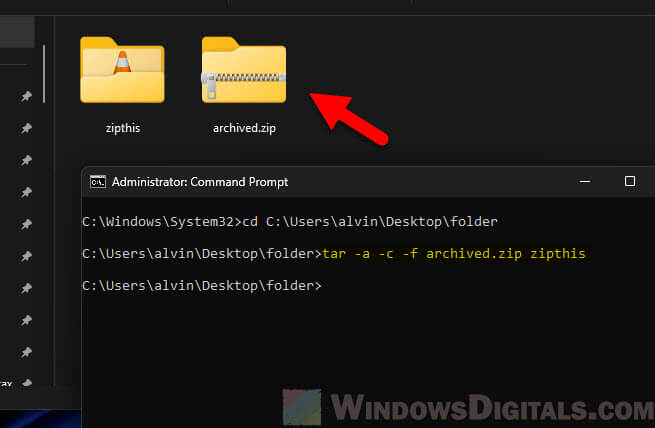
- The basic way to make a ZIP file with
taris like this:tar -a -c -f archive_name.zip file_or_directory_to_compress
- Here,
-apicks the ZIP format automatically,-cmeans create, and-fnames the archive. - To make a ZIP archive of a folder called MyFolder, the command would be:
tar -a -c -f myarchive.zip MyFolder

- This command makes a ZIP file named myarchive.zip with MyFolder inside.
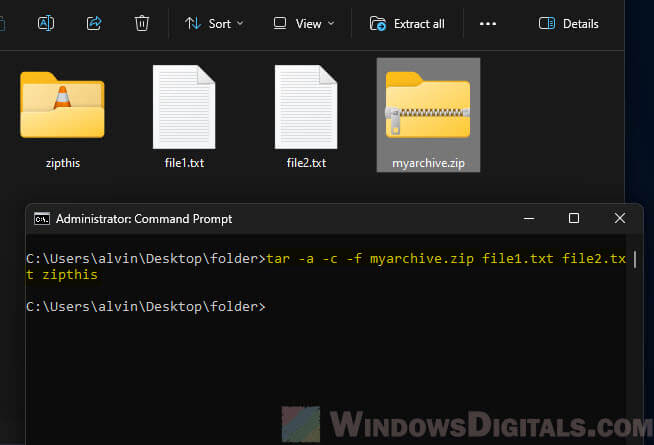
- You can also pack several files or folders in one go:
tar -a -c -f myarchive.zip file1.txt file2.txt MyFolder

- This makes a ZIP file with file1.txt, file2.txt, and the MyFolder folder inside.
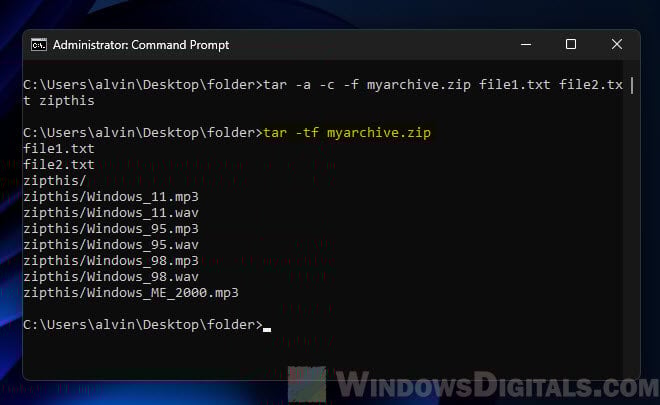
- To check if your files are correctly packed, you can list what’s in the ZIP file:
tar -tf myarchive.zip

- This shows the files in myarchive.zip.
Pro tip: How to Split a File Into Multiple Files in Windows 11
In the next part, we’ll share some extra tips to make your ZIP archiving with tar even better.
Some tips for more efficient ZIP archiving with tar command
The basic tar command for making ZIP files is simple, but there are more options and tricks that can help you archive better and fit your needs.
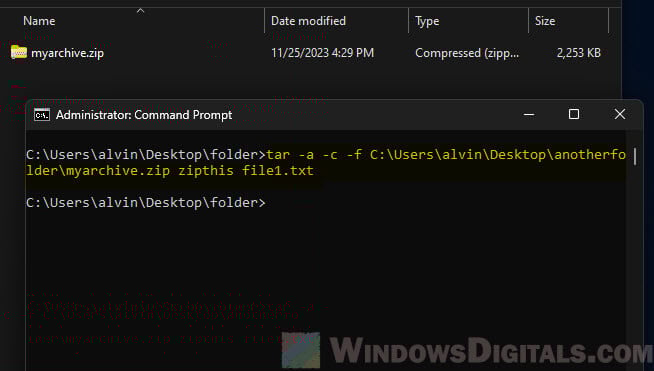
- Usually,
tarmakes the ZIP file right where you are. To make the archive in a different place, add the path to the archive name. For example:tar -a -c -f C:\Archives\myarchive.zip MyFolder

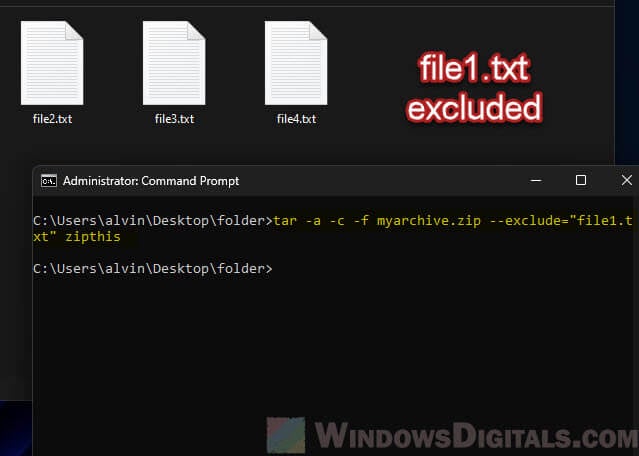
- Sometimes, you might not want to include certain files or folders in the archive. Use the
--excludeoption for this:tar -a -c -f myarchive.zip --exclude="file1.txt" MyFolder

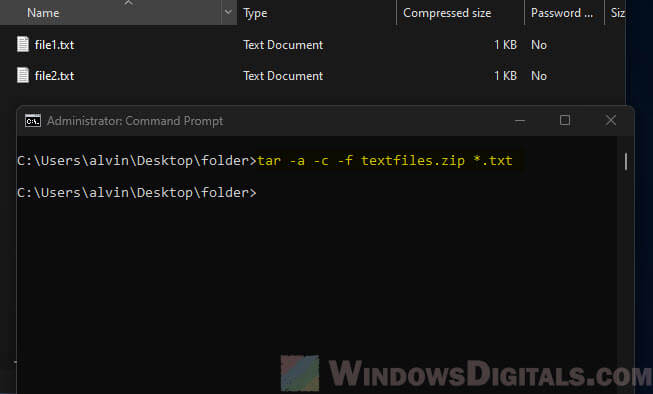
- You can use wildcards (*) to pack files that match a certain pattern. For example, to pack all
.txtfiles:tar -a -c -f textfiles.zip *.txt

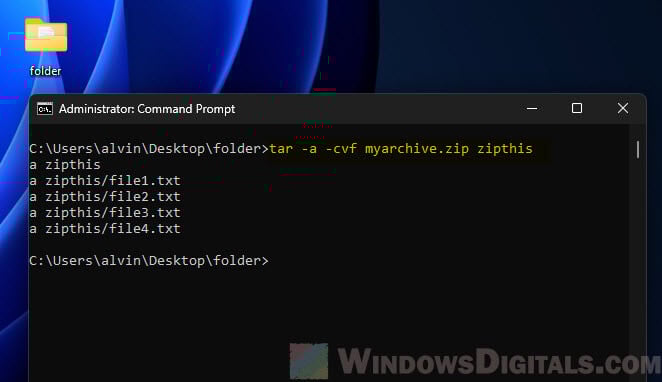
- If you want to see the files being packed, add the
-v(verbose) option:tar -a -cvf myarchive.zip MyFolder

- This will show each file as it’s added to the archive.
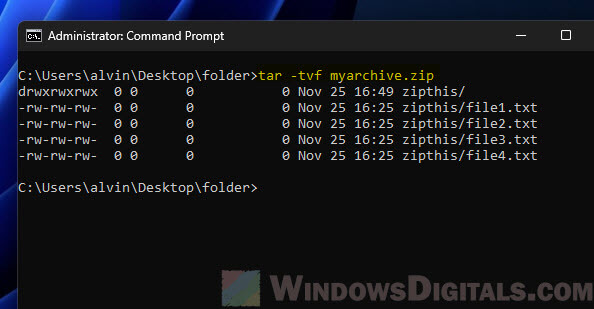
- After making an archive, it’s good to check if it’s all okay. Do this by:
tar -tvf myarchive.zip

- This not only shows the contents but also checks if the files are fine.
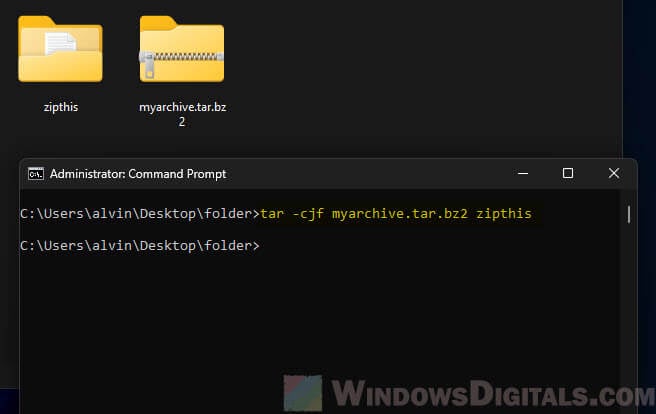
- While
-apicks ZIP compression by itself, you can choose other compression methods like gzip or bzip2 with-zor-j:tar -czf myarchive.tar.gz MyFolder tar -cjf myarchive.tar.bz2 MyFolder

- Note that these commands make
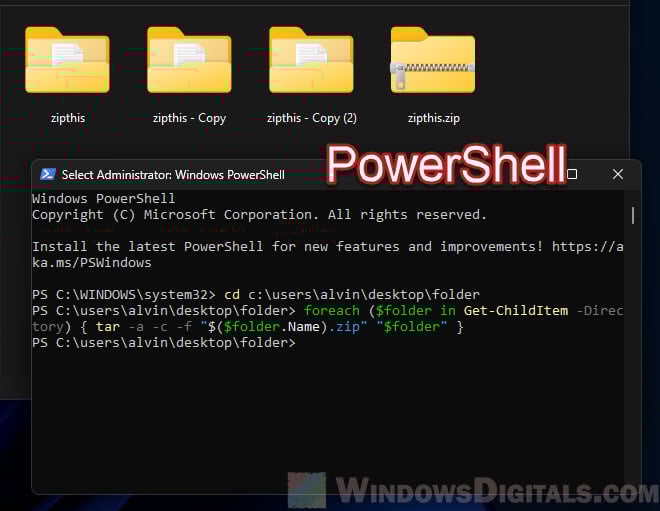
.tar.gzor.tar.bz2files, not ZIP. - For batch archiving multiple directories into separate archives, you can use a simple script or loop in the command line. For example, in PowerShell:
foreach ($folder in Get-ChildItem -Directory) {
tar -a -c -f "$($folder.Name).zip" "$folder"
}
Useful guide: Move All Files from Subfolders to Main Folder (Windows)
Create tar.gz and tar archives with tar command in Windows 11
Besides making ZIP files, the tar command in Windows can also make .tar.gz (tarball compressed with gzip) and .tar (uncompressed tarball) archives. These types are very common in Unix and Linux systems and are useful for many things, like backing up and sharing software.
Create a tar.gz archive
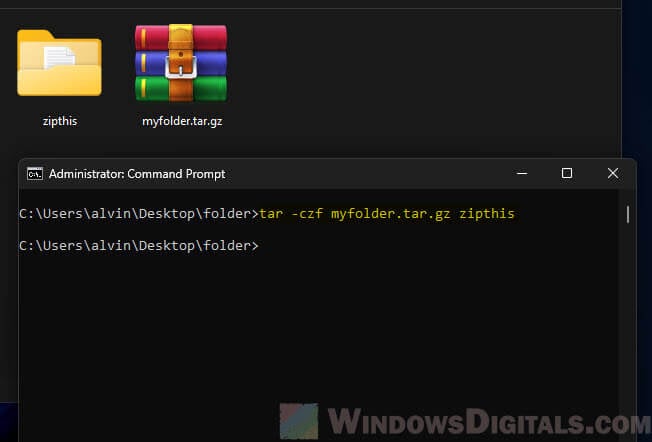
- To make a .tar.gz archive, use the
-zoption for gzip compression. The basic command looks like this:tar -czf archive_name.tar.gz file_or_directory_to_compress
- Here,
-cmeans create,-zapplies gzip compression, and-fnames the archive file. - To compress a folder called MyFolder into a .tar.gz archive, the command is:
tar -czf myfolder.tar.gz MyFolder

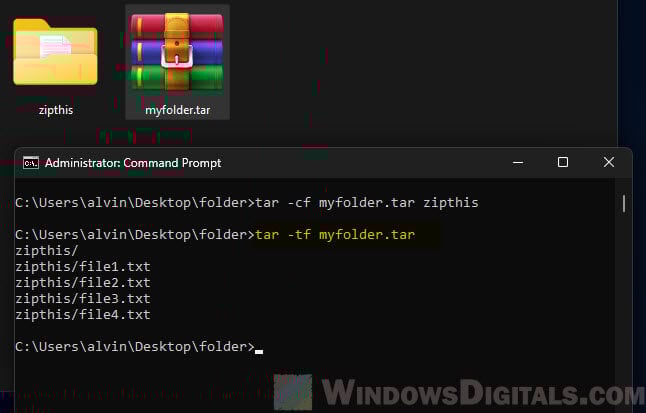
Create a tar archive
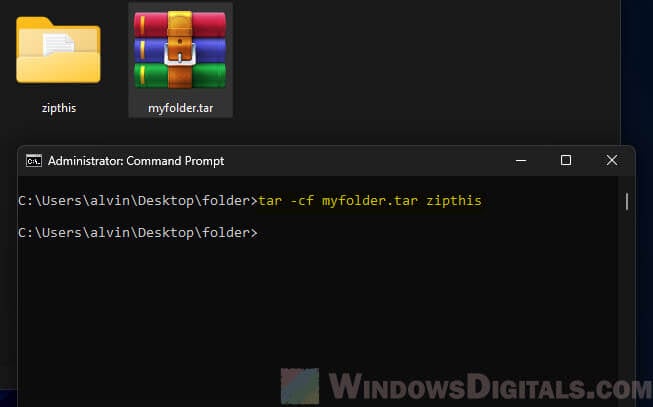
- Making an uncompressed tar archive is simple. Just leave out the compression option (
-zfor gzip or-jfor bzip2). The command goes like this:tar -cf archive_name.tar file_or_directory_to_compress
- To pack MyFolder into a .tar file, use:
tar -cf myfolder.tar MyFolder

Some other options
- Just like with ZIP archiving, you can use the
-v(verbose) option to see the files being added to the archive. - The
--excludeoption works the same way as with ZIP files, letting you leave out specific files or folders. - Use
tar -tf archive_name.tar.gzortar -tf archive_name.tarto list what’s in your .tar.gz or .tar archive.
Содержание статьи:
- Архивация файлов в Windows 11
- Способ 1
- Способ 2
- Альтернативные варианты сжатия
- Вопросы и ответы: 0
Приветствую!
В современной Windows 11 24h2 появилась встроенная возможность сжимать* файлы и папки в архивы 7Z и TAR (в дополнении к ZIP // на мой взгляд не хватает еще RAR, GZ). Т.е. для работы с этими форматами более не нужен сторонний архиватор, а все действия можно сделать прямо из проводника (что, собственно, сегодня и хочу кратко показать…).
📌 Для справки! Зачем может понадобиться сжимать файлы в 7Z:
- для того, чтобы уменьшить размер папки/файла (например, для ее более быстрой отправки по сети, или записи на флешку). 7Z показывает хор. степень сжатия (лучше, чем у ZIP);
- чтобы иметь дело с одним архивом, а не с сотней мелких файлов;
- для шифрования файла, чтобы запаролить его (правда Windows 11 такую опцию пока не предоставляет), и др.
*
Архивация файлов в Windows 11
Способ 1
Итак…
Если у вас Windows 11 24h2+ (как узнать версию ОС) — то достаточно сделать правый клик мышки по файлу/папке и выбрать в меню «Сжать до…», затем указать формат и архив будет создан (см. скриншот ниже). 👇
Обратите внимание, что есть возможность также открыть доп. параметры для ручной настройки создания архива (стрелка-4 на скрине ниже).
Примечание: если у вас при клике ПКМ по файлу появл. классическое контекстное меню (в котором нет 7Z) — то откл. его и вкл. меню от Windows 11. Вот пример, как это делается. Также проверьте версию своей ОС.

Сжать до (после ПКМ по файлу) — Windows 11
Среди доп. параметров можно выбрать место размещения нового архива, формат, метод сжатия (для 7Z: Store, Deflare, Bzip2, LZMA 1/2, PPMd), уровень сжатия. См. пример ниже. 👇

Выберите место назначения и создайте архив — меню Windows 11
Работает архиватор быстро, в моих тестах не зависал. Из недостатков лично я бы выделил следующее:
- отсутствие возможности поставить пароль;
- нельзя добавить в уже существующий архив новые файлы (для 7Z);
- не работает в старом контекстном меню проводника (просто его многие вкл. по умолчанию в отличие от нового…).
Тем не менее считаю, что поддержка основных форматов архивов ОС Windows — дело полезное (а то иной раз после переустановки ОС, когда под-рукой нет комп. аптечки, — думаешь чем открыть архив с драйверами… 👀).
Кстати!
Открывать архивы 7Z, TAR, ZIP в Windows 11 можно как обычные файлы: по двойному клику левой кнопки мыши (только у них значок в виде папки с замочком). См. пример ниже. 👇

Открыл архив 7Z в проводнике (Windows 11)
*
Способ 2
Если функционала архиватора (встроенного в Windows 11) недостаточно — можно прибегнуть к сторонней программе. В плане работы с форматом 7Z, наверное, нет ничего лучше, чем 📌7-Zip (ссылка на офиц. сайт).
После ее установки — достаточно сделать правый клик мыши по файлу (перейти в контекстно меню, нажав показать доп. параметры), и выбрать в меню «7-ZIP -> Добавить к архиву».
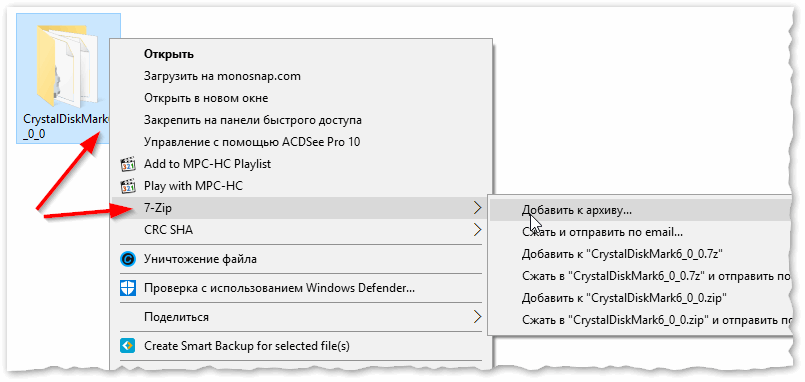
7-Zip — добавить к архиву (проводник Windows)
Далее откроется окно с кучей параметров. В общем случае достаточно указать формат сжатия (7Z), затем выбрать степень сжатия (например, ультра) и нажать OK. Всё просто?! 😉
Примечание: если вам нужно создать зашифрованный архив с доступом по паролю — то см. вот этот пример (он как раз для 7-ZIP).
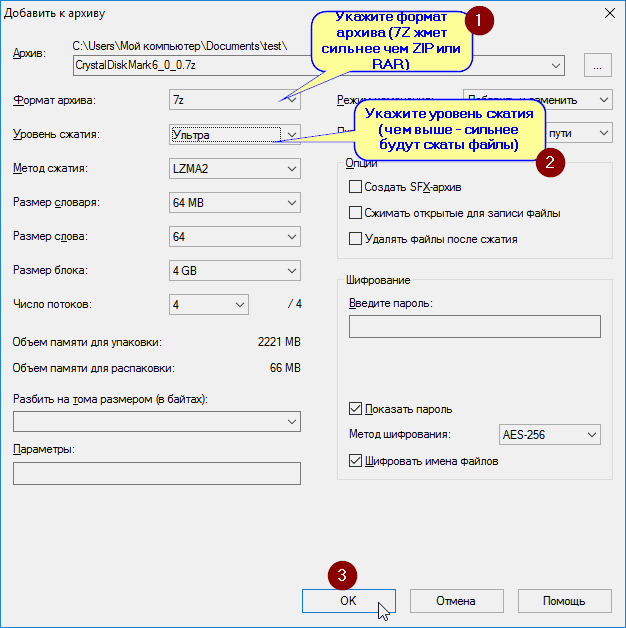
Добавить к архиву — настройки архиватора 7-ZIP (необходимо задать основные параметры: уровень сжатия, метод, размер блока и т.д.)
Кстати, помимо 7-ZIP и WinRAR — есть и др. достаточно неплохие архиваторы, способные открывать десятки (если не сотни) всевозможных форматов. В этой заметке привел неск. таких продуктов, рекомендую к знакомству!
https://ocomp.info/arhivatoryi-analog-winrar.html
*
Альтернативные варианты сжатия
Не все файлы одинаково хорошо сжимаются. Например, картинки или видео (иногда документы в PDF, образы ISO, MDF) с помощью архиватора сжать практически не удается. И в таких случаях (при необходимости уменьшить их размер) — можно пойти «другим путем»…
О чем речь: можно попробовать их переконвертировать в иной формат, «отрезать» лишнее, удалить часть ненужных страниц (если это документ), и т.д. Несколько практических примеров для разных файлов я показал в этой заметке (рекомендую!).
https://ocomp.info/kak-umenshit-razmer-fayla.html
*
Дополнения по теме заметки — приветствуются в комментариях.
Удачи!
👋
Both Linux and macOS can create and extract a compressed archive file out of the box. As of Windows 10 build 17063 though, Tar is now packaged in the OS by default. This gives users a way to compress files without installing additional apps however, Tar only has a command line interface on Windows 10 and it cannot create or extract ZIP files. Those are its limitations. Here’s how to use Tar on Windows 10.
Check your Windows 10 build number to make sure you have build 17063 or later.
Compress Files
To compress files and folders, you need to run the following command.
Syntax
tar -cvzf archive name.tar path to folder to compress
Example
tar -cvzf archive.tar "C:\Users\fatiw\Desktop\My Account Info"
The output file will be saved to the same directory that you’re in. For example, if you ran the above command in your user folder, that’s where the archive will be saved. You can cd to a different folder, and create the archive there. If the file name that you want to give the .tar file or the path to the folder or file you want to compress contains spaces, make sure you enclose it in double quotes.
Extract
To extract a Tar file, you need to run the following command.
Syntax
tar -zxvf archive name.tar -C path to extraction location
Example
tar -zxvf archive1.tar -C "D:\Apps"
About Extraction And Compression
There is a small difference between extraction and compression using Tar on Windows 10. When you compress a file or folder, the compressed file is saved to the directory you’re currently in. This means that you have to be careful which folder you cd into. Alternatively, you can specify in the command where you want to save the Tar file.
Syntax
tar -cvzf "path and name to archive.tar" "path to folder to compress"
Example
tar -cvzf "C:\Users\fatiw\Desktop\My Account Info\my_archive.tar" "C:\Users\fatiw\Desktop\My Account Info"
With extraction, you have to specify where the folder is extracted to however you can extract it from any directory. You do not have to cd into the folder the Tar file is in to execute the command.
You can read up on other commands that the Tar program supports. It’s not the easiest way to compress files and folders and users will likely still go for third-party apps that offer a GUI over clunky command prompt commands simply because they’re easier to use.

Fatima Wahab
Fatima has been writing for AddictiveTips for six years. She began as a junior writer and has been working as the Editor in Chief since 2014.
Fatima gets an adrenaline rush from figuring out how technology works, and how to manipulate it. A well-designed app, something that solves a common everyday problem and looks
По умолчанию tar архивирует файлы только без сжатия, но с использованием некоторых частей. Мы можем использовать различные методы сжатия, чтобы на выходе получить архив меньшего размера. Утилита tar обычно включается в большинство дистрибутивов Linux по умолчанию, а сам формат поддерживается другими операционными системами, включая Windows и macOS, с помощью различных инструментов и утилит.
В этой статье мы рассмотрим некоторые общие примеры использования команды tar и поддерживаемые флаги.
1. Создание tar архива
Для создания обычного архива без сжатия достаточно ввести команду ниже:
$ tar cvf <tar-file-name> <files-to-archive>
Здесь флаги c обозначает создание, v обозначает подробный вывод и f обозначает имя файла архива tar. По соглашению укажите имя файла tar с расширением .tar. Архивируемые файлы могут быть определены с помощью подстановочных знаков или же можно указать один файл или несколько файлов/путей.
В качестве примера можно привести три файла в каталоге:

Создать архив, содержащий все три файла, можно следующим образом:

Также можно указать только конкретные файлы для архивирования, например:

2. Создание сжатого архива (GZ)
tar позволяет не только архивировать файлы, но и сжимать их для экономии места. Одним из популярных форматов сжатия является gunzip, обычно представленный расширением .gz после .tar или как tgz. Мы можем использовать флаг z, чтобы указать, что файлы должны быть сжаты с помощью gunzip. Вот пример:

Можно заметить, что размер архивных файлов существенно отличается, хотя оба содержат одни и те же три файла. Это связано с использованием сжатия с использованием флага z.
3. Создание сжатого архива (BZ)
tar поддерживает несколько других форматов сжатия. Одним из них является bz2 или bzip2, который представлен расширением tar.bz2 или иногда как tbz2. Это может дать вам меньший размер архива, но, в свою очередь, потребляет больше ЦП, так что процесс сжатия/декомпрессии может быть медленнее, чем gz архив. Для создания bz архива используется флаг j:

4. Распаковка всех файлов
Архив tar (сжатый или несжатый) можно извлечь с помощью опции x. Ниже приведены примеры, поясняющие его использование:

Эта команда также работает для сжатого архива формата gz:

И даже для архива со сжатием bz2:

5. Просмотр содержания архива
Чтобы перечислить содержимое архива tar, можно использовать флаг t, как показано ниже:

6. Распаковка конкретных файлов
Из архива tar, tar.gz или tar.bz2 можно извлечь как все файлы, так и один конкретный файл, указав имя файла:

Аналогично, можно указать несколько имен файлов, разделенных пробелом, чтобы извлечь их вместе за один переход.

7. Распаковка с помощью маски
Чтобы извлечь один или несколько файлов с помощью шаблона PATTERN, используйте флаг --wildcards:

8. Добавление файлов в архив
В существующий несжатый архив можно добавлять новые файлы используя флаг r или --append с новыми именами файлов или шаблоном подстановочных символов (помните, что это работает только с несжатыми TAR-файлами, а не со сжатыми форматами tar.gz или tar.bz2):

Можно увидеть, что содержимое списка archive.tar показывает два только что добавленных файла.
9. Удаление файлов из архива
Удаление определенных файлов из архива tar возможно с помощью флага --delete, как показано ниже (сравните список tar до и после удаления файлов):

Опять же это работает только для несжатых архивов и завершится неудачей для сжатых форматов архива.
10. Создание архива с проверкой
При создании несжатых архивных файлов можно проверить содержимое архива, используя флаг W как показано ниже:

Этот флаг нельзя использовать с флагами сжатия, хотя можно сжать созданный файл tar позже с помощью gzip или других инструментов.
11. Распаковка архива в папку
Если вы хотите извлечь содержимое тарбола в определенную папку вместо текущего каталога, используйте флаг -C с указанием пути к каталогу, как показано ниже:

12. Использование флага –diff
Можно использовать флаг --diff или d для поиска любых изменений между файлами в архиве tar и файлами в файловой системе. Вот пример, который запускает diff один раз, когда файл внутри архива и снаружи был один и тот же. Если запустить команду снова после обновления файла, то можно увидеть разницу в выходных данных.

13. Исключение файлов
Исключение определенных файлов может быть обязательным при создании архивов tar. Этого можно достичь с помощью флага --exclude.

Как можно заметить из приведенных выше выходных данных, можно задать флаг --exclude несколько раз, чтобы указать несколько имен файлов или шаблонов связывая их логическим AND. Следует отметить, что из шести файлов в директории в приведенном выше примере только два файла удовлетворяли условию, которое должно быть включено в archive.tar.gz.
14. Просмотр размера содержимого архива
Размер содержимого сжатого архива tar можно получить с помощью следующей команды:

Аналогично для архива bz2:

15. Архивация с сохранением разрешений
По умолчанию команда tar сохраняет разрешение архивированных файлов и каталогов, хотя можно явно указать его с помощью флага -p или --preserve-permissions, как показано ниже.

Заключение
tar — полезная утилита в системах Unix/Linux в течение долгого времени и в первую очередь использовалась в задачах архивирования и резервного копирования. С течением времени утилита развивалась и приобретала многие опции. Он может использоваться для простых и сложных задач, если вы знаете, какие функции он предлагает. В этой статье описаны некоторые основные операции, которые можно выполнить с помощью команды tar, и показано, как она может помочь в выполнении повседневных задач системного администрирования.
Для получения дополнительных сведений обратитесь воспользуйтесь встроенным руководством Linux с помощью команда man tar или используйте команду tar --help или tar --usage.
Background
Needed a quick command to create a single file out of multiple files.
In years past I would have reached for pzkip command line.
Googled
Googled for a more modern approach.
Stack Overflow
Got a hefty lift via Stack Overflow.
It says, if you using MS Windows 10, go with tar, as it is built in.
- Create .zip folder from the command line – (Windows)
Link
Found MSFT now supports tar.
Outline
- Tar Help ( –help )
- Create Tar File ( -c )
- List Tar File ( -t )
- Extract Tar File ( -x )
Options
File Specifier
| Objective | Explanation | Option | Option Argument |
|---|---|---|---|
| Generic | |||
| Specify the file name as a specific filename or a file name pattern | -f | Filename | |
| Verbose Mode | -v | Verbose | |
| Interactive | -w | Interactive | |
| Create Archive ( -c ) | |||
| File Specifier | |||
| Filename | File | ||
| Directory | Directory | ||
| A file that can contain a list of files to process | @archive | ||
| Compression Algorithm – Compress archive with gzip/bzip2/xz/lzma ( -z, -j, -J, –lzma ) | |||
| gzip | -z | ||
| bzip2 | -j | ||
| xz | -xz | ||
| lzma | -lzma | ||
| Archive Format – Select archive format ( format {ustar|pax|cpio|shar} ) ( –format ) | |||
| –format | |||
| ustar | ustar | ||
| pax | pax | ||
| cpio | cpio | ||
| shar | shar | ||
| Exclude Files Matching Pattern | |||
| –exclude | |||
| Exclude files that match a pattern | <file-pattern> | ||
| Base directory or folder | |||
| Change to a base folder | –C | <folder> | |
| Folder/File Listing Target for packaging (@<archive> ) | |||
| Add entries from <archive> to output | @<archive> | <filename> | |
| List Archive ( -t ) | |||
| File Specifier | |||
| Only list files matching a specific file name or pattern | File | ||
| List Archive ( -x ) | |||
| Change to a base folder | –C | <folder> | |
| File Patterns ( When indicated, only files that match this pattern are extracted ) | <file pattern > | ||
| Keep Don’t overwrite existing files | -k | ||
| Don’t restore file’s last modification timestamp | -m | ||
| Files Should not be restored to File System. Only show File Contents on the console |
-O | ||
| Restore each file permission (including ACLs, owner, file flags) | -p |
Tar Help
Syntax
tar --help
Output
Output – Image

Create Tar File
Syntax
tar -c -f [destination-files] [source-files]
Sample
tar -c -f filesfortheweek.tar dailyfiles.txt
Output
Output – Text
tar: Removing leading drive letter from member names
Create Compress Tar File
Syntax
tar -c -z -f [destination-files] [source-files]
Sample
tar -c -z -f filesfortheweek.tar.zip dailyfiles.txt
Output
Output – Text
tar: Removing leading drive letter from member names
List Tar Files
Syntax
tar -t -f [destination-files]
Sample
tar -t -f filesfortheweek.tar
Extract From Tar File
Syntax
tar -x -f [destination-files] -C [source-files]
Sample
if not exist "C:\dailyFiles" mkdir "C:\dailyFiles"

tar -x -f filesfortheweek.tar -C "C:\dailyFiles"
Output
Error
Error – Missing Destination Folder
Outline
If your targeted extract folder does not exist, when attempting to extract files, you will get an error message.
The error message will read unable to chdir ( change directory ) to the targeted folder.
Remediation is simple.
Create the folder manually.
Or in script via, if not exist %target_folder% mkdir %target_folder%
Image

Text
tar: could not chdir to 'C:\dailyfiles'
Referenced Work
- libarchive.org
- libarchive.org
Link
- libarchive.org
- Microsoft
- Tech Community
- Virtualization Team
- Tar and Curl Come to Windows!
Link
- Tar and Curl Come to Windows!
- Virtualization Team
- Windows Command Line
- Rich Turner
- Tar and Curl Come to Windows!
Link
- Tar and Curl Come to Windows!
- Rich Turner
- Tech Community
- PurInfoTech
- Mauro Huc
- How to quickly extract .tar.gz files on Windows 10
Link
- How to quickly extract .tar.gz files on Windows 10
- Mauro Huc
- Stack Overflow
- Create .zip folder from the command line – (Windows)
Link
- Create .zip folder from the command line – (Windows)