
Все способы:
- Отключаем интернет на «десятке»
- Вариант 1: Подключение по Wi-Fi
- Вариант 2: Проводное подключение
- Заключение
- Вопросы и ответы: 4
Постоянное подключение к интернету требуется не всегда – например, если трафик лимитированный, во избежание перерасхода компьютер лучше отсоединять от всемирной сети после сессии. Особенно этот совет актуален для Виндовс 10, и в статье далее мы рассмотрим способы отключения от интернета в этой версии операционной системы.
Отключаем интернет на «десятке»
Отключение интернета на Windows 10 ничем принципиальным не отличается от подобной процедуры для других ОС этого семейства, и зависит в первую очередь от типа соединения — кабельного или беспроводного.
Вариант 1: Подключение по Wi-Fi
Беспроводное соединение намного удобнее подключения по Ethernet, и для некоторых компьютеров (в частности, некоторых современных ноутбуков) является единственным доступным.
Способ 1: Значок в трее
Основной метод отключения от беспроводного соединения представляет собой задействование штатного списка сетей Wi-Fi.
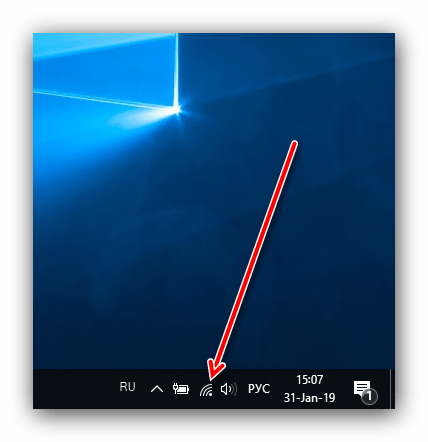
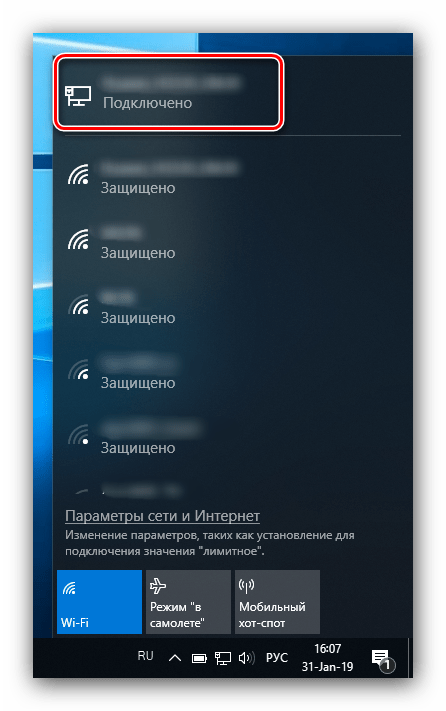
- Взгляните на системный трей, расположенный в правом нижнем углу дисплея компьютера. Найдите на нём значок с иконкой антенны, от которой отходят волны, наведите на него курсор и кликните левой кнопкой мыши.
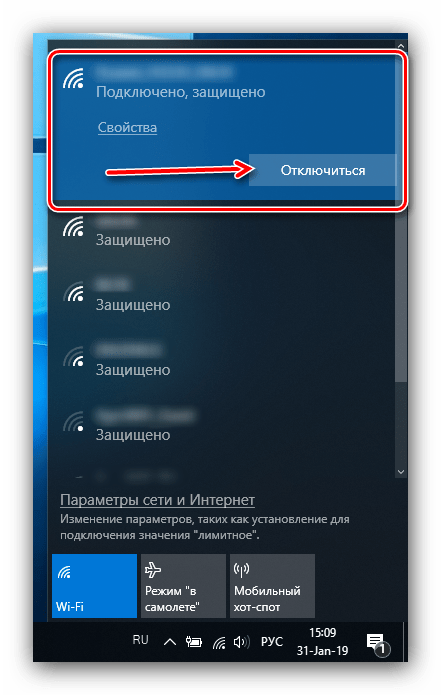
- Откроется список распознанных сетей Wi-Fi. Та, к которой ПК или ноутбук подключены в текущий момент, расположена в самом верху и выделена синим. Найдите в этой области кнопку «Отключиться» и нажмите на неё.
- Готово – ваш компьютер будет отключён от сети.
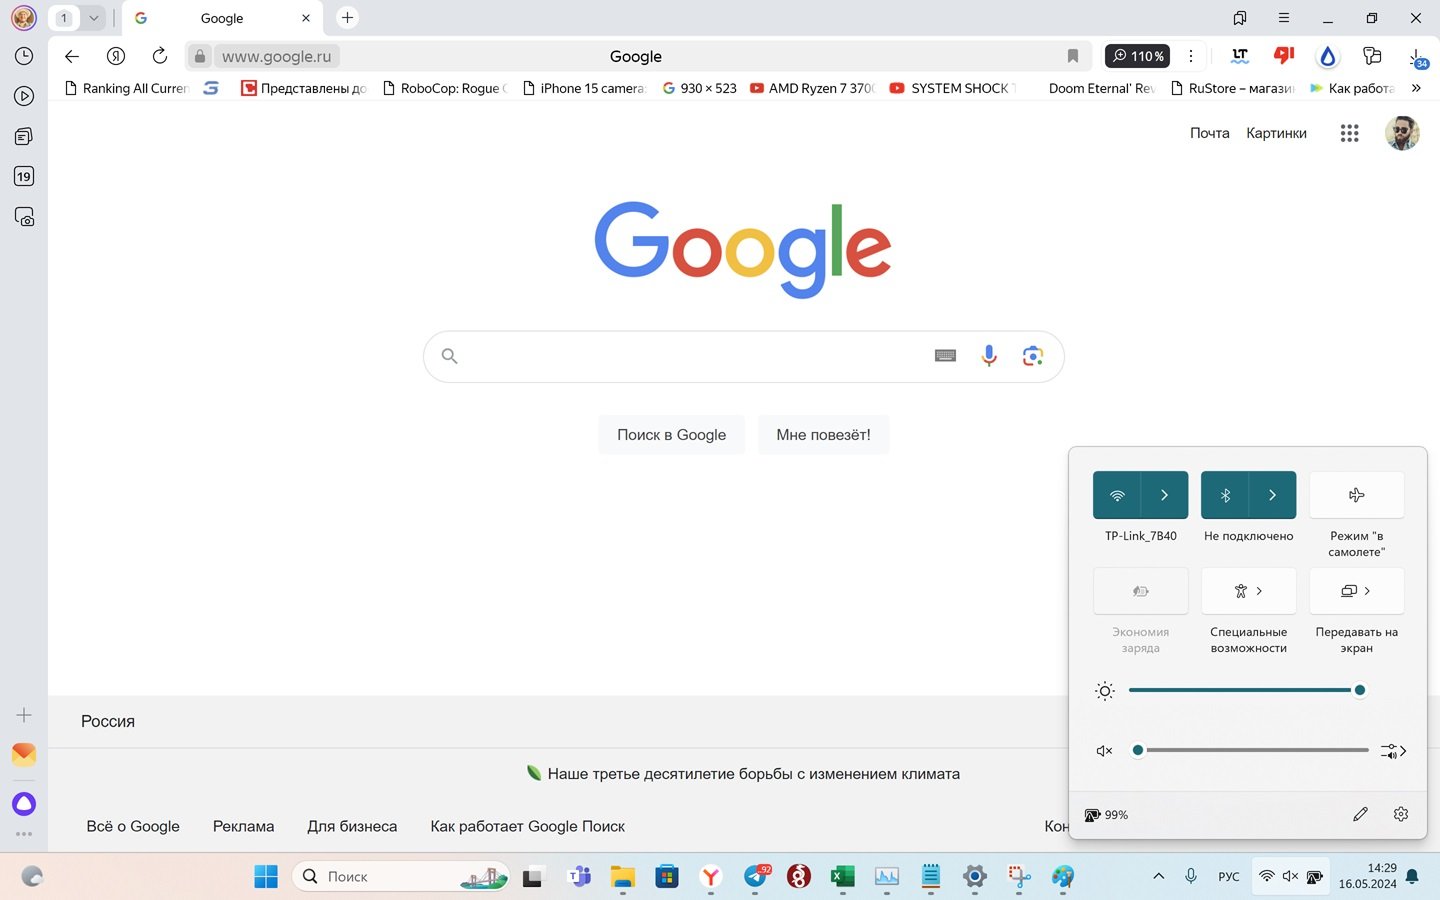
Способ 2: Режим «В самолёте»
Альтернативный способ отсоединения от «паутины» заключается в активации режима «В самолёте», в котором выключается вся беспроводная связь, в том числе и Bluetooth.
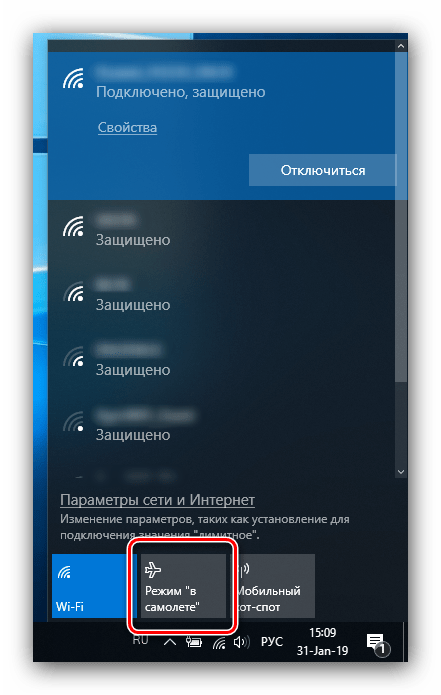
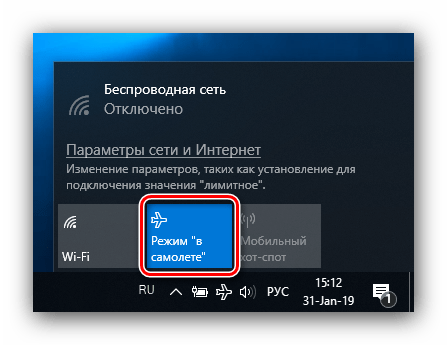
- Проделайте шаг 1 из предыдущей инструкции, но на этот раз воспользуйтесь кнопкой «Режим “В самолёте”», расположенной внизу перечня сетей.
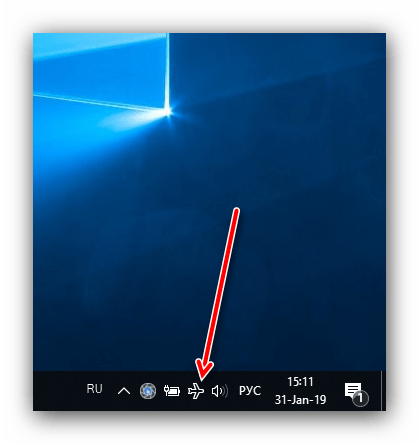
- Вся беспроводная связь будет отключена – значок Wi-Fi в трее сменится на иконку с изображением самолёта.

Для отключения этого режима просто кликните по этой иконке и снова нажмите на кнопку «Режим “В самолёте”».
Вариант 2: Проводное подключение
В случае соединения с интернетом по кабелю доступен только один вариант отключения, порядок действий следующий:
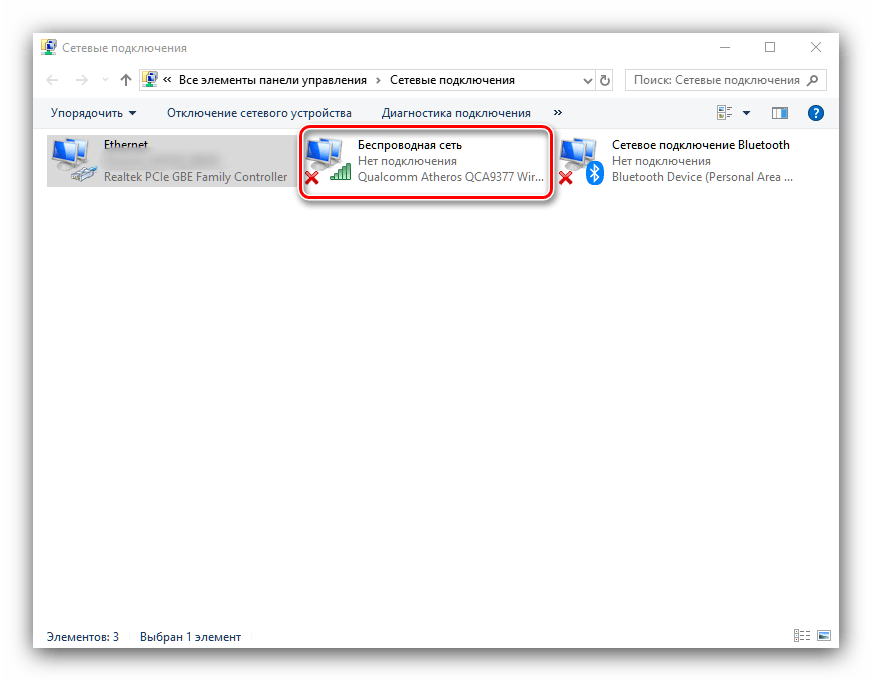
- Снова взгляните на системный трей – вместо иконки Wi-Fi должен быть значок с изображением компьютера и кабеля. Кликните по нему.
- Будет отображен список доступных сетей, такой же, как и в случае с Wi-Fi. Сеть, к которой компьютер подключён, отображается вверху, кликните по ней.
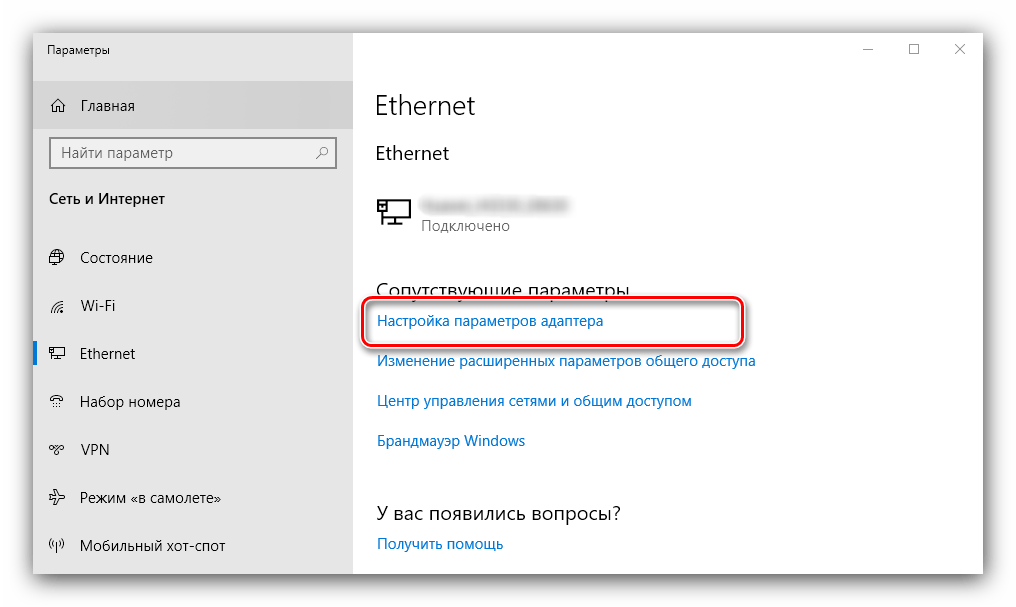
- Откроется пункт «Ethernet» категории параметров «Сеть и Интернет». Здесь нажмите на ссылку «Настройка параметров адаптера».
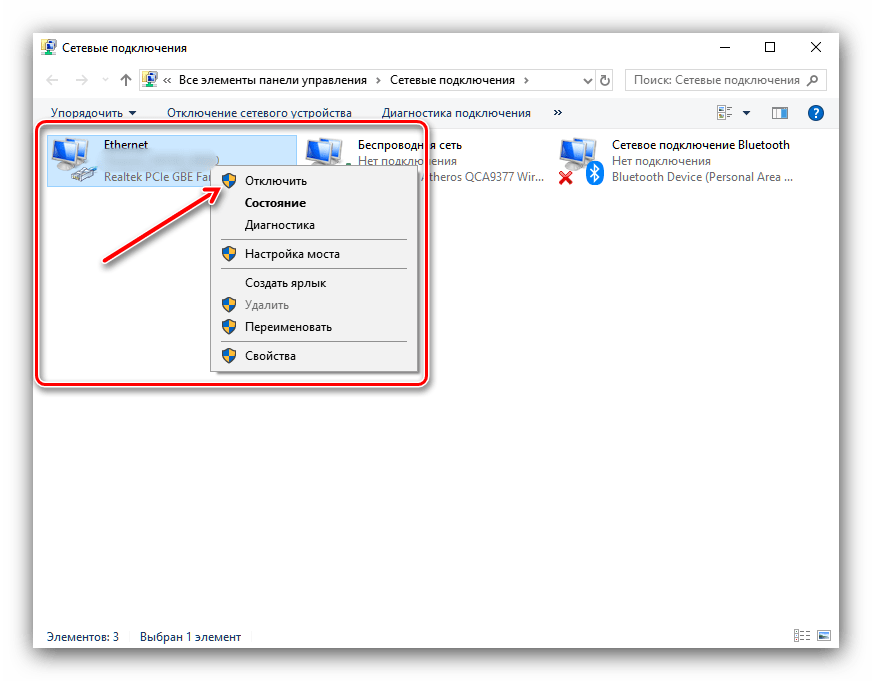
- Найдите среди устройств сетевую карту (обычно она обозначена словом «Ethernet»), выделите её и нажмите правую кнопку мыши. В контекстном меню щёлкните по пункту «Отключить».

К слову, таким же образом можно отключить и адаптер беспроводной связи, что является альтернативой способам, представленным в Варианте 1.
- Теперь интернет на вашем компьютере отключен.
Заключение
Отключение интернета на Windows 10 представляет собой тривиальную задачу, с которой может справиться любой пользователь.
Наша группа в TelegramПолезные советы и помощь
You will be delighted to know that Windows 10 OS offers six different methods to Disable Ethernet Network Connection. Commonly, you need to do this to figure out certain basic network issues. The most familiar method is through Network Connections but here, we present you a few more ways.
Your PC may have more one than one network adapter and thus it is necessary to carefully locate the specific Ethernet connection. In addition, please possess all the administrative privileges to carry out the given methods. To maintain your expenses on data usage, you can Enable Metered Connection for Ethernet on Windows 10. Let’s hook to the tutorial and explore all the ways one after the another.
How to Disable Ethernet Network Connection in Windows 10
Method 1 – Through Network Connections
Step 1 – First & foremost, launch Settings program to Disable Ethernet Network Connection. For this, press Windows + I keys in one go. Alternatively, right-click Start and from the options select Settings.
Step 2 – Select Network & Internet when various icons are visible in the Settings app.
Step 3 – Click Ethernet on the left sidebar of the next page. On corresponding right side of Ethernet, locate and click Change adapter options.
Step 4 – The above action launches Network Connections window on the PC screen, displaying all the connections.
Step 5 – So, find Ethernet in the list and execute a right-click on it. Out of few options that appear, click Disable. Finally, wait for few seconds and Ethernet connection gets disabled.
Method 2 – From Desktop
If you reset Ethernet connection time and again, you can create its shortcut on the desktop for easy accessibility.
Step 1 – Type ncpa.cpl on Cortana text field and click the same that appears below Best match.
Step 2 – Right-click on Ethernet network and choose the option namely Create Shortcut. If you see a prompt, confirm the shortcut creation by clicking Yes.
Step 3 – Go to the desktop and right-click on the shortcut of Ethernet and choose Disable.
Read our tutorial to Create Desktop Shortcut to Network Connection Windows 10.
Method 3 – Using Command Prompt
Step 1 – To Disable Ethernet Network Connection, type cmd in Cortana text box and when the same cmd appears on top, conduct a right-click on it. This shows few choices, click Run as administrator.
Learn multiple ways to Launch Elevated Command Prompt on Windows 10.
Step 2 – Confirm the UAC prompt by clicking the Yes button.
Step 3 – Now, copy-paste the below line of command in the window that comes into view.
netsh interface show interface
Step 4 – It immediately shows all network adapter names of the computer as shown in the given screenshot. So, carefully, locate the name of your Ethernet that you prefer to disable.
Step 5 – Moving ahead, input the below command and press Enter to disable your specific Ethernet connection.
netsh interface set interface “network_adapter_name” admin=disable
Note – Here, ensure to replace network_adapter_name with the actual name and that too within quotes.
The final command with the actual name should look like this –
netsh interface set interface “Ethernet 10” admin=disable
Step 6 – That’s all and this simple command helps you to Disable Ethernet Network Connection quite effortlessly.
Method 4 – Via Device Manager
Step 1 – Right-click Start and out of various options, locate and select the one namely Device Manager.
Step 2 – Search for Network adapters and to see its list, click the arrow on its left side. When you see the list of adapters, find out the Ethernet you wish to disable.
Step 3 – Make a right-click and choose Disable device when few options are visible.
Step 4 – A dialog may appear to seek your confirmation, click Yes.
Method 5 – Use WMIC Command
Step 1 – Here also, type the command cmd on Cortana. When cmd comes on top, right-click and go ahead with “Run as administrator“. Agree to the UAC prompt and to do so, click Yes on the dialog.
Step 2 – Copy/paste this given command and when you press Enter to execute it, you can notice the list of network connections along with their index numbers on left.
wmic nic get name, index
Step 3 – See the index number of your preferred Ethernet network and run this command.
wmic path win32_networkadapter where index=index-number call disable
Note – Here also, ensure to substitute index-number with the actual number of the connection.
So, after inserting the correct number, the command looks something like this.
wmic path win32_networkadapter where index=1 call disable
Step 4 – To verify, open Network Connections and you can find the Ethernet disabled.
Method 6 – Through PowerShell
Step 1 – To begin with, press Win&X and move ahead by choosing Windows PowerShell (Admin) from the menu that shows up.
Explore more ways to Open Elevated PowerShell on Windows 10 After Creators Update.
Step 2 – Type in or copy/paste the command to retrieve the network interface list.
Get-NetAdapter
Step 3 – This shows you all the names of the network adapters moreover, their description, Status, Mac address and so on. So, see the name of the Ethernet you want to proceed with.
For reference, you may like to follow How To Modify MAC Address on A Network Adapter on Windows 10.
Step 4 – So, to Disable Ethernet Network Connection via PowerShell, copy-paste this piece of command.
Get-NetAdapter -Name networkadapter | Disable-NetAdapter -Confirm:$false
Note – Make sure to remove networkadapter and type in the name of the Ethernet you wish to disable.
For instance – The correct command goes like this –
Get-NetAdapter -Name Ethernet | Disable-NetAdapter -Confirm:$false
Conclusion
Hopefully, with these many procedures, you can quite effortlessly Disable Ethernet Network Connection on Windows 10. However, every user holds a different reason to disable this specific connection. If you have more ways to disable the wired connection, do write them to us.
Download Article
Restrict a computer’s internet access with one of these simple methods
Download Article
- Airplane Mode in Windows 10/8
- Disabling the Network Adapter (All Versions)
- Disabling Wi-Fi in Windows 10
- Video
- Tips
|
|
|
|
This wikiHow teaches you how to disable any internet connection on your Windows PC. If you’re using Windows 10 or 8, you can quickly disable all internet access by turning on airplane mode. For a longer-term solution, you can disable your wireless or wired network adapter on any version of Windows.
Things You Should Know
- You can disable your internet easily by turning on airplane mode, which will temporarily cut your internet connection.
- Turning off the network adapter will make it so your computer can’t connect to the internet until you turn the adapter back on.
- In Windows 10, you can disable Wi-Fi by clicking the Wi-Fi icon in your taskbar and de-selecting the Wi-Fi button.
- If your computer has no Wi-Fi and is reliant on ethernet, pulling the ethernet cord will disable your internet connection.
-

You should see it in the taskbar next to the clock, which is usually at the bottom of the screen. Use this method to temporarily prevent your PC from connecting to the internet.
- Depending on the type of connection, the icon will either be a globe (sometimes with a «caution» sign over it) or several curved lines (Windows 10) or a stack of signal bars (Windows 8).
-

If you’re using Windows 10, it’s the tile with an airplane icon. If you’re using Windows 8 or 8.1, slide the «Airplane mode» switch to the On position instead. This will disconnect the PC from all wired and wireless networks immediately.
- An airplane icon will appear to the left of the clock as long as airplane mode is enabled.
- To reconnect, return to the network connection and click Airplane mode again (Windows 10) or slide the «Airplane mode» switch to the Off position.


Advertisement
-

Use this method if you want to turn off (either temporarily or permanently) your PC’s ability to connect to a wired or wireless network. The steps to open Control Panel vary by Windows version:
- Windows 10 or 8: Press ⊞ Win+S to open the search bar, type control panel, and then click Control Panel in the search results.
- Windows 7, Vista, and XP: Click the Start menu and select Control Panel.
-

The option you see varies by PC.
-
It’s in the left panel. A list of your network adapters will appear.
-

A menu will expand.
-
This adapter is now inactive and will remain so until you re-enable it.
- To re-enable the connection, right-click the connection and click Enable.


Advertisement
-
You should see your internet connection next to the clock in the taskbar, which is usually at the bottom of the screen. Depending on the type of connection, the icon will either be a globe (sometimes with a «caution» sign over it) or several curved lines.
- If you don’t see a network connection icon, click the up-arrow left of the clock to expand additional icons.
-
It’s at the bottom-left corner of the menu at the bottom of the screen. This disables all wireless connections.
- If you just want to disconnect from the network you’re connected to now, click Disconnect on that network. Be aware that depending on your settings, your PC may try reconnecting to the network (or other open networks) immediately.
- To re-enable the adapter, click your network icon again in the taskbar, then click the Wi-Fi button again. Depending on your settings, you may need to reconnect to your wireless network manually by clicking its name.


Advertisement
Ask a Question
200 characters left
Include your email address to get a message when this question is answered.
Submit
Advertisement
Video
-
If your computer is reliant on an Ethernet connection, you can simply unplug the Ethernet cable from your computer to disable Internet.
-
Most Windows Vista and up computers have a Wi-Fi key in one of the top rows of the keyboard. Simply pressing this will disable your computer’s Wi-Fi until you press it again.
Thanks for submitting a tip for review!
Advertisement
-
Don’t enter any commands that aren’t explicitly outlined here into Command Prompt if you aren’t sure of their consequences.
Advertisement
About This Article
Article SummaryX
1. Click your internet connection icon.
2. Click Airplane mode or slide the Airplane mode switch On.
Did this summary help you?
Thanks to all authors for creating a page that has been read 137,066 times.
Is this article up to date?
Порой возникает необходимость в отключении от интернета ПК или ноутбука, работающего на Windows. Например, для тщательной проверки на вирусы. Рассказываем о том, как это сделать.
Отключение интернета с помощью роутера
Needpix
В большинстве современных квартир и офисов интернет раздается через Wi-Fi-роутер. Поэтому самый простой, действенный и быстрый способ отключиться от сети — это физически выключить роутер (просто отключите его от розетки). Когда интернет вновь потребуется, подключите роутер заново.
Отключение интернета с помощью провода
Needpix
Если вы используете проводное подключение (редкое явление в 2024 году, но все еще встречается), то нужно просто вынуть кабель с интернетом из соответствующего порта.
Если желание отключать роутер или отсоединять провод отсутствует, то можно обойтись программными способами. Рассказываем, как это сделать.

GoodFon
Windows 7 сегодня крайне редкая ОС. Если у вас такая и нужно отключить интернет, следуйте нашей инструкции:
- В нижней части интерфейса найдите иконку соединения с сетью;
- Нажмите на ней мышкой, затем выберете пункт «Изменение параметров адаптера»;
- Нажмите на активное соединение и деактивируйте его.
Как отключить интернет на Windows 8 и Windows 8.1

На ПК/ноутбуке с Windows 8 или Windows 8.1 (в 2024 году эта версия Windows не слишком распространена, но некоторые по-прежнему используют системы с ней) нужно:
- Зайти в «Панель управления»;
- Выбрать раздел «Сеть и интернет»;
- После кликнуть на «Центр управления сетями и общим доступом» и «Изменение параметров адаптера»;
- Вы увидите все сетевые подключения;
- Выберете то, что активно, нажмите на нем ПКМ (правая кнопка мыши) и далее «Отключить».
Можно также просто отключить саму сетевую карту физически.
Как отключить интернет на Windows 10

В Windows 10 можно сделать точно так же, как и на Windows 8.
Но есть и другой, более простой способы:
- Нажмите ПКМ на «Пуск»;
- Выберете «Сетевые подключения»;
- В открывшемся окне просто отключите Wi-Fi.
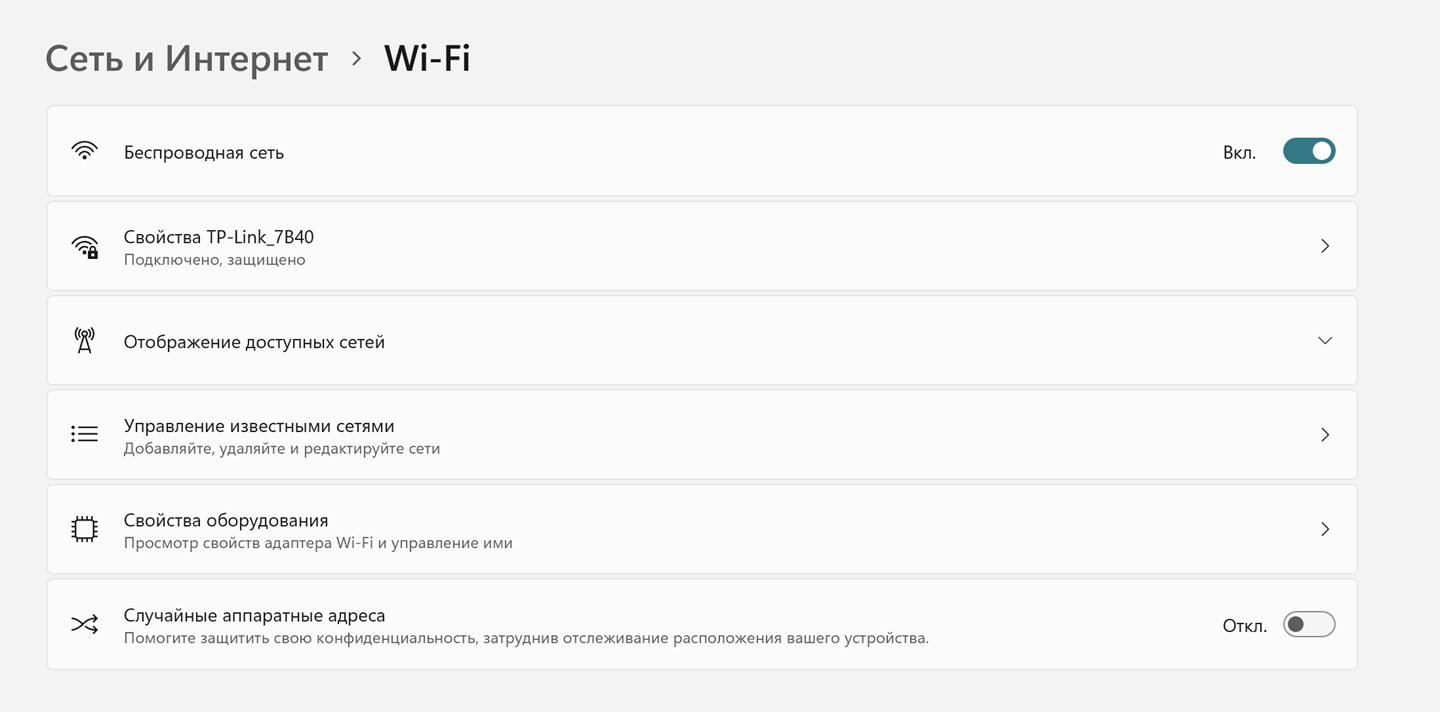
Как отключить интернет на Windows 11
Для отключения интернета на актуальной Windows 11 надо сделать так:
- Нажмите ПКМ на нижней части интерфейса «Пуск»;
- Нажмите ЛКМ (левая кнопка мыши) на «Сетевые подключения»;
- В новом окне отключите Wi-Fi.
Есть еще один, более простой способ:
- Нажмите на значок Wi-Fi в правом нижнем углу интерфейса ОС;
- Затем нажмите еще раз на значок Wi-Fi с названием актуального подключения;
- После просто нажмите ЛКМ на «Отключить».
Как видим, ничего сложного в отключение интернета на Windows нет.

Заглавное фото: MakeUseOf