
User Account Control (UAC) is a security feature in Windows which helps you to prevent your system from unauthorized access. This feature helps to protect your Windows files and settings. If you want to change User Account Control settings then, we bring to you a perfect guide that will teach you how to enable or disable User Account Control in Windows 11. So, continue reading to turn On or Off User Account Control.

Table of Contents
User Account Control is a great feature in Windows for security and control of your system files and settings. You can provide access to other users and any other third-party apps by changing the UAC settings. In this article, we have shown the methods to enable or disable UAC on Windows 11.
Why Should You Turn On User Account Control (UAC)?
Turning On User account control (UAC) is necessary when you’re sharing a single user account on your PC amongst different people or team members and want to assure changes made to the PC make into effect only after approval by you as an admin. Following are some features of User Account Control (UAC)
- This provides controlled access by the administrator for the users and enables users to get administrative permission to make any important changes to the PC.
- It manages Windows functions like downloading, accessing specific websites, sharing or transferring data from the PC to a different device, installing an application in the PC, etc.
- Many teachers and organizations use this feature in schools, colleges, and other such institutions to regulate the devices provided for learning or working purposes according to the basic decorum created by the authority.
Now Let’s discuss some methods that you can follow to turn On or Off User Account Control on Windows 11.
Method 1: Through Control Panel
You can enable administrator permissions in Windows 11 by making changes in the User Accounts section through Control Panel settings. To do so, follow these steps:
1. Click on the Search icon and type control panel, then click on Open.

2. Here, set View by: > Category, then click on User Accounts.

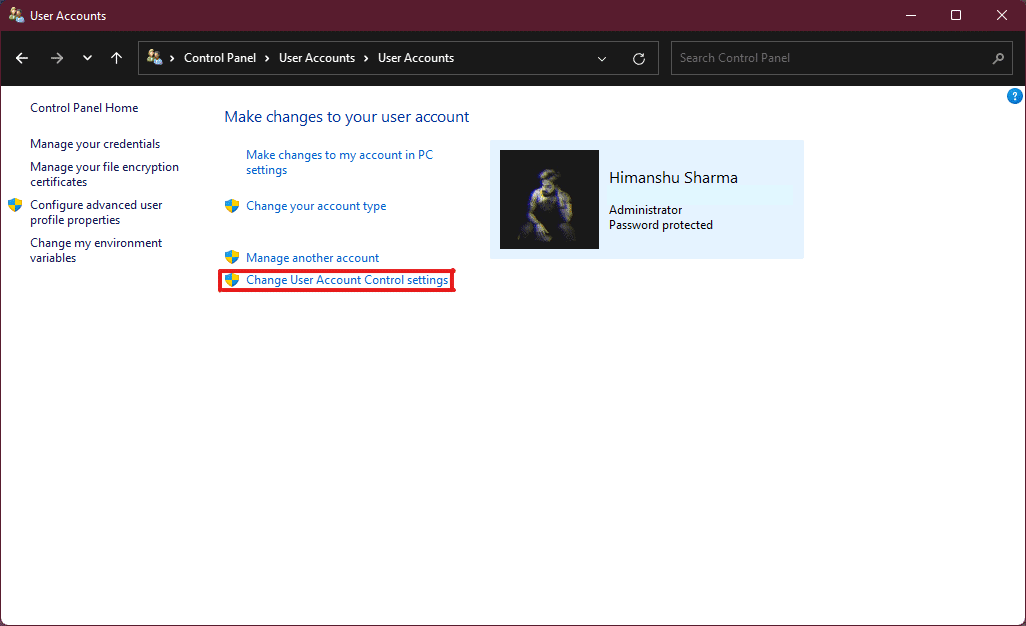
3. In the User Accounts settings, click on the User Accounts option as highlighted below.

4. Now, in the Make changes to your user account section, click on Change User Account Control settings.
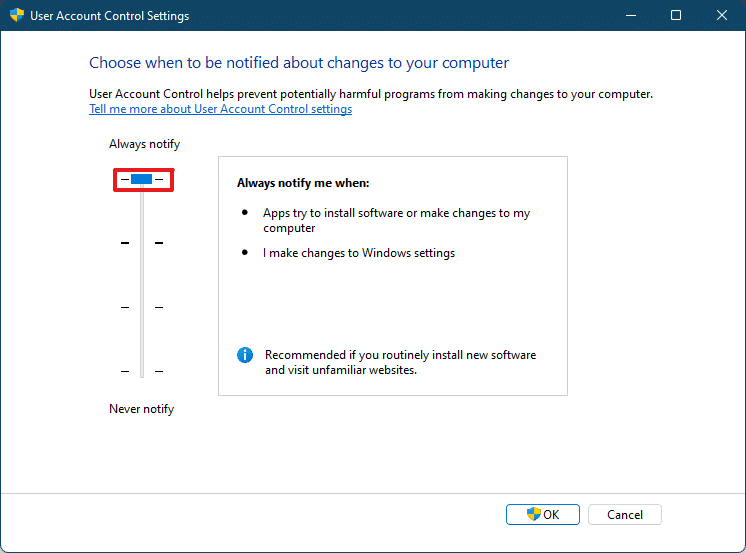
5. This will open a User Account Control settings window where you’ll find a vertical slider. You can move the slider to change the User Account Control settings.
6A. By default, the slider will be in the second-highest level then this enables the Notify me only when apps try to make changes to my computer setting.

6B. If you move the slider to the third-highest level then, it will enable the Notify me only when apps try to make changes to my computer (do not dim my desktop) setting.
Note: This setting is the same as the default settings but, it will not dim your Desktop. In this setting, malware can enter your system. So this setting is not recommended.

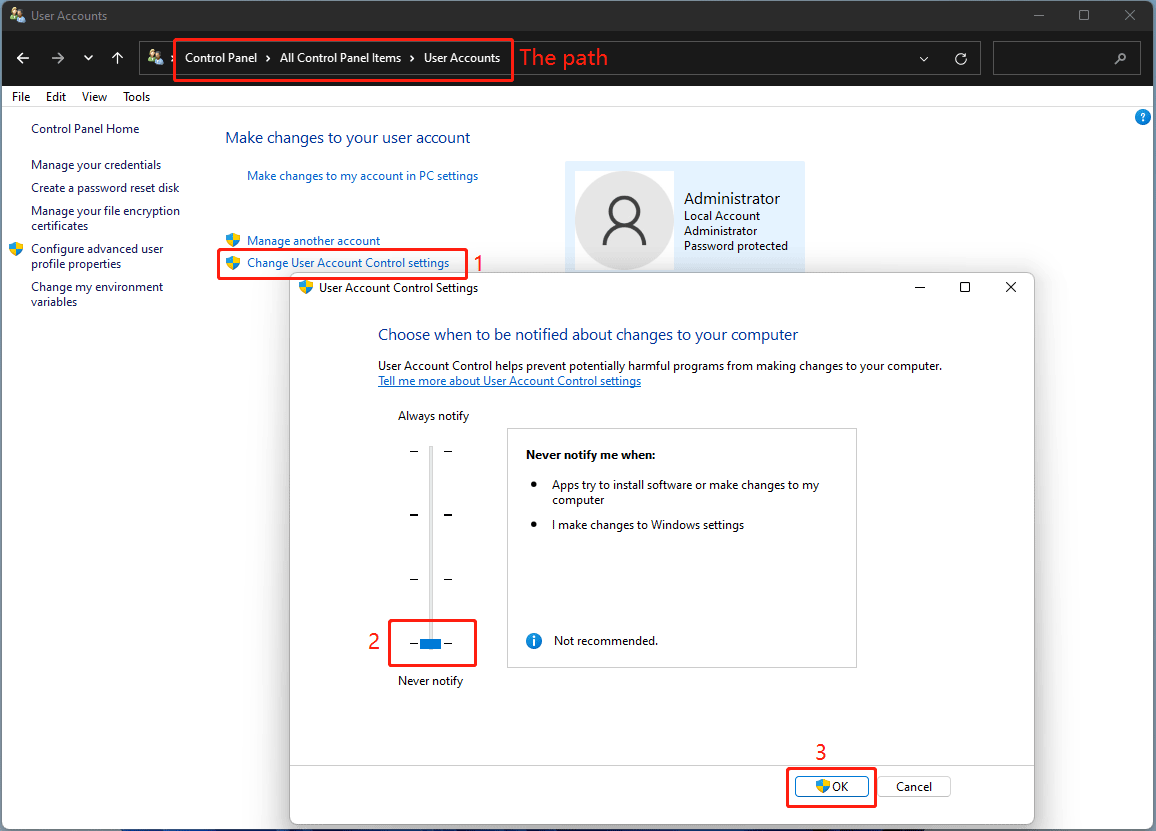
6C. If you move the slider to the bottom level then, this will turn Off UAC in Windows 11. This setting is not recommended as any users and apps can make changes to your system.

6D. You can move the slider to the highest level which will enable the setting to always notify when apps or users make changes to your system.
7. After choosing the preferred setting, click on OK to apply the settings and close the window.
Also Read: How to Create a Local Account in Windows 11
Method 2: Through Registry Editor
Following are the steps to enable or disable User Account Control in Windows 11 through Registry Editor.
1. Hit the Windows + R keys simultaneously to open the Run dialog box.
2, Type regedit and click on OK.

3. In the Registry Editor, go to the following location path from the address bar.
HKEY_LOCAL_MACHINE\SOFTWARE\Microsoft\Windows\CurrentVersion\Policies\System

4. Then, in the right pane, search for EnableLUA value, right-click on it and select the Modify… option.

5. Change the Value data to 0 and click on OK to disable User Account Control.
To enable User Account Control again, you can follow the same steps and change the Value data to 1 in Step 4.
Method 3: Through Local Security Policy Editor
Another method to turn On or Off UAC is through local security policy app. Here are the steps to do so.
1. Launch Registry Editor, type secpol.msc and click on OK to open the Local Security Policy app.

2. Double-click on Local Policies to expand it from the left pane.

3. Again, double-click on Security Options in the Local Policies folder.

4. Now, in the left pane, double-click on the User Account Control: Run all administrators in Admin Approval Mode policy

5. In the Local Security Setting tab, select the Disabled option to disable User Account Control (UAC)

6. Then, click on Apply > OK to save changes.
7. Finally, close all the windows and restart your system.
Note: If you want to enable User Account Control (UAC) again, follow the same steps as above and select the Enabled option in Step 5.

The administrator settings will be applied, and the changes will be visible on selected actions hence now you know how to enable administrator permissions in Windows 11.
Also Read: How to Enable or Disable Compact OS in Windows 11
Pro Tip: Download & Run Registry Files
Alternatively, you can enable or disable User Account Control on Windows 11 by merging specifically set registry files with your computer registry files. To do it, follow these steps:
1. Download the registry files for applying different UAC settings from the links given below.
- Always notify Mode
- Default Mode
- Do not dim my desktop mode
- Never notify mode
2. Now, open the .reg file for a particular UAC setting.
3. Click on Run in the Security Warning prompt is shown.

4. Finally, click on Yes in the Registry Editor prompt to apply the respective UAC setting.

5. Restart your PC to apply the changes.
Recommended:
- How to Fix Skyrim Crash to Desktop
- How to Disable Wakeup Password in Windows 11
- 6 Ways to Fix Netflix Error Code M7121-1331-P7
- How to Fix Galaxy S6 Won’t Charge
We hope this article provided enough help to your query of how to enable or disable User Account Control in Windows 11. Write down in the comment section below if you think we missed something, don’t forget to mention your favorite method amongst these. If you’ve further doubts about this topic, write it in the comment section below or reach us out directly.
Среди самых частых вопросов пользователей Windows всех версий — отключение контроля учетных записей в системе: системной функции, призванной обеспечить повышенную безопасность при запуске программ, требующих прав администратора и способных выполнить изменения в системе. При выполнении таких программ появляется окно «Разрешить этому приложению вносить изменения на вашем устройстве?», затемняется экран, а доступ сторонних программ к затемненному экрану ограничен.
В этой инструкции подробно о том, как отключить UAC или контроль учетных записей в Windows 11, об отключении запросов только при изменении настроек без отключения UAC, а также дополнительная информация, которая может быть полезной в контексте рассматриваемой темы. Внимание: отключить UAC можно только при наличии прав администратора, если у вас их нет, но вам требуется установить или запустить программу, используйте инструкцию Как установить программу без прав Администратора в Windows.
Отключение контроля учётных записей в Панели управления
Отключение контроля учетных записей — не самая безопасная практика: если вы делаете это только из-за того, что вам не нравятся окна вида «Разрешить этому приложению вносить изменения на вашем устройстве?», возможно, следует отказаться от отключения UAC. Также учитывайте, что для отключения требуется иметь права администратора на компьютере.
Первый способ отключить UAC в Windows 11 — использование элемента настройки параметров контроли учётных записей Панели управления. Учитывайте, что для выполнения описанных действий необходимо иметь права администратора. Шаги выглядят следующим образом:
- Откройте окно настроек контроля учетных записей одним из следующих способов (есть и другие, но, уверен, должно хватить указанных 3-х):
- Откроется окно настроек параметров контроля учетных записей.
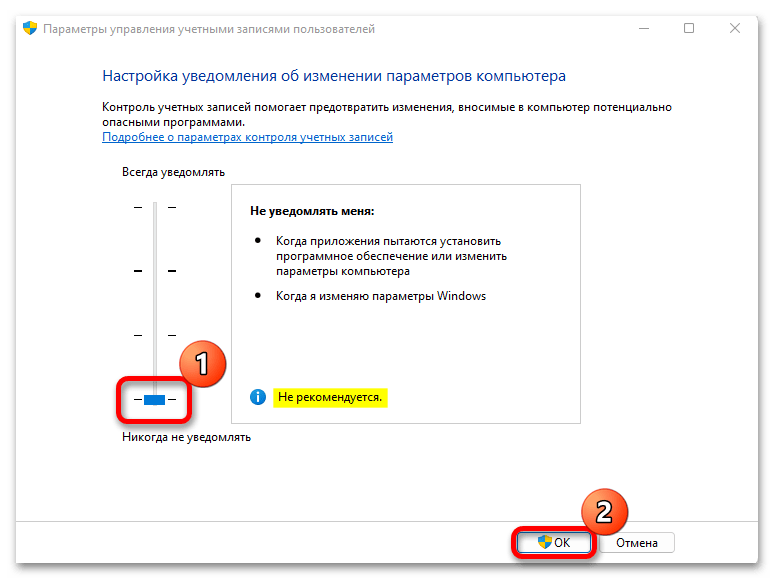
- Для полного отключения контроля учетных записей, переместите переключатель слева в нижнее положение — «Никогда не уведомлять» и примените настройки. Указанные действия полностью отключат контроль учетных записей.

- Если выбрать второй снизу пункт — то отдельные уведомления UAC будут появляться (при запуске сторонних программ, которые могут менять что-либо на уровне системы), но экран затемняться не будет. Это оптимальный выбор, если ваша задача — убрать уведомления контроля учетных записей при изменении настроек Windows 11 в «Параметрах» или «Панели управления».

В случае, если вы отключали контроль учетных записей для какого-либо однократного действия, рекомендую снова включить его после того, как действие было выполнено.
Отключение UAC в редакторе реестра и редакторе локальной групповой политики
Ещё одна возможность — использовать редактор реестра или редактор локальной групповой политики для отключения контроля учетных записей. Учитывайте, что редактор локальной групповой политики доступен только в Windows 11 Pro и Enterprise.
Для отключения с помощью редактора реестра выполните следующие действия:
- Нажмите клавиши Win+R (Win — клавиша с эмблемой Windows), введите regedit и нажмите Enter.
- В редакторе реестра перейдите к разделу (можно скопировать путь и вставить в строке вверху окна)
HKEY_LOCAL_MACHINE\SOFTWARE\Microsoft\Windows\CurrentVersion\Policies\System
- В правой панели дважды нажмите по параметру с именем EnableLUA и установите значение 0 (ноль) для него. Примените сделанные настройки и закройте редактор реестра.

- Перезагрузите компьютер самостоятельно или подтвердите перезагрузку в появившемся уведомлении.

Для отключения с помощью редактора локальной групповой политики (напоминаю, в Windows 11 «Домашняя» утилита недоступна):
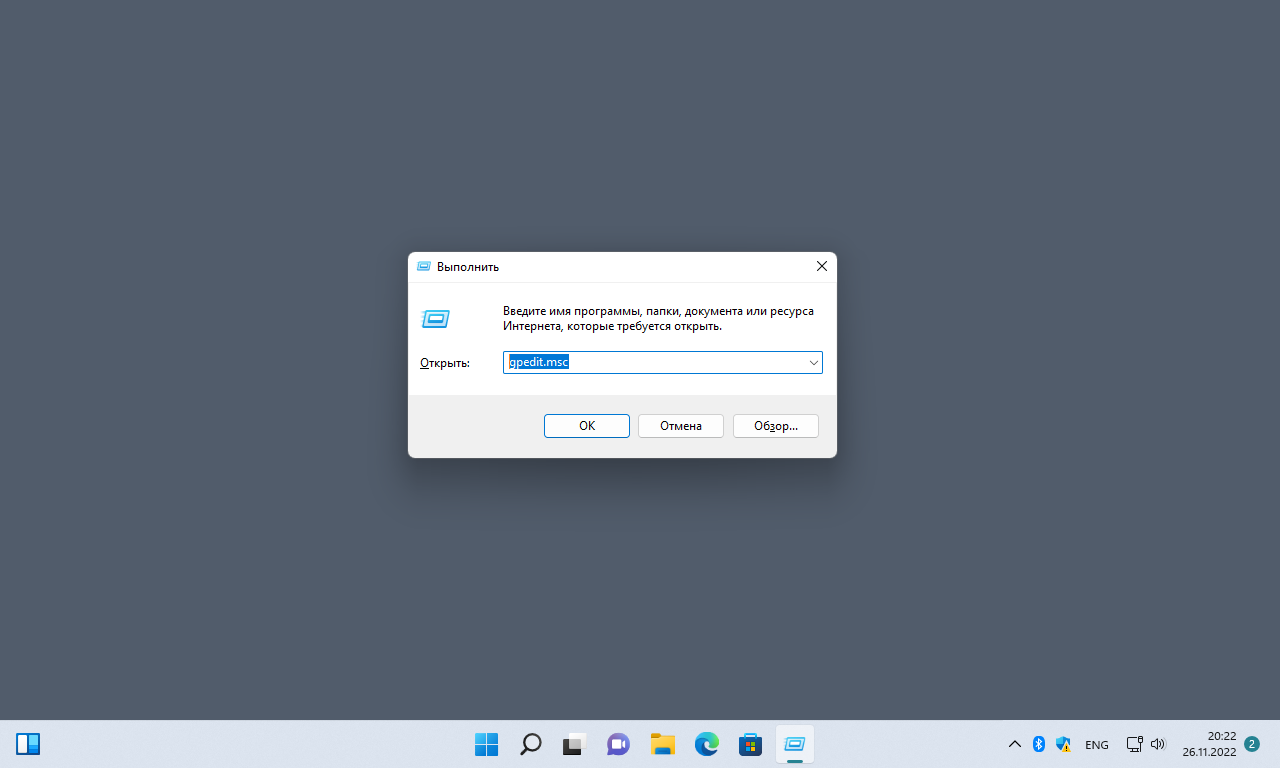
- Нажмите клавиши Win+R на клавиатуре, введите gpedit.msc и нажмите Enter.
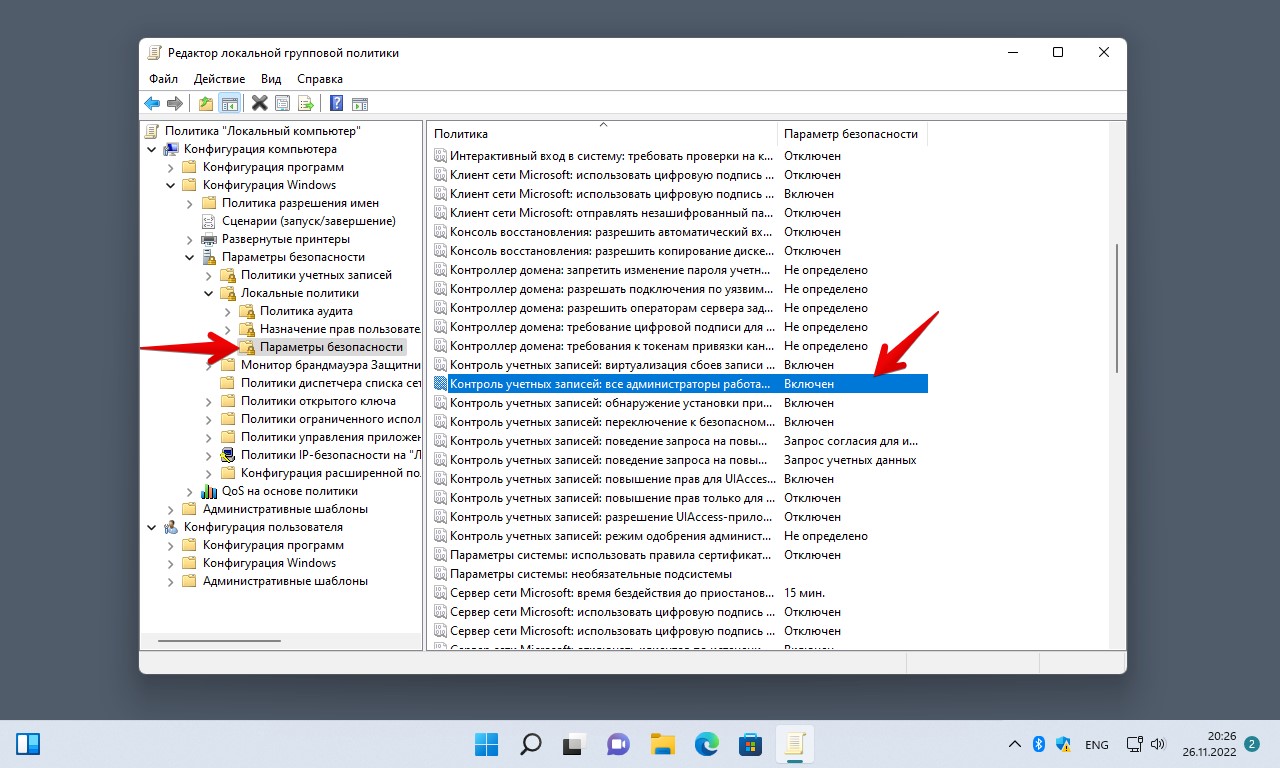
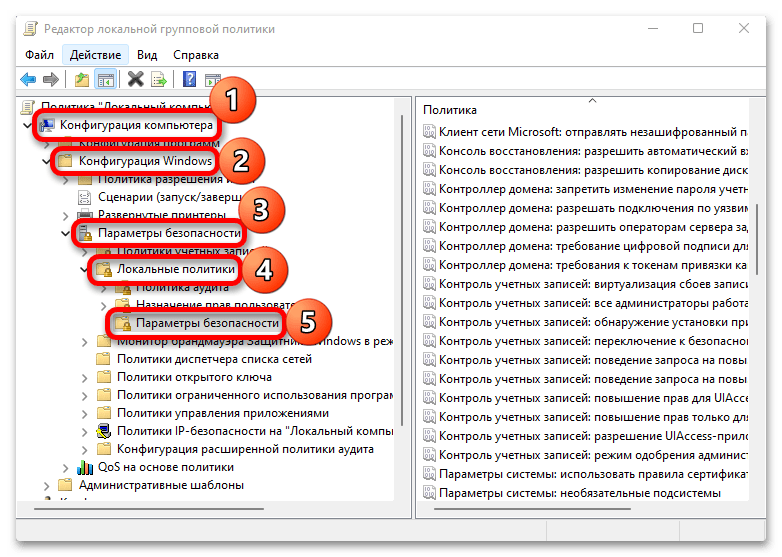
- Перейдите к разделу «Конфигурация компьютера» — «Конфигурация Windows» — «Параметры безопасности» — «Локальные политики» — «Параметры безопасности».
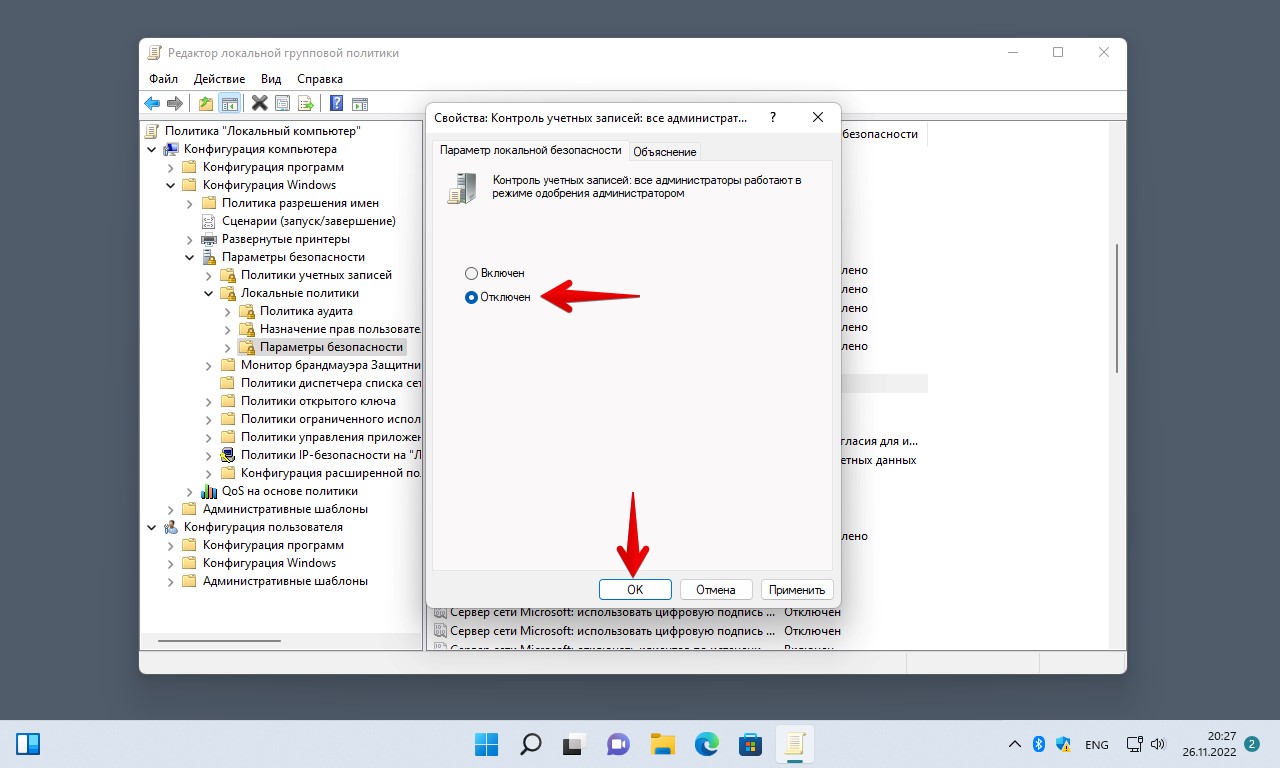
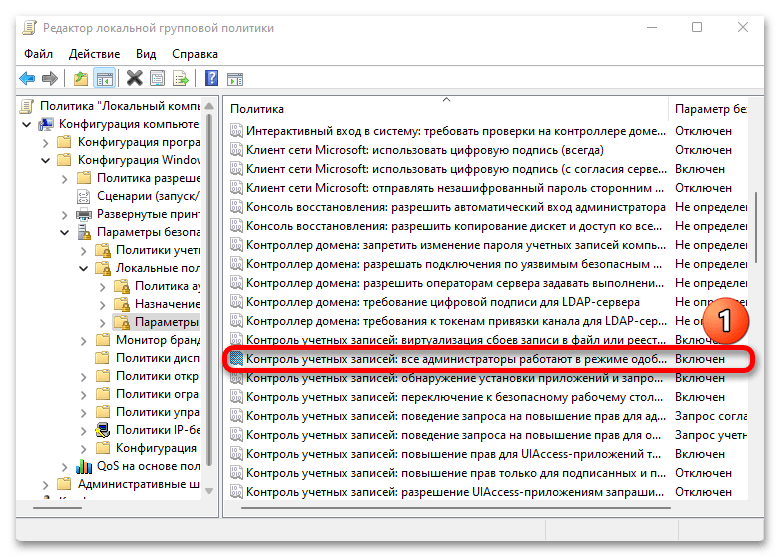
- В правой панели найдите политику с именем «Контроль учетных записей: все администраторы работают в режиме одобрения администратором», установите значение «Отключен» и примените настройки.

- Перезагрузите компьютер.

В большинстве случаев, предложенных способов оказывается достаточно для отключения UAC. Дополнительно можно отметить, что многие сторонние программы настройки Windows также имеют опцию включения и отключения контроля учетных записей. Также может быть полезным: Как отключить запрос контроля учетных записей для конкретной программы.
-
Home
-
News
- How to Disable/Enable User Account Control (UAC) in Windows 11?
How to Disable/Enable User Account Control (UAC) in Windows 11?
By Stella | Follow |
Last Updated
If you think Windows User Account Control is annoying, you can choose to disable it on your Windows 11 computer. In this post, MiniTool Software shows you how to disable User Account Control (UAC) in Windows 11/10 and how to disable UAC for specific applications in Windows 11/10.
About User Account Control in Windows
User Account Control (UAC) is a Windows fundamental component of Microsoft’s overall security vision. It is enabled by default on your computer. Every time you want to make a change to your computer, its interface will pop up to remind you for mitigating the impact of malware. Given that it appears too frequently, some of you want to turn it off.
On the other hand, if you have disabled UAC Windows 10, you find it is enabled again after you upgrade your computer to Windows 11. Well then, how to disable User Account Control in Windows 11? Is it possible to disable UAC for one program in Windows 11/10?
In the following parts, we mainly show you these guides:
- How to disable UAC Windows 11/10?
- How to disable UAC for one program in Windows 10/11?
How to Disable/Enable UAC Windows 11/10?
Here, we show you the easiest method on how to turn off UAC in Windows 11. This method is also available in Windows 10.
- Open Control Panel in Windows 11 (You can use Search to search for control panel and open it).
- Choose View by Large icons or small icons. Then, click User Accounts.
- Click the Change User Account Control settings link.
- Move the slider to Never notify.
- Click OK.
- Click Yes on the pop-up UAC interface to confirm the operation.
After these steps, you will no longer see User Account Control again on your Windows 11 computer.
If you want to enable UAC in Windows 11 again, you need to move the slider to one of the other three locations.
Additionally, you can use Command Prompt, Registry Editor, or Local Group Policy Editor to let your Windows 11 disable UAC. These methods are the same as in Windows 10. We have a previous post about disabling UAC Windows 10. You can use the methods in that post to disable UAC in Windows 11. Here it is: How to Disable UAC in Windows 10? Here Are Four Simple Ways.
How to Disable UAC for One Program in Windows 11/10?
There is another situation: you just want to disable UAV for one program in Windows 11/10. Here are the things you can do:
1. Use Windows Search to search for task scheduler and select the first result to open Task Scheduler.
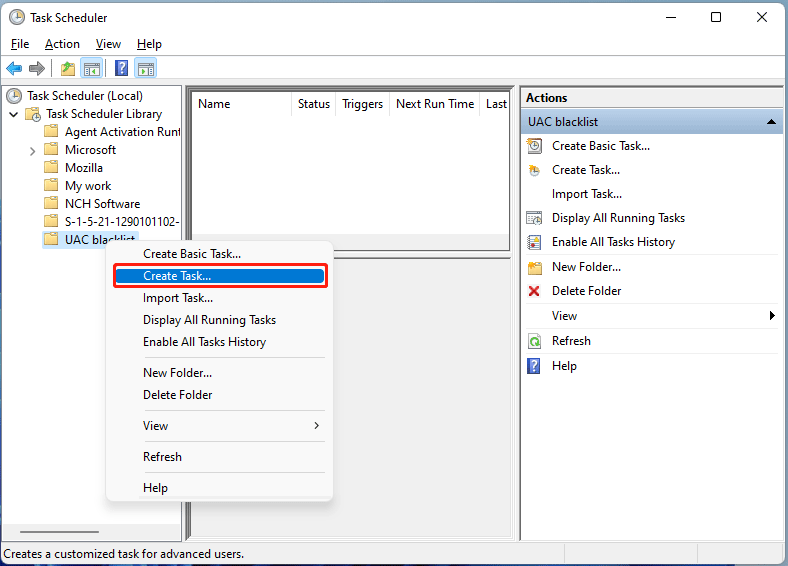
2. Right-click Task Scheduler Library and choose New Folder. Then name it. Here, I name it UAC blacklist.
3. Expand Task Scheduler Library.
4. Right-click the newly created folder and select Create Task.
5. Name the task something descriptive. Here, I name it the program name which I want to disable UAC for it.
6. Select Run with highest privileges in the Security options section.
7. Expand Configure for and select the Windows operating system you are using. Since I am using a Windows 11 Insider preview build, there is no Windows 11. After the official release of Windows 11, the option should be available. If you are running Windows 10, select Windows 10 to continue.
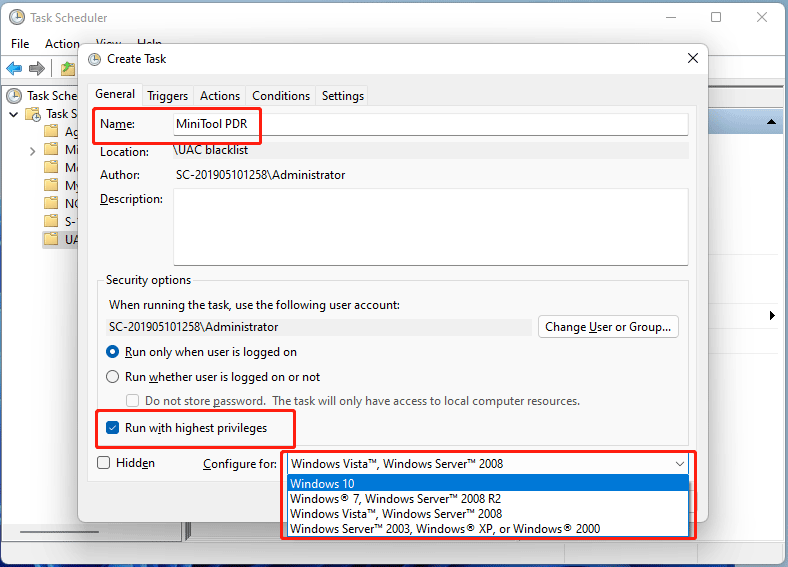
8. Click OK.
9. Click OK on the small pop-up windows to go to the next page.
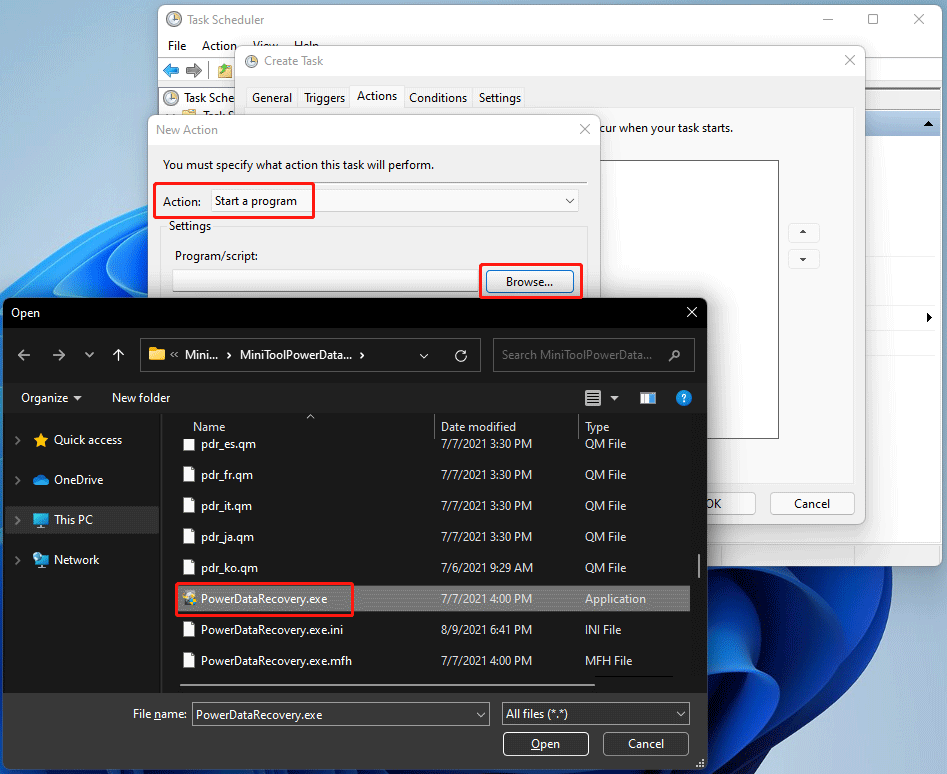
10. Click New under Actions. On the new interface, make sure Start a program is selected. Then, click Browse to select the target app’s .exe file from your computer. If you don’t know the location, you can right-click the shortcut of that app and select Open file location to view where it is.
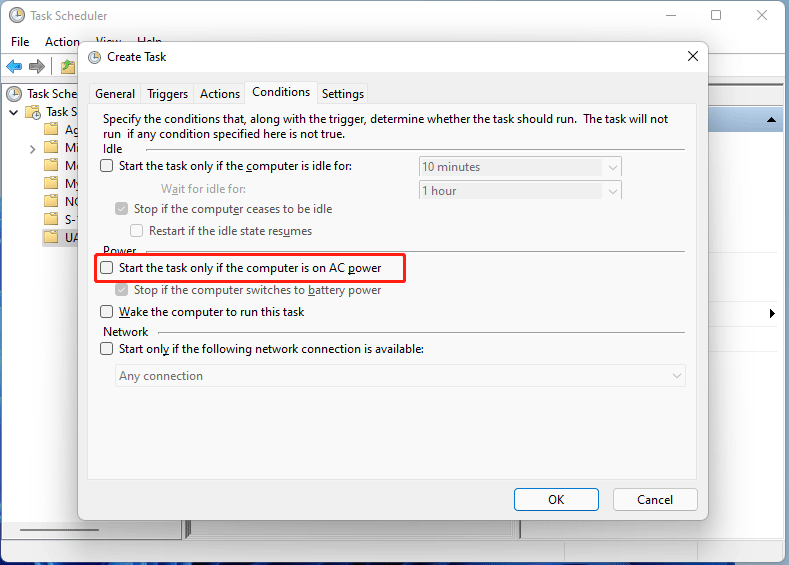
11. If you are using a laptop, you also need to go to the Conditions tab and uncheck Start the task only if the computer is on AC power.
12. Show the desktop on your computer and then create a shortcut for that app.
When these steps are complete, you can click the newly created shortcut to open that program without seeing the UAC interface.
Bottom Line
Now, you should know how to disable UAC in Windows 11. If you need to disable UAC for some special programs, there is also a guide for you. If you have other issues that need to be fixed, you can let us know in the comments.
About The Author
Position: Columnist
Stella has been working in MiniTool Software as an English Editor for more than 8 years. Her articles mainly cover the fields of data recovery including storage media data recovery, phone data recovery, and photo recovery, videos download, partition management, and video & audio format conversions.
Контроль учетных записей (UAC) в Windows 11 можно отключить различными способами. UAC — это такая мера безопасности, которая помогает предотвратить изменения в Windows 11 различными приложениями. Однако некоторых пользователей раздражает окно контроля учетных записей, они считают данную функцию ненужной. В этой статье мы покажем, как отключить UAC в Windows 11.
Способ 1. Отключаем UAC через панель управления
Для того, чтобы попасть в панель управления, нажимаем на клавиатуре клавиши «Win+S», чтобы вызвать меню поиска Windows 11 и в поисковом поле набираем «Панель управления», затем через результаты поиска переходим в приложение.
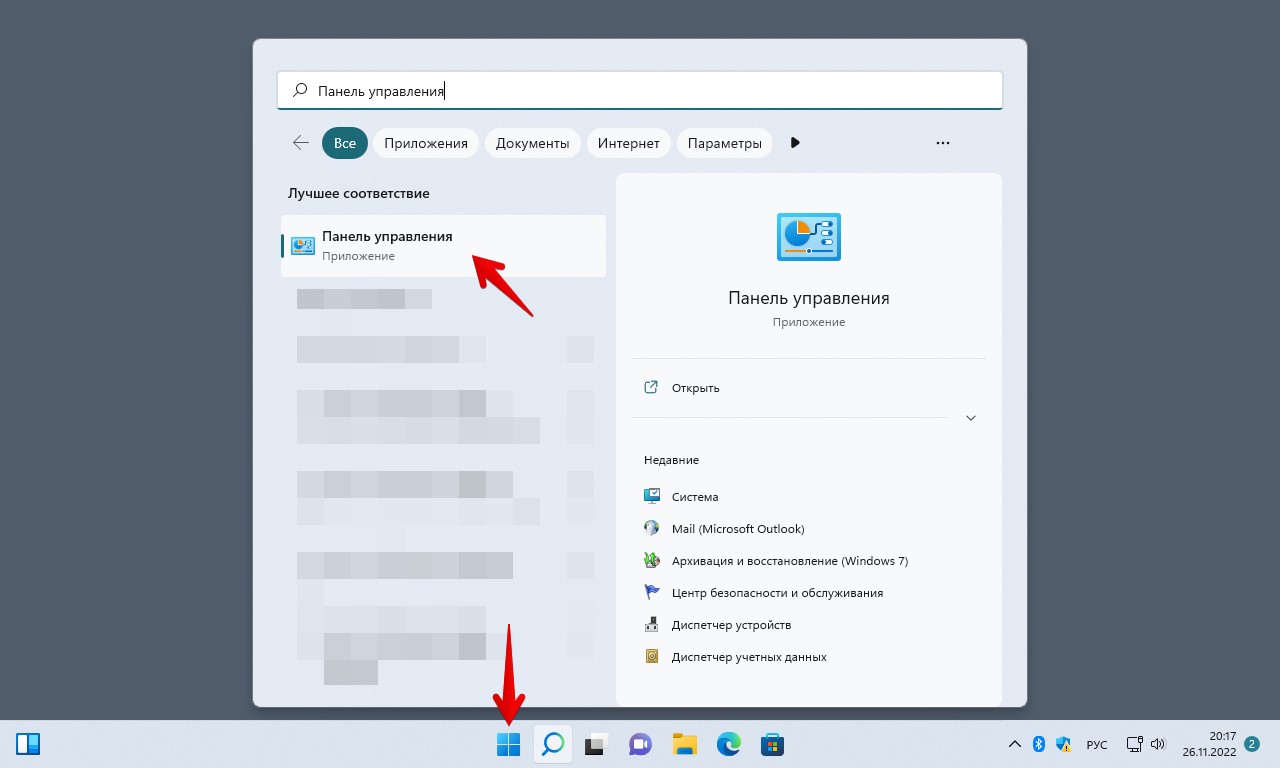
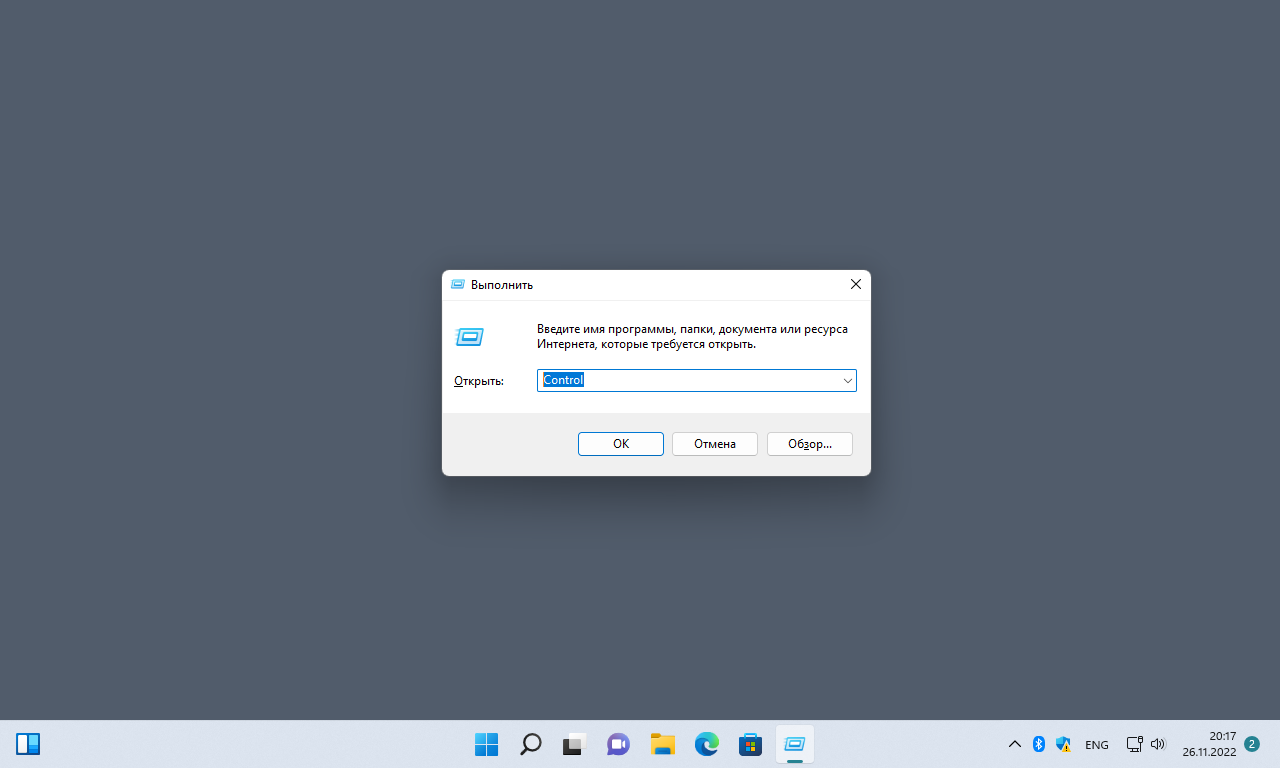
Существует и альтернативный способ — через окно «Выполнить». Вызываем окно через горячие клавиши «Win+R», вводим команду «Control» и нажимаем кнопку «ОК».
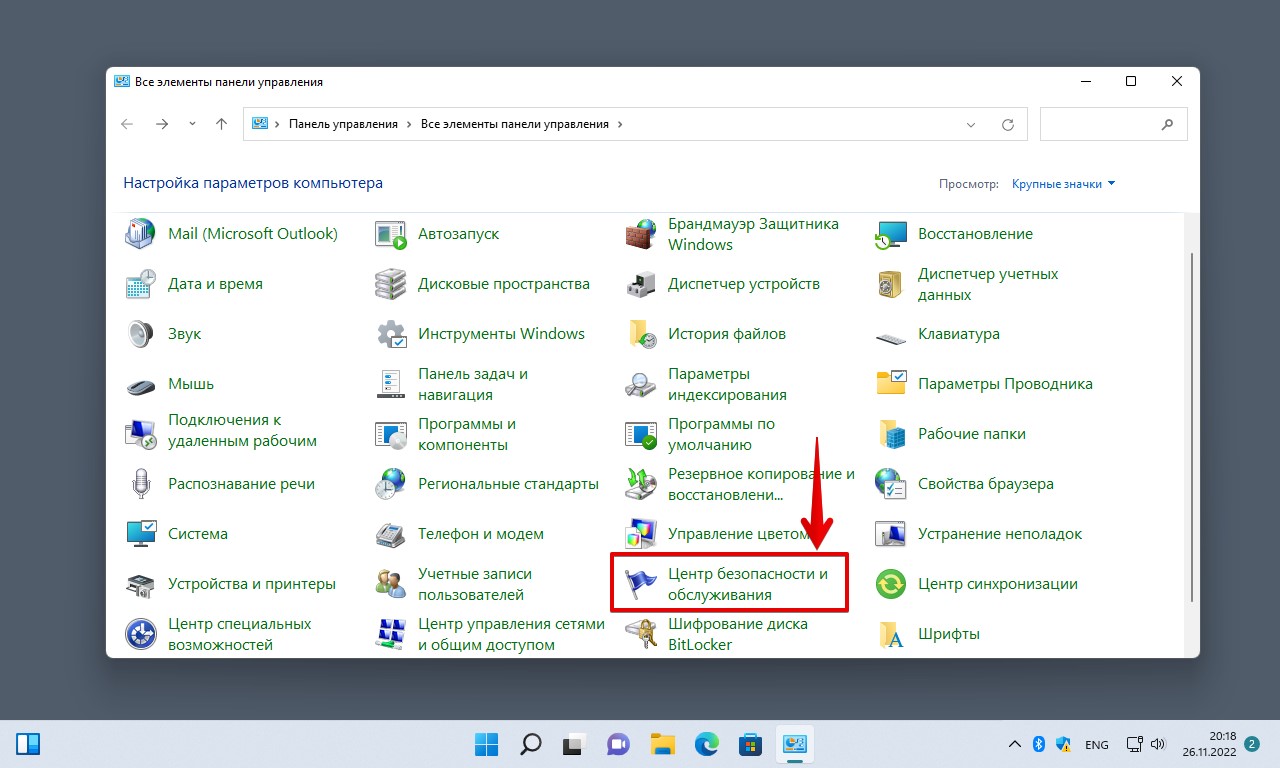
В окне панели управления находим пункт «Центр безопасности и обслуживания» и переходим.
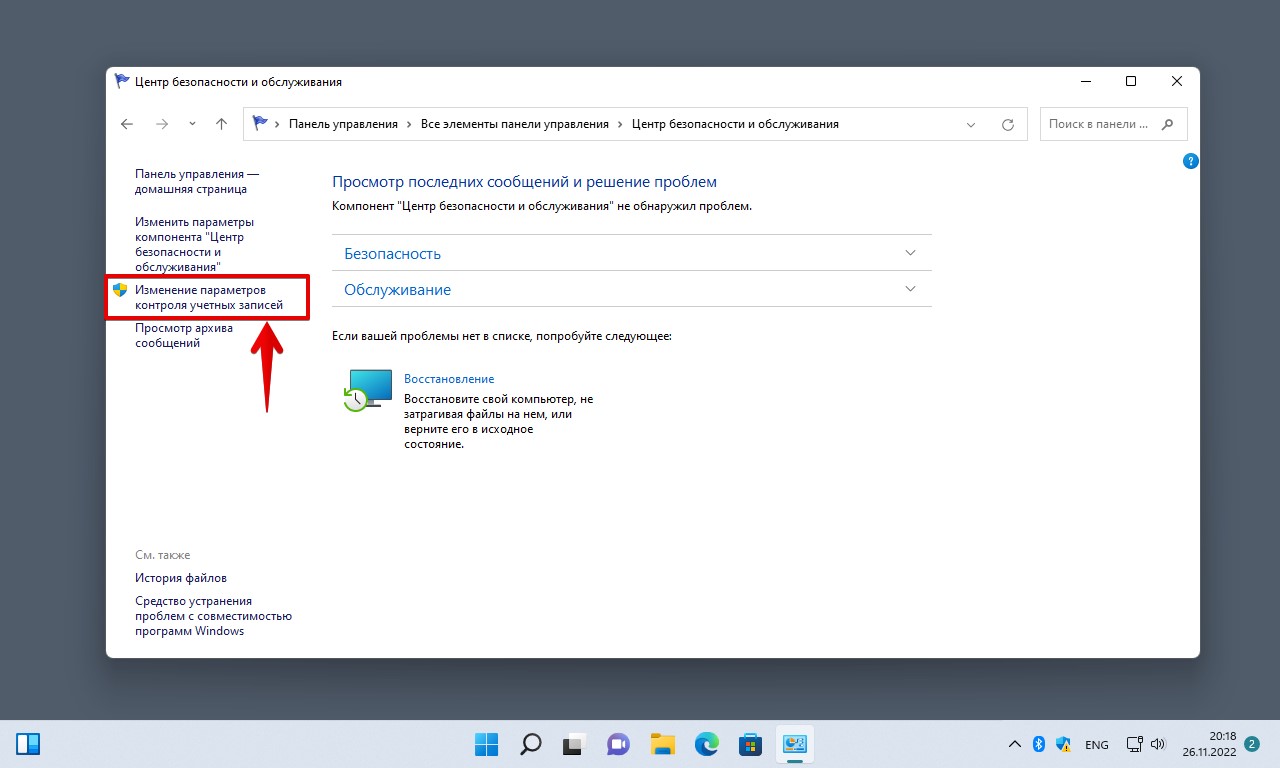
Слева находим пункт «Изменение параметров контроля учетных записей».
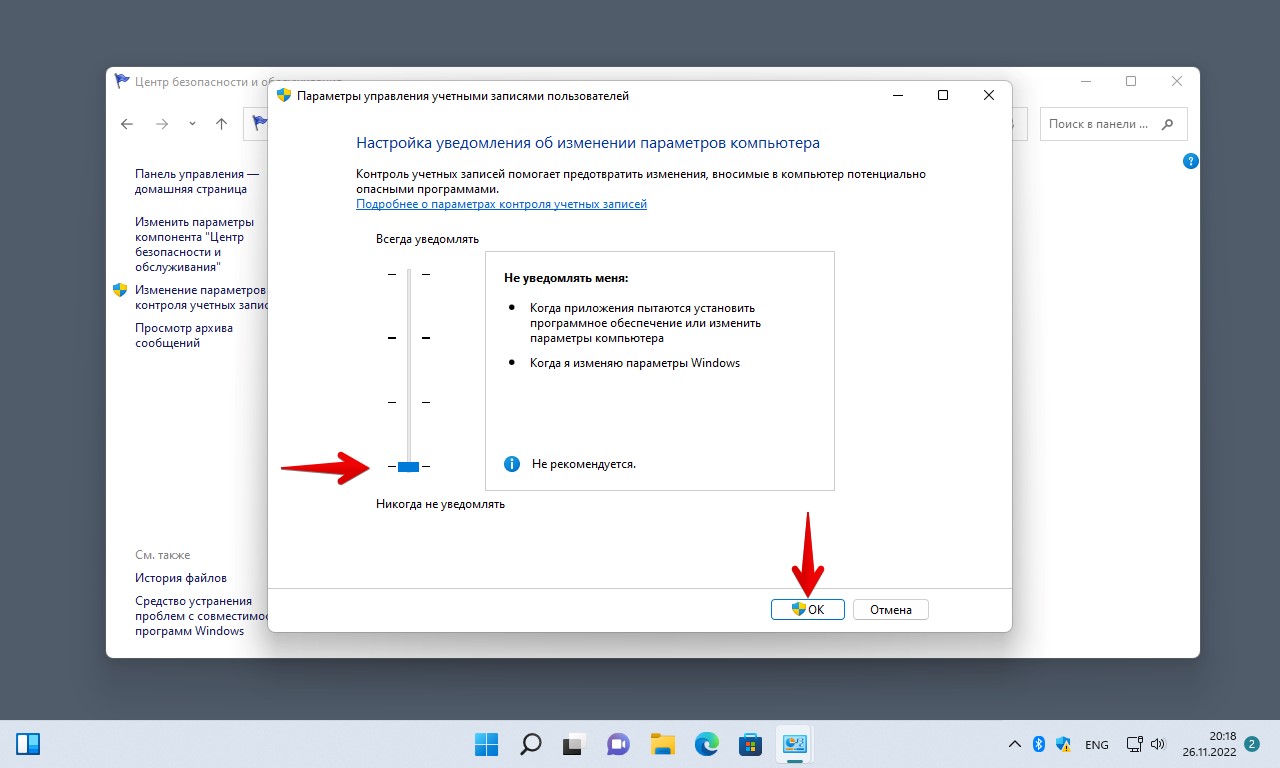
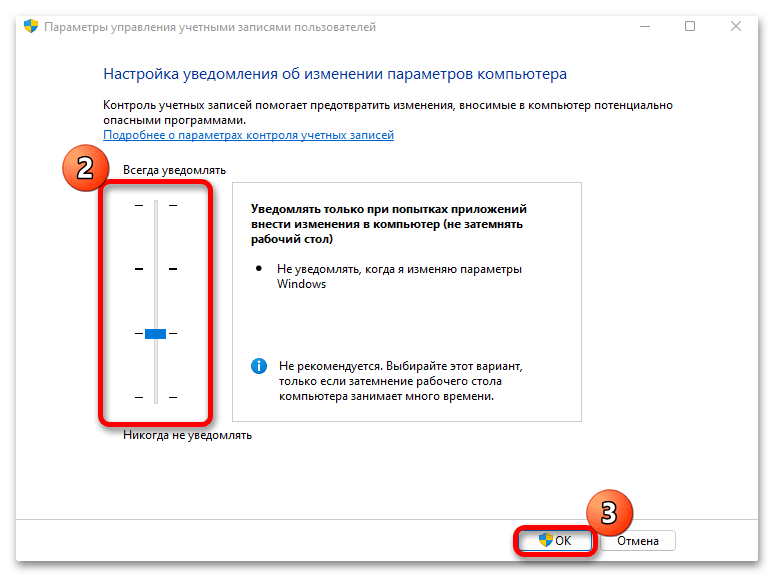
Появится окно «Параметры управления учетными записями пользователей», перемещаем переключатель в положение «Никогда не уведомлять» и нажимаем кнопку «ОК».
Способ 2. Отключаем UAC через реестр
Для того чтобы попасть в реестр Windows 11 нажимаем клавиши «Win+R», вводим в поле «regedit» и нажимаем клавишу ввода.

В окне реестра переходим по следующему пути:
Компьютер\HKEY_LOCAL_MACHINE\SOFTWARE\Microsoft\Windows\CurrentVersion\Policies\System
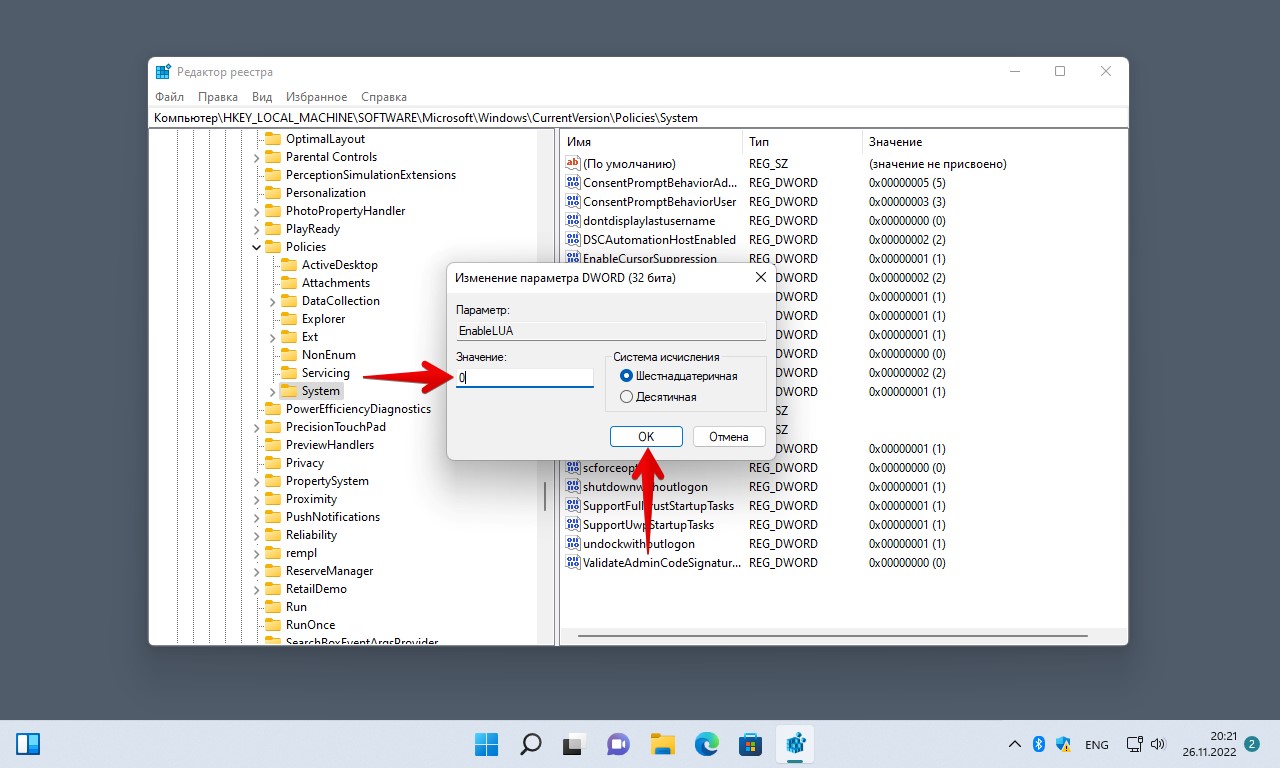
В разделе «System» находим параметр «EnableLUA», нажимаем правой кнопкой мыши по параметру и выбираем пункт «Изменить».

В окне «Изменение параметра DWORD» меняем значение «1» на «0» и нажимаем кнопку «ОК», чтобы сохранить.
Способ 3. Отключаем UAC через редактор локальной групповой политики
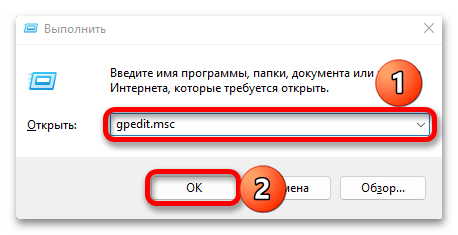
Нажимаем клавиши «Win+R» и вводим «gpedit.msc» в поле «Открыть», а затем нажимаем клавишу «Enter» на клавиатуре.
В окне «Редактор локальной групповой политики» переходим по разделам: «Конфигурация компьютера» — «Конфигурация Windows» — «Параметры безопасности» — «Локальные политики» — «Параметры безопасности» и находим пункт «Контроль учетных записей: все администраторы работают в режиме одобрения администратором», щелкаем по нему мышью.
В появившемся окне «Свойства» выбираем пункт «Отключен» и нажимаем на кнопку «ОК».
Теперь вы знаете, как остановить UAC в Windows 11. Microsoft рекомендует не отключать данную функцию из соображений безопасности, выбор остается за вами.
Все способы:
- Способ 1: Изменение параметров UAC
- Способ 2: Редактирование реестра
- Способ 3: Консоль Виндовс 11
- Способ 4: Редактор групповой политики
- Способ 5: Winaero Tweaker
- Вопросы и ответы: 0
Способ 1: Изменение параметров UAC
Как и другие элементы обеспечения безопасности Виндовс, контроль учетных записей (UAC) в основном направлен на снижение воздействия на нее вредоносных программ. Запуск на компьютере приложений или процессов с низким уровнем доверия обычно сопровождается запросом на внесение ими изменений, а это, видимо, не всех устраивает. Компания Microsoft, по понятным причинам, не рекомендует трогать эту функцию, но способы отключить UAC все же оставила.
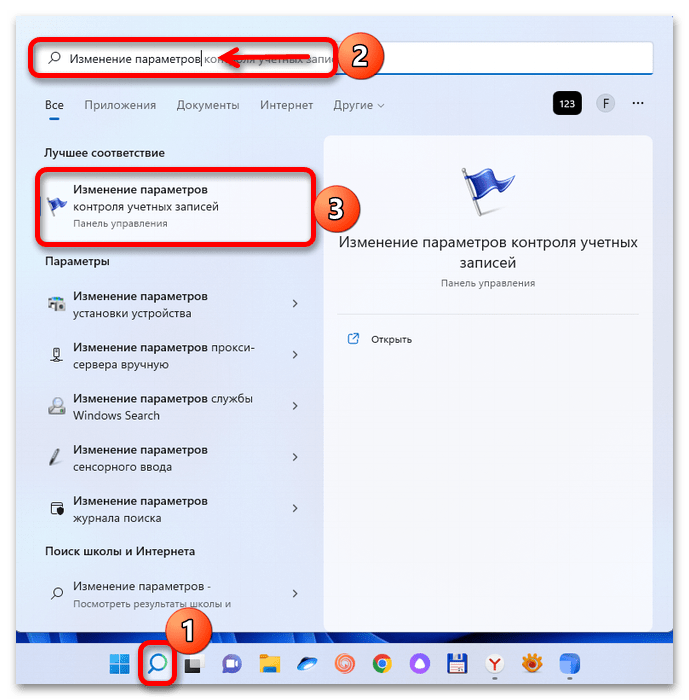
- С помощью поискового поля находим раздел «Изменение параметров контроля учетных записей» и перемещаемся туда.
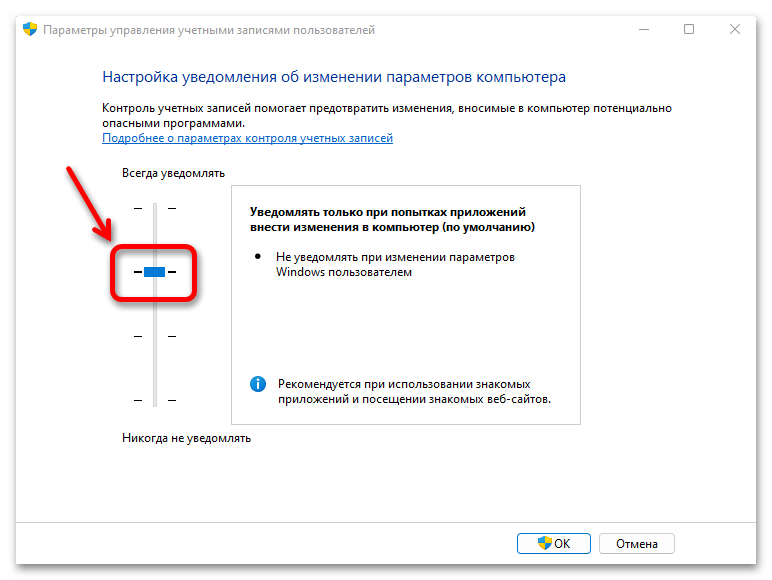
- Из четырех уровней безопасности здесь включен второй, т.е. запросы будут появляться во всех случаях, кроме тех, когда параметры Windows 11 меняет юзер.

Во время получения запроса затемняется экран и, если это занимает много времени, можно спуститься на уровень ниже, чтобы просто получать уведомления. Нам же нужно полностью отключить UAC, поэтому переключаемся на первый уровень и подтверждаем действие.
Этот вариант удобен тем, что потом можно продолжить работу без перезагрузки компьютера, чего не скажешь о следующих способах.
Способ 2: Редактирование реестра
Если вы ищете другой метод, то отключить функцию можно в системном реестре.
- Жмем на клавиатуре «Windows+R» вызываем окно «Выполнить», вписываем код
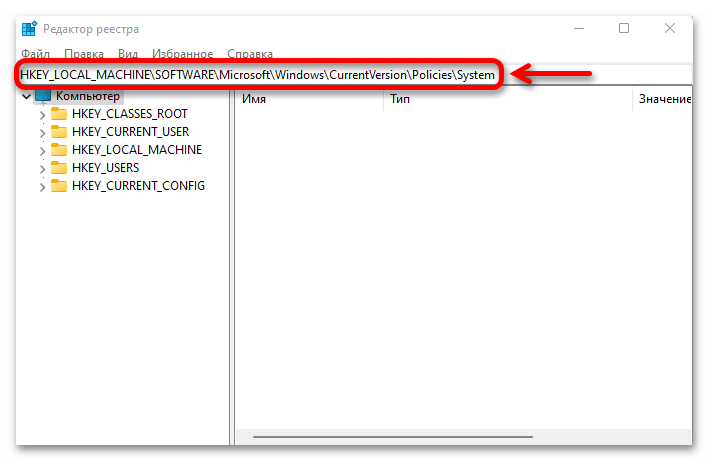
regeditи подтверждаем действие. - В адресное поле вставляем следующий путь и нажимаем «Enter».
HKEY_LOCAL_MACHINE\SOFTWARE\Microsoft\Windows\CurrentVersion\Policies\System - Нам нужна запись «EnableLUA» в правой области редактора. Щелкаем по ней дважды,

в поле «Значение» ставим ноль, кликаем «OK» и перезагружаем ПК.


Способ 3: Консоль Виндовс 11
Редактировать реестр можно через консоль операционной системы. Для этого подойдет и «Командная строка», но в данном примере мы воспользуемся PowerShell.
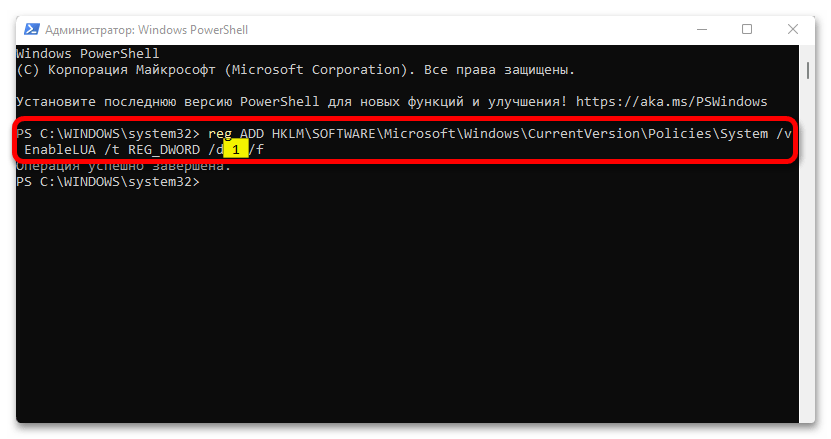
- Кликаем меню «Пуск» правой кнопкой мышки и запускаем Windows PowerShell с повышенными правами. Если искомая оснастка отсутствует в списке, используем поиск.
- Копируем строку ниже и вставляем ее щелчком правой кнопки мышки в окно консоли, а когда операция завершится, перезагружаем устройство.
reg ADD HKLM\SOFTWARE\Microsoft\Windows\CurrentVersion\Policies\System /v EnableLUA /t REG_DWORD /d 0 /f - Чтобы затем включить UAC, делаем то же самое, но в строке меняем «0» на «1».


Используя вышеуказанный код, можно создать ярлыки на включение и отключение UAC. Это, конечно, немного ускорит процесс, но перезагружать систему все равно придется.
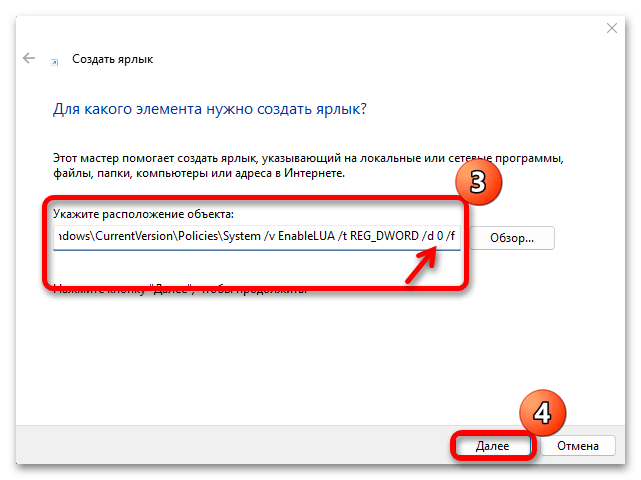
- На Рабочем столе создаем ярлык,

копируем и вставляем строку со значением ноль,

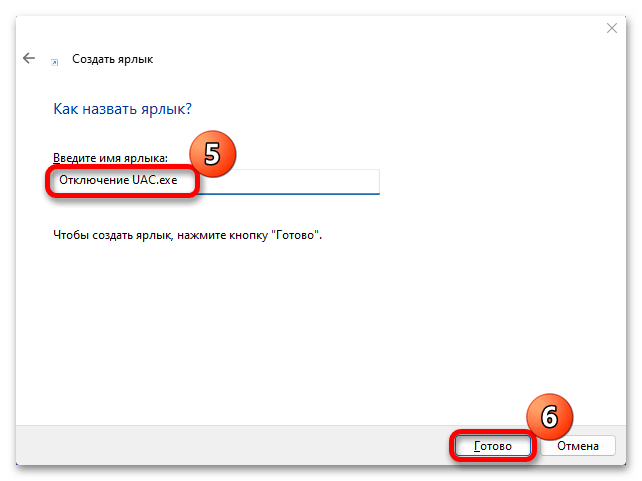
придумываем имя и сохраняем настройки.
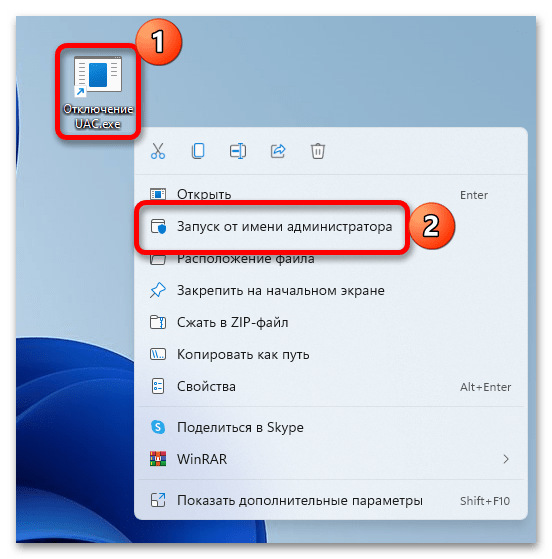
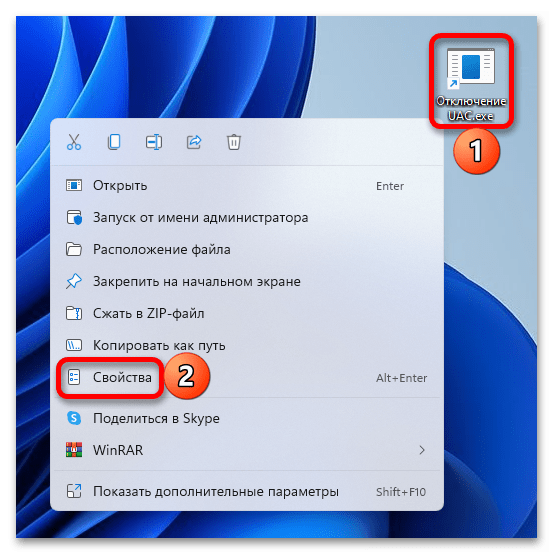
- Теперь открываем контекстное меню ярлыка и запускаем его с правами администратора. Останется только перезагрузить компьютер.
- Для создания второго ярлыка повторяем все действия, используя строку со значением один.
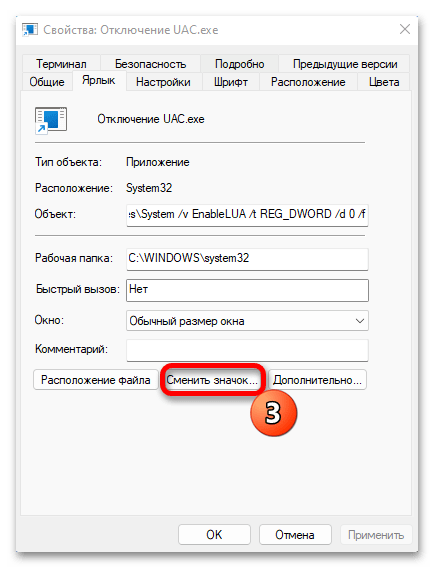
- С виду ярлыки будут одинаковые, поэтому лучше поменять значок хотя бы одного, чтобы было удобнее их различать. Открываем «Свойства» ярлыка,

жмем «Сменить значок»,

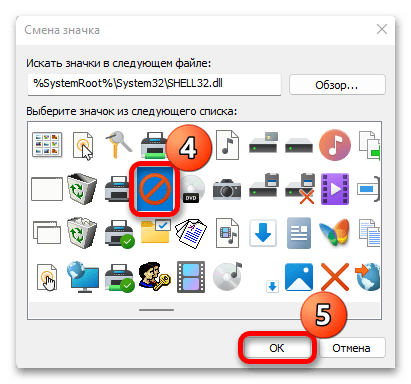
выбираем подходящий из списка доступных

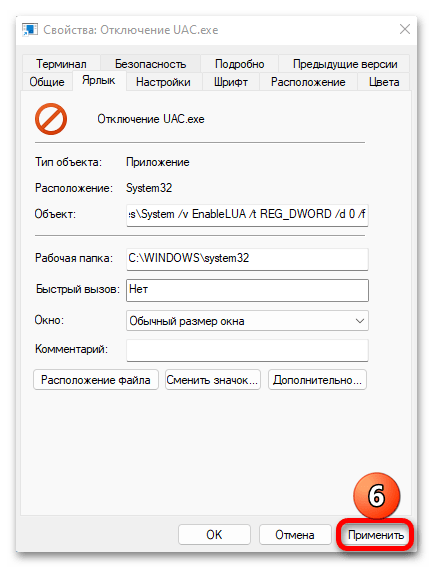
и применяем изменения.


Способ 4: Редактор групповой политики
Этот метод подойдет, только если на компьютере установлена Windows 11 версии «Pro» и выше.
- С помощью утилиты
gpedit.mscвызываем «Редактор групповой политики». - Выбираем папку «Конфигурация компьютера», а затем двойными кликами по очереди открываем все ее подразделы как показано на скриншоте ниже.
- Дважды щелкаем «Контроль учетных записей: все администраторы»,

отключаем опцию, применяем изменения и перезапускаем устройство.

Способ 5: Winaero Tweaker
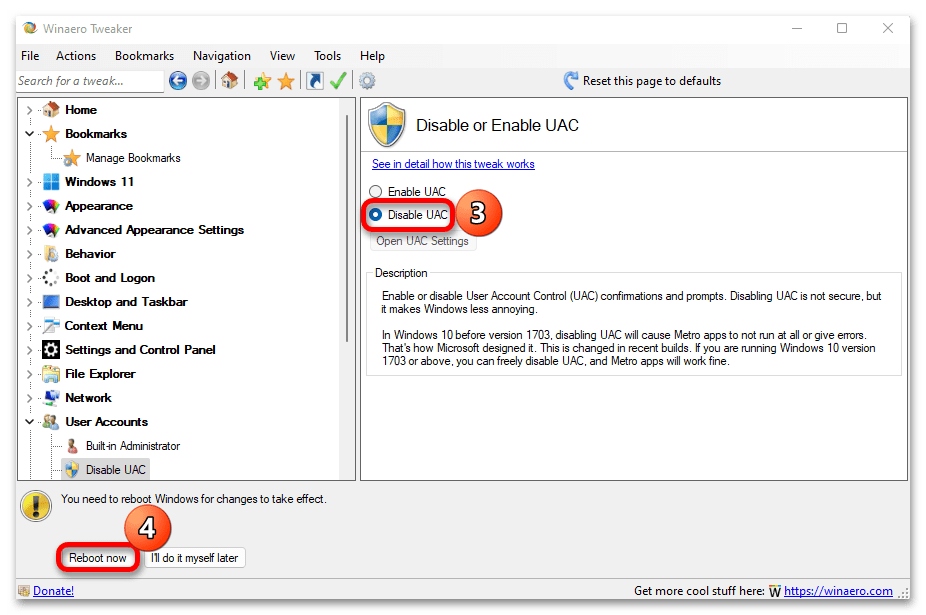
Существуют сторонние решения, которые помогут выполнить стоящую перед нами задачу, и об одном из них мы собираемся рассказать. Winaero Tweaker – бесплатная программа с широкой функциональностью. Например, она дает возможность настраивать параметры, которые Microsoft тщательно скрывает, а также повышает эффективность некоторых системных инструментов путем расширения контекстного меню, опций, команд и т.д.
Скачать Winaero Tweaker с официального сайта
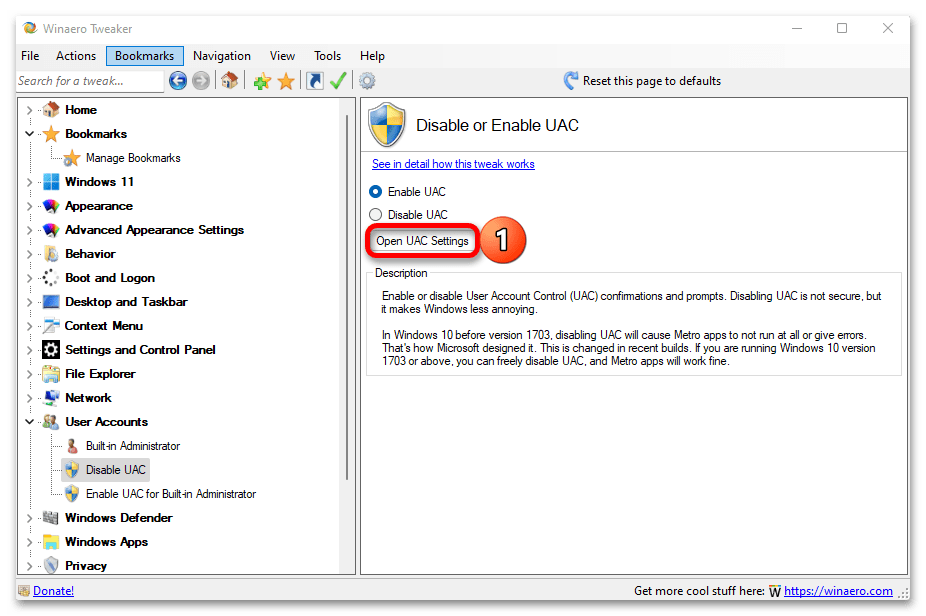
- Запускаем софт, находим и выделяем раздел «User Accounts», дважды кликаем по «Disable UAC»,

отключаем контроль учетных записей и подтверждаем изменения перезагрузкой системы.
- В этом же окне можно открыть настройки UAC,

чтобы отключить функцию без необходимости перезагружать Виндовс 11.

Наша группа в TelegramПолезные советы и помощь