
Windows Defender — встроенная антивирусная программа в операционной системе Windows, которая защищает устройство от вредоносного программного обеспечения и других угроз. Однако бывают ситуации, когда необходимо временно отключить защиту, например, для установки программного обеспечения, которое может быть заблокировано антивирусом, или для выполнения задач, требующих полного контроля над системой. В этом руководстве расскажем, как отключить антивирус Windows, обеспечив при этом максимальную безопасность вашего устройства.
Важные моменты перед отключением
Перед тем как отключить Windows Defender, необходимо учитывать несколько ключевых аспектов:
Риски безопасности
Временное отключение антивируса увеличивает вероятность заражения системы. Отключайте защиту только на короткий срок и убедитесь, что у вас есть альтернативные средства защиты.
Дополнительная защита
Если требуется отключить встроенный антивирус, нужно установить стороннее решение, например, PRO32 Total Security, которое будет обеспечивать защиту вашей системы на время отключения Windows Defender.
Отключение через параметры системы
Самый простой способ временно отключить Windows Defender — использовать встроенные системные настройки:
1. Доступ к настройкам безопасности:
- Откройте меню Пуск и выберите «Параметры».
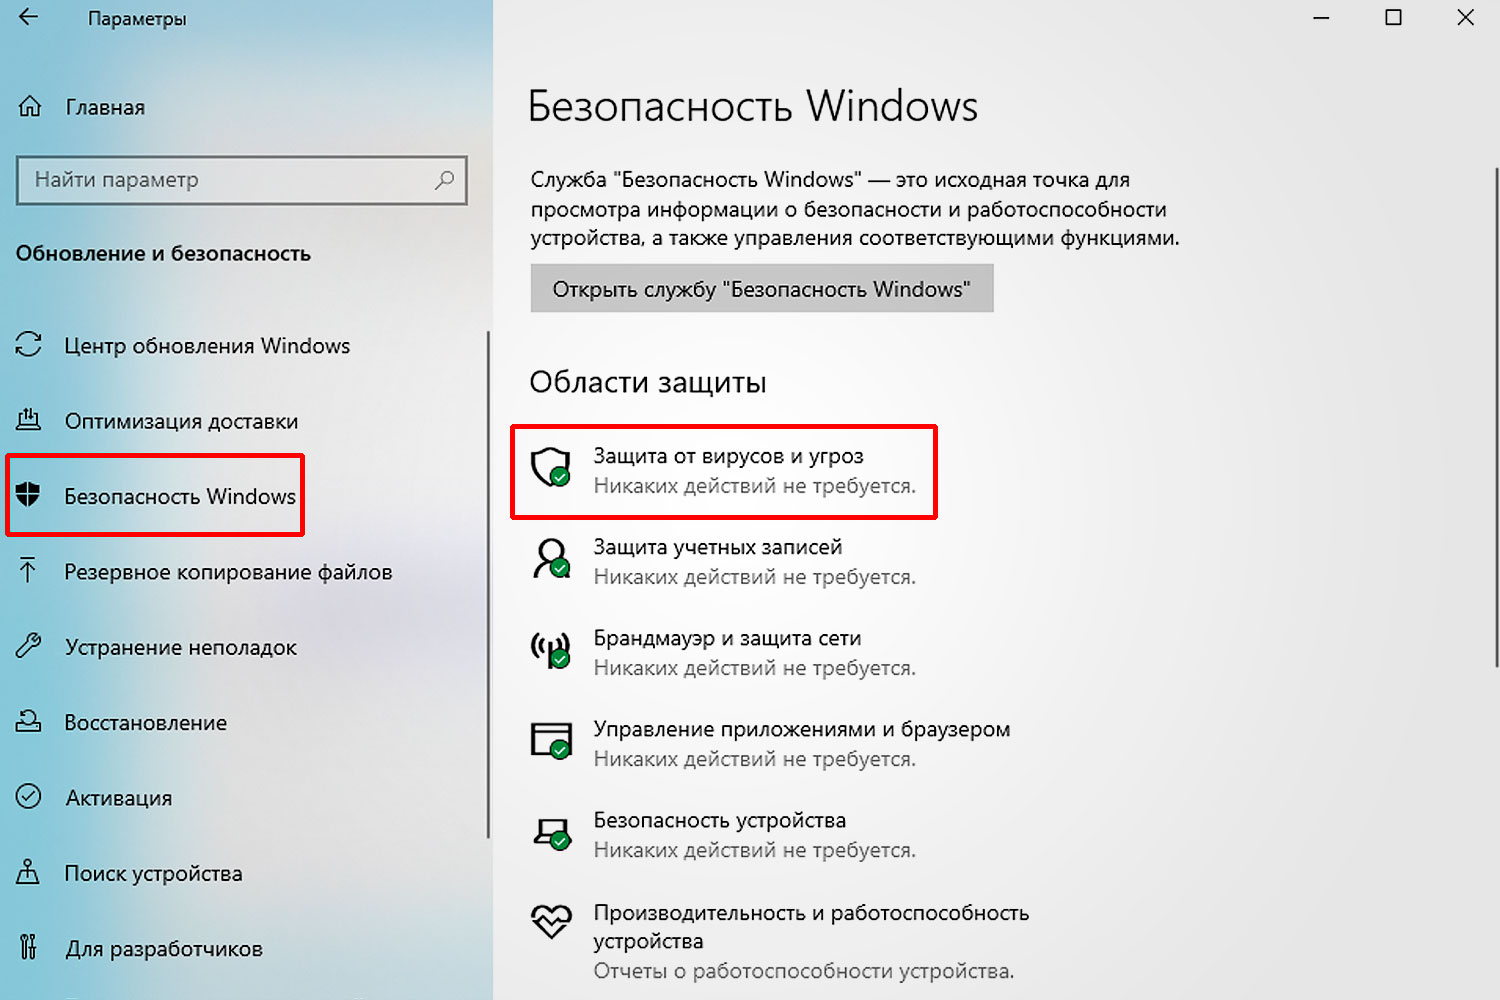
- Перейдите в раздел «Обновление и безопасность» и выберите «Безопасность Windows».
2. Отключение защиты в реальном времени:
- В разделе «Антивирус и защита от угроз» выберите «Управление настройками».
- Отключите опцию «Защита в реальном времени», передвинув переключатель. Это временно деактивирует антивирус, однако система может автоматически включить его через некоторое время.
Полное отключение через редактор локальной групповой политики
Если вы используете Windows Pro или Enterprise, можно полностью отключить Windows Defender через редактор локальной групповой политики:
1. Запуск редактора групповой политики:
- Нажмите Win + R для открытия окна «Выполнить».
- Введите команду gpedit.msc и нажмите Enter.
2. Настройка отключения антивируса:
- Перейдите в раздел Конфигурация компьютера → Административные шаблоны → Компоненты Windows → Антивирусная программа Windows Defender.
- Найдите параметр «Отключить антивирусную программу Windows Defender» и включите его, чтобы полностью отключить встроенную защиту.
Отключение через редактор реестра
Этот метод требует осторожности, поскольку некорректное изменение реестра может вызвать проблемы в работе системы:
1. Запуск редактора реестра:
Откройте окно «Выполнить» с помощью сочетания клавиш Win + R и введите regedit, затем нажмите Enter.
2. Изменение параметров реестра:
- Перейдите по пути: HKEY_LOCAL_MACHINE\SOFTWARE\Policies\Microsoft\Windows Defender.
- Если параметр DisableAntiSpyware отсутствует, создайте его:
- Щёлкните правой кнопкой мыши в правой части окна, выберите Создать → Параметр DWORD (32 бита).
- Присвойте параметру имя DisableAntiSpyware и установите значение 1.
Временное отключение через командную строку
Если необходимо временно остановить работу Windows Defender, можно воспользоваться командной строкой:
1. Запуск командной строки с правами администратора:
В меню Пуск введите cmd, затем щёлкните правой кнопкой мыши на «Командная строка» и выберите «Запуск от имени администратора».
2. Остановка антивирусной службы:
Введите команду sc stop WinDefend и нажмите Enter. Это временно остановит работу Windows Defender.
3. Повторное включение защиты:
Чтобы снова включить антивирус, введите команду sc start WinDefend и нажмите Enter.
Отключение антивируса Windows может быть необходимо в ряде случаев, но всегда следует помнить о рисках, связанных с этим действием. Включайте защиту сразу после выполнения нужных задач. Если у вас возникают сомнения, лучше обратиться к профессионалам. Для обеспечения дополнительной безопасности во время отключения Windows Defender рекомендуется использовать проверенные антивирусные решения, такие как PRO32 Антивирус.
There are times when we want to turn off Windows Defender on Windows 10 quickly. For example, if we are installing a software which requires that the antivirus should be disabled during installation (yes there are some software which requires this).
Windows Defender is an all in one security software from Microsoft consisting of antivirus and a firewall. Windows Defender comes pre-installed with Windows 10. It gets all its updates from Windows Update.
Although you can turn Windows Defender on or off from Windows Settings, there are other quick ways to turn it on or turn off Windows Defender Windows 10 or even Windows 8/8.1. You should choose the best method according to the version of Windows you are using.
Table of Contents
Why turn off Windows Defender?
A general recommendation in terms of security is that you should always have security enabled for your PC at all times. This could be using Windows Defender, Microsoft’s own security solution built into Windows 10, or using a third-party security tool.
Sometimes you will need to disable antivirus and firewall protection in Windows. For example, when you are playing a game but the antivirus keeps on scanning the files and slows down the system. Another example can be when the antivirus detects a program as a false positive although you know that the program is completely safe to use.
Some people believe that it is safe to turn off Windows Defender and use cracking software. This includes activating Windows using illegal tools like KMSPico or the Microsoft Toolkit. These cracking tools are not safe at all. They may inject malware into the system that may not be detectable by the antivirus after installation. The malware is used for cryptomining and other hacking purposes.
There are two ways to turn off Windows Defender, either temporarily or permanently. We will discuss both ways here.
How to Turn Off Windows Defender Using Windows Settings
If you want to turn Windows Defender on or off using Windows Settings, follow the steps below:
- Open Windows Settings (Windows key + i)
- Go to Update & Security –> Windows Security
- From the right-hand pane, select Manage settings under Virus & threat protection settings.
- Toggle the switch to Off under Real-time protection.

This will turn off real-time protection while a manual scan is available at your disposal.
How To Disable Windows Defender Using Command Prompt
To turn off Windows Defender using Command Prompt, follow these steps:
-
Open command prompt with administrative privileges
-
Run the following command to disable Windows Defender:
sc stop WinDefend -
To make sure that Windows Defender is stopped, run this command:
sc query WinDefend
To enable Windows defender again, run the following command:
sc start WinDefendPlease note that this is a temporary method to stop Windows Defender. The service will return to its original state once the system is restarted.
To disable Windows Defender permanently using the command prompt, run the following command:
sc config WinDefend start= disabled
sc stop WinDefend
To enable it again on startup, run the following commands:
sc config WinDefend start= auto
sc start WinDefend
If you want to check the current state of the Windows Defender service, run the following command:
sc query WinDefendCheck the STATE variable. It should be in RUNNING state if it is enabled.

How To Permanently Disable Windows Defender Using PowerShell
One advantage of PowerShell is that you can deploy changes to Windows Defender on multiple computers across the network.
If you prefer PowerShell way, follow the steps below:
- Run PowerShell with administrative privileges (Windows key + X + A)
- To disable real-time monitoring for Windows Defender, run the following command:
Set-MpPreference -DisableRealtimeMonitoring $true - To enable real-time monitoring, run the following command:
Set-MpPreference -DisableRealtimeMonitoring $false
The above method will only turn off real-time monitoring of Windows Defender. If you want to completely remove Windows Defender from Windows 10, use the following PowerShell command:
Uninstall-WindowsFeature -Name Windows-Defender
How To Permanently Turn Off Windows Defender Using Group Policy
If you are a network admin and want to disable Windows Defender from your network, it is wise to use Group Policy. Just follow the steps below to turn off Windows Defender using the Group Policy editor:
- Open Group Policy Editor (Run –> gpedit.msc)
- Go to Computer Configuration –> Administrative Templates –> Windows Components –> Windows Defender Antivirus

- From the right-hand pane, open Turn off Windows Defender Antivirus and select Enabled


This setting can be accessed through Local Group Policy as well as Domain Group Policy. The local policy will turn off Windows Defender for all local users while the domain policy will disable it for all systems on which the policy is applied.
How To Permanently Disable Windows Defender Using Windows Registry
You can also disable Windows Defender permanently from Windows Registry just by creating or altering a few registry keys.. Follow the steps below:
- Go to Run –> regedit. This will open the Windows Registry Editor.
- Navigate to the following key:
HKEY_LOCAL_MACHINE\SOFTWARE\Policies\Microsoft\Windows Defender - In the right pane, right-click the empty area and create a new DWORD (32-bit) value.
- Rename the new item to DisableAntiSpyware
- Double-click DisableAntiSpyware and change its value to 1.
Windows Defender will not load after the next computer restart. To enable Windows Defender again, you can either delete the created registry key or simply change its value to 0.
Please note that you can’t completely uninstall the Windows Defender. Even if you manage to delete its service or files, it will most likely be restored on the next major Windows update.
There are a few scenarios where the user wants to disable a specific part of the Windows Defender system. We will discuss the scenarios below.
How to turn off Windows Firewall only
To turn off Windows Firewall only and keep using other Windows Defender functionality, follow the steps below:
- Open Windows Settings (Windows key + i)
- Click on Update & Security and then Windows Security
- In the right-hand pane, click on Open Windows Security
- From the left-hand pane, select Firewall & network protection
- In the right-hand pane, you will see three protection types. Domain network, Private network, Public network.
- Click on each network type and toggle it to disabled.
This will only turn off the firewall. The antivirus and other functionality of Windows Defender will keep on working.
How to turn off Windows Defender real-time antivirus only
If you want to turn off the antivirus real-time functionality only, you can follow the steps below:
- Open Windows Settings (Windows key + i)
- Click on Update & Security and then Windows Security
- From the left-hand pane, click on Virus & threat protection
- In the right-hand pane, toggle real-time protection to off.
Verdict
If you have not installed any third-party antivirus, then you should keep Windows Defender running as it will protect you from the most common virus/hacking threats while you are connected to the Internet. There should always be an anti-malware solution running on your computer at all times. These methods should be used to disable the security software temporarily.
I hope this has been informative for you. If there are any other easier ways to enable or disable Windows Defender, please let us know in the comments below!
Provide feedback
Saved searches
Use saved searches to filter your results more quickly
Sign up
Содержание
- Введение
- Основные способы отключения антивируса Windows
- Через параметры безопасности Windows
- Через Панель управления
- Через командную строку (CMD)
- Через реестр Windows
- Через PowerShell
- Отключение стороннего антивируса (360 Total Security)
- Что делать, если антивирус Windows не открывается
- Заключение
- Видео
Введение
Антивирус Windows Defender (Firewall, брандмауэр), известный как Защитник Windows, является встроенным средством защиты во всех версиях этой операционной системы. Этот файервол обеспечивает базовую защиту от вредоносных программ, вирусов и других угроз. Однако в некоторых случаях пользователи могут столкнуться с необходимостью временно или полностью его отключить, например, для настройки доступа из внешней сети, установки всевозможного ПО, повышения производительности или устранения конфликтов с другими программами. В данной статье мы разберём, как отключить брандмауэр на Windows 7, 10 и 11, а также рассмотрим различные способы его отключения: через командную строку, реестр, PowerShell и при помощи сторонних утилит.
Основные способы отключения антивируса Windows
Через параметры безопасности Windows
Наиболее простой способ отключить антивирус Windows — воспользоваться настройками встроенной системы безопасности.
- Откройте настройки Защитника Windows:
• В Windows 10 и 11: зайдите в Параметры → Обновление и безопасность → Безопасность Windows → Защита от вирусов и угроз.
• В Windows 7: перейдите в Панель управления → Центр поддержки → Безопасность. - Отключите защиту в реальном времени: в разделе Параметры защиты от вирусов и угроз найдите Защита в реальном времени и переключите ползунок в положение Отключено. Это временно отключит антивирус, и он автоматически включится при следующем перезагрузке системы.
Через Панель управления
Для более старых версий Windows, таких как Windows 7, можно отключить Защитник Windows через Панель управления.
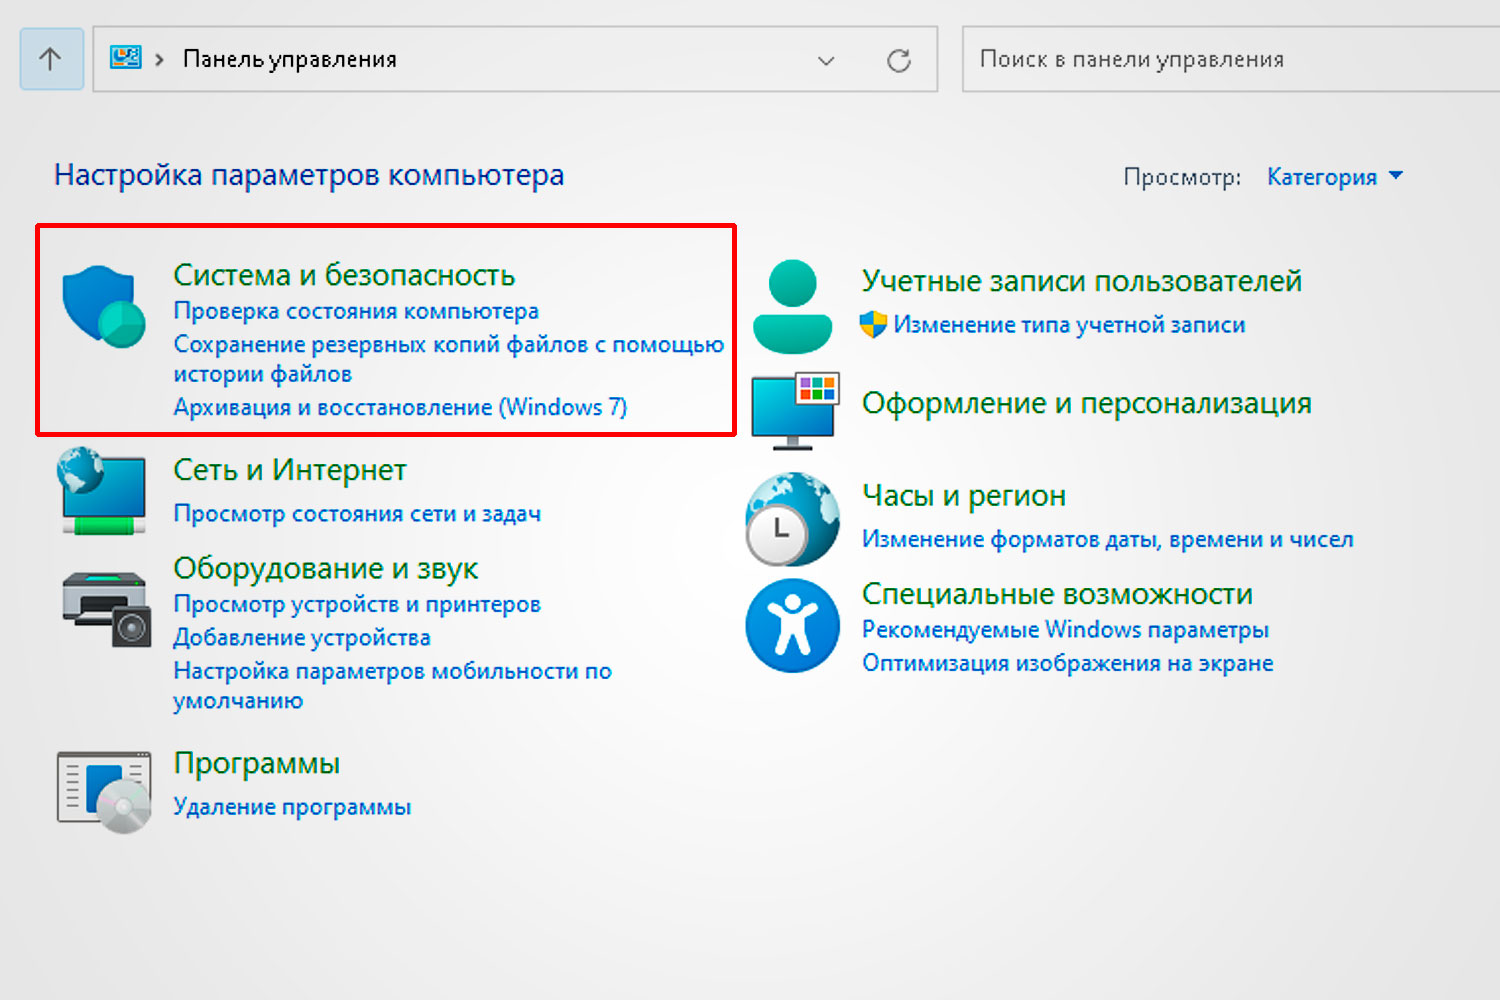
- Откройте Панель управления. Нажмите комбинацию Win + R, введите control panel и нажмите Enter.
- Перейдите в раздел Защитника Windows. Найдите пункт Центр безопасности и выберите Защита от вредоносных программ.
- Отключите защиту. Найдите настройку отключения Защитника и установите параметры на Отключить.
Через командную строку (CMD)
Командная строка позволяет отключить защиту в реальном времени, что удобно для пользователей, привыкших работать с командными инструментами.
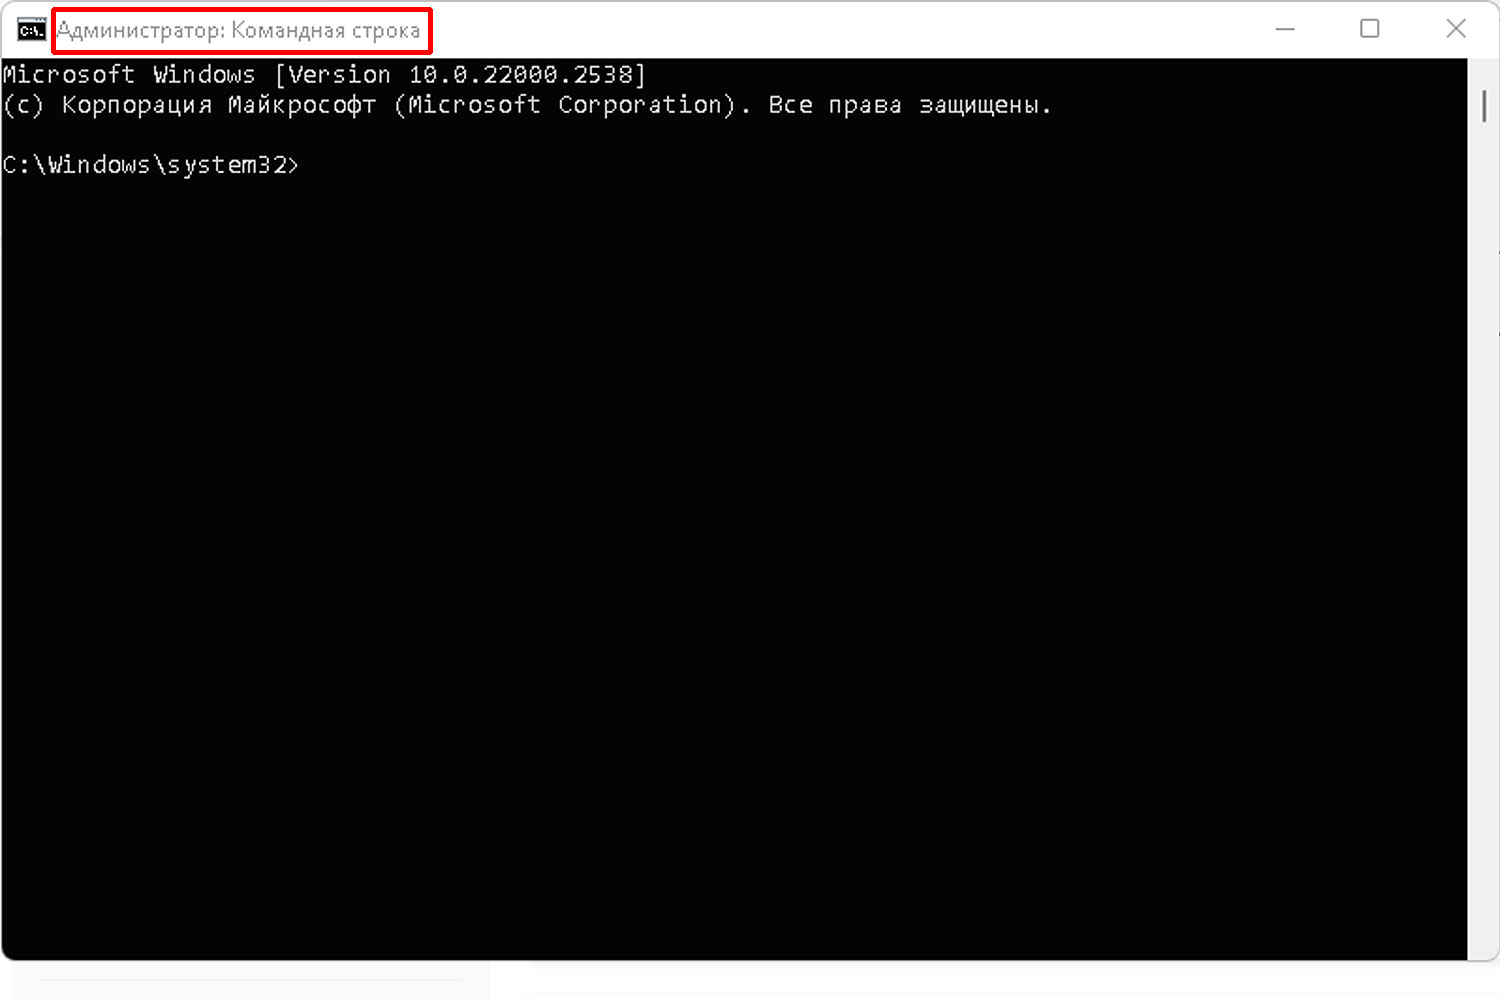
- Откройте командную строку от имени администратора. Нажмите Win + S, введите cmd, кликните правой кнопкой мыши и выберите Запуск от имени администратора.
- Введите команду для отключения защиты. Введите следующие команды для отключения и включения защиты соответственно:
sc stop WinDefend
sc start WinDefend
Эти команды отключают Защитник Windows временно — до следующей перезагрузки.
Через реестр Windows

Редактор реестра позволяет глубже управлять параметрами антивируса, но требует осторожности, так как неправильные изменения могут повредить систему.
- Запустите редактор реестра. Нажмите Win + R, введите regedit и нажмите Enter.
- Перейдите к нужному разделу. Перейдите по следующему пути:
HKEY_LOCAL_MACHINE\SOFTWARE\Policies\Microsoft\Windows Defender
- Создайте параметр для отключения. Кликните правой кнопкой мыши в пустом пространстве, выберите Создать → Параметр DWORD (32 бита) и назовите его DisableAntiSpyware. Установите значение 1, чтобы отключить Защитник Windows.
- Перезагрузите систему, чтобы изменения вступили в силу.
Через PowerShell
PowerShell предоставляет командлеты для управления Защитником Windows. Этот способ подходит для пользователей, предпочитающих скриптовые команды.
- Запустите PowerShell от имени администратора. Нажмите Win + X, выберите Windows PowerShell (Администратор).
- Введите команду для отключения. Введите следующие команды для отключения и включения защиты в реальном времени соответственно:
Set-MpPreference -DisableRealtimeMonitoring $true
Set-MpPreference -DisableRealtimeMonitoring $false
Отключение стороннего антивируса (360 Total Security)

Для пользователей, использующих антивирусное ПО 360 Total Security, способ отключения отличается от встроенного антивируса Windows.
- Откройте интерфейс 360 Total Security. Дважды кликните на значок 360 Total Security в трее.
- Перейдите в раздел настроек защиты. В интерфейсе программы найдите пункт Антивирус и выберите Настройки.
- Отключите функции защиты. Найдите опцию Отключить антивирус или временно приостановите защиту, выбрав подходящую настройку.
Что делать, если антивирус Windows не открывается?
В некоторых случаях антивирус Windows может не запускаться или не открываться из-за системных сбоев. Вот несколько способов, как можно решить эту проблему:
- Перезагрузите компьютер. Это поможет восстановить работоспособность антивируса.
- Проверьте службу Защитника Windows. Откройте Диспетчер задач (Ctrl + Shift + Esc) и перейдите на вкладку Службы. Найдите службу WinDefend и убедитесь, что она запущена.
- Выполните проверку системных файлов. Откройте командную строку от имени администратора и выполните команду, которая проверит и восстановит повреждённые системные файлы:
sfc /scannow
Заключение
Отключение антивируса Windows может быть полезным в ряде ситуаций, однако всегда рекомендуется использовать это действие с осторожностью. Временное отключение защитника, особенно для выполнения установки определенного программного обеспечения, может помочь устранить несовместимости. Используя различные методы — от командной строки до реестра, пользователи могут найти наиболее удобный способ отключения антивируса Windows в зависимости от своих предпочтений и уровня навыков. Убедитесь, что включаете защиту обратно, чтобы обеспечить безопасность вашей системы.
Видео
Как отключить встроенный Антивирус Windows 10 — смотреть видео онлайн от ПроКомпьютер в хорошем качестве опубликованное 9 июля 2024 года в 230844.Отключаем встроенный Антивирус Windows 10 он же Защитник Windows…. Смотрите видео онлайн Как отключить встроенный Антивирус Windows 10 на канале ПроКомпьютер в хорошем качестве и бесплатно опубликованное 9 июля 2024 года в 2308 длительностью 000236 на видеохостинге RUTUBE.rutube.ru
Today, we are going to show you different methods to Enable/Disable Windows Defender Antivirus Service aka WinDefend. The first and foremost work of this service is to protect your PC from detrimental malware and virus attacks. It’s a Win32 service and gets installed automatically when you install the Windows 11 or 10 operating system. Hence, there is no hassle to download it manually. The location of WinDefend service is %ProgramFiles%\Windows Defender\MsMpEng.exe. If it is changed, damaged or deleted, you have no way left rather than restoring its original version from Windows 10 installation media.
Like other services, Windows Defender Antivirus Service functions as “LocalSystem”. For this, it has its own process which is MsMpEng.exe. The startup type of WinDefend service remains Automatic from when it gets installed. As a result, the service can initiate its operation automatically when the operating system starts. But if anything goes wrong, it fails to start. Mostly it happens when Remote Procedure Call service is stopped or disabled. In other cases, you can inspect Event Log as the failure details get recorded there.
Ways to Enable/Disable Windows Defender Antivirus Service in Windows 11 and 10
Here is How to Enable/Disable Windows Defender Antivirus Service in Windows 11 or 10 [WinDefend] –
1] Most Convenient way – Use Service console
Step-1: Press Windows and Q keyboard shortcuts to invoke Search bar and then type services in the given field.
Step-2: When the result shows up, hit Enter to open Services app.
Step-3: In the running console, scroll down to locate Windows Defender Antivirus Service.
Step-4: Once found, either double-click or right-click on the same and select Properties.
Step-5: A new wizard will come up with General tab opened. Change the Startup type to either Automatic or Manual using its drop-down menu.
Step-6: To enable Windows Defender Antivirus Service, click the Start button located under Service status.
Step-7: If you want to disable the same WinDefend service, simply hit the Stop button.
Step-8: Lastly, click on Apply and then OK to save the changes.
2] Run Command Prompt to enable/disable Windows Defender Antivirus Service
- Right-click on Start button and select Run from the Win+X menu.
- Type cmd.exe in the text field and thereafter press Shift+Ctrl+Enter hotkeys together.
- A UAC will prompt up, click Yes to run elevated Command Prompt.
- In the black window, type preferred command and hit Enter to change the startup type of WinDefend service –
Automatic –
REG add “HKLM\SYSTEM\CurrentControlSet\services\WinDefend” /v Start /t REG_DWORD /d 2 /f
Manual –
REG add “HKLM\SYSTEM\CurrentControlSet\services\WinDefend” /v Start /t REG_DWORD /d 3 /f
- Now, run the following command in the same black window to enable Windows Defender Antivirus Service –
net start WinDefend
- In order to disable Windows Defender Antivirus Service, execute the below command –
REG add “HKLM\SYSTEM\CurrentControlSet\services\WinDefend” /v Start /t REG_DWORD /d 4 /f
3] Modify the Registry key of WinDefend service
- Press Win+R hotkeys at one go to open the Run dialog box.
- Type regedit in the provided area and hit Enter.
- A UAC will come into the view, click Yes button to give consent.
- In Registry Editor window, navigate to the following path on its left sidebar –
HKEY_LOCAL_MACHINE\SYSTEM\CurrentControlSet\Services\WinDefend
- Once you reach there, you will see Start DWORD in the right pane. Right-click on it and select Modify or simply double-click for the same purpose.
- In the Value data box, put preferred value followed by clicking OK button.
Automatic – 2
Manual – 3
Automatic (Delayed Start) – 2
Disabled – 4
4] Use System Configuration
Step#1: Press Windows key to open up the Start menu. Write down msconfig and hit Enter when you see the result.
Step#2: When System Configuration wizard rolls out in the display, shift to its Services tab.
Step#3: Scroll down a bit to locate Windows Defender Antivirus Service from the available list.
Step#4: After getting the same, do a click on the checkbox against it to put a tick mark.
Step#5: Later on, click on Apply and then OK button to implement the modifications of the service.
Step#6: If you want to disable the service, just clear the tick mark you put there.
Step#7: To make the changes effective, restart Windows 10 PC.
That’s all!!!