
Приложение Почта в Windows 10 является одним из лучших почтовых клиентов для операционной системы Windows. Приложение, которое впервые появилась в Windows 8, претерпело не мало изменений.
Приложение для работы с почтой очень удобное, но многие пользователи испытывают ряд вопросов. Если вы имеете проблемы с приложением в Windows 10 и не в состоянии разобраться с ней, вы можете решить ее переустановив само приложение.
Переустановка почтового клиента проходит довольно таки легко. С помощью PowerShell либо или с помощью сторонних утилит. После того, как приложение будет удалено, свежий экземпляр почтового приложения можно установить из официального магазина Windows 10.
В этом руководстве, мы рассмотрим, как переустановить приложение почта в Windows 10.
- ВНИМАНИЕ: Удаление почтового приложения приведет к удалению приложения Календарь. Аналогичным образом, когда вы переустанавливаете приложение Почта, то приложение Календарь также будет переустановлено.
Приложение Почта может быть удалено с помощью приложения «Параметры» или вы можете использовать PowerShell, рассмотрим оба способа.
Удалить предустановленное в Windows 10 приложение «Почта» с помощью Параметров.
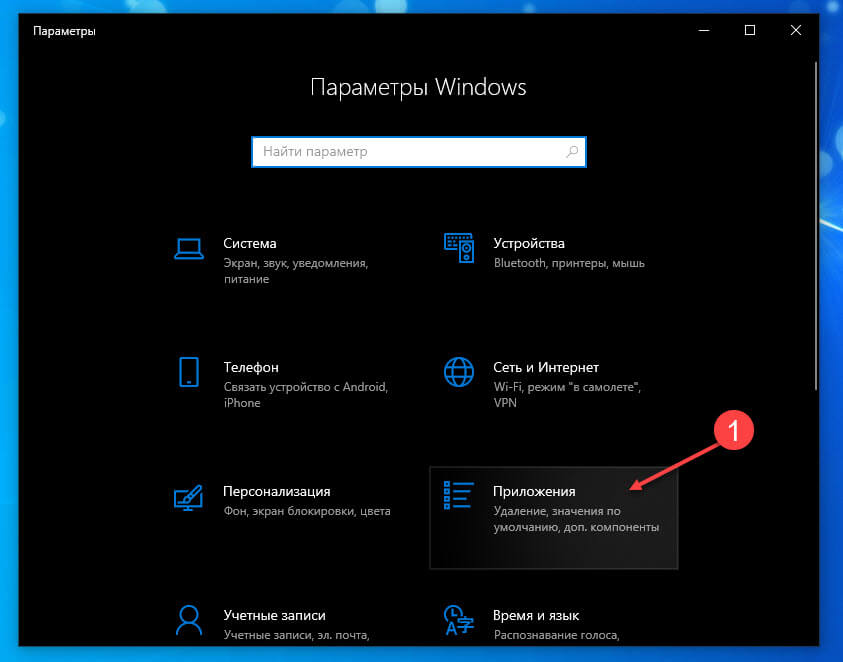
Шаг 1: Откройте приложение «Параметры» и перейдите в следующую группу настроек «Приложения» → «Приложения и возможности».
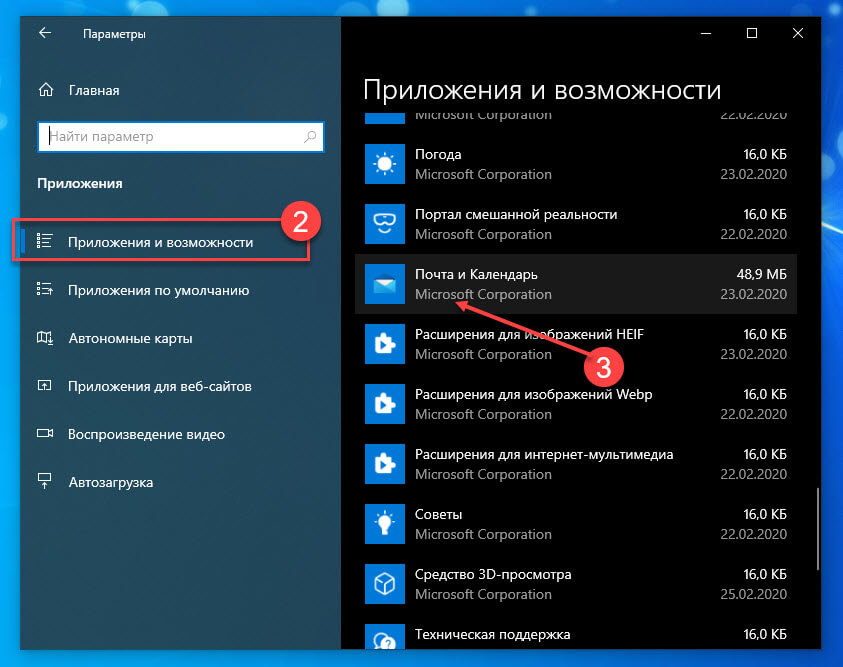
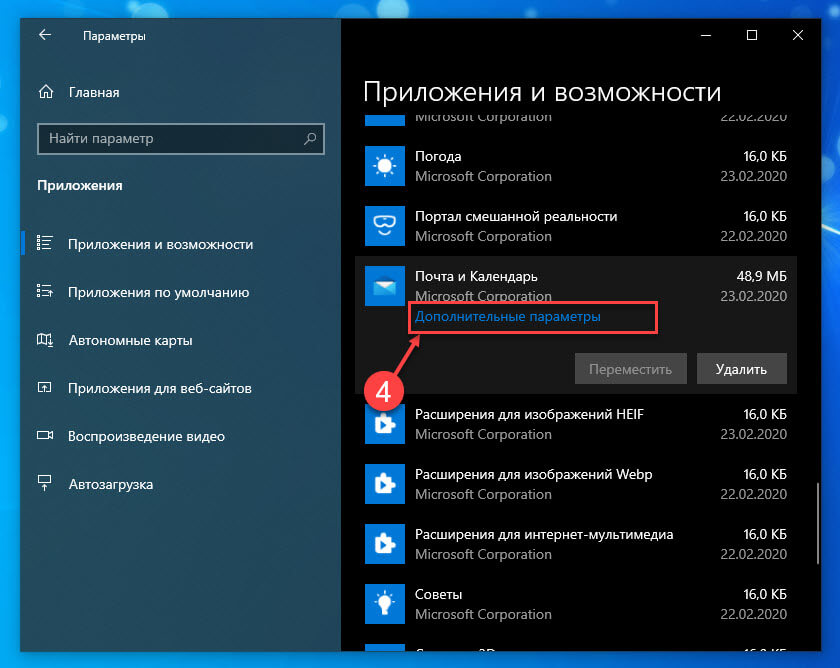
Шаг 2: В списке приложений найдите «Почта и Календарь», а затем нажмите на запись, чтобы увидеть ссылку Дополнительные параметры. Откройте ее.
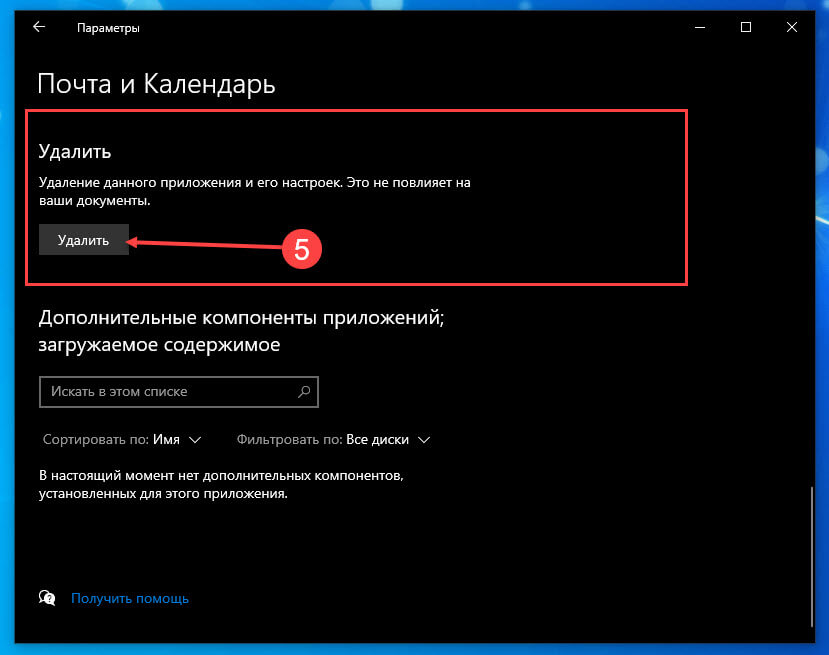
Шаг 3: Прокрутите страницу в низ, найдите и нажмите кнопку «Удалить». Это удалит данное приложение и его настройки, но, не повлияет на ваши документы. Вы увидите диалоговое окно подтверждения, нажмите удалить еще раз, для подтверждения.
Приложение «Почта» удалено из вашей системы.
Удалить предустановленное в Windows 10 приложение «Почта» с помощью PowerShell.
Шаг 1: Запустите PowerShell от имени администратора. (см. как)
Шаг 2: Введите следующую команду и нажмите Enter.
Get-AppxPackage Microsoft.windowscommunicationsapps | Remove-AppxPackage

Выполнение займет несколько секунд, и приложение «Почта» больше не будет частью вашей системы. Вы можете закрыть Windows PowerShell после выполнения команды.
Переустановить приложение «Почта».
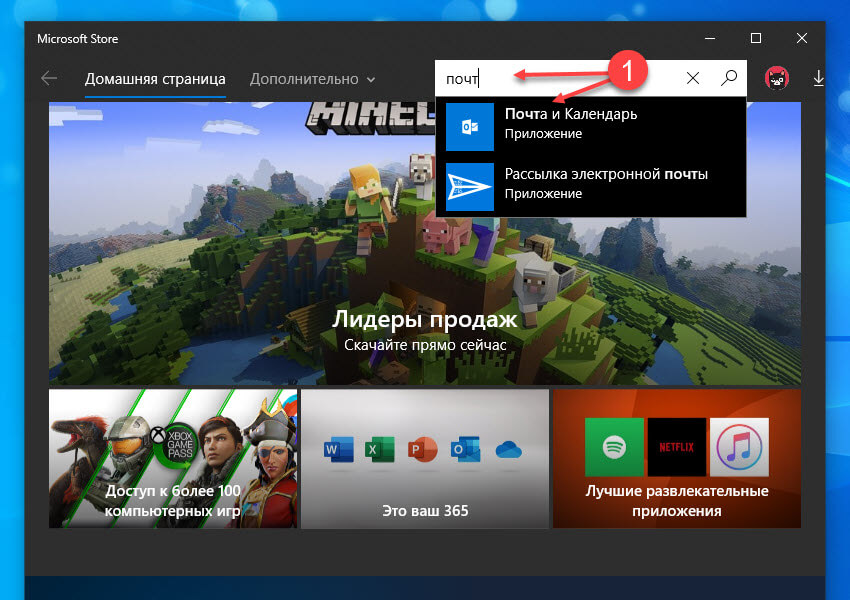
Шаг 1: Запустите Microsoft Store в Windows 10.
Шаг 2: Чтобы переустановить приложение введите в поле поиска Почта, выберите пункт «Почта и Календарь», чтобы открыть страницу.
Шаг 3: Нажмите кнопку «Установить», чтобы установить приложение Почта.
После того, как приложение установлено, добавьте учетную запись электронной почты в приложение.
Вот и все!
Windows 10 Mail App Recovery Solution : Here’s How to Do It!
Having a dedicated application to send and retrieve emails can actually help streamline the process of keeping on top of all your emails. Windows 10 Mail App is no exception, as it comes with all essential features to manage your email account. However, users are frequently discovering that the Microsoft’s Windows 10 Mail App keep crashing right after opening. One user described his experience and asked for a Windows 10 Mail App Recovery Solution:
Peter, USA: An email I’d been waiting for past one day finally came, but when I tried to open windows 10 mail client, it will open for about 2 to 5 seconds and then crash. I have even tried un-installing and re-installing with no luck. This is a severe headache for me since my Windows 10 Mail App consists more than 1000 important emails that I can’t afford to lose at any cost. Does there any solution exists that can help me to achieve Windows 10 Mail App recovery?
This Windows 10 Mail App crashing issue appears to be getting worse. Thus, following the significant escalation of such Windows 10 Mail App recovery issues, we have come up with an authentic solution – BitRecover Windows 10 Mail App Backup Tool.
Windows 10 Mail App Recovery Software: Overview
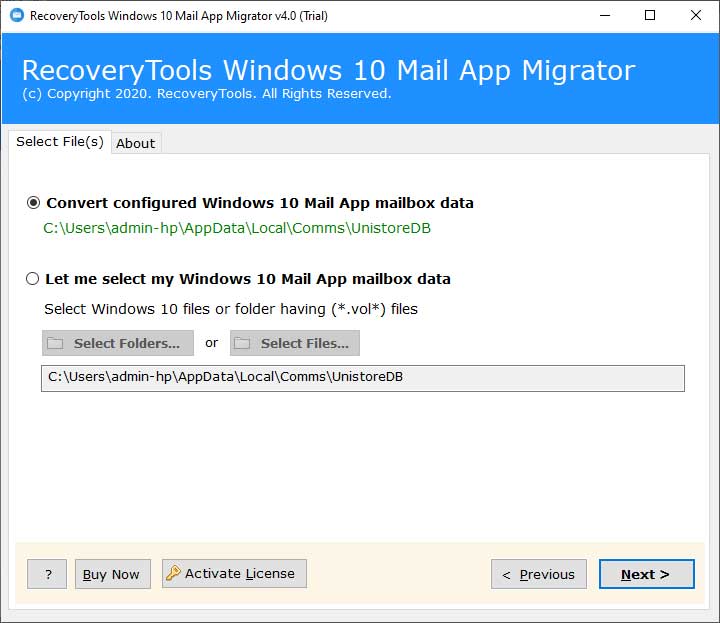
BitRecover Windows 10 Mail App recovery tool is a splendid email data recovery software. It specializes in restoring all emails from windows 10 mail client to a safe location on your computer. The software has the ability to convert configured Windows 10 Mail App mailbox data from the default location: C:\Users\UserName\AppData\Local\Comms\UnistoreDB.
The Windows 10 Mail App recovery tool offers to deliver fast Performance and Trustworthiness. This workaround is perfect as it can help you to recover Windows 10 Mail App emails during sudden crash.
Following Benefits can be Enjoyed with this Application:
- SWIFT RECOVERY – Utilizes less time to recover Windows 10 Mail App data.
- ACCURATE RECOVERY – Assures 100 % data integrity after Windows 10 Mail App recovery.
- FULL EMAIL RECOVERY – Restore complete “user-specified” Windows 10 Mail App data.
- STEADY RESULTS – Delivers impeccable Windows 10 Mail App recovery experience.
- NUMEROUS SAVING OPTIONS – Recover Windows 10 Mail App data into 35+ File Formats.
Based on the rigorous testing of this product, now you can totally recover emails from windows 10 mail app and hence avoid irrecoverable data loss issues. Major highlights of this software are – Speed, Accuracy and Reliability.
How to Recover Emails from Windows 10 Mail App ? – Fix the Issue Now
In this section, you will know how to use the Windows 10 Mail App recovery software. So, firstly, download and install the software on your computer. Read all instructions and now proceed towards the main steps:
Step 1: Select “Convert configured Windows 10 Mail App mailbox data” option and press “Next” tab.
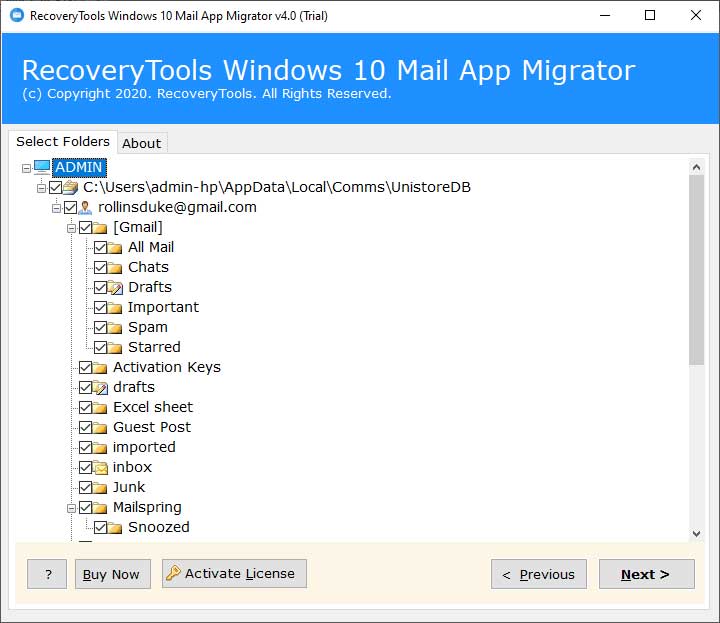
Step 2: Now, you can see the preview of all Windows 10 Mail App folders. So, choose the required folders which you want to recover and again click on “Next” button.
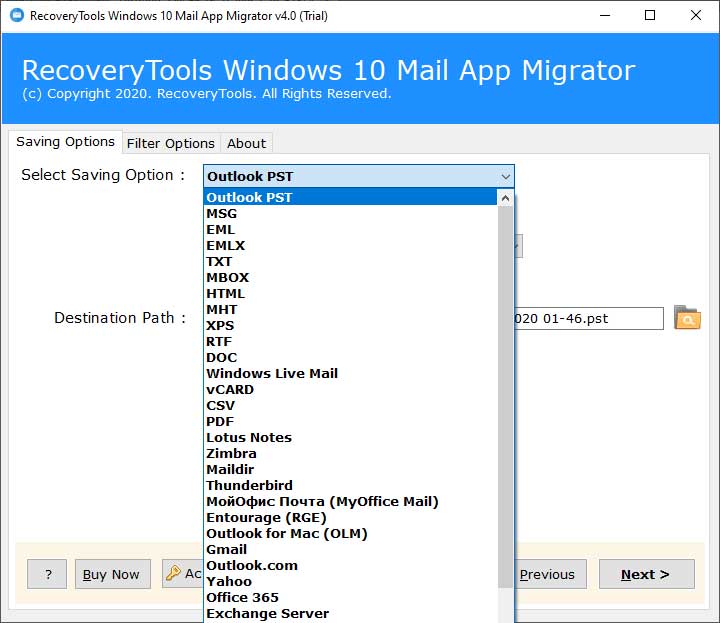
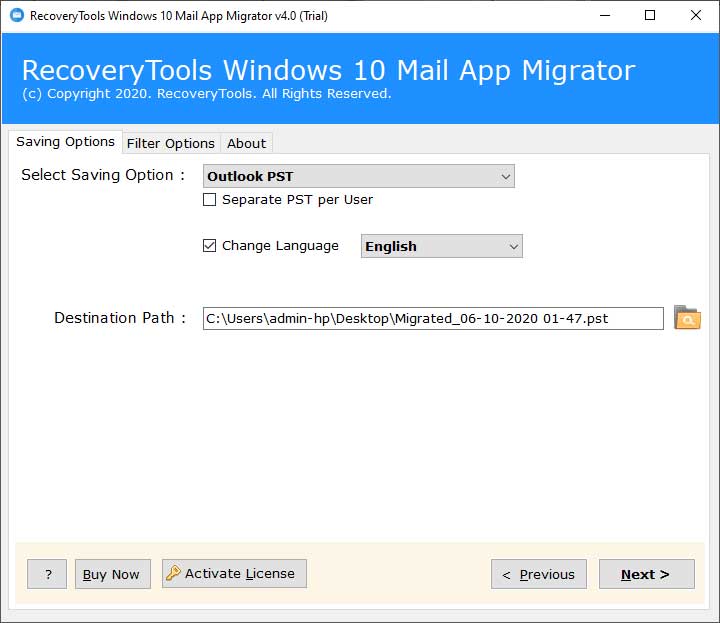
Step3: Then, select any saving option into which you wish to save the Windows 10 Mail App recovered data.
Step4: Thereafter, confirm the destination location where you want to save the output.
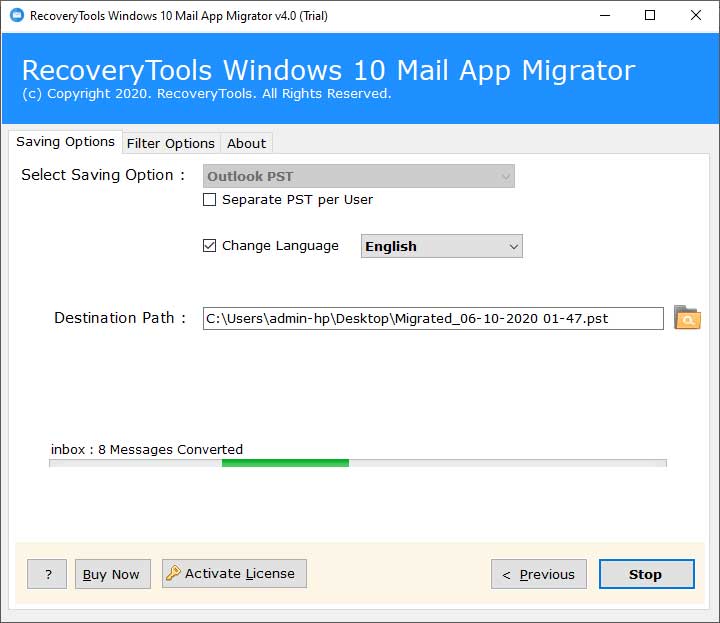
Step5: Click on the Next button to start to recover data from Windows 10 Mail App.
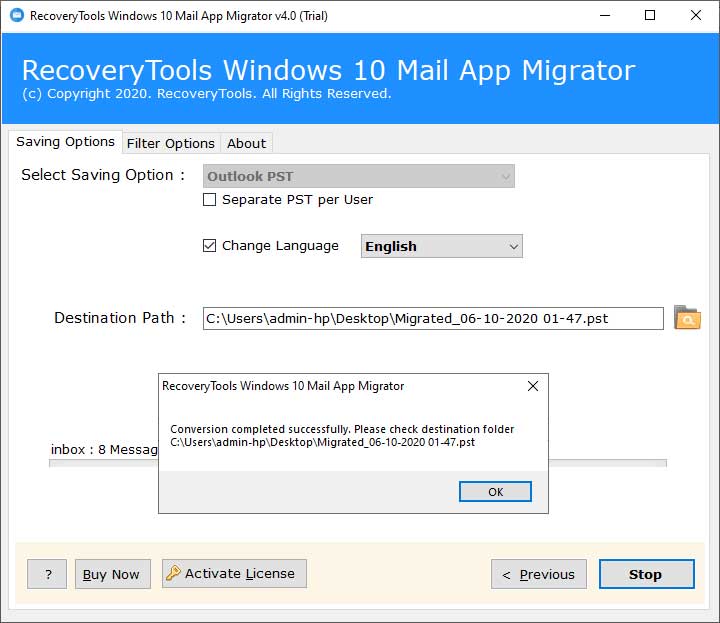
Step 6: Once the task finishes, you will receive a completion message. Click on OK to end it.
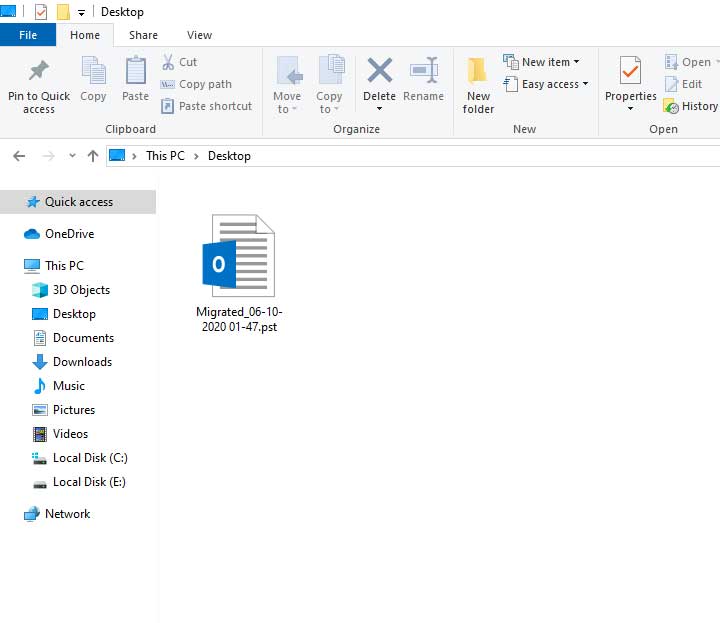
Step 7: Now, you can open the destination folder consisting of resultant recovered data.
Other Benefits of Using Windows 10 Mail Client Recovery Software
Selective Email Recovery: With this tool, you can selectively recover Windows 10 Mail App data. Thus, you can save your time and energy be converting only required mailboxes of Windows 10 Mail App.
Convert Win 10 Contacts: Along with emails, you can migrate Windows 10 Mail App contacts into CSV (Comma Separated Values) or VCF (Virtual Contact File).
Multiple Saving Options: This application is truly a multipurpose utility as it offers numerous saving options. Users can restore Windows 10 Mail App emails into these formats such as Outlook PST, MSG, EML, EMLX, TXT, MBOX, HTML, MHT, XPS, RTF, DOC, Windows Live Mail, vCard, CSV, PDF, Lotus Notes, Zimbra, Maildir, Thunderbird, мойофис почта (MyOffice Mail), Entourage (RGE), Outlook for Mac (OLM), Gmail, Outlook.com, Yahoo, Office 365, Exchange Server, Hosted Exchange Server, G Suite, IBM Verse, Amazon Workmail, Kerio, SmarterMail, MDaemon, and IMAP.
Data Filter Options: One major benefit of the Windows 10 Mail App recovery tool is that it offers data filter options which enables users to convert data as per date range, subject, email address, etc.
Different Scenarios that Causes Windows 10 Mail App Issues
All these causes may be responsible when you suffer from Windows 10 Mail App issues. Thus, it is highly desirable to use an automated Windows 10 Mail App recovery software.
- Windows 10 Mail App not opening
- Windows 10 mail client not syncing
- Crashing of Windows 10 Mail App
- Windows 10 Mail App not receiving emails
- Windows 10 Mail client keeps freezing
Wrapping Up
In the above blog, we have explained how to fix the Windows 10 Mail App issues. With the Windows 10 Mail App recovery software, users can straightforwardly convert all configured Win 10 mailbox data into numerous saving options. Please note that you can take a free trial of this software with the demo version. It allows to backup and restore few Windows 10 Mail App emails. Also, you can check the tool’s efficiency with this demo version. Later you have to upgrade the license keys of the product for unlimited conversion and recovery of emails. Hopefully, now you can restore entire database of Windows 10 Mail App.
-
Используем командную строку
-
Удаляем пакеты обновлений
-
Используем диспетчер задач и диалоговое окно Выполнить
-
Вывод
Не смотря на некоторые очевидные плюсы, новая операционная система Windows 10 имеет свои недостатки. Они, конечно, исправляются разработчиками, но это процесс не быстрый. Часто пользователи сталкиваются с одной распространенной проблемой — не работает приложение Почта в Windows 10. Помимо Почты, не запускаются также приложения Календарь и Люди. Что делать, если подобная проблема возникла и у вас? Для решения можно воспользоваться тремя способами.
Используем командную строку
Для решения проблемы с приложением Почта и Календарь необходимо:
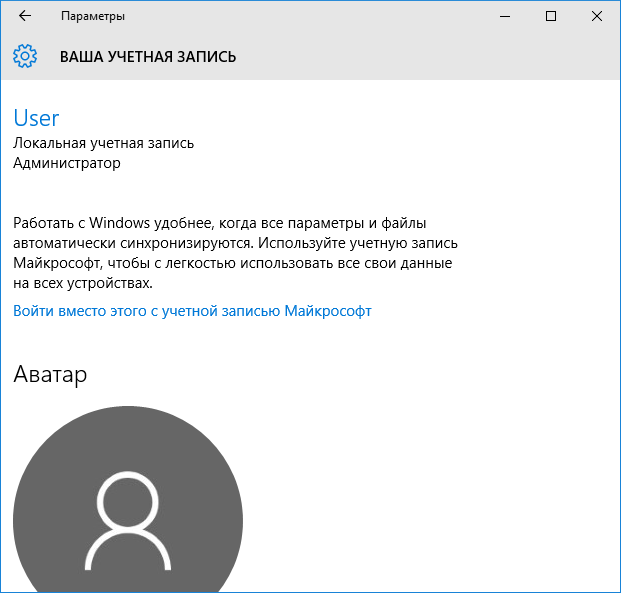
- Проверить, что вы находитесь в системе под локальной учетной записью. Если вы для входа в Windows используете учетную запись Microsoft, то необходимо выйти из неё и войти используя локальную. Это можно сделать перейдя в Параметры – Учетная запись – Ваша учетная запись.

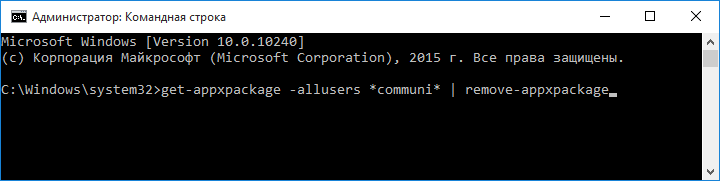
- Запустить командную строку от имени Администратора (нажав “Win+X” и выбрав соответствующий пункт).
- Ввести в консоль команду: get-appxpackage -allusers *communi* | remove-appxpackage и нажать Enter.

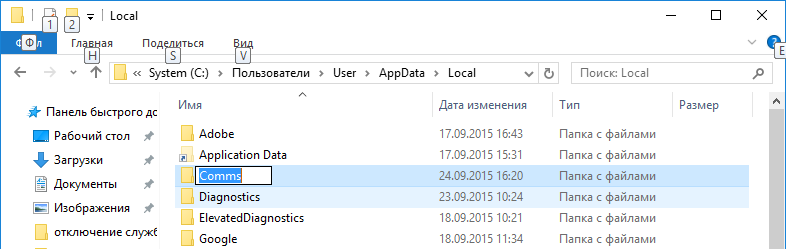
- После этого открываем Проводник, вводим в адресную строку: %localappdata%\Comms и удаляем все содержимое этой папки. Один файл невозможно будет удалить, необходимо будет перезагрузить систему и повторить процедуру удаления.

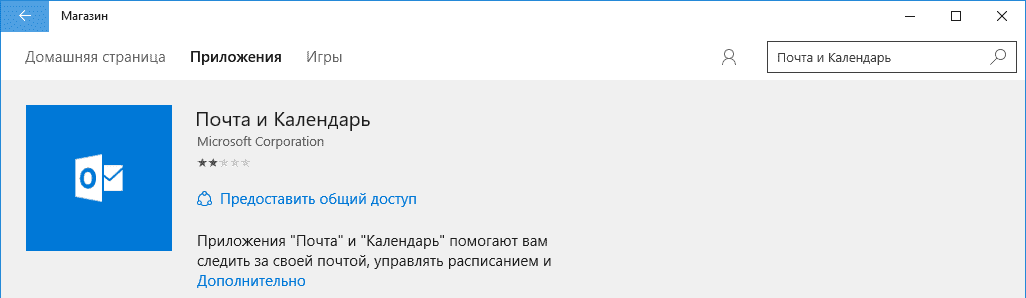
- Отрываем Магазин Windows и устанавливаем приложения Почта и Календарь.

- После этого можно опять использовать учетную запись Microsoft.

Удаляем пакеты обновлений
Было замечено, что приложения Почта и Люди перестают работать после установки некоторых обновлений системы. То есть, удалив обновления, работа этих приложений должна возобновится. Для этого необходимо:
- Так же, как и в способе выше, зайти в Windows используя локальную учетную запись.
- Переименовать скрытую папку Comms в Comms.old (она находится в C:\Пользователи\Имя\AppData\Local).

- Перезагрузить компьютер и удалить папку Comms.old.
Используем диспетчер задач и диалоговое окно Выполнить
Для этого способа понадобится:
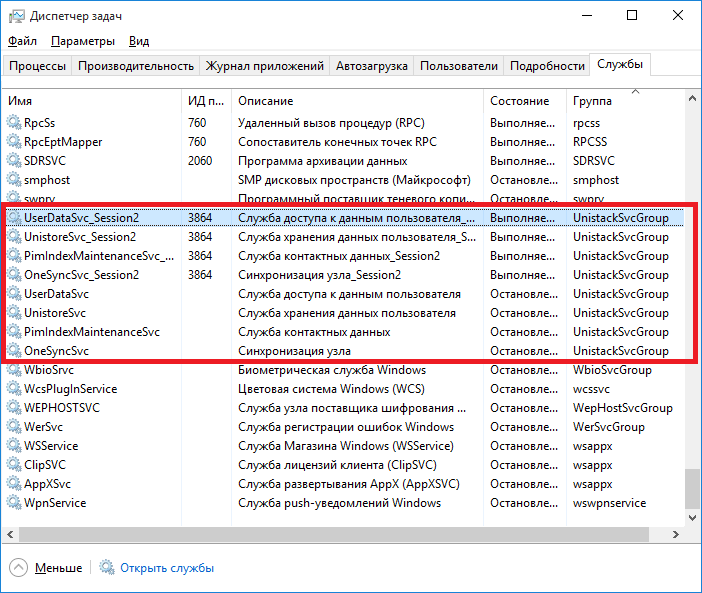
- Открыть диспетчер задач (Ctrl+Shift+Esc) и перейти во вкладку Службы.
- Остановить все службы в группе UnistackSvcGroup (нажать правой клавишей по службе и выбрать пункт Остановить).

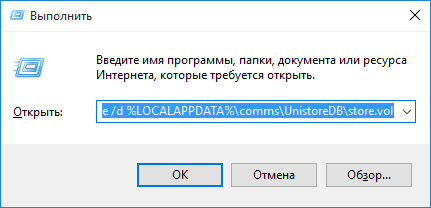
- В окне Выполнить (вызывается комбинацией Win+R) запустить команду C:\windows\system32\esentutl.exe /d %LOCALAPPDATA%\comms\UnistoreDB\store.vol и перезагрузить компьютер.

Вывод
Итак, как мы увидели, новое ПО приносит вместе с радостью дополнительные трудности пользователям операционной системы Windows. С другой стороны, нет проблем, которые невозможно решить, и все рекомендации действуют в большинстве случаев.
The Mail app in Windows 10 is one of the better email clients out there for the Windows operating system. Mail, which was first introduced with Windows 8, has been redesigned and polished in Windows 10 for better user experience and performance.
Although the Mail app is fantastic, many users are experiencing a variety of issues while using the app. If you’re also having issues with the Mail app in Windows 10 and are unable to sort out the issue, you might be able to resolve the issue by reinstalling the Mail app.

Reinstalling the Mail app is fairly straightforward and easy. It can be uninstalled either via PowerShell or with the help of a third-party utility called Windows 10 App Remover. Once the app is uninstalled, a fresh copy of Mail can be installed from the official Store.
In this guide, we will see how to reinstall the Mail app in Windows 10 with and without the help of third-party utilities.
WARNING 1: Reinstalling the Mail app might remove any saved emails and credentials in the app. You might need to add your email accounts all over again. We advise you to create a manual restore point before attempting to reinstall the Mail app.
WARNING 2: Uninstalling the Mail app will also uninstall the Calendar app, as both are packaged together as Windows communication apps. Likewise, when you install the Mail app, the Calendar app will also be installed.
Tip: You might be able to fix issues by resetting the Mail app in Windows 10.
1 – Reinstall the Mail app without using third-party utilities
2 – Reinstall the Mail app using CCleaner
3 – Reinstall the Mail app with the help of third-party utilities
Method 1 of 3
Reinstall Windows 10 Mail app via PowerShell
The Mail app can’t be uninstalled via Settings or Control Panel. We need to either use PowerShell or third-party tools to uninstall it. In this method, we are going to use PowerShell. Skip to Method 2 to uninstall the Mail app with the help of third-party utilities.
Step 1: Launch PowerShell as an administrator. To do so, type PowerShell in the Start menu or taskbar search box, right-click on the PowerShell entry and then click the Run as administrator option.

Click the Yes button when you see the User Account Control prompt.
Step 2: In the elevated PowerShell prompt, type the following command and hit Enter:
Get-AppxPackage Microsoft.windowscommunicationsapps | Remove-AppxPackage

Press the Enter key to execute the command. The app will be removed in a few seconds.
The Mail app is now completely uninstalled. If it were pinned to the taskbar, the icon would automatically disappear from the taskbar.
Step 5: Once the Mail app is uninstalled, reboot your PC.
Step 6: Launch the Store app. The Store app can be found on the Start menu or can be launched by typing Store in the search box. And if you can’t find it, follow our how to reinstall the Store app guide.

Step 7: Once the Store app is launched, type Mail in the search box and then click Mail and Calendar to open its page.

Step 8: Click the Install button to install the Mail app. That’s it!


Once the app is installed, add your email account(s) to the app. It should work without any issues.
Method 2 of 3
Reinstalling the Mail app using CCleaner
Step 1: Download CCleaner for Windows 10 and install the same on your PC.
Step 2: Run CCleaner. Click Tools and then click Uninstall.
Step 3: Select the Mail and Calendar app and then click the Uninstall option. Click the Yes button when you see the confirmation dialog to uninstall the mail app.

Step 4: Open the Store app, search for Mail and Calendar app, and then install the same to reinstall the Mail app.
Method 3 of 3
Reinstalling the Mail app using Windows 10 App Remover tool
Step 1: Download Windows 10 App Remover by visiting this page. It’s a portable program. Hence, no need to install it.
Step 2: Run Windows 10 App Remover, click the button labeled Calendar & Mail and then click Yes for the confirmation prompt.


Step 3: Once the app is uninstalled, follow the instructions mentioned in Step 5, Step 6, Step 7, and Step 8 of Method 1.
I hope this helps!
Windows 10 bundles several default apps, including the Mail app, which is the best experience to manage your email accounts. However, as most of Microsoft products these days, the Mail app is offered as a service, which means that it’s always considered a work in progress, which also means that throughout the life of the app you’re likely to come across more issues.
A lot of users often complain about emails not syncing, the Mail app not opening, problems adding new email accounts, and certain settings not working, among other issues. While many times the root of the problem could be related to account settings, almost always it’s an issue that can be resolved by resetting Mail app on Windows 10.
In this guide, you’ll learn the steps to use the Settings app to reset the Mail app on Windows 10. In addition, this guide will show you the steps to use PowerShell to reset the app by uninstalling the app from your computer, and then reinstall it again through the Microsoft Store.
- How to reset Mail app using Settings
- How to reset Mail app using PowerShell
- How to install missing Mail app packages on Windows 10
How to reset Mail app using Settings
To reset the Mail app using the Settings app, use these steps:
-
Open Settings.
-
Click on Apps.
-
Click on Apps & features.
-
Select the Mail and Calendar app from the list.
-
Click the Advanced options link.

Mail app Advanced options link -
Click the Reset button.
Reset Mail app on Windows 10 -
Click the Reset button again to confirm.


Once you’ve completed the steps, this reset option will permanently delete the app’s data, including settings, preferences, and sign-in details.
How to reset Mail app using PowerShell
To reset the Mail and Calendar apps using this method, you’ll need to use PowerShell to remove the app and then use the Microsoft Store to reinstall it.
Uninstall Mail using PowerShell
To uninstall the built-in Mail app on Windows 10 with PowerShell, use these steps:
-
Open Start.
-
Search for PowerShell, right-click the result, and select the Run as administrator option.
-
Type the following command on PowerShell and press Enter:
Get-AppxPackage Microsoft.windowscommunicationsapps | Remove-AppxPackage

- Restart your computer.

Once you’ve completed the steps, you’ll need to reinstall both apps from the Microsoft Store using the instructions below.
Reinstalling Mail app using Microsoft Store
To reinstall the Mail app, use these steps:
-
Open Microsoft Store.
-
Search for “Mail and Calendar” and click the top result.
-
Click the Install button.

Reinstall default Mail app on Windows 10 -
Launch the Mail app.
-
Continue with the on-screen directions to complete the setup.

Quick Tip: If you get an error trying to install the app, simply restart your computer and try again.
After you have configured the Mail app, the email syncing problem, the Mail not opening issue, or any other issue should be resolved.
Another common problem that can affect the functionality of the Mail app (and Calendar) is the “Privacy” settings. If this is the case, you can try opening Settings > Privacy, and making sure under Calendar and Email, in both sections “Mail and Calendar” option are turned on.
How to install missing Mail app packages on Windows 10
If you’re experience problems trying to sync emails, or you’re unable to add new accounts after upgrading to a new version of Windows 10, it could be a problem with missing “Feature on Demand” packages.
This is a known issue and Microsoft recommends the following workaround:
-
Open Start.
-
Search for Command Prompt, right-click the result, and click the Run as administrator option.
-
Type the following command and press Enter:
dism /online /Add-Capability /CapabilityName:OneCoreUAP.OneSync~~~~0.0.1.0
-
Restart your computer.
-
Open Mail.
-
Click the Settings (gear) button in the bottom-left corner.
-
Click on Manage Accounts to see if the Account settings are available, which indicates that the packages has been added successfully.
After completing the steps, the Mail app should start working again. If the account is still not syncing, delete and re-add the account again on Mail Settings > Manage Accounts > Select the account, select Delete account from this device, and clicking the Delete option. Once the account is removed, select Add Account to add the account one more time.
Update February 6, 2019: This article has been updated to make sure it includes the latest changes and information.