
Is your Windows 10 Start menu not working? Do you want to reset the Start menu of Windows 10? The Start Menu is one of the most used places in Windows 10. It is an all-in-one place where we search the system for something and quickly access the pinned tiles.
Basically, Windows 10 Start menu is a table of contents for all the apps (programs), folders, and contacts you use often. In Desktop mode, all the app icons appear in an alphabetical list on the left side of the screen, and they can be made to appear on the right side as tiles. If the tiles are “live,” they can display changing information from the application in real time, such as stock quotes or the weather. Just select the Start button on the taskbar. Next, customize it according to choice by pinning apps and programs or moving and regrouping tiles. If you need more space, you can resize the Start menu as well.

Due to any reason, if your Start menu is not working, this gearupwindows article will help you troubleshoot them.
Like any other program on Windows 10, the Start Menu also depends upon a process that runs in the background. If the Start Menu behaves abnormally or is completely unavailable, or icons have wavered, a simple restart of its process may help you to recover them without rebooting your computer.
You can restart the Start menu in Windows 10 using the following ways:-
- Using Task Manager
- Via Command Prompt
- Through Windows PowerShell
How to Restart the Start Menu using the Windows 10 Task Manager?
Perhaps, Task Manager is the easiest way to restart the Start menu on Windows 10 PC. Simply kill the associated process from the Task Manager, and then it will re-run automatically. Perform the following steps to do so:-
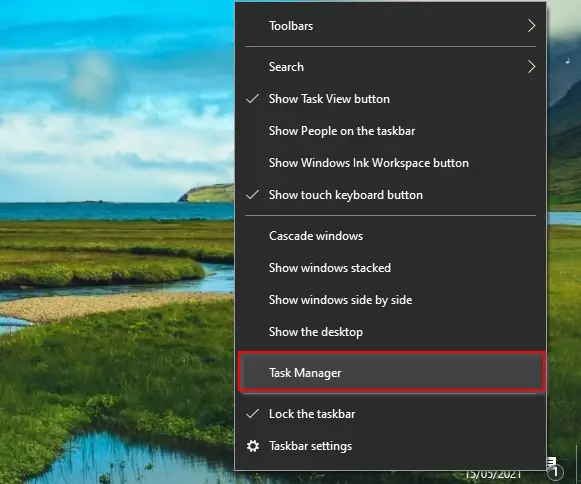
Step 1. Launch Task Manager by right-clicking the Taskbar and selecting Task Manager, or use the shortcut keys Ctrl + Shift + Esc to open it.
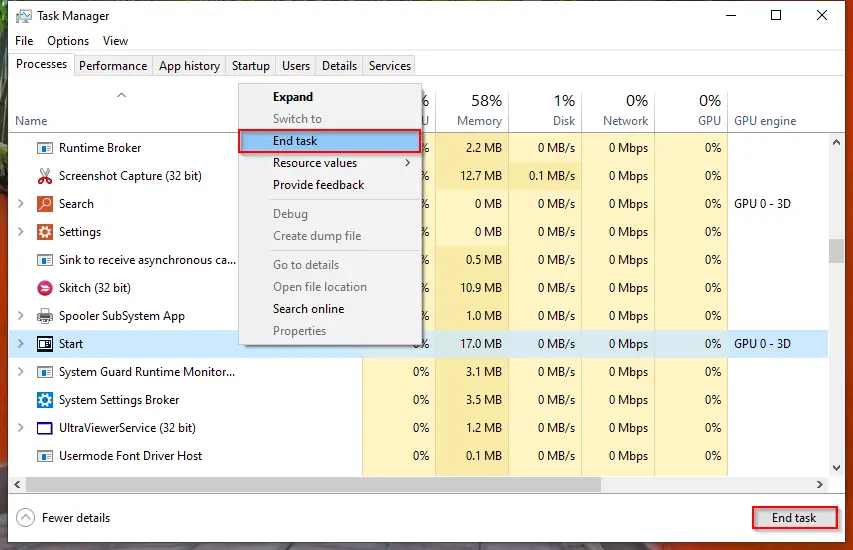
Step 2. Navigate to the Processes tab and locate the Start process under it. Select the End task by right-clicking on it. Alternatively, select the Start process and click End Task at the bottom-right of the Task Manager window.
Once you execute the above steps, Start Menu will disappear and appear again automatically. That means the Start process will restart automatically within the next few seconds.
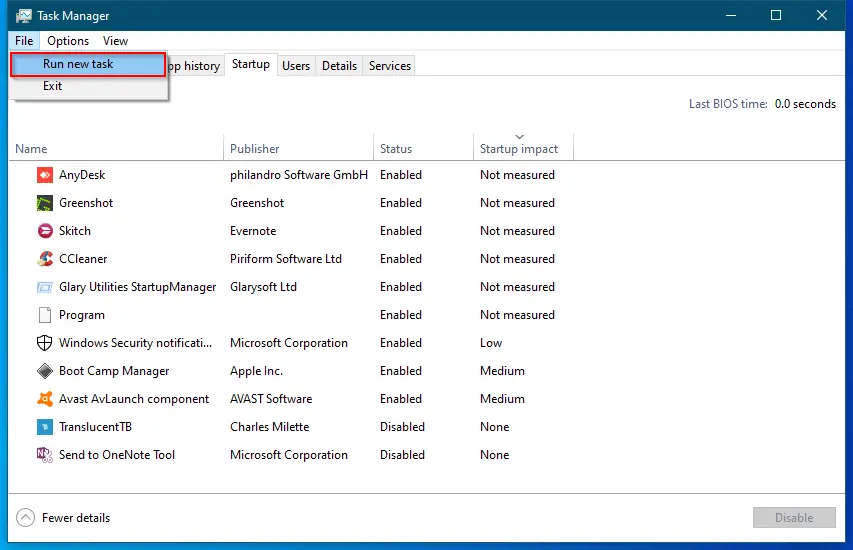
If you see that the Start process does not launch automatically, click on the File menu and then select the Run new task option.
In the dialog box that opens, paste the following command:-
C:\Windows\SystemApps\Microsoft.Windows.StartMenuExperienceHost_cw5n1h2txyewy\StartMenuExperienceHost.exe
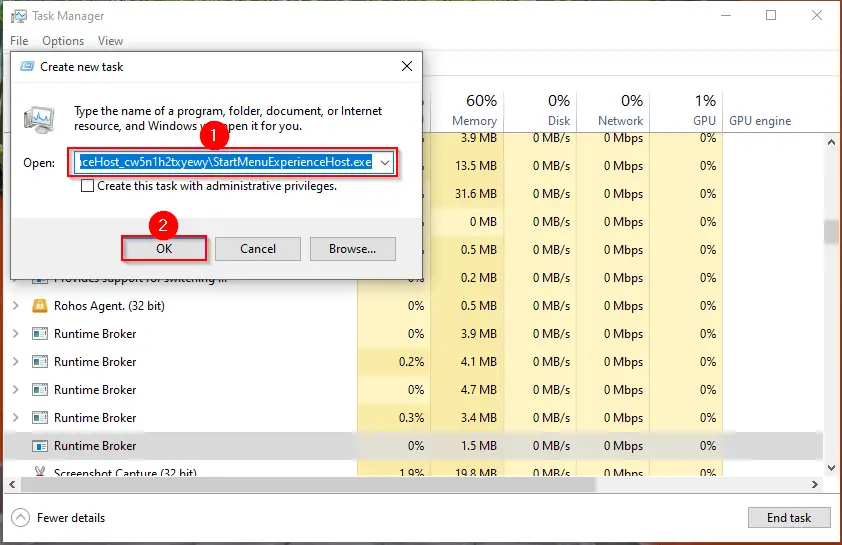
Click OK.
The Start process will start again, and now the Start Menu should work perfectly and normally respond as it should.
How to Restart the Start Menu via Command Prompt?
Follow these steps to restart the Start Menu via Command Prompt:-
Step 1. Open the Command Prompt with elevated rights.
Step 2. In the prompt, type the following command and hit Enter from the keyboard:-
taskkill /im StartMenuExperienceHost.exe /f
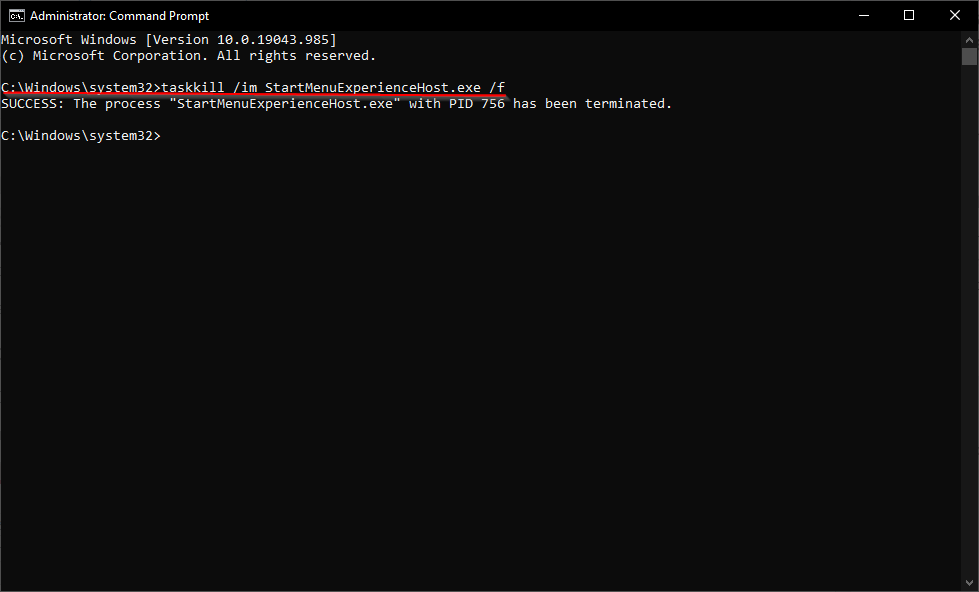
You should receive a message, “SUCCESS: The process “StartMenuExperienceHost.exe” with PID 756 has been terminated.”
Now, the Start process will stop and start automatically.
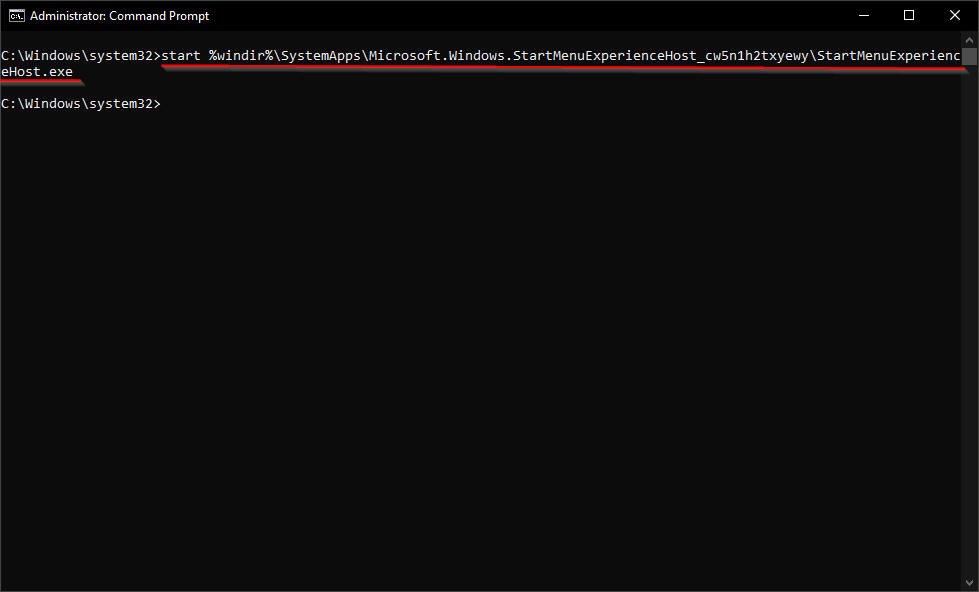
Step 3. If the Start process cannot rise automatically, execute the following command again:-
start %windir%\SystemApps\Microsoft.Windows.StartMenuExperienceHost_cw5n1h2txyewy\StartMenuExperienceHost.exe
After executing the above steps, the Start menu will start working again.
How to Restart the Start Menu in Windows 10 through PowerShell?
To restart the Start menu in Windows 10 using PowerShell, use these steps:-
Step 1. Open Windows PowerShell as an administrator.
Step 2. In the elevated Windows PowerShell, copy and paste the following and then hit Enter key on the keyboard:-
Stop-Process -Name "StartMenuExperienceHost" -Force
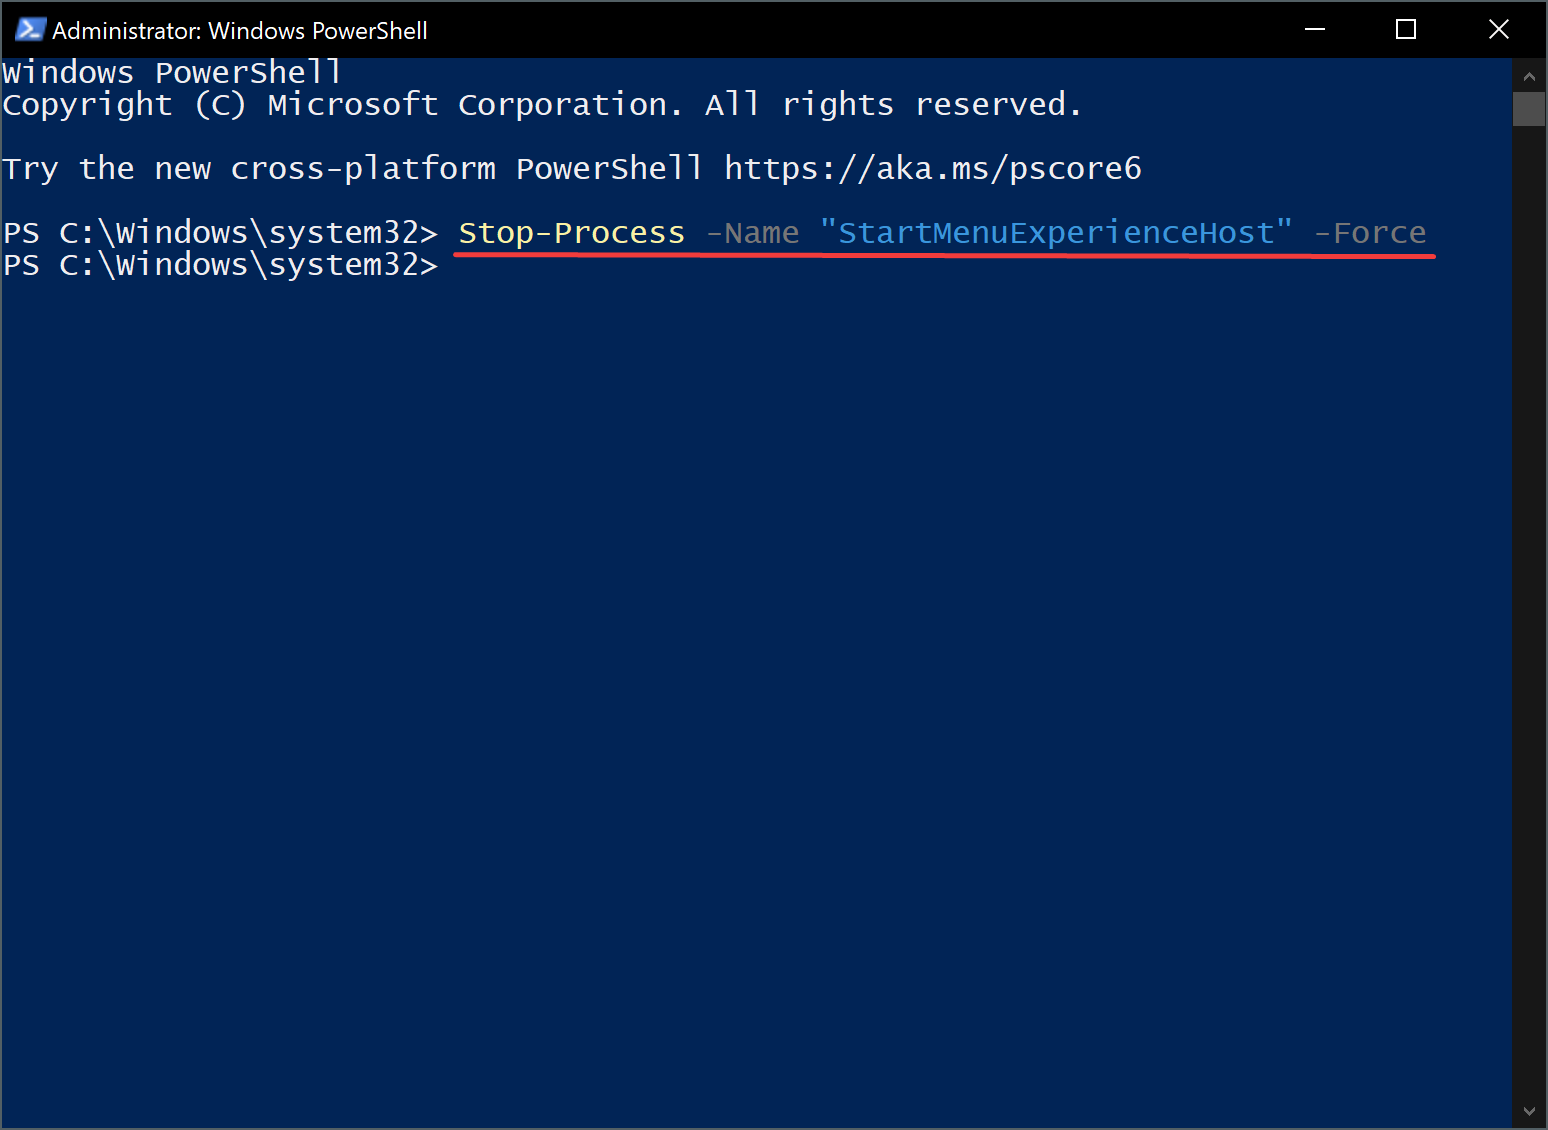
That’s it. Now, the Start menu process will exit and restart automatically.
How to Reset the Start Menu in Windows 10?
Please don’t confuse it with the Restarting the Start menu. The above method is used to restart the Start menu, but Resetting is different. Resetting will completely restore the Start menu to its original state. If you have made several changes to your Start menu, all be erased automatically. So, if you don’t want to eliminate your Start menu settings, please use the above-mentioned restarting steps only.
There are at least two known methods available through which you can reset the Start menu of Windows 10; these are the following:-
- Using Registry Editor
- Via Local User Account
How to Reset the Start Menu in Windows 10 using Windows Registry?
Since we will modify Windows Registry in this method, we recommend you take a full backup of the registry and create a system restore point. In case something goes wrong, you can restore your PC to its previous working state.
Those who have made several changes to Windows 10 Start menu and want to remove them completely, do the following:-
Step 1. Press the Windows logo + R keys to open the Run dialog box.
Step 2. In the Run box, type the following and hit Enter from the keyboard or click the OK button:-
regedit
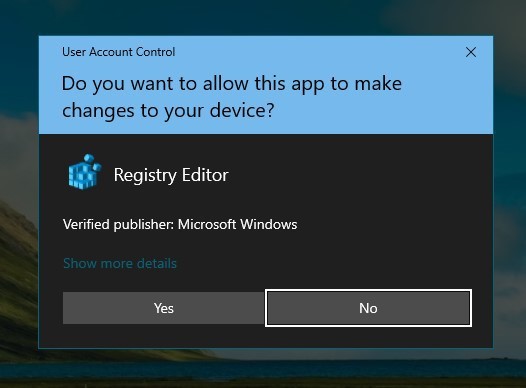
If the User Account Control dialog opens, click the Yes button to continue opening the Registry Editor window.
The above action will open Registry Editor.

Step 3. In the Registry Editor window, from the left side pane, point to the following registry key:-
Computer\HKEY_CURRENT_USER\SOFTWARE\Microsoft\Windows\CurrentVersion\CloudStore\Store\Cache\DefaultAccount
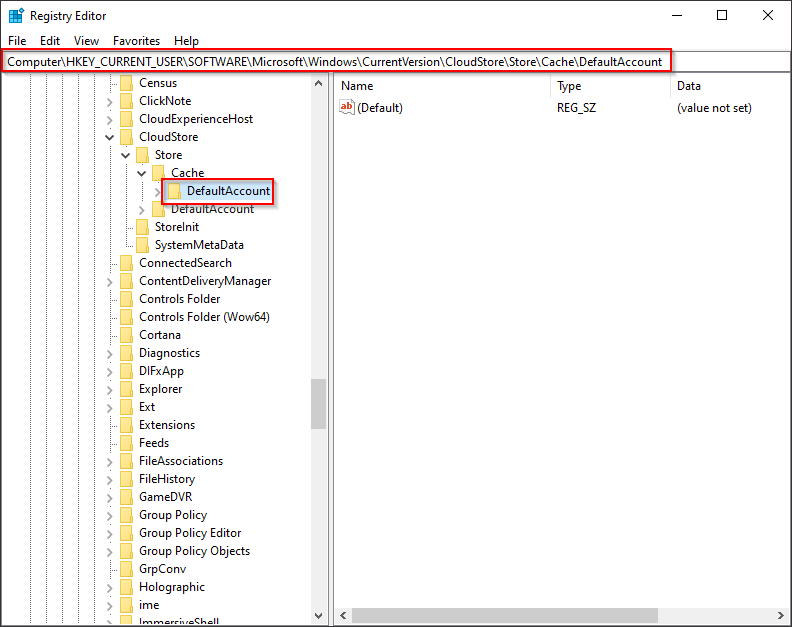
Step 4. Right-click on select Delete.

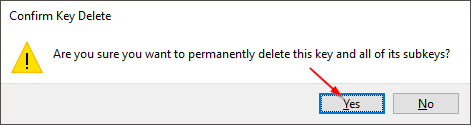
Step 5. Click Yes to confirm the deletion.
Step 6. Now, close the Registry Editor and restart your computer.
After executing the above steps, click on the Start button to see Windows 10 Start menu layout. You will notice your customization has gone, and it is reset to factory default.
How to Reset the Start Menu in Windows 10 via Local User Account?
For those who don’t want to modify the Windows Registry, this is an alternate method. In this method, we will take the help of a Local User Account. Let us see what to do.
Note: Microsoft has deprecated the “TileDataLayer” model in the Windows 10 1703 Creators Update. So, if you are using an older Windows 10 version before Windows 10 1703 Creators Update, then only this method will work. Otherwise, you can continue with the Registry method to reset the Start menu on Windows 10.
All the Start menu layout information remains stored in a database inside the TileDataLayer folder for your information. If this database is corrupt, your Start menu will not work properly. If we replace this faulty database with a working database, the problem will be fixed immediately. Fortunately, there is a workaround to reset the Start menu layout on your Windows 10 computer that is not complicated.
Before proceeding with the steps, ensure you’ll need to have three user accounts on your computer. These are the following:-
- Your account: The user account in which the Start menu isn’t working correctly, and you want to reset them.
- Local account: A temporary account from where you will copy the Start menu files to reset the menu on your account.
- Administrator account: You’ll need this account to copy the Start menu files between user accounts because you can’t overwrite files while they’re in memory.
How do I create a new Local User Account?
To create a fresh Local User Account, perform the following steps:-
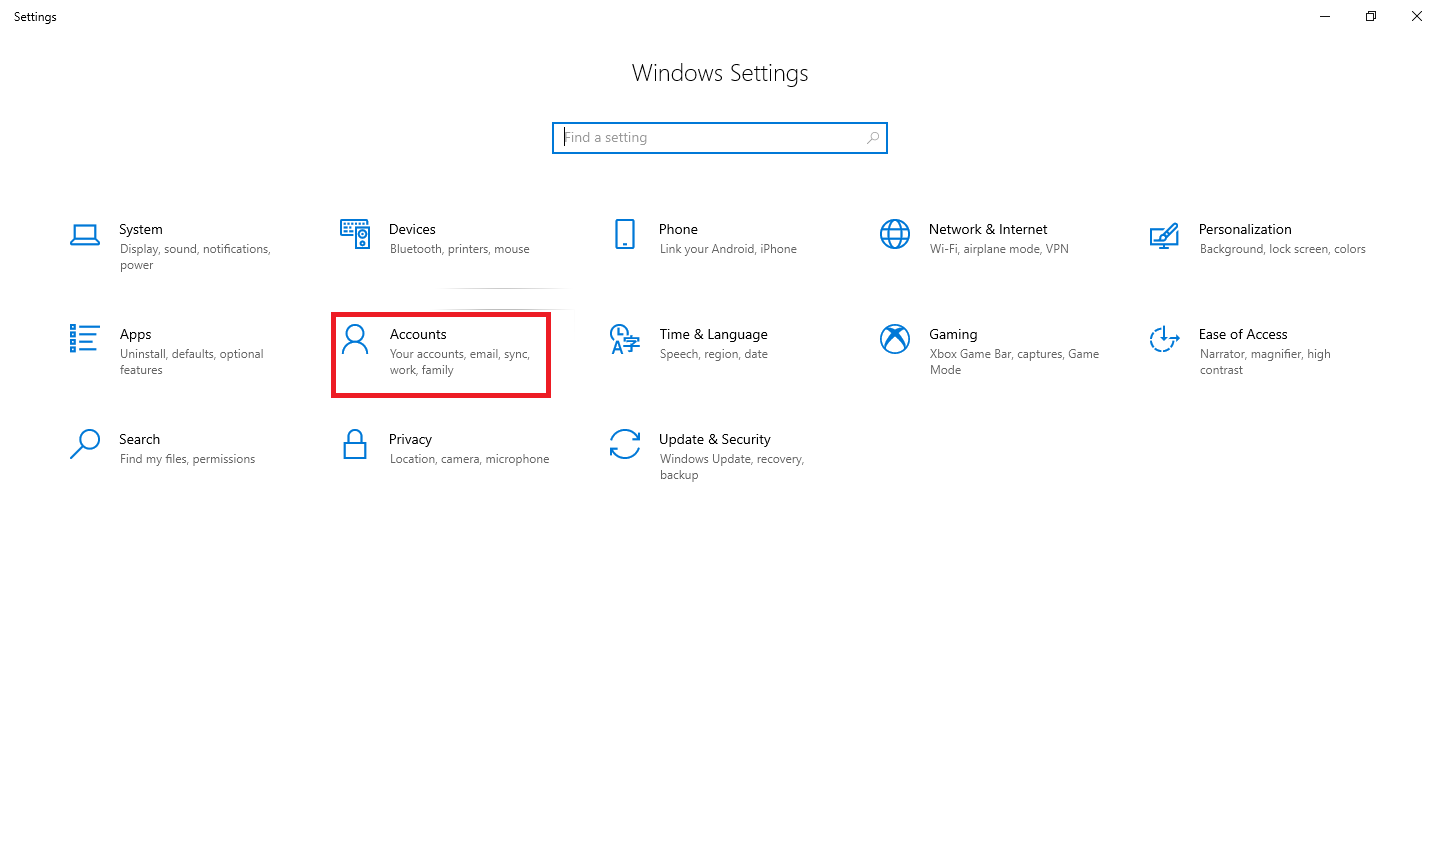
Step 2. In Settings, click the Accounts category.
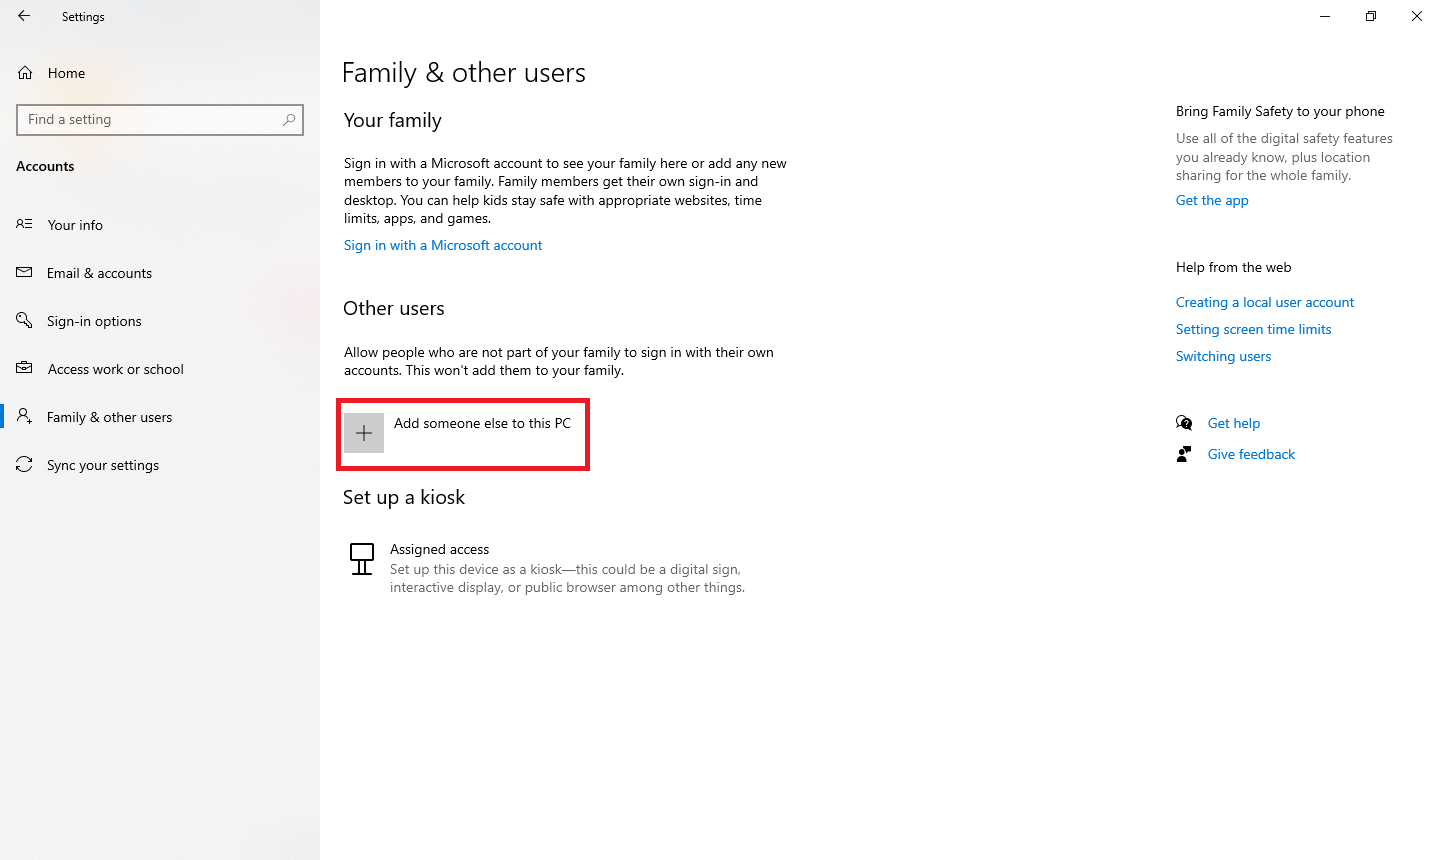
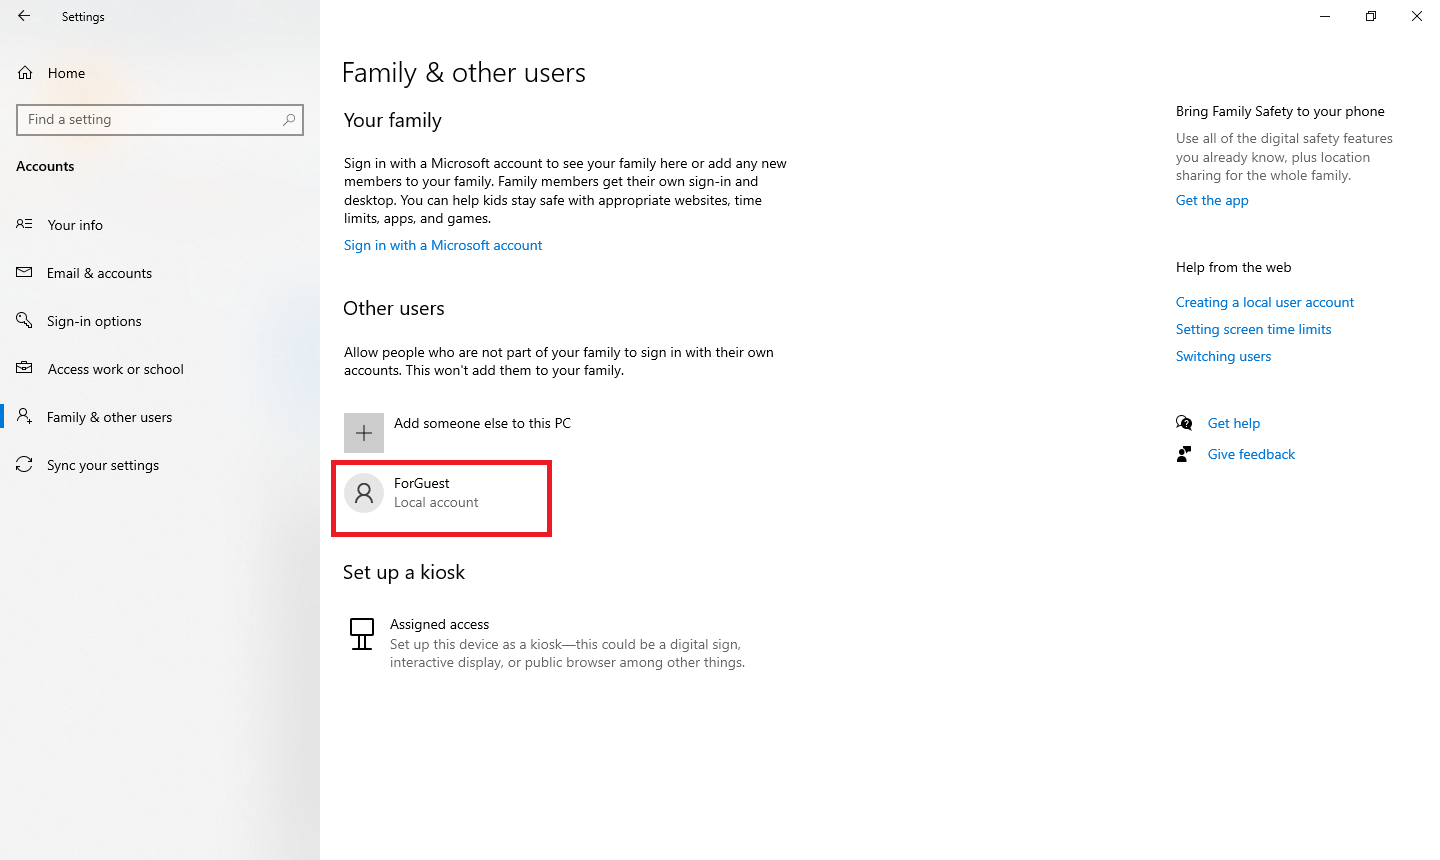
Step 3. In the left side pane under the Accounts, click the “Family and other users” tab.
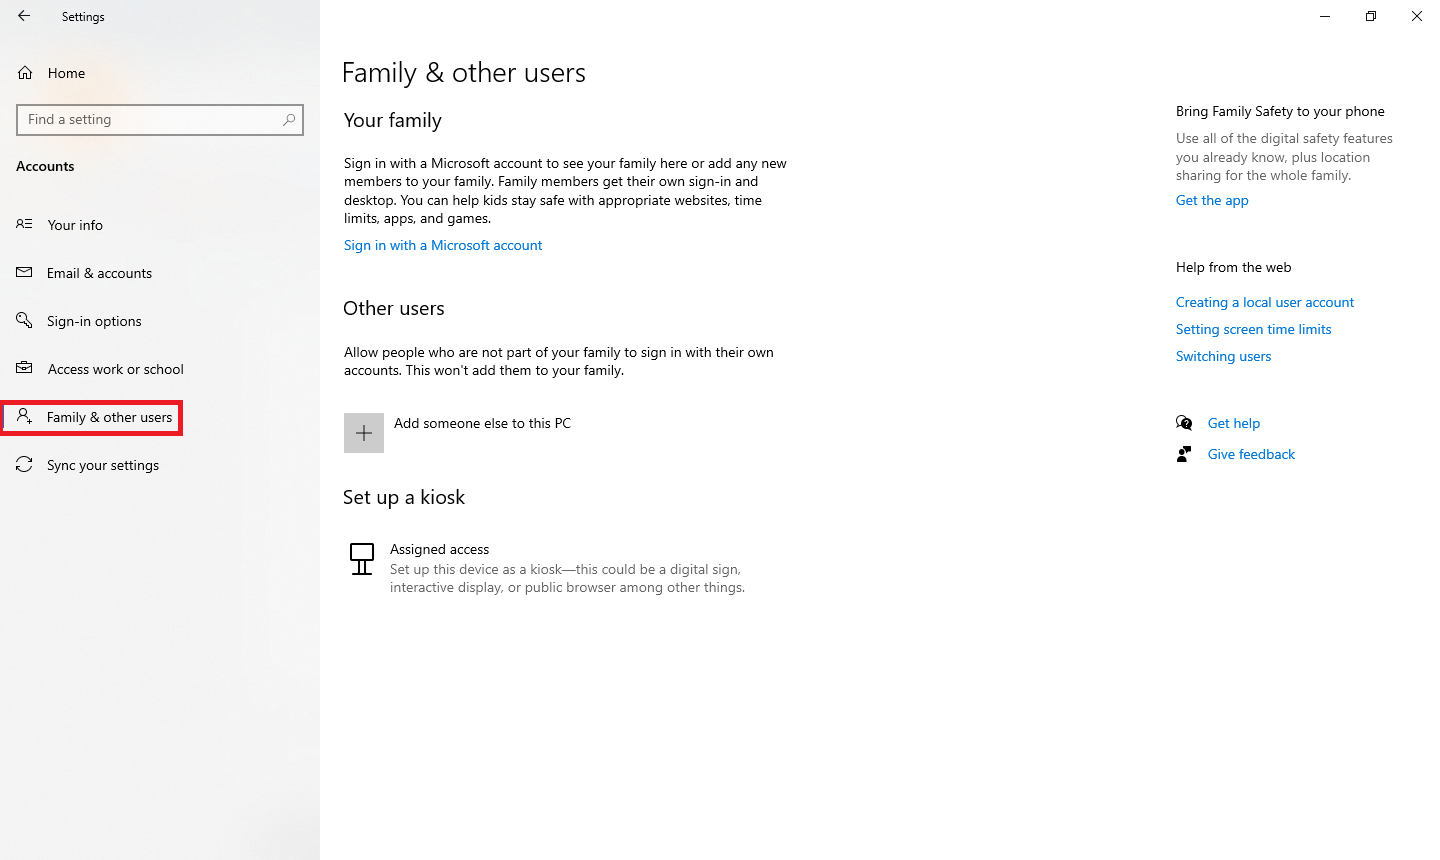
Step 4. From the right-side pane, click the “Add someone else to this PC” button.
Step 5. In the Microsoft window that pops up, click on the “I do not have this person’s login information” link at the bottom of the page.
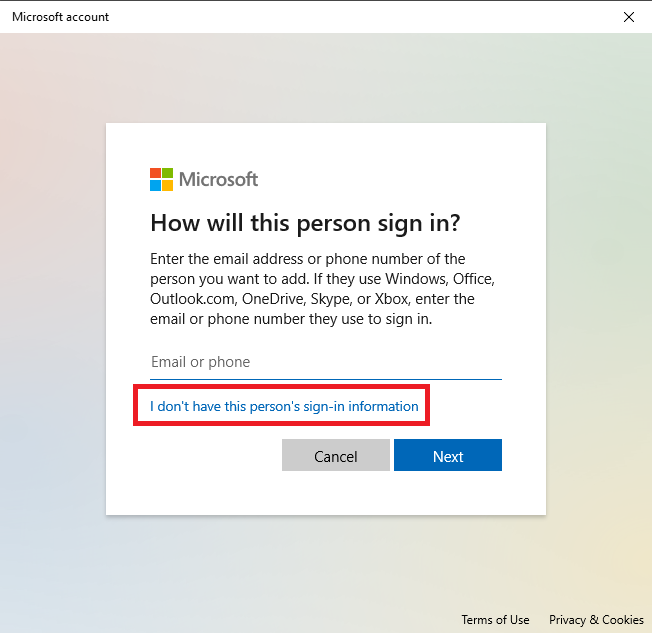
Step 6. Click the Next button.
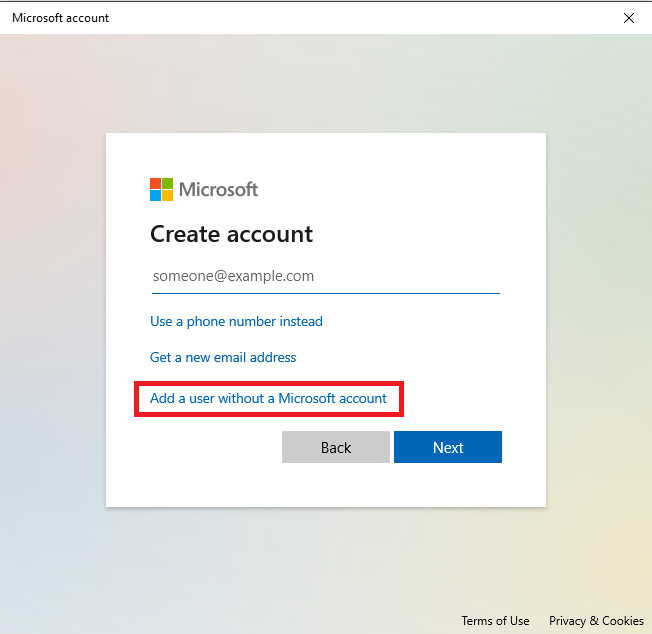
Step 7. On the next page, click on the ‘”Add a user without a Microsoft account” link at the bottom of the page.
Step 8. Enter a username, password, confirm the password, set three security questions and answers, and then click on the Next button.
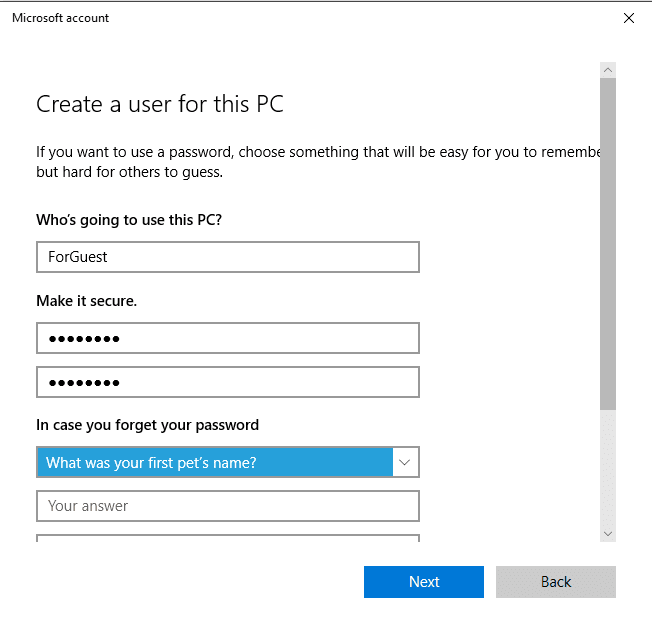
Step 9. Clicking on the “Next” button will lead you to the previous “Family and other users” window. This will show you that your new account is listed.
How to enable the built-in Administrator account?
Follow these steps to turn on the built-in Administrator account:-
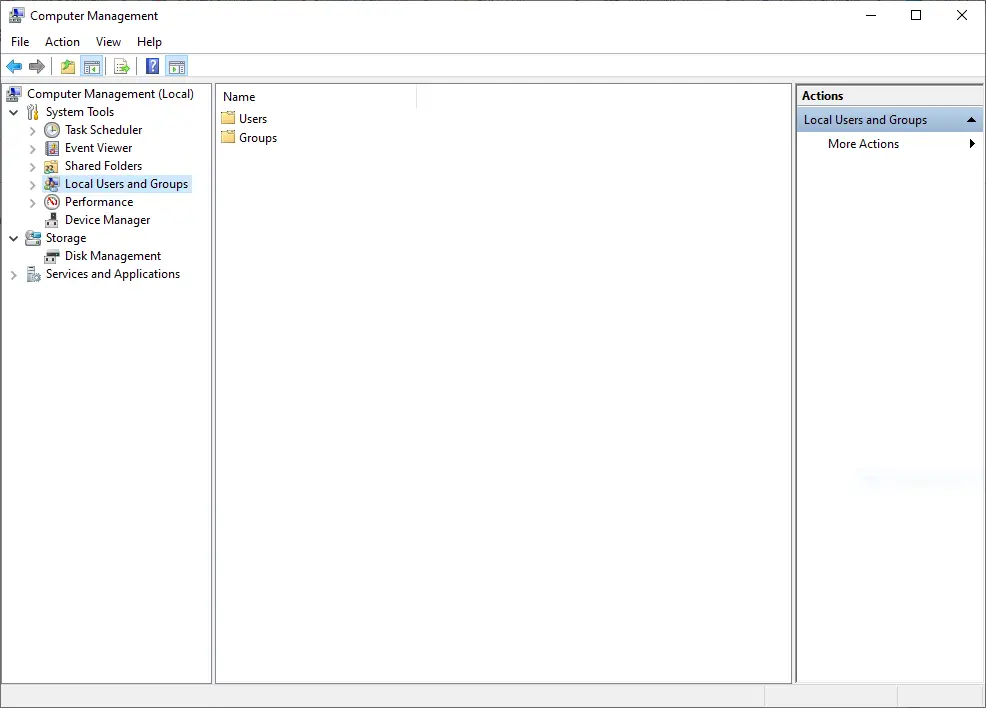
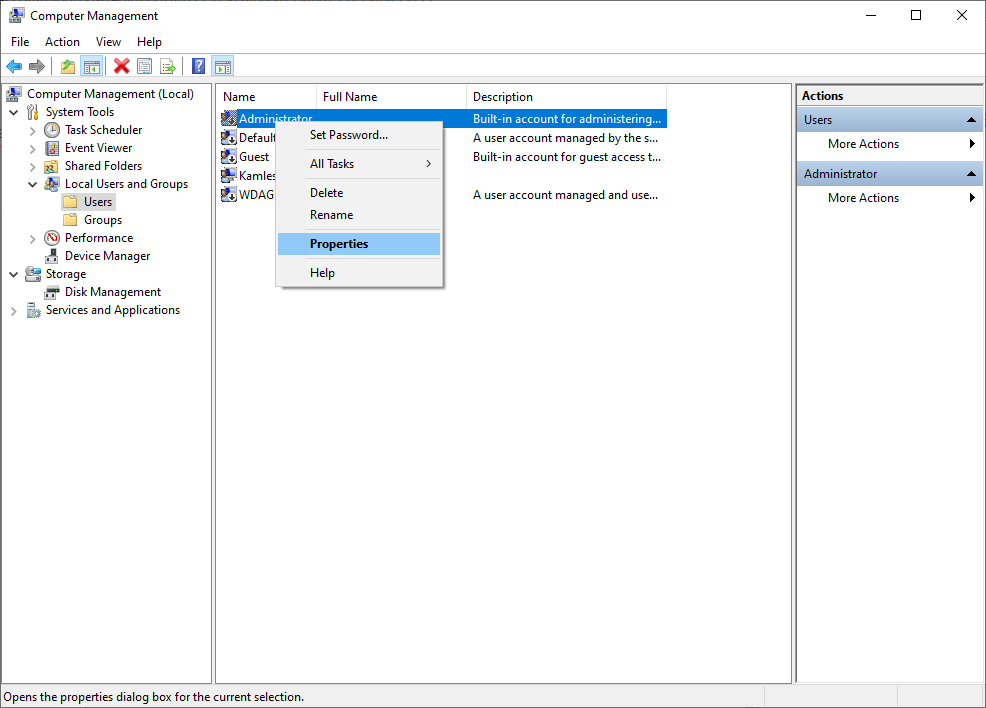
Step 1. Right-click on This PC from the desktop and select Manage.
Note: If you don’t find This PC icon on the Desktop, you can restore This PC icon from the Personalize app. You can even find This PC by clicking on the Search button and typing This PC.
Step 2. From the Computer Management window, click on Local Users and Groups.
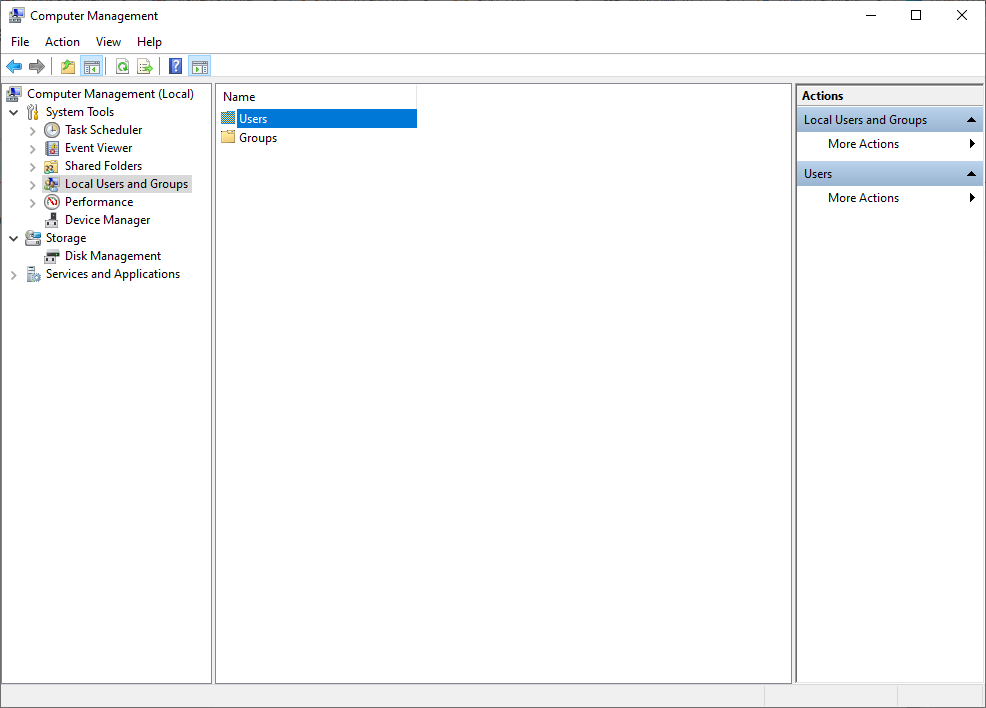
Step 3. Double-click on Users from the right side pane.
Step 4. You will find a down arrow on the Administrator account.
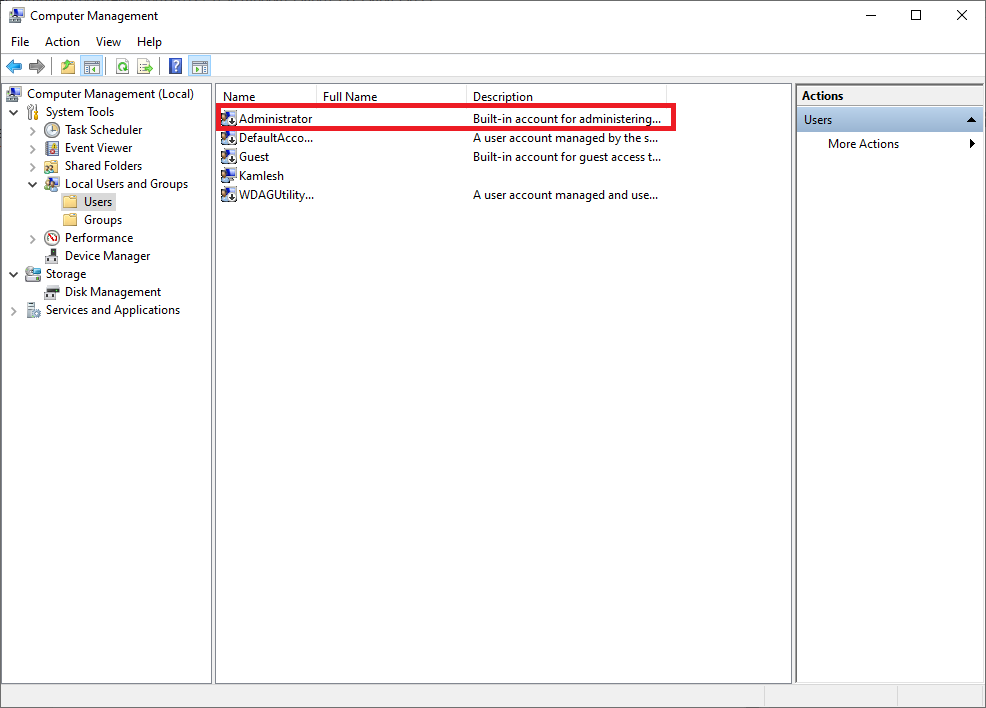
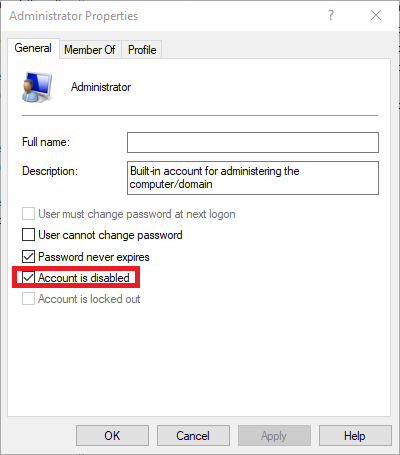
Step 5. Select the Administrator account, right-click, and choose Properties from the available options.
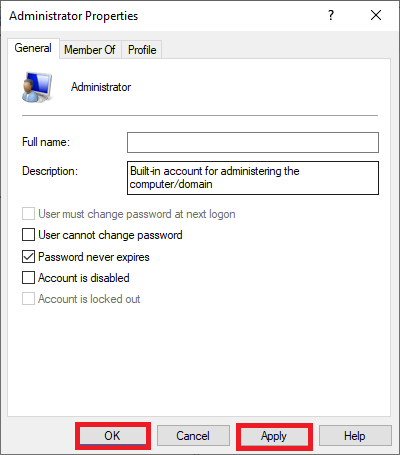
Step 6. You will see a checkmark on “Account is disabled,” uncheck the same to enable the built-in Administrator account.
Step 7. Click Apply and then the OK button.
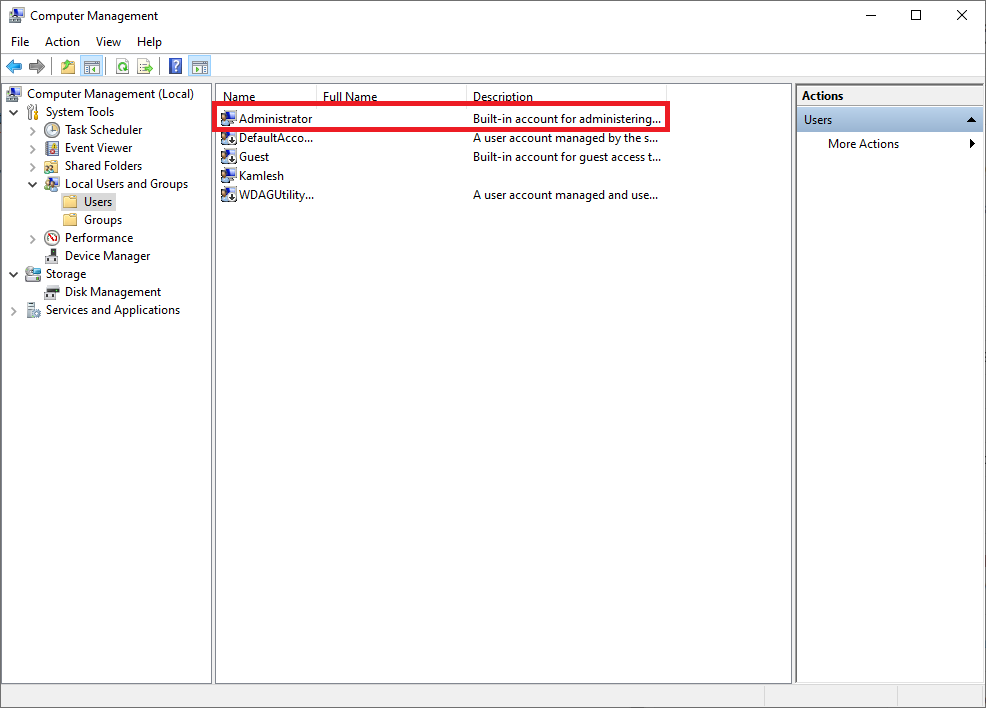
Step 8. Now, you will notice the down arrow button is removed, and the Administrator account is activated.
How to Reset the Start menu layout using a Local User Account?
Follow these steps to reset the Start menu layout using a Local User Account:-
Step 1. Sign-in to the newly created local account to create its profile.
Step 2. Now, Sign out from the newly created local account.
Step 3. Sign-in to the Administrator account.
Step 4. Open File Explorer by pressing the Windows logo + E keys simultaneously.
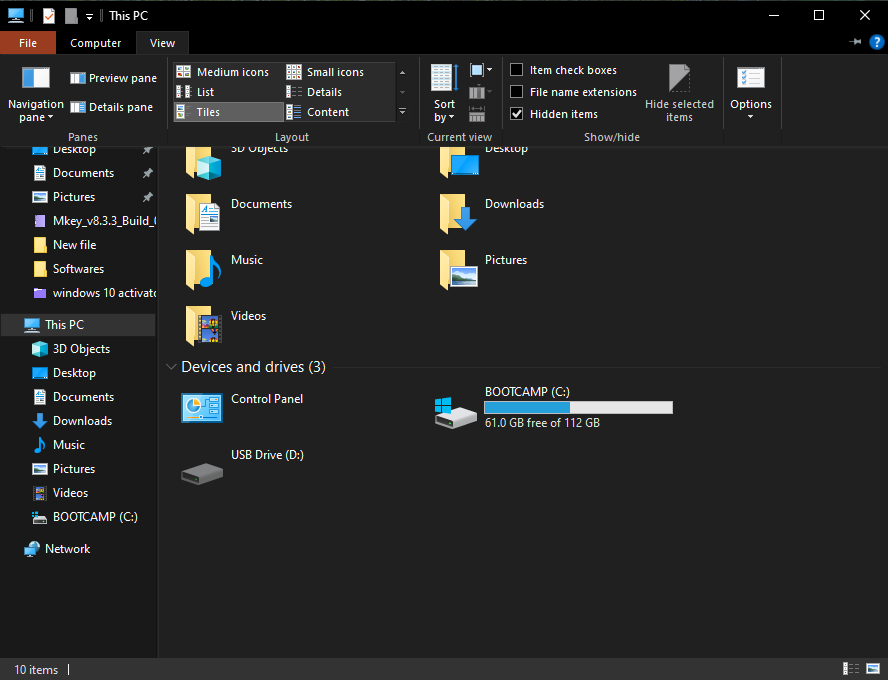
Step 5. On the View tab, check the Hidden items checkbox to show hidden files and folders.
Step 6. Navigate to the following path:-
C:\Users\BROKEN-START-USER-NAME\AppData\Local\TileDataLayer
Note: Replace BROKEN-START-USER-NAME in the above path with the user account’s name so that the Start menu isn’t working properly.
Step 7. Right-click the Database folder and select Rename. Rename the folder as Database.bak and press Enter.
Step 8. Now, browse the following path:-
C:\Users\WORKING-START-USER-NAME\AppData\Local\TileDataLayer
Note: In the above path, replace WORKING-START-USER-NAME with the newly created account name.
Inside the TileDataLayer folder, you’ll see a Database folder; right-click the folder and select Copy.
Step 9. Again, navigate to the following path:-
C:\Users\BROKEN-START-USER-NAME\AppData\Local\TileDataLayer
Note: Replace BROKEN-START-USER-NAME in the above path with the user account’s name so that the Start menu isn’t working properly. Right-click and select Paste to paste the working database which you have copied in earlier steps.
Step 10. Now, Sign-out from the Administrator account.
Step 11. Sign-in to your original user account on which the Start menu was broken or not responding. It should normally work now.
Conclusion
In conclusion, the Windows 10 Start menu is a vital feature that allows users to access programs and apps quickly. When it is not working as it should, it can be frustrating. However, restarting the Start menu using Task Manager, Command Prompt, or Windows PowerShell is an easy process that can help troubleshoot the problem. It is important to note that resetting the Start menu should only be done if necessary since it will erase all customizations made to the Start menu. Users can reset the Start menu using Registry Editor or Local User Account. Remember to take a backup of the registry and create a system restore point before resetting the Start menu, as any mistakes made can affect the system.

Если вы привыкли ко внешнему виду меню Пуск или к старому виду кнопки Пуск на Windows 7 или Windows Vista, то вы наверняка захотите вернуть подобный внешний вид и на Windows 10. Существует несколько способов, как вы сможете это сделать. Первый способ не потребует от вас установки дополнительного ПО. Вы сможете просто настроить внешний вид меню Пуск на Windows 10. Но это не приведет ко 100% возврату к классической версии меню. Второй вариант потребует от вас установить дополнительное ПО. Этот вариант несколько сложней, зато он позволит на 100% вернуться к прежней версии меню Пуск, а также вернуть привычный внешний вид кнопки Пуск.
Как вернуть классический вид кнопки и меню Пуск на Windows 10
Компания Microsoft учла ошибки Windows 8, поэтому на Windows 10 кнопка и меню Пуск есть по умолчанию. Но внешний вид кнопки и меню отличается. Если вы хотите вернуться к привычному внешнему виду, то выбирайте один из двух способов:
- Использовать стандартные возможности Windows 10;
- Установить дополнительное ПО;
Каждый вариант обладает своими преимуществами. Существуют пользователи, кто не любит устанавливать сторонние программы. Особенно для того, чтобы изменить что-то в операционной системе. Эти пользователи оценят способ, не требующий установки программ. Но этот способ не идеален, так как он лишь приблизит внешний вид Пуска к классическому, но не вернет его на 100% к прежнему виду. Второй способ – с установкой ПО, вернет прежний внешний вид, но вам потребуется сохранить эту программу на компьютере до тех пор, пока вам нужен классический внешний вид Пуска.
Меню Пуск на Windows 10
Кнопка Пуск на Windows 10 расположена в том же самом месте, что и в прежних версиях ОС. Значит вам не придется бороться с ее перемещением. Но вот внешний вид меню Пуск на Windows 10 отличается от внешнего вида меню Пуск на Windows 10. Майкрософт сделала меню Пуск максимально гибким, поэтому у каждого пользователя оно выглядит по-разному, например, следующим образом:
Как вы видите, в левой части меню расположены программы, которые были недавно использованы. В правой части расположены, так называемые плитки, которые предоставляют быстрый доступ к информации или ресурсам. Также в этом меню отображаются и виджеты. Все очень яркое, мигает и отвлекает внимание. Именно это многообразие информации и является причиной, почему многие хотят перейти от стандартного меню Пуск к классическому виду.
Как вернуть классический Пуск на Windows 10
У всех свое понимание термина «Классический». Опросы показали, что большинство пользователей считают классическим меню из Windows 7. Поэтому рассмотрим на примере данного меню. Первый способ заключается в том, чтобы настроить меню Пуск по образу и подобию прежней версии. Для этого вам нужно развернуть меню, и правой кнопкой мышки щелкнуть на те элементы, которые вам не нужны, например, на плитки:
Далее вам нужно выбрать пункт «Открепить от начального экрана» и этот элемент пропадет. После того, как вы открепите все элементы, у вас останется только левая колонка. В целом, это будет похоже на классический внешний вид меню Пуск. Но в стандартных настройках область меню очень широкая. Поэтому мышкой стягиваем область меню. Вы можете сделать меню любой ширины, но, чтобы меню было удобным, советуем сделать его по ширине не менее, чем 4 иконки под ним. В результате у вас получится следующий внешний вид меню:
Это все, что вы можете сделать, не прибегая к сторонним программам. Согласитесь, это похоже на классический внешний вид, но им не является. Конечно, некоторых это устроит, но тех, кто решил идти до конца, ждет другой способ – установка дополнительного ПО. Этот способ не требует подготовительных действий, описанных выше. Вам нужно скачать и установить одну из программ, например:
- StartIsBack++;
- Classic Shell;
Существуют и другие программы для возврата классического меню на Windows 10. Но эти две являются бесплатными и лучшими. Во-первых, они занимают всего несколько Мб места, а во-вторых, они позволяют вернуть внешний вид всего за пару кликов. В результате вы сможете получить подобный внешний вид меню Пуск:
Согласитесь, это уже намного больше похоже на правду. Но это еще не все. Так вы вернули только меню Пуск. Но вы сможете использовать программы и для возврата кнопки Пуск, то есть привычной круглой иконки. Все это могут сделать те же самые программы. И в результате вы получите прежний внешний вид, знакомый еще со времен Windows 7. Но не забывайте, что все украшения системы влияют на быстродействие Windows 10, а также на время автономной работы.
Как вернуть обратно стандартный вид Пуск Windows 10
Если классический внешний вид вам не подошел, то вы всегда можете вернуться к прежнему виду меню. Если вы использовали программы, то просто отключите их или удалите. После этого вернется стандартный вид меню Пуск. Ведь если нет программы, то нет и внешнего вида, который она сделала. А если вы использовали ручной метод и самостоятельно удалили все лишние плитки, то вам достаточно вернуть необходимые плитки тем же образом. Достаточно кликнуть правой кнопкой мышки и выбрать те виджеты и блоки, которые вы бы хотели видеть у себя в меню Пуск на Windows 10.
Загрузить PDF
Загрузить PDF
Если вы недавно обновили операционную систему до Windows 10 и у вас пропало меню «Пуск», не беспокойтесь, его еще можно будет вернуть.
-

Проверьте, появляются ли у вас опции, когда вы нажимаете правой кнопкой мыши на том месте, где раньше находилось меню «Пуск». Если да, тогда нажмите на опцию «Диспетчер задач».
- В противном случае нажмите комбинацию клавиш (Ctrl+Alt+Delete). После этого на экране появятся несколько опций, среди которых будет и «Диспетчер задач».
-
В окне «Диспетчер задач» необходимо нажать на меню «Файл», а затем выбрать «Запустить новую задачу».
-
Введите «powershell» и убедитесь, что рядом с опцией «Создать задачу с правами администратора» стоит галочка.
- Вот, что вы увидите.
-

После строки C:\WINDOWS\system32> необходимо ввести (или вставить) «sfc /scannow» (без кавычек).
- Запустите проверку файлов. В зависимости от компьютера проверка пройдет либо очень быстро, либо вам придется подождать.
-
Возможно, ваша проблема была решена. Прочитайте, что написано на экране, а еще лучше, сделайте скриншот экрана.
-
Реклама


-
Хотя проблема заключается не в самих приложениях, это все же поможет ее решить.
-
Запустите Диспетчер задач (как уже говорилось ранее) и запустите еще одну задачу с правами администратора.
-
- Get-AppXPackage -AllUsers | Foreach {Add-AppxPackage -DisableDevelopmentMode -Register «$($_.InstallLocation)\AppXManifest.xml»}
-
Дождитесь, пока процесс завершится, а затем перезагрузите компьютер. Меню «Пуск» должно вернуться на свое место.
Реклама


Советы
- Не забудьте сделать закладку этой статьи, поскольку меню «Пуск» может снова пропасть.
Реклама
Об этой статье
Эту страницу просматривали 28 174 раза.
Была ли эта статья полезной?
В большинстве случаев поможет уже обычная перезагрузка Windows. Для этого переключитесь на Рабочий стол и нажмите комбинацию клавиш [Alt]+[F4], а затем выберите пункт «Перезагрузка Windows» и нажмите на «ОК».

Причиной нестабильной работы стартового меню может быть также и антивирус. Для проверки этой возможности деинсталлируйте антивирус и проверьте работу меню «Пуск». Если меню работает нормально, то можно снова установить антивирусную программу. Версия антивируса при этом должна быть самой последней.

Проводник Windows также может негативно влиять на функционирование стартового меню. Перезапустить Проводник вы можете, открыв Диспетчер задач с помощью горячих клавиш [Ctrl]+[Shift]+[Esc]. Нажмите «Подробнее» в левом нижнем углу и затем перейдите к вкладке «Процессы» и прокрутите до строки «Проводник». Нажмите на строку правой кнопкой мыши и выберите в контекстном меню команду «Перезапустить».
Кроме того, Вам может помочь работа в режиме планшета. Комбинацией клавиш [Windows]+[А] завершите работу инфо-центра Windows 10 и перейдите в режим планшета. После нажатия на «Пуск» в полноэкранном режиме стартовое меню должно снова появиться. Повторное нажатие на «Режим планшета» — и вы снова переключитесь в режим рабочего стола.

В некоторых случаях за подобные неполадки отвечает определенный лог-файл. Удалить его вы можете следующим образом: откройте Проводник и перейдите по пути «С:\Users\*Имя пользователя*\AppData\Local\ TileDataLayer\Database» (вместо слов *Имя пользователя* вам нужно внести свое имя пользователя).
В открывшейся папке найдите файл EDB00001.log и удалите его. Вместо цифры «1» в имени файла может стоять любая другая цифра. Для совершения этой операции вам, возможно, придется в «Управлении | Службы и приложения» найти службу «tiledatamodelsvc» и остановить ее.
Фото: компания-производитель