
Windows 11/10 includes a feature known as Memory Compression. It makes better use of available memory on all systems by reducing physical memory utilization. Furthermore, it improves the speed of writing to and reading from disk when this feature is enabled on your computer.
Memory compression helps improve the overall user experience; however, additional CPU resources may be required during compressing and decompressing the data in RAM, which may slow CPU processing on some systems.
Memory Compression is faster than a traditional paging file, but it uses more CPU resources. If you notice your PC is slow, you should try enabling and disabling Memory Compression.
How to View Amount of Compressed Memory in Windows 11/10?
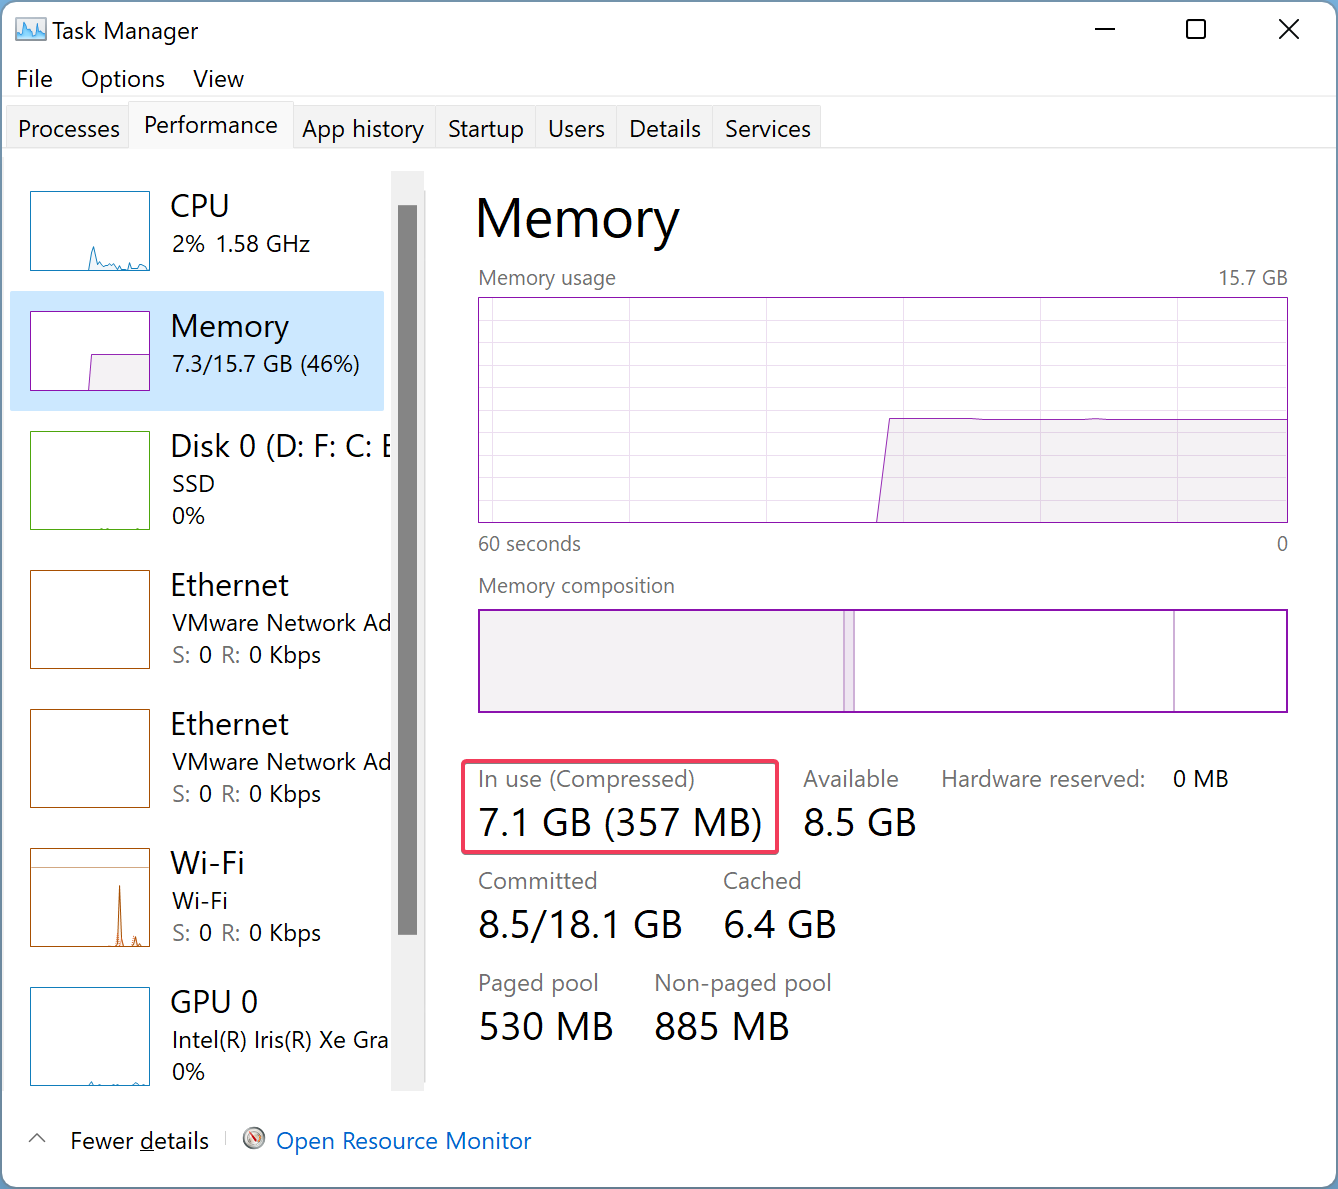
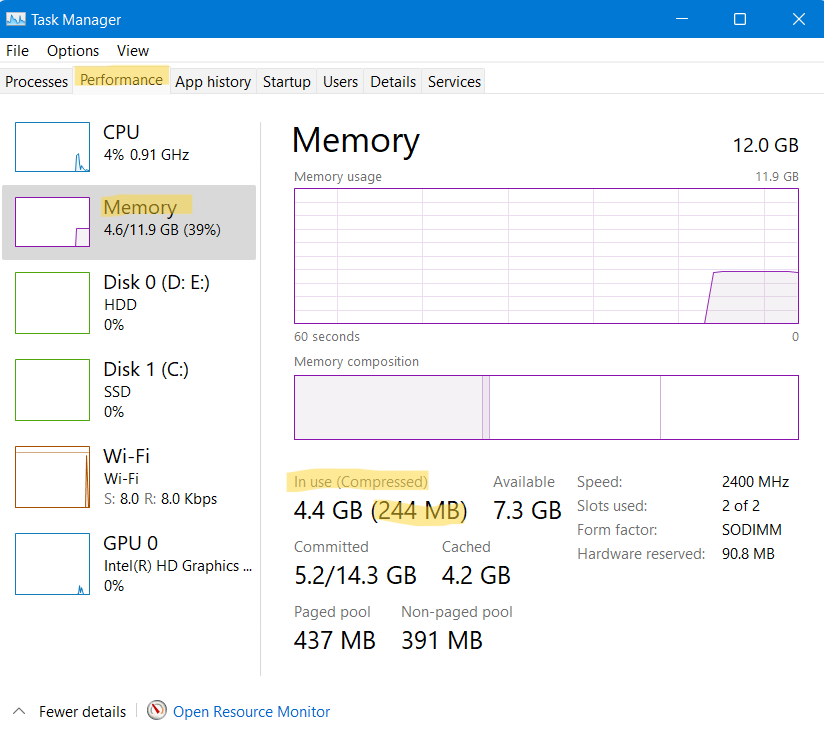
Open the Task Manager by pressing Ctrl + Shift + Esc and navigate to the Performance tab. Click Memory in the left sidebar, and on the right sidebar, you can see how much memory is compressed.
How to See if Memory Compression is Enabled or Disabled?
To view if Memory Compression is enabled or disabled on your Windows 11/10, do the following:-
Step 1. First, open Windows PowerShell with elevated rights.
Step 2. Then, on the prompt of Windows PowerShell, type the following and hit Enter from the keyboard:-
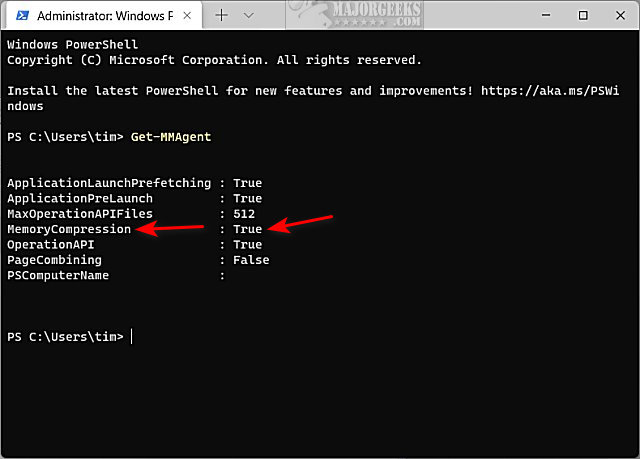
Get-MMAgent
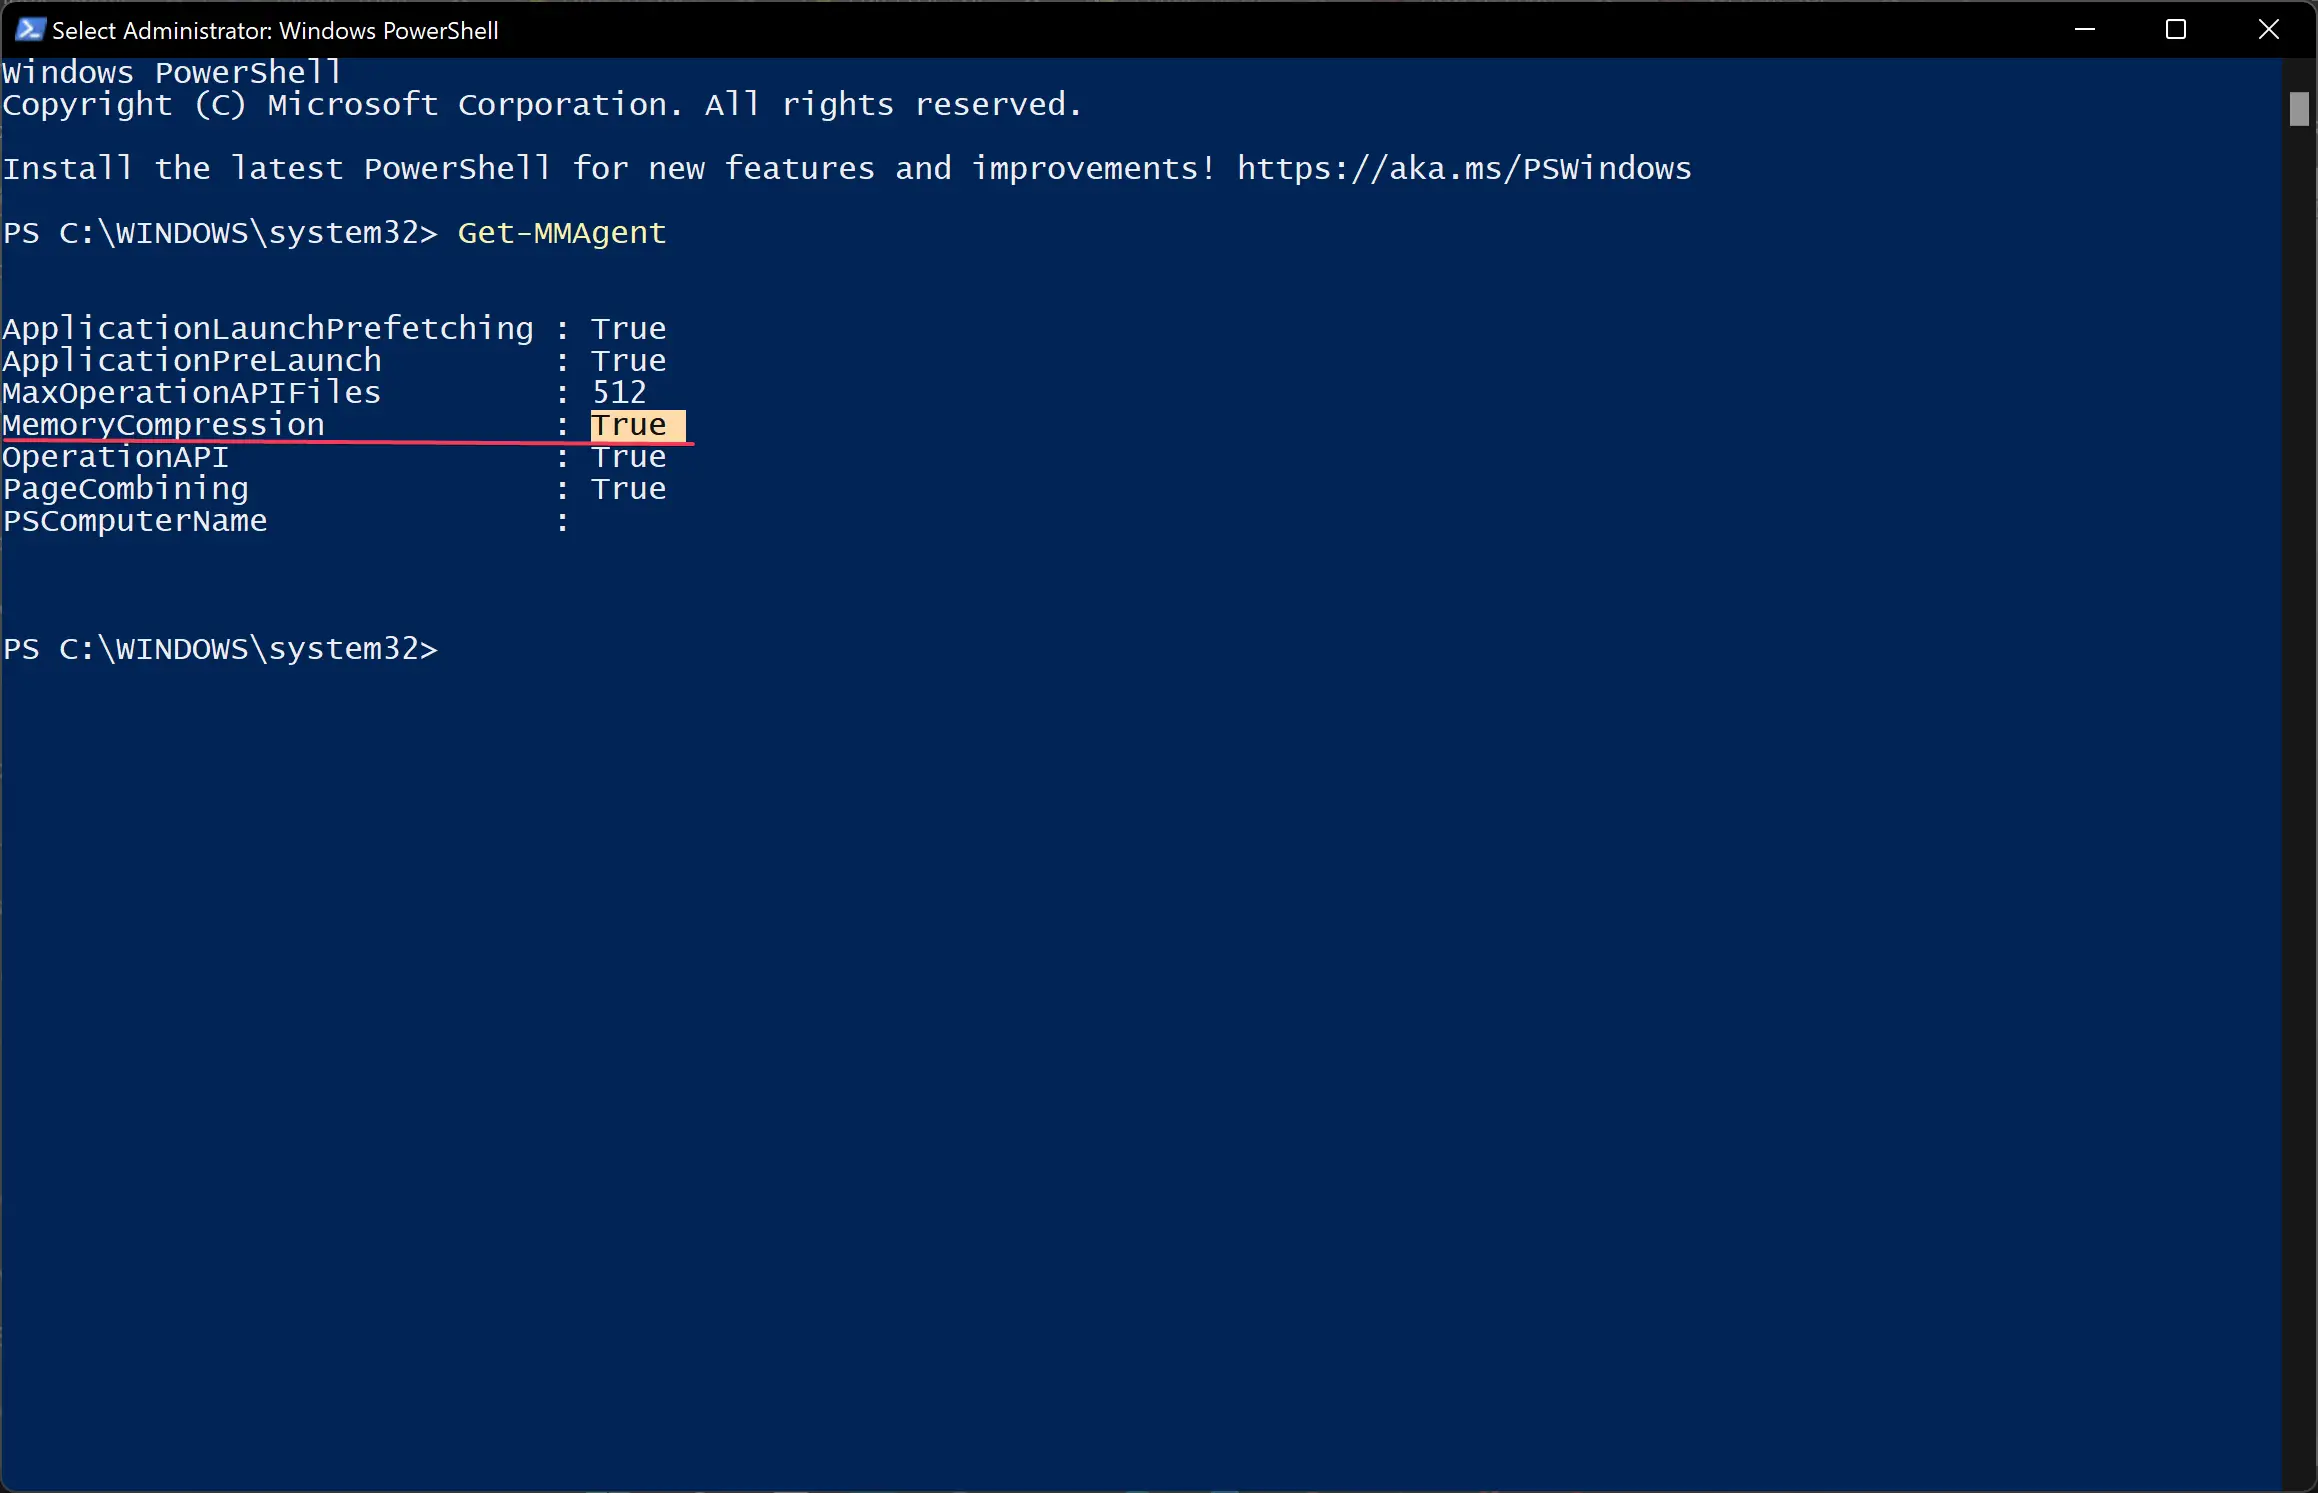
Besides the MemoryCompression field, you can see True for enabled or False for disabled.
How to Turn on Memory Compression in Windows 11/10?
Memory compression features may help low-end systems with little system memory. It compresses the system’s memory by reducing the number of read/write requests and frees up RAM without enacting traditional paging.
To enable Memory Compression in Windows 11/10, do the following steps:-
Step 1. First, open Windows PowerShell with elevated rights.
Step 2. Then, on the prompt of Windows PowerShell, type the following and hit Enter from the keyboard:-
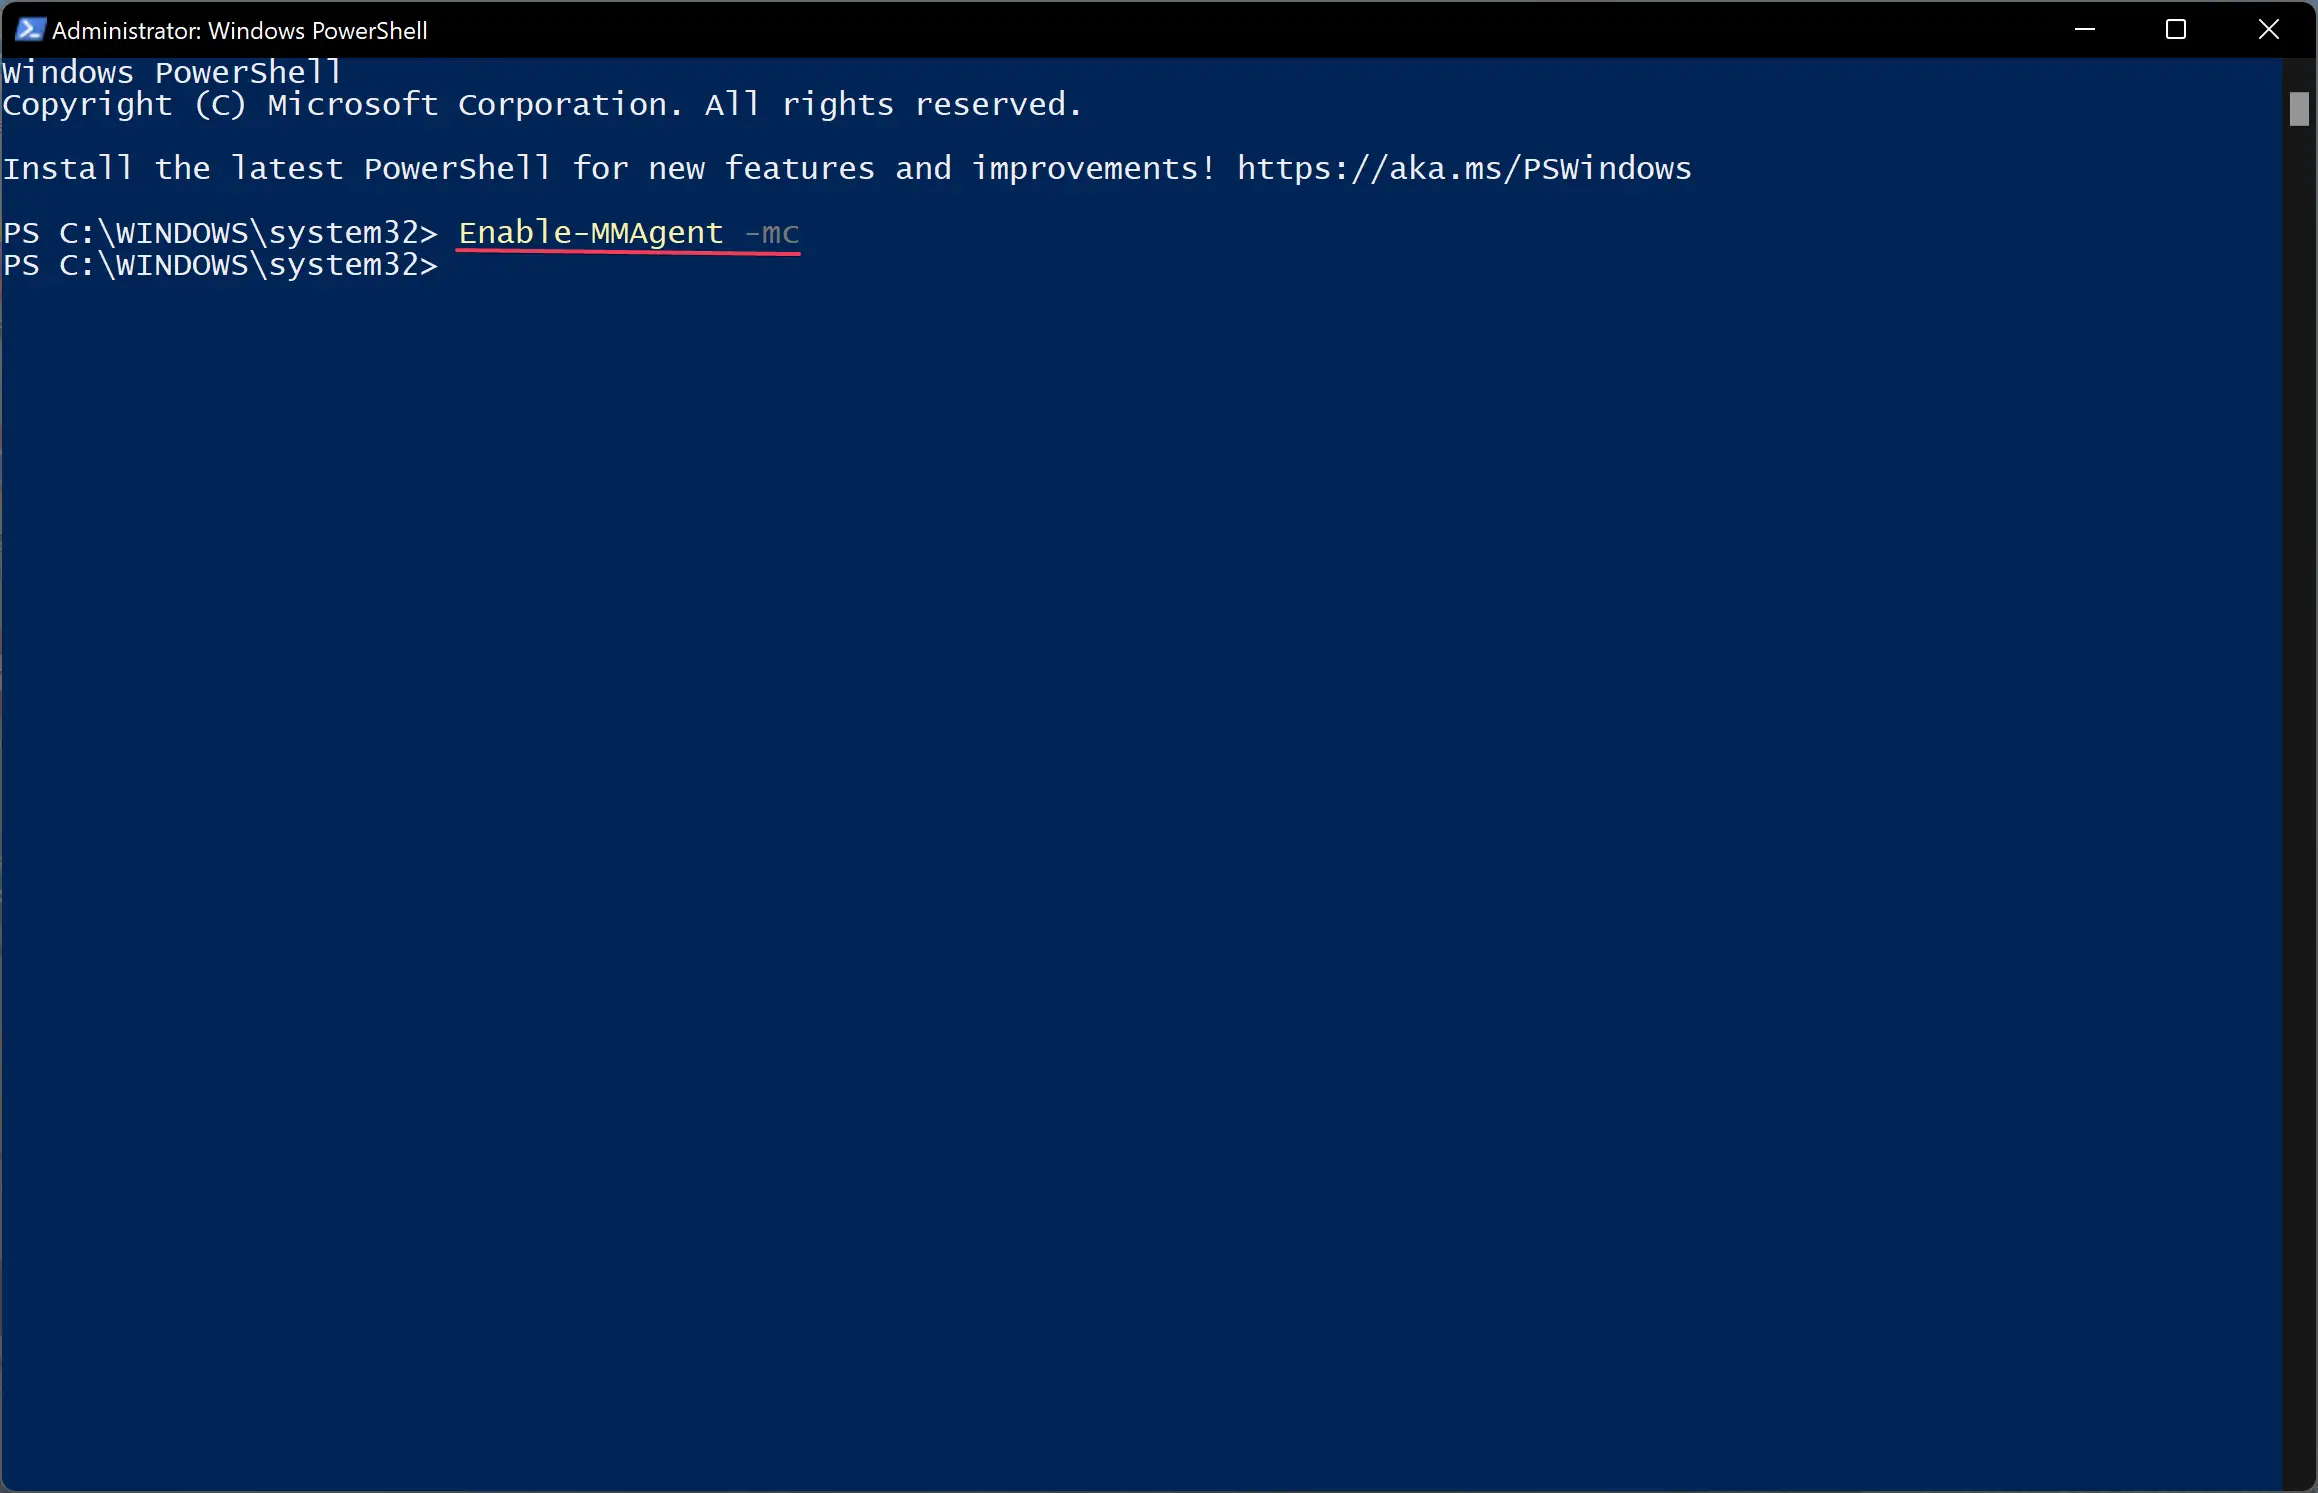
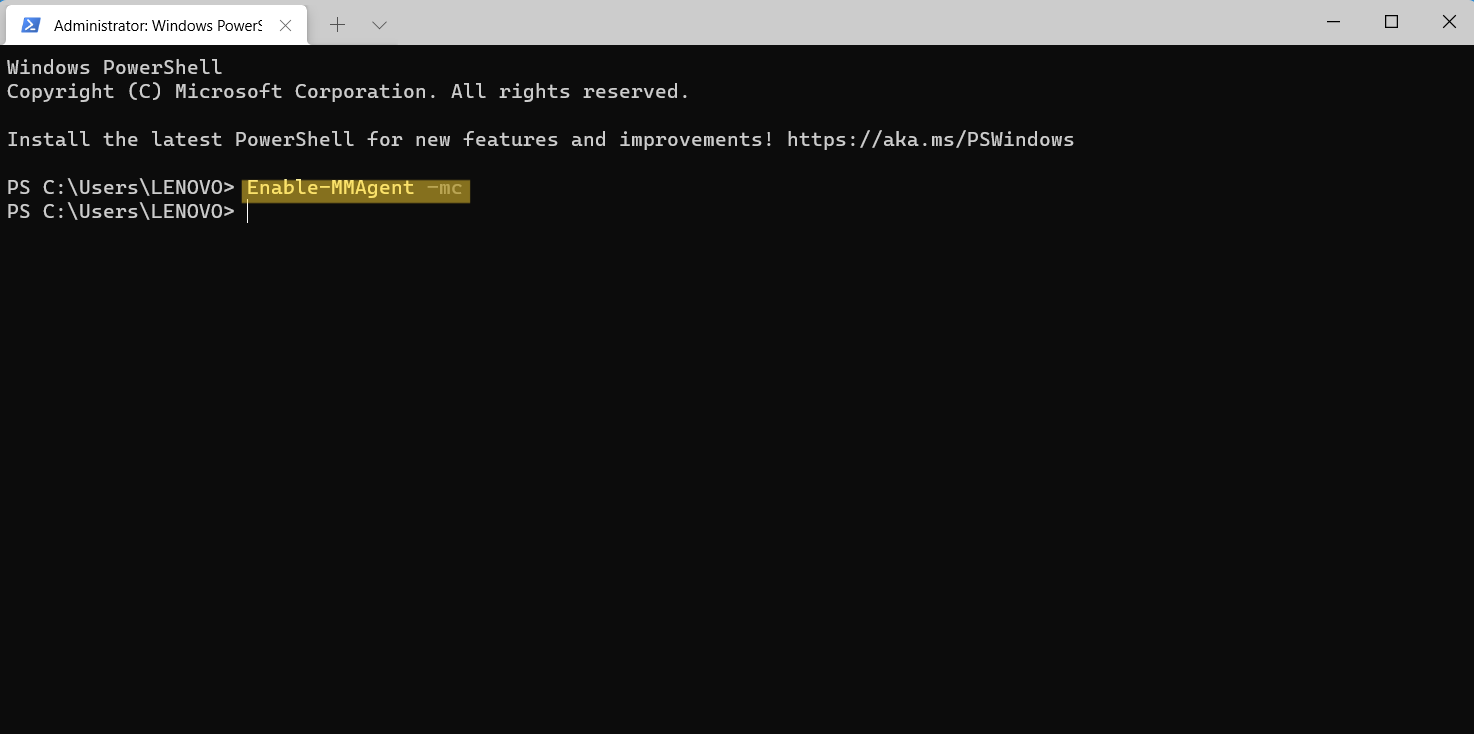
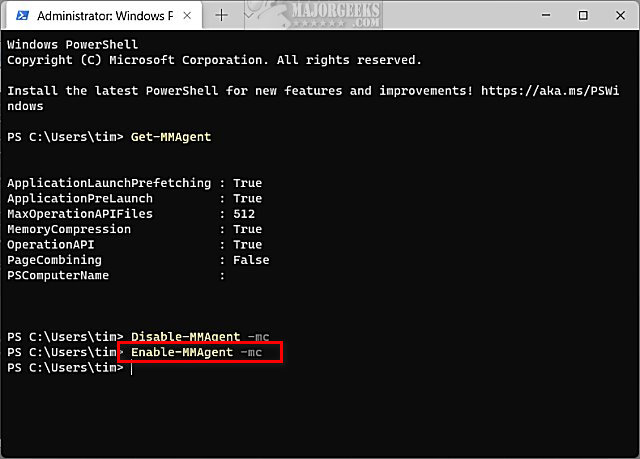
Enable-MMAgent -mc
Step 3. Reboot your computer to apply the changes.
How to Turn off Memory Compression in Windows 11/10?
To disable Memory Compression in Windows 11/10, do the following recommended steps:-
Step 1. First, open Windows PowerShell with elevated rights.
Step 2. Then, on the prompt of Windows PowerShell, type the following and hit Enter from the keyboard:-
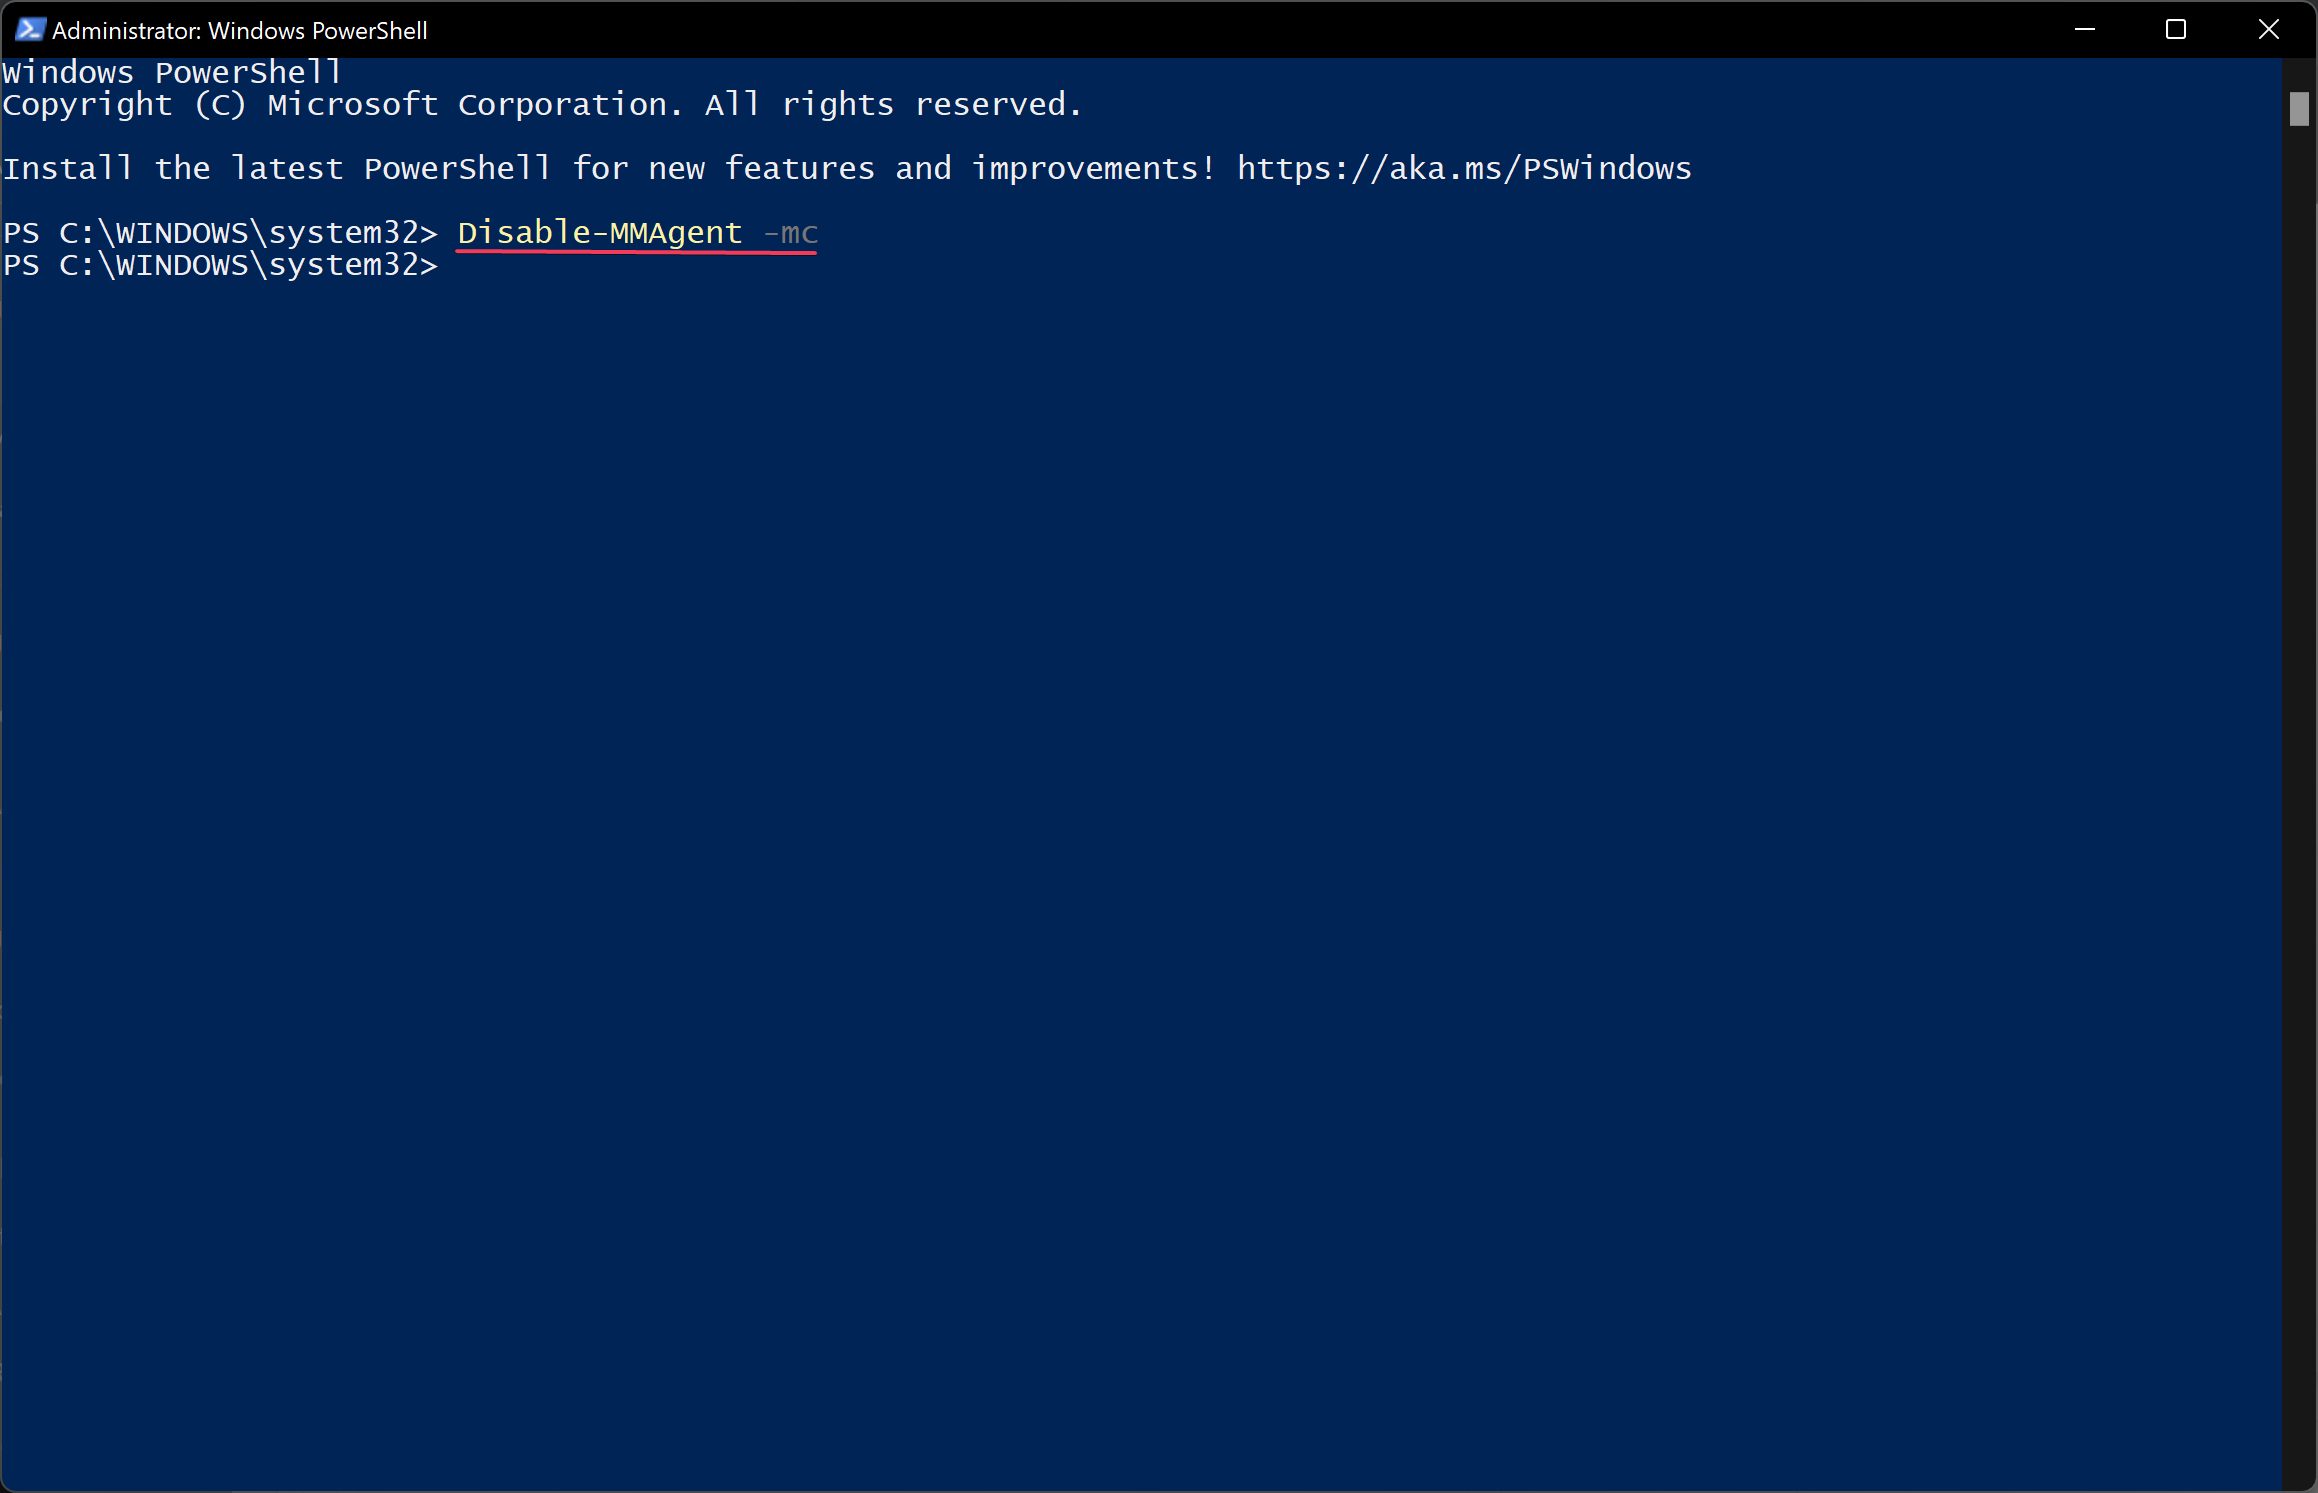
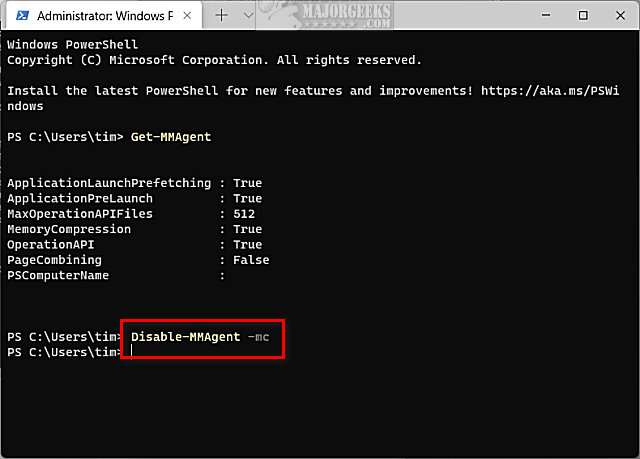
Disable-MMAgent -mc
Step 3. Finally, restart your computer to apply the changes.
Conclusion
In conclusion, Memory Compression is a useful feature available in Windows 11/10 that helps reduce physical memory utilization and improves disk read/write speed, thereby enhancing the overall user experience. Although it may use additional CPU resources for compressing and decompressing data in RAM, which can slow CPU processing on some systems, it is still faster than traditional paging files. Users can view the amount of compressed memory, check whether Memory Compression is enabled or disabled, and turn it on or off using Windows PowerShell with elevated rights. If you have a low-end system with limited memory, enabling Memory Compression may help improve performance. However, if you experience slow performance, you can try disabling Memory Compression to see if it makes a difference.
Do you know how to enable or disable Memory Compression in Windows 11/10? In Windows 11, there is a feature called Memory compression. This feature was introduced in Windows 10, which lets you store more data in the RAM than it usually could. As its name suggests, memory compression stores part of the memory pages in a compressed manner in RAM. For instance, if your apps require to store 4GB data, then Windows might have 3 GB uncompressed data and 0.5 GB compressed data. Now, this compressed data would have actually taken up 1 GB in RAM.
With this feature, Windows 11/10 can compress a part of RAM for reducing the page swap out. So, Memory compression is helpful for Windows users who do not have much physical memory. Now, let’s see how to enable or disable Memory Compress in Windows PC.
Page Contents
Enable or Disable Memory Compression in Windows 11/10
Part 1: How to Check if Memory Compression is Enabled
1. Firstly, open Task Manager on your system. After that, go to Performance and choose Memory.
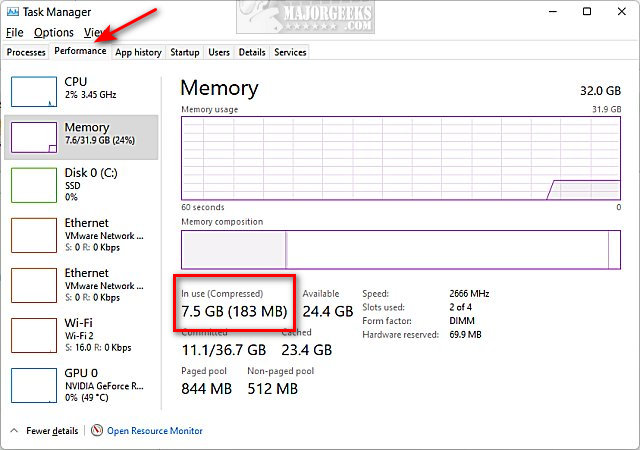
2. Within the In Use (Compressed) section, you could check how much memory is compressed. The memory displayed in the brackets is the compressed one. However, if the compressed memory is displayed as 0 MB, then this feature is disabled on your Windows PC.
Part 2: Enable or Disable Memory Compression in Windows 11/10
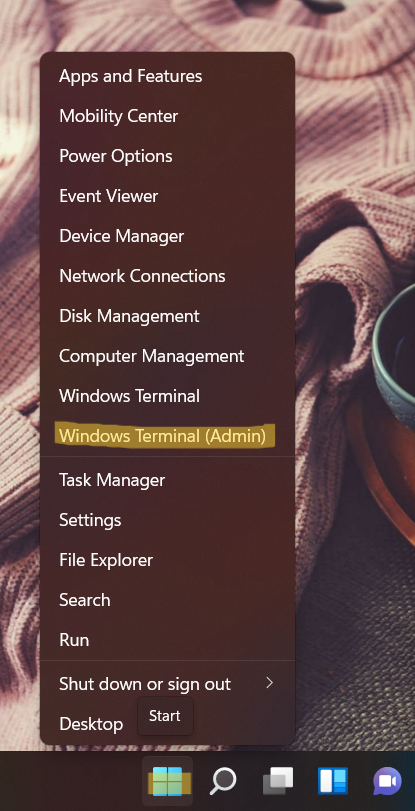
1. To disable Memory Compression, open Windows Terminal (Admin) by right-clicking on the Windows Start button. For Windows 10 users, open Windows PowerShell as administrator.
2. Now, run the following command to disable Memory Compression:
Disable-MMAgent -mc
Once executed, run another command as follows:
Get-MMAgent
Now, you will be able to see whether the Memory Compression feature is disabled on your system successfully or not. If False is written next to MemoryCompression, it means it is disabled now.

3. To enable Memory Compression, run the following command:
Enable-MMAgent –mc
Now, reboot your Windows system for applying the changes. Once done, check if this feature is on or not through Task Manager.
So, this is how you can turn on or off the Memory Compression feature on your Windows 11/10 PC hassle-free.
RELATED ARTICLES
By Timothy Tibbetts |
A newer feature introduced in Windows 10 and continuing with Windows 11 is Memory Manager or MM. Windows 10 & 11 use Memory Manager by default, but you can enable or disable it.
Memory Manager (MM) was designed to compress infrequently-accessed memory pages, which reduces the number of reads and writes to the disk (pagefile) and therefore improves responsiveness. Compressing memory reduces the amount of memory used per process, allowing the operating system to maintain more physical memory applications before enacting traditional paging.
Memory Manager is on by default, but some people claim to reduce lag if they have a high-end CPU. Before proceeding, remember that it is recommended that you leave Memory Manager on.
Video tutorial:
How to See if Memory Compression is Enabled or Disabled in Windows 10 & 11
Press the Windows Key + X and click on Task Manager.
Click on the Performance tab.
Look for In use to see if memory compression is on or off.
All of the following steps require you to next open Windows Terminal as Administrator.
Type in Get-MMAgent and press Enter.
Look for MemoryCompression.
How to Disable Memory Compression in Windows 10 & 11
Type in Disable-MMAgent -mc and press Enter. Wait a few seconds to complete.
Reboot your computer to apply the change.
How to Enable Memory Compression in Windows 10 & 11
Type in Enable-MMAgent -mc and press Enter. Wait a few seconds to complete.
Reboot your computer to apply the change.
Similar:
comments powered by Disqus

This tutorial will show you how to enable or disable Memory Compression in Windows 10 and Windows 11.
Memory Compression allows Windows 10 and Windows 11 to make better use of available memory on all systems by reducing physical memory utilization, resulting in fewer pagefile IO operations and a reduced reliance on disk. Furthermore, it improves the speed of writing to and reading from disk when MM determines paging must be enacted. Microsoft expects users to experience improved overall responsiveness and usability on all devices running Windows 10 and Windows 11.
Microsoft enabled the Memory Manager (MM) to compress infrequently-accessed memory pages which reduces the amount of reads and writes to the disk (pagefile) and therefore improves responsiveness. Compressing memory reduces the amount of memory used per process, allowing the operating system to maintain more applications in physical memory at a time before enacting traditional paging.
When Memory Manager’s policy does dictate paging, the data being written to or read from the disk is already compressed to typically around 40 percent of its original size. This compression improves the performance of other unrelated operations on the system by reducing a major source of interfering IO load. The end result is a snappier, more responsive experience with improved app launch performance and consistency.
Memory Compression is faster than using the page file, but does use more CPU resources. Your system may not perform as fast as it would if it didn’t need to compress data in memory. If you see a lot of compressed memory and suspect it’s the reason your PC is a bit slow, the only solution for this is to install more physical memory (RAM) or disable Memory Compression.
You must be signed in as an administrator to enable or disable Memory Compression.
Contents
- Option One: See if Memory Compression is Currently Enabled or Disabled
- Option Two: Enable Memory Compression
- Option Three: Disable Memory Compression
EXAMPLE: See amount of compressed memory in Task Manager

Option One
See if Memory Compression is Currently Enabled or Disabled
1 Open Windows Terminal (Admin). and select Windows PowerShell.
2 Copy and paste the Get-MMAgent command into Windows Terminal (Admin), and press Enter. (see screenshot below)
3 Look to see if MemoryCompression shows as True (enabled) or False (disabled).
4 You can now close Windows Terminal (Admin) if you like.

Option Two
Enable Memory Compression
This is the default setting.
1 Open Windows Terminal (Admin). and select Windows PowerShell.
2 Copy and paste the Enable-MMAgent -mc command into Windows Terminal (Admin), and press Enter. (see screenshot below)
3 Close Windows Terminal (Admin).
4 Restart the computer to apply.

Option Three
Disable Memory Compression
1 Open Windows Terminal (Admin). and select Windows PowerShell.
2 Copy and paste the Disable-MMAgent -mc command into Windows Terminal (Admin), and press Enter. (see screenshot below)
3 Close Windows Terminal (Admin).
4 Restart the computer to apply.
That’s it,
Shawn Brink
Если заглянуть в раздел «Производительность» — «Память» диспетчера задач Windows 11/10, вы можете увидеть пункт «Используется (Сжатая)». В более ранних версиях системы такого понятия как «сжатая» память не было и имеет смысл разобрать, что это такое.
На близкую тему могут быть полезными статьи: Что такое Кэшированная оперативная память Windows, Что делать, если невыгружаемый пул занимает память в Windows.
Как работает сжатие памяти в Windows
Как было отмечено выше, посмотреть количество сжатой памяти можно, зайдя в диспетчер задач (правый клик по кнопке Пуск — выбор соответствующего пункта меню) на вкладке «Производительность» в разделе «Память». Что такое сжатая память?

Предположим, что запущенные на вашем компьютере программы и сама операционная система требуют 20 Гб оперативной памяти для работы, а в наличии — лишь 16 Гб. Что при этом происходит?
- В предыдущих версиях Windows «избыточные» данные, то есть как минимум 4 Гб выгружались в файл подкачки на вашем жестком диске или SSD.
- Начиная с Windows 10 и такое поведение сохранилось в Windows 11, часть неиспользуемых в настоящий момент данных сжимается в оперативной памяти, то есть производится своего рода архивация прямо в оперативной памяти, без помещения страниц памяти на диск. Файл подкачки продолжает использоваться, но обращаться к нему приходится реже.
Второй подход сокращает потребность в обращении к HDD или SSD, ускоряет доступ к данным при необходимости, а также сокращает необходимый для работы объем оперативной памяти. Сжатие и распаковка данных в памяти требуют использования ресурсов процессора, однако, выигрыш в скорости по сравнению с файлом подкачки на диске должен быть и с учётом этого фактора.
В случае, если на вашем компьютере или ноутбуке нет нехватки оперативной памяти или множества запущенных, но не используемых программ и процессов, вероятнее всего вы почти никогда не увидите больших чисел в разделе «Сжатая память» — управление памятью Windows достаточно эффективно, чтобы не использовать её там, где это не требуется.

И, наоборот, на системах, где вопрос доступной оперативной памяти стоит остро, а в самой RAM есть достаточно данных, которые не требуют немедленного доступа, сжатая память может использоваться достаточно активно.
В первых версиях Windows 10, сжатое хранилище в памяти (compression store в терминологии Microsoft) отображалось как память, используемая процессом «System» или «Система и сжатая память».

В последних версиях ОС мы можем наблюдать используемую сжатую память в диспетчере задач, а не в памяти, используемой процессами, что должно снизить переживания некоторых пользователей, которые ранее часто обращались с вопросом: Что делать, если Система и сжатая память грузит процессор или RAM.