
Applies ToWindows 11 Windows 10
Чтобы включить или отключить сенсорный экран в Windows, выполните следующие действия.
-
Щелкните правой кнопкой мыши меню Пуск и выберите диспетчер устройств.
-
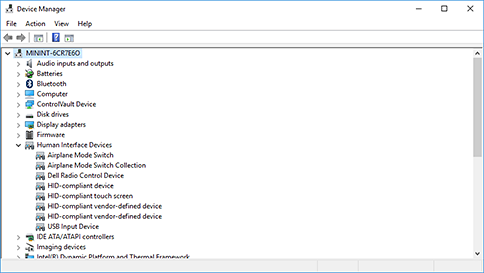
В открывавшемся окне диспетчер устройств щелкните стрелку рядом с элементом Устройства интерфейса пользователя, чтобы развернуть ее.

-
В разделе Устройства интерфейса пользователя щелкните правой кнопкой мыши hiD-совместимый сенсорный экран и выберите Включить устройство или Отключить устройство в зависимости от того, какое действие требуется.
-
Если в списке есть несколько hiD-совместимых устройств с сенсорным экраном , повторите шаги для каждого устройства.
Если сенсорный экран не работает, см. статью Что делать, если сенсорный экран не работает в Windows.
Нужна дополнительная помощь?
Нужны дополнительные параметры?
Изучите преимущества подписки, просмотрите учебные курсы, узнайте, как защитить свое устройство и т. д.
Does someone in your family find it funny to touch your screen while using it? If you have to deal with this, then disabling the touchscreen is something you might consider. Or maybe you turned it off but can’t remember to turn it back on. Either way, you’ll see your options to turn on or off the touchscreen on your Windows 11 computer. Remember that you can change what you’ve done at any time.
Contents
- 1 How to Turn on Touchscreen on Windows 11
- 2 How to Turn off Touchscreen in Windows 11
- 2.1 Conclusion
How to Turn on Touchscreen on Windows 11
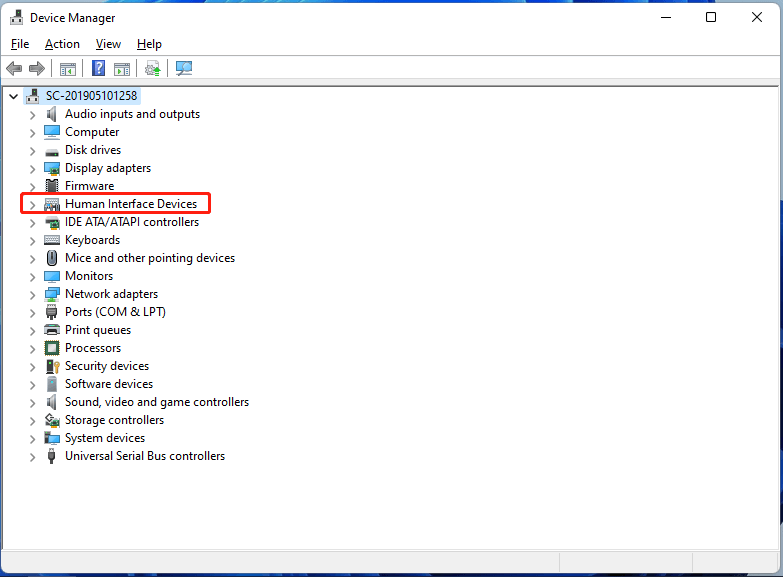
To turn on the touchscreen on your Windows 11 computer, you’ll need to type Device Manager in the search bar. Once it’s open, look for the Human Interface Devices option on the list.

Below this option, you’ll see a long list of options. One of those options should be the HID-compliant touch screen option. If you can’t find this option and you’re sure you’ve looked carefully, then that means that your Windows 11 computer doesn’t support touch. If you do see it click on it.

After selecting the option, click on the Action option at the top. From the list of options, make sure to choose the enable device option. Choose the HID-compliant touchscreen options > Actions > Enable Device.
How to Turn off Touchscreen in Windows 11
If you ever need to turn off the touchscreen for whatever reason, here’s what you’ll need to do. Search for and open the Device Manager. Click on the Human Interface Devices option to see all listed options when it opens. Choose the HID-compliant touch screen option and select the Action option at the top. Choose the Disable device option from the list.

You’ll see a confirmation message asking you if you’re sure that you want to turn it off. If you’re sure, click on the Yes option. Now choose the HID-compliant touch screen > Action > Disable device > Yes. Don’t worry if you change your mind about turning the touchscreen on or off. You can reverse the changes at any time.
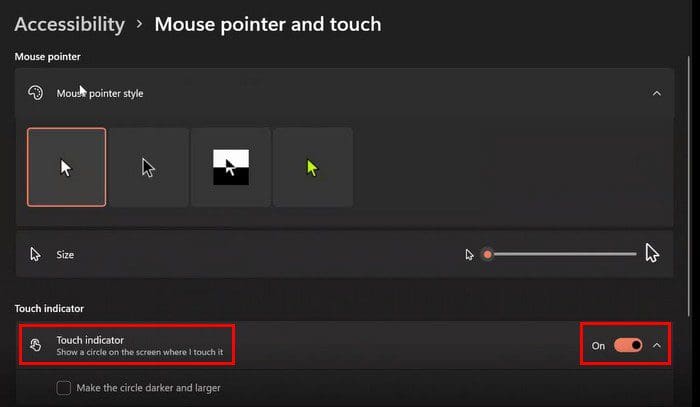
If what you find annoying about the touchscreen is the touch indicator, then you don’t have to turn off the feature. You can simply go into Settings, turn off the touch indicator, and keep the touchscreen on. As long as you’re there, you can also make the touch indicator larger if you ever need that option. You’ll need to go to Settings > Accessibility > Mouse pointer and touch > toggle off the Touch indicator option.
Conclusion
As you can see, turning the touchscreen on or off is a simple task. Even if you change your mind later on, you can always change your option and go back to how things were before. The touchscreen option is helpful, but it may not be something that everyone wants. Do you find the touchscreen useful? Share your thoughts in the comments below, and don’t forget to share the article with others on social media.
This article edited on MiniTool official webpage mainly teaches you some knowledge about Windows 11 touch input. It tells you how to enable touch screen, touch keyboard, as well as use touch input with gestures. Move down for the details!
Update: The official Windows 11 is already available since October 5, 2021.
About Windows 11 Touch Input
For Win11 new technologies of inputting, besides voice input, people are also able to take advantage of an improved touch keyboard to type. Microsoft has improved the scaling layouts of its on-screen keyboard on Windows 11 and added more themes for it besides the traditional light and dark modes.
How to Use Touch Screen Windows 11?
First of all, a touch screen is only available on laptops, tablets, etc. computer devices that support touch screens; it is not possible on the desktop. You can check with the device manual or the store where you purchased it to see whether it has a touch input feature or not.
The following are the steps to quickly enable Windows 11 touch screen for touch input.
- Click on the Start menu icon on the taskbar and search “device manager” with the Windows Search utility within the Start menu. You can begin typing immediately when the Start menu is open without firstly clicking on the search bar at the top.
- Open Device Manager in the search result.
- In Device Manager, expand the Human Interface Devices and select the first HID-compliant touch screen. If you can’t see this option, it is probably that your device does not have a screen that supports touch. If you are sure that your Windows 11 device supports a touch screen, you may refer to this article to solve your problem: How to Fix HID Compliant Touch Screen Missing?
- Choose Action > Enable device on the top menu of the Device Manager.
Repeat the above process to enable all your HID-compliant touch screen items in Device Manager.
How to Enable Windows 11 Touch Keyboard?
Generally, it is very simple to trigger an on-screen keyboard in Windows 11. Just click on the Touch keyboard icon on the taskbar! If you can’t see the on-screen keyboard icon in the taskbar, right-click on the taskbar and select the Show touch keyboard button option.
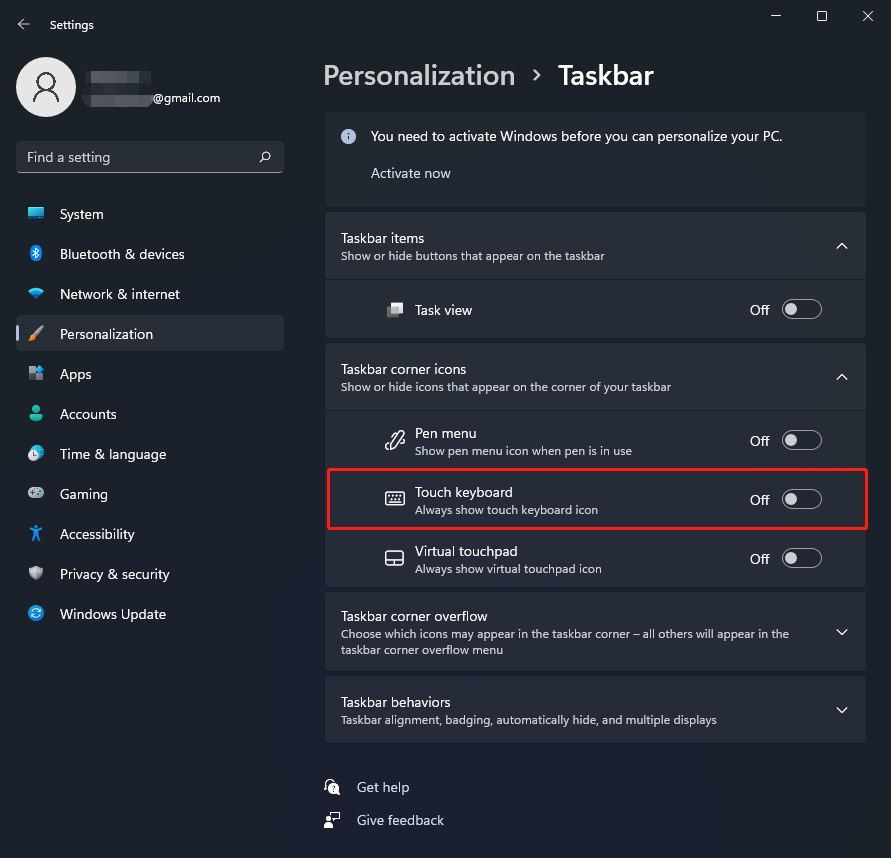
Or, you can navigate to Windows Settings > Personalization > Taskbar, unfold Taskbar corner icons, and turn on the Touch keyboard option. You can also reach this taskbar setting by right-clicking on the taskbar and choose Taskbar settings.
When you finally get your touch keyboard opened, you can do some customization to it. Just tap on the gear icon on the top left of the touch keyboard and you can change keyboard layout, enable handwriting, personalize theme and size, specialize typing preference (autocorrect), as well as switch language, etc.
Also read: Tutorial on How to Use the Touch Keyboard in Windows 10?
Windows 11 Touch Screen Gestures
Firstly, let’s see a video teaching you how to use screen gestures in Windows eleven.
- Select an item – Tap on the screen.
- Right-clicking – Use 1 finger to hold the target site for a few seconds.
- Open widgets – Swipe from left to right on the screen.
- Open notification/action center and calendar – Swipe from right to left on the screen.
- Show the desktop – Put 3 or 4 fingers on the screen and swipe them down to minimize all programs.
- See all open windows – Place 3 or 4 fingers on the screen and swipe them up.
- Open task view – When all your opened windows are on the screen, just put 4 fingers on the screen and swipe up. Or, just tap on the task view icon next to the Search icon on taskbar.
- Add new desktop – In the task view, just tap on the New desktop
- Switch between different desktops – Tap 4 fingers on the screen and swipe left or right.
- Snap a window to one side – In portrait mode, just grab the edge of the window which will automatically be roomed in and move it to the left/bottom or right /top side you want. Then, you can simply tap on another window to make it fulfill the other side. If you switch your device from portrait to landscape, it will automatically change the two windows from stacked view to side-by-side view.
- Scroll – Place 2 fingers on the screen and slide vertically or horizontally.
- Zoom in or zoom out – Place 2 fingers on the screen and pinch in or stretch out.
- Open Cortana – Tap 3 fingers on the screen.
Windows 11 Touch Input Not Working
If the touch screen on your Windows 11 does not work, you can try the below solutions to fix it.
Solution 1. Enable Touch Screen Functionality
The first method is to turn on the touch screen services by the instruction described above. The touch screen function should be on by default. Yet, it still has a chance to be off.
Solution 2. Update Touch Screen Driver
Secondly, a non-workable touch screen may result from that its driver is out of date. If so, you can just bring it back to work by updating its driver. In Device Manager, right-click on each HID-compliant touch screen and select Update driver.
Besides, you can try to disable and re-enable the touch screen driver or uninstall and reinstall its driver.
Solution 3. Restart Windows 11 Device
Sometimes, a restart of the device can deal with its issues.
Solution 4. Update Windows 11
Also, update the operating system (OS) usually handle many problems.
Solution 5. Check the Hardware
If you bought your machine at a comparatively cheaper price, your hardware equipment may be lower than others. That is to say, your computer may not support a touch screen.
Solution 6. Calibrate your Touch Screen
Sometimes, a set of specific Windows touch settings will solve Windows 11 touch input not working problem.
- Make sure all your human interface devices are connected to your computer including mouse, keyboard, trackpad, and so on.
- Search “calibrate” and launch the Calibrate screen for pen or touch input
- Select Calibrate in the default Display tab of the popup.
- Choose Touch input in the new window. If you are using a device that has a stylus such as Surface, you should select Pen input.
- If a User Account Control message pops up, just click the Yes
- Next, tap the crosshair in the upper-left corner of the screen. Then, tap it again each time it moves.
- If you are satisfied with the setting, just click on the Save the calibration data. If not, select the reset
Solution 7. Clean the Screen
Finally, your screen may be dirty and disturbed by dust. Then, just clean it with a soft cloth. Sometimes, you may need to remove its case or screen protector to return its availability. Also, make sure your hands are clean and dry without gloves.
Other Possible Solutions
- Dry the device out if it gets wet.
- Tap the edges of the device that has dropped.
- Disconnect peripherals of the device.
- Set the device in safe mode.
- Take the device for professional fix service.
Also read
- 5 Best Keyboards for Video Editing for Mac/Windows in 2023!
- What Is Windows 11 Simulator & Best Windows 11 Simulator
- Where to Get Windows 11 CD Key & How to Activate Win11 with It?
- What to Do If You Encounter Fake Windows 11 Downloader/Installer?
Having trouble with Windows 11 touch screen not working? We’ll help you fix that.
This issue is pretty common, whether you use Microsoft Surface 2-in-1 hybrid Windows PCs, HP, ASUS, Lenovo, or other laptops with touch screens.
Since touchscreens are complex, many factors can cause errors in Windows 11 and beyond. We identified common culprits and solutions. So all you have to do is follow the step-by-step instructions below.
How can I fix the touchscreen not working in Windows 11?
First and foremost:
- make sure your screen is clean
- remove the screen protector to see if the touchscreen works better without it and consider replacing it
Still, having issues? Let’s try more advanced fixes:
1. Run the Hardware and devices troubleshooter
- Right-click Start and select Run.

- To open Command Prompt, type cmd in the text and click OK.

- Then input the following command and hit Enter:
msdt.exe -id DeviceDiagnostic
- Press Enter to open the Hardware and Devices troubleshooter.

- Then click Next to go through that troubleshooter’s potential fixes.


2. Check for Windows 11 updates
- First, click Start on your taskbar.
- Then select the Settings app pinned to the Start menu.

- Select Windows Update from the left, and click on Check for updates.

- Download and install any Windows 11 patch updates.


3. Verify that the touchscreen is enabled
- First, right-click the Start menu’s button to open a handy shortcuts menu, and select Device Manager.
- Double-click the Human Interface Devices category.

- Right-click the HID-compliant touch screen and select Enable device if it’s disabled.


Once done, restart the computer and check if the Lenovo Windows 11 touch screen is not working issue is resolved.
NOTE
If the HID-compliant touch screen is already enabled, try re-enabling it by selecting Disable device and then Enable again.
4. Adjust the power setting for HID-compliant touch screen
- Press Windows + R to launch the Run command, enter devmgmt.msc in the text field, and click OK.
- Then expand the Human Interface Devices category by double-clicking it.
- Right-click the HID-compliant touch screen to select a Properties option.

- Head to the Power Management tab in the properties window. Then, uncheck the Allow this computer to turn off this device to save the power option to disable the setting.

- Click the OK button on the properties window.


Once done, restart the computer and verify if the Windows 11 touch screen is not working after the sleep issue is resolved.
5. Update the touchscreen driver
- Open the Device Manager window and double-click on Human Interface Devices to expand and view the entries under it.
- Right-click the HID-compliant touch screen device and select Update driver.

- Then choose the Search automatically for drivers option within the Update Drivers tool.

- Restart Windows after installing a new touchscreen driver.


Alternatively, you can try updating the touchscreen driver with reputable third-party driver updater software.
6. Reinstall the touchscreen driver
- Press Windows + S to open the Search menu, enter Device Manager in the text field, and click on the relevant search result.

- Extend the Human Interface Devices category.
- Right-click the HID-compliant touch screen and select Uninstall device.

- Select the Uninstall option.

- To reinstall the touchscreen driver, click the Action menu and select the Scan for hardware changes option. Or, you could restart the computer.


- How to Delete Windows 11 Saved Passwords
- How to Download DirectX 12 Agility SDK [Installation Guide]
7. Remove recently installed software
- Press Windows + R, and type appwiz.CPL in the text field, and click OK.
- Click the Installed On option in the third column to rearrange the listed software so that the most recently installed programs are at the top.

- Select the software you installed shortly before the touchscreen stops working, and then click Uninstall.
- Follow the on-screen instructions to complete the process.


8. Roll back Windows 11
NOTE
Rolling back Windows 11 removes software installed after selected restore point dates. If you want to check what programs a chosen restore point removes, click the Scan for affected programs button.
- Launch Run with the Windows + R hotkey, enter rstrui, and click OK to open System Restore.
- If System Restore displays a Choose a different restore point option, select that radio button, and click Next.

- You might be able to select a Show more restore points checkbox. If so, choose that option to expand the list of restore points.
- Then choose a restore point that will roll Windows 11 back to a date when the touchscreen was working on your PC. Alternatively, select the oldest restore point listed there.

- Click Next to proceed to the confirmation step.
- Select the Finish option to start the system restoration.


This will remove recent software that might interfere with your touchscreen and lead it not to work in Windows 11. Just make sure the data removed is backed up so you won’t lose any valuable info, files, or apps.
9. Roll back Windows 11 updates
- Type Windows key + I to open Settings.
- Scroll down to Windows Update and open it.

- Select Update history.

- Scroll down to Related settings and select Uninstall updates.

- Check the date of installation to identify an update that coincides with the time when your touchscreen stopped working and select Uninstall.


This will help fix the issue if you had no prior issues, but Windows 11 touch screen started not to work after an update. After rolling back the updates, check if your touch screen is any better.
You can always re-install them from the same settings menu.
How do I fix ghost touch on Windows 11?
Ghost touch has been a major problem for those using a touchscreen-enabled Windows 11 laptop. But, it’s easily fixable, given you follow the right approach and understand what’s causing the issue.
For instance, high humidity, water droplets on the screen, or devices that can affect touchscreen functionality placed near the laptop are also possible causes.
So, clean the screen, minimize the influence of other factors if not possible to eliminate them, and then restart the computer. In case this doesn’t work, you may update the drivers in Windows 11.
If nothing works, it’s likely a hardware issue, and taking your computer to a certified repair shop would be the best choice.
Does Windows 11 have any new touchscreen features?
Microsoft has enhanced Windows 11’s touchscreen optimization in a few ways. First, the new desktop platform’s UI automatically adjusts whenever you detach or attach a keyboard. So, for example, the taskbar icon spaces will increase when detaching a keyboard.
That means Windows 11 automatically turns tablet mode on and off when you detach or attach keyboards. Unfortunately, the new desktop platform doesn’t include a Tablet mode setting like Windows 10.
Windows 11 also includes a variety of touch keyboard themes for you. You can change the touch keyboard’s color scheme by clicking Personalization, then Touch keyboard in Settings. Up next, choose a new theme from there.

How come the touchscreen isn’t working in Windows 11?
Windows 11’s touchscreen mode can stop working for similar reasons as in Windows 10. Again, it can often be a driver-related issue.
However, this problem can also arise because of power management system settings, conflicting software, manually adjusted calibration, and maybe even registry errors.
Also, changes made to the BIOS can often affect the functionality, and you will notice that Dell Windows 11 touch screen is not working.
How can I check if my PC is touchscreen compatible?
You should see an HID-compliant touchscreen device within Device Manager. Next, click Action in Device Manager, and select the Scan for hardware changes option.
If you can’t see a touchscreen device in Device Manager after selecting that option, then your PC isn’t touchscreen compatible. If you do, quickly enable your touch keyboard on Windows 11.
Should I reset Windows 11 when the touchscreen is not working?
That’s a drastic resolution for fixing any Windows issue, but it often works. If you don’t mind that you’ll have to reinstall third-party software after resetting the platform, by all means, give that potential resolution a try.
You can easily reset Windows 11 to factory settings, and the process shouldn’t take very long.
However, try applying all the potential fixes before resetting Windows 11. We don’t promise they’ll work for everybody, but there’s a good chance they’ll resolve the issue.
If you still need extra help, consider contacting Microsoft’s Windows support service. You can do so by clicking the Get support link on the Contact Microsoft Support page or posting on the big M’s support forum.
Even more, check out what to do for the Lenovo touchscreen not working issue. As strange as it may sound, many users confirmed that holding the Power button for one minute did the trick.
Feel free to ask questions about troubleshooting Windows 11’s touchscreen in the comments below. In addition, users who have found other ways to fix the issue are also welcome to share their resolutions below.
Всем привет! Сегодня я расскажу, вам как отключить (или наоборот включить) сенсорный экран на ноутбуке. Очень важный момент – я буду рассказывать именно про сенсорный экран, а не про тачпад, который заменяет нам мышь. Если вы хотите отключить второе – читаем эту инструкцию (ссылка). С тачпадом все куда проще, но вот у сенсорного экрана, к сожалению, нет такого большого количества способов отключения. Я постарался облазить все форумы и интернет, и нашел для вас рабочие варианты.
Содержание
- Способ 1: Диспетчер устройств
- Способ 2: Редактор реестра
- Способ 3: Командная строка
- Способ 4: PowerShell
- Способ 5: Дополнительное ПО и драйвера
- Задать вопрос автору статьи
Способ 1: Диспетчер устройств

Отключить сенсорный экран в Windows 10, 11, 7 или 8 – проще всего через наш любимый «Диспетчер устройств».
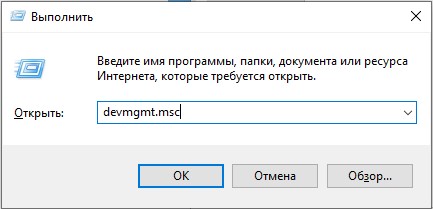
- Зажимаем клавиши:
+ R
- Вводим запрос:
devmgmt.msc
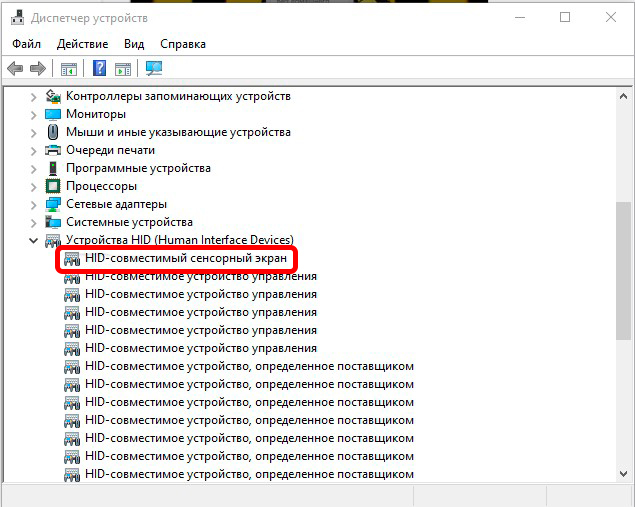
- Раскрываем раздел «Устройства HID (Human Interface Devices)».
- Два раза щелкаем левой кнопкой мыши по устройству:
HID-совместимый сенсорный экран
ПРИМЕЧАНИЕ! Если вы хотите, наоборот, его включить, найдите это устройство, нажмите по нему правой кнопкой мыши и выберите вариант «Включить устройство».
- В свойствах перейдите на вкладку «Драйвер».
- Кликните по кнопке «Отключить устройство».
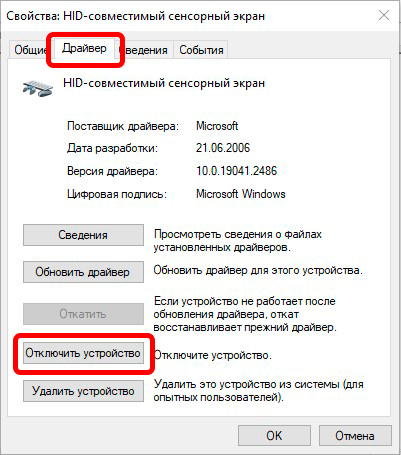
- Соглашаемся с предупреждением.
ВНИМАНИЕ! Если вы включили сенсор, и он не работает – значит у вас установлены не все драйвера. Вам нужно установить полный пак с официального сайта производителя. Очень важно скачать драйвера именно с сайта, не используя при этом «Диспетчер устройств» и автоматическое обновление дров с серверов Microsoft. Более подробно про установку всех драйверов – читаем тут.
Способ 2: Редактор реестра
Второй вариант отключить или включить сенсорный экран в Windows – это воспользоваться редактором реестра.
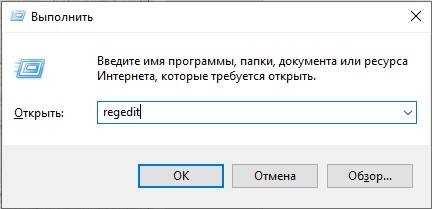
- Зажимаем клавиши на клавиатуре:
+ R
- Используем команду:
regedit
- Проходим в папку:
HKEY_Current_USER\Software\Microsoft\Wisp\Touch
- В правом блоке через правую кнопку мыши создаем параметр DWORD.
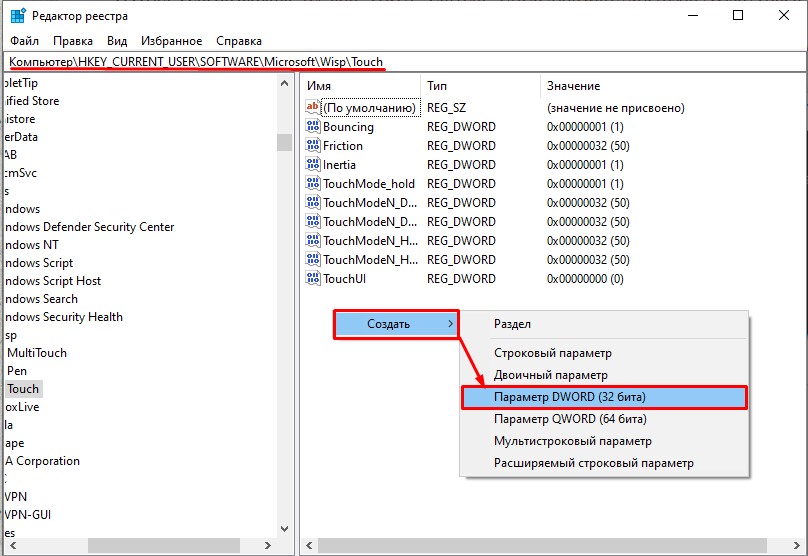
- Называем его:
TouchGate
- Далее устанавливаем значение в зависимости от цели:
0 – выключить
1 – включить
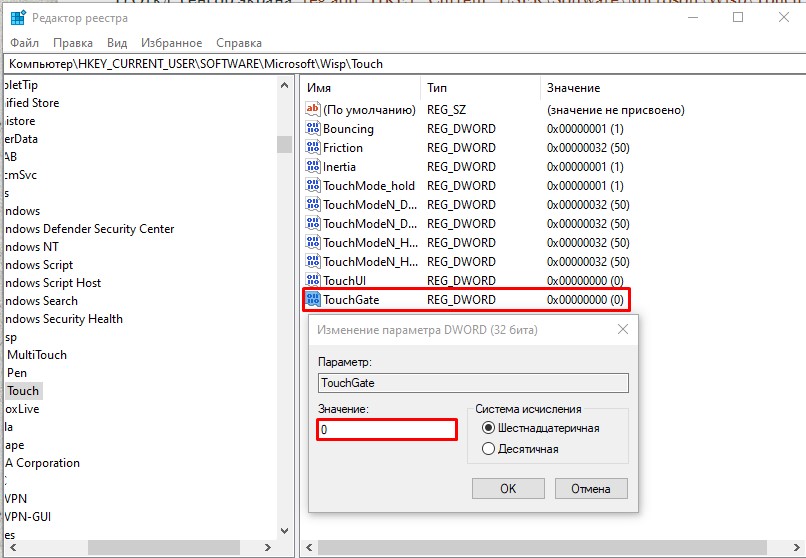
- Чтобы изменения вступили в силу – обязательно перезагрузите операционную систему.
Способ 3: Командная строка
Быстро создать параметр в реестре можно через командную строку – запускаем консоль с правами администратора. Далее используем одну из команд. Для включения сенсорного экрана используем:
reg add "HKEY_Current_USER\Software\Microsoft\Wisp\Touch" /v TouchGate /t REG_DWORD /d 00000001 /f
А для отключения:
reg add "HKEY_Current_USER\Software\Microsoft\Wisp\Touch" /v TouchGate /t REG_DWORD /d 00000000 /f
Способ 4: PowerShell
Есть еще две команды, которые работают в более продвинутой консоли – PowerShell. Чтобы запустить данную командную строку, кликните правой кнопкой мыши по кнопке «Пуск». После этого можете ввести одну из представленных команд. Для включения:
Get-PnpDevice | Where-Object {$_.FriendlyName -like '*touch screen*'} | Enable-PnpDevice -Confirm:$false
Для выключения:
Get-PnpDevice | Where-Object {$_.FriendlyName -like '*touch screen*'} | Disable-PnpDevice -Confirm:$false
Способ 5: Дополнительное ПО и драйвера
На всех современных ноутбуках производитель предоставляем дополнительное программное обеспечение в виде панели настроек. В данной панели точно есть кнопка для быстрого отключения и включения сенсора. Саму панель можно скачать с официального сайта производителя вашего ноутбука. Например, у Lenovo – Lenovo Vantage, у MSI – MSI Center, у HP – это HP System Event Utilit и т.д. Просто перейдите на официальный сайт производителя вашего ноутбука, скачайте и установите эту утилиту. После этого в установленной программе найдите кнопку для отключения или включения сенсора.