
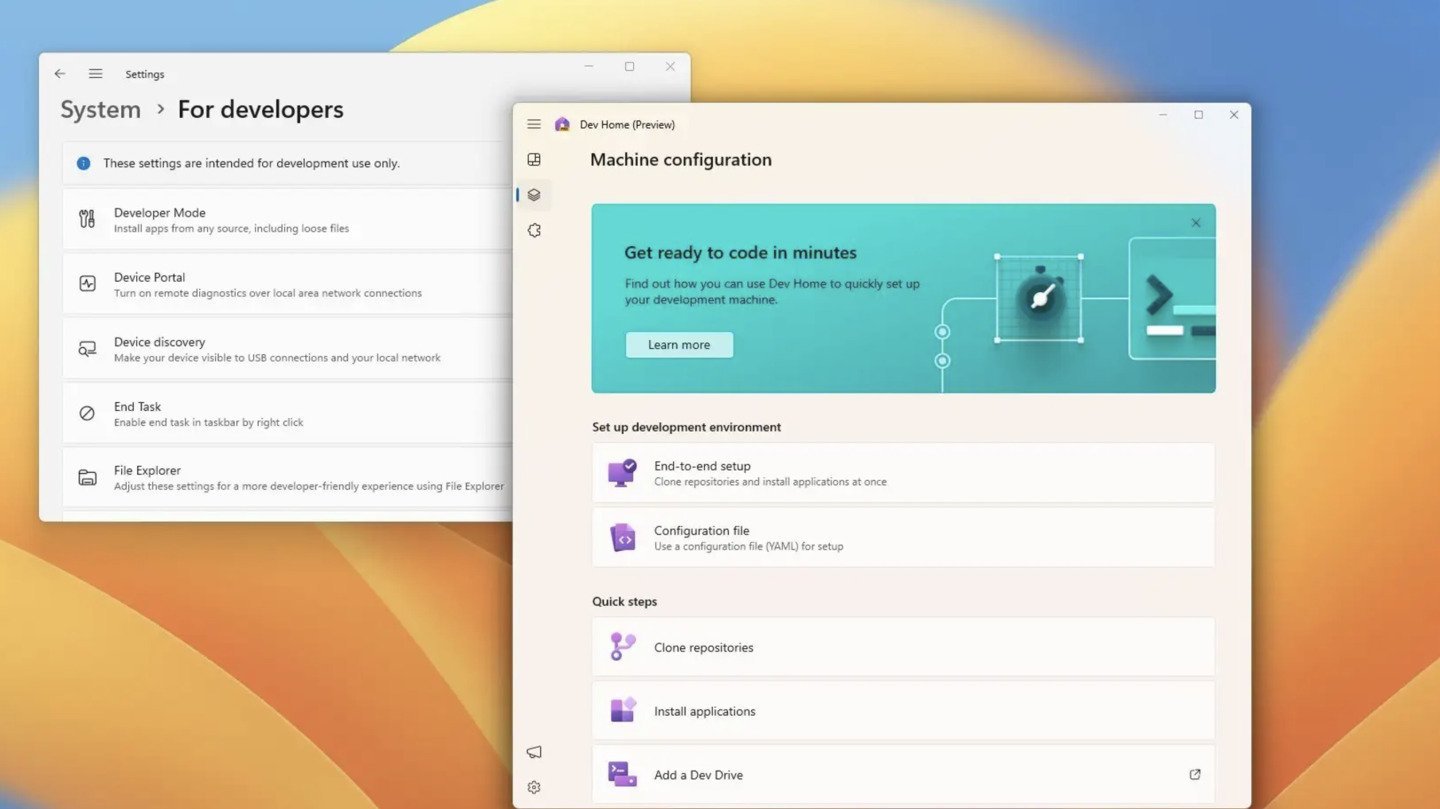
Основная цель, с которой включают режим разработчика обычные пользователи Windows 11 — установка UWP приложений не из магазина Microsoft Store, хотя этим его функциональность не ограничивается.
В этой простой пошаговой инструкции подробно о том, как включить режим разработчика Windows 11 в Параметрах или альтернативными способами: в редакторе реестра, PowerShell или командной строке.
Включение режима разработчика в Параметрах Windows 11
Базовый способ включения режима разработчика — использование соответствующего раздела параметров:
- Откройте Параметры, для этого можно использовать сочетание клавиш Win+I
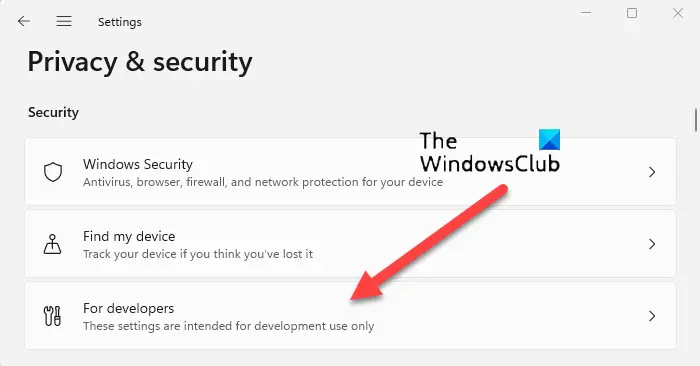
- Перейдите в раздел «Конфиденциальность и защита» и откройте пункт «Для разработчиков».

- В разделе «Режим разработчика» включите переключатель «Установка приложений из любого источника, включая свободные файлы».

- Подтвердите включение режима разработчика.


По сути, на этом действия закончены, хотя на этой же странице настроек представлены и другие опции:
- Портал устройств
- Обнаружение устройств
- Ряд настроек, имеющих отношение к представлению файлов в проводнике, работе удаленного рабочего стола, терминала по умолчанию и возможности выполнения неподписанных скриптов PowerShell
Более подробная информация доступна на официальной странице Майкрософт.
Дополнительные методы включения режима разработчика
За возможность установки приложений из любого источника отвечает соответствующая локальная групповая политика, изменить которую можно в редакторе локальной групповой политики или редакторе реестра.
В Windows 11 Pro и Enterprise удобнее использовать редактор локальной групповой политики:
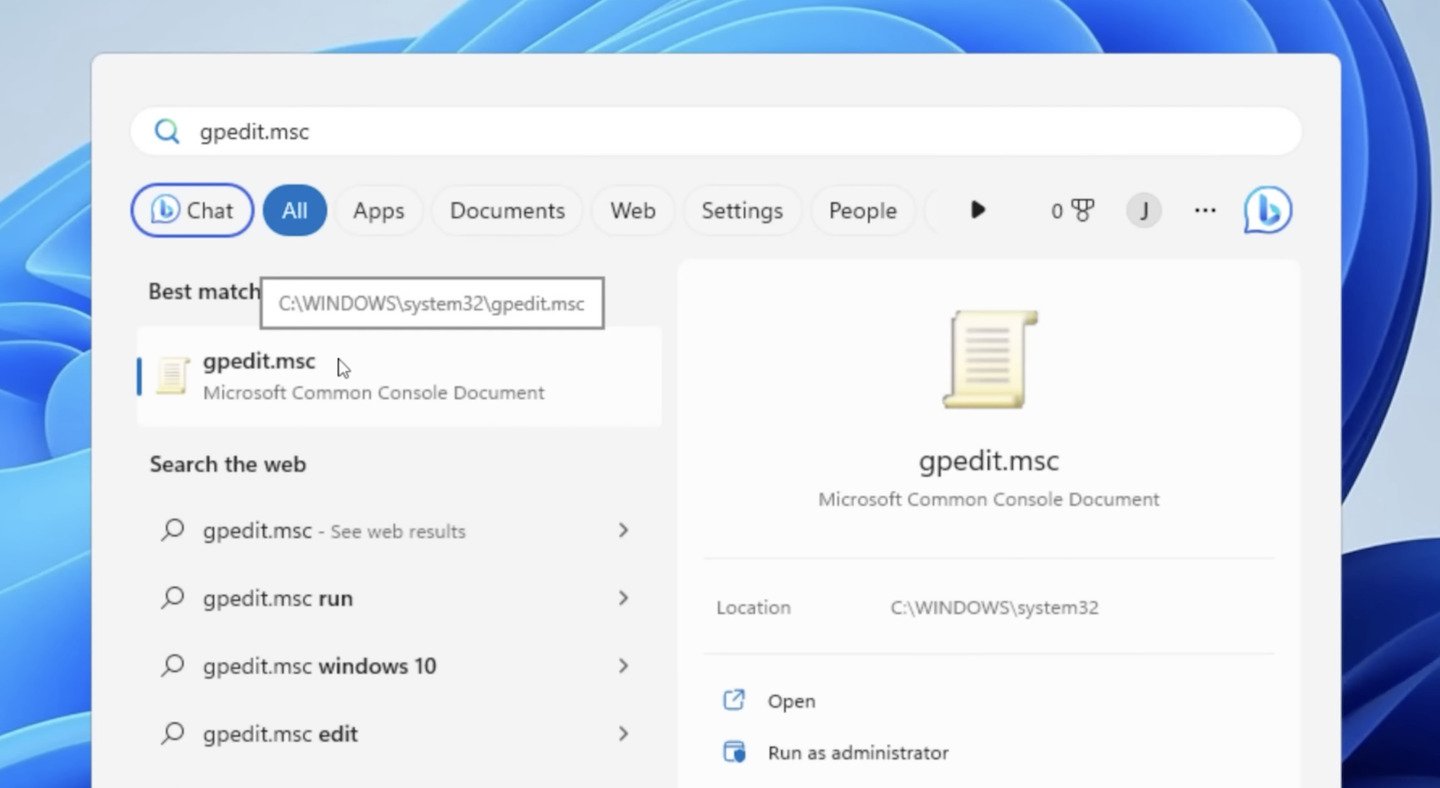
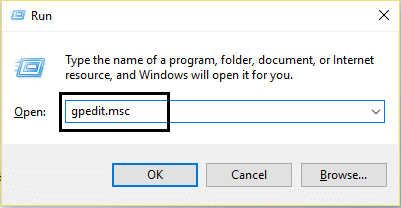
- Нажмите правой кнопкой мыши по кнопке «Пуск», выберите пункт «Выполнить», введите gpedit.msc и нажмите Enter.
- Перейдите к разделу Конфигурация компьютера — Административные шаблоны — Компоненты Windows — Развертывание пакета приложения.
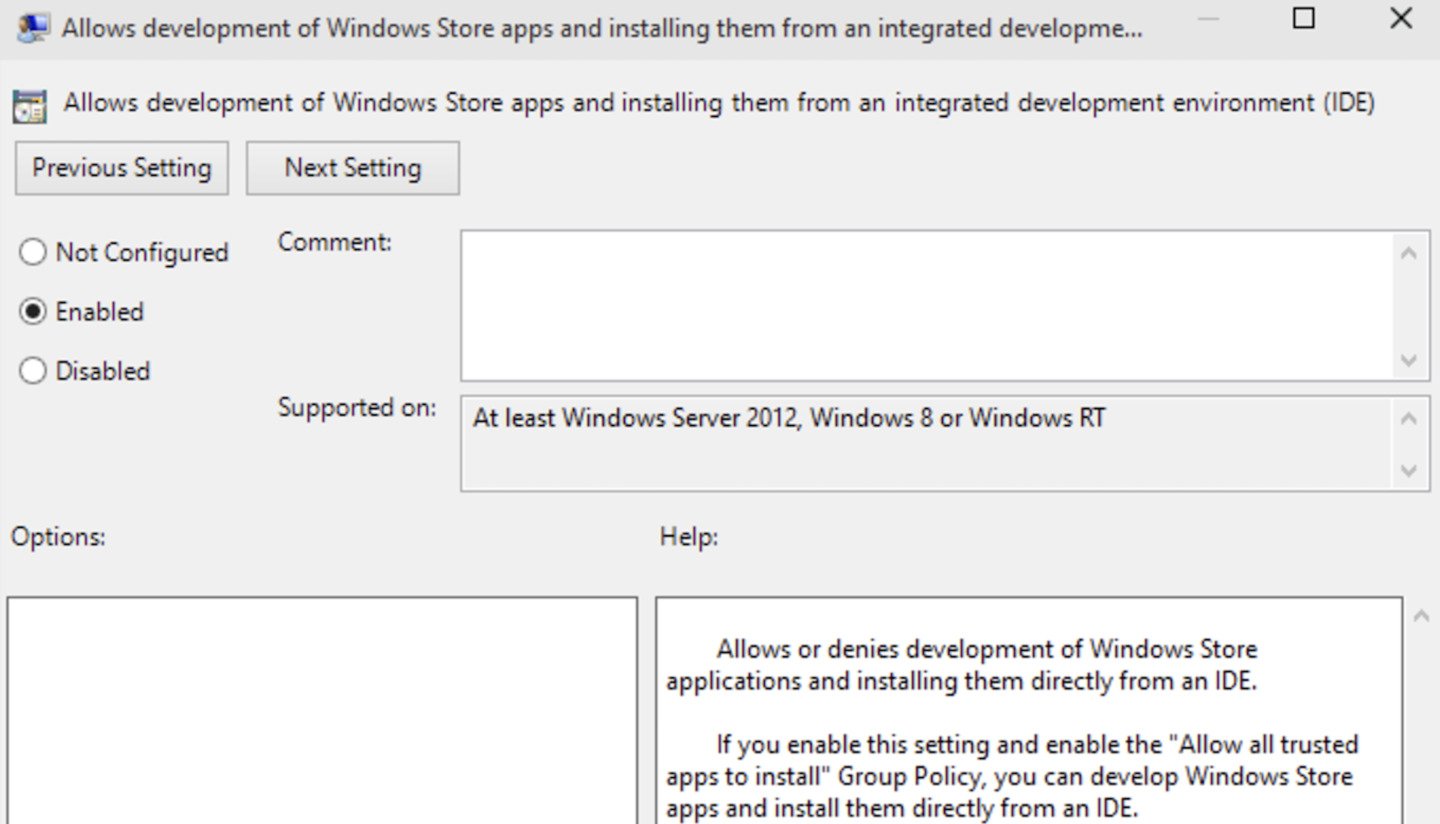
- В правой панели редактора нажмите дважды по политике «Разрешить разработку приложений Магазина Windows и их установку из интегрированной среды разработки (IDE)».
- Установите «Включено» и примените настройки.


При отсутствии редактора локальной групповой политики (в Windows 11 Домашняя) можно использовать редактор реестра:
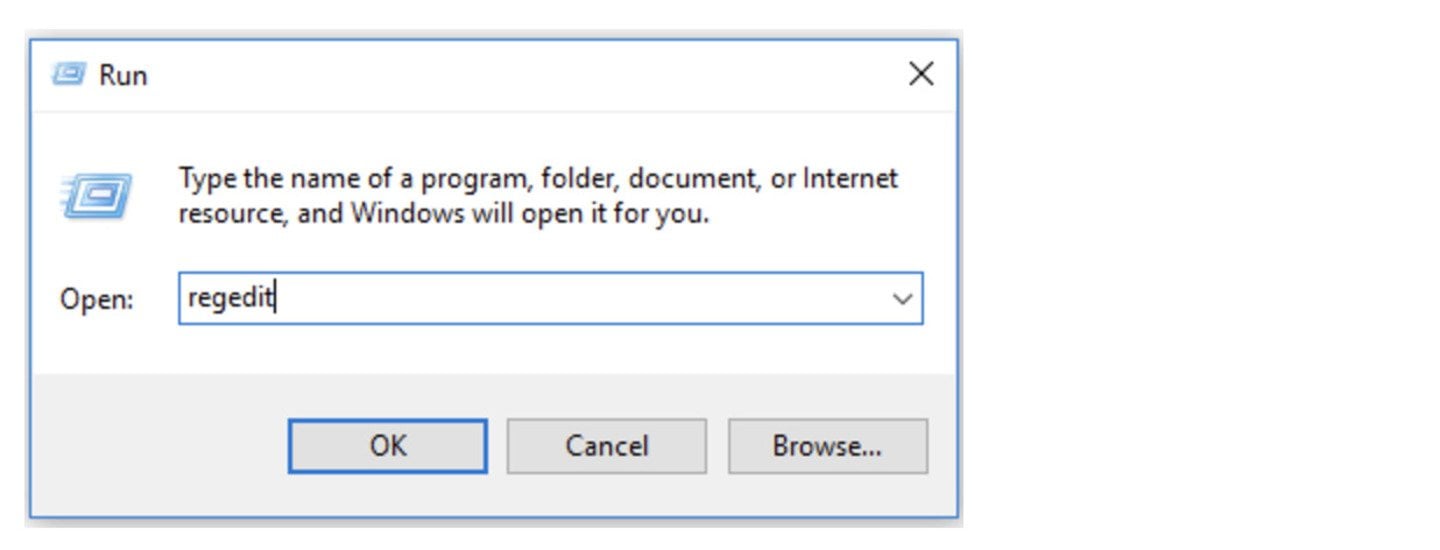
- Нажмите клавиши Win+R, введите regedit и нажмите Enter.
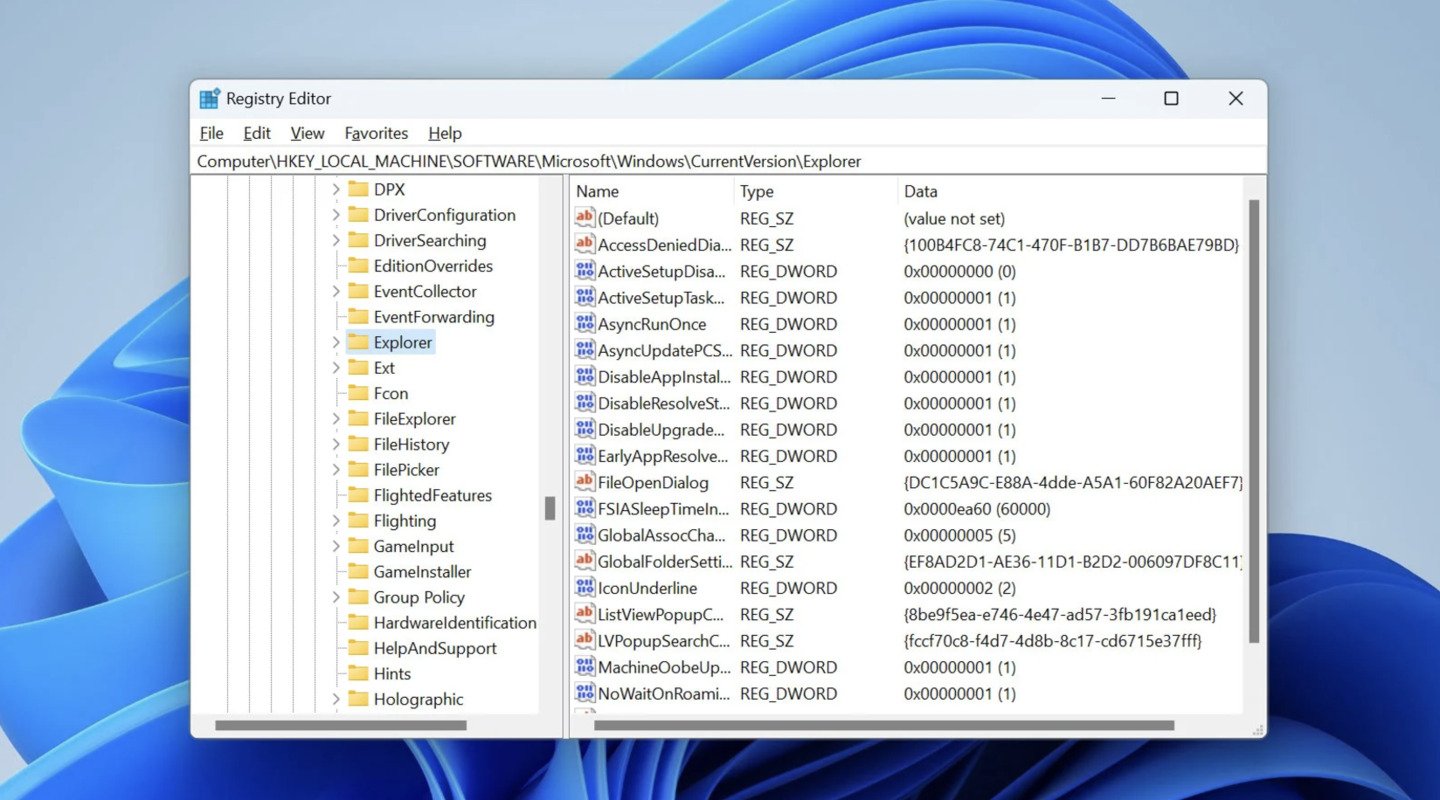
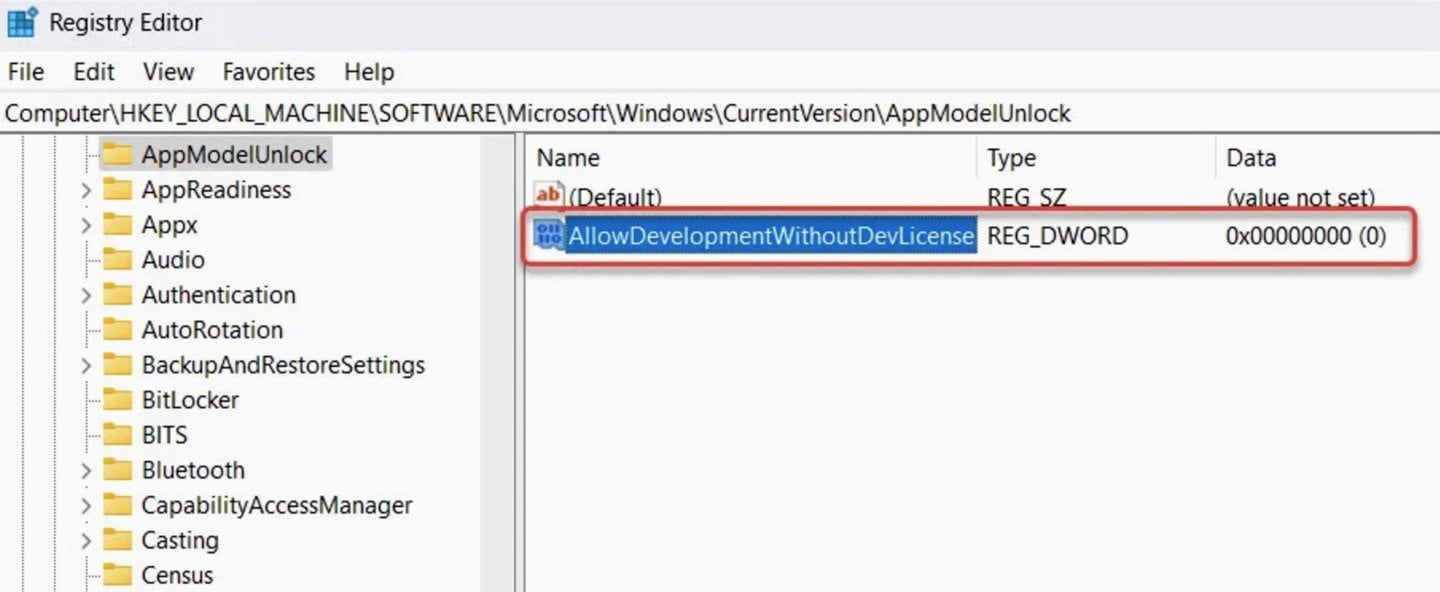
- Перейдите к разделу реестра
HKEY_LOCAL_MACHINE\SOFTWARE\Microsoft\Windows\CurrentVersion\AppModelUnlock
а при его отсутствии — создайте этот раздел.
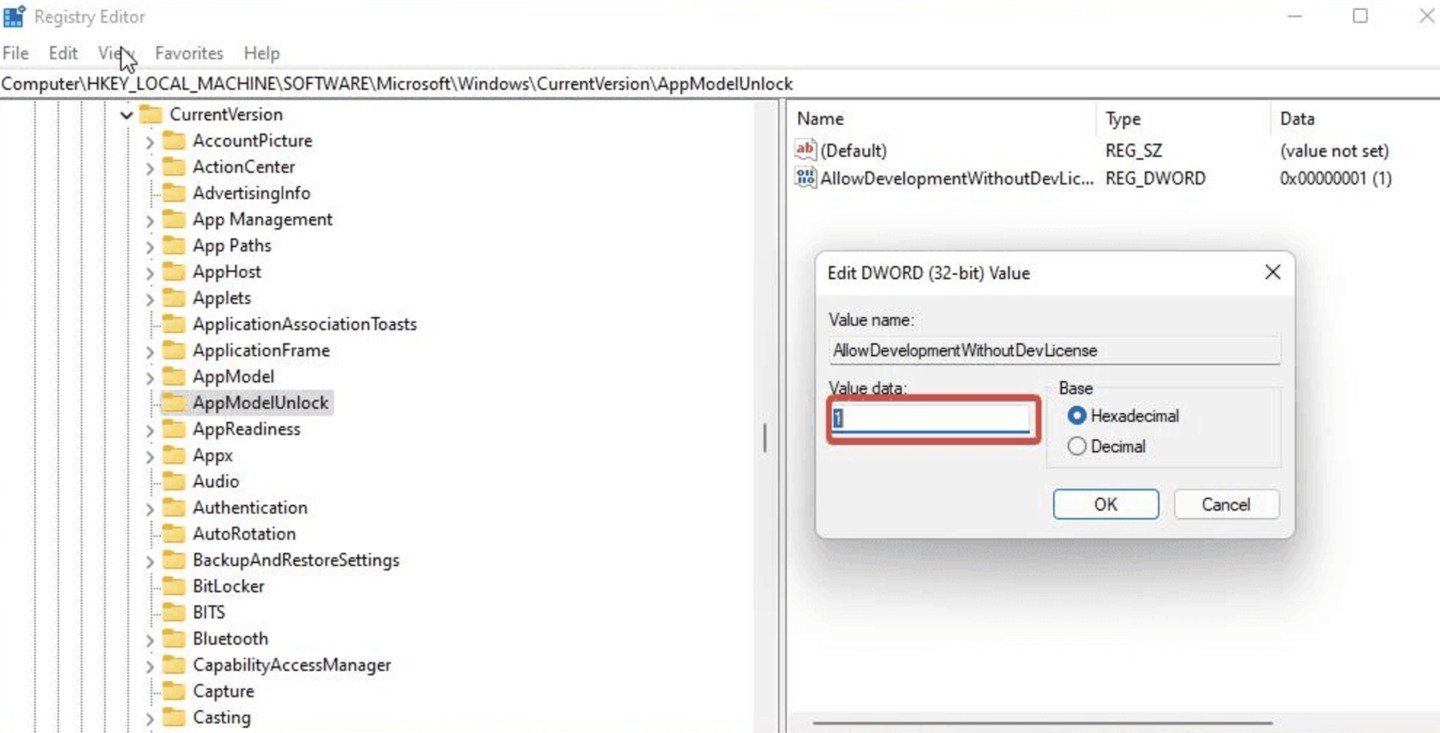
- В этом разделе создайте параметр DWORD32 с именем AllowDevelopmentWithoutDevLicense и значением 1 (если параметр уже присутствует — дважды нажимаем по нему и изменяем значение с 0 на 1). Также может иметь смысл изменить значение параметра AllowAllTrustedApps в этом разделе на 1 (разрешает установку неопубликованных приложений, отдельно от включения режима разработчика).

- Готово, режим разработчика включен.

То же самое можно сделать в командной строке или PowerShell (требуется запуск от имени администратора), по порядку выполнив следующие две команды:
reg add "HKEY_LOCAL_MACHINE\SOFTWARE\Microsoft\Windows\CurrentVersion\AppModelUnlock" /t REG_DWORD /f /v "AllowAllTrustedApps" /d "1"
reg add "HKEY_LOCAL_MACHINE\SOFTWARE\Microsoft\Windows\CurrentVersion\AppModelUnlock" /t REG_DWORD /f /v "AllowDevelopmentWithoutDevLicense" /d "1"
На этом всё. Если остаются вопросы, жду их в комментариях к статье.
If you don’t already know, Windows comes with a “Developer Mode” that allows developers to experiment and test Windows Store applications or run their own apps on the Windows platform. This feature is present in both Windows 10 and 11, but needs to be manually enabled.
If you are a regular computer user, then do not worry. You probably do not need to enable this feature, and it is probably of no use to you either. However, if you are a developer who likes to mess around with Universal Windows Platform (UWP) apps, then this article is for you.
Today we will be discussing what exactly Developer Mode is, how to enable or disable it, and what it offers.
Table of Contents
What is Developer Mode in Windows
Developer Mode is a feature in Windows that allows you to perform additional testing and debugging of the Windows Store as well as third-party applications. Furthermore, it also introduces some new tools to the Windows environment designed to help the developers with their testing.
Turning on Developer Mode also helps the user experience issues with Remote Desktop, Windows PowerShell, and File Explorer, which is otherwise restricted by default.
Developer Mode was first introduced in Windows 10 in 2016 and has since made its way to all the following Windows versions. When enabled, it offers the following additional tools for the developers to use:
- Installing and debugging uncertified Windows Store applications.
- Device Portal
- Device Discovery
Not only that, this mode improves the following Windows tools for an optimized developer experience:
- File Explorer
- Remote Desktop
- Windows PowerShell
Let us now show you how to enable Developer Mode in Windows.
Enable Developer Mode in Windows 11
Follow these steps to activate Developer Mode in Windows 11:
-
Navigate to the following:
Settings app >> Privacy and Security >> For developers
-
Here, toggle the slider under “Developer Mode” into the On position.

Turn on Developer Mode -
When asked for a confirmation, click Yes.
Yes to confirm


This will turn on the Developer Mode. You can simply toggle the sliders under “Device Portal” and “Device Discovery” to enable them too. This is discussed in detail further down this post.
Furthermore, you will find additional settings for File Explorer, Remote Desktop, and PowerShell on the same Settings page, from which you can select and then Apply the changes.
Enable Developer Mode in Windows 10
Follow these steps to activate Developer Mode in Windows 10:
-
Navigate to the following:
Settings app >> Windows Update >> For developers
-
Here, toggle the slider under “Developer Mode” into the On position.

Turn on Developer Mode -
When asked for a confirmation, click Yes.
Yes to confirm


Developer Mode will now be enabled. If you want to disable it in the future, simply toggle the slider under Developer Mode again into the Off position.
Similar to Windows 11, you can simply toggle the sliders under “Device Portal” and “Device Discovery” to enable them too. This will be discussed in detail further down this post.
Furthermore, you will find additional settings for File Explorer, Remote Desktop, and PowerShell on the same Settings page, from which you can select and then Apply the changes.
However, unlike in Windows 11, the Windows 10 “For developer” page does not give you any options on Windows Terminal.
That said, you can now sideload third-party applications or use existing Microsoft Store apps to begin your testing.
What is Device Portal
Device Portal is a tool that can be installed on your PC after enabling Developer Mode. Once that is enabled, you can then enable the Device Portal from the “For developers” settings page.
The Windows Device Portal allows you to manage your PC remotely through a locally-installed web server. Using the server’s web interface, you can then connect to this computer remotely over the network and manage it how you please. For this reason, when the Device Portal is enabled, your PC also changes the Windows Firewall.
The Device Portal provides advanced diagnostics of the PC, as well as real-time performance data. However, not every developer may need this tool.
The Device Portal is mostly useful for testing applications on remote Windows devices, such as Xbox, Hololens, etc.
You can set up credentials and other information for the Device Portal from the “For developers” settings page.

What is Device Discovery
Windows Device Discovery is another developer feature that needs to be manually enabled. Its primary function is to pair a remote Windows device so it can be connected to this PC remotely.
Once the Device Portal is enabled, you can pair a device with it using a simple code through Device Discovery.

Other Developer Mode Enhancements
As we mentioned earlier, enabling Developer Mode in Windows enhances a few pre-existing Windows tools. The sections below briefly describe what options the user can choose from.
Windows Explorer
You can manage what File Explorer now displays directly from the Settings app. However, these are only a handful of options. You can select any or all of the following options:
- Change settings to show file extensions
- Change setting to show hidden and system files
- Change settings to show full path in title bar
- Change policy to show Run as a different user in Start
- Change settings to show empty drives

Remote Desktop
The following enhancements are offered for a Remote Desktop Connection to this PC once the Developer Mode is turned on:
- Change settings to allow remote connections to this computer.
- Change settings to allow connection only from computers running Remote Desktop with Network Level Authentication.
- Change settings so that the PC never goes to sleep when plugged in

Windows PowerShell
With Developer Mode, you can set whether or not to allow running scripts in PowerShell using the following option:
- Change execution policy to allow local PowerShell scripts to run without signing. Require singing for remote scripts.

Troubleshoot Enabling Developer Mode in Windows
Users often report that they are unable to enable Developer Mode due to one reason or the other, and become frustrated when they cannot find a solution. If you experience similar issues, refer to the solutions suggested below and perform them to mitigate the issue.
Change User Account Type to Administrator
It may be possible that your user account is a standard user that does not have any administrative rights. In that case, you must convert your user account to an administrative account, or enable the Developer Mode from an account that is an administrator on your PC.
Here are 6 ways to convert your existing account into an administrative account.
Allow Trusted Apps to Install using Group Policy
Another problem could be that Windows blocks apps to install, rendering the Developer Mode and its associated tools incapable of a successful installation. In that case, you can allow trusted apps to be installed on your PC using the following steps:
-
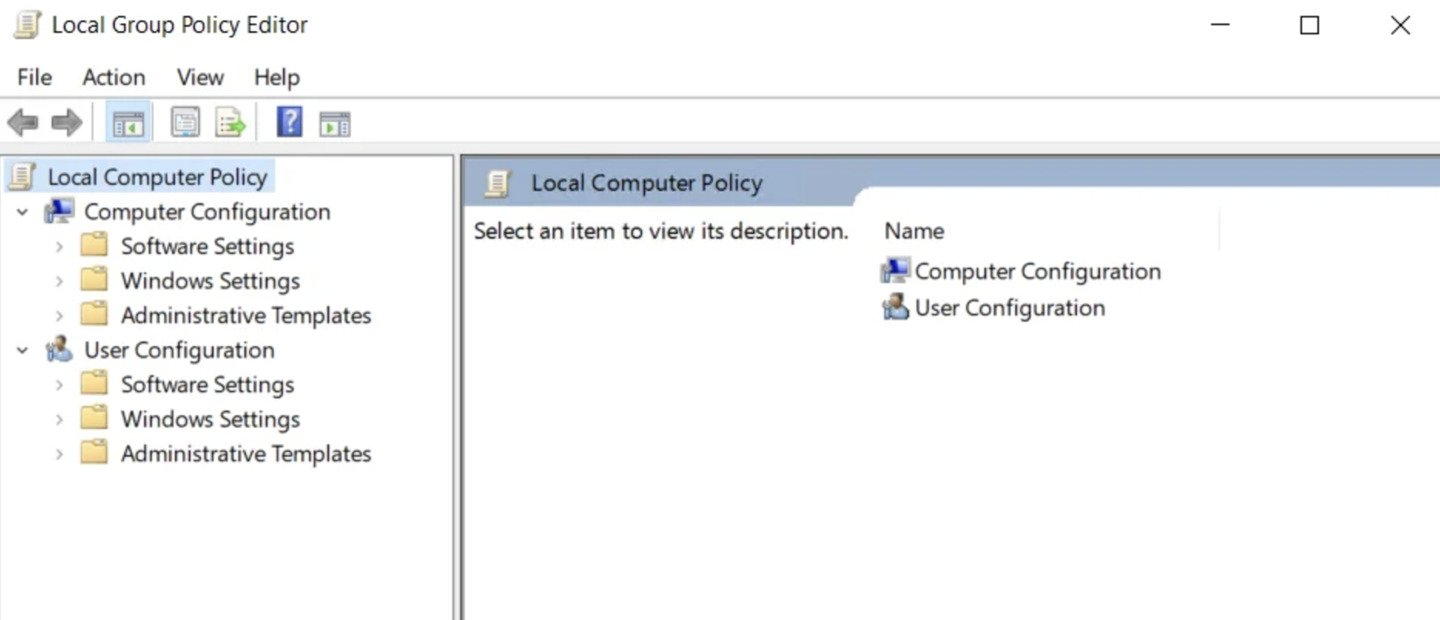
Open the Group Policy Editor by typing in gpedit.msc in the Run Command box.

gpedit msc -
Now navigate to the following from the left pane in the Editor:
Computer Confiuration >> Administrative Templates >> Windows Components >> App Package Deployment
-
Here, double-click on the policy “Allow all trusted apps to install” in the right pane.

Open policy -
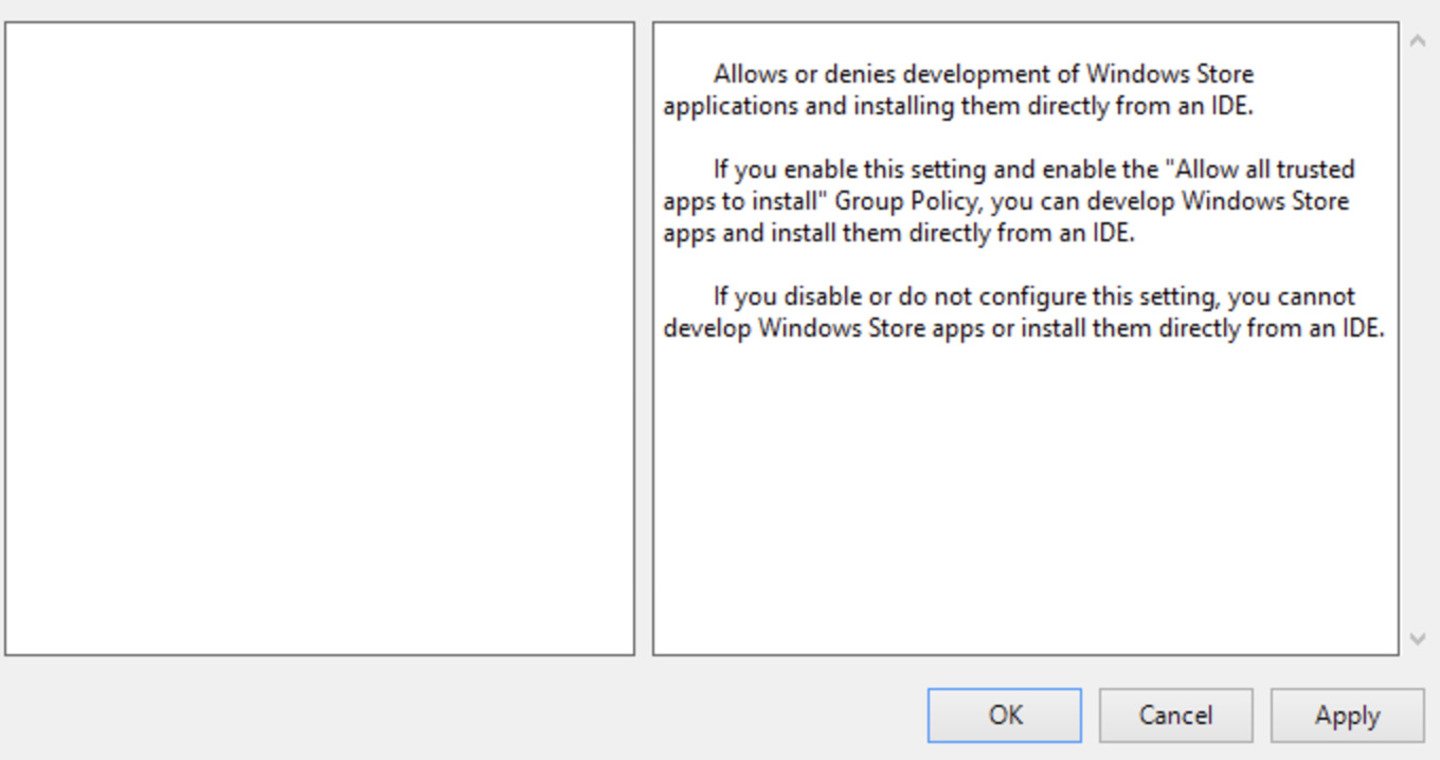
From the pop-up policy, select the Enabled radio button, then click Apply and OK.

Enable the policy -
Now open the Command Prompt with elevated rights and run the following cmdlet to implement the changes.
GPUpdate /Force
gpupdate force latest


Once this is done, try re-enabling Developer Mode and check if the issue persists.
Undo Recent Changes
If the Developer Mode was working just fine before and has suddenly encountered an error, something that was recently changed has likely affected it, making Developer Mode unable to run properly.
This change could be a new software installation, a new Windows update that was installed, or any other insignificant changes.
In that case, you can try to uninstall any recently-installed apps through Programs and Features in the Control Panel. If you believe it was caused by a Windows update, try uninstalling the update. If you made multiple changes to the operating system or do not recall any changes made, try restoring your PC to an earlier state to undo any changes.
Disable Windows Telemetry
Windows Telemetry is used to collect and track data and activity on your PC so it can be reported back to Microsoft, which is useful for them so they can work on improving the user experience.
However, this service can also prevent you from accessing certain Windows features, such as the Developer Mode. Therefore, disabling telemetry and data collection just might fix the problem.
Here are 6 ways to disable telemetry on a Windows PC.
Final Thoughts
Windows Developer Mode is an excellent tool for developers who like playing around with custom UWP and Microsoft Store apps. It gives you the ability to test their limits.
Moreover, if you want to try out the new features in the latest Developer options, you can subscribe to the Windows Insider channel and try out these new (yet somewhat unstable) features in the Developer Mode.
«Режим разработчика» в Windows 10 — особая конфигурация операционной системы, предназначенная для авторов программного обеспечения. Она упрощает создание, тестирование и установку приложений, не требующих публикации в Microsoft Store. В этом гайде мы расскажем о том, как активировать режим разработчика разными способами.
Для чего нужен «Режим разработчика»?
Источник: YouTube-канал ThioJoe / Интерфейс Windows 10
В первую очередь «Режим разработчика» будет полезен программистам и создателям софта. Он позволяет устанавливать приложение, минуя официальный магазин Microsoft Store, что упрощает отладку ПО.
Также он открывает доступ к инструментам разработки — например, к функции PowerShell. Она объединяет в себе возможности командной строки, языка сценариев и среды для управления системами.
Кроме того, «Режим разработчика» позволяет активировать дополнительные функции вроде Windows Subsystem for Linux. С ее помощью можно запускать полноценные дистрибутивы Linux без использования виртуальной машины.
Через меню «Параметры»
Самый простой способ. Для активации «Режима разработчика» выполните следующие шаги:
- Нажмите Win + I для открытия окна «Параметры» (Settings) или перейдите в меню «Пуск»;
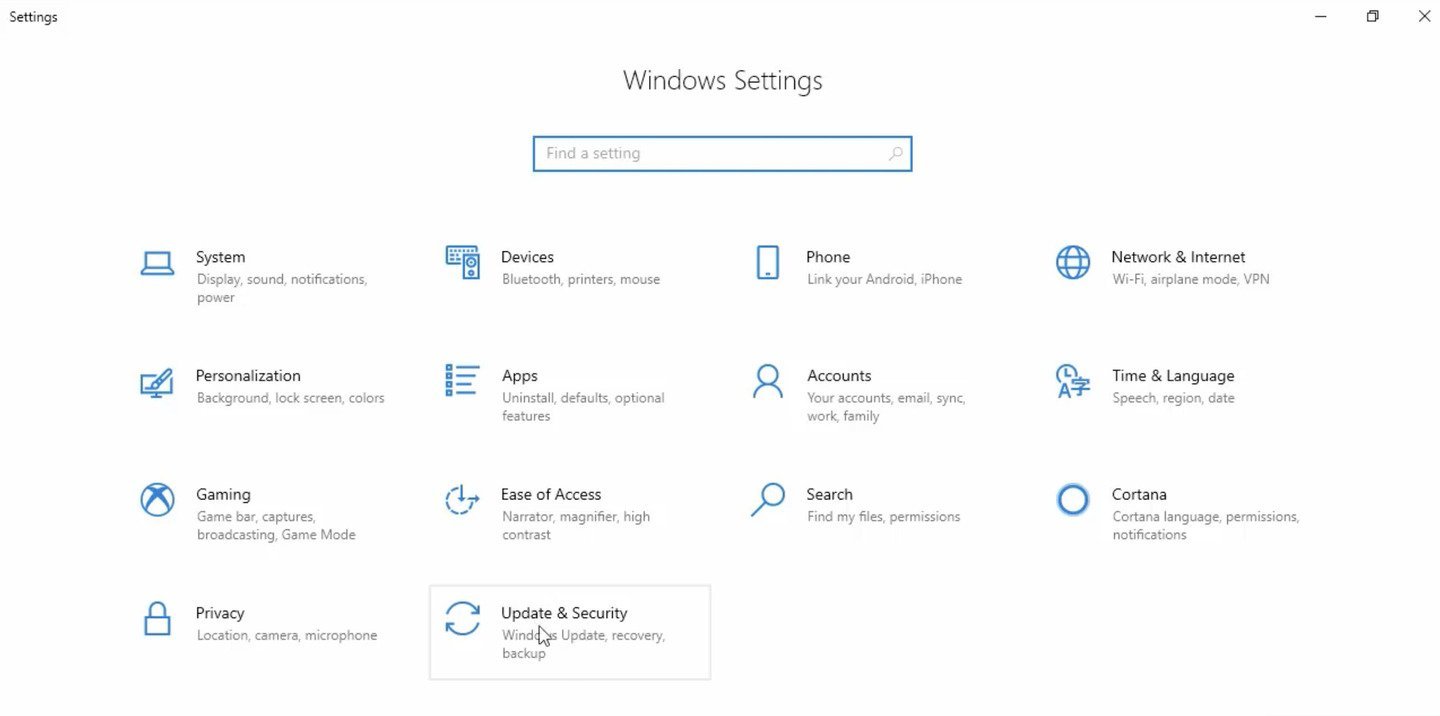
- Выберите раздел «Обновление и безопасность» (Update & Security).
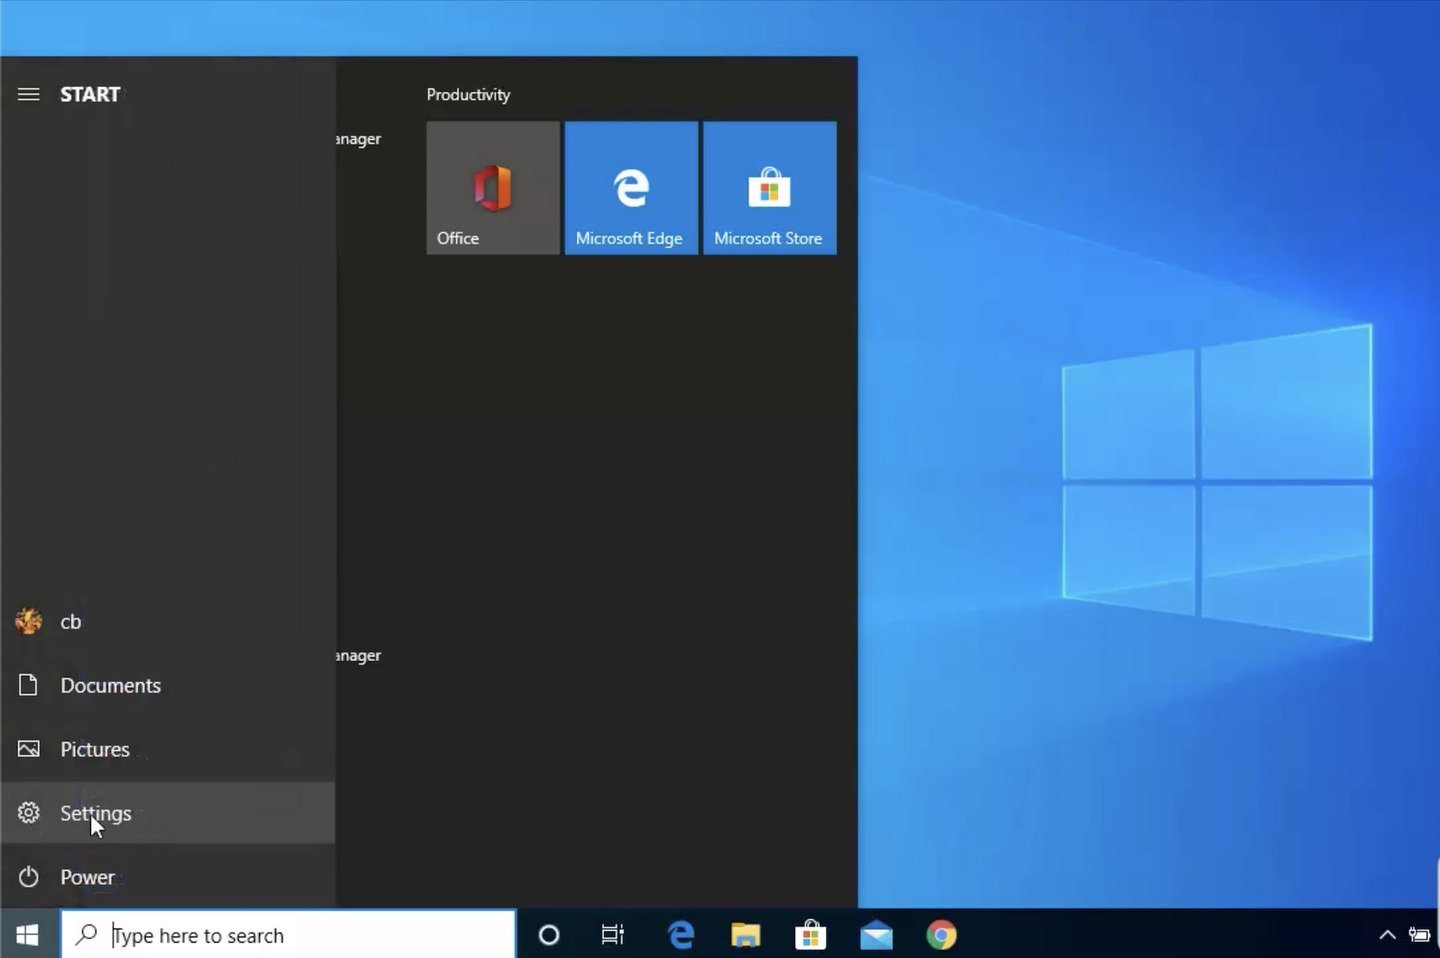
Источник: YouTube-канал Jake Gardner / Интерфейс Windows 10
- Слева внизу найдите вкладку «Для разработчиков» (For developers);
- В появившемся окне выберите «Режим разработчика» (Developer mode).

Источник: YouTube-канал Jake Gardner / Интерфейс Windows 10
- Подтвердите активацию, когда во всплывающем окне появится запрос «Использовать возможности разработчика» (Use developer features);
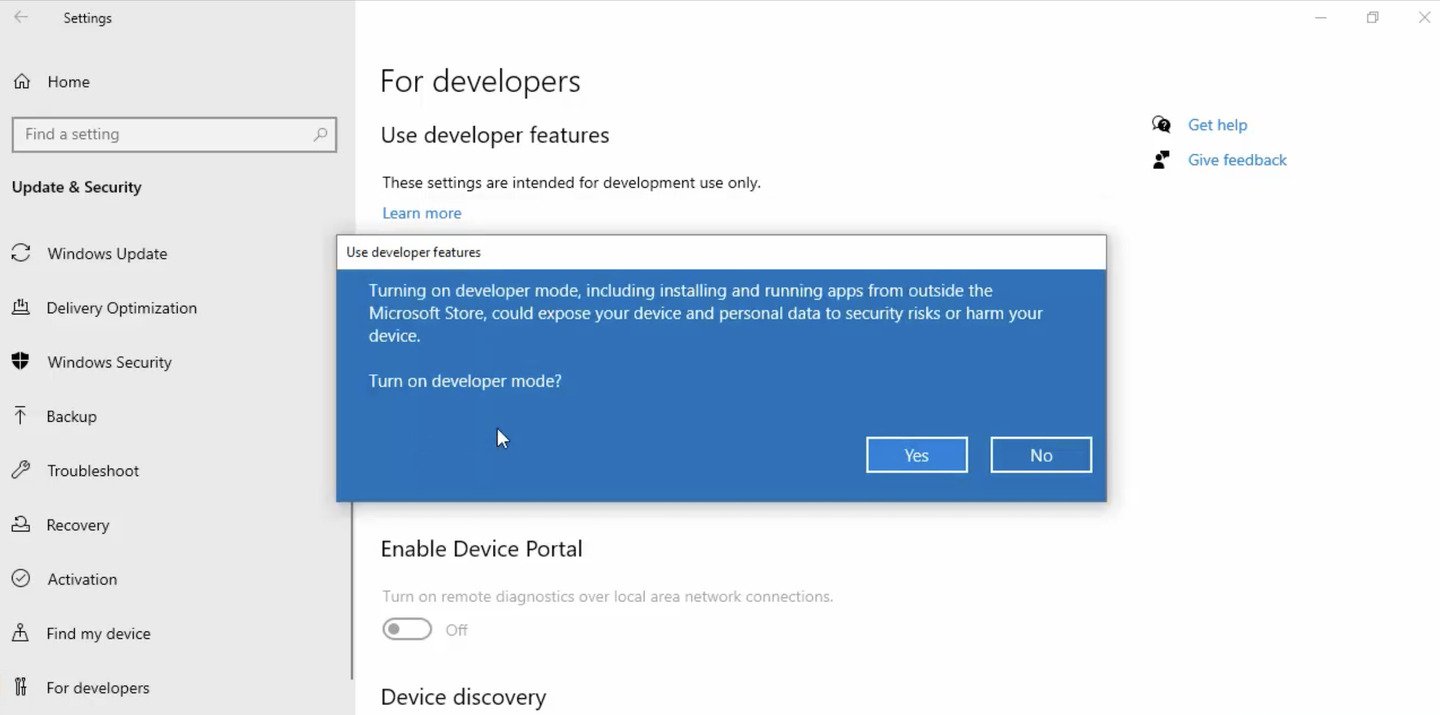
Источник: YouTube-канал Jake Gardner / Интерфейс Windows 10
- Теперь в настройках появится дополнительный параметр «Режим разработчика» (Developer mode). Активируйте его, поставив галочку напротив.
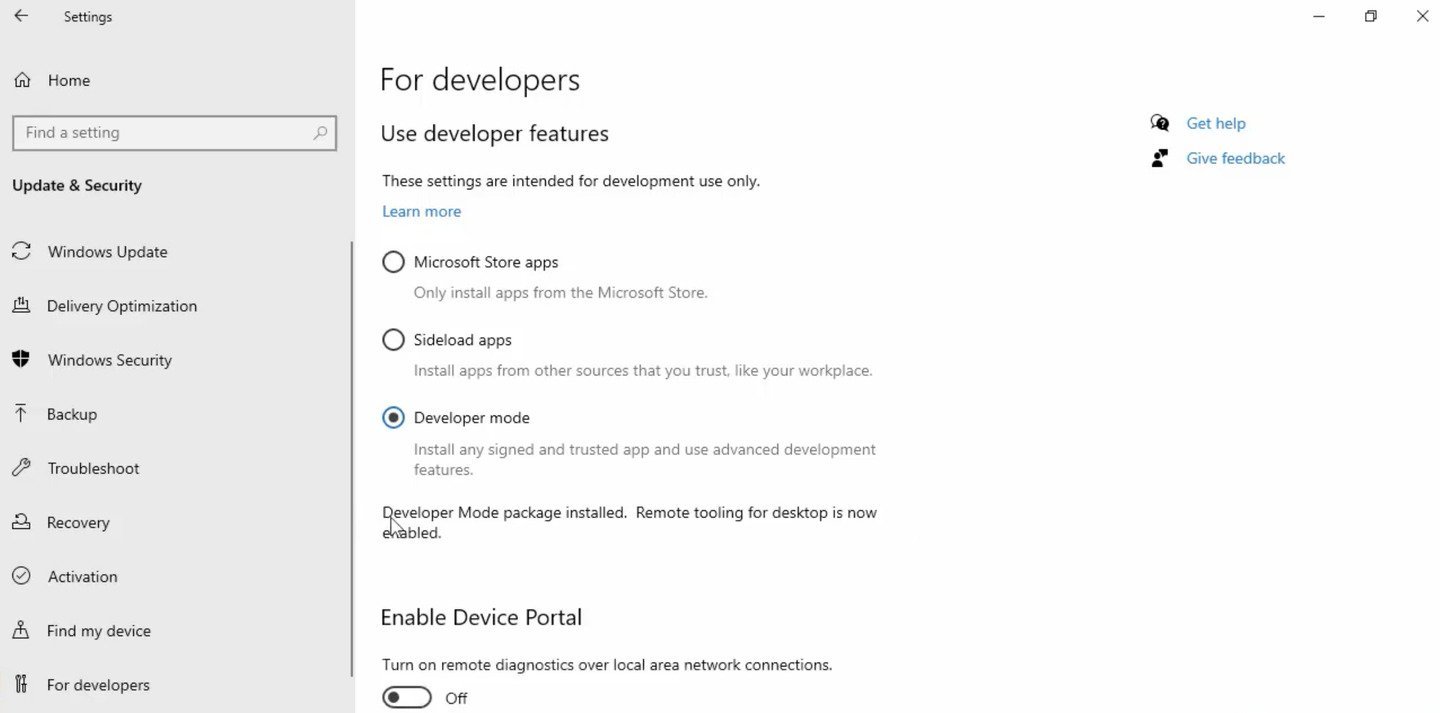
Источник: YouTube-канал Jake Gardner / Интерфейс Windows 10
Через «Редактор локальной групповой политики»
Второй способ активации «Режима разработчика» в Windows 10 — через «Редактор локальной групповой политики» (Local Group Policy Editor).
Порядок действий:
- Нажмите Win + R, чтобы открыть окно «Выполнить»;
- Введите команду gpedit.msc и нажмите Enter.
Источник: YouTube-канал QuickFix@IT / Интерфейс Windows 10
Теперь нужно выбрать раздел «Развертывание пакета приложений» (App Pachage Deployment). Для этого пройдите по пути:
- «Конфигурация компьютера» (Computer Configuration) → «Административные шаблоны» (Administrative Templates) → «Компоненты Windows» (Windows Components).
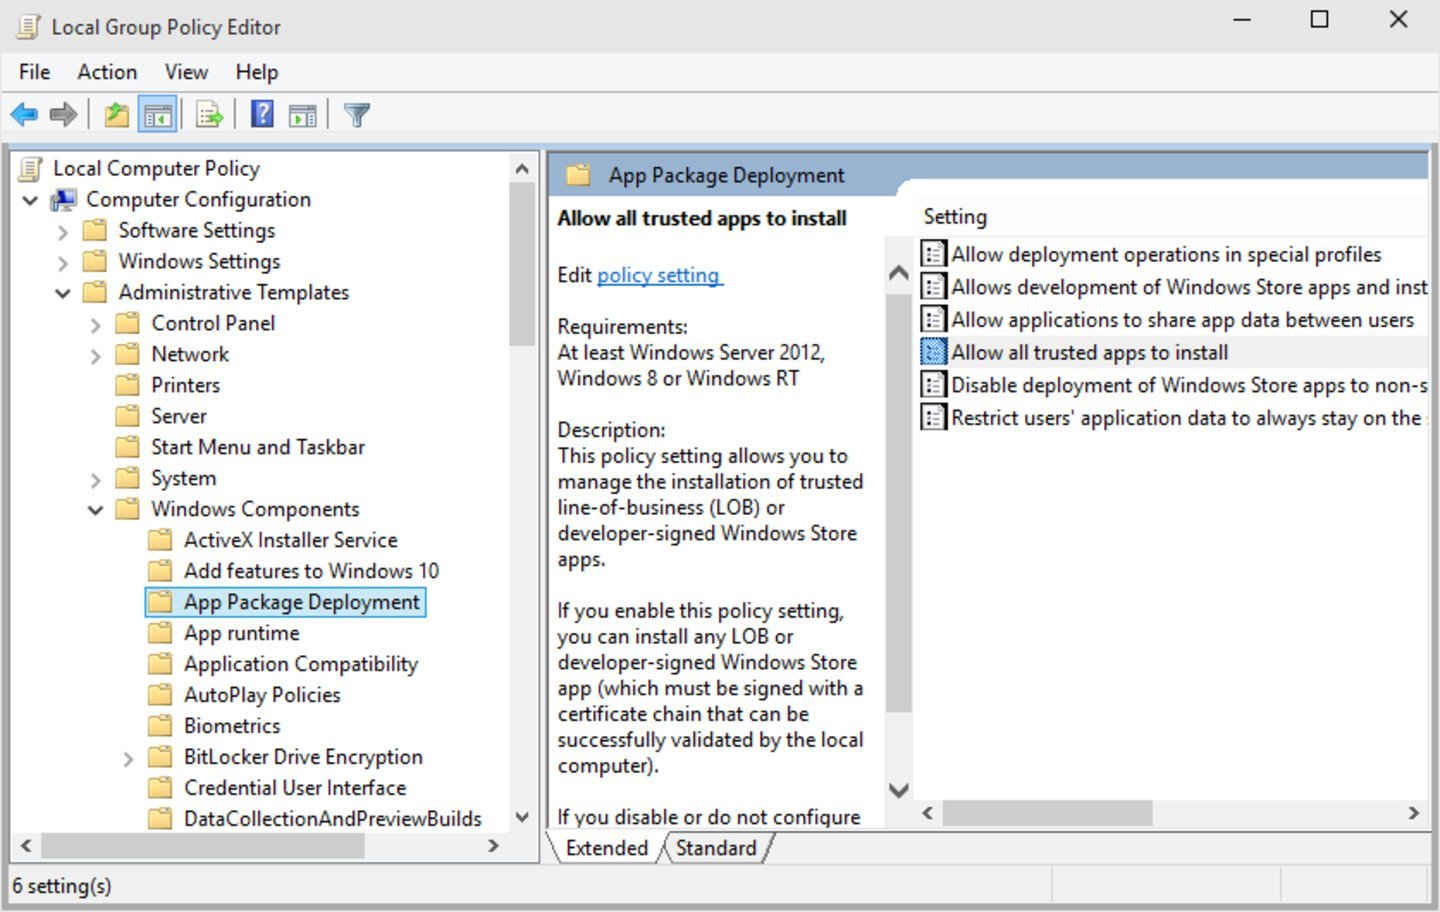
Источник: YouTube-канал QuickFix@IT / Интерфейс Windows 10
Следом необходимо активировать параметры:
- «Разрешить разработку приложений Магазина Windows и их установку из интегрированной среды разработки» (Allow development of Windows Store apps and installing them from an integrated development environment);
- «Разрешить установку всех доверенных приложений» (Allow all trusted apps to install).
Источник: YouTube-канал Jake Gardner / Интерфейс Windows 10
- Активация производится щелчком мыши по параметру с последующей функцией «Включено» (Enable);
- Нажмите «Применить» (Apply) для обоих параметров и перезагрузите компьютер.
Источник: YouTube-канал Jake Gardner / Интерфейс Windows 10
Важно — данный способ подходит для версий Windows 10 Corporate и Professional.
Через «Редактор реестра»
Этот способ подойдет для всех версий Windows 10.
Порядок действий:
- Нажмите Win + R, чтобы открыть окно «Выполнить»;
- Введите regedit и нажмите Enter;
- Подтвердите запрос на внесение изменений.
Источник: YouTube-канал Jake Gardner / Интерфейс Windows 10
В редакторе реестра перейдите по следующему пути:
- HKEY_LOCAL_MACHINE\SOFTWARE\Microsoft\Windows\CurrentVersion\AppModelUnlock
Источник: YouTube-канал QuickFix@IT / Интерфейс Windows 10
Если раздел AppModelUnlock отсутствует, его нужно создать вручную. Для этого:
- Щелкните правой кнопкой мыши на CurrentVersion;
- Выберите «Создать раздел» (Create a new key) и назовите его «AppModelUnlock».
Источник: YouTube-канал QuickFix@IT / Интерфейс Windows 10
В разделе AppModelUnlock создайте три параметра и назовите их:
- DWORD (32-битное значение);
- AllowAllTrustedApps;
- AllowDevelopmentWithoutDevLicense.
Источник: YouTube-канал QuickFix@IT / Интерфейс Windows 10
Для этого:
- Щелкните правой кнопкой мыши в правой части окна и выберите «Создать» → «Название параметра»;
- Дважды щелкните на него и установите значение «1».
Новые настройки вступят в силу после закрытия реестра и перезагрузки ПК.
Как отключить «Режим разработчика»
Отключение через «Параметры»
Чтобы отключить «Режим разработчика» в Windows 10 выполните следующие шаги:
- Откройте «Параметры» (Settings) через «Пуск» или сочетанием клавиш Win + I;
- Перейдите в раздел «Обновление и безопасность» (Update & Security).
Источник: YouTube-канал QuickHelper / Интерфейс Windows 10
- Выберите «Для разработчиков» (For developers) в левой части окна;
- Снимите галочку с пункта «Режим разработчика» (Developer mode), указав один из двух оставшихся режимов.
Источник: YouTube-канал QuickHelper / Интерфейс Windows 10
Через «Редактор групповой политики»
Для активации «Редактора локальной групповой политики» (Local Group Policy Editor) выполните следующие действия:
- Нажмите Win + R, чтобы открыть окно «Выполнить»;
- Введите команду gpedit.msc и нажмите Enter.
Источник: YouTube-канал QuickFix@IT / Интерфейс Windows 10
Следом перейдите в раздел «Развертывание пакета приложений» (п.2.2) и найдите два параметра:
- «Разрешить разработку приложений Магазина Windows и их установку из интегрированной среды разработки» (Allow development of Windows Store apps and installing them from an integrated development environment);
- «Разрешить установку всех доверенных приложений» (Allow all trusted apps to install).
Источник: YouTube-канал QuickHelper / Интерфейс Windows 10
Деактивация параметров осуществляется щелчком по параметру «Выключено» (Disable);
Через «Редактор реестра»
Необходимо открыть «Редактор реестра» и перейти к папке:
- HKEY_LOCAL_MACHINE\SOFTWARE\Microsoft\Windows\CurrentVersion\AppModelUnlock
Источник: YouTube-канал QuickFix@IT / Интерфейс Windows 10
- Теперь удалите параметр AllowDevelopmentWithoutDevLicense или измените его значение на «0»;
- Перезагрузите компьютер.
Заглавное фото: MS.Codes
Читайте также:
- Как настроить и отключить контроль учетных записей в Windows 10
- Как включить и настроить родительский контроль в Windows 10
- Как исправить ошибку 0x80070005 в Windows 10 и 11
- Как включить и настроить DLNA-сервер на Windows 10
- Windows 10 LTSB — что это такое и где скачать
Enable or Disable Developer Mode in Windows 10: Earlier to develop, install or test apps in Windows, you require to purchase developer license from Microsoft which needed renewing every 30 or 90 days but since the introduction of Windows 10, there is no longer need for the developer license. You just need to enable developer mode and you can start installing or testing your apps inside Windows 10. Developers mode helps you test your apps for bugs and further improvements before you submit it to the Windows App Store.

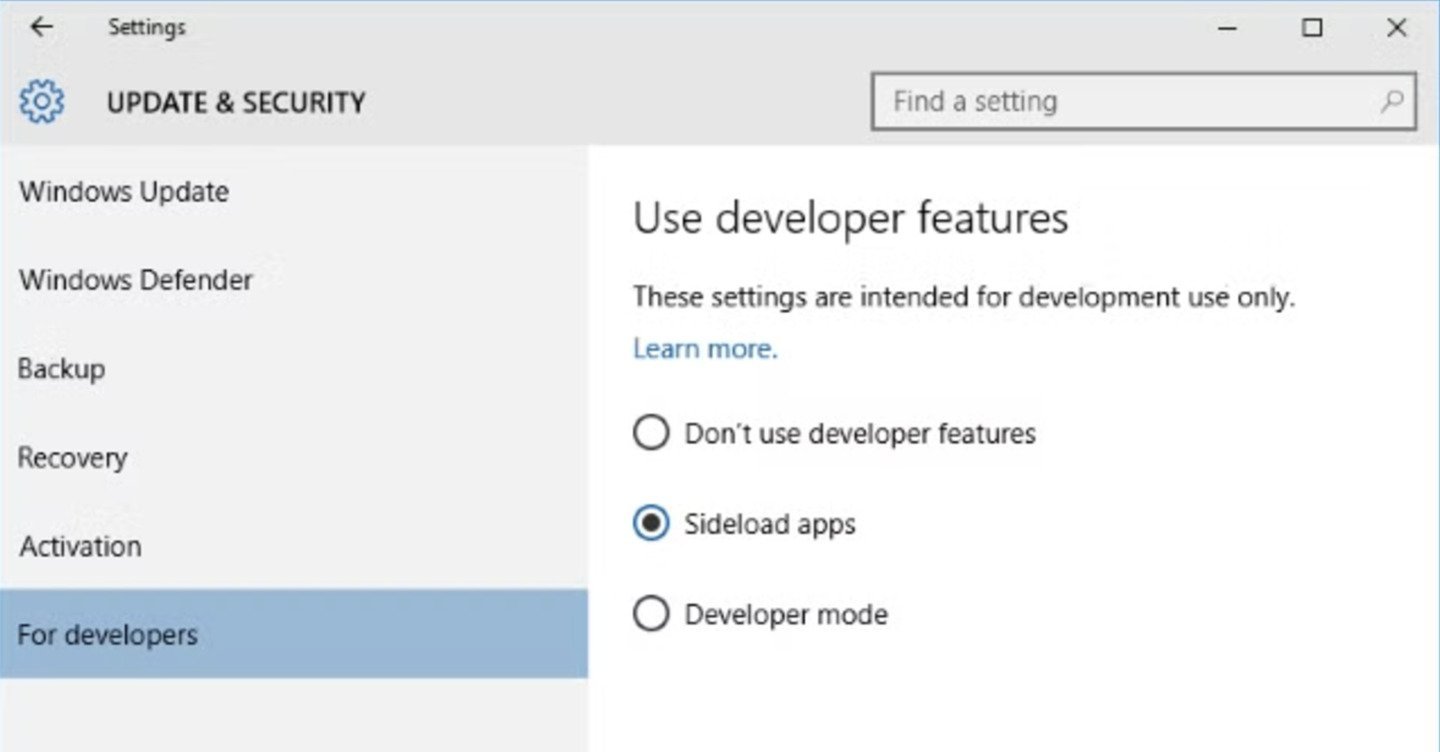
You could always choose the level of security of your device using these settings:
Windows Store apps: This is the default settings which only let you install apps from the Window Store
Sideload apps: This means installing an app that has not been certified by the Windows Store, for example, an app that is internal to your company only.
Developer mode: Lets you test, debug, install your apps on your device and you can also Sideload apps.
So if you’re a developer or you need to test a 3rd party app on your device then you need to enable Developer mode in Windows 10. But some people also need to disable this feature as not everybody uses developer mode, so without wasting any time let’s see How to Enable or Disable Developer Mode in Windows 10 with the help of the below-listed tutorial.
Table of Contents
Make sure to create a restore point just in case something goes wrong.
Method 1: Enable or Disable Developer Mode in Windows 10 Settings
1.Press Windows Key + I to open Settings then click on Update & security icon.
2.From the left-hand menu make sure to select “For developer“.
3.Now according to your choice select either Windows Store apps, Sideload apps, or Developer mode.

4.If you selected Sideload apps or Developer mode then click on Yes to continue.

5.Once finished, close Settings and reboot your PC.
Method 2: Enable or Disable Developer Mode in Registry Editor
1.Press Windows Key + R then type regedit and hit Enter to open Registry Editor.
2.Navigate to the following registry key:
HKEY_LOCAL_MACHINE\SOFTWARE\Microsoft\Windows\CurrentVersion\AppModelUnlock
3.Right-click on AppModelUnlock then select New > DWORD (32-bit) Value.

4.Name this newly created DWORD as AllowAllTrustedApps and hit Enter.
5.Similarly, create a new DWORD with the name AllowDevelopmentWithoutDevLicense.

6.Now depending on your choice set the value of the above registry keys as:
Windows Store apps – Set the value of AllowAllTrustedApps and AllowDevelopmentWithoutDevLicense to 0
Sideload apps – Set the value of AllowAllTrustedApps to 1 and AllowDevelopmentWithoutDevLicense to 0
Developer mode – Set the value of AllowAllTrustedApps and AllowDevelopmentWithoutDevLicense to 1

7.Once finished, close everything and restart your PC.
Method 3: Enable or Disable Developer Mode in Group Policy Editor
1.Press Windows Key + R then type gpedit.msc and hit Enter.
2.Navigate to the following path:
Computer Configuration > Administrative Templates > Windows Components > App Package Deployment
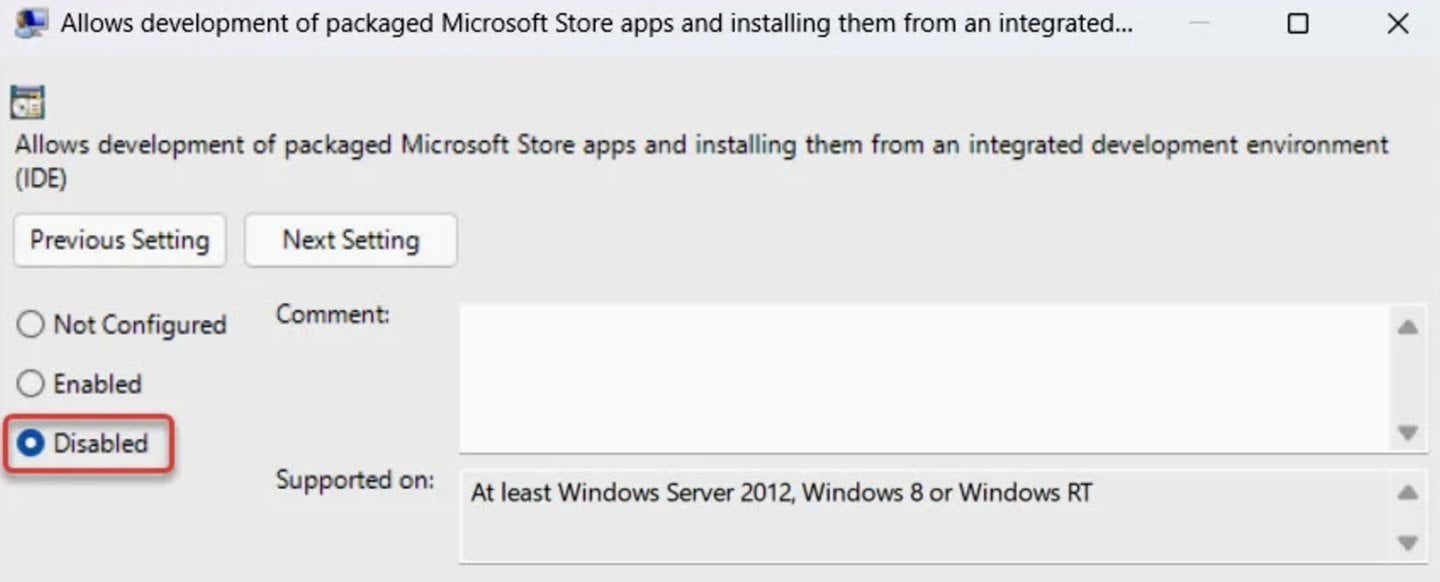
3.Make sure to select App Package Deployment then in right window pane double-click on “Allow all trusted apps to install” and “Allows development of Windows Store apps and installing them from an integrated development environment (IDE)” policy.

4.To Enable Developer Mode in Windows 10, set the above policies to Enabled and then click Apply followed by OK.

Note: If in future you need to disable Developer Mode in Windows 10, then simply set the above policies to Disabled.
5.Reboot your PC to save changes.
Recommended:
- Allow or Prevent Windows 10 Themes to Change Desktop Icons
- Enable Verbose or Highly Detailed Status Messages in Windows 10
- Prevent User From Changing Desktop Icons in Windows 10
- Disable Desktop Wallpaper JPEG Quality Reduction in Windows 10
That’s it you have successfully learned How to Enable or Disable Developer Mode in Windows 10 but if you still have any questions regarding this tutorial then feel free to ask them in the comment’s section.
Download Windows Speedup Tool to fix errors and make PC run faster
Windows OS has introduced a new way for development. You now no longer require a Developer License to develop, install or test your apps. You can just enable your Windows device once for these tasks and you are all set to go. In this post, we will see how to turn on or turn off Developer Mode in Windows 11 and Windows 10.
The Developer Mode in Windows 11 is not new. It existed in Windows 10 too. However, it now resides under Privacy & Security settings, unlike Update and Security settings, seen in Windows 10.
- Open Windows 11 Settings.
- Scroll down to Privacy & security.
- Switch to the Security Section.
- Expand For Developers menu.
- Locate Developer Mode heading.
- Toggle the switch to On position.
So, in order to deploy and debug your widget application, you will need to enable Windows developer mode. Do it, if you haven’t already.
If you have Windows 11 installed and running on your system, open Settings.
Scroll down to the Privacy & Security setting under the Left navigation pane.
Switch to the Security section on the right.
Expand For Developers menu by clicking the side arrow.
Locate the Developer Mode entry.

When found, set ‘Install apps from any source, including loose files’ option to On.
When prompted with the warning message, read it.
If you don’t mind bearing the risks, Turn On Developer Mode by hitting the Yes button.
That’s how easy it is to enable the Developer Mode in Windows 11.
Turn on or off Developer Mode in Windows 10
Open the Settings app > Update & Security. Click on For developers on the left side. Now select Developer mode
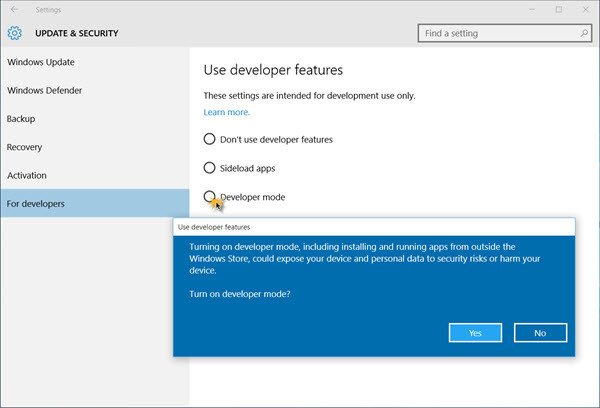
You will be asked for confirmation – Turn on developer mode? Click Yes, and the developer mode will be enabled.
NOTE: You can also use the Group Policy and the Registry Editor to achieve the same in Windows 11 and Windows 10.
Using GPEDIT
Open Group Policy Editor and navigate to the following setting:
Local Computer Policy > Computer Configuration > Administrative Templates > Windows Components > App Package Deployment
You will need to edit and Enable the following two policies:
- Allow all trusted apps to install
- Allows the development of Windows Store apps and installing them from an integrated development environment (IDE).
Using REGEDIT
Open Registry Editor and navigate to the following keys:
HKLM\SOFTWARE\Microsoft\Windows\CurrentVersion\AppModelUnlock\AllowAllTrustedApps
HKLM\SOFTWARE\Microsoft\Windows\CurrentVersion\AppModelUnlock\AllowDevelopmentWithoutDevLicense
Now set the value of both the DWORDs to 1.
If you wish to verify whether the developer mode has been enabled, run PowerShell in admin mode, type the following and hit Enter:
show-windowsdeveloperlicenseregistration
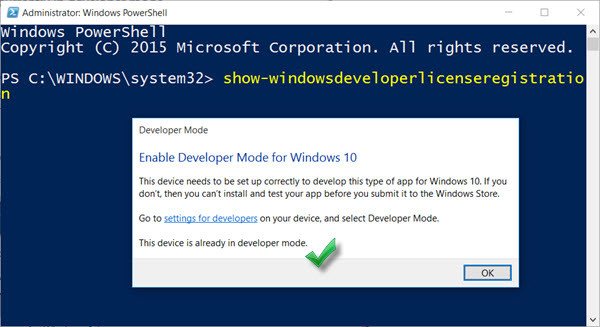
You will see the confirmation in the last line – This device is already in developer mode. You will now be able to also sideload applications.
Enjoy developing for Windows 11/10!
What is Microsoft Developer Mode?
Developer Mode is a secret set of options that allow developers to deploy apps from Visual Studio and debug them on the device. Apart from this, it also provides some additional user experience optimizations within certain common Windows features. You do not need a developer license to enable this mode.
Is Developer Mode Safe in Windows 10?
Yes! The mode is intended for developers who want to have access to different sets of tools to test Microsoft Store applications.
Read: Best websites to learn Coding online for free.
Anand Khanse is the Admin of TheWindowsClub.com, a 10-year Microsoft MVP (2006-16) & a Windows Insider MVP (2016-2022). Please read the entire post & the comments first, create a System Restore Point before making any changes to your system & be careful about any 3rd-party offers while installing freeware.