
Песочница в Windows 11 — дополнительный компонент системы, который позволяет запускать программы в изолированной от основной ОС среде, что позволяет обезопасить себя при запуске каких-либо сомнительных программ. В отличие от полноценной виртуальной машины, например, Hyper-V, песочница требует меньше ресурсов для работы, а её состояние не сохраняется при следующем запуске.
В этой инструкции подробно о том, как включить Песочницу в Windows 11 и доступных настройках.
Как включить Песочницу в Windows 11
Прежде чем приступить, о некоторых необходимых условиях для того, чтобы была возможность запустить и использовать функцию «Песочница»:
- На компьютере должна быть установлена редакция Windows 11 Pro (Профессиональная), Enterprise (Корпоративная) или Education (Для образования). Для Домашней версии вы можете использовать альтернативную песочницу Sandboxie или использовать виртуальную машину VirtualBox. Или, если вам требуется именно Песочница Windows — можно применить скрипт, который будет приведён далее, но работоспособность установленной таким образом песочницы не гарантирована.
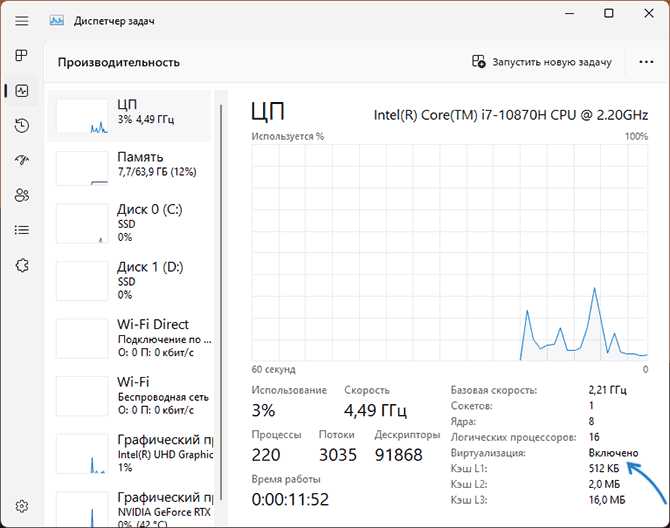
- В БИОС должна быть включена виртуализация. Проверить текущий статус виртуализации можно в диспетчере задач в разделе «Производительность» — «ЦП», как видно на изображении ниже. Здесь может пригодиться инструкция Как включить виртуализацию на ПК или ноутбуке.

- Для работы Песочницы требуется не менее 4 Гб оперативной памяти (рекомендуется 8), 1 Гб места на диске, минимум 2 ядра процессора.
Если все требования выполняются, переходим к включению Песочницы. Для этого есть несколько способов.
Включение Песочницы в «Программы и компоненты»
Первый и самый простой способ включить «Песочницу» — использовать интерфейс установки дополнительных компонентов Windows 11:
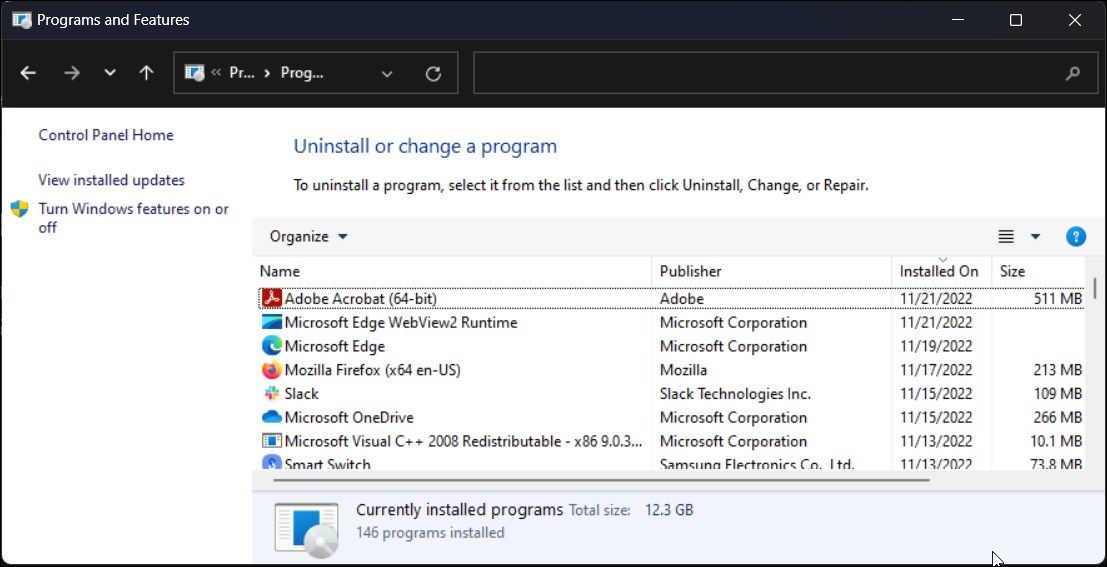
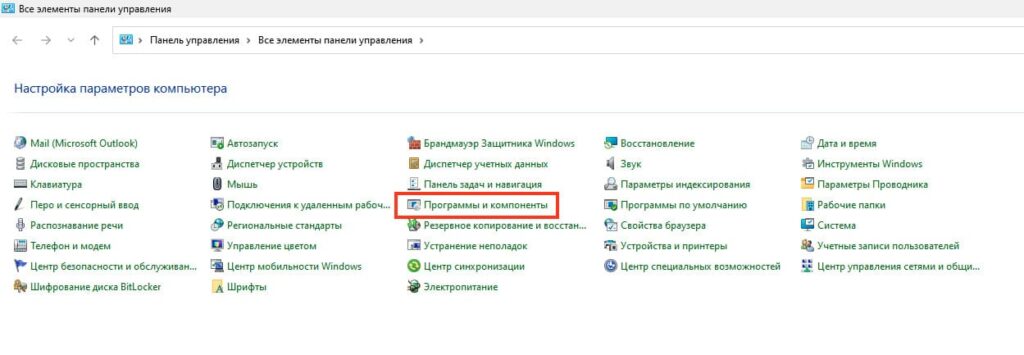
- Откройте Панель управления, а в ней — пункт «Программы и компоненты», либо нажмите клавиши Win+R на клавиатуре, введите appwiz.cpl и нажмите Enter.
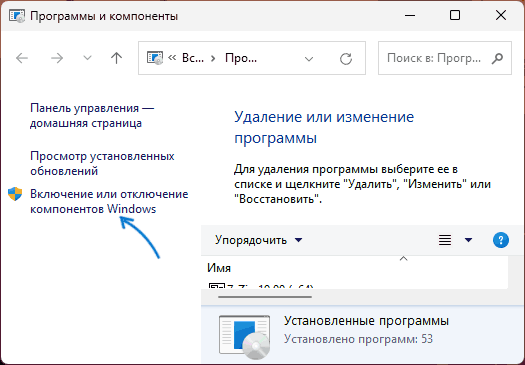
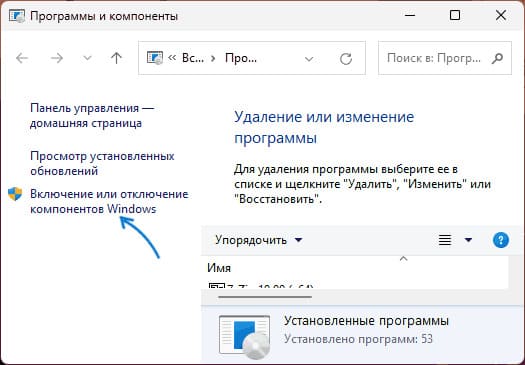
- Нажмите «Включение или отключение компонентов Windows» в левой панели.

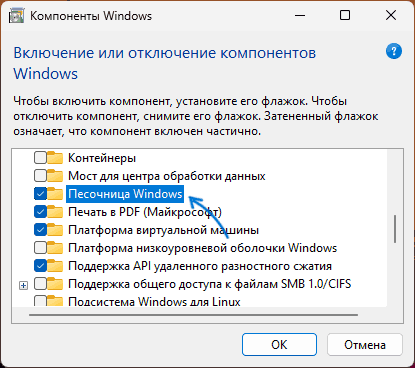
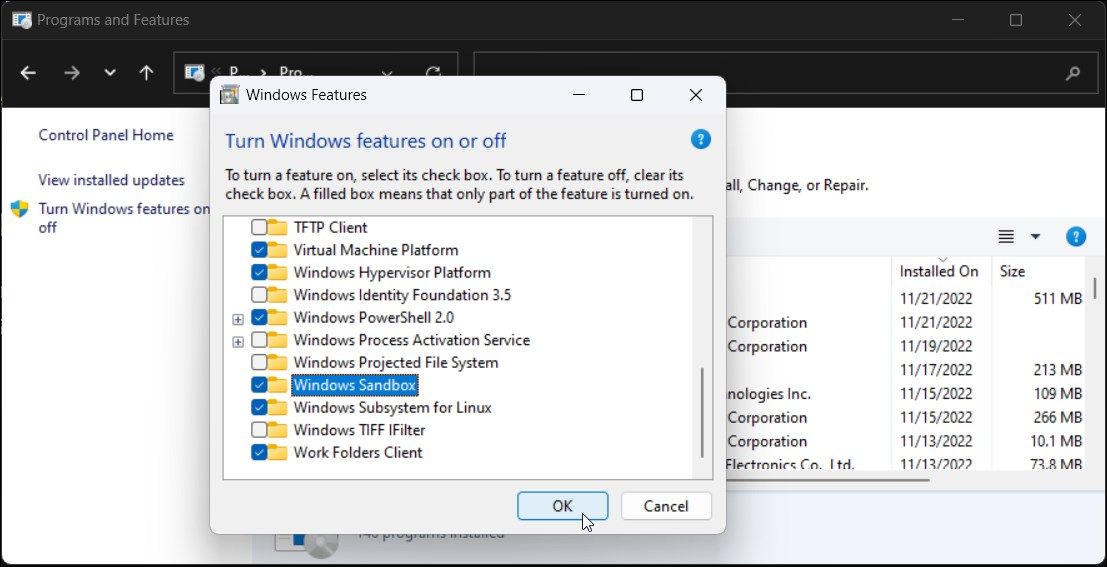
- Отметьте пункт «Песочница Windows» в списке и нажмите «Ок».

- Дождитесь завершения установки Песочницы и подтвердите перезапуск компьютера, не забыв сохранить текущую работу, если на компьютере выполнялись какие-то ещё действия.
- Примечание: можно встретить информацию, что для работы Песочницы требуется также включить компоненты Hyper-V и «Платформа виртуальной машины». Это не так, Песочница будет исправно работать и без них.

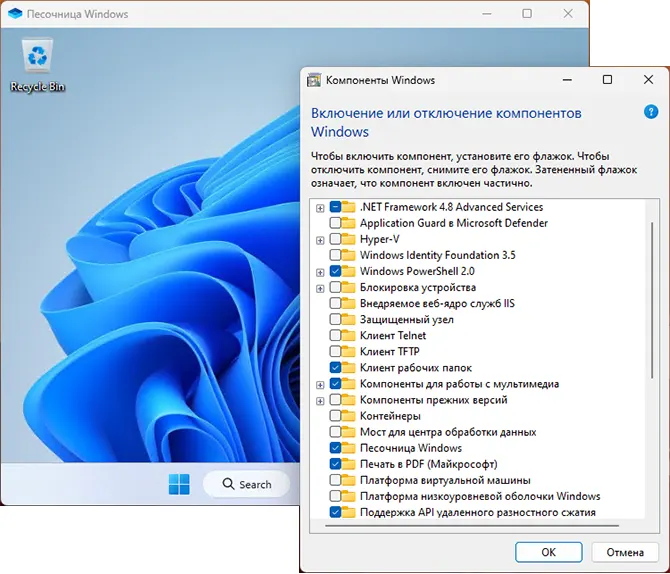
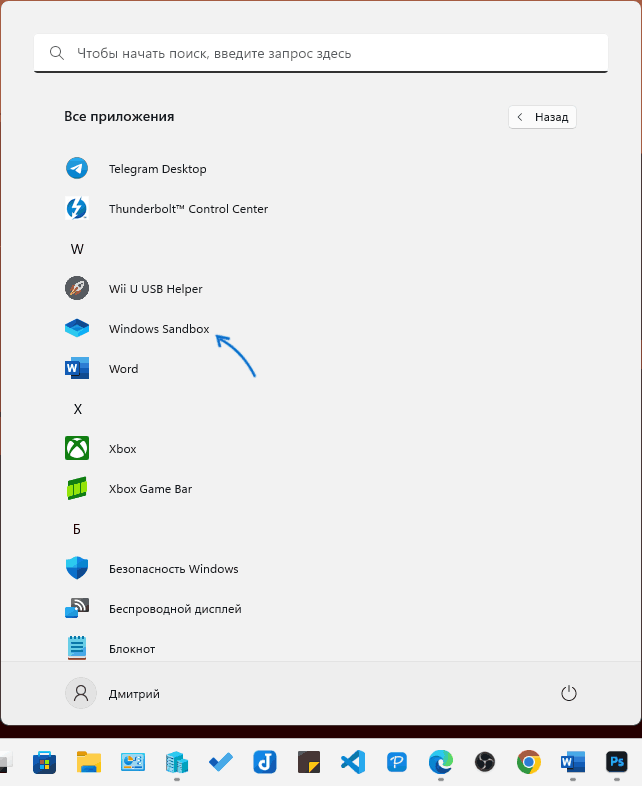
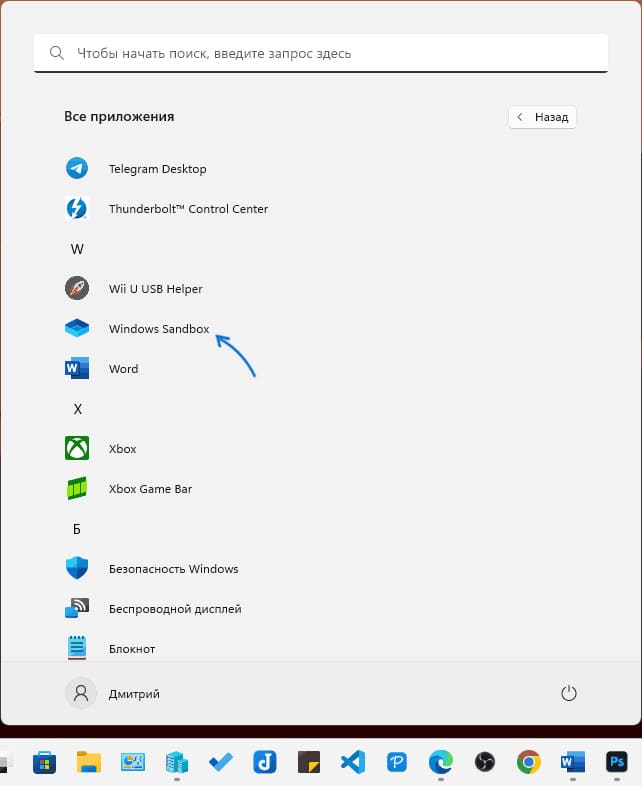
После перезагрузки компьютера песочница Windows (Windows Sandbox) будет доступна в списке «Все приложения» меню Пуск.
С помощью командной строки или Windows PowerShell (Терминала Windows)
Ещё одна возможность включить Песочницу Windows 11 — использовать команду командной строки или Windows PowerShell).
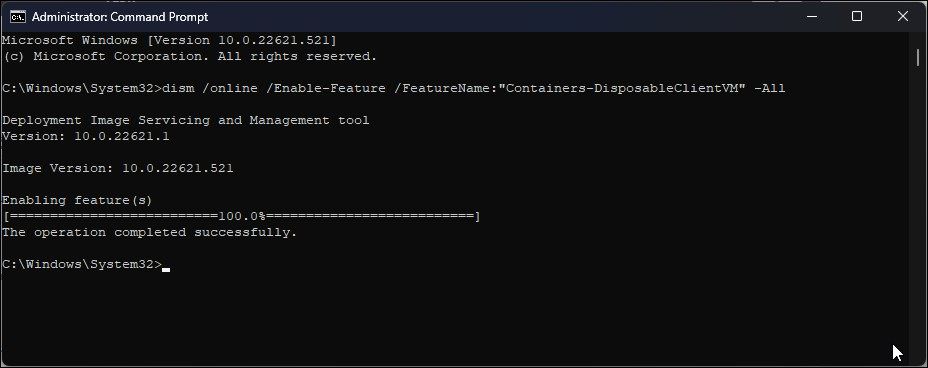
В командной строке достаточно использовать команду:
dism /online /Enable-Feature /FeatureName:"Containers-DisposableClientVM" -All
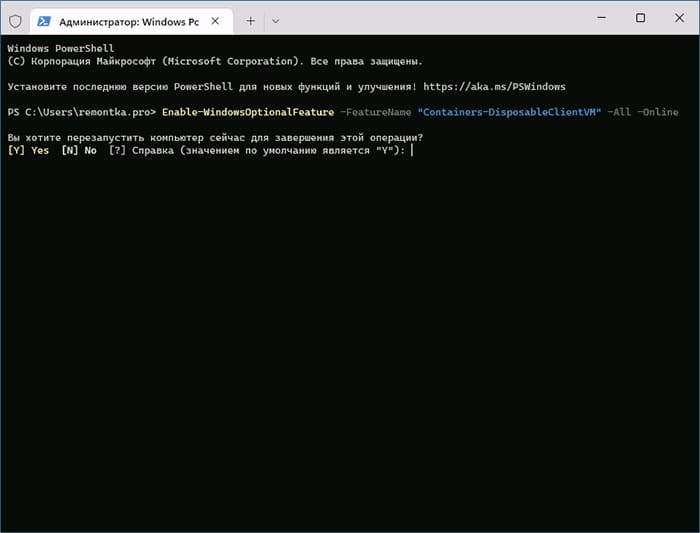
А в PowerShell или Терминале Windows, который удобно запустить из контекстного меню кнопки «Пуск»:
Enable-WindowsOptionalFeature -FeatureName "Containers-DisposableClientVM" -All -Online
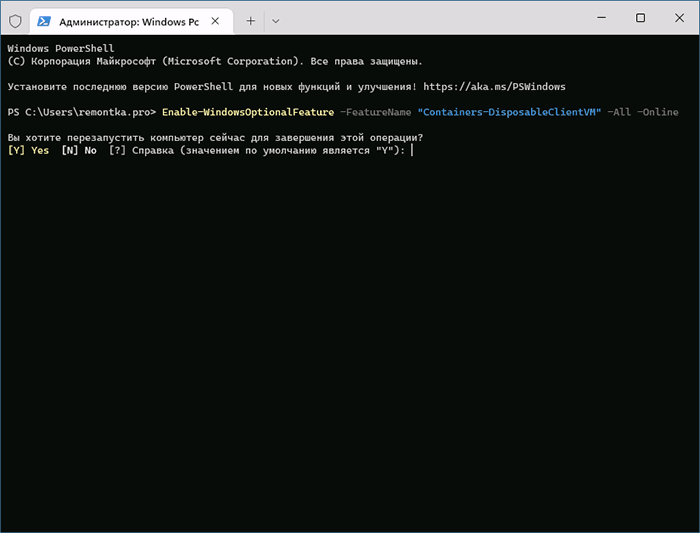
В обоих случаях консоль следует запускать от имени Администратора, а после выполнения установки — перезагрузить компьютер.
Включение Песочницы в Windows 11 Home
Несмотря на то, что в Windows 11 Домашняя компонент «Песочница» не предусмотрен, вы можете включить его, используя следующий скрипт. Важно: гарантий, что после установки Песочница будет исправно работать нет, отсутствие проблем с системой также не гарантируется.
Создайте bat-файл с указанным содержимым, запустите его от имени Администратора и подтвердите перезагрузку после установки всех компонентов.
@echo off

echo Checking for permissions
>nul 2>&1 "%SYSTEMROOT%\system32\cacls.exe" "%SYSTEMROOT%\system32\config\system"

echo Permission check result: %errorlevel%

REM --> If error flag set, we do not have admin.
if '%errorlevel%' NEQ '0' (
echo Requesting administrative privileges...
goto UACPrompt
) else ( goto gotAdmin )

:UACPrompt
echo Set UAC = CreateObject^("Shell.Application"^) > "%temp%\getadmin.vbs"
echo UAC.ShellExecute "%~s0", "", "", "runas", 1 >> "%temp%\getadmin.vbs"

echo Running created temporary "%temp%\getadmin.vbs"
timeout /T 2
"%temp%\getadmin.vbs"
exit /B

:gotAdmin
if exist "%temp%\getadmin.vbs" ( del "%temp%\getadmin.vbs" )
pushd "%CD%"
CD /D "%~dp0"

echo Batch was successfully started with admin privileges
echo .
cls
GOTO:menu
:menu
Title Sandbox Installer
echo Select Action
echo 1 Install
echo 2 Uninstall
echo 3 Exit
set /p uni= Enter your option:
if %uni% ==1 goto :in
if %uni% ==2 goto :un
if %uni% ==3 goto :ex

:in
cls
Title Install Sandbox

pushd "%~dp0"

dir /b %SystemRoot%\servicing\Packages\*Containers*.mum >sandbox.txt

for /f %%i in ('findstr /i . sandbox.txt 2^>nul') do dism /online /norestart /add-package:"%SystemRoot%\servicing\Packages\%%i"

del sandbox.txt

Dism /online /enable-feature /featurename:Containers-DisposableClientVM /LimitAccess /ALL /NoRestart

goto :remenu

:un
cls
Title Uninstall Sandbox

pushd "%~dp0"

Dism /online /disable-feature /featurename:Containers-DisposableClientVM /NoRestart

dir /b %SystemRoot%\servicing\Packages\*Containers*.mum >sandbox.txt

for /f %%i in ('findstr /i . sandbox.txt 2^>nul') do dism /online /norestart /remove-package:"%SystemRoot%\servicing\Packages\%%i"

del sandbox.txt

goto :remenu

:remenu
cls
echo Restart computer?
echo 1 Yes
echo 2 No
set /p uni= Input 1 or 2:
if %uni% ==1 goto :re
if %uni% ==2 goto :ex

:re
shutdown /r /t 0 /f
goto :ex

:ex
exit
Использование Песочницы
Для запуска Песочницы Windows 11 достаточно найти пункт «Windows Sandbox» (по какой-то причине название не переведено на русский язык) в меню Пуск или с помощью поиска на панели задач и открыть его.
Альтернативный вариант — нажать клавиши Win+R на клавиатуре, ввести windowssandbox и нажать Enter. Сам исполняемый файл Песочницы находится в
C:\Windows\System32\WindowsSandbox.exe
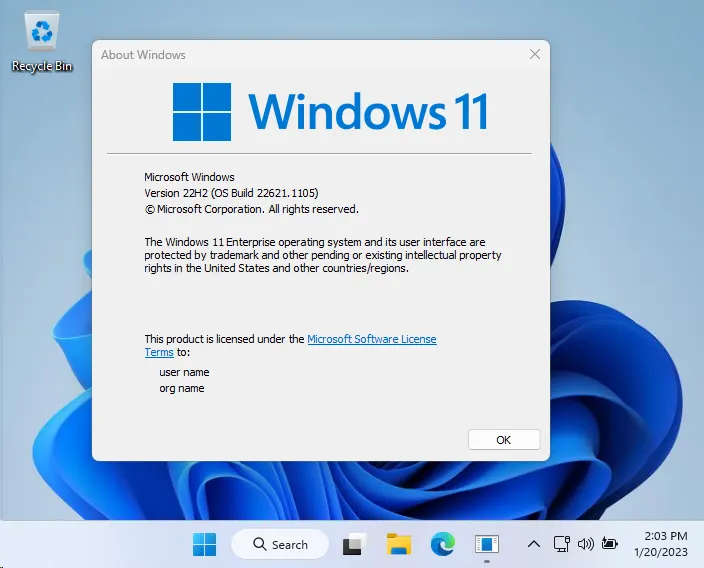
В результате будет запущено окно с Windows 11, которое и представляет собой изолированную среду, называемую «Песочницей». К сожалению, с английским языком интерфейса даже если у вас установлена русскоязычная Windows 11.
Основная информация, которая может пригодиться при использовании Песочницы:
- Для передачи файла из основной системы в Песочницу просто скопируйте его и вставьте уже в Песочнице. Это работает и в обратном направлении.
- По умолчанию в Песочнице Windows 11 есть доступ в Интернет и установлен браузер Microsoft Edge, который можно использовать для скачивания программ на проверку.
- Вы можете установить русский язык ввода в Песочнице в Параметры (Settings) — Time & Language — Language and Region. Но после закрытия песочницы этот язык исчезнет, как и всё остальное, что вы в ней делали.
- Размер окна Песочницы свободно меняется, разрешение «внутреннего экрана» будет изменено соответствующим образом.
- Для создания скриншотов внутри Песочницы можно использовать те же методы, что и в основной системе (Способы сделать скриншот Windows 11).
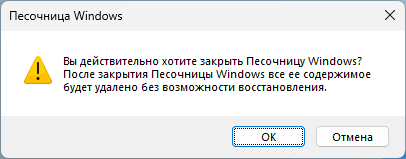
И ещё раз напомню: всё то, что вы делали в Песочнице на сохраняется после выхода из неё. Об этом вас будут уведомлять каждый раз при закрытии окна изолированного запуска приложений:
Возможности конфигурации
Песочница Windows поддерживает файлы конфигурации, представляющие собой XML-файл с расширением .wsb и поддерживающие следующие параметры (для большинства из которых применимы значения Enable, Disable и Default):
- vGPU — включение или отключение доступа к GPU (видеокарте).
- Networking — включение или отключение доступа к сети из Песочницы.
- MappedFolders — служит для общего доступа к папкам между основной системой и песочнице, есть возможность включить доступ только для чтения.
- LogonCommand — команда, выполняемая при входе в Песочницу.
- AudioInput — включение или отключение ввода аудио.
- VideoInput — то же самое для ввода видео.
- ProtectedClient — включает дополнительные функции защиты для сеанса подключения к Песочнице.
- PrinterRedirection — включение перенаправления принтера.
- ClipboardRedirection — перенаправление буфера обмена.
- MemoryInMB — размер оперативной памяти в мегабайтах, которые может использовать песочница.
Более подробно можно прочитать в справке на официальном сайте Майкрософт.
Пример готового файла конфигурации:
<Configuration>
 <VGpu>Disable</VGpu>
 <Networking>Disable</Networking>
 <MappedFolders>
  <MappedFolder>
   <HostFolder>C:\Users\remontka\Downloads</HostFolder>
   <SandboxFolder>C:\Users\WDAGUtilityAccount\Downloads</SandboxFolder>
   <ReadOnly>true</ReadOnly>
  </MappedFolder>
 </MappedFolders>
 <LogonCommand>
  <Command>notepad.exe C:\users\WDAGUtilityAccount\text.txt</Command>
 </LogonCommand>
</Configuration>
После написания файла конфигурации и сохранения его с расширением .wsb достаточно запустить этот файл, чтобы Песочница была запущена с заданными в нем параметрами. Вы можете создавать любое количество файлов конфигурации для быстрого запуска Песочницы с разным набором настроек.
Как удалить Песочницу
Если вам потребовалось удалить (выключить) Песочницу Windows 11, сделать это можно в Панели управления в разделе «Включение или отключение компонентов Windows», просто сняв отметку с соответствующего компонента.
Второй вариант: использовать одну из следующих команд, первая из которых предназначена для командной строки, вторая — для Windows PowerShell.
Dism /online /Disable-Feature /FeatureName:"Containers-DisposableClientVM"
Disable-WindowsOptionalFeature -FeatureName "Containers-DisposableClientVM" -Online
Microsoft Windows 11 features multiple virtualization solutions out of the box. While Hyper-V is an excellent tool, Windows Sandbox is an easy alternative to Windows virtual machines. It lets you run untrusted apps in an isolated environment without the hassle of setting up a complete virtualization tool.
Unfortunately, Windows Sandbox is not available on the Home edition of the OS. If you are running the Pro, Enterprise, and Education edition, here is how to enable and set up Windows Sandbox in Windows 11.
How to Set Up Windows Sandbox in Windows 11
Windows Sandbox is an optional feature, which means you’ll have to install it from the Optional features section. You can add and remove optional features from the Windows Features dialog. Alternatively, you can use PowerShell or Command Prompt for a swift installation of Windows Sandbox.
While the setup process is easier, your computer must meet some system requirements. Windows 11 Pro, Education, or Enterprise running computers with virtualization support are Windows Sandbox compatible. In most cases, if your system can run Windows Hyper-V, it should also run Windows Sandbox.
1. Enable Windows Sandbox Using the Windows Features Dialog
You can install Windows Sandbox using the Windows Features dialog. This dialog houses most of the optional Windows features that are ready to be installed on your PC.
Follow these steps to install Windows Sandbox using the Windows Features dialog:
- Press Win + R to open Run.
- Type appwiz.cpl and click OK to open Control Panel.
-
In the left panel, click on Turn Windows features on or off.

- In the Turn Windows features on or off dialog, scroll down and locate Windows Sandbox.
-
Check the Windows Sandbox option and click OK.
- Windows will search for the files and install the required dependencies to run Windows Sandbox scenarios. Once the changes are applied, close the Windows features dialog and restart your PC.
- After the restart, press Win + S to open Windows search.
- Type sandbox and click on Windows Sandbox from the search result to launch the virtualization tool.
3. Install Windows Sandbox Using PowerShell

You can use the Enable WindowsOptionalFeature command in PowerShell to install Windows Sandbox in Windows. This method is useful if you find the sandbox option greyed out or unable to install it from the Windows Feature dialog.
To install Windows Sandbox using PowerShell:
- Press Win + X to open the WinX menu.
- Click on Windows Terminal (Admin) to open the Windows Terminal with administrative privilege. Since PowerShell is assigned as the default profile upon launch, you can execute your PowerShell cmdlets straight away in Windows Terminal.
-
In the Windows Terminal window, copy and paste the following command and press Enter:
Enable-WindowsOptionalFeature -Online -FeatureName "Containers-DisposableClientVM" -All
- If no error occurs, Windows will install the required files to enable Windows Sandbox.
- Once done, press Y and hit Enter to restart your PC.
- After the restart, you can launch Windows Sandbox from Windows Search.
3. Install Windows SandBox Using Command Prompt
Deployment Image Servicing and Management (DISM) is a command-line utility that facilitates the installation of optional features using the Command Prompt. To install Windows Sandbox, you will need to use the Enable-Feature command in Command Prompt. Here’s how to do it.
- Press Win + R to open Run.
- Type cmd in the Run dialog. Press and hold Ctrl + Shift and click OK to open Command Prompt as administrator.
-
In the Command Prompt, type the following command and press Enter:
dism /online /Enable-Feature /FeatureName: "Containers-DisposableClientVM" -All - Wait for the process to complete. Once done, press Y and Enter to restart your PC.
How to Use Windows Sandbox
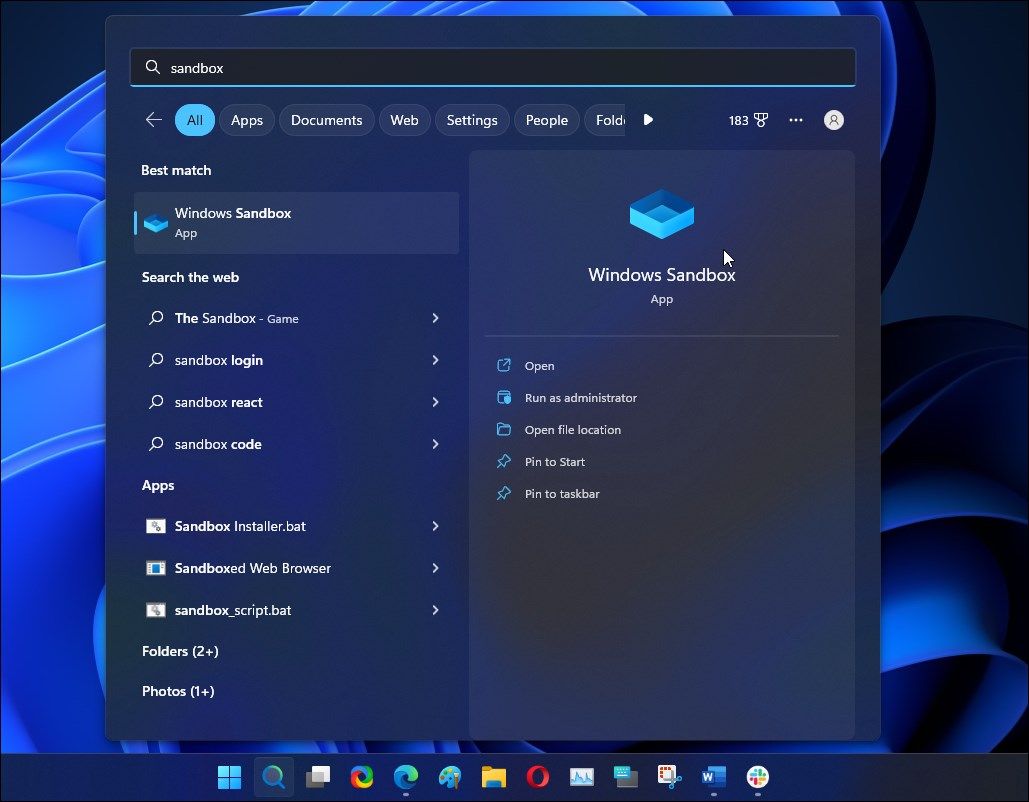
Now that you have Windows Sandbox installed, you can start using it to test untrusted apps in isolation. To launch the app, press Win + S to open Windows Search and type Windows Sandbox. Click on the app from the search result to open it.
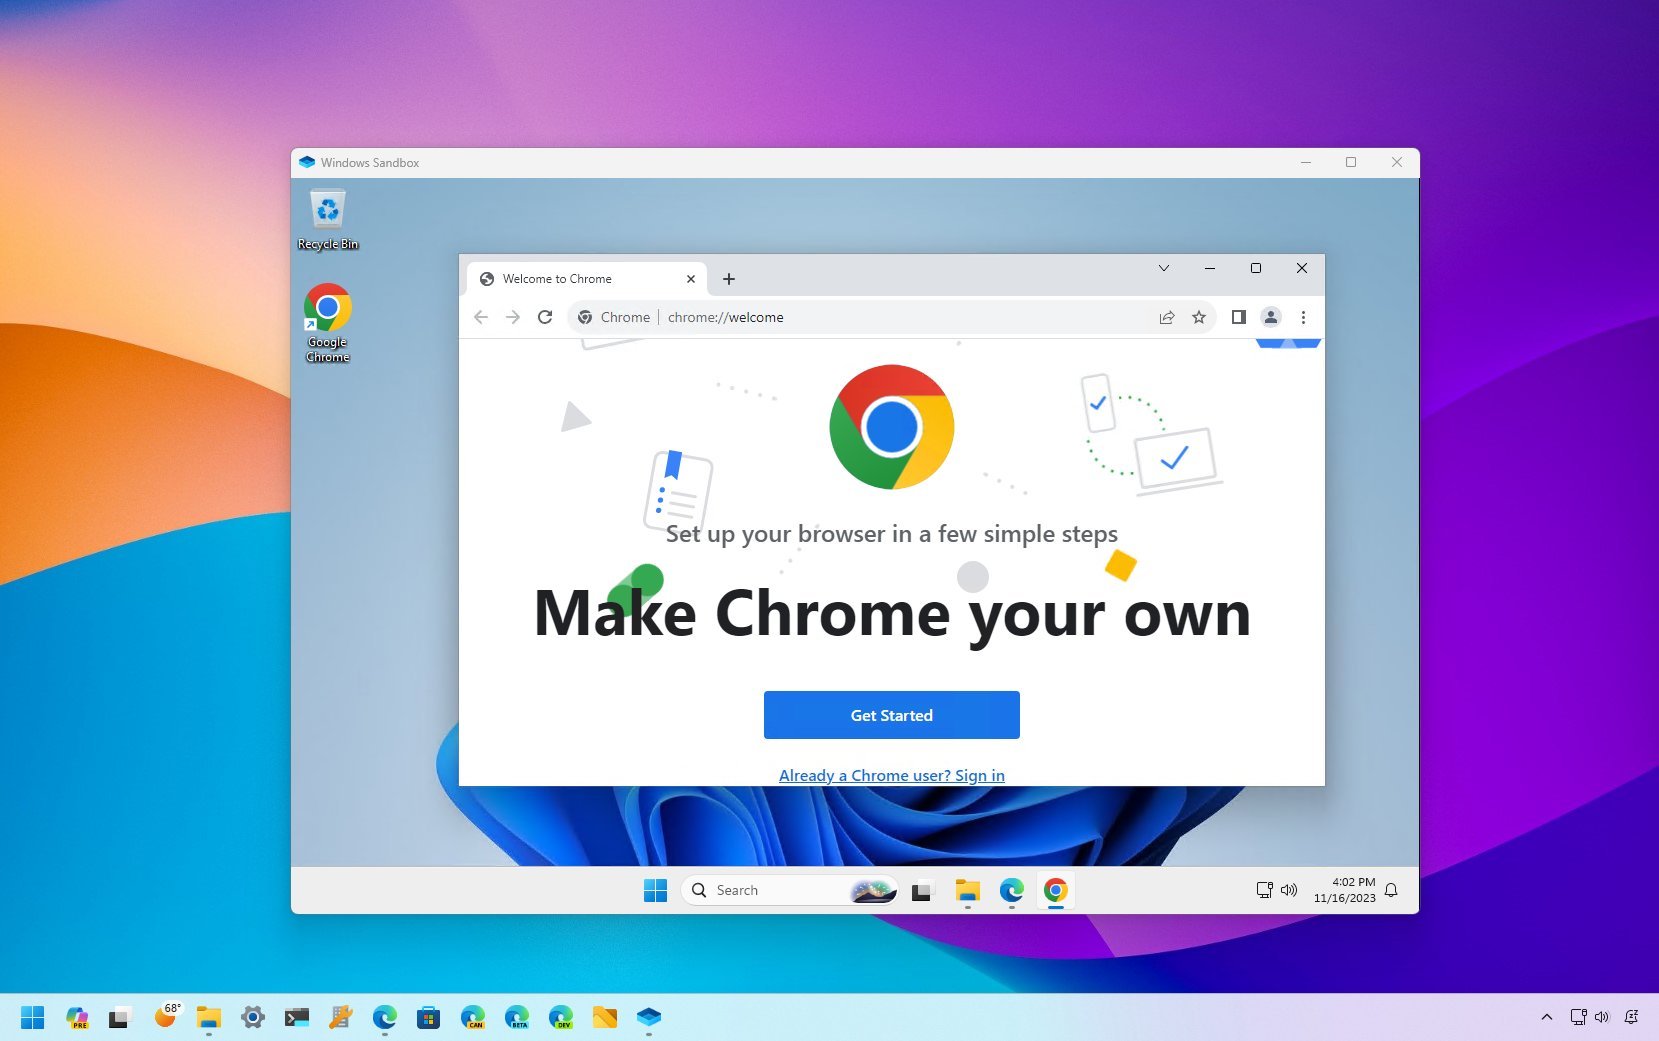
Upon its launch, Windows Sandbox looks like a lightweight version of your Windows machine. You can copy files from your host system or download them from the Internet using the built-in web browser. Any actions you perform in the sandbox will not affect your host system.
Once the testing is complete, close the Sandbox and click OK to confirm the action. Unlike a VM, Sandbox will delete all the data (including apps and files) upon exit. So, you’ll get a clean, isolated environment running the same Windows OS build as your host machine each time.
Set Up and Use Windows Sandbox in Windows 11
Windows Sandbox provides an excellent way to test apps and files in an isolated environment without the hassle of setting up a virtual machine. While the virtual machines have distinct advantages, Sandbox is lighter, faster, and loads a fresh copy of Windows OS each time it’s run.
Windows 11 Home users, however, have missed out on this excellent feature. But if you must use a sandbox, consider using third-party alternatives such as Sandboxie Plus and SHADE Sandbox. These alternatives offer a similar set of functionalities with no complicated setup involved.
(Image credit: Mauro Huculak)
On Windows 11, the «Windows Sandbox» feature allows you to create a lightweight virtualization environment to install and test untrusted applications or websites without altering or affecting the main setup.
In more technical terms, Windows Sandbox is a virtual machine that the system creates on demand with the Microsoft Hyper-V hypervisor using the same image of the version of the operating system currently on the computer. The only difference is that this is a custom lightweight (100MB~) virtualization environment optimized for performance and security.
Although you can use any other virtualization technology, this feature offers extra benefits. For instance, you don’t have to activate the instance, and you do not have to spend extra time setting up the virtual machine. Also, you will start with a clean Windows 11 installation whenever you open the sandbox, and everything will get deleted whenever you close it.
In this how-to guide, I will outline the steps to set up and use Windows Sandbox on your computer.
How to enable Windows Sandbox on Windows 11
On Windows 11, enabling the isolated environment to test applications requires turning on virtualization at the hardware level before you can turn on Windows Sandbox.
If you want to use this feature, the device needs Windows 11 Pro or higher, a processor with two or more cores, at least 4GB of memory, and SSD storage (not a requirement, but it’s recommended).
Enable UEFI virtualization
To enable virtualization on the UEFI firmware on Windows 11, use these steps:
All the latest news, reviews, and guides for Windows and Xbox diehards.
- Open Settings.
- Click on System.
- Click the Recovery page on the right side.
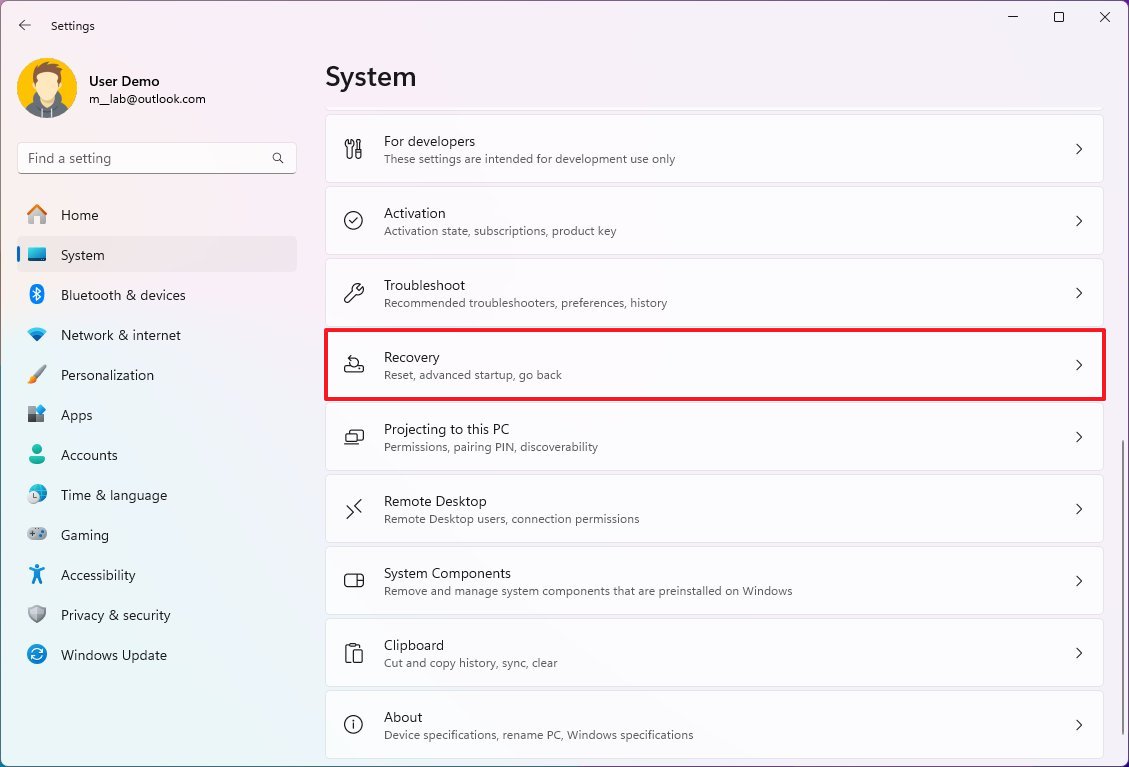
- Under the «Recovery options» section, click the Restart now button for the «Advanced startup» setting.
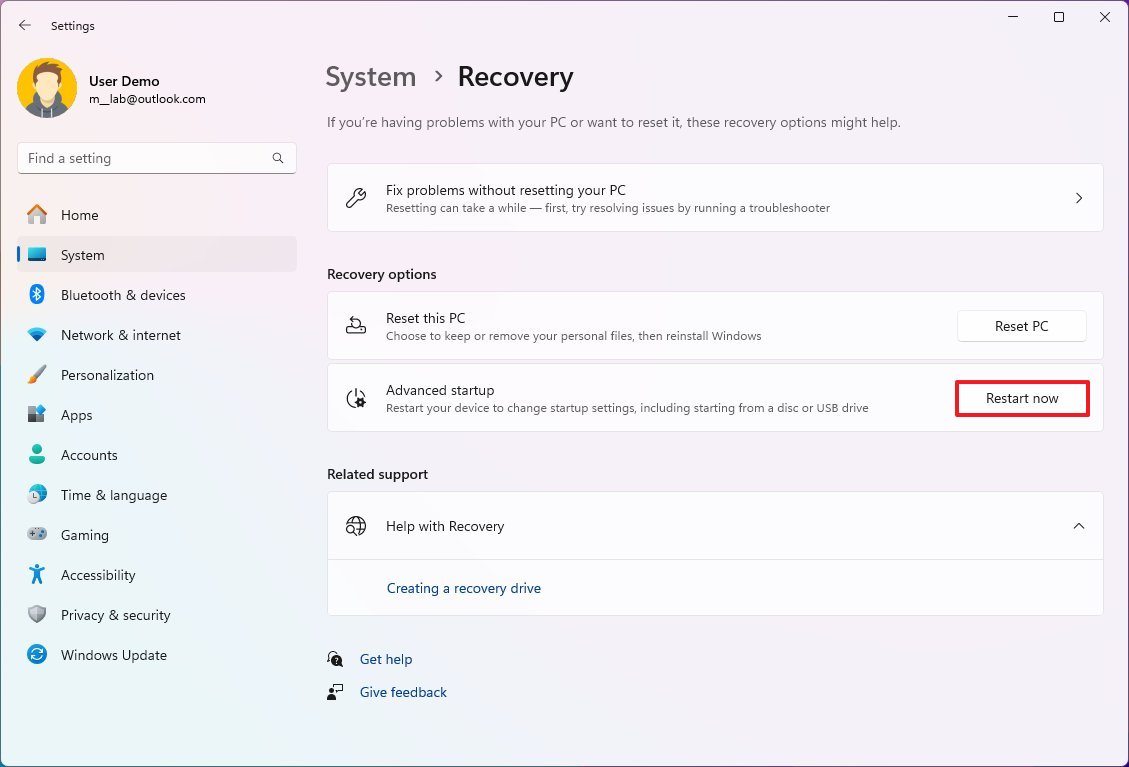
- Click the Restart now button again.
- Click on Troubleshoot.
- Click on Advanced options.
- Click the «UEFI Firmware Settings» option.
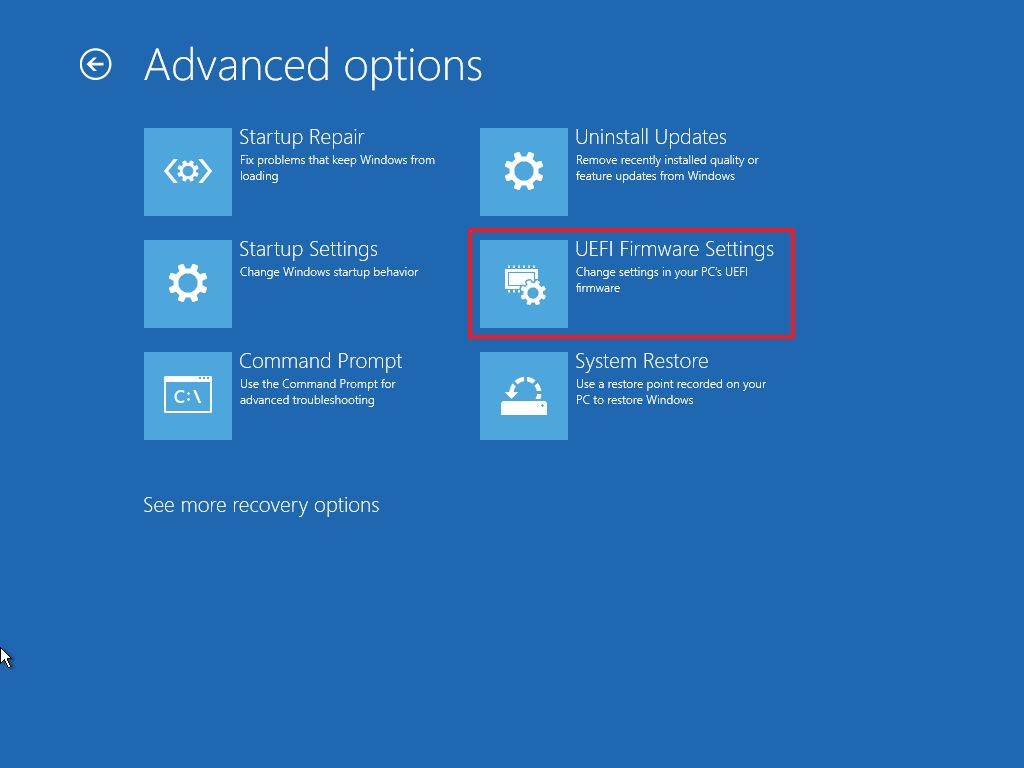
- Click the Restart button.
- Open the Advanced, Configuration, or Security page in the UEFI settings.
- Quick note: You may have to check your hardware manufacturer support website to determine the location that contains the settings.
- Turn on the virtualization feature in the firmware.
- Quick tip: The feature may appear as «Virtualization Technology,» «Intel Virtual Technology,» or «SVM mode,» but the name could be different on the motherboard.
- Save the firmware settings.
- Restart computer.
Once you complete the steps, you can enable the Windows Sandbox feature on Windows 11.
Enable Windows Sandbox
To enable Windows Sandbox on Windows 11, use these steps:
- Open Settings.
- Click on Apps.
- Click the Optional features page on the right side.
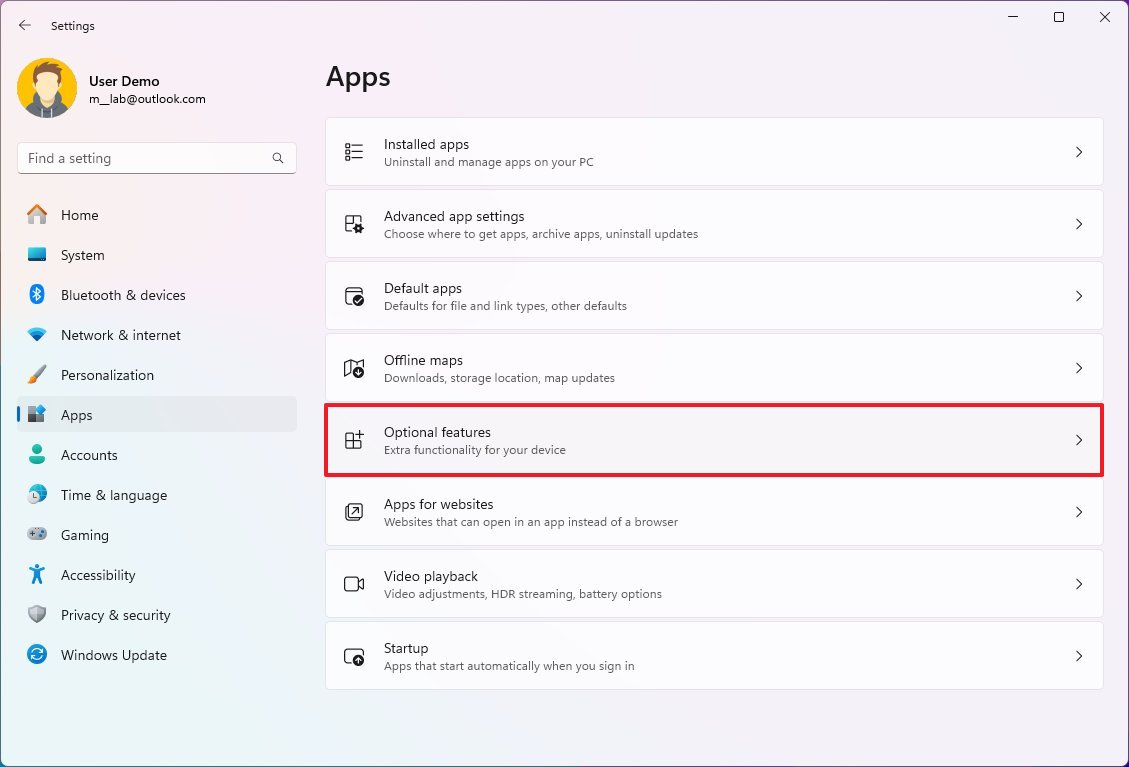
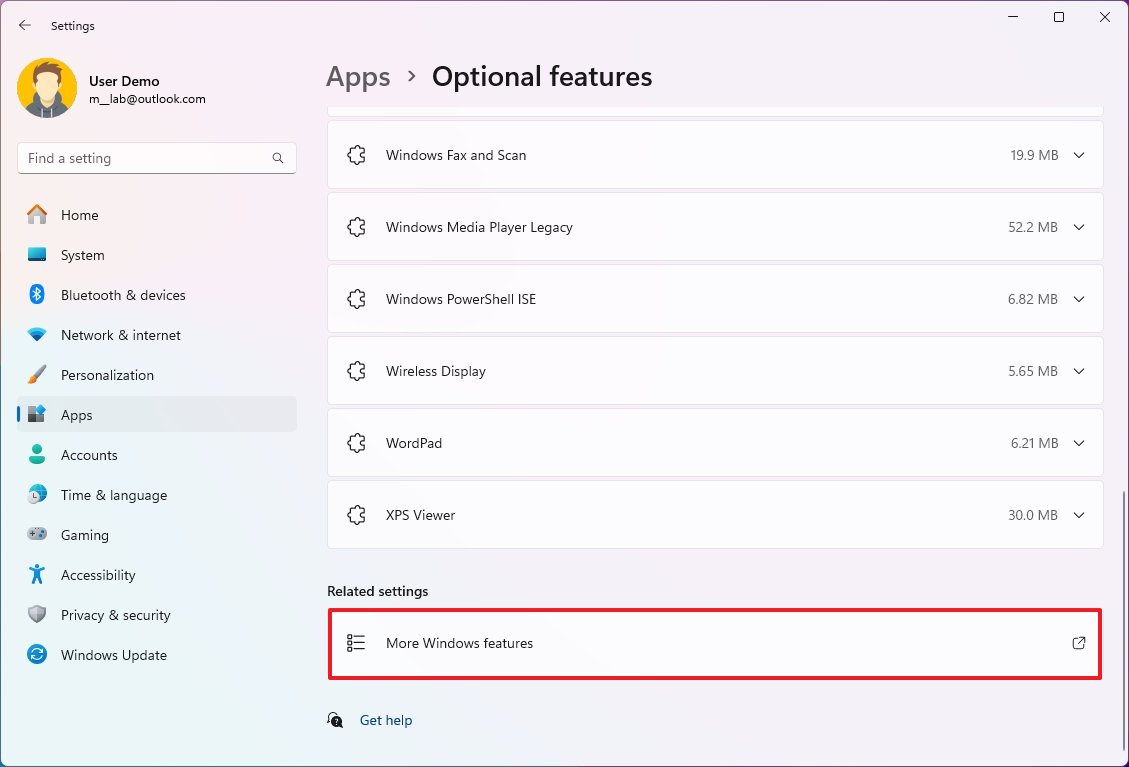
- Under the «Related settings» section, click the «More Windows features» setting.
- Check the Windows Sandbox option.

- Click the OK button.
- Click the Restart now button.
After you complete the steps, you can run the sandbox to install and test applications without risking the main installation.
How to use Windows Sandbox on Windows 11
Getting started using Windows Sandbox is straightforward, and here’s how:
- Open Start.
- Search for Windows Sandbox, right-click the top result, and select the Run as administrator option.
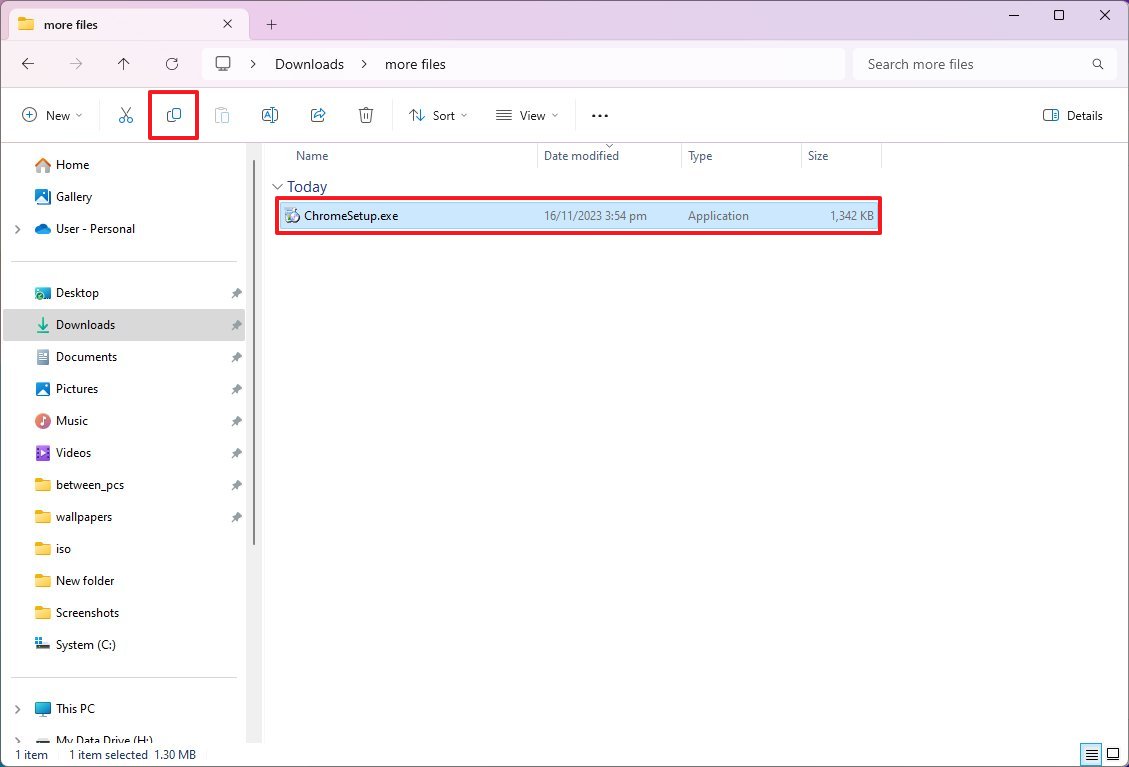
- Open File Explorer on your computer.
- Open the folder with the untrusted app to test.
- Select the executable and click the Copy button from the command bar.
- In the Windows Sandbox desktop, right-click on the desktop and select the Paste option to transfer the installer.
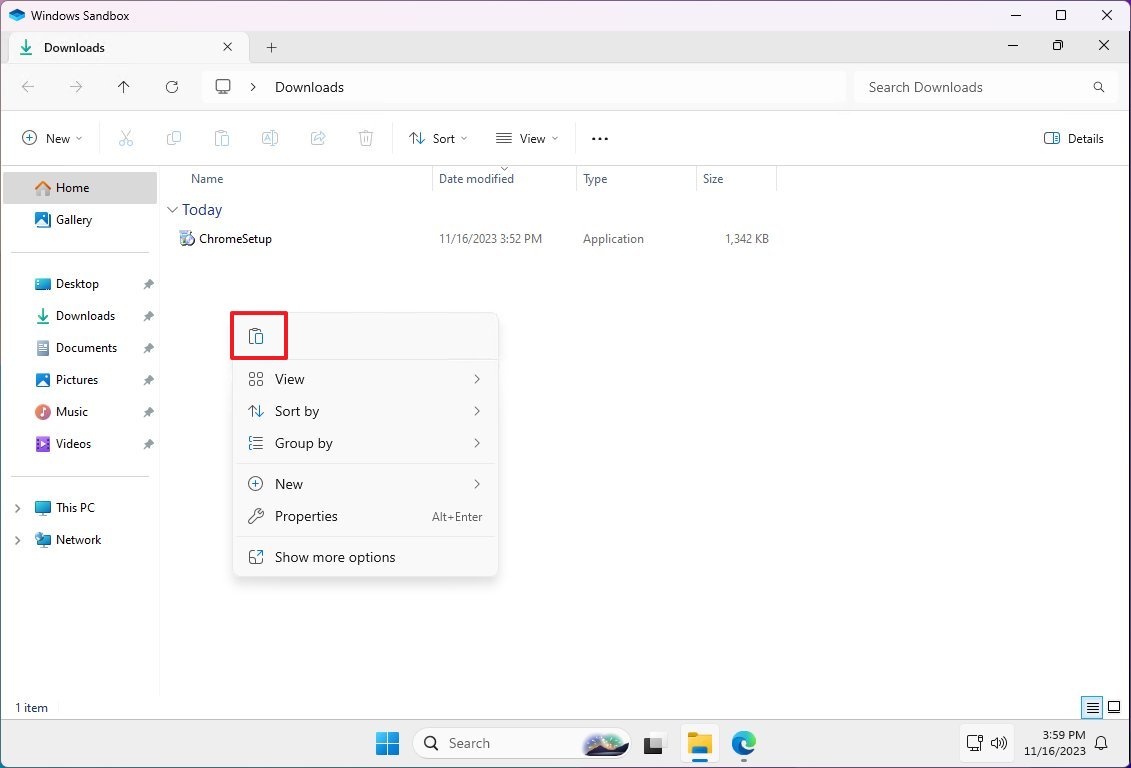
- Quick tip: Alternatively, you can also download the application files using Microsoft Edge.
- Double-click the installer (.exe, .msi, or any other) to begin the installation.
- Continue with the on-screen directions to complete the installation.
Once you complete the steps, you can use the sandbox to test apps without compromising your setup. In addition to testing applications, you can use this environment to access untrusted websites without affecting your device configuration.
You can use the «Ctrl + Alt + Break» or «Pause» keyboard shortcut on Windows Sandbox to enter and exit the full-screen experience. If you use high contrast mode, you can use the «Shift + Alt + PrintScreen» shortcut to enable the feature in this environment.
After you’re done testing, close Windows Sandbox by clicking the X (close) button, and the system will delete any content you may have created or configured and the virtual machine instance.
More resources
For more helpful articles, coverage, and answers to common questions about Windows 10 and Windows 11, visit the following resources:
- Windows 11 on Windows Central — All you need to know
- Windows 10 on Windows Central — All you need to know
Mauro Huculak has been a Windows How-To Expert contributor for WindowsCentral.com for nearly a decade and has over 15 years of experience writing comprehensive guides. He also has an IT background and has achieved different professional certifications from Microsoft, Cisco, VMware, and CompTIA. He has been recognized as a Microsoft MVP for many years.
Песочница в Windows 11 — это важный компонент системы, который позволяет запускать программы в изолированной среде, защищая основную операционную систему. Это особенно полезно при работе с подозрительными приложениями. В отличие от виртуальных машин, таких как Hyper-V, Песочница требует меньше ресурсов и не сохраняет данные после завершения работы.
В этой статье мы расскажем, как настроить и использовать Песочницу в Windows 11, а также обсудим доступные настройки и способы её удаления.
Приобрести оригинальные ключи активации Windows 11 можно у нас в магазине от 1690 ₽!
Так же, скачать дистрибутивы разных версий Windows 11 можно у нас в каталогe.
Как включить Песочницу Windows 11
Для начала стоит отметить, что для использования Песочницы нужно выполнить несколько условий:
— Компьютер должен работать под управлением Windows 11 Pro, Enterprise или Education. В Windows 11 Home Песочница не доступна без дополнительных манипуляций.
— Виртуализация должна быть включена в БИОС. Вы можете проверить её статус в диспетчере задач, на вкладке «Производительность» — «ЦП»
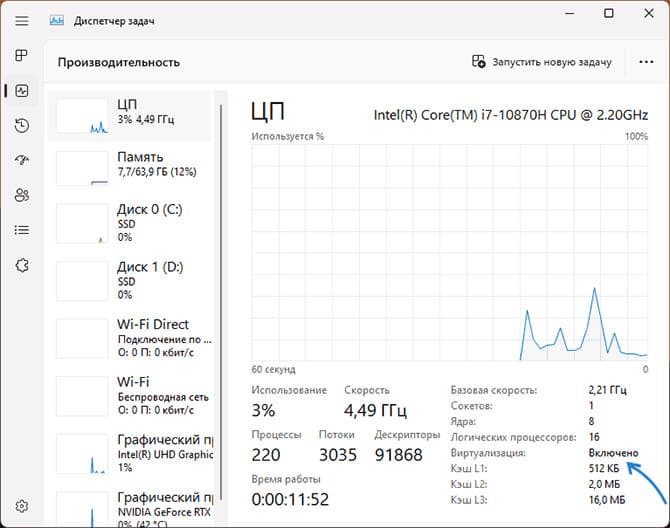
.
— Минимальные требования: 4 ГБ оперативной памяти (рекомендуется 8 ГБ), 1 ГБ дискового пространства и 2 ядра процессора.
Если все условия выполнены, вы можете включить Песочницу одним из следующих способов.
Способ 1: Через Программы и компоненты
1. Откройте Панель управления и выберите «Программы и компоненты».
2. Нажмите «Включение или отключение компонентов Windows».
3. Найдите и отметьте пункт «Песочница Windows», затем нажмите «Ок» и перезагрузите компьютер.

После перезагрузки Песочница будет доступна в меню «Все приложения».
Способ 2: Использование PowerShell или Командной строки
Вы можете включить Песочницу с помощью команд. Для Командной строки:
dism /online /Enable-Feature /FeatureName:"Containers-DisposableClientVM" -All
Для PowerShell:
Enable-WindowsOptionalFeature -FeatureName "Containers-DisposableClientVM" -All -Online
Обе команды требуют прав администратора и последующей перезагрузки системы.
Как включить Песочницу в Windows 11 Home
Хотя в Windows 11 Домашняя Песочница отсутствует, можно попробовать включить её с помощью скрипта. Важно помнить, что работоспособность Песочницы после этого не гарантируется.
Создайте bat-файл с указанным содержимым, запустите его от имени Администратора и подтвердите перезагрузку после установки всех компонентов:
@echo off
echo Checking for permissions
>nul 2>&1 "%SYSTEMROOT%\system32\cacls.exe" "%SYSTEMROOT%\system32\config\system"echo Permission check result: %errorlevel%
REM --> If error flag set, we do not have admin.
if '%errorlevel%' NEQ '0' (
echo Requesting administrative privileges...
goto UACPrompt
) else ( goto gotAdmin ):UACPrompt
echo Set UAC = CreateObject^("Shell.Application"^) > "%temp%\getadmin.vbs"
echo UAC.ShellExecute "%~s0", "", "", "runas", 1 >> "%temp%\getadmin.vbs"echo Running created temporary "%temp%\getadmin.vbs"
timeout /T 2
"%temp%\getadmin.vbs"
exit /B:gotAdmin
if exist "%temp%\getadmin.vbs" ( del "%temp%\getadmin.vbs" )
pushd "%CD%"
CD /D "%~dp0"echo Batch was successfully started with admin privileges
echo .
cls
GOTO:menu
:menu
Title Sandbox Installer
echo Select Action
echo 1 Install
echo 2 Uninstall
echo 3 Exit
set /p uni= Enter your option:
if %uni% ==1 goto :in
if %uni% ==2 goto :un
if %uni% ==3 goto :ex:in
cls
Title Install Sandboxpushd "%~dp0"
dir /b %SystemRoot%\servicing\Packages\*Containers*.mum >sandbox.txt
for /f %%i in ('findstr /i . sandbox.txt 2^>nul') do dism /online /norestart /add-package:"%SystemRoot%\servicing\Packages\%%i"
del sandbox.txt
Dism /online /enable-feature /featurename:Containers-DisposableClientVM /LimitAccess /ALL /NoRestart
goto :remenu
:un
cls
Title Uninstall Sandboxpushd "%~dp0"
Dism /online /disable-feature /featurename:Containers-DisposableClientVM /NoRestart
dir /b %SystemRoot%\servicing\Packages\*Containers*.mum >sandbox.txt
for /f %%i in ('findstr /i . sandbox.txt 2^>nul') do dism /online /norestart /remove-package:"%SystemRoot%\servicing\Packages\%%i"
del sandbox.txt
goto :remenu
:remenu
cls
echo Restart computer?
echo 1 Yes
echo 2 No
set /p uni= Input 1 or 2:
if %uni% ==1 goto :re
if %uni% ==2 goto :ex:re
shutdown /r /t 0 /f
goto :ex
:ex

exit
Использование Песочницы
Чтобы запустить Песочницу, откройте меню Пуск и найдите «Windows Sandbox». Она запустит изолированную среду с Windows 11. Для передачи файлов просто копируйте и вставляйте их между основной системой и Песочницей. Также, Песочница поддерживает доступ в интернет и установку приложений для проверки.
Альтернативный вариант запуска — нажать клавиши Win+R на клавиатуре, ввести windowssandbox и нажать Enter.
Сам исполняемый файл Песочницы находится в C:\Windows\System32\WindowsSandbox.exe
В результате будет запущено окно с Windows 11, которое и представляет собой изолированную среду, называемую «Песочницей». К сожалению, с английским языком интерфейса даже если у вас установлена русскоязычная Windows 11.

Основная информация, которая может пригодиться при использовании Песочницы:
— Для передачи файла из основной системы в Песочницу просто скопируйте его и вставьте уже в Песочнице. Это работает и в обратном направлении.
— По умолчанию в Песочнице Windows 11 есть доступ в Интернет и установлен браузер Microsoft Edge, который можно использовать для скачивания программ на проверку.
— Вы можете установить русский язык ввода в Песочнице в Параметры (Settings) — Time & Language — Language and Region. Но после закрытия песочницы этот язык исчезнет, как и всё остальное, что вы в ней делали.
— Размер окна Песочницы свободно меняется, разрешение «внутреннего экрана» будет изменено соответствующим образом.
— Для создания скриншотов внутри Песочницы можно использовать те же методы, что и в основной системе (Способы сделать скриншот Windows 11).
— Всё то, что вы делали в Песочнице на сохраняется после выхода из неё. Об этом вас будут уведомлять каждый раз при закрытии окна изолированного запуска приложений.

Возможности конфигурации Песочницы
Песочница поддерживает конфигурационные файлы формата .wsb, в которых можно указать параметры, такие как доступ к сети, видеокарте, общий доступ к папкам и другие.
vGPU — включение или отключение доступа к GPU (видеокарте).
Networking — включение или отключение доступа к сети из Песочницы.
MappedFolders — служит для общего доступа к папкам между основной системой и песочнице, есть возможность включить доступ только для чтения.
LogonCommand — команда, выполняемая при входе в Песочницу.
AudioInput — включение или отключение ввода аудио.
VideoInput — то же самое для ввода видео.
ProtectedClient — включает дополнительные функции защиты для сеанса подключения к Песочнице.
PrinterRedirection — включение перенаправления принтера.
ClipboardRedirection — перенаправление буфера обмена.
MemoryInMB — размер оперативной памяти в мегабайтах, которые может использовать песочница.
Более подробно можно прочитать в справке на официальном сайте Майкрософт.
Пример файла конфигурации:
Скачать его можно с нашего сайта.

После написания файла конфигурации и сохранения его с расширением .wsb достаточно запустить этот файл, чтобы Песочница была запущена с заданными в нем параметрами.
Как удалить Песочницу
Если вам нужно удалить Песочницу, вернитесь в Панель управления в раздел «Программы и компоненты», снимите отметку с пункта «Песочница Windows» и перезагрузите компьютер. Также можно воспользоваться командой:
Команда для cmd:
Dism /online /Disable-Feature /FeatureName:"Containers-DisposableClientVM"
Команда для Powershell:
Disable-WindowsOptionalFeature -FeatureName "Containers-DisposableClientVM" -Online
-
Home
-
News
- How to Enable or Disable Sandbox in Windows 11? (3 Ways)
By Vera | Follow |
Last Updated
Windows Sandbox is a useful feature that offers you a safe environment to run apps in Windows 11 without fear of harming your computer. How can you enable or disable Sandbox in Windows 11? MiniTool will show you three ways to do this task and let’s see them.
Windows 11 Sandbox
Windows Sandbox was first introduced in Windows 10 19H1 and now it is also a part of Windows 11. It is designed to create a secure environment to isolate running apps from the main systems, without accessing files, Windows registry, and critical parts of the main Windows system. That is, programs installed in Windows Sandbox keep “sandboxed” and run separately from the host machine.
This feature is fairly helpful, especially when you download an executable file or an app from risky sources and install it in Sandbox. This won’t damage your PC.
Windows Sandbox is temporary. When you close this tool, all the apps, files, and settings will be deleted. The system will restore to its original and clean state next time you run Sandbox.
To use Windows Sandbox, you need to enable it on your PC. Well then, how to enable Sandbox in Windows 11? Try the methods below.
3 Ways to Enable Sandbox Windows 11
Enable Windows 11 Sandbox in Settings via Windows Features
Here is what you should do:
1. Press Win + R keys on the keyboard to get the Run dialogue, type exe to the text box and press Enter to open the Windows Features interface. Alternatively, you can search for Turn Windows features on or off to the search box and click the result to open Windows Features.
2. Locate Windows Sandbox and then tick the box of this feature and click OK.
3. Click Restart now to finish installing the requested change.
Tip: Sometimes you find the option for Windows Sandbox is grey. To fix this issue, you can refer to this related article – Here Is a Simple Solution to Windows 10 Sandbox Is Greyed out!
To disable Windows Sandbox in Windows 11, uncheck the option – Windows Sandbox in the Windows Features window.
Enable Sandbox Windows 11 via PowerShell
You can also follow these steps below to turn on Sandbox using PowerShell.
1. Right-click on the start icon and choose Windows PowerShell (Admin) to run this command tool with admin rights.
2. To enable Sandbox, type Enable-WindowsOptionalFeature -Online -FeatureName “Containers-DisposableClientVM” –All and press Enter. To disable Sandbox Windows 11, type Disable-WindowsOptionalFeature -Online -FeatureName “Containers-DisposableClientVM” –Online and press Enter.
Enable Sandbox Windows 11 via Command Prompt
In addition, you can use another command tool – Command Prompt to turn on Sandbox in Windows 11. Follow the guide below:
1. Launch Command Prompt (CMD) in Windows 11 with admin privileges.
2. Type Dism /online /Enable-Feature /FeatureName:”Containers-DisposableClientVM” –All in the CMD window and press Enter to enable Windows Sandbox.
If you need to disable Sandbox, use this command – Dism /online /Disable-Feature /FeatureName:”Containers-DisposableClientVM” and press Enter.
Final Words
That’s all the information about how to enable or disable Sandbox in Windows 11.
After enabling Windows Sandbox, it is easy to run it, just the same as run other programs or apps. Go to find Windows Sandbox from the search menu and select it to open it. If a prompt appears to ask for an administrator’s permission, click Yes. Drag and drop files or apps to Sandbox when needed. After exiting this tool, any changes you have made will be deleted.
About The Author
Position: Columnist
Vera is an editor of the MiniTool Team since 2016 who has more than 7 years’ writing experiences in the field of technical articles. Her articles mainly focus on disk & partition management, PC data recovery, video conversion, as well as PC backup & restore, helping users to solve some errors and issues when using their computers. In her spare times, she likes shopping, playing games and reading some articles.