
Quick Answer
- Another working method to enable the drag and drop feature in your Windows 11 taskbar is to use an official Microsoft app providing the same.
- Press the Windows + I key to open the Settings app and expand Windows Update in the left sidebar to check for new system updates.
- Try dragging a file to your taskbar and then pick the desired app window in which you wish to open it.
Despite Windows 11’s new useful features, Microsoft removed some existing ones, such as the Drag and Drop file feature, creating inconvenience for basic navigation activities. That said, if you’re unhappy about the same and wish to bring it back, this explainer has precisely what you need. In this article, we have demonstrated several effective methods to get the Drag and Drop feature on Windows 11 taskbar. Additionally, you can learn to install Windows 11 on Unsupported Systems with just a single tool.
How to Get Drag and Drop Feature on Windows 11 Taskbar
With the help of several tools and tweaks, restoring the drag-and-drop feature on Windows 11 is pretty simple. Follow these methods to achieve the same.
Upgrade to the Windows 11 22H2 Update
After getting a boatload of user requests to restore the drag-and-drop taskbar functionality, Microsoft has finally rolled it out in its 22H2 feature update. Here’s how you can update your system to experience it.
1. Press the Windows + I key to open the Settings app and expand Windows Update in the left sidebar to check for new system updates.
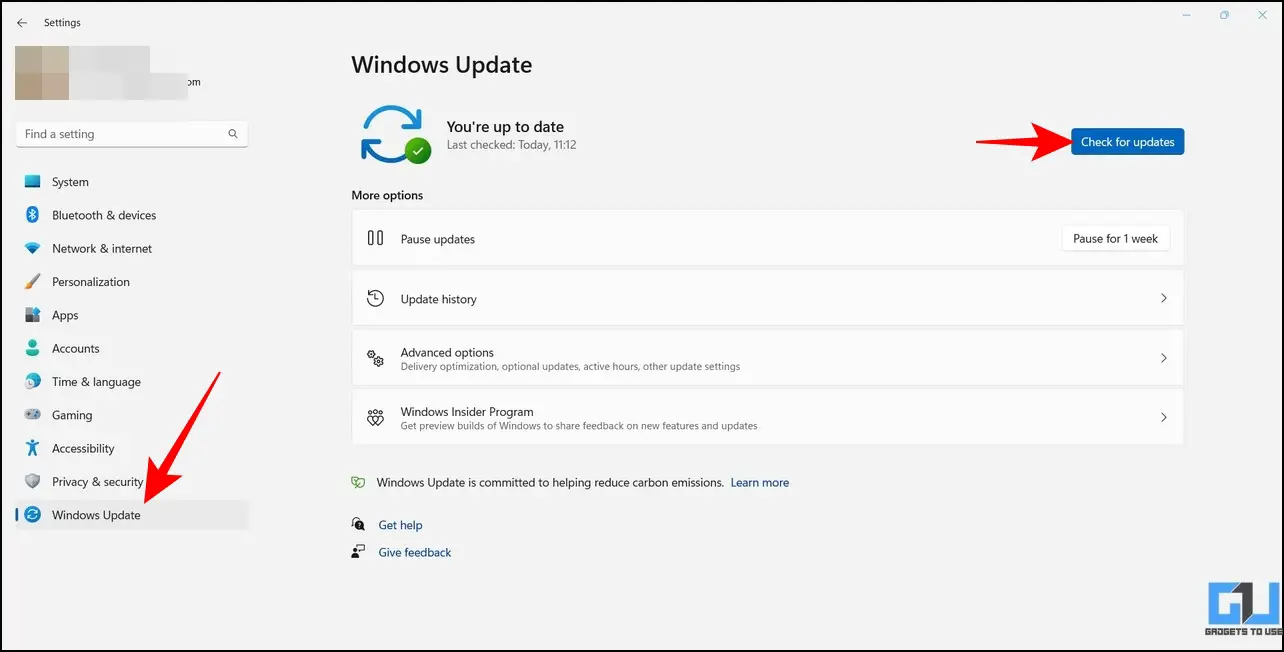
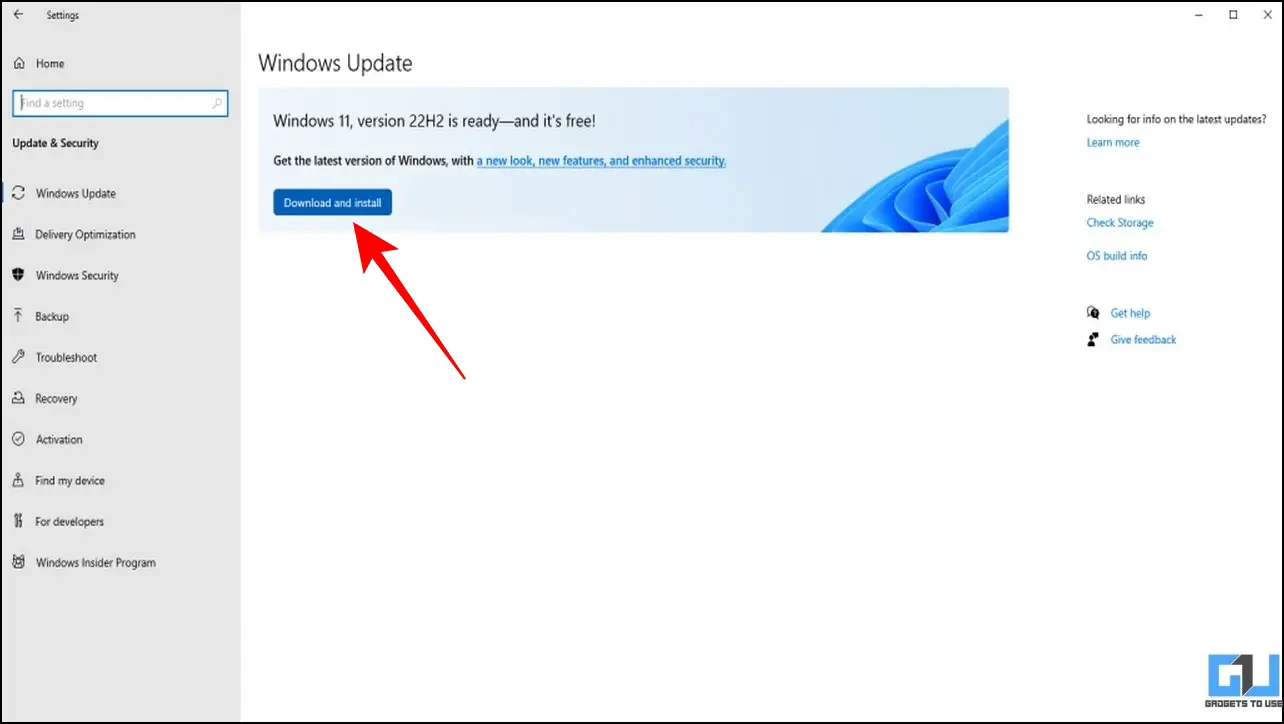
2. Wait a few seconds to receive the latest 22H2 update. Click the Download and Install button to upgrade your system.
3. If you haven’t received the 22H2 update yet, follow the next methods to achieve the same.
Try Alt+Tab Method to Simulate the Drag and Drop Feature
One of the simplest workarounds to achieve this functionality in Windows 11 is to use the Alt + Tab method. Here’s what you need to do:
1. Click and drag the file you wish to use in the desired app using this feature.
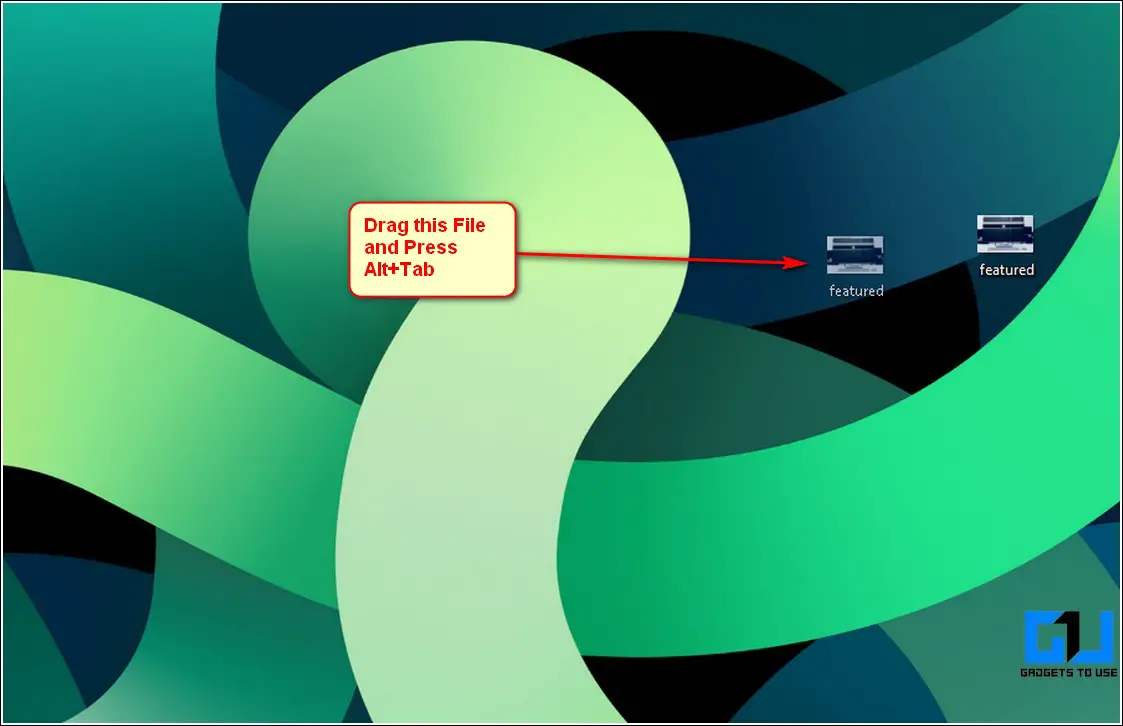
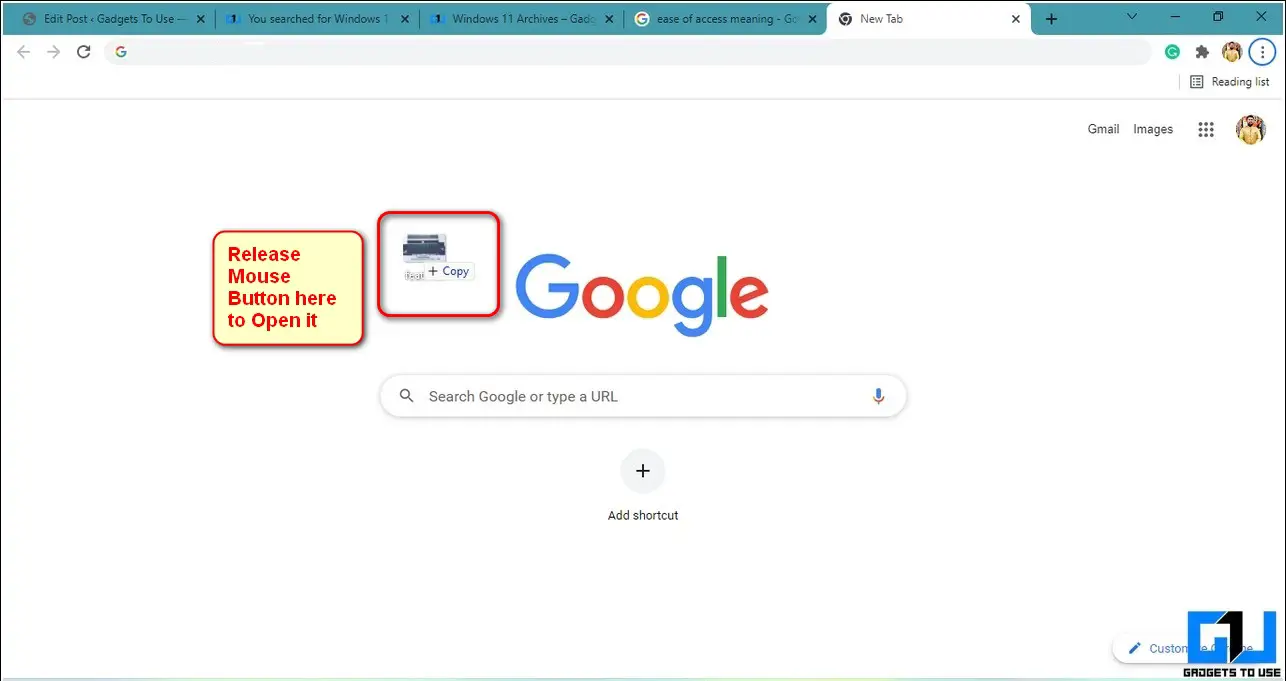
2. Now, press the mouse button and drag the file, switch your window by pressing the Alt+Tab key combination, and open your desired app window.
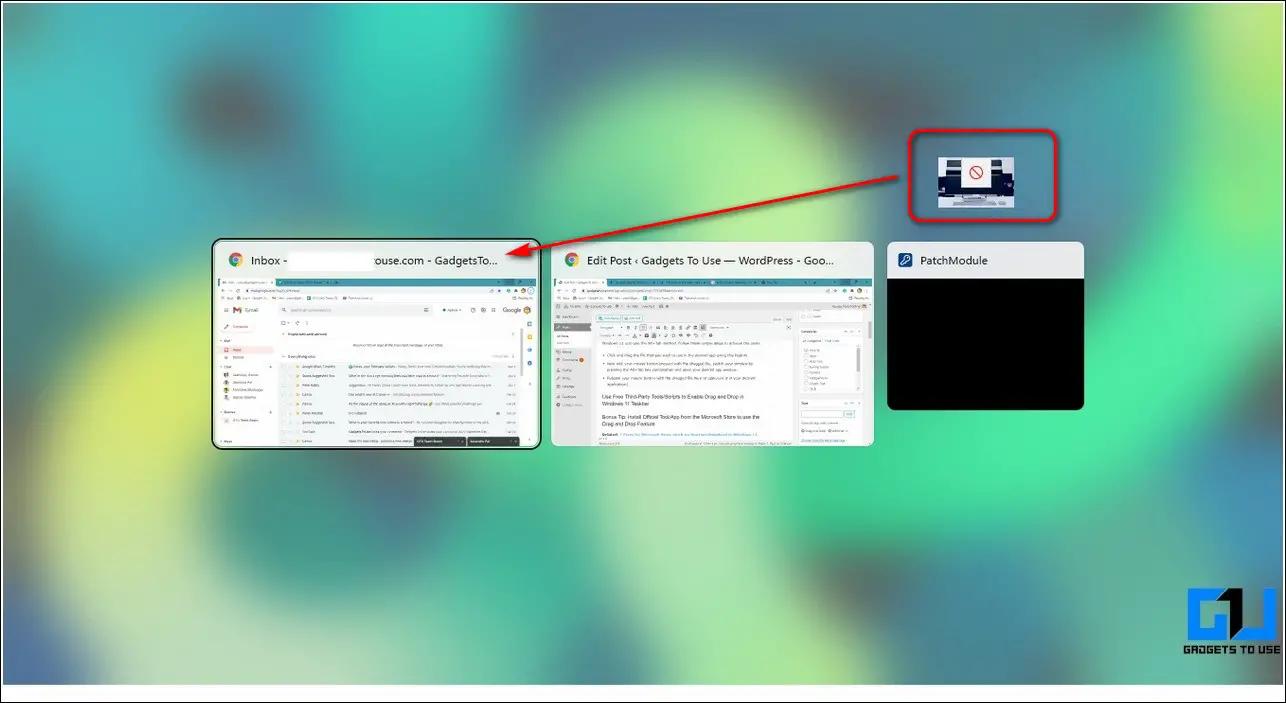
3. Release your mouse button with the dragged inside the opened window to open/use it in your desired application. That’s it. You’ve successfully opened your file inside your desired application using the drag and drop feature similar to taskbar functionality.
Use Free Third-Party Tools/Scripts to Enable Drag and Drop Feature
Another effective fix to enable the drag-and-drop feature in Windows 11 taskbar is to use a free tool/script available on GitHub. Follow these steps to achieve the same.
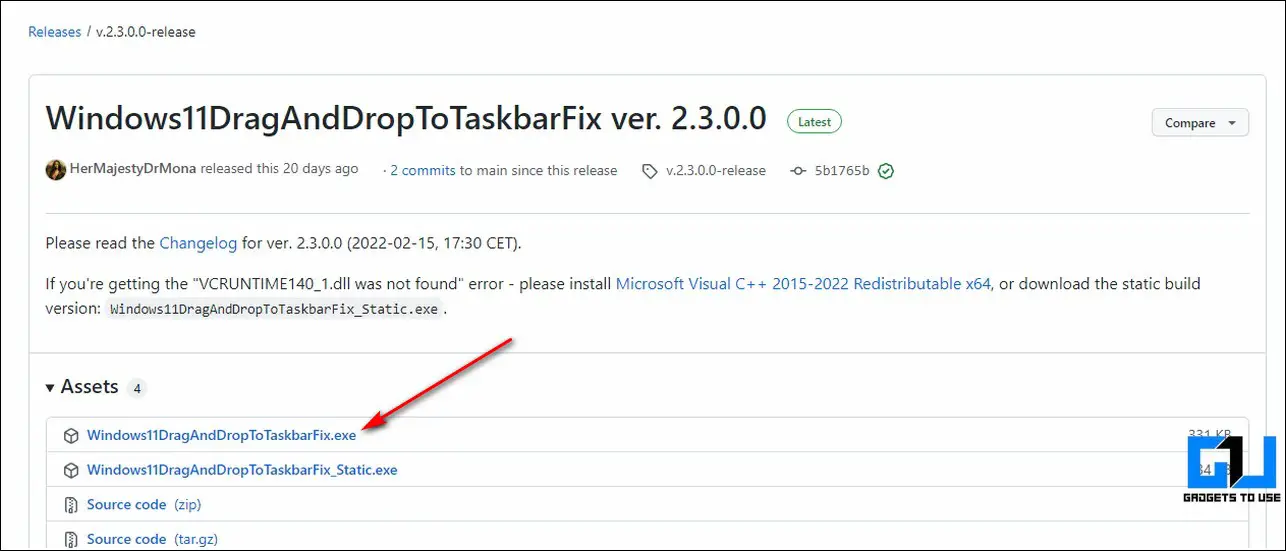
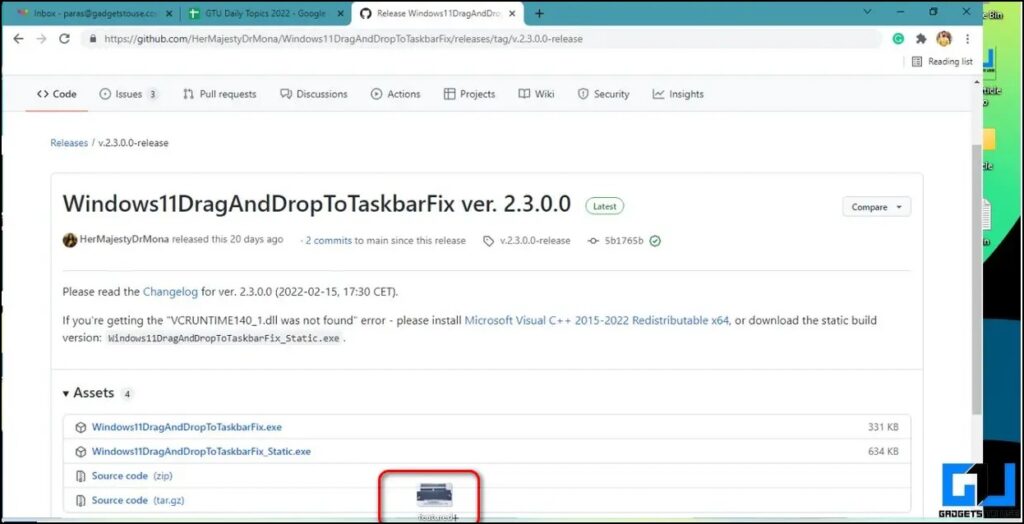
1. Access the GitHub page for the Windows 11 Taskbar Fix.
2. Next, click the Windows11DragAndDropToTaskbarFix.exe file to download it.
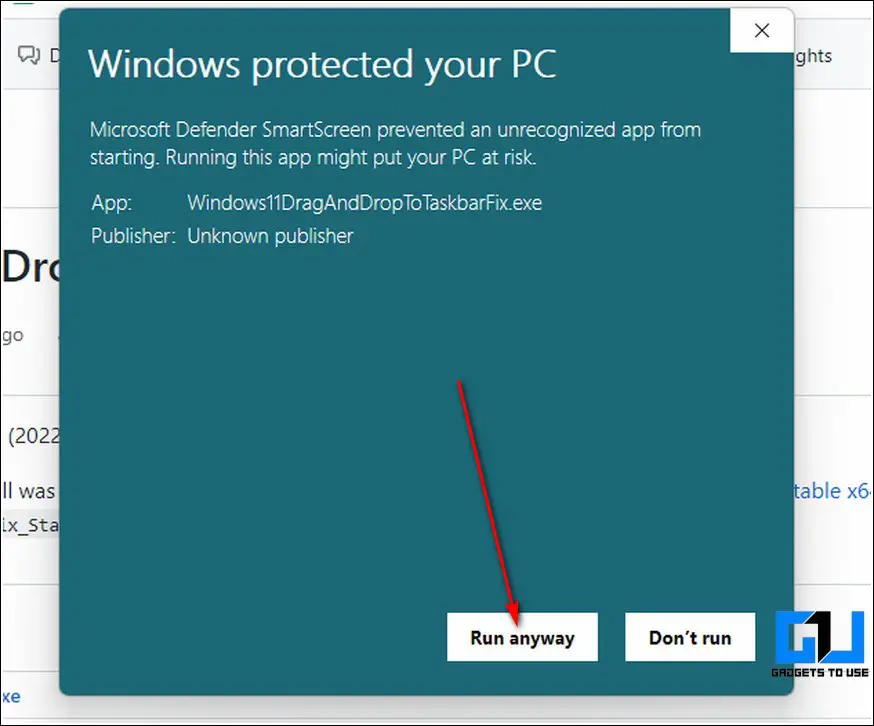
3. Double-click on the downloaded file to install it. Click on the Run Anyway button if prompted by the Microsoft Installer.
4. That’s it. The tool will now start automatically on your Windows 11 system. Try dragging a file to your taskbar and then pick the desired app window in which you wish to open it. Congrats. You can now easily use this feature in your Windows 11 taskbar.
Tweak the Windows Registry Files
Besides downloading third-party tools and scripts, you can also tweak Windows Registry files to revive the drag-and-drop taskbar feature. Here’s what you need to follow.
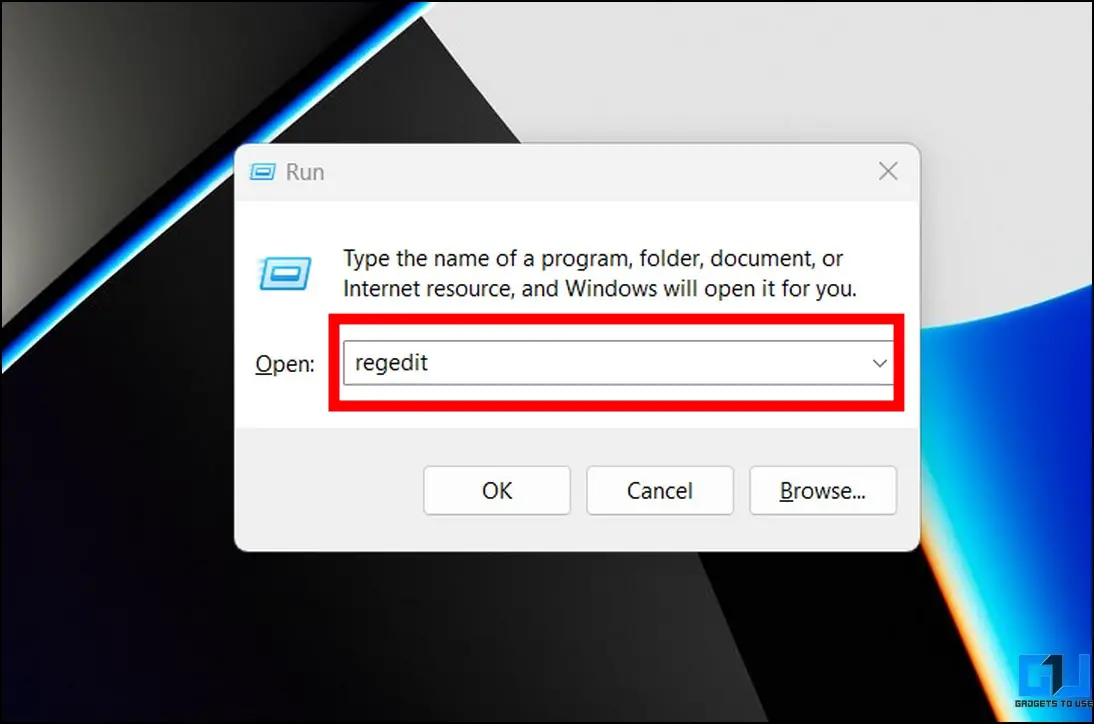
1. Open the Run window by pressing the Windows + R hotkeys and type ‘regedit‘ to run the Registry Editor window.
2. Next, copy and paste the following path in the navigation bar and hit the enter key.
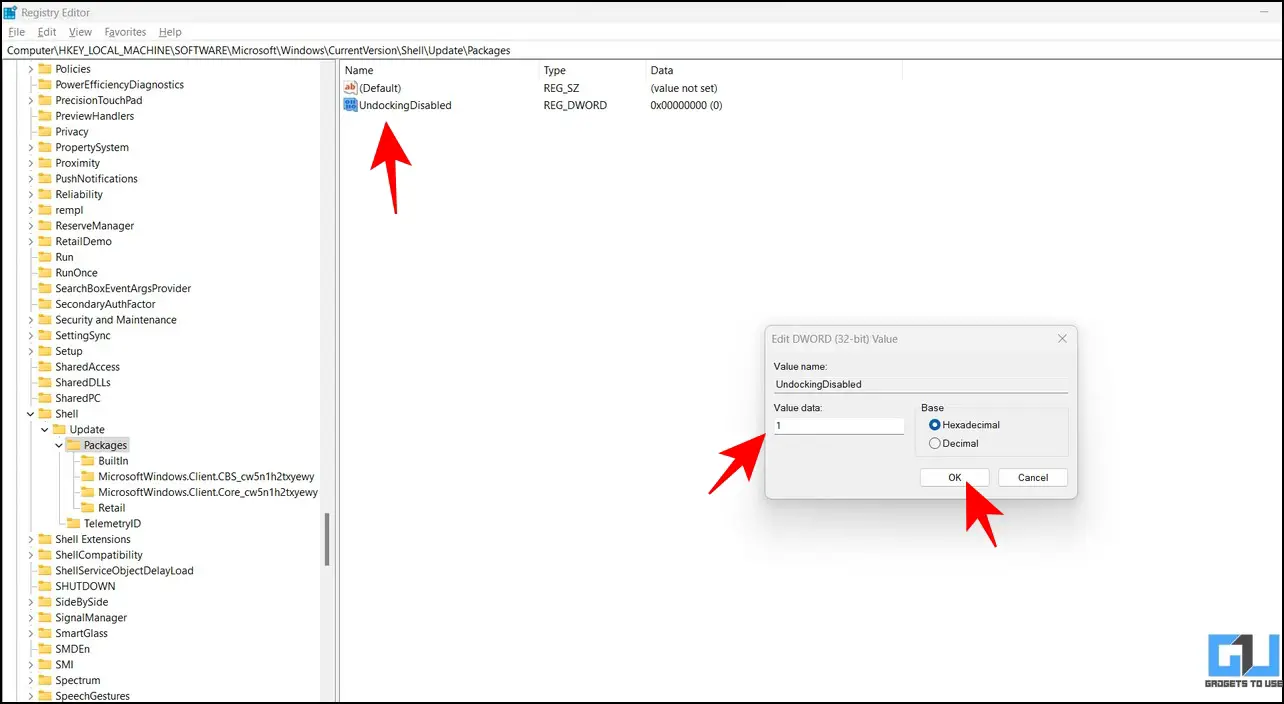
HKEY_LOCAL_MACHINE\SOFTWARE\Microsoft\Windows\CurrentVersion\Shell \Update\Packages
3. Right-click the Packages folder to create a new DWORD (32-Bit value).

4. Name this key as ‘UndockingDisabled‘ and set its value to 1. Click the OK button to save changes.
5. Restart your system to experience changes.
Note: Enabling the drag-and-drop taskbar functionality using this method makes the Start and Search taskbar icons static, i.e., you can not click to use them. To revert changes, you can delete the created Undocking Disbaled in the Registry Editor app and reboot your system.
Install the Official Microsoft Store App to get Drag and Drop Feature
Another working method to enable the drag and drop feature in your Windows 11 taskbar is to use an official Microsoft app providing the same. Follow these steps for an easy fix.
1. Open the Microsoft Store app on your Windows 11 system.
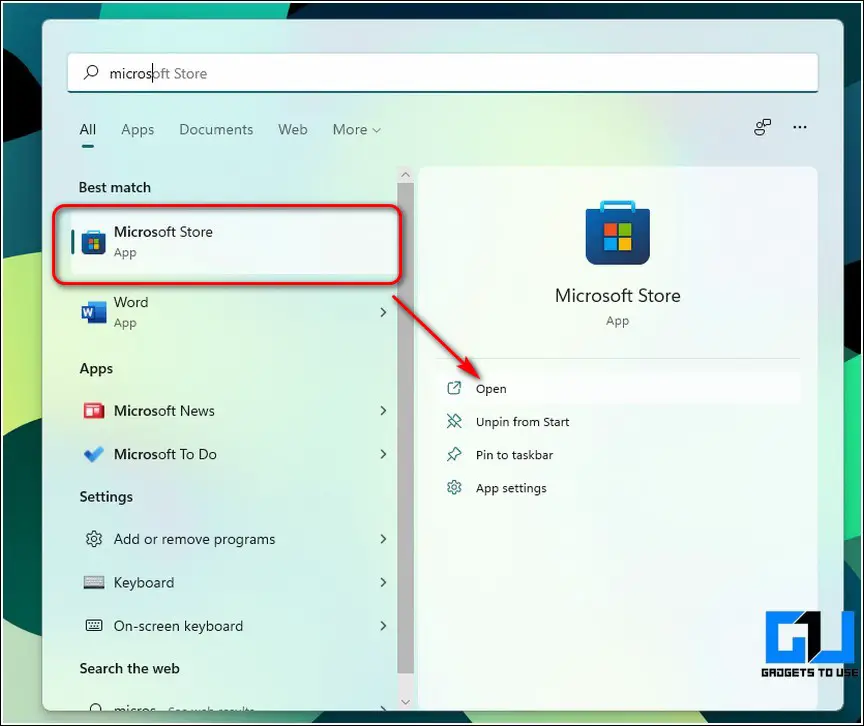
2. Next, search for the Drag and Drop Toolbar for Windows 11 app and click the Get button to install it to your system.
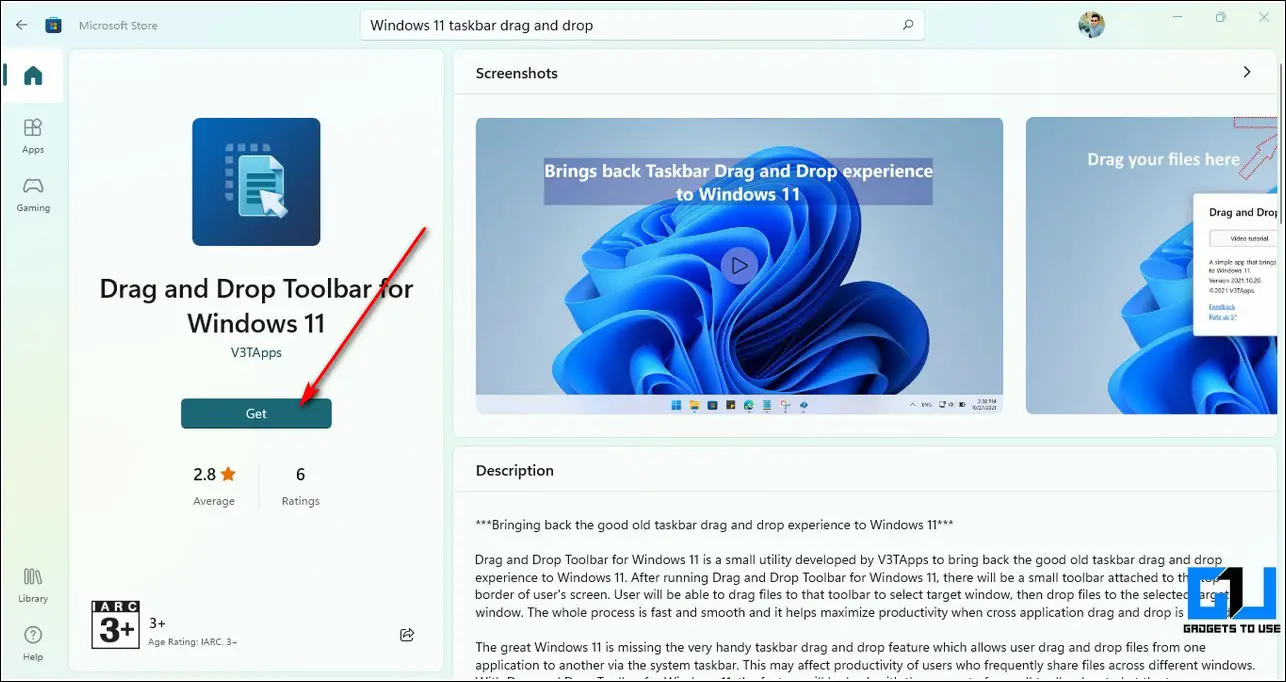
3. This app will now launch a separate notch-shaped taskbar at the top-middle center of your screen.
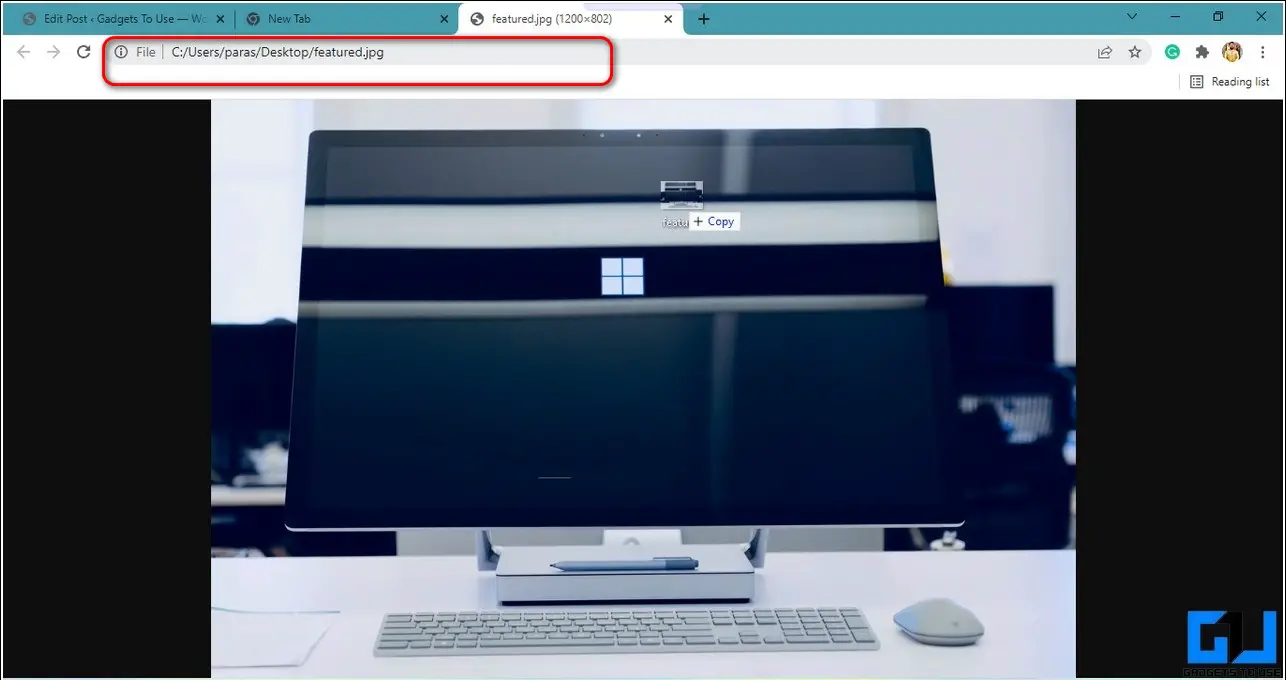
4. You can drag your file to this mini taskbar to open your file in the desired application.
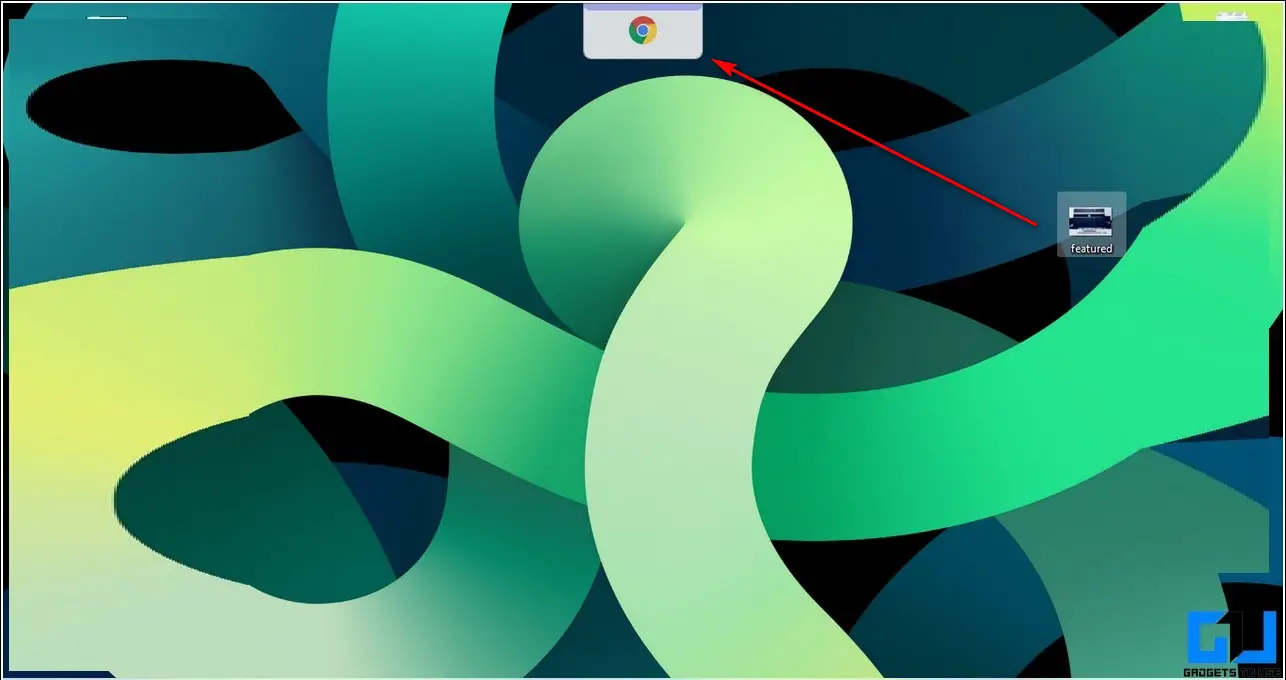
5. Your dragged file will instantly open in your chosen application.
Bonus: Switch Screen Layout to Drag and Drop files Quickly
Besides using the taskbar to drag and drop files, you can switch your current screen layout on Windows 11 to open two or more folders for exchanging files. Follow these easy steps to achieve the same.
1. Open your desired folder and hover the mouse cursor over the Maximize/Minimize button to switch screen layouts.
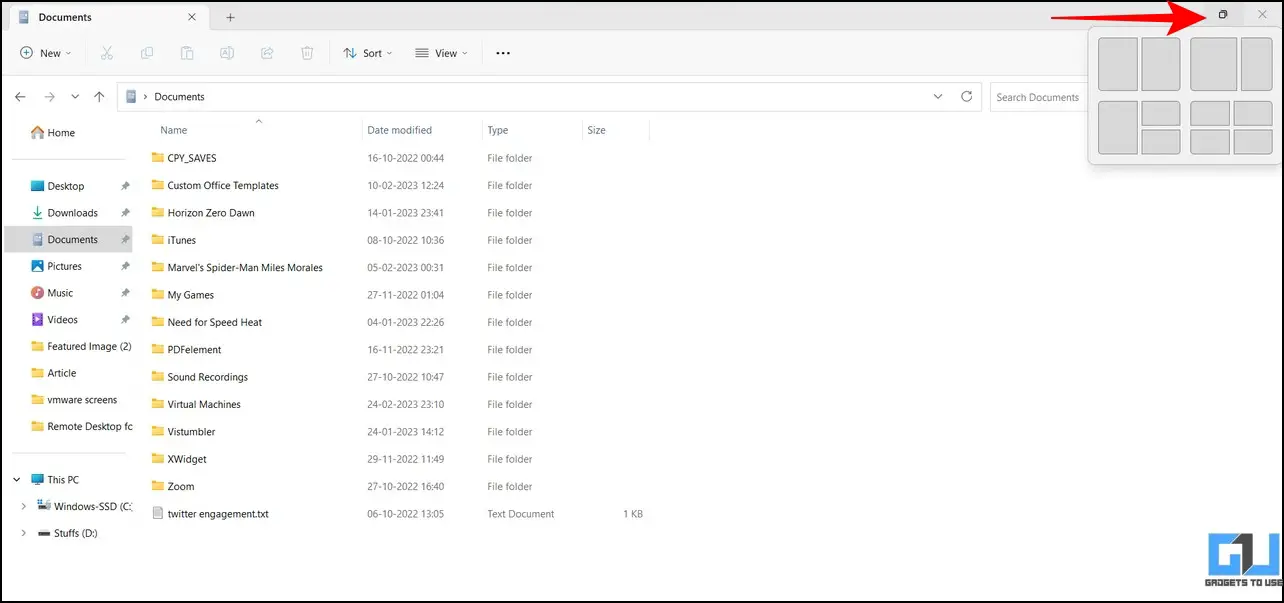
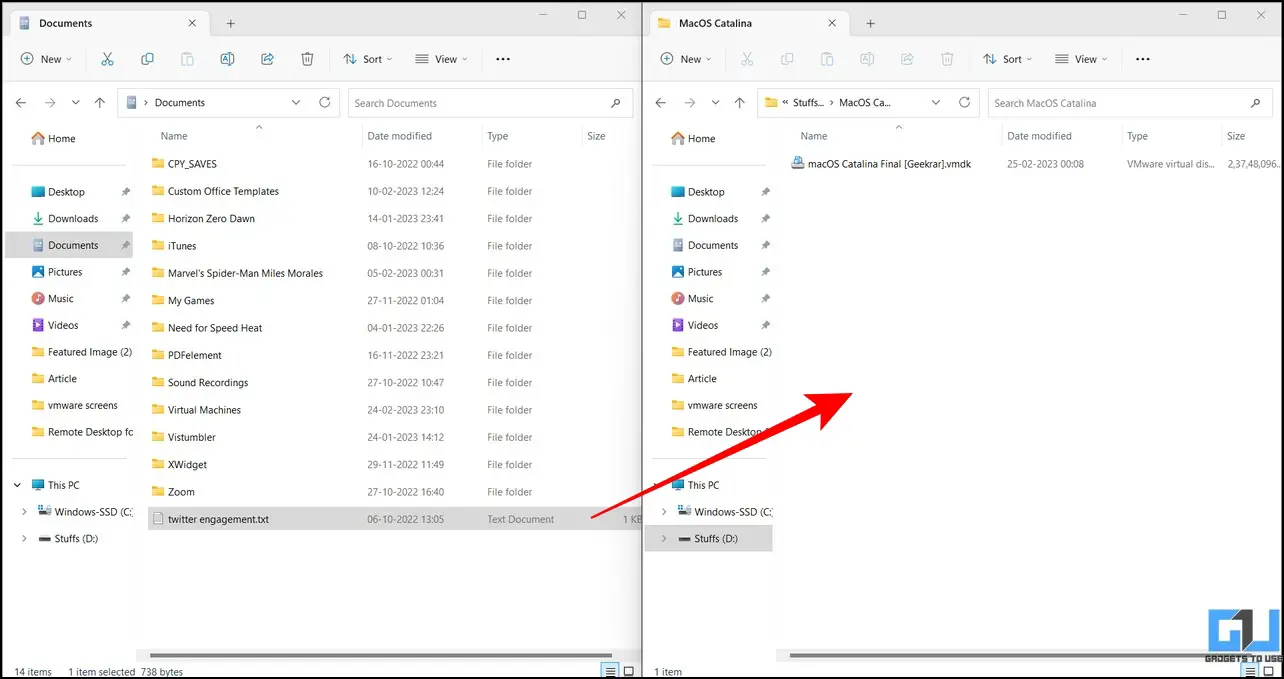
2. Pick your preferred split screen layout and open the folders to exchange files between them.
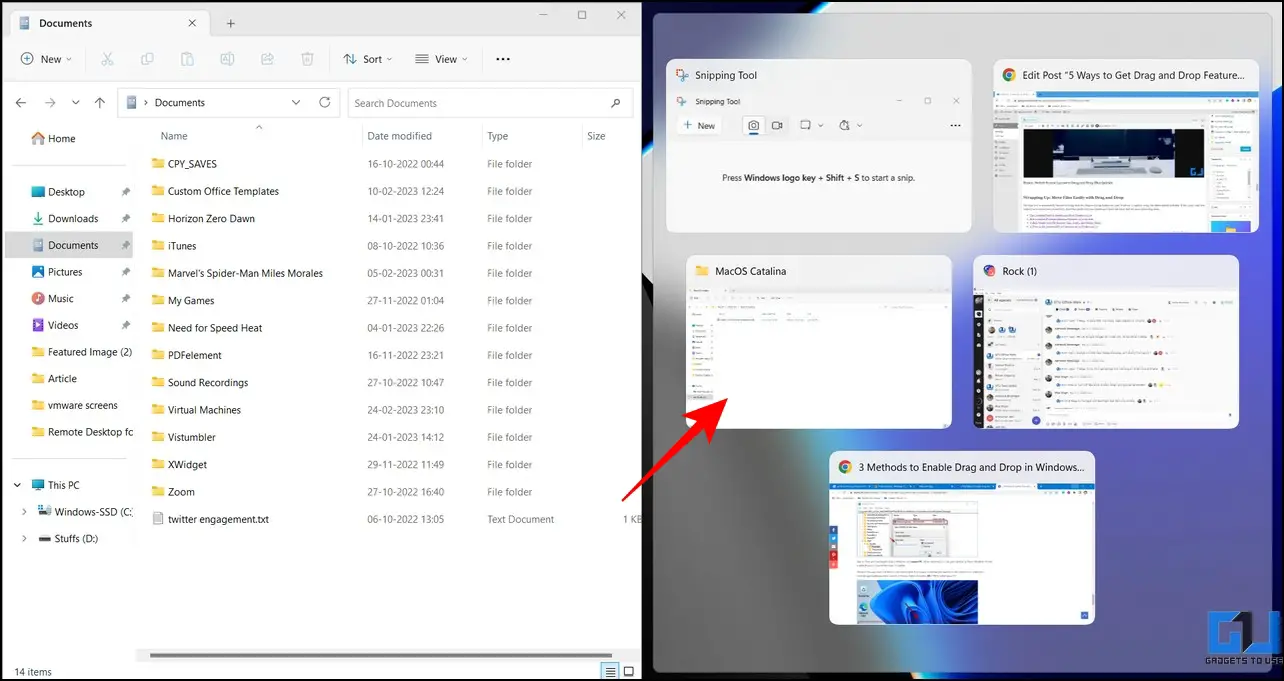
3. Finally, drag your file from one folder to another to transfer it.
FAQs
Q: How to enable the drag-and-drop feature in Windows 11 taskbar?
A: You need to install the 22H2 update of Windows 11, to get the drag-and-drop feature. In case you have not received the update, follow the other easy methods in this explainer to enable the drag-and-drop feature on Windows 11 taskbar.
Q: How to use the GitHub tool to use drag and drop on Windows 11?
A: GitHub’s taskbar fixer tool tweaks the system to make drag and drop available to Windows 11 users. For more details, refer to the method listed above.
Wrapping Up: Move Files Easily with Drag and Drop
We hope you’ve successfully learned to bring back the drag-and-drop feature on your Windows 11 taskbar using the above-tested methods. If this quick read has helped you to boost your productivity, share this guide with your friends and check the below link for more interesting reads. Stay subscribed to GadgetsToUse for more such reads.
You might be interested in the following:
- The Complete Guide to Install macOS on Windows 11/10
- 6 Ways to Pin Any App or Feature to Taskbar in Windows 11
- 15 Best Windows 11 File Explorer Tips, Tricks, and Hidden Hacks
- 11 Ways to Fix Internal SSD not showing up in Windows 10/11
You can also follow us for instant tech news at Google News or for tips and tricks, smartphones & gadgets reviews, join GadgetsToUse Telegram Group, or for the latest review videos subscribe GadgetsToUse Youtube Channel.
Was this article helpful?
YesNo

We all know that Microsoft has released its new OS and over many stories, it is true that it sports a sizeable upgrade over its predecessor.
It carries a simple design that enhances productivity and user experience. One thing we have seen regarding the drag and drop feature that it could be updating is that it was present in Windows 10 and not in Windows 11, we have 4 methods here that you can use to enable it and fix it if it stops working.
Many thought this was an initial bug but later learned it was meant to be like this in the new version. However, don’t be disappointed as Microsoft will bring back this feature and be available to all this year. We can still revive this in the current version thanks to some third-party developers and Modders.
So if you are curious and don’t want to wait, follow through to know everything.
About the Drag and Drop Feature in Windows 11
This feature has been used by users almost every day as it allows them to:
- Organize files, folders and other important stuff through simple mouse movements.
It provides more ease than cutting and pasting each item from one place to another individual.
It was discontinued in the new version which became quite a controversy but after many requests, Microsoft has planned to bring it back and is restoring it to the taskbar at some point this year.
#1 – Use Alt and Tab
- You need to press and hold down the button on the mouse to grab the file you wish to drop.
- Drag it and hit “Alt + Tab” from the keyboard while holding the Alt and mouse buttons at the same time to navigate between the files. Release it once done.
- Release the mouse button to drop the file.
#2 – Install Windows11DragAndDropToTaskbarFix App
Enjoy this feature in the new version 11 thanks to third-party developers. For this, you need to download some files from third-party sources from the internet.
- You need to visit the “GitHub page”.
- Once there, locate and click on the “Windows11DragAndDropToTaskbarFix.exe” file to get it.
- After the download is over, open and run the downloaded file.
If you get “VCRUNTIME140_1.dII was not found” errors then you need to follow the steps mentioned below:
- For this, you need to go to ^ icon present on the taskbar to open the system tray.
- After this, you need to click on the “Mona Lisa” icon, the Windows11draganddroptotaskbarfix icon.
- Next, drag a file and then drop it to Photoshop or any application present on the taskbar.
- You shall notice that this feature has been enabled.
This does not provide support to pinning applications or software to the taskbar by using the drag-and-drop gesture.
Moreover, if you wish to configure the startup action of the app then for this you need to hit the “Mona Lisa” icon and then choose “configure”, after this the notepad shall open. For this to run on the startup automatically you need to keep AutomaticallyRunThisProgramOnStarup=1 as it is and to run it manually change it to 0.
ALSO CHECK: DiskPart Partition and Formatting Commands List.
#3 – Tweak Windows Registry
By making a system restore point in the Windows registry editor we can both enable and adjust drag-and-drop sensitivity settings.
- From the keyboard, you need to press “Windows + R”.
- The command box shall open.
- In here type the following and hit “ok”
regedit
- You shall see the Windows Registry Editor on the screen.
- After this go to the following path
HKEY_LOCAL_MACHINE\SOFTWARE\Microsoft\Windows\CurrentVersion\Shell \Update\Packages
- Next, click right on the blank white space there on the right navigation pane/
- In here you need to select New > DWORD (32-bit) value.
- This shall create new value in Registry Editor.
- Click right on this.
- Then you need to select “rename”.
- Rename this as follows below:
UndockingDisabled
- Right-click on this.
- Then choose “modify”.
- Change the value from 0 to 1.
- Hit “OK” to save settings.
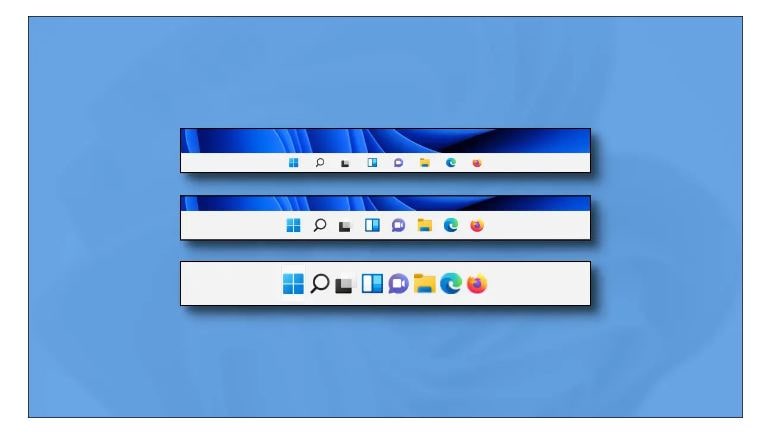
Once done restart your PC, once back on you shall see that the taskbar shall appear the same as in version 10 and the drag and drop feature function shall be restored on the system.
Note: It has one drawback: start, search and Cortana shall not be able to open from the taskbar. Icons shall be there but you shall not be able to launch them.
To disable this and revert, head towards the registry editor to the same folder mentioned above and then hit “UndockingDisabled” and delete it. After this, you need to restart your system, and it will return to normal in no time.
#4 – Use Drag and Drop Toolbar App
At times, what happens is that we need to download some of the apps to make basic features of our system run; however, as this feature does not return anytime soon you can download the drag-and-drop toolbar for version 11. This shall add a replicated taskbar to the top of the screen automatically.
Now, to configure and use this for Windows 11 you need to follow the steps below:
- You need to first install the toolbar for your PC or Laptop.
- Once done, you shall see a new taskbar allotted at the top of the screen.
- After this, you can drag and drop any file onto it and transfer it to the destination folder.
ALSO CHECK: Folder Thumbnails Not Working in Windows 11 and how to configure them.
Fix Drag and Drop not working in Windows 11
If you encounter such a problem, you need to click and right-click on the files and folders but keep in mind that you cannot drag and drop them anymore. We have seen this issue personally and after doing a lot of research we have found one which has worked in different cases.
At times, you might not be able to drag the file from one place to another with the help of the mouse even though the mouse and Windows are working fine as well except for this.
This issue seems to be seen in both versions 10 and 11, and we stumbled upon it when running virtual machines in VMware Workstation Player for VirtualBox. Still, unfortunately, we don’t know the cause behind such an issue plus were not able to find any documentation from Microsoft underlying the issue as well.
Do a Left Click on any of the files, Keep the Left Click Pressed on your mouse and Click on Escape on your keyboardWhen the basic option is not working, you need to click left on the file in File Explorer and keep it pressed. As it is held down hit escape from the keyboard once, after this you need to release the left-click mouse button and then try performing it again. This worked for us and would work for you as well.
You can try another fix, which is to restart your windows. Another is to cut and paste with the help of the mouse you intend to drag and drop. If both of these did not work out for you, you might be facing driver issues, corrupt system files, or something else.
ALSO CHECK: Quick Access Toolbar Not Showing in Windows 11.
Final Words
Drag and drop is a great feature that was part of Windows 10 however it looks to be not the same or removed from Windows 11! However, worry not as we shared 4 different methods to manually enable it and fix it if it is not working or showing for you. Before you go, please leave feedback in the comments section.
If you’re using Windows 11 and missing the drag and drop functionality, you’re in luck. Enabling drag and drop in Windows 11 is straightforward and takes just a few steps. By following this guide, you’ll quickly restore this useful feature and make your workflow smoother.
In this guide, we’ll walk you through the steps to enable the drag and drop function in Windows 11. This will help you move files and folders across different locations effortlessly.
Step 1: Open the Task Manager
To get started, right-click on the taskbar and select «Task Manager» from the context menu.
You can also use the shortcut Ctrl + Shift + Esc to open the Task Manager directly.
Step 2: Navigate to the File Menu
Once the Task Manager is open, click on «File» in the top-left corner.
The File menu is where you’ll find options to start a new task, which is essential for our next steps.
Step 3: Open the Registry Editor
Click on «Run new task» under the File menu, then type «regedit» and press Enter.
This action will open the Registry Editor, a powerful tool used to change system settings.
Step 4: Locate the Drag and Drop Registry Key
In the Registry Editor, navigate to the key: HKEY_LOCAL_MACHINESOFTWAREMicrosoftWindowsCurrentVersionShell Extensions.
You might need to expand folders by clicking the small arrows next to them to find the correct path.
Step 5: Modify the ‘Blocked’ Value
In the Shell Extensions folder, find the «Blocked» key. If it doesn’t exist, you may need to create it by right-clicking and selecting New > Key, then naming it «Blocked.»
Right-click on the «Blocked» key, select New > String Value, and name it «{8e74d236-7f35-4720-b138-1fed0b85ea75}». Leave its value data empty.
After completing these steps, close the Registry Editor and restart your computer. Drag and drop functionality should now be enabled.
Tips for Enabling Drag and Drop in Windows 11
- Back Up Your Registry: Always back up your registry before making any changes to avoid potential system issues.
- Use Admin Rights: Make sure you have administrative rights when accessing the Registry Editor.
- Stay Updated: Keep Windows 11 updated, as future updates might include an official fix for drag and drop.
- Third-Party Software: Consider third-party software tools if you’re uncomfortable editing the registry.
- Undo Changes: If something goes wrong, remember you can undo changes by deleting the added registry key.
Frequently Asked Questions
What is drag and drop in Windows 11?
Drag and drop is a feature that allows you to move files or folders by clicking, holding, and dragging them to a new location.
Why isn’t drag and drop working in Windows 11?
It might be due to system settings or a missing registry key. Follow the steps above to re-enable it.
Is it safe to edit the registry?
Yes, but proceed with caution. Always back up your registry before making any changes.
Can I enable drag and drop without admin rights?
No, you’ll need administrative rights to access and modify the registry.
Will enabling drag and drop affect system performance?
No, enabling drag and drop shouldn’t affect system performance.
Summary
- Open the Task Manager.
- Navigate to the File menu.
- Open the Registry Editor.
- Locate the Drag and Drop Registry Key.
- Modify the ‘Blocked’ Value.
Conclusion
Enabling drag and drop in Windows 11 is a simple process that can significantly enhance your productivity. By following the steps outlined above, you can restore this essential feature in no time. Remember to back up your registry before making any changes to ensure your system remains stable.
Once you have successfully enabled drag and drop, you’ll find it much easier to organize your files and folders. While Windows 11 offers many new features and improvements, some old functionalities, like drag and drop, are just too valuable to lose.
If you’re interested in learning more about Windows 11 features or troubleshooting other common issues, there are plenty of resources available online. Always stay updated with the latest Windows updates, as they often contain fixes and improvements that can enhance your user experience.
Happy dragging and dropping!
Kermit Matthews is a freelance writer based in Philadelphia, Pennsylvania with more than a decade of experience writing technology guides. He has a Bachelor’s and Master’s degree in Computer Science and has spent much of his professional career in IT management.
He specializes in writing content about iPhones, Android devices, Microsoft Office, and many other popular applications and devices.
Read his full bio here.
Одним из самых неприятных для меня «нововведений» Windows 11 стало отключение возможности перетаскивать файлы (Drag and Drop) на значки открытых программ в панели задач. Если ранее, отыскав в проводнике нужный файл, я мог перетащить его на значок свёрнутой программы, и она открывалась, готовая «принять» этот файл, теперь это не работает.
В предварительных сборках это можно было исправить в редакторе реестра, но этот способ больше не работает. Есть информация, что в будущих версиях ОС эту функциональность вернут. Однако для того, чтобы включить поддержку перетаскивания файлов уже сейчас, придётся прибегнуть к сторонним средствам — бесплатной утилите Windows11DragAndDropToTaskbarFix.
Включение поддержки Drag and Drop для панели задач в Windows11DragAndDropToTaskbarFix
Единственная задача бесплатной программы Windows11DragAndDropToTaskbarFix — вернуть прежнее поведение панели задач Windows 11 при перетаскивании файлов на значки открытых программ. Использование очень простое:
- Скачайте последнюю версию утилиты с официальной страницы разработчика и сохраните файл в удобное вам расположение. Учитывайте, что фильтр SmartScreen в Microsoft Edge и Windows могут блокировать загрузку и запуск файла как малоизвестного.
- Запустите программу (при сообщениях о том, что система не обнаружила файлы VCRUNTIME140_1.DLL и другие, используйте эту инструкцию). После запуска откроется окно командной строки, которое через короткое время само закроется.

- Сразу после этого вы сможете перетаскивать файлы и другие элементы на значки открытых программ в панели задач Windows 11.


Дополнительно, в папке с программой вы можете создать файл конфигурации с именем Windows11DragAndDropToTaskbarFixConfig.txt и добавить в него параметры, такие как включение автоматического запуска Windows11DragAndDropToTaskbarFix при входе в систему. Подробнее о файле конфигурации можно прочитать на официальной странице.
В моем тесте утилита исправно работает, из замеченных нюансов:
- При перетаскивании файлов всё так же отображается красный перечеркнутый значок «запрета действия» (но на работоспособность не влияет).
- В отзывах о проблемах с программой на GitHub есть информация о том, что при использовании нескольких мониторов, на втором монитора программа может работать неправильно.
При работе утилита не показывает своих значков в панели задач или области уведомлений: если вам требуется закрыть её, используйте диспетчер задач.