
The volume mixer is an excellent tool for managing volume on a per-app basis. It used to be easy to access on older versions of Windows but as of Windows 11, it’s been moved to the Settings app. The old volume mixer is still around and you can access it, and also pin it to the taskbar for quick access, or you can use a third-party app.
There are two stock volume mixers on Windows 11; the old one that users could easily access from the system tray, and the one in the Settings app which can be opened from the system tray as well.
1. Open Volume mixer
To open the volume mixer,
- Tap the Win+R keyboard shortcut to open the run box.
- In the run box, enter SndVol.exe and tap the Enter key.
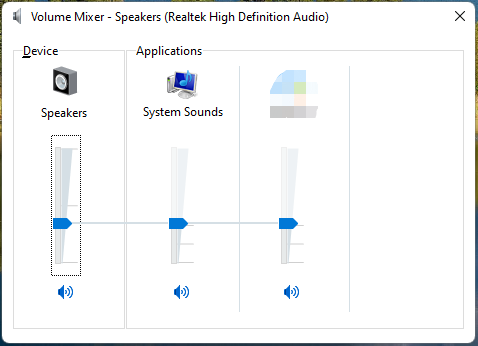
- The volume mixer will open.
- To pin it to the taskbar, go to the desktop.
- Right-click an empty area on the desktop and select New>Shortcut.
- In the location field, enter SndVol.exe and click Next.
- Name the shortcut Volume Mixer.
- Right-click the shortcut and select Pin to taskbar.
- You can delete the shortcut after it has been pinned.
2. Open Volume Mixer – Settings app
If you’d like to open the volume mixer in the Settings app, follow these steps.
- Right-click the speaker icon in the system tray.
- Select Volume Mixer.
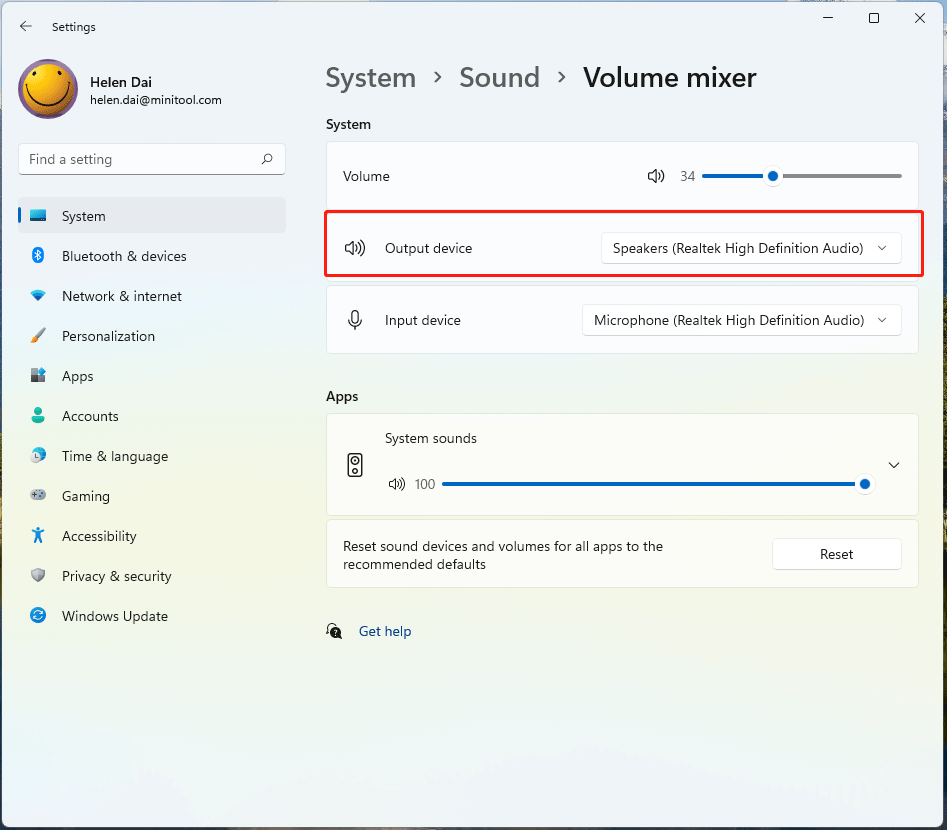
- The Settings app will open to the volume mixer panel.
3. Ear Trumpet
Ear Trumpet is a free, third-party app that adds a decent volume mixer to the system tray. With this app, you can change the volume on a per-app basis and opening it only takes one click.
- Visit the Ear Trumpet Microsoft Store page and click Get.
- Open the Microsoft Store app when prompted to by the browser.
- Click Install.
- Once the app is installed, open it.
- The app will add a speaker icon to the system tray.
- Click the icon to open the volume mixer.
Conclusion
Of the many things that Microsoft has removed or made inconvenient to access on Windows, the volume mixer is one of the worst offenses. The volume mixer is useful and users have to jump through hoops to access it. The mixer that has been moved to, or added to, the Settings app has the same features but it is somehow clumsy to use when compared to the mixer Windows users have had in older versions. Ear Trumpet does a better volume mixer than the Settings app. Let’s hope Microsoft doesn’t scrape the SndVol.exe executable on Windows 11.

Fatima Wahab
Fatima has been writing for AddictiveTips for six years. She began as a junior writer and has been working as the Editor in Chief since 2014.
Fatima gets an adrenaline rush from figuring out how technology works, and how to manipulate it. A well-designed app, something that solves a common everyday problem and looks
Sign in to your MUO account

Windows operating system comes with a powerful audio system featuring the Volume Mixer. It lets you adjust the volume levels of individual applications within Windows, giving you a personalized sound experience. This guide will show you different methods to open Volume Mixer in Windows 11.
1. Use the Run Command Line
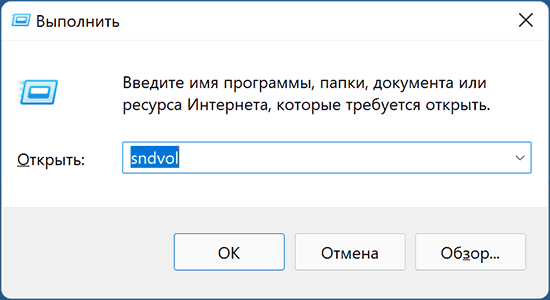
This is the quickest way to open Volume Mixer in Windows 11. All you have to do is press the Win + R keys and type «sndvol.exe» into the text box.
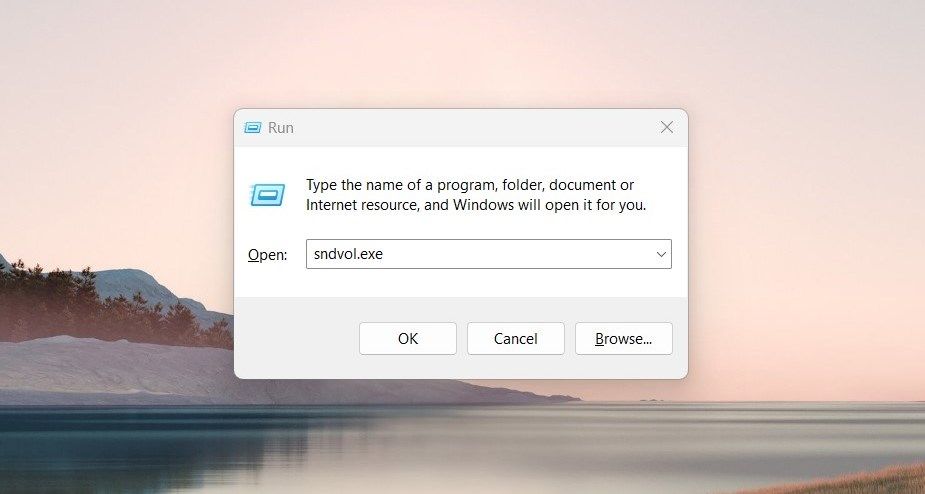
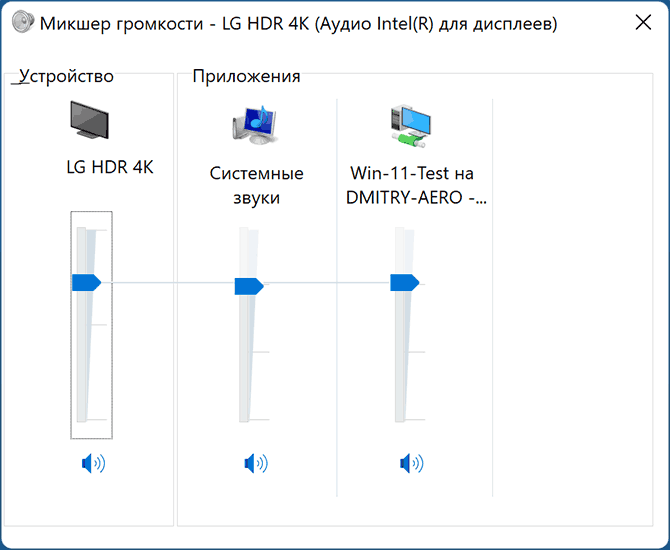
Now click OK or hit Enter on your keyboard. You will see the Volume Mixer window where you can adjust individual programs’ volume.
2. Use Taskbar Volume Icon
Notification Center is another way to access Volume Mixer in Windows 11. To do this, right-click the volume icon in the bottom right corner of your taskbar and choose Open volume mixer.
This will open the Volume Mixer window where you can control the volume levels of different applications and adjust their output devices.
3. Use the Control Panel
Along with the above two methods, you can also launch the Volume Mixer directly from the Control Panel. This program lets you control the volume levels independently for each application running on your computer.
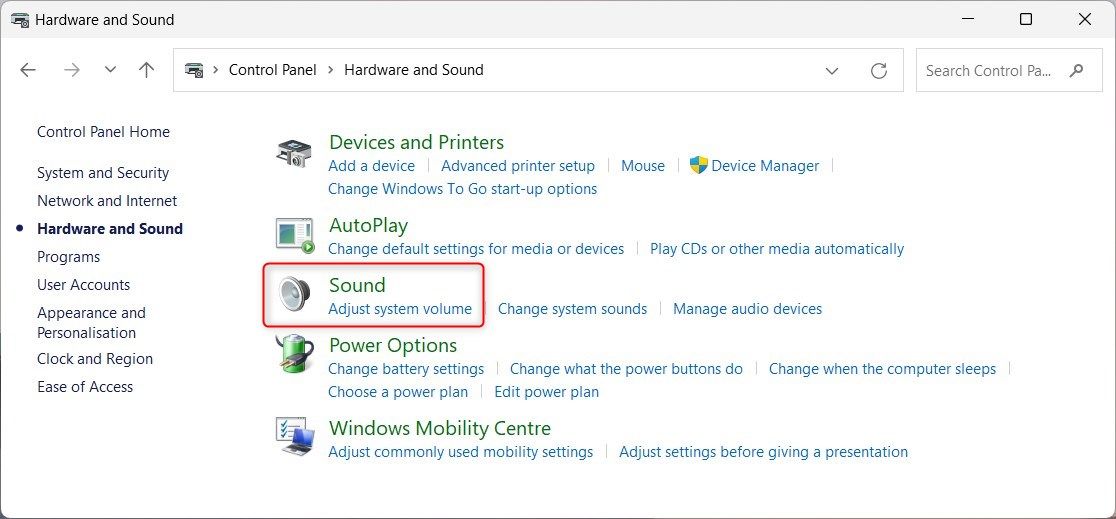
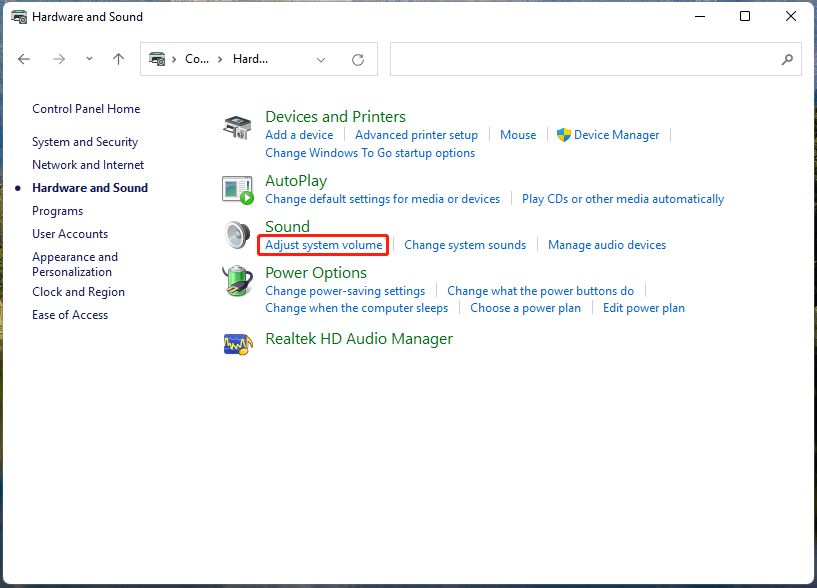
To access it, open the Control Panel, select Hardware and Sound, and then click Adjust system volume under the Sound section.

In order to change the volume of a specific application, click on its icon and drag the slider. To mute a specific application, click on the speaker icon next to it.
4. Use the Windows File Explorer
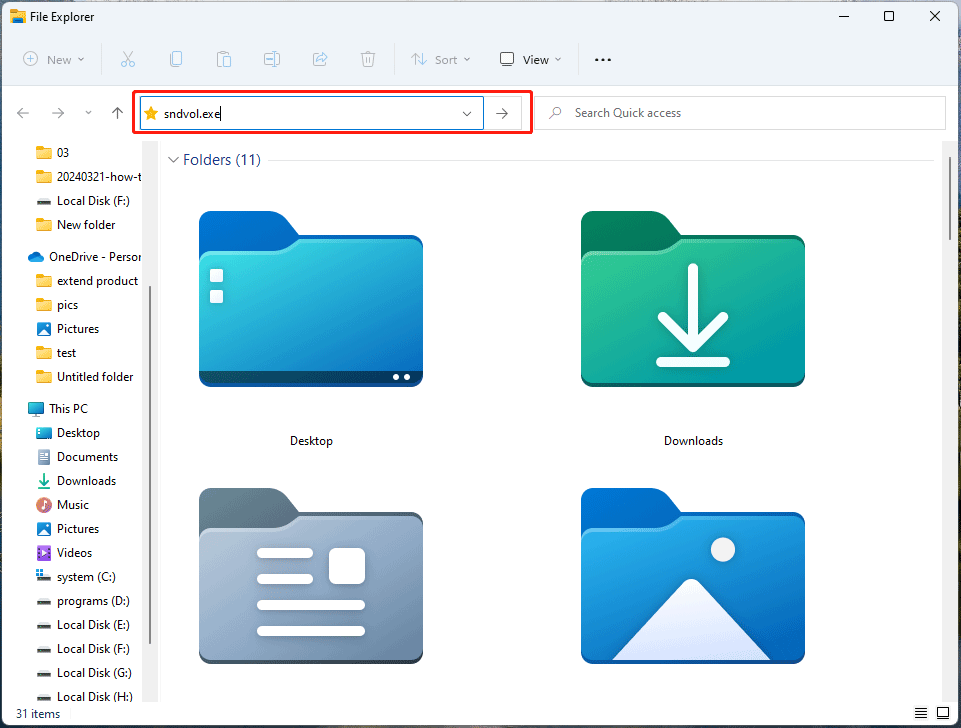
Windows File Explorer has an address bar that allows you to reach almost all files or programs on your computer. To open Volume Mixer, type sndvol.exe into the address bar and press Enter. This will open the Volume Mixer instantly, and you can adjust each app’s volume from here.
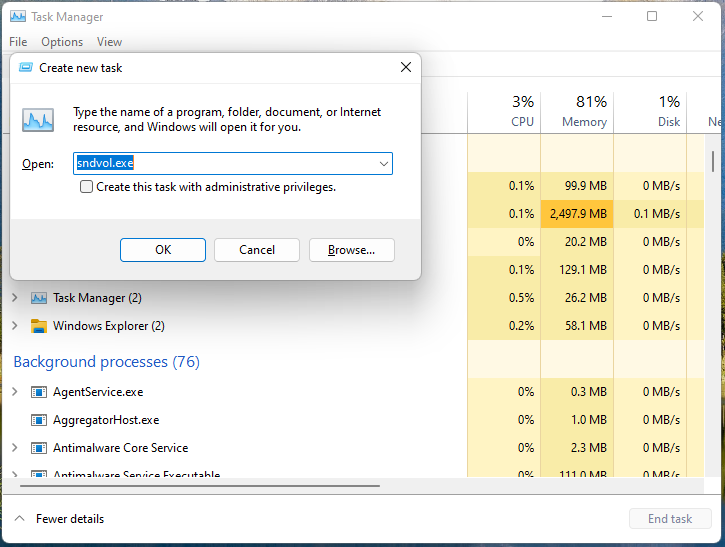
5. Use the Task Manager
You can also open Volume Mixer using Task Manager. To do so, right-click on Taskbar and select Task Manager from the option list. You can also press Ctrl + Shift + Esc on your keyboard to open it instantly.
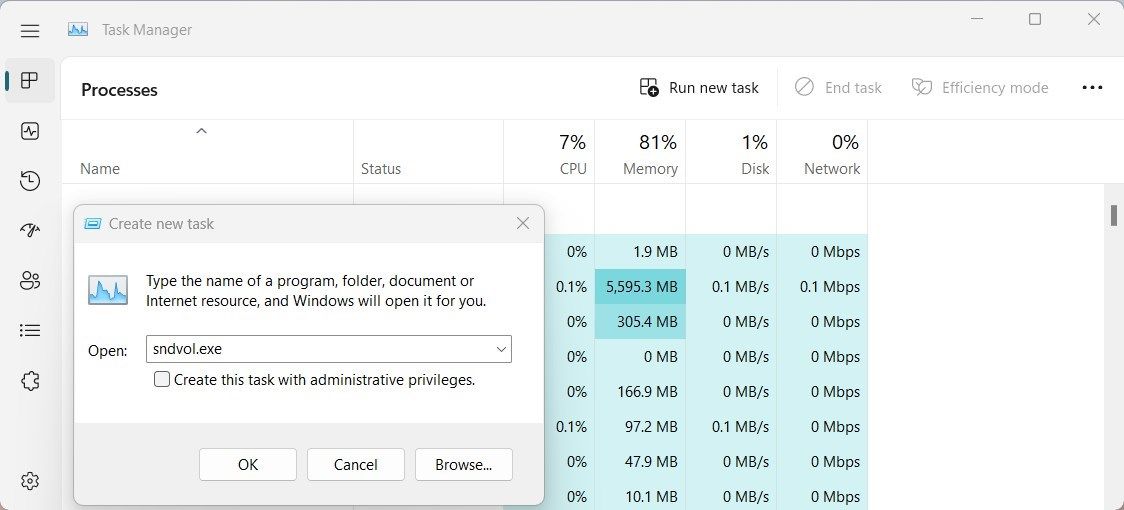
In the Task Manager window, click Run new task and type sndvol.exe in the Create new task window. Finally, click OK to launch Volume Mixer.
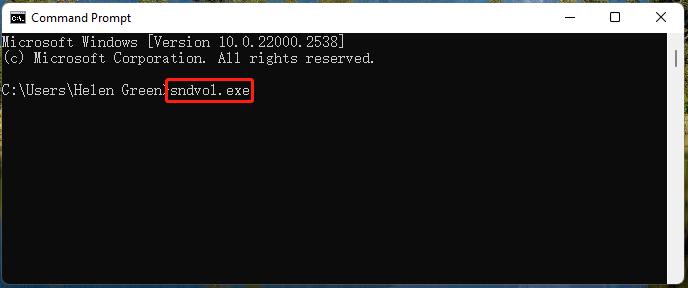
6. Use the Command Prompt
If you prefer using the command line over the graphical user interface, then this method is for you. To open Command prompt, click on Start, type “cmd” in its search box, and select the result from the list.
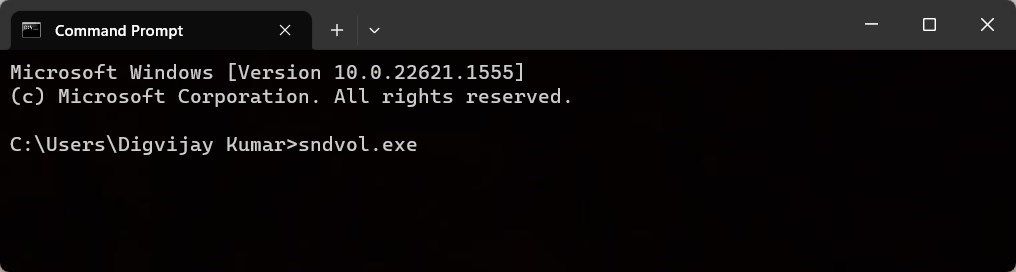
In the Command Prompt window, type sndvol.exe, and hit Enter again. This will open Volume Mixer immediately, allowing you to adjust the volume of each application from there.
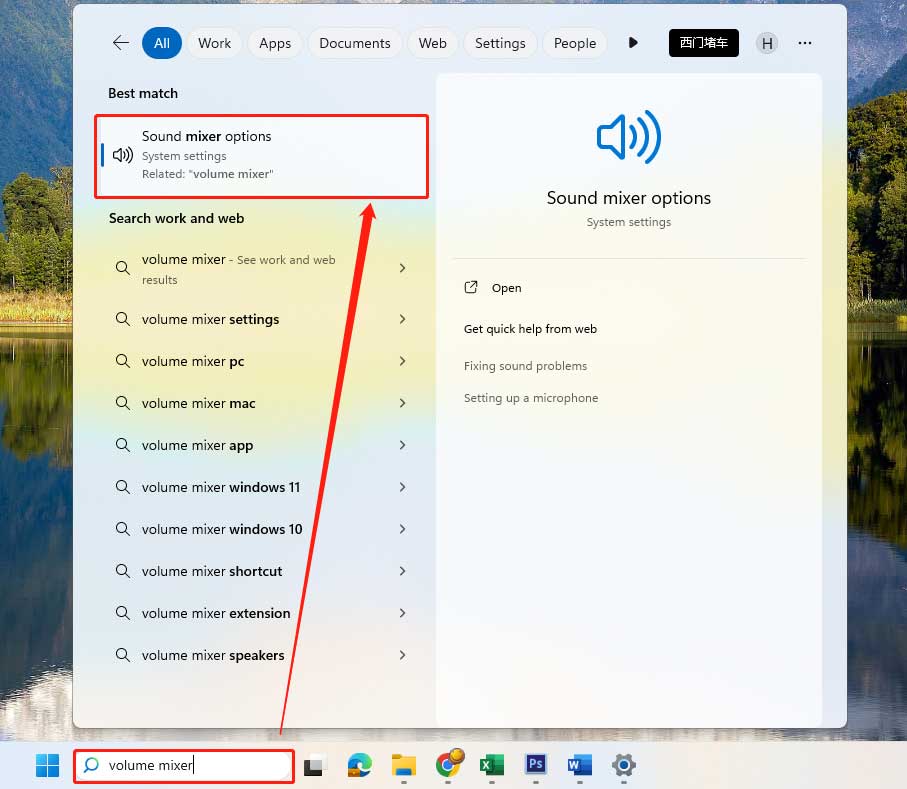
You can also use the Windows Search tool to open Volume Mixer in Windows 11. To do this, type “Volume Mixer” in the search bar and then click on the corresponding result.
Once the Volume Mixer window opens, you can adjust individual volume levels for applications or change their output devices in order to get your desired sound experience.
8. Create a Desktop Shortcut
Creating a desktop shortcut in Windows for Volume Mixer can help you quickly access this tool without having to search for it in different places.
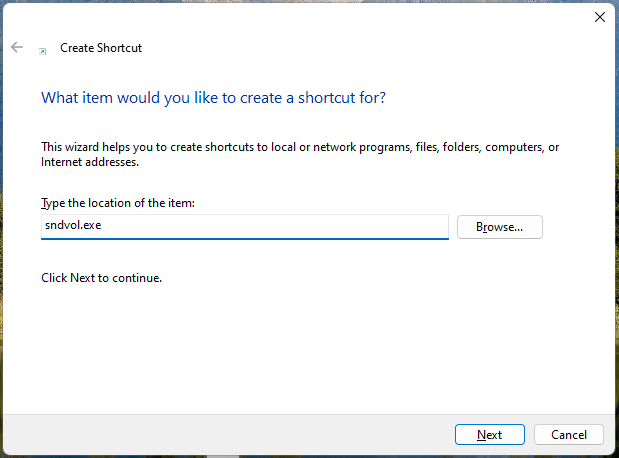
To create a shortcut, right-click on the desktop and select New > Shortcut from the context menu.
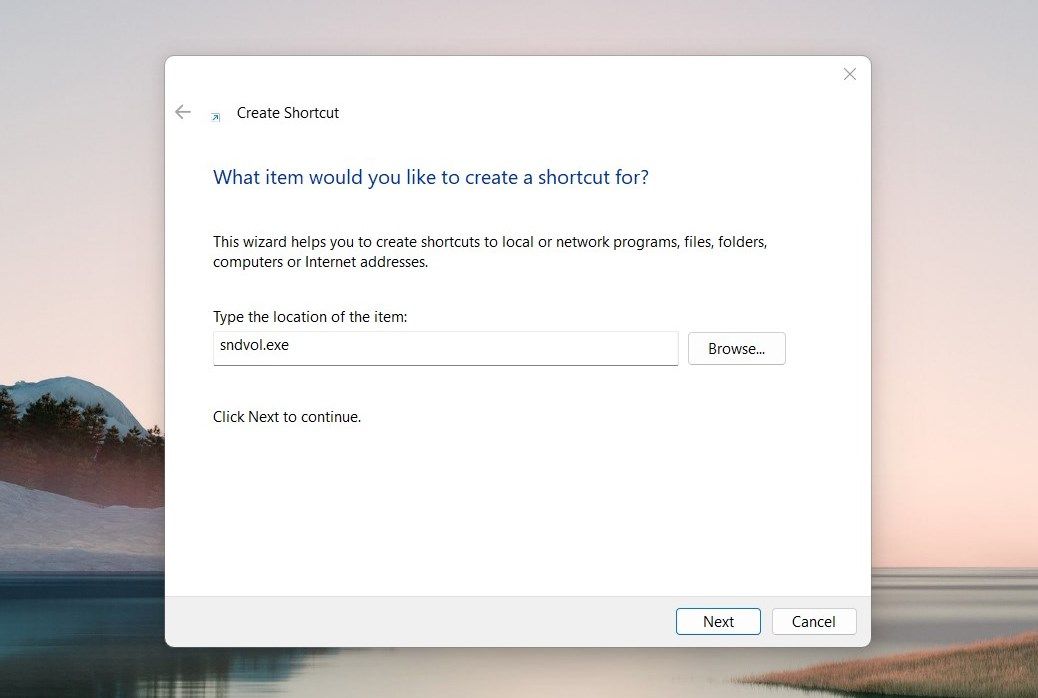
In the shortcut window, type sndvol.exe in the text box, and click Next.
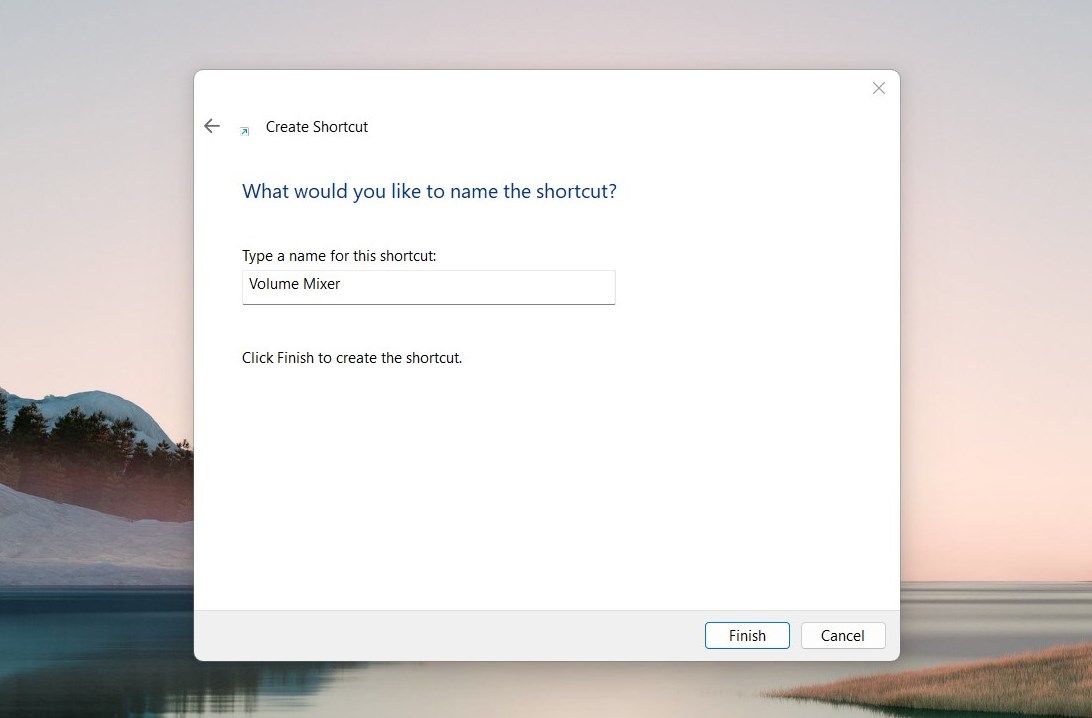
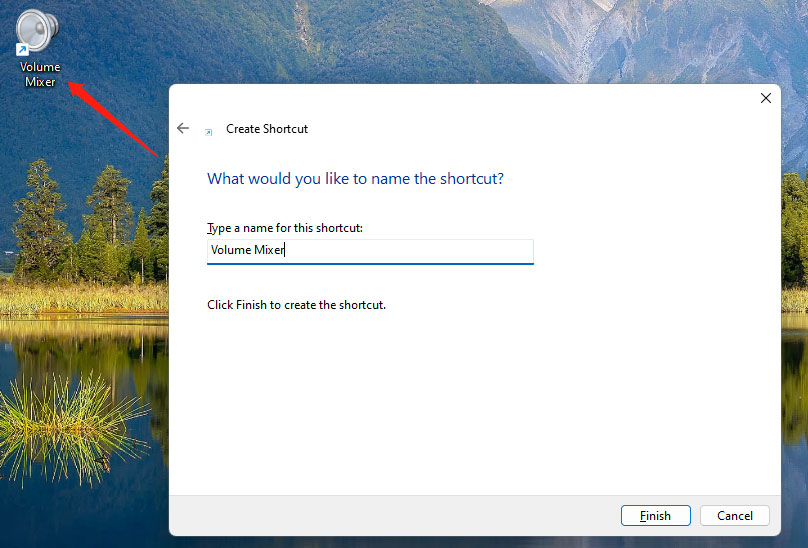
Then, enter a name for the shortcut and click Finish. This will create a shortcut on the desktop, and you can double-click on it to open Volume Mixer.
Get Quick and Easy Access to the Volume Mixer
In this article, you will find eight ways to open Volume Mixer on your PC. It allows you to customize individual application volumes within Windows to meet your specific needs. Give them a shot and see which works best for you.
Если нажать по значку с изображением динамика в области уведомлений Windows 11 правой кнопкой мыши, то, как и в предыдущей версии системы, в открывшемся меню будет пункт «Открыть микшер громкости», однако откроет он новый вариант микшера в Параметры — Система — Звук — Громкость, что не всегда удобно: старый регулятор громкости имеет свои преимущества.
В этой инструкции о том, как запустить классический микшер громкости в Windows 11, а при необходимости частого использования — ускорить его запуск.
Запуск старого микшера громкости
Старый вариант микшера громкости в Windows 11 никуда не делся, он всё также присутствует в системе, во всяком случае на дату написания статьи. Чтобы открыть его:
- Нажмите клавиши Win+R на клавиатуре (Win — клавиша с эмблемой Windows), введите sndvol в окно «Выполнить» и нажмите Enter.

- Откроется привычный микшер громкости со всеми доступными ранее возможностями настройки звука.

К сожалению, если он требуется часто, каждый раз выполнять запуск с помощью диалогового окна «Выполнить» не очень удобно, а способ возврата классического регулятора громкости с помощью реестра, который работал в предыдущей версии системы, в Windows 11 больше не работает.
Если стандартный микшер громкости вам нужен регулярно, сделать его открытие более удобным можно следующим способом:
- В удобном вам расположении — папке или на рабочем столе нажмите правой кнопкой мыши и выберите пункт «Создать» — «Ярлык» в контекстном меню.
- В поле «Укажите расположение объекта» введите sndvol.exe и нажмите «Далее».
- Укажите желаемое имя ярлыка.
- Теперь по запуску ярлыка будет открываться стандартный микшер громкости, а сам ярлык вы можете закрепить на панели задач: правый клик по ярлыку — показать дополнительные параметры — закрепить на панели задач.
Бесплатное приложение Classic Volume Mixer
Дополнительная возможность восстановления стандартных регулировок громкости — бесплатная программа Classic Volume Mixer для Windows 11, доступная для загрузки на странице разработчика: https://github.com/popeen/Classic-Volume-Mixer/releases. Учитывайте, что при загрузке приложения, оно может быть заблокировано фильтром SmartScreen, как «малоизвестное».

После запуска программы она добавит свой значок в область уведомлений. Значок может быть скрыт, чтобы отображался всегда — используйте параметры панели задач (открыть можно через правый клик по панели задач), раздел «Переполнение угла панели задач». По нажатии на значок будет открываться стандартный микшер громкости.
Возможно, для кого-то из читателей описанное упростит рассмотренный аспект работы с Windows 11. Однако нельзя исключать, что в будущих обновлениях системы стандартный микшер громкости может и исчезнуть.
-
Home
-
News
- How to Open Windows 11 Volume Mixer and Pin it to Taskbar?
By Helen | Follow |
Last Updated
Whether you’re fine-tuning individual app volumes or adjusting system sounds, the Windows 11 Volume Mixer offers a range of customization options. Here in this post written by the Windows video editor from MiniTool, let’s explore how to open the Volume Mixer in Windows 11 and pin it to your taskbar for convenient access.
In the realm of digital multitasking, controlling audio settings swiftly and efficiently is paramount. Windows 11, the latest iteration of Microsoft’s operating system, introduces a sleek and streamlined Volume Mixer interface, empowering users to manage audio levels with ease.
How to Open Volume Mixer Windows 11?
First of all, all the following methods can open Windows 11 Volume Mixer but in two different forms. One is directly opening the Volume Mixer app while the other is accessing Volume Mixer in Windows Settings.
#1 Open Volume Mixer in Windows Settings
Solution 1. Through System Tray
Right-click on the speaker icon located in the system tray at the bottom right corner of the taskbar and select the Open volume mixer option.
Solution 2. By Windows Search
Alternatively, you can search for “Volume Mixer” in the Windows Search bar.
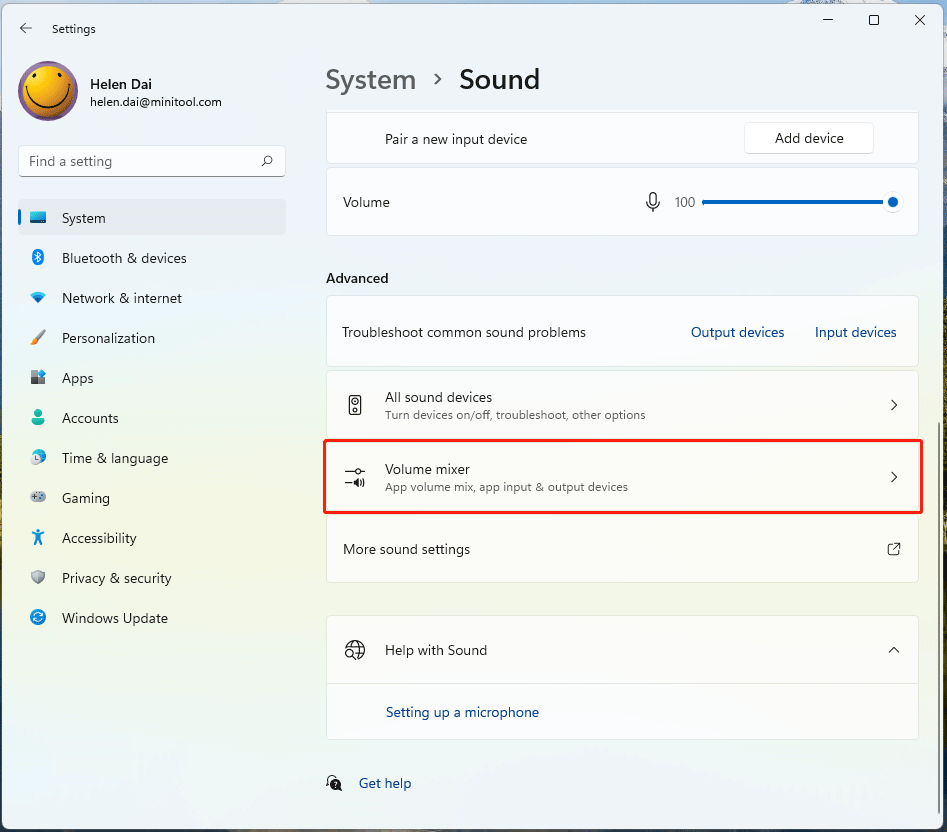
Solution 3. Within Windows Settings
Or you can access Volume Mixer through the Settings app by navigating to System > Sound > Advanced sound options and choosing Volume Mixer.
#2 Open Volume Mixer App
Solution 4. With Windows Run
Open the Windows Run box, input sndvol.exe, and click OK.

Solution 5. From Control Panel
Launch Windows 11 Control Panel, view its items by Category from the top right, and click Hardware and Sound. Next, select Adjust system volume under the Sound section.
Solution 6. Use File Explorer
Another way to launch the Win11 Volume Mixer is by relying on Windows File Explorer. Just input sndvol.exe into its search bar and press Enter.
Solution 7. Relying on Task Manager
Just open Task Manager in Windows, click File > Run new task, and type sndvol.exe into the column.
Solution 8. Through Command Prompt (CMD)
Also, you are able to access the volume mixer using the Windows command. Directly input sndvol.exe into Command Prompt or Windows PowerShell (Windows Terminal) and press Enter.
Solution 9. By Creating a Shortcut
Finally, you can create a shortcut for Windows 11 Volume Mixer on your desktop. Then, you can launch it directly from the desktop.
1. Right-click on any blank area on your desktop and select New > Shortcut from the context menu.
2. In the pop-up window, type sndvol.exe in the column.
3. Next, name the shortcut of Windows 11 Volume Mixer and click Finish.
How to Pin Volume Mixer to Taskbar?
- Open Volume Mixer.
- Right-click on the Volume Mixer icon in the taskbar.
- From the context menu, select Pin to taskbar.
Once pinned, you’ll see the Volume Mixer icon permanently added to your taskbar for quick access. If you want to unpin Volume Mixer, just right-click on its icon again and choose
How to Use Windows 11 Volume Mixer?
Adjusting App Volumes
Once in the Volume Mixer, you’ll see individual volume sliders for each open application or program. Just drag the sliders up or down to adjust the volume levels of specific apps or system sounds.
Muting and Unmuting
To mute a particular app or system sound, simply click on the speaker icon located below the volume slider. Clicking again will unmute the app or sound.
Device Selection
If you have multiple audio output devices connected to your system, you can select the desired playback device from the corresponding dropdown menu within the Volume Mixer settings window.
Benefits of Using Volume Mixer in Windows 11
- Granular Control: With the Volume Mixer, you can adjust the volume levels of individual apps and system sounds, allowing for precise audio customization.
- Enhanced Productivity: Quickly mute or adjust the volume of specific applications without disrupting your workflow, whether you’re gaming, watching videos, or working on multiple tasks simultaneously.
- Effortless Accessibility: By pinning the Volume Mixer to your taskbar, you ensure instant access to audio controls whenever you need them, minimizing the time spent navigating menus or settings.
Conclusion
The Volume Mixer in Windows 11 serves as a versatile tool for managing audio levels and customizing your sound experience to suit your preferences. Whether you’re a seasoned multitasker or simply seeking greater control over your system’s audio output, mastering the Volume Mixer can significantly enhance your overall Windows 11 experience.
By familiarizing yourself with the Volume Mixer interface and utilizing the option to pin it to your taskbar, you’ll streamline your audio management workflow and unlock the full potential of your Windows 11 device. So, dive into the world of sound control and elevate your digital experience with the Windows 11 Volume Mixer today.
Related Articles
- Volume Mixer Won’t Open Windows 10 [Full Fix]
- Volume Mixer Not Saving Settings on Windows? Try These Methods
- 3 Ways to Fix Volume Mixer Name Not Available in Windows 10
About The Author
Position: Columnist
Helen enjoys the process of turning video clips and photos about herself into beautiful videos. Then, she will share the videos on Instagram, YouTube, Facebook, Twitter, etc. The most exciting thing is to see the increasing number of views of her videos. Helen is willing to share her ideas about making wonderful videos from scratch. Thus, she writes articles for MiniTool Technology.
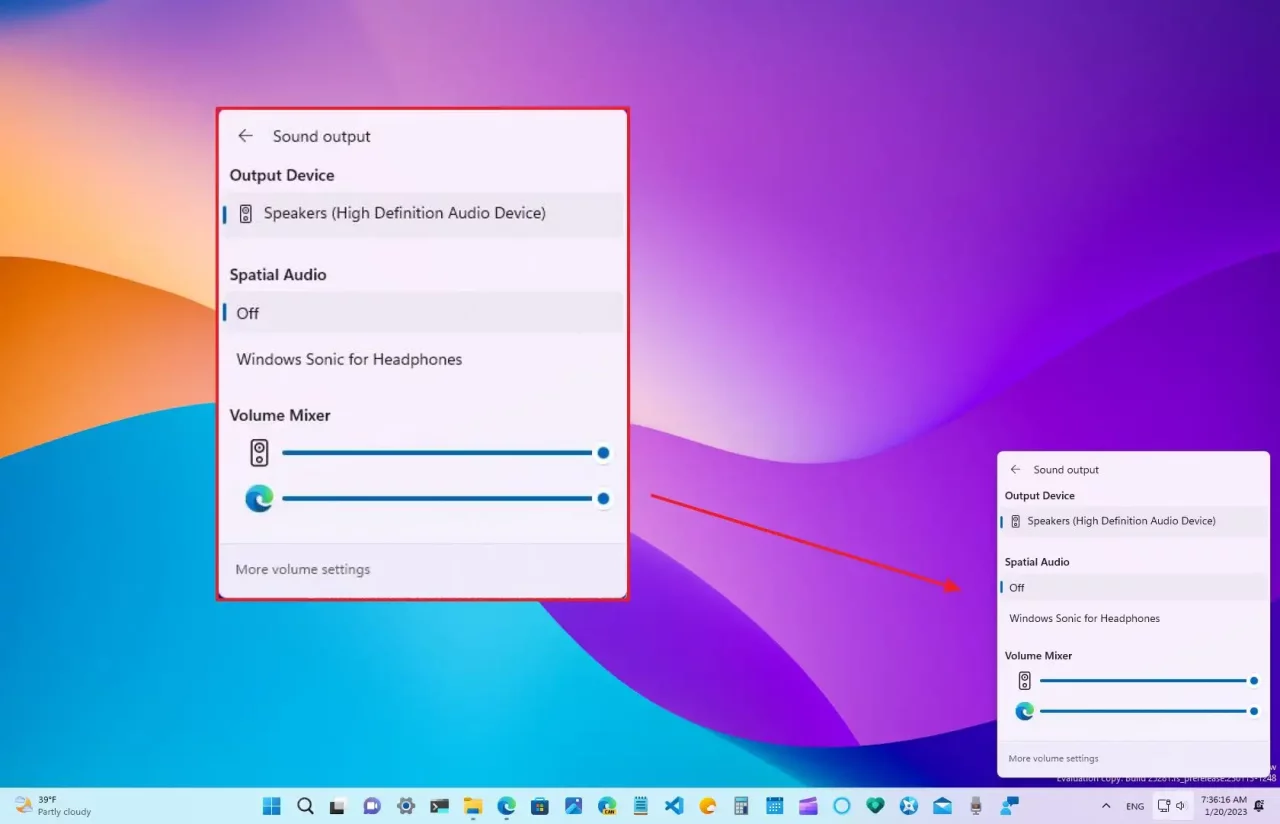
Накануне Microsoft выпустила новую инсайдерскую сборку Windows 11 под номером 22581 для канала Dev, в которой вновь появилось несколько скрытых нововведений. Например, добавлен обновлённый микшер громкости, позволяющий изменять громкость отдельных приложений из меню быстрых действий без перехода в приложение «Параметры». Новая функция отчасти напоминает приложение EarTrumpet.
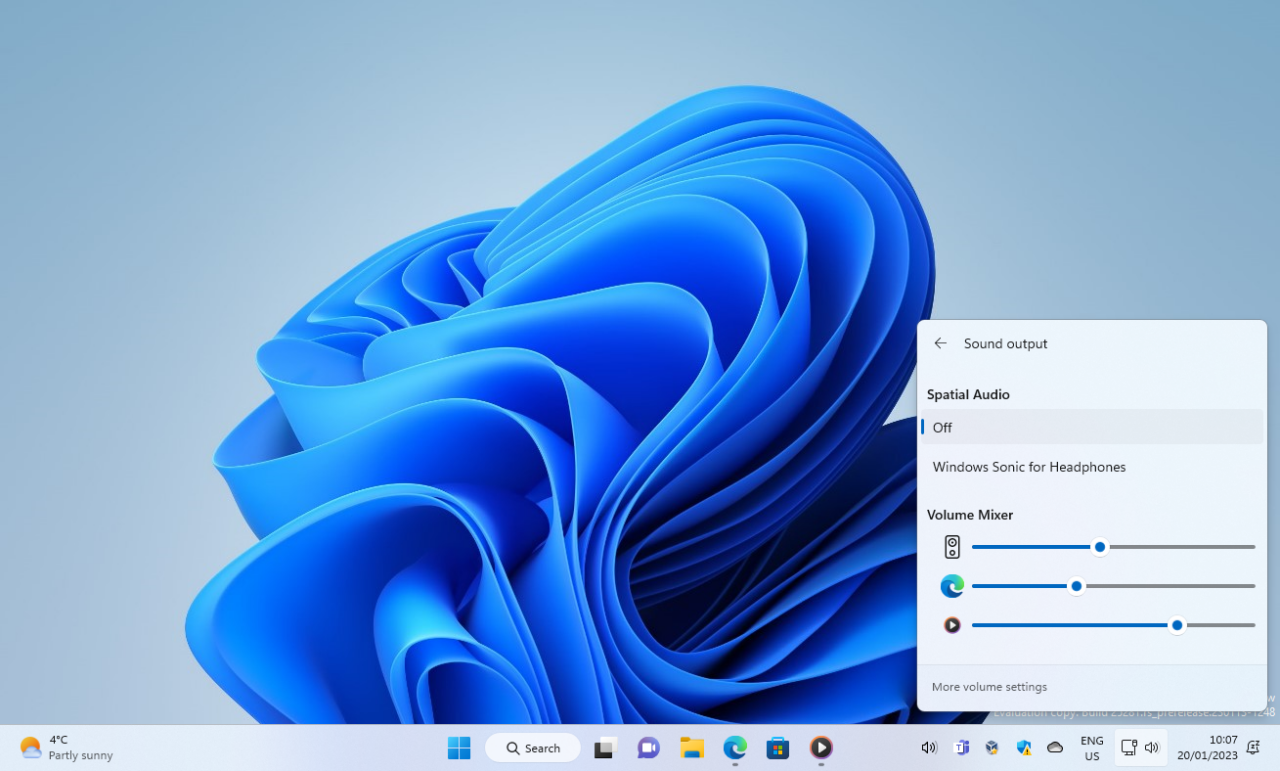
Важно отметить, что обновлённый микшер громкости пока официально не анонсирован, но, вероятно, он будет представлен в ближайших инсайдерских сборках. Чтобы принудительно включить новшество, необходимо воспользоваться утилитой ViVeTool и инструкцией ниже.
Инструкция
- Скачайте утилиту ViVeTool по этой ссылке. Это новая версия ViveTool 0.3.2, подробности о которой мы рассказали в нашем материале.
- Распакуйте скачанный архив в любое место на вашем компьютере (например, можно создать папку ViVeTool в корне диска C: и поместить файлы туда).
- Откройте командную строку от имени администратора (например, набрав CMD в поиске и выбрав соответствующий пункт).
- В командной строке перейдите в папку с ViVeTool с помощью команды cd /d <путь к папке>, после чего нажмите Enter. Например:
cd /d "C:\ViVeTool" - Введите команду
vivetool /enable /id:42106010 /store:bothи нажмите Enter. - Убедитесь, что в командной строке появилось сообщение «Successfully set feature configuration»
- Перезагрузите компьютер для применения изменений.
Для отключения функции воспользуйтесь командой:
vivetool /disable /id:42106010 /store:both