
While every meeting is switched to the online mode it is important for your Webcam to communicate with your device and function well when synced with applications like Zoom, Skype, Google Meet, etc. However, some users while using the Dell laptop camera faced issues that interrupted the usual working. Camera not detected or blank screen issue can come up due to various reasons. Although, these issues can seem tough and irritating but can be easily resolved by users themselves.
If you are looking out for options to resolve the issue of Dell laptop camera not working, the given article is for you. But before we proceed with fixes it is important to identify what can be the reasons behind Dell laptop Webcam not working.
Although identifying the reason behind your Dell integrated webcam not working, we have listed a few issues that can cause the issue in your Windows device.
- If the in-app permissions are not granted to the Webcam
- Your antivirus can interrupt the accessibility of Webcam to the application in the name of security concerns
- Due to outdated or corrupted Webcam drivers on your device.
For most Dell devices these issues when addressed can resolve the Dell laptop camera not working Windows 11, 10, 8, or 7. Now that we know the reasons let us move to the respective fixes.
How to Fix Dell Laptop Camera Not Working Windows 10, 11, 8, or 7?
You don’t need to apply all the fixes listed below just try one fix at a time, until the camera not working on Dell laptop Windows 10, 11, or older versions issue is resolved.
FIX 1: Give App Permissions
If you have downloaded the Windows update recently it is possible that the existing applications require permissions to be granted. Use the steps below to grant permission for the camera to your desired app.
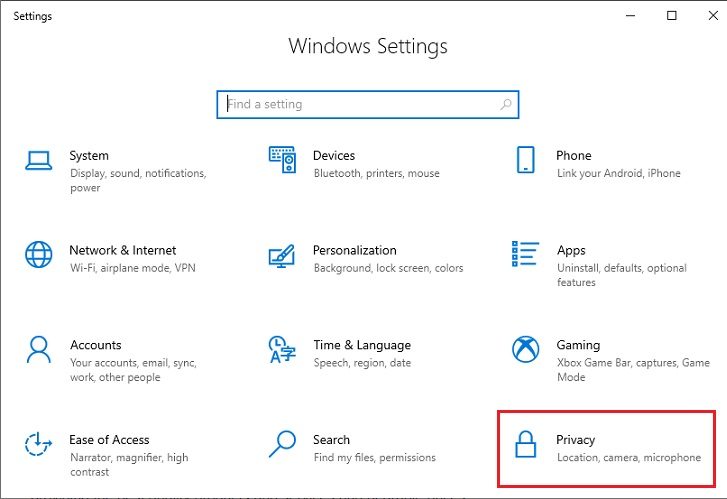
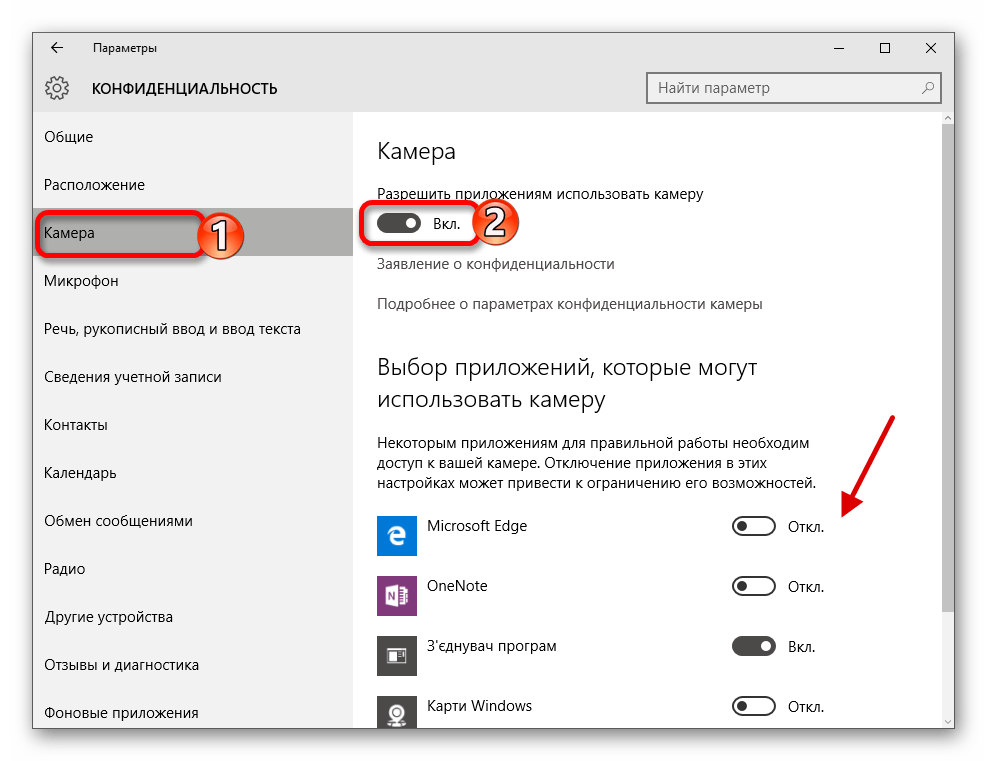
- Open the Settings App using Windows and I keys together. Expand the Privacy section.

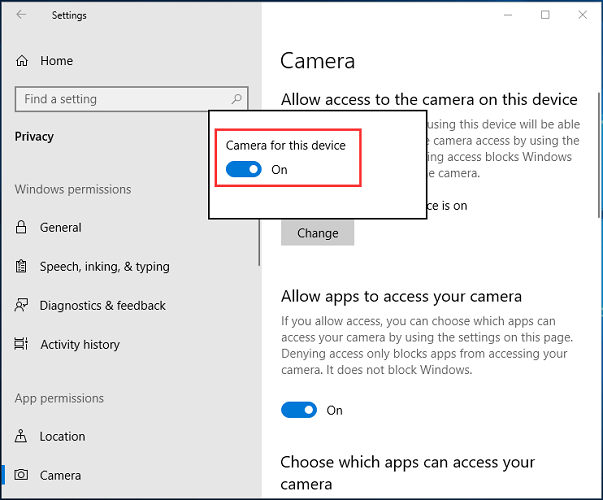
- From the left panel select the option Camera and check if the toggle is turned on for Allow apps to access your camera.
Also, check if the Camera access for this device is on.
- Scroll down in the list of Microsoft applications and check if the access toggle is turned on for the specific app.
Once the camera permissions are granted check if this fixes Dell laptop camera not working. If the problem remains, move to the next solution.
Also Know: How To Fix MSI Camera Not Working in Windows PC
FIX 2: Check Antivirus on your Device
If your Dell device has antivirus software installed it is possible that the software is blocking the access of webcam leading to Dell integrated webcam not working. This can occur due to security concerns raised by the antivirus against your webcam. However, to fix the issue of the camera not working on Dell laptop, temporarily disable the antivirus and check if the issue is fixed. But make sure you enable the Antivirus once the work is done so that none of your system files are affected.
If the problem persists even after disabling the Antivirus software camera not working on Dell laptop issue remains, move on to the next set of fixes.
FIX 3: Update Webcam Driver
The issue of the Dell laptop camera not working Windows 7,8,10, or 11 can be due to a pending webcam driver update. You can manually download the latest driver update from Dell’s official support page. But this requires technical skills and patience to be implemented. If you are a new user you might need an option that is easy, quick, and automatic.
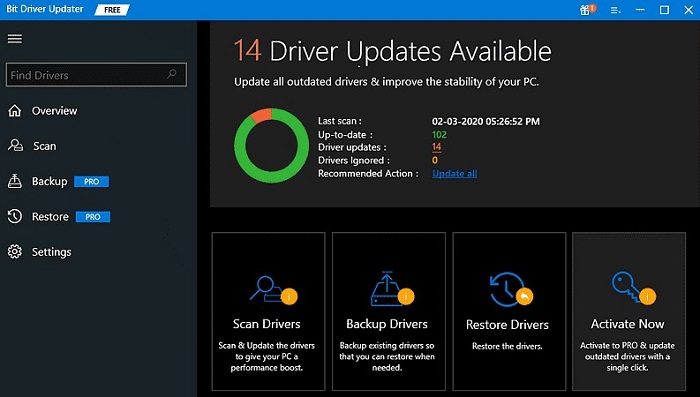
The Bit Driver Updater is a tool that allows driver updates automatically. Simply scan for pending driver updates, download them, or schedule downloads at your ease and that is it. Moreover, with the tool, you can achieve improved performance of your PC, backup and restore functionality for all your driver data, and 24*7 support assistance. If you wish to unlock the complete list of features, buy the Pro version with a complete guarantee of money back for up to 60 days if the tool is unsatisfactory.
How to Use the Bit Driver Updater?
Download the Bit Driver Updater from the button below. Complete installation by processing simple installation steps on your screen.
Once done use the steps below to download the latest webcam driver automatically and fix the Dell camera not working issue on your device.
- Run the Bit Driver Updater software and look for the Scan drivers option. Click on it to begin the search for outdated drivers and wait till the list is displayed.

- Locate the Webcam driver from the list and click on Update option in front of it. Alternatively, If you wish to update all the driver’s Pro version users of the software can use Update All option.

- Install webcam driver and Restart your dell laptop to bring the updates into action.

This method will fix the error of Dell laptop camera not working Windows 11, 10, 8, or 7. If the fixes till now have brought no luck for your Dell device, move to the next and final option.
Also Know: Logitech C920 Webcam Not Working on Windows 11/10 [Solved]
FIX 4: Reinstall Webcam Driver
If the fixes mentioned above didn’t work for your Dell device and the webcam update also failed to recover camera not working on Dell laptop the last resort is to reinstall the webcam driver. If the webcam driver installed on your device is corrupted or some files are missing the problem can come up.
Here’s how you can uninstall the existing Webcam driver and install it again.
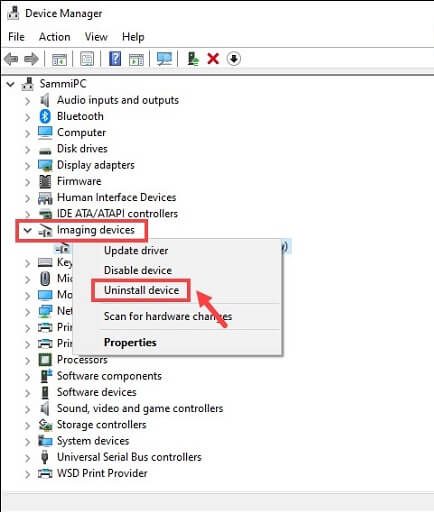
- Right click on the Windows icon on the taskbar and select Device Manager to open the utility.
- In Device Manager expand the category for Imaging devices or Camera whichever is available. Select your Camera device and click on Uninstall Device option.

- In the following window with the warning click on Uninstall to confirm.
Now Restart your device and Scan for missing drivers. Update the Webcam driver and Install it by applying instructions that are followed.
Check if this fixes the Dell laptop camera not working on your device.
Also Know:Best Video Quality Enhancer Software in 2023 (Free)
Dell Laptop Camera Not Working Windows 11, 10, 8, or 7: FIXED
We hope the above fixes helped you simplify the fixes and resolve Dell laptop camera not working issue. Apply the fixes in the order they are listed to avoid the extra work. Make sure you use the Bit Driver Updater tool to never miss a driver update and download all the system drivers automatically. These fixes when applied can resolve Dell laptop webcam not working quickly.
Need more help from us? Feel free to ask all your questions in the comment box. Also, if the guide helped you with your problem do leave your feedback or suggestions in the section for comments. Don’t forget to subscribe to our blog for more informative, technology-specific, and problem-solving articles. To never miss an update Follow us on Facebook, Instagram, Pinterest, and Twitter.
Для этого вам потребуется нажать иконку меню “Пуск”, и пройти по следующему пути: Далее, Компьютер, Свойства и Диспетчер устройств. В самом низу списка будет значок, обозначающий устройства обработки изображений — это и будет камера.
Через команду “Задействовать”, вызываемую по щелчку правой кнопки мыши, вы можете легко выключить и включить ваше веб-камеру. По этому же принципу происходит управление блю-тус адаптером.
Виндоус 10 на сегодняшний день предлагает современные драйверы для веб-камер. Как только они будут доступны вашему ноутбуку, их установит центр обновлений.
Обратите внимание! Сбои, связанные с работой веб-камеры, могут быть связаны со сбоем совершенно других систем, например, приложений для видоконференций, старыми драйверами и т.д.
Ваша камера работает нормально, если в панели управления рядом с пунктом Устройства обработки изображений нет стрелочки вниз или же ярко-красного восклицательного знака. Если этого пункта нет вообще, следует обратиться в официальную тех.поддержку или в наш сервис: опытные специалисты быстро и без проблем найдут и устранят проблему, возвратив вашему ноутбуку полную функциональность. Диагностика осуществляется бесплатно.
Возможные проблемы:
Настройка ОС Windows — 700 руб.
Установка драйверов — 700 руб
Замена камеры — 900 руб.
Home
Laptops
By
Abhishek Silwal
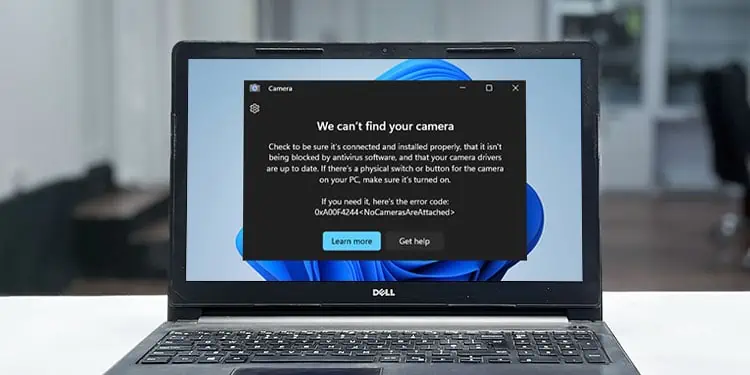
If the camera or webcam on your Dell laptop is not working, you’ll usually see some error message or a black screen on the camera window depending on the application. This issue usually happens due to improper permission or camera settings and driver issues. But it can be a hardware issue as well.
First, figure out if the camera does not work on all applications or only some. If only the Camera app is not working, you can go to its settings and then repair or reset it. But if no applications can use the camera, you need to check and manage a few processes.
Check the Camera Shutter/Slider
Some Dell laptops have a shutter on the camera for privacy reasons. You need to slide it to the left to expose the camera.

Some models also contain a button on a Function key (usually F8 or F9) to enable/disable the camera. In such cases, you should be able to see a camera icon on this key.
Try pressing this key or Fn + this key and see if the camera works now. You might also see an icon that tells whether the camera is on or off on the screen.
Enable Camera Access
Your computer contains privacy options that restrict usage to trackable components like a Camera or Microphone. So, you may need to go to such privacy settings and enable access before being able to use the camera.
- Press Win + I to open Windows Settings.
- Go to Privacy & security > Camera or Privacy > Camera.
- Enable Camera access, Let apps access your camera, and all the necessary apps.

- On Windows 10, you need to select on Change and toggle on Camera access for this device. Then, enable the switches next to Allow apps to access your camera as well as each required application.


Check the Camera in BIOS
You should also check if the camera is disabled in your BIOS. In such cases, your system won’t even try to detect and use the camera device.
- Restart your laptop. As soon as the Dell logo appears, press the BIOS key (usually F2) to get to BIOS. You may need to press this key repeatedly to get the proper timing.
- Go to System Configuration > Miscellaneous Devices.
- Tick Enable Camera and click Apply.

- Click on Exit to get out of the BIOS/UEFI setup.

Check Camera Status
The next thing you should do is go to the Device Manager and check the camera driver or device to determine why it is not working. Depending on the icon you see on the camera, you should be able to determine the potential causes.
- Press the Windows key + R to launch Run.
- Type
devmgmt.mscand click OK. It will run the Device Manager. - Expand the category Cameras or Imaging Devices.
- Check the icon on your camera device.
- If it shows a black arrow icon pointed down, the device is off. Right-click on the camera and pick Enable device to enable it.

- If it shows an error sign (yellow exclamation mark), it indicates a device or drive issue. Double-click on the device to open its Properties and see the error message corresponding to the error’s nature. You usually need to update or reinstall the drive to resolve the errors.
- If you can’t find a camera device, check under Sound, video, and game controllers. If it’s not there, right-click your computer name (the first name on the device manager) and select Scan for hardware changes.
If the camera is still missing, it shows that the laptop has not detected any camera. So, either there are some connection issues or the camera device is damaged.
- Some devices that the system hasn’t detected properly can come under Other devices. So, check this category and look for the error code here as well.
- If it does not show any error, it is likely blocked by an antivirus app for privacy or because it detected some malware.
- If it shows a black arrow icon pointed down, the device is off. Right-click on the camera and pick Enable device to enable it.


Update/Reinstall Camera Driver
If the camera device shows some errors, there might be some problems with the current driver. Also, even if the camera icon on the Device Manager does not show any error, we still recommend troubleshooting for driver errors as Windows may not always be able to detect the exact condition of the camera.
First, try updating the driver.
- Go to the Device Manager and get to your camera device.
- Right-click the device and select Update driver.
- Click on Search automatically for drivers.

If your system already contains the latest version of the driver, you should uninstall and then reinstall it to take care of any bugs within.
- Go to the Device Manager and get to your camera.
- Right-click the camera and choose Uninstall device.
- Tick the option in the window and click Uninstall.

- After that, right-click on the computer name and then Scan for hardware changes to automatically detect the camera and reinstall its driver.

Close Other Apps Using the Camera
If an application is already using the camera, it will prevent all other processes from using this resource. So, you should also check if any such apps are open on your system and close them appropriately. You can use the built-in program, Task Manager for this purpose.
- Open the Task Manager by pressing Ctrl + Shift + Esc hotkey.
- If you can’t see many tabs, select More details.
- Go to the Processes tab.
- Search the applications that can use the camera under Apps or Background processes.
- If you find such an app, select it and click End Task.


After looking through all the processes, try opening the app where you need the camera and see if it works now.
Check Antivirus App
Some third-party antivirus apps also include a separate option to disable access to the camera as a privacy setting. You need to go to the app’s settings and change this option in such cases. If you are unable to find the option, we recommend searching official sources to find where it is.

Scan for Malware
It is also possible that your current camera driver is infected with some malware. Or the app’s file that helps access the camera is suffering from this issue. In such cases, your antivirus program will restrict running such software components.
You need to scan and remove such threats from your system. To do so from the built-in Windows Security or Defender,
- Open Settings and select Privacy & security > Windows Security.
- Go to Virus & threat protection and then Scan options.
- Tick Full scan. Then, click Scan now.

Repair or Reset the Camera App
This solution is only applicable to the scenario where the Camera app on Windows doesn’t work and shows some error messages. If all other apps can use the camera or webcam, the issue is with the Camera app itself. You need to repair or reset the app in this case.
- Press the Windows key + S to pop up search bar.
- Type
Camerabut don’t open the app. - Right-click on Camera and select App settings.

- Scroll down to the Reset section.
- First, click on Repair. If it doesn’t help, select Reset the next time.


If the Camera app still doesn’t work, you need to reinstall it.
- Open Run.
- Type
powershelland press Ctrl + Shift + Enter to launch the Elevated Windows PowerShell. - Enter
get-appxpackage *Microsoft.WindowsCamera* | remove-appxpackageto remove the app.
- Then, install Camera from Microsoft Store.

Run Dell SupportAssist
Dell provides a dedicated support app that helps perform all possible troubleshoots on your laptop. It is also possible to use this app to automatically resolve most of the camera issues.
- Open Dell SupportAssist on your laptop. If you don’t have this application, you need to download it from the official website.
- Click on Run all from the Home tab. It will optimize your system, install all driver updates as well as check your hardware devices for errors.

- Check the results of the hardware diagnostics and apply the solutions suggested by the apps.

Repair the Camera Device (Hardware)
Your laptop won’t detect the camera at all if its connection to the motherboard is broken or if the device itself has some damage.
The only way to check for and resolve such issues is by exposing the camera hardware by removing your screen bezel. Doing so without prior experience and training can damage other components like the screen as well as the bezel. Also, you may not have all the necessary equipment to perform such operations.
So, we highly recommend you seek help from service centers or hardware specialists. It is especially true if the laptop warranty is still valid as any attempts to open the laptop parts will void the warranty.
В Windows 10 разработчики добавили новое приложение – «Камера». С её помощью вы можете делать снимки или записывать видео. В статье будут описаны настройки и решение проблем, связанные с этим инструментом ОС.
Включаем камеру в Windows 10
Чтобы включить камеру в Виндовс 10, сначала нужно настроить её в «Параметрах».
- Зажмите Win+I и перейдите в «Конфиденциальность».
- В разделе «Камера» включите разрешение на её использование. Внизу можно настроить разрешение определённым программам.
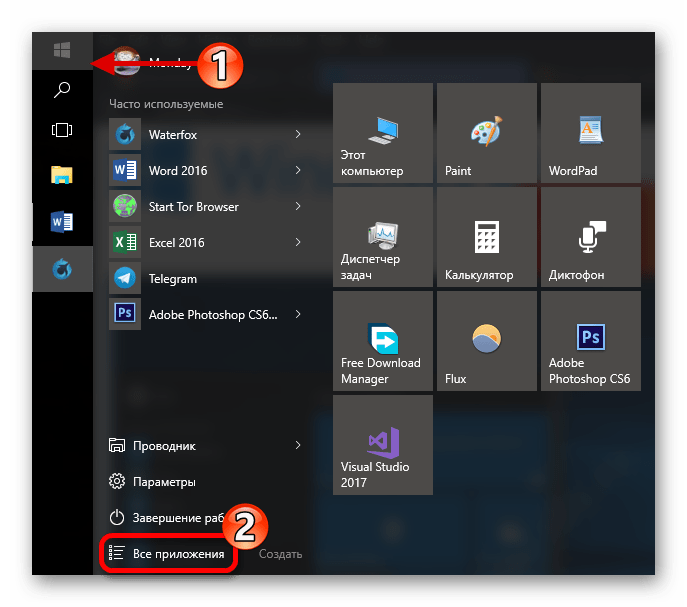
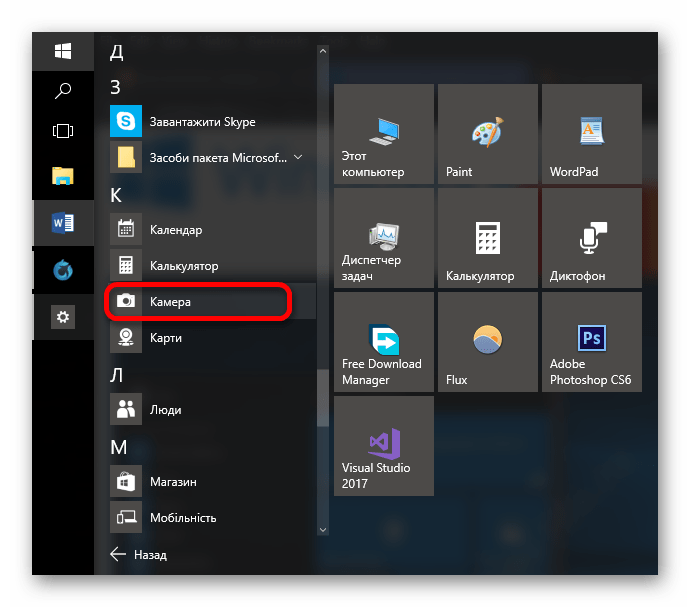
- Теперь откройте «Пуск» — «Все приложения».
- Найдите «Камера».

Данная программа имеет стандартные функции и в ней есть всё необходимое для комфортной работы и использования.

Решение некоторых проблем
Бывает так, что после обновлений камера отказывается работать. Это можно исправить переустановкой драйверов.
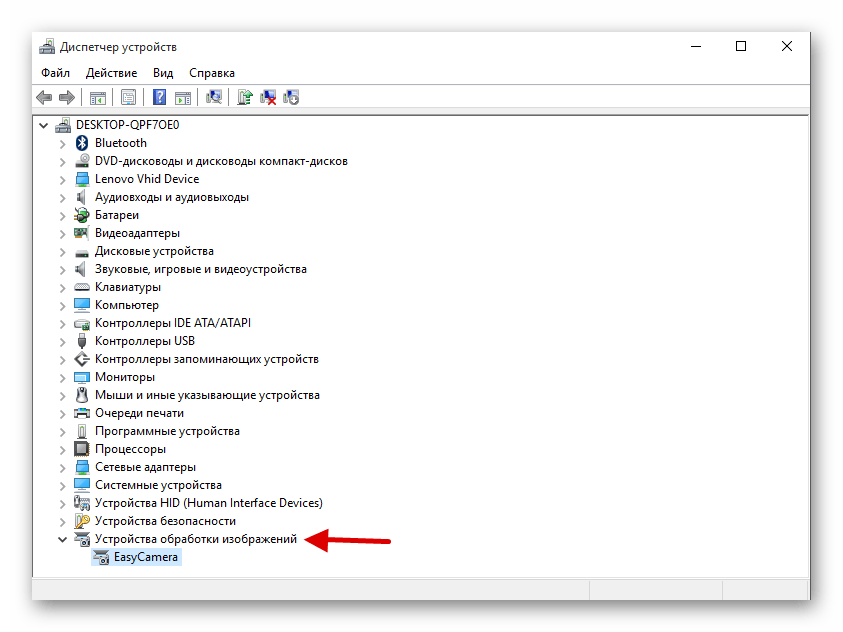
- Кликните правой кнопкой мыши на значок «Пуск» и выберите «Диспетчер устройств».
- Найдите и разверните раздел «Устройства обработки изображений».
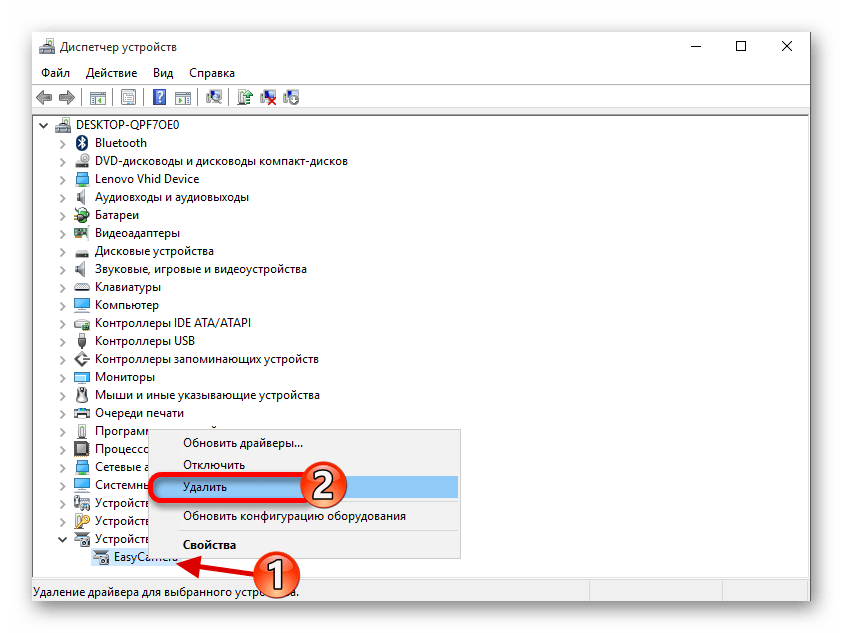
- Вызовите контекстное меню (правый клик) на оборудовании и выберите пункт «Удалить».
- Теперь в верхней панели кликните «Действие» — «Обновить конфигурацию оборудования».


Подробнее:
Лучшие программы для установки драйверов
Как обновить драйвера на компьютере с помощью DriverPack Solution
Подробнее: Проверка компьютера на наличие вирусов без антивируса
Включение камеры в Виндовс 10 — довольно простая задача, с которой не должно возникнуть серьёзных сложностей.
Наша группа в TelegramПолезные советы и помощь
Dell laptops are widely popular for their reliability and performance. The webcam and microphone, as important components of a laptop, play an important role in video calling, online conferencing and multimedia recording. In this article, we will detail how to turn on the webcam and microphone on Dell laptops and solve the problems you may encounter during use.
Learn how to turn on the webcam and microphone on Dell laptops
To use the webcam and microphone on your Dell laptop, you need to make sure the relevant drivers are installed and enabled. Here are the basic steps:
Enable the devices through system settings
Step 1: Open the «Start» menu and click on the «Settings» icon.
Step 2: Go to «Privacy» settings and select «Camera» or «Microphone» in the left menu.
Step 3: Make sure the «Allow apps to use camera» or «Allow apps to use microphone» option is enabled.
Check the driver via Device Manager
Step 1: Right-click on the Start button and select Device Manager.
Step 2: Locate the «Image Devices» and «Audio Input and Output» options in the device list.
Step 3: Make sure the camera and microphone devices are enabled, right-click on the device name and select «Enable Device» or «Update Driver».
Enabling Devices via Apps
Video calling apps: Open Skype, Zoom or other video calling apps and select the correct camera and microphone in the app settings.
Recording apps: Open your system’s recorder app and make sure the microphone is enabled.
Second, solve the problem of Dell laptop camera and microphone not working
During the process of using, you may encounter the situation that the webcam and microphone can’t work properly. Here are some common problems and their solutions:
Device is not recognized
Check the drivers: Check if the drivers for the webcam and microphone work properly in Device Manager, update or reinstall the drivers if necessary.
Restart your computer: Shut down and restart your computer to make sure the devices are recognized correctly.
Device is occupied by other applications
Close other applications: Make sure no other applications are using the camera and microphone.
Check background processes: Open Task Manager and end background processes that may be using the device.
Permission issues
Check app permissions: Make sure that the relevant apps have been granted permission to use the camera and microphone.
Check system settings: Check the system permissions in the «Privacy» settings to make sure the camera and microphone are not disabled in the global settings.
Dell laptop camera and microphone use common troubleshooting
Even if the device is successfully enabled, sometimes you may encounter some faults affecting the use, the following are common problems and solutions:
Blurry or no picture
Clean the camera lens: Make sure the camera lens is clean and free of dust or dirt.
Adjusting app settings: Adjust the camera settings in the video call app to select the appropriate resolution and brightness.
Distorted or no sound
Check microphone settings: Make sure the microphone is enabled and select the correct audio input device in the app.
Adjust volume: Open the volume control panel and adjust the microphone input volume.
Sound and picture are not synchronized
Network Connection Problems: Ensure that the network connection is stable to avoid lags and stutters.
Restart the application: Close and reopen the application to resynchronize the audio and video.
Detailed steps and settings to enable webcam and microphone on Dell laptop
Here are the detailed steps and settings:
Enable the device in system settings
Open «Settings» menu, select «Privacy», enable the camera and microphone privileges.
Check the device status in «Device Manager» and enable or update the driver.
Application Settings
Open the video call or recording application and enter the settings screen.
Select the correct camera and microphone devices for audio/video testing.
Optimize the usage environment
Ensure that the usage environment is well lit and the camera lens is clean.
Use a high-quality microphone or headset to improve the sound quality.
Improve the quality and stability of Dell laptop webcam and microphone usage
For a better using experience, here are some suggestions to improve the quality and stability:
Keep your device up-to-date
Regularly check and update the camera and microphone drivers to ensure the best device compatibility and performance.
Optimize device settings
Adjust the camera and microphone settings in the apps and choose the appropriate parameters.
Close unnecessary background apps to reduce system resource usage.
Use high-quality accessories
Use high-quality camera and microphone accessories to improve audio and video quality.
Check the network
Make sure to use it in a stable network environment to avoid problems caused by unstable network.
With the above methods, users can not only smoothly enable the webcam and microphone on Dell laptops, but also improve the quality and stability of use and enjoy a better audio and video experience. If you encounter problems that can’t be solved in actual operation, we recommend consulting Dell customer service or checking the relevant technical documents.