
Время на прочтение2 мин
Количество просмотров69K
В прошлом нашем посте мы рассказали как готовим стандартные клиентские виртуальные машины и показали на примере нашего нового тарифа с Ultralight windows vds за 99 рублей, как мы создавали стандартный образ Windows Server 2019 Core.
В службу поддержки стали поступать заявки как работать с Server 2019 Core без привычной графической оболочки. Мы решили показать работу с Windows Server 2019 Core и как установить на него GUI.

Не повторяйте это на рабочих машинах, не используйте Server Core как рабочий стол, отключите RDP, обезопасьте свою информационную систему, именно безопасность — это главная фишка «Core» инсталляции.
В одной из следующих наших статей мы рассмотрим таблицу совместимости программ с Windows Server Core. В этой статье мы затронем то, как установить оболочку.
Оболочка сторонними средствами
1. Сложный, но наиболее экономичный способ
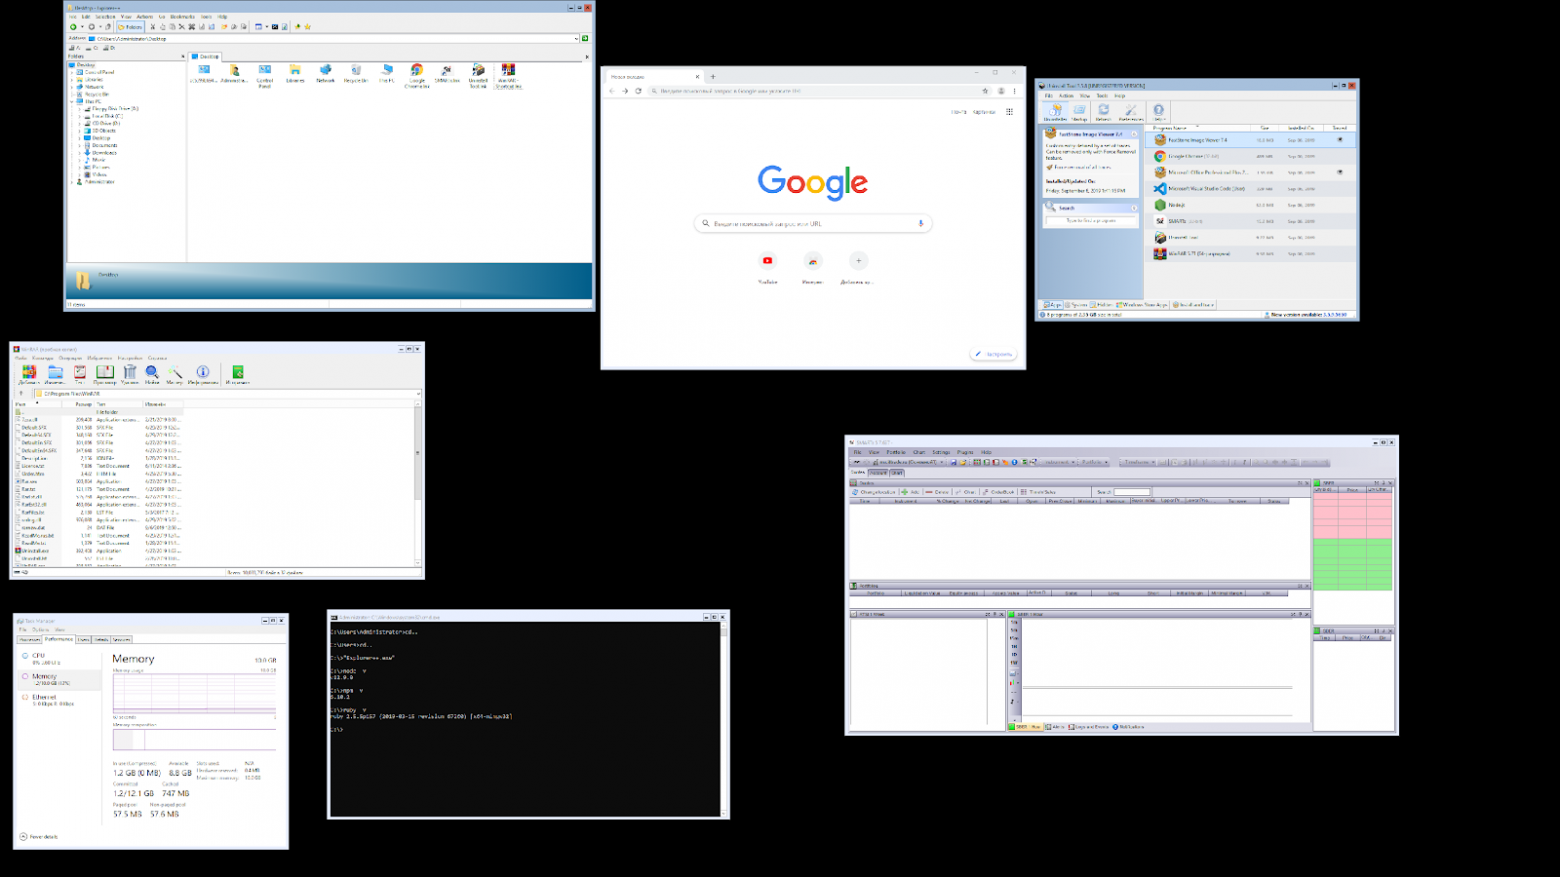
В Server Core из коробки нет привычного нам explorer.exe, чтобы облегчить нам жизнь, мы скачаем explorer++. Он заменяет все, что умеет оригинальный explorer. Рассматривался только explorer++, но подойдет почти любой файловый менеджер, в том числе Total Commander, FAR Manager и другие.
Скачиваем файлы.
Сначала нам нужно скачать файл на сервер. Это можно сделать через SMB (общую папку), Windows Admin Center и Invoke-WebRequest, он работает с параметром -UseBasicParsing.
Invoke-WebRequest -UseBasicParsing -Uri 'https://website.com/file.exe' -OutFile C:\Users\Administrator\Downloads\file.exeГде -uri это URL файла, а -OutFile полный путь куда его скачивать, указывая расширение файла и
C помощью Powershell:
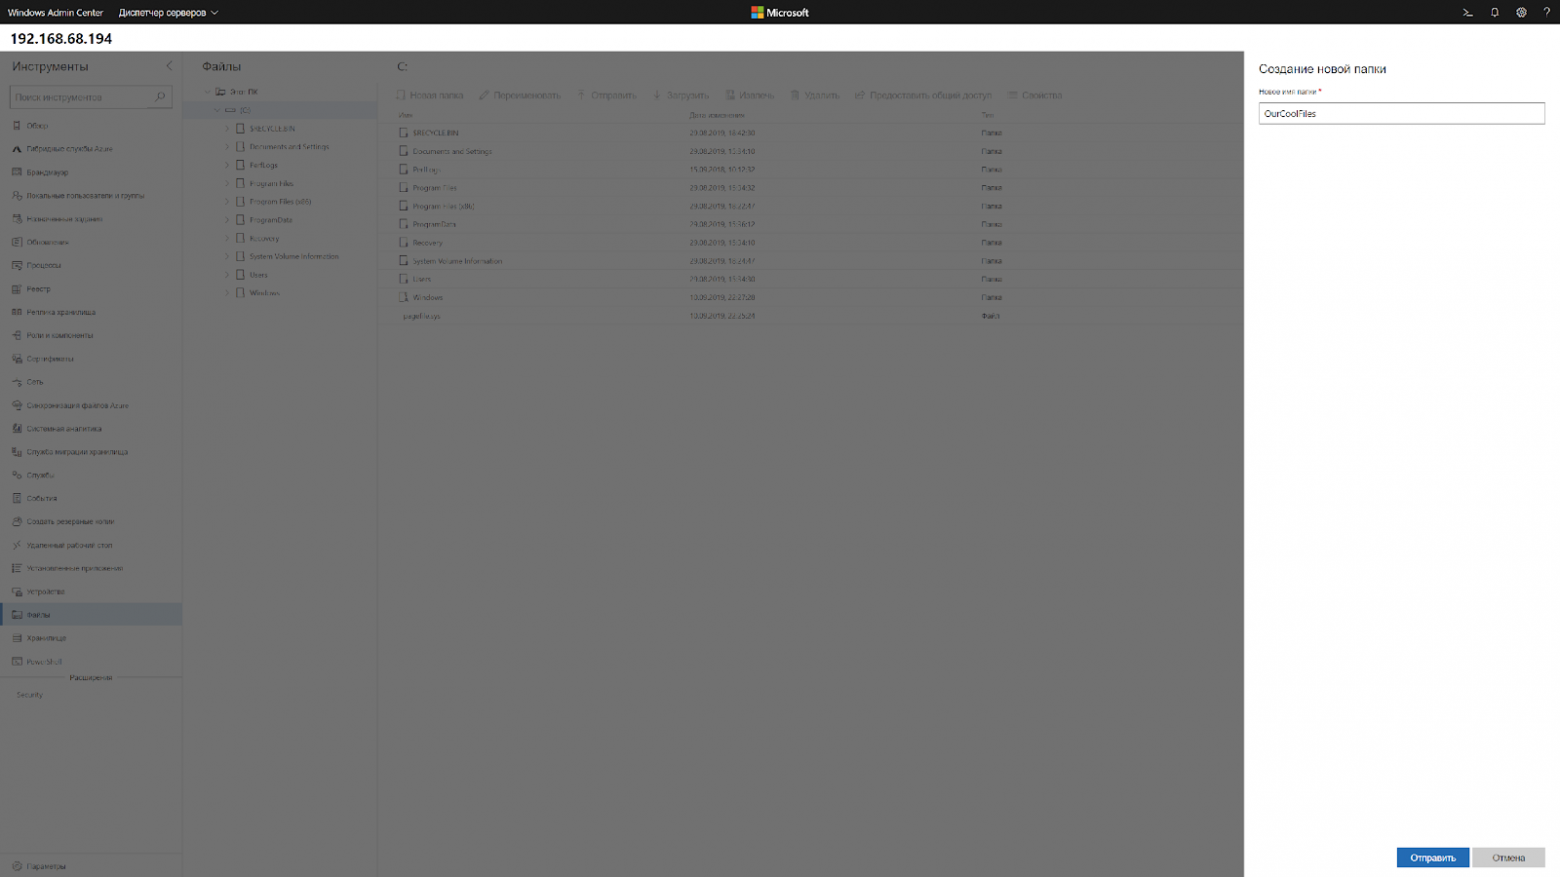
На сервере создаём новую папку:
New-Item -Path 'C:\OurCoolFiles\' -ItemType DirectoryРасшариваем общую папку:
New-SmbShare -Path 'C:\OurCoolFiles\' -FullAccess Administrator
-Name OurCoolShare
На вашем ПК папка подключается как сетевой диск.

Через Windows Admin Center создаем новую папку выбрав пункт в меню.
Переходим в общую папку и жмем кнопку отправить, выбираем файл.

Добавляем оболочку в планировщик.
Если вы не хотите запускать оболочку вручную при каждом входе в систему, то нужно добавить её в планировщик задач.
$A = New-ScheduledTaskAction -Execute "C:\OurCoolFiles\explorer++.exe"
$T = New-ScheduledTaskTrigger -AtLogon
$P = New-ScheduledTaskPrincipal "local\Administrator"
$S = New-ScheduledTaskSettingsSet
$D = New-ScheduledTask -Action $A -Principal $P -Trigger $T -Settings $S
Register-ScheduledTask StartExplorer -InputObject $D
Без планировщика можно запустить через CMD:
CD C:\OurCoolFiles\Explorer++.exeСпособ 2. Запускаем родной Explorer
Remember, no GUI
Server Core App Compatibility Feature on Demand (FOD), вернет в систему: MMC, Eventvwr, PerfMon, Resmon, Explorer.exe и даже Powershell ISE. Подробнее можете ознакомиться на MSDN. Существующий набор ролей и компонентов он не расширяет.
Запустите Powershell и введите следующую команду:
Add-WindowsCapability -Online -Name ServerCore.AppCompatibility~~~~0.0.1.0Затем перезагрузите сервер:
Restart-Computer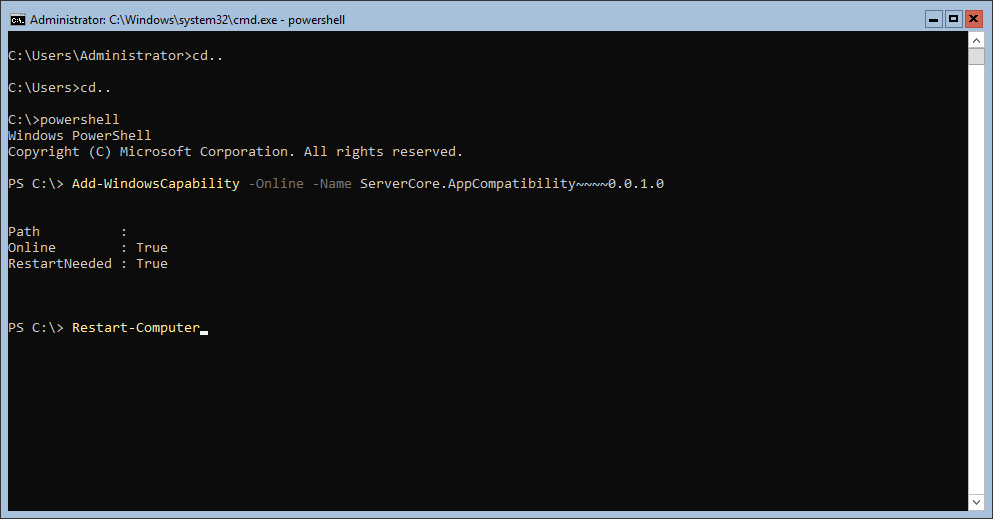
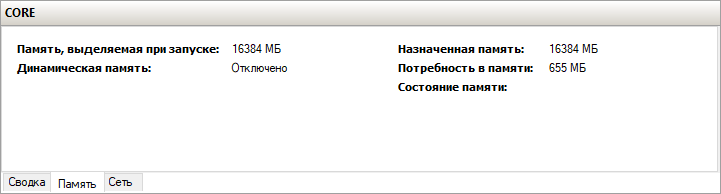
После этого вы сможете запускать даже Microsoft Office, но потеряете примерно 200 мегабайт ОЗУ навсегда, даже если в системе нет активных пользователей.

Windows Server 2019 c установленным Features on Demand
Windows Server 2019 CORE
На этом всё. В следующей статье мы рассмотрим таблицу совместимости программ с Windows Server Core.
Предлагаем обновлённый тариф UltraLite Windows VDS за 99 рублей с установленной Windows Server 2019 Core.

Some people would feel frustrating about that after installing Windows server 2016 successfully, the user interface has changed. There is no a graphic user interface, so all the operation would be executed by typing some professional commands. That is not easy for some users who are not familiar with Windows server, especially for the people who is the freshman for Windows server. Then people may ask whether there is a way to enable the GUI in Windows server 2016. Here I would show you how to enable the GUI in Windows server 2016.
Here I would show the detailed steps from scratch.
When we begin installing the new Windows server 2016, there are many options for us.

You can see many option are list on the above picture. The options without Desktop Experience are the core editions. They would not offer GUI after installation. And the ones with Desktop Experience would offer full GUI features. If you clear about which is your favor, you would find the problem and has no need to read the under passage. But if you just wrong installed the core edition of Windows server 2016 and you regretted it when finding that all the operations have to be implemented by typing commands. Then you should follow the under steps.
Step 1: Open PowerShell console and type Get-WindowsFeature -Name *GUI* into it.

You would find that all the install state of the GUI features listed are shown as removed. And now you should try to install the removed GUI features. Before that, you should make sure that your server has access to internet.
Step 2: Just type Install-WindowsFeature -Name Server-Gui-Shell, Server-Gui-Mgmt-Infra into PowerShell console and press Enter to execute it.

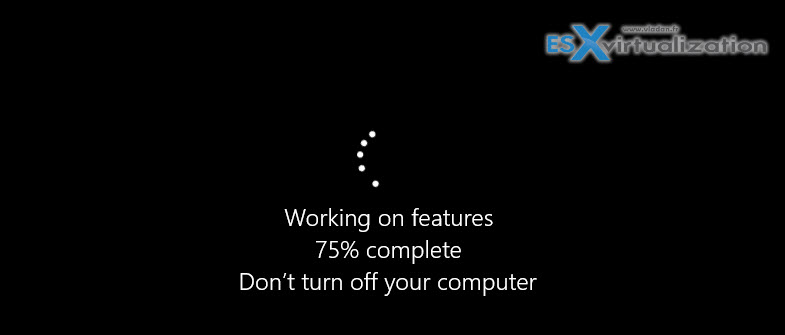
Typically, when the above operation is completed and you should just type Restart-Computer into the PowerShell console to restart your server. Then you would see windows server 2016 with the full graphic user interface(GUI).
Note: If your server has no access to the internet, you would probably see a large number of error message with red color. Then you have to use your installation media to successfully install server GUI features. Before you can do that, you need to identify appropriate index of Windows server 2016 edition from which you want to install features. The GUI features are only default built in the editions labelled with desktop experience, so you should skip indexes for core editions in the list.

So here i would show you installing the GUI features from a installation media.
Here we go.
Step 1: If you have store the windows server installation media in this system before, just navigate to the path of it. Type the command Get-WindowsImage -ImagePath XXX\XX\X into the console.
Attention : The GUI features information are stored in install.win file located on D:\sources in my system drive, so you should just adapt it to your condition.
Here the GUI features related file’s path is D:\sources\install.wim. Then i just type Get-WindowsImage -ImagePath D:\sources\install.wim into the console to find the system imageindex.

From the first picture in this passage, we know that the imageindex of core edition without GUI is 1 and 3. Then you should just choose the right imageindex between 2 and 4. Here i would choose the imageindex as 2.
Step 2: Type Install-WindowsFeature -Name Server-Gui-Shell, Server-Gui-Mgmt-Infra -Source wim:D:\sources\install.wim:2 into PowerShell console. And press Enter to execute it.

Note: To install feature from non-default location, you should follow the appropriate syntax like below.
InstallationProvider:WIMFileLocation:ImageIndex
So if you want to install the GUI features from a installation media, you should follow the syntax.
Step 3: After the above operation is finished, you should be prompted with the information that you must restart this server to finish the installation process. Just type Restart-Computer into the PowerShell console and execute it.

Then you would find that the full GUI features has been enabled in your Windows server 2016.

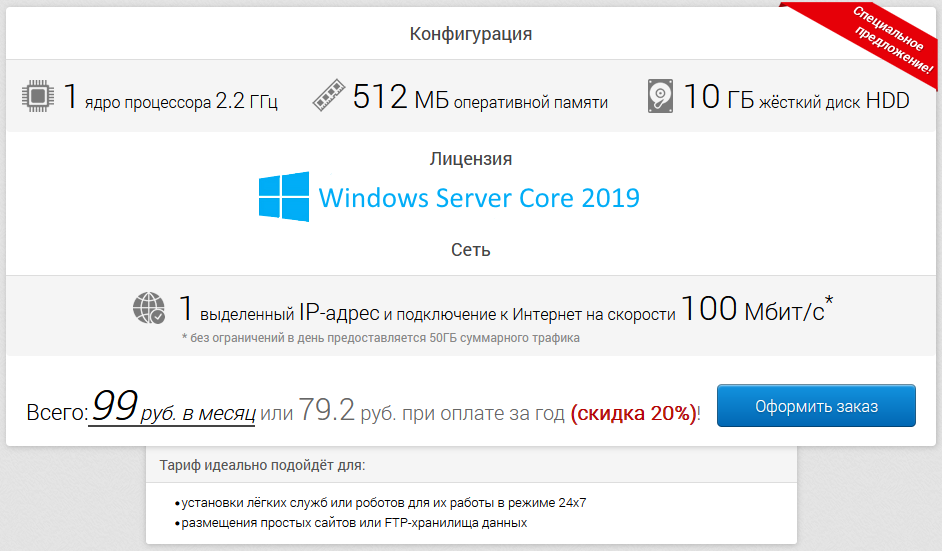
На хостинге UltraVDS есть готовая для заказа конфигурация виртуальной машины, стоимость которой составляет всего 99 рублей в месяц. Этот VPS работает под управлением операционной системы Windows Server 2019 Core. По умолчанию на сервере отсутствует привычная графическая оболочка, поэтому данная статья посвящена тому, как установить GUI на Windows Server Core.
Метод первый — запуск Explorer++
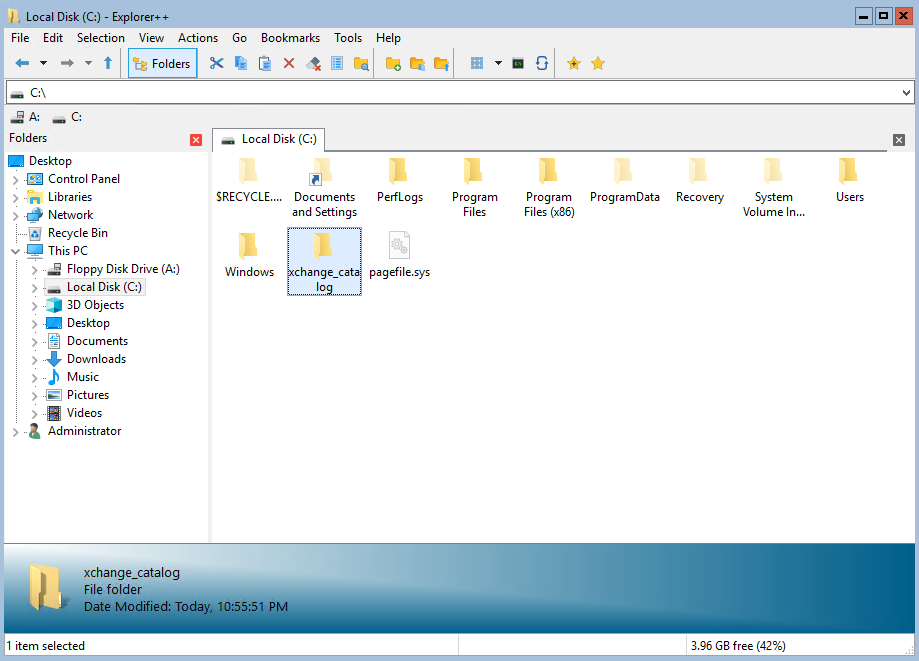
В Windows Server Core изначально отсутствует привычный проводник Explorer. Исходя из этого первым шагом необходимо загрузить Explorer++, который вполне может послужить заменой оригинального explorer.exe. В данном контексте мы рассматриваем Explorer++, но применяться может практически любой файловый менеджер, включая FAR Manager, Total Commander или что-либо ещё.
Во-первых, необходимо загрузить на свою локальную рабочую станцию дистрибутив браузера. Сделать это можно, например, отсюда.
Далее, подключитесь к вашему VDS и создайте там директорию, которую будете использовать как общую папку для обмена файлами. Для чего из командной строки откройте PowerShell при помощи команды:
powershell
После чего создайте директорию:
New-Item -Path 'C:\xchange_catalog\' -ItemType Directory
И предоставьте директории общий доступ:
New-SmbShare -Path 'C:\xchange_catalog\' -FullAccess Administrator -Name SHARED_DIR
Здесь:
C:\xchange_catalog\— созданная на сервере папка;Administrator— пользователь, которому предоставлены права на полный доступ к папке;SHARED_DIR— имя расшаренного ресурса.
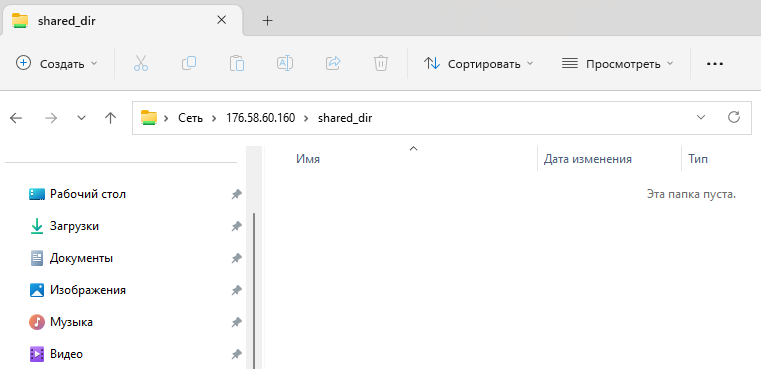
Теперь вы сможете подключиться к вашему удалённому серверу. Для чего в проводнике наберите соответствующий путь к каталогу на VPS. В нашем случае путь до общего каталога выглядит как:
\\176.58.60.160\shared_dir
Вы же должны использовать IP-адрес вашего виртуального сервера и имя вашего расшаренного ресурса.
Теперь необходимо найти загруженный ранее архив с дистрибутивом Explorer++, распаковать его и скопировать файл Explorer++.exe в общую папку на сервере.
После этого вы уже можете запустить Explorer++ из командной строки, перейдя в каталог с файлом Explorer++.exe и выполнив команду запуска приложения:
cd C:\xchange_catalog
Explorer++.exe
Но мы немного усложним задачу и сделаем так, чтобы не нужно было запускать Explorer++ при каждом входе в систему в ручную.
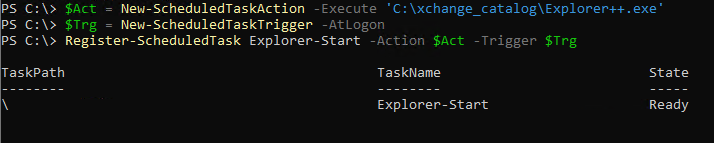
Для этого запустите из командной строки PowerShell и добавьте запуск браузера в планировщик:
$Act = New-ScheduledTaskAction -Execute 'C:\xchange_catalog\Explorer++.exe'
$Trg = New-ScheduledTaskTrigger -AtLogon
Register-ScheduledTask Explorer-Start -Action $Act -Trigger $Trg
При помощи данных команд мы создали задачу, которая называется Explorer-Start, и которая будет запускаться при каждом входе пользователя в систему.
То есть, если вы завершите сеанс подключения к VPS командой logoff, после чего снова войдёте на сервер, то Explorer++ откроется, когда произойдёт вход вашей учётной записи в систему.
Метод второй — установка родного браузера
В данном методе мы будем использовать дополнительный пакет компонентов, который необходимо будет добавить в установки основных серверных компонентов операционной системы. Речь идёт о Server Core App Compatibility Feature on Demand (FOD), который может вернуть в систему средство «Просмотр событий» (Eventvwr.msc), монитор ресурсов (Resmon,exe), Проводник (Explorer.exe) и даже Windows PowerShell (Powershell_ISE.exe).
Для установки пакета войдите в PowerShell и запустите следующую команду:
Add-WindowsCapability -Online -Name ServerCore.AppCompatibility~~~~0.0.1.0
После чего необходимо перезапустить сервер:
Restart-Computer
В результате у вас появится возможность запускать даже Microsoft Office, но при этом система потеряет порядка двухсот мегабайт оперативной памяти. Причём потеряны они будут навсегда, и даже если в вашей системе не будет активных пользователей.
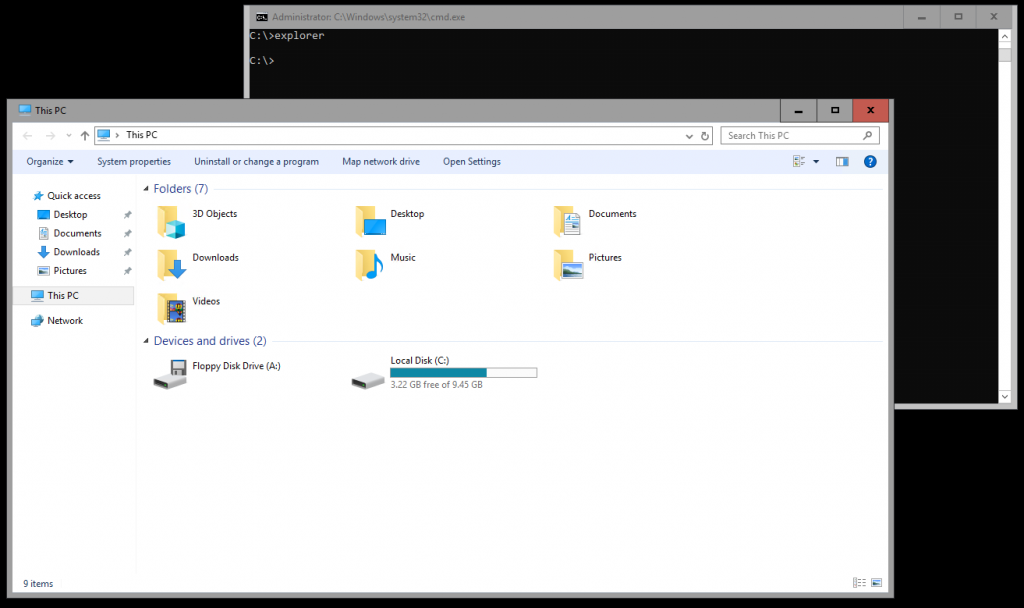
Но вернёмся к графической оболочке. Чтобы запустить проводник из командной строки необходимо набрать:
explorer
What happens if you install Windows Server 2012 without the GUI features and then realize that you want to turn on the GUI? For those who are used to GUI based Windows Server administration, seeing a command line interface can be daunting. This guide will help you to go from the command line interface, using PowerShell, to installing and turning on the GUI.
The first step in this is to enter the PowerShell. At the command line prompt, just enter PowerShell and you will see something like the below:

The next step is to type Install-WindowsFeature Server-Gui-Shell, Server-Gui-Mgmt-Infra in order to get the

You will see a text based installer. This part of the Windows Server 2012 GUI installation is rather easy and there is plenty of time to grab a drink.

Once this is complete, you do need to reboot the server before the GUI will be turned on. Unless you have something else going on that you need to shutdown first, you can shutdown and reboot immediately with shutdown -r -t 0 as seen below:

The system will then reboot and go through the Windows Server 2012 configuration changes.

When the system boots, you will see that the GUI is turned on. The Server Manager dashboard is present on login and everything works.

Conclusion
If you are accustomed to the Windows Server 2012 GUI, you may be a bit nervous seeing a command line only interface. Fear not, the guide above uses less than 90 characters of typing to install and turn on the GUI. In total this took me only a few minutes to do the run-through. Also, this guide assumed one has a command line only installation. If you already have the GUI installed, you can use SConfig to turn on the GUI easily.
The default install of the Windows Server 2016 (Tech preview 2) do not provide Graphical User Interface (GUI) and even the second option only installs the local administrative tools (Server Manager). Not the traditional desktop that we’re used to having in 2012 R2 or 2008 R2 server systems. So if you take the second option (with local admin tools) you basically end up with a server without a desktop and start menu.
I know that this is rather good as the server system gets very slim footprint, reducing the surface, but If you want to install a third party application(s) that needs the GUI and the usual desktop environment ,then you must add something – a full desktop GUI. Windows server 2016 GUI install can be done through PowerShell, and you only need a single line of code. You can also add the GUI by selecting a Feature through adding a new role and feature wizard. (as you do that in Windows Server 2012 R2…)
Note that I’m testing it with a built through VMware Workstation 11. I picked up the default config (Workstation 11 compatible VMs) and the ISO has been detected as Windows 10.
Windows Server 2016 Gui Install – How to:
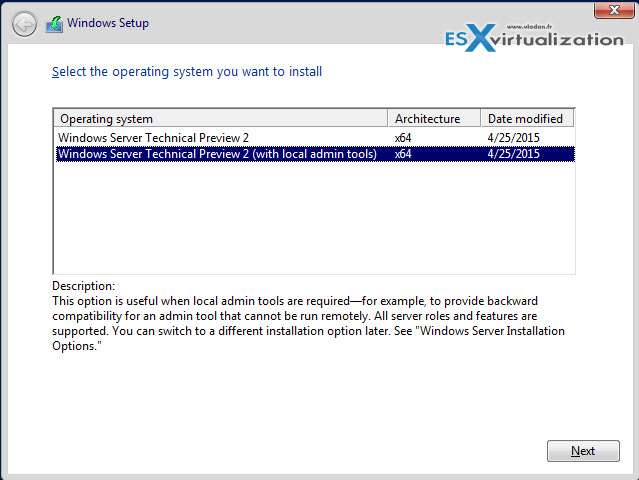
Step 1: During the setup process I choose the second option – Windows Server Technical preview 2 (with local admin tools), but you could only install the core (tested that as well).
Step 2: After reboot, you’re asked to assign a new password to the user’s account. After that, you’ll end up with a console where the server manager launches automatically. Well, in my case I was using easy install with VMware workstation, so I had an automatical installation of VMware tools followed by another reboot…
But if I would have assigned that password in VMware workstation during the assistant walking me through the creation of the VM, then the double reboot would have happened without my interaction.
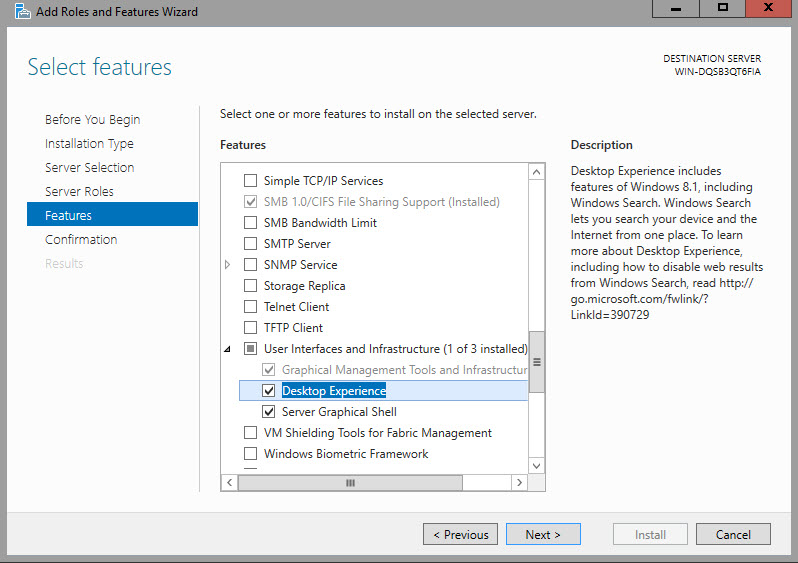
Anyway, through Server manager click Add roles and features > skip the first and second page and go directly to “features” where you choose the Server Graphical Shell. I picked the desktop experience in this example but that is not necessary. The desktop experience adds the usual package used for desktop environments:
- Windows Search
- Desktop wallpapers
- Etc…
At the same time, you can tick the checkbox so the server can reboot automatically at the end of the installation process.
Validate the choice > Next > Install. And after a reboot the server shows well the Full desktop with Start menu and Server Manager.
Option 2: Install the GUI via PowerShell
In case you choose to install just the core (nano) and you don’t have server manager installed, you can use PowerShell. To install the GUI via PowerShell you can enter this single line of code in your PowerShell Window:
Install–WindowsFeature Server–Gui–Shell –Restart –Source wim:D:sourcesinstall.wim:4
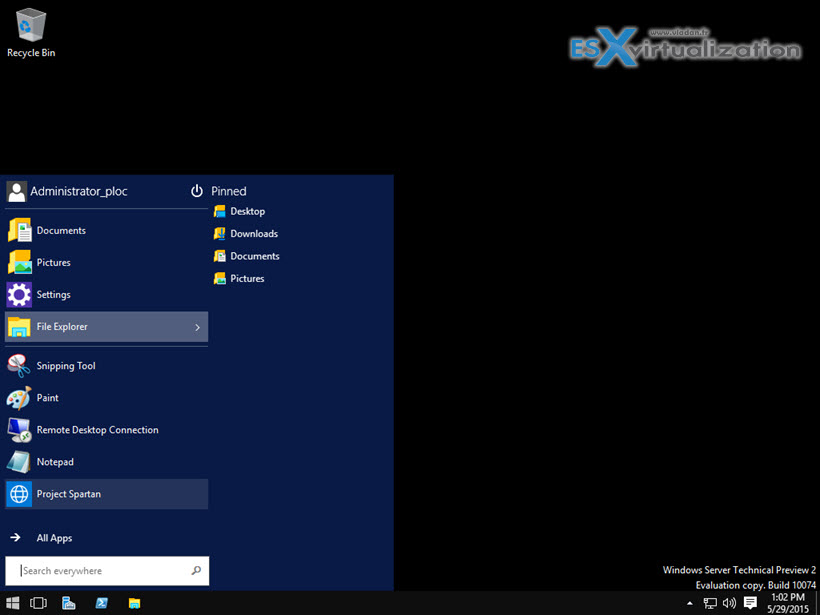
Shoot from the lab:

The server reboots automatically at the end (without a prompt). And after the reboot where you’ll see this usual screen…
The server reboots and shows GUI, Start Menu AND the Server manager.
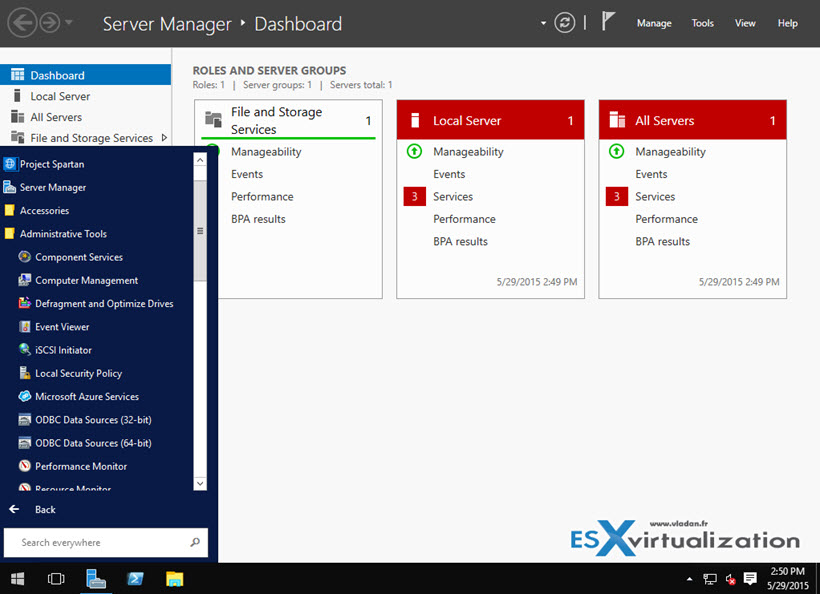
As you can see, the process is quite similar to what’s available in Windows Server 2012 R2, and it’s quite simple.
I don’t think that the GUI will completely disappear. There will still be applications that won’t work in environments without a GUI. Look at the SMBs which usually have 1 or 2 Windows servers (physical, yeah) and which do need to provide not only file level service with domain authentication, but many more custom based enterprise applications, printing, and networks core services etc. So the Windows based servers (with GUI windows on it) will, IMHO, never die…
At the same time, it’s good that we have the option to deploy stripped down version of Windows server (who knows how the final version will look like) without any services. And add more services/roles later via Powershell or from remote workstation via administrative tools.