Table of contents
- What May Cause “HAL INITIALIZATION FAILED” on Windows 10 and Windows 11?
- Method 1: Update your graphics card driver
- Method 2: Set “useplatformclock” to “true”
- Method 3: Clean junk files
- Method 4: Check if your hard disk is corrupted
- Method 5: Check for malware
- Method 6: Run BSOD troubleshooter
- Method 7: Run the System File Checker
- Method 8: Reinstall Windows
- Conclusion
While facing the ” HAL_INITIALIZATION_FAILED ” error can be scary, you should worry not. From updating drivers to tweaking system settings, we’ll provide a comprehensive list of fixes to tackle this issue.
Imagine putting your sweet little laptop or PC to sleep mode for the night only to get the ” HAL INITIALIZATION FAILED ” error waking it up in the morning. It might sound dreadful, but it’s not the end of the world. This Blue Screen of Death (BSOD) error is not uncommon and can be caused by various factors, from outdated drivers to a damaged HDD and beyond.
By the end of this article, you’ll learn how to fix both the Windows 11 and Windows 10 “HAL_INITIALIZATION_FAILED ” error, so you can finally breathe out and enjoy your computer running smoothly again.
What May Cause “HAL INITIALIZATION FAILED” on Windows 10 and Windows 11?
Before diving into the solutions to fix the “HAL INITIALIZATION FAILED” error, it’s important to know what can trigger it. Here are a few major reasons:
Before diving into the solutions to fix the ” HAL INITIALIZATION FAILED ” error, it’s important to know what can trigger it . Here are a few major reasons:
- Corrupted, outdated, or incorrectly configured drivers.
- Damaged system files.
- Malware infection.
- Corrupted or damaged hard disk.
Now that you know the possible reasons behind the problem, let’s explore methods to fix the ” HAL INITIALIZATION FAILED ” error.
Method 1: Update your graphics card driver
A lot of BSOD errors, including ” HAL INITIALIZATION FAILED ,” can be caused by software or hardware incompatibility. In our case it could be due to the corrupted or outdated graphics card driver. So the first step should be to try and update it.
You can do this manually or use reliable third-party software to automate the process . Here’s how to update a graphics card driver manually:
- Right-click on Start and select Device Manager.
- Locate your graphics card under Display adapters, right-click on it, and select Update driver.
- In the next window, select Search automatically for drivers.
Картинка с сайта: www.auslogics.com
- If you have more than one graphics card, repeat the same steps for each.
Another way to manually update a graphics card is to download it directly from the manufacturer.
However, the first way doesn’t guarantee that you will download the latest version of the driver, while the second one can be complicated and time-consuming, as you might need to scour through manufacturers’ websites and several installers to find the latest compatible version for your system.
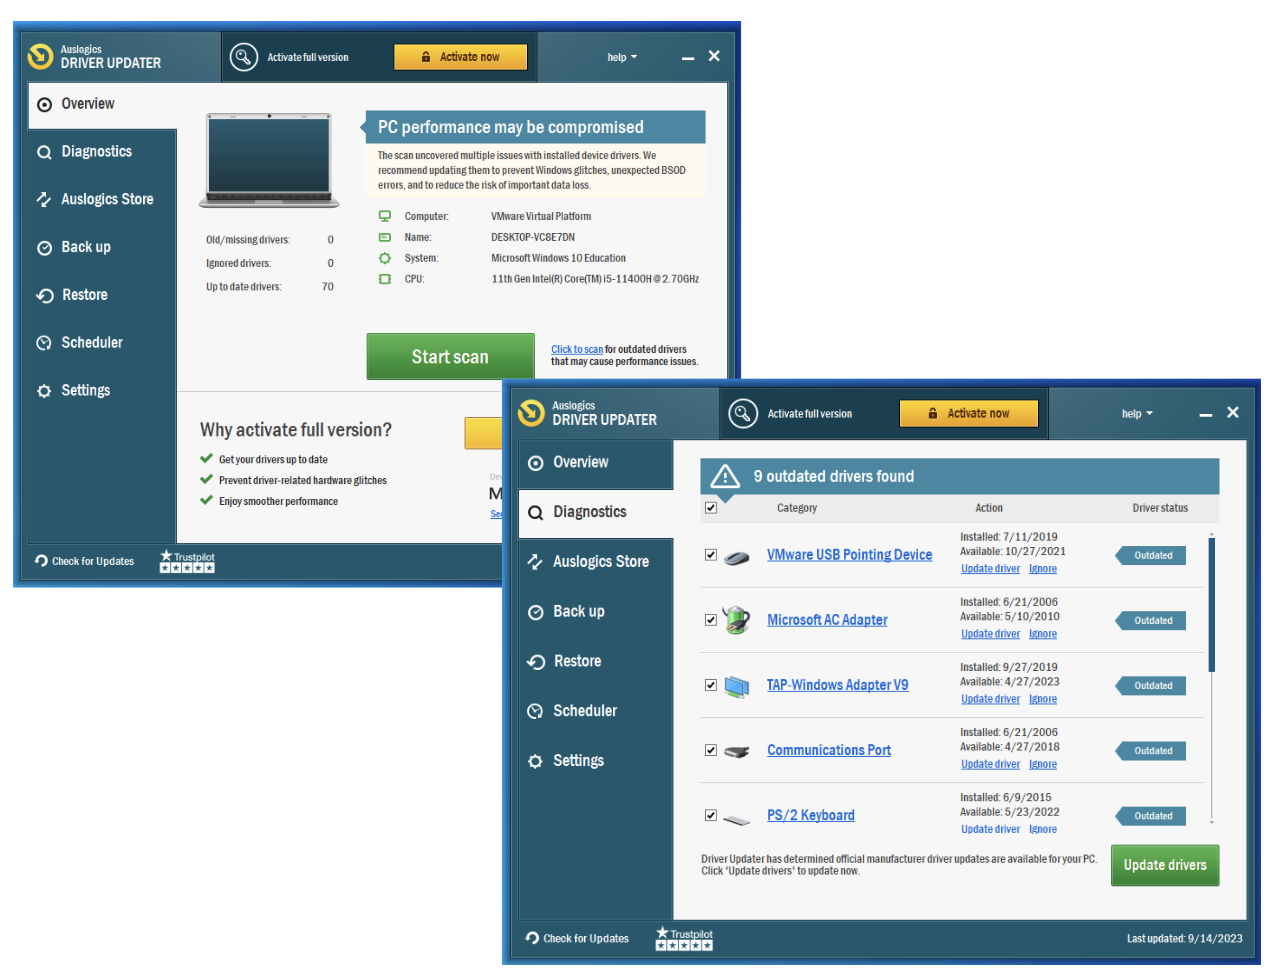
That’s why we recommend using Auslogics Driver Updater. With a click of a button, this reliable tool recognizes the operating system running on your computer. It will automatically search for the latest official compatible drivers, preventing you from mistakenly installing the wrong version.
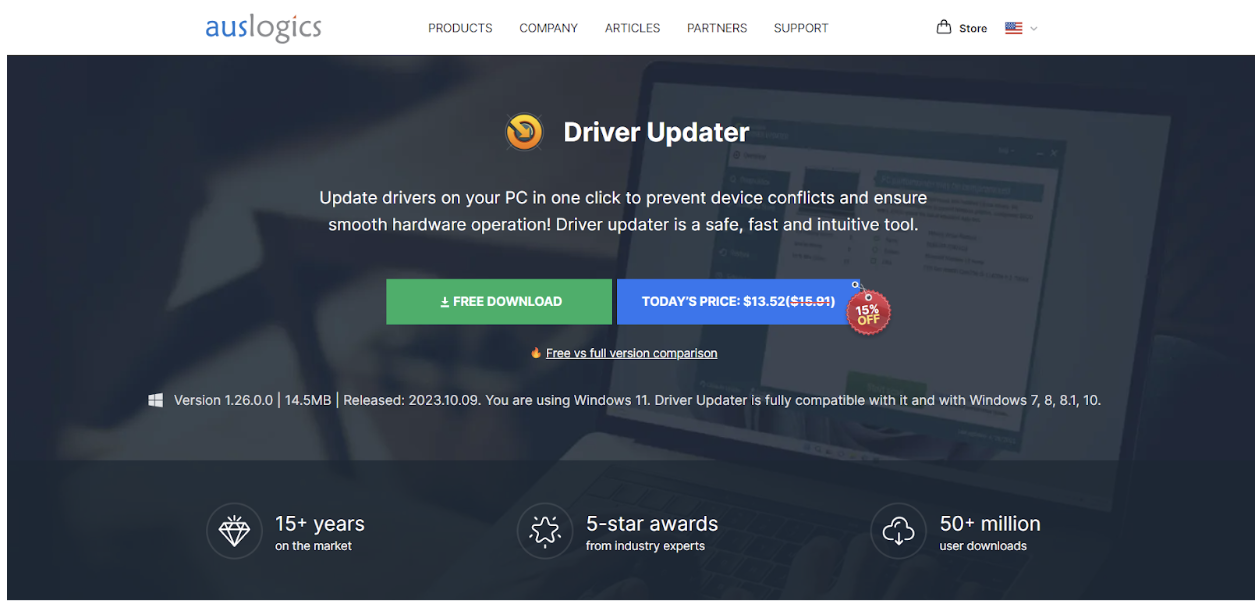
Auslogics Driver Updater
What’s more, Auslogics Driver Updater will take care of all faulty or outdated drivers—not just the one related to the ” HAL_INITIALIZATION_FAILED ” error. So, once the process is complete, you can expect a significant improvement in the speed and performance of your computer.
Auslogics Driver Updater
Also read: How to Check if My Drivers Are Up to Date on Windows 10 PC?
Method 2: Set “useplatformclock” to “true”
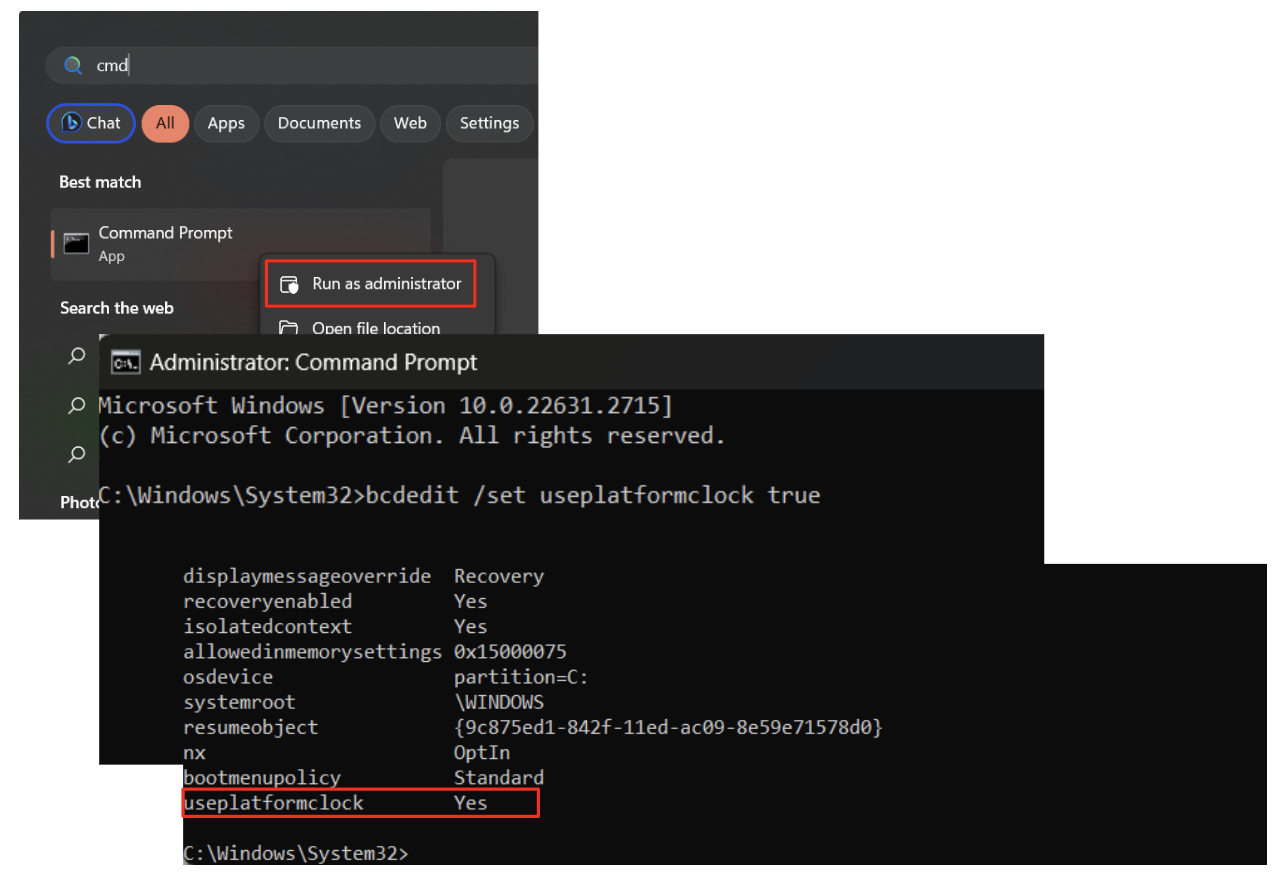
Another way to get rid of the “HAL_INITIALIZATION_FAILED” error is to set “useplatformclock” to “true.” Follow these steps to implement the fix:
- Click the Search icon.
- Type
cmd. - Right-click the Command Prompt option, then click on Run as administrator.
- If prompted, grant permission to the app by clicking Yes.
- In the Command Prompt, type
bcdedit /set useplatformclock true. - Check whether useplatformclock is set to true by typing
bcdedit /enum. You should see Yes on the right to useplatformclock.Картинка с сайта: www.auslogics.com
Another way to get rid of the ” HAL_INITIALIZATION_FAILED ” error is to set “useplatformclock” to “true.” Follow these steps to implement the fix :
- Click the Search icon.
- Type
cmd. - Right-click the Command Prompt option, then click on Run as administrator.
- If prompted, grant permission to the app by clicking Yes.
- In the Command Prompt, type
bcdedit /set useplatformclock true. - Check whether useplatformclock is set to true by typing
bcdedit /enum. You should see Yes on the right to useplatformclock.
- Restart your PC to check whether the problem has been resolved.
This method works perfectly for both Windows 10 and Windows 11 computers.
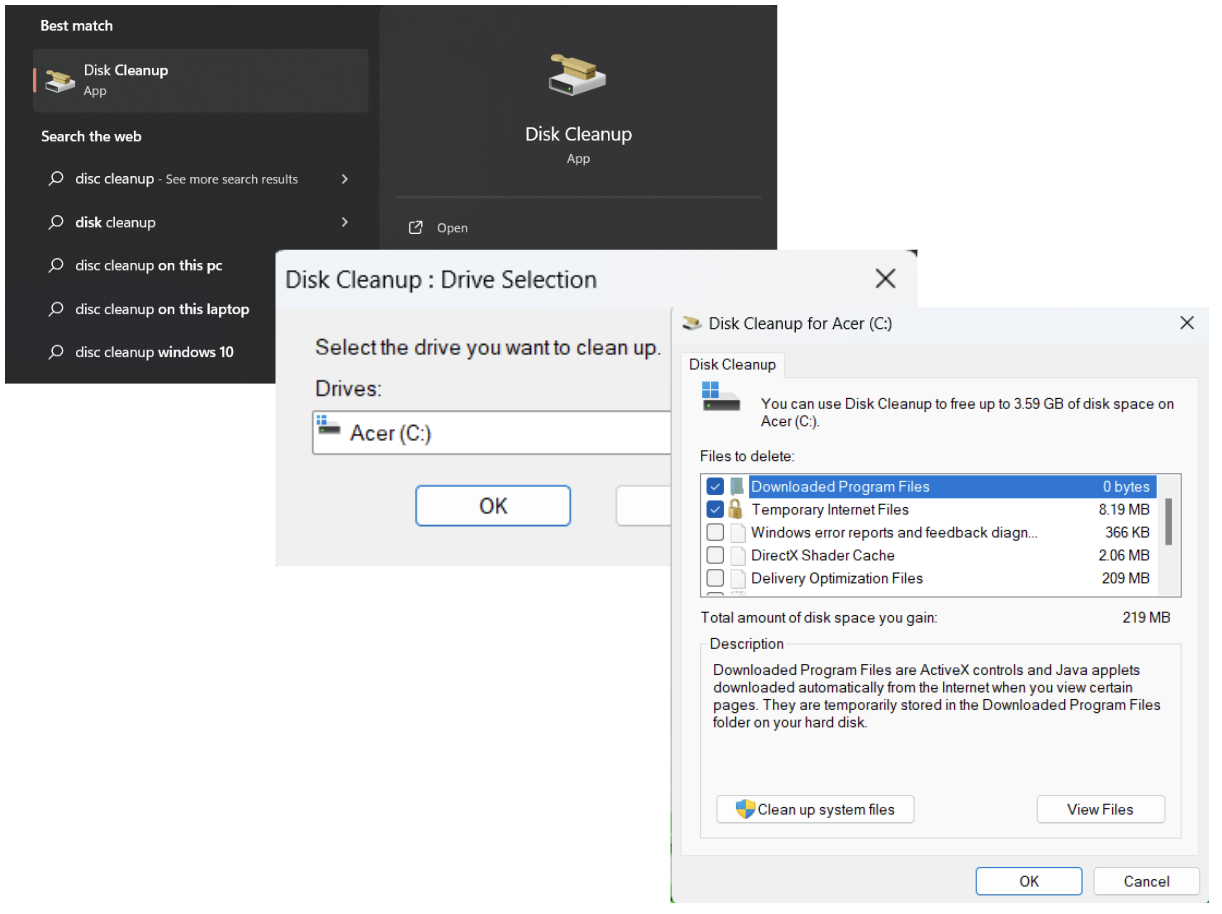
Method 3: Clean junk files
Junk files could have piled up on your system causing the “HAL_INITIALIZATION_FAILED” error. Here’s how to clean them:
- Click the Search icon.
- Type
disk cleanup, then hitEnter. - Choose the drive to clean and wait for the app to calculate the amount of space you can free up.
- Select Temporary Files and any other file types you wish to clean.
- Click OK, restart your computer, and check if the error has been resolved.
Further reading: How to Delete Temporary Files from Windows 10 PCs
Method 4: Check if your hard disk is corrupted
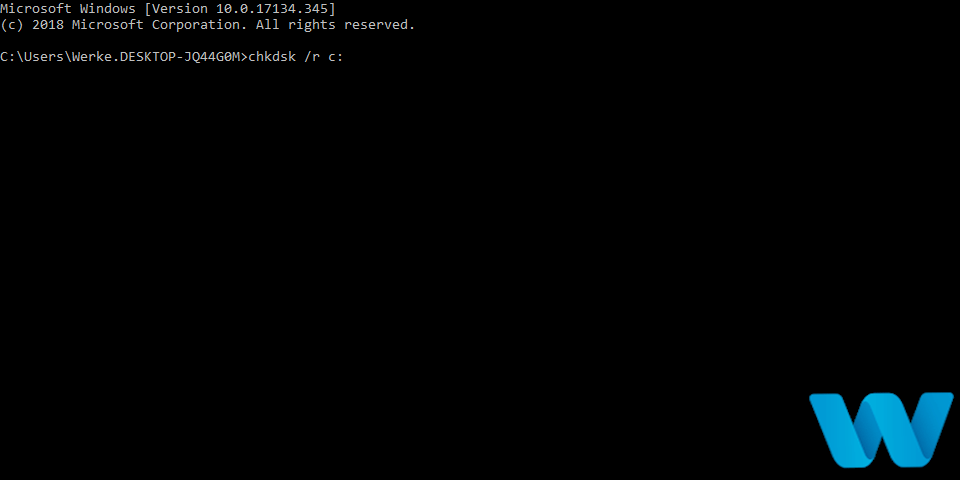
HDD corruption is among the main reasons behind the ” HAL_INITIALIZATION_FAILED ” error. Here’s how to check it:
- Click the Search icon, type
cmd. - Right-click the Command Prompt option, then click on Run as administrator.
- If prompted, grant permission to the app by clicking Yes.
- Now, type
chkdsk /fin the Command Prompt window and hitEnter.
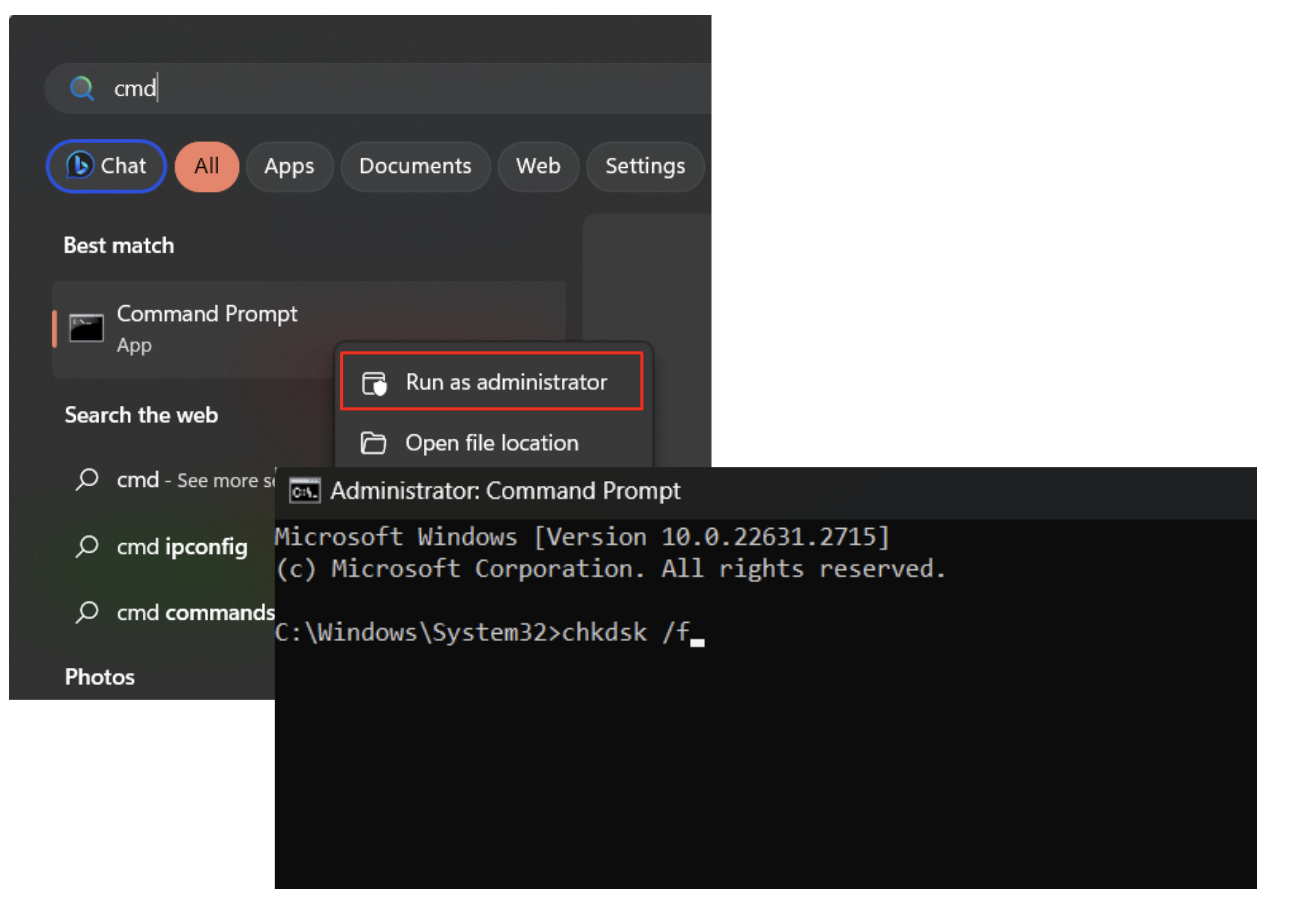
- If prompted to restart, press
Y and Enter. - After completion, restart your computer and check if the error has been fixed.
This method will suit both Windows 10 and Windows 11 OS users.
Further reading: How to Run Hard Drive Diagnostics on Windows PC?
Method 5: Check for malware
Malware also could be the cause of the ” HAL INITIALIZATION FAILED ” error. Consider using Auslogics Anti-Malware, a reputable tool that can work alongside your primary antivirus software, protecting your computer from potential threats and preventing malware from infecting your system.
Related: Signs of Malware: How to Know if Your Computer is Infected
Method 6: Run BSOD troubleshooter
Here’s how to fix the Windows 10 “HAL_INITIALIZATION_FAILED” error by running the BSOD troubleshooter:
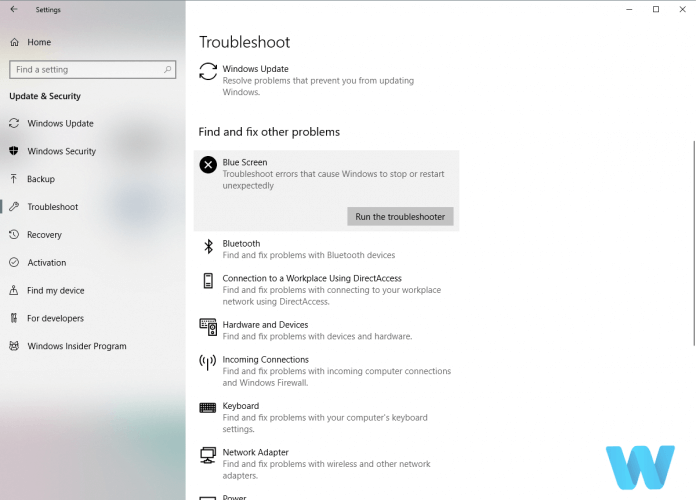
- Open Settings and navigate to Update & Security.
- Select Troubleshoot from the options on the left.
- Now, search for Blue Screen under Find and fix other problems, and then click on Run the troubleshooter.
- Follow the on-screen instructions. Once the troubleshooter is done, check if the error has been resolved.

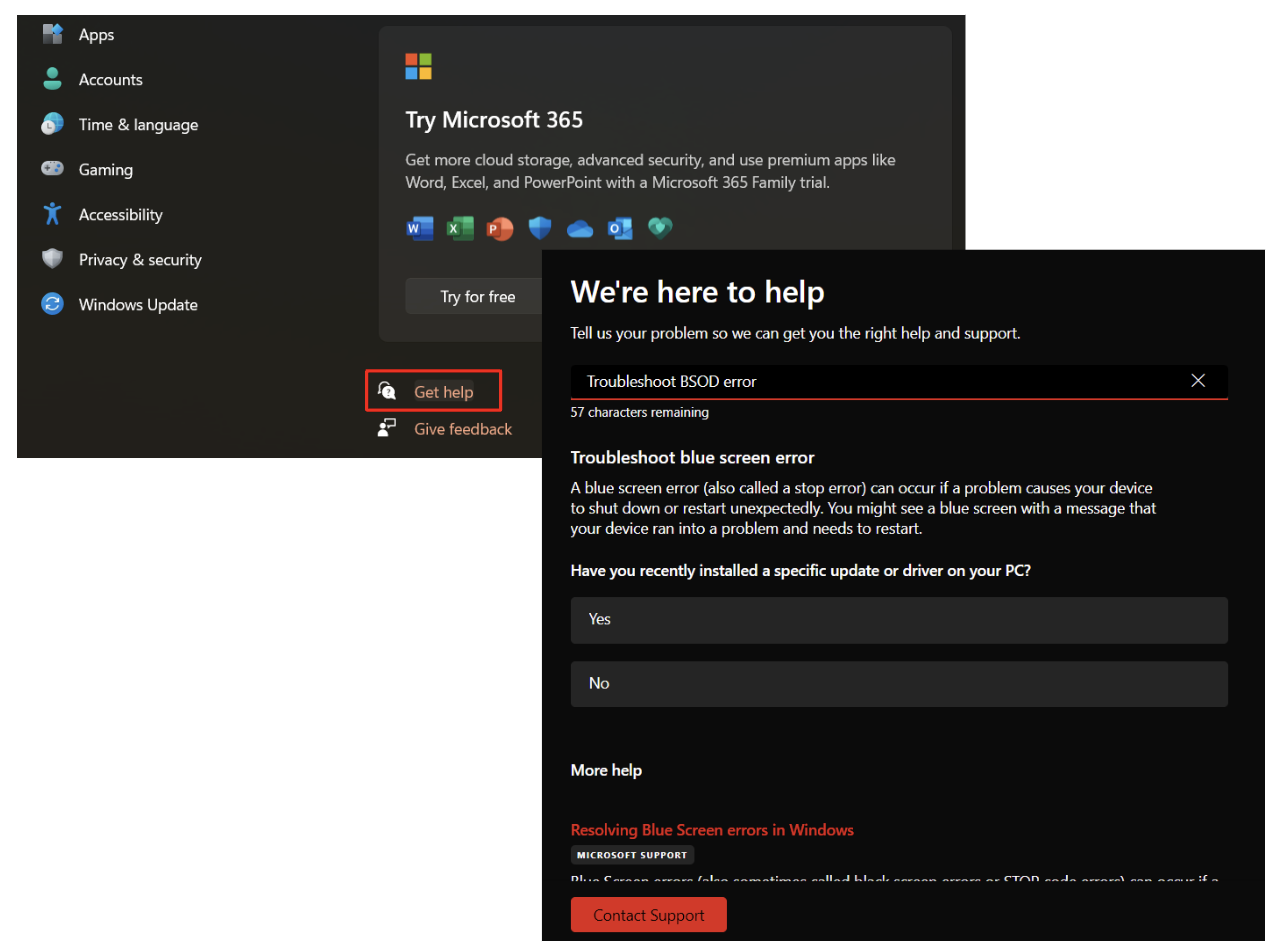
If you need to troubleshoot “HAL INITIALIZATION FAILED” on Windows 11 , then go to Settings, locate the “Get help” link on the bottom right side, type “Troubleshoot BSOD error,” and follow the prompts on the screen.
Fix this issue quickly
You can try using a safe and totally free tool developed by the Auslogics team of experts.
A few simple steps to troubleshoot the issue:
Download the tiny Auslogics TroubleShooter tool.
Run the application (no installation is needed).
The app will check for the issue mentioned in the article. When the scan is done, check that this is the issue you were looking to solve and click ‘Apply now’ to apply the recommended fix.
You can use the app to troubleshoot other malfunctions for free by simply typing in a brief description of the issue your PC is experiencing. Or you can scan your PC for performance issues using the My Scanner tab.
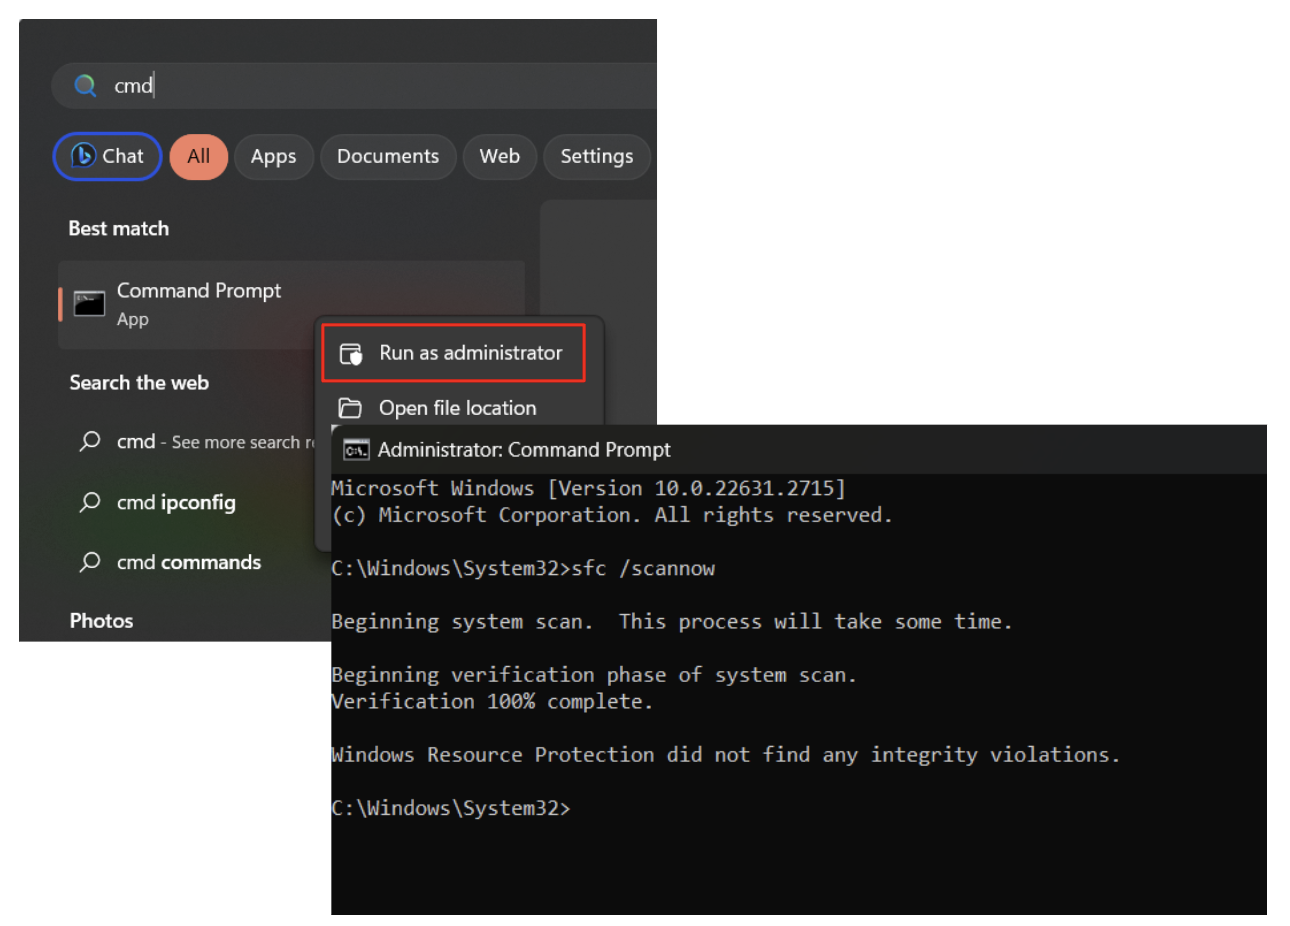
Method 7: Run the System File Checker
Another possible reason triggering both the Windows 11 and Windows 10 “HAL_INITIALIZATION_FAILED” error is corrupted system files. Run the System File Checker to scan for and repair them:
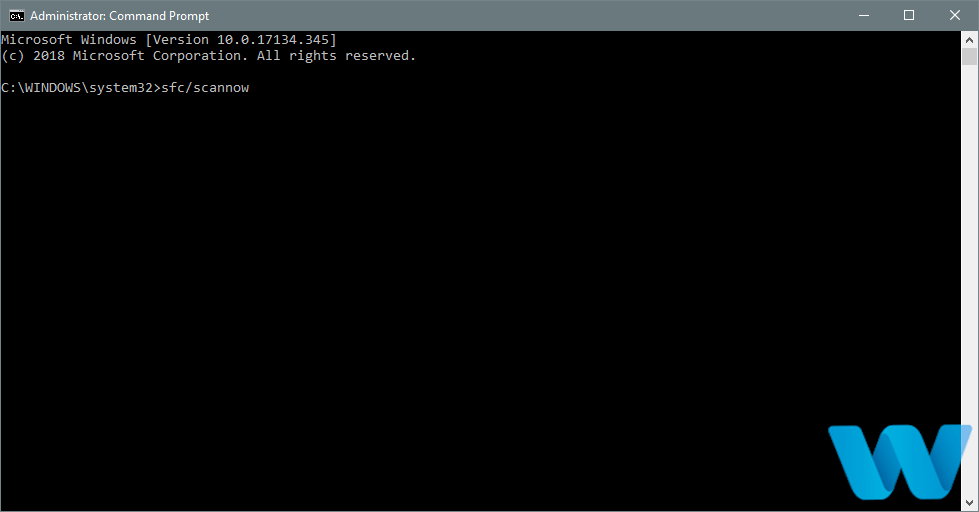
- Run the Command Prompt as administrator as described previously.
- Once accessed the Command Prompt, type
sfc /scannowand pressEnter. - Allow the tool to complete the check. This may take some time.
- Restart your PC to check if the error is gone.
Method 8: Reinstall Windows
If all else fails, the last resort to fix the ” HAL_INITIALIZATION_FAILED ” error is to reinstall your Windows system. Be mindful though, as this action will wipe out all data from your computer. Make sure to explore our guides on creating and using a media creation tool and restoring Windows to have a full understanding of the procedure.
Related: Windows 10 Backup Guide: Backing Up to an External Hard Drive
Conclusion
While facing the “HAL_INITIALIZATION_FAILED” error is definitely disturbing, this article provides you with all the tools to fix it. Whether it’s updating drivers, cleaning up your system, or scanning for malware, the methods outlined above aim to restore your system’s stability.
Try them out and share your success story or additional insights in the comments below to help others facing a similar challenge.