
Applies ToWindows 11 Windows 10
Поддержка Windows 10 прекратится в октябре 2025 г.
После 14 октября 2025 г. корпорация Майкрософт больше не будет предоставлять бесплатные обновления программного обеспечения из Центра обновления Windows, техническую помощь и исправления безопасности для Windows 10. Ваш компьютер по-прежнему будет работать, но мы рекомендуем перейти на Windows 11.
Подробнее
Виртуализация позволяет устройству Windows эмулировать другую операционную систему, например Android или Linux. Включение виртуализации дает доступ к более крупной библиотеке приложений для использования и установки на устройстве. Если вы обновили устройство с Windows 10 до Windows 11, эти действия помогут включить виртуализацию.
Примечание: На многих устройствах Windows уже включена виртуализация, поэтому вам может не потребоваться выполнять эти действия.
Прежде чем приступить к работе, определите модель устройства и производителя. Эти сведения потребуются позже в процессе.
Перед началом работы рекомендуется открыть эту страницу на другом устройстве. Вот как получить UEFI из Windows:
-
В приложении «Настройки» на устройстве с Windows, выберите Восстановление системных > или используйте следующий ярлык:
Выздоровление
Примечание: В Windows 10 вы можете получить доступ к обновлению & Безопасность > Восстановление
-
В разделе Параметры восстановления рядом с пунктом Расширенный запуск выберите Перезапустить сейчас.
-
Компьютер перезагрузится в среде восстановления Windows. Выберите Устранение неполадок > Дополнительные параметры > параметры UEFI > перезапуск

-
Компьютер перезагрузится снова, и вы будете использовать служебную программу UEFI. На этом шаге на компьютере может появиться UEFI, который называется BIOS.

Примечание: Эти инструкции могут применяться, если вы обновили компьютер с Windows 10 до Windows 11.
-
Нажмите кнопку Пуск , введите компоненты Windows и выберите Включить или отключить компоненты Windows в списке результатов.
-
В открывшемся окне Компоненты Windows найдите платформу виртуальных машин и выберите ее.
-
Нажмите кнопку ОК. Возможно, потребуется перезагрузить компьютер
Нужна дополнительная помощь?
Нужны дополнительные параметры?
Изучите преимущества подписки, просмотрите учебные курсы, узнайте, как защитить свое устройство и т. д.
Many commercially available PCs allow users to manage their BIOS configuration directly from the startup screen. These step-by-step guides will help you access and adjust the BIOS settings on prebuilt PCs manufactured by Asus.
If you don’t know what kind of CPU you have, please see Identifying Your CPU.
With Intel Processors
- Restart or boot your computer.
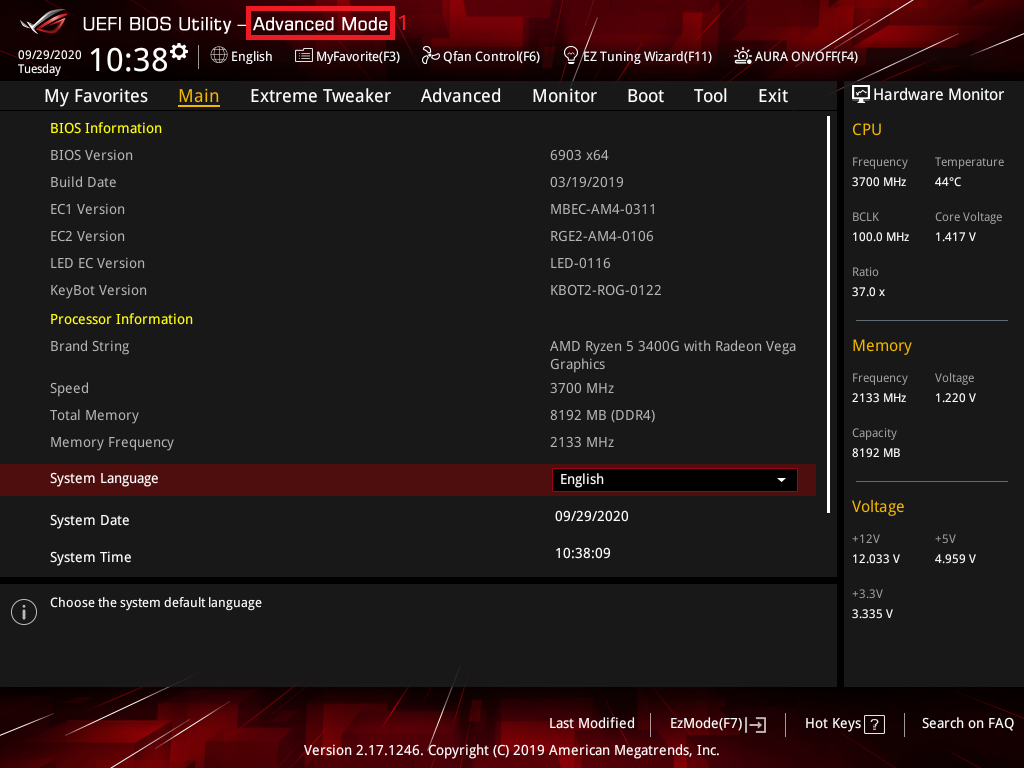
- Immediately press Del to access BIOS setup. If your system launches in BIOS [EZ Mode] by default (#1), you may need to press F7 key to access [Advanced Mode] (#2)

(Source)
(Source)
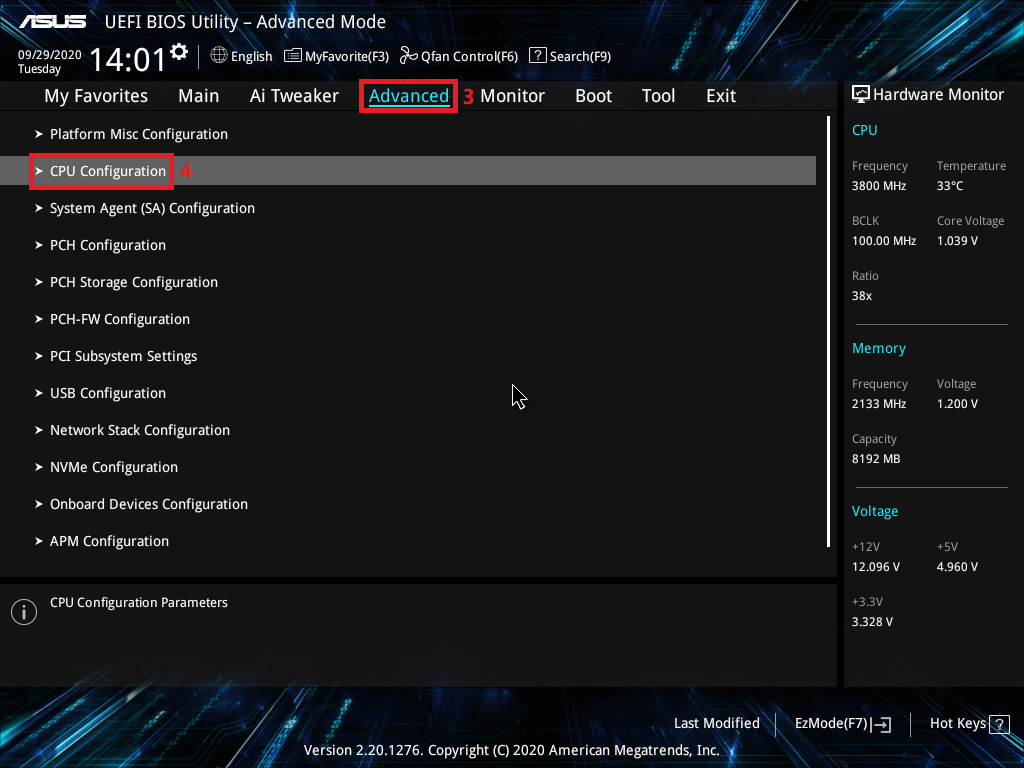
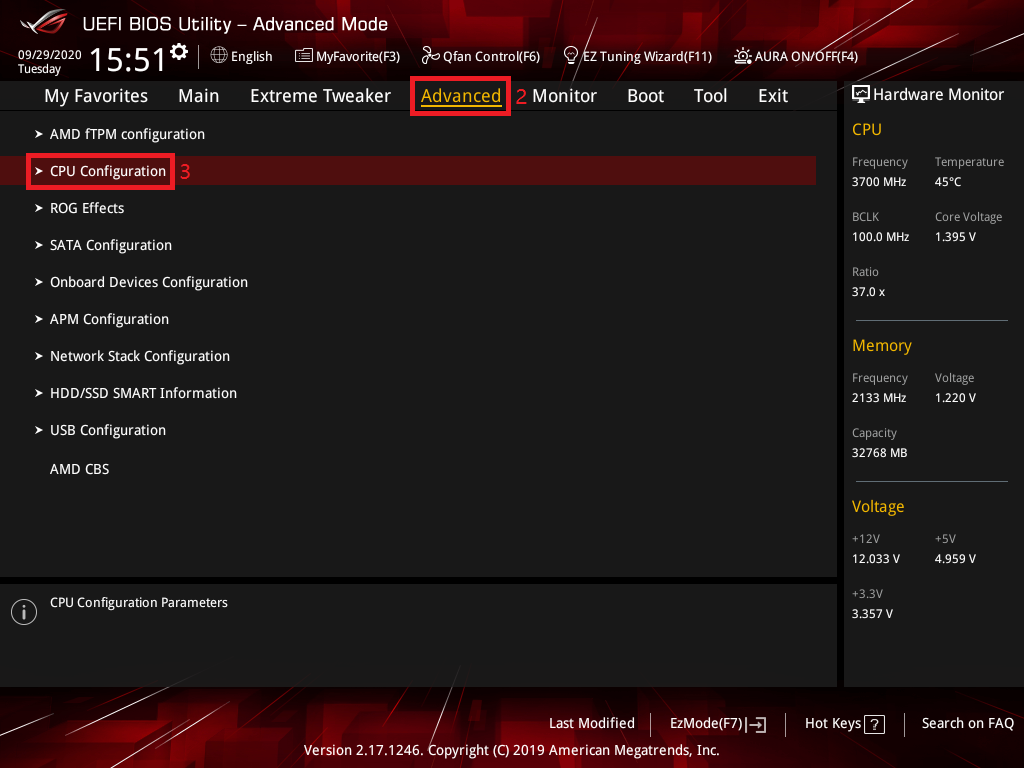
- Navigate to the Advanced (#3) tab with the arrow keys or mouse.
- Click or hit enter to expand the CPU Configuration (#4) settings.
(Source)
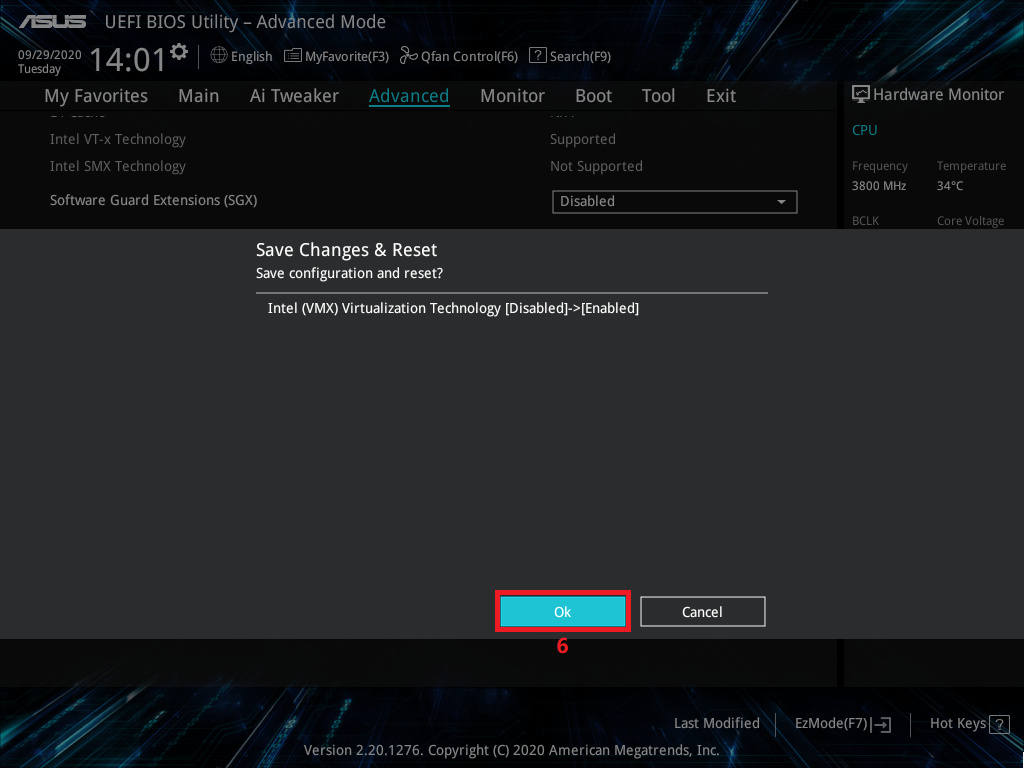
- Scroll down and enable Intel (VMX) Virtualization Technology (#5).
(Source)
- Press F10 and click “OK” (#6) to save your configuration and exit.
(Source)


With AMD Processors
- Restart or boot your computer.
- Immediately press Del to access BIOS setup. If your system launches in BIOS [EZ Mode] by default, you may need to press F7 key to access [Advanced Mode] (Fig. 1)
(Source)
- Navigate to the Advanced tab with the arrow keys or mouse.
- Click on the CPU Configuration settings from the menu.
(Source)
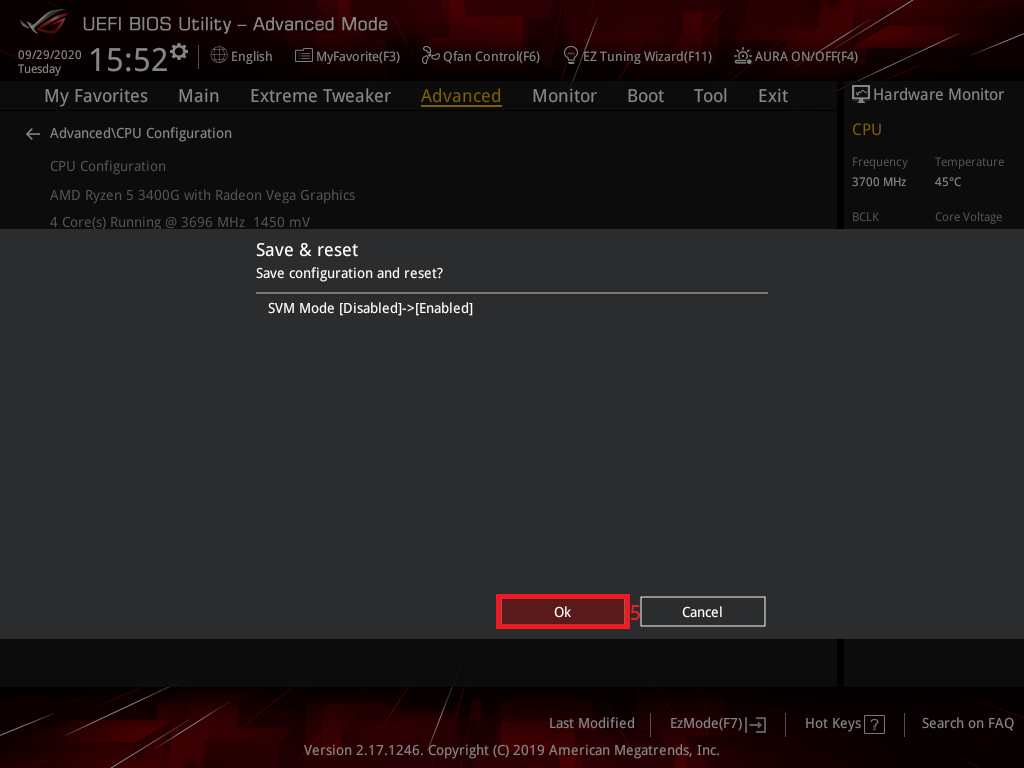
- Scroll down and enable SVM Mode.
(Source)
- Press F10 and click “OK” to save your configuration and exit.
(Source)


Did this answer your question?
Thanks for the feedback
There was a problem submitting your feedback. Please try again later.
Still need help?
Contact Us
Contact Us
FAQ
[Motherboard]How to set VT(Virtualization Technology) in BIOS and install Virtual Machine in Windows
How to set VT(Virtualization Technology) in BIOS and install Virtual Machine in Windows
Intel Platform
AMD Platform
Insatll VT in Windows 10
Intel Platform
1. Power on the system and press[delete] key to enter BIOS [EZ Mode]
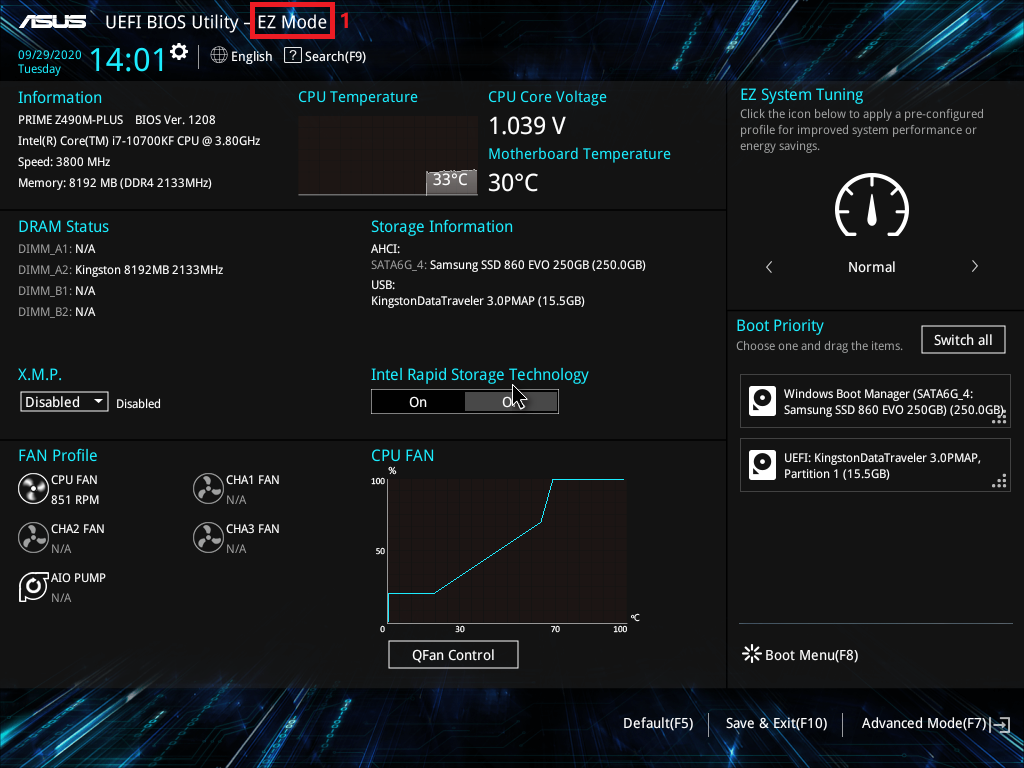
2. Press [F7] key to enter BIOS [Advance Mode] as below picture:
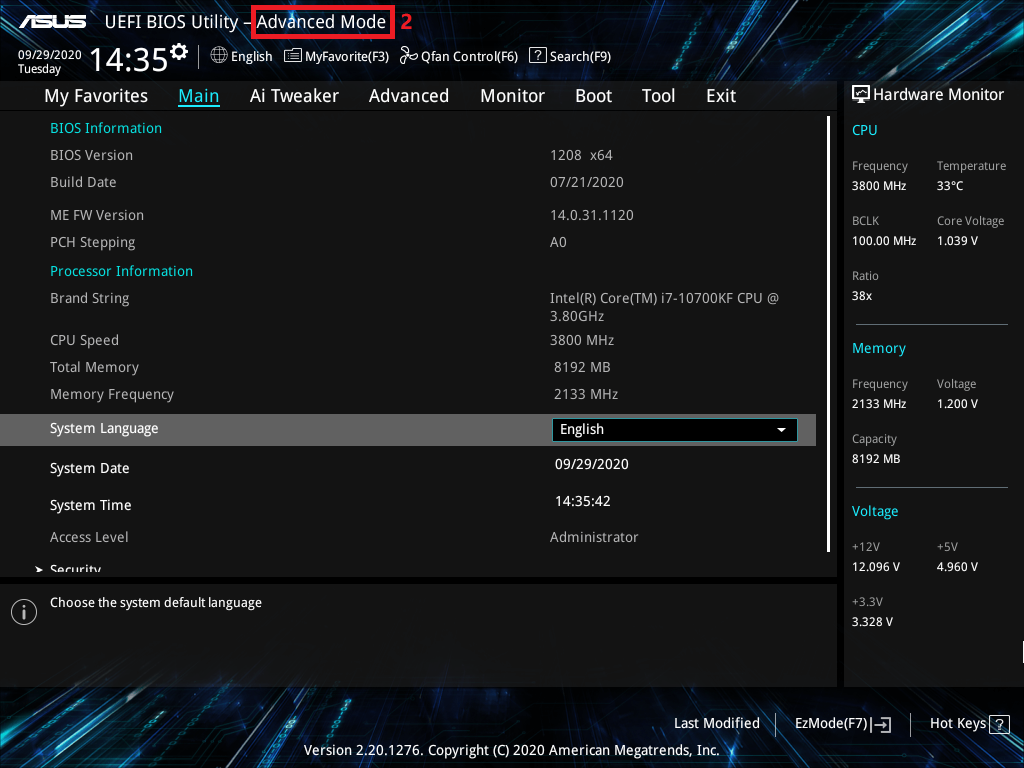
(If press [delete] key to enter [Advanced Mode] directly and then no need to press [F7] key any more)
3. Select [Advanced] page and click [CPU Configuration] item
4. Select [Intel(VMX) Virtualization Technology] item and set to [Enabled]

5. Press [F10] key and click [OK] ,the system will auto reboot
AMD Platform
1. Power on the system and press[delete] key to enter BIOS [Advanced Mode]
2. Select [Advanced] page and click [CPU Configuration] item
3. click [SVM Mode] item and set to [Enabled]

4. Press [F10] key and click [OK] ,the system will auto reboot
Insatll VT in Windows 10
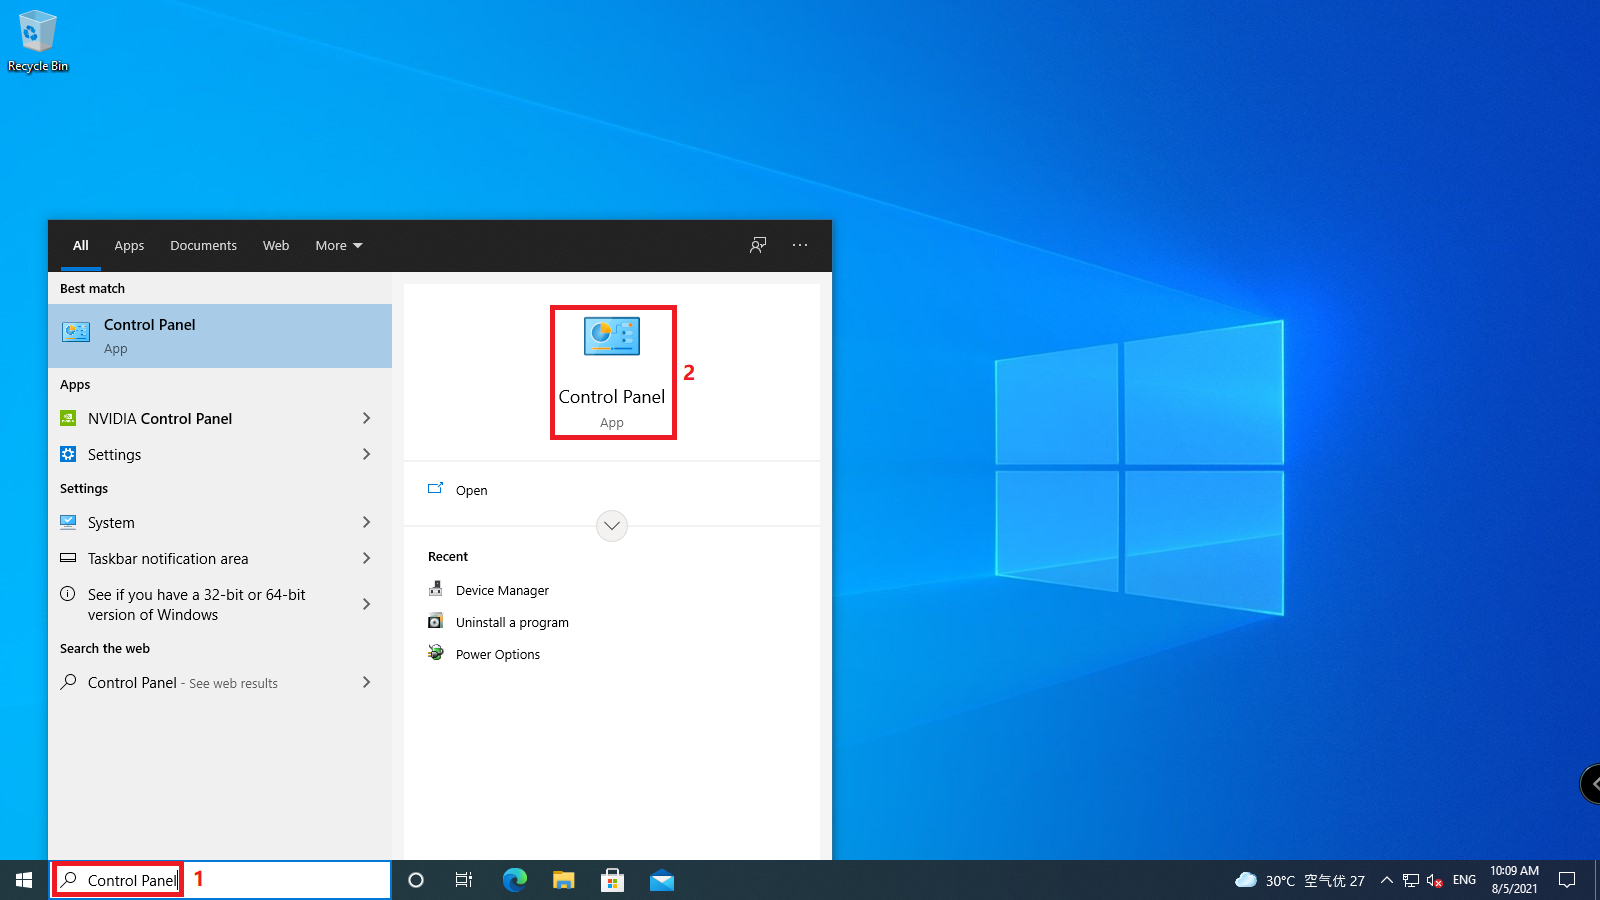
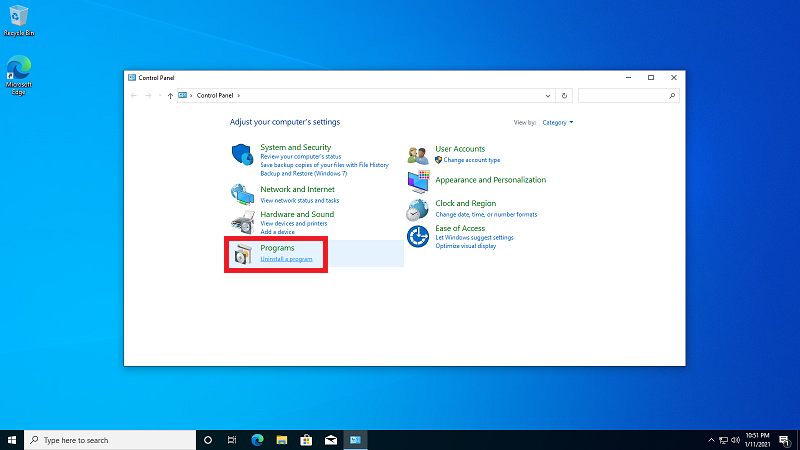
1. In the search box on the taskbar, type [Control Panel], and then select [Control Panel].
2. Click [Uninstall a program]
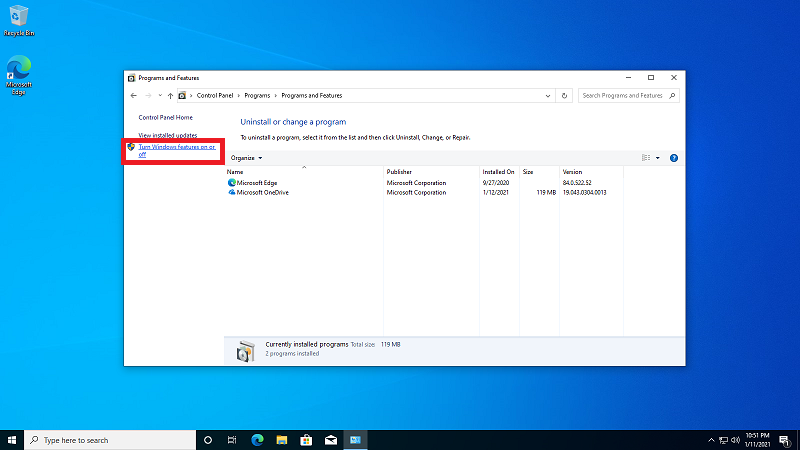
3. Click [Turn Windows feature on or off]
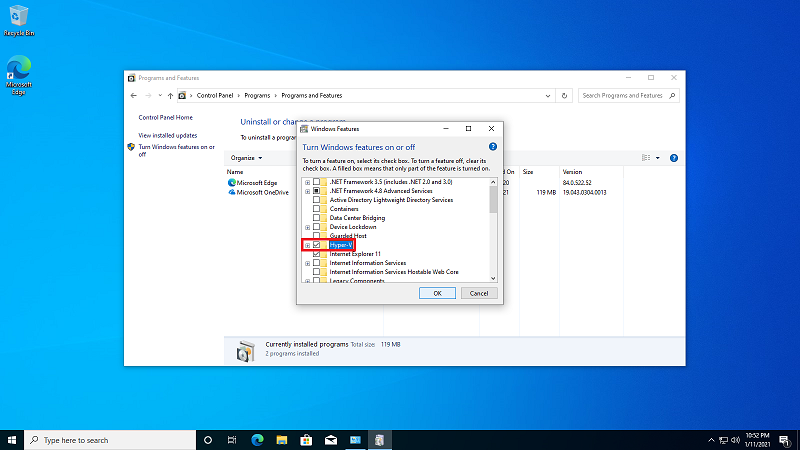
4. Mark [Hyper-V] and click [OK] to continue
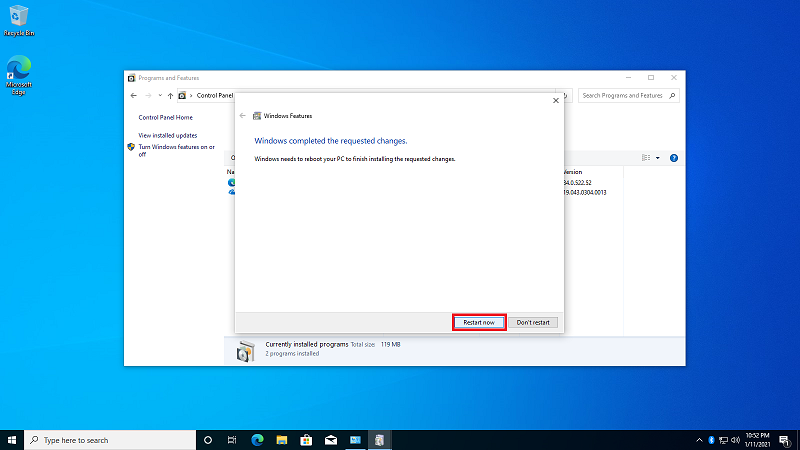
5. Click [Restart now] after installition
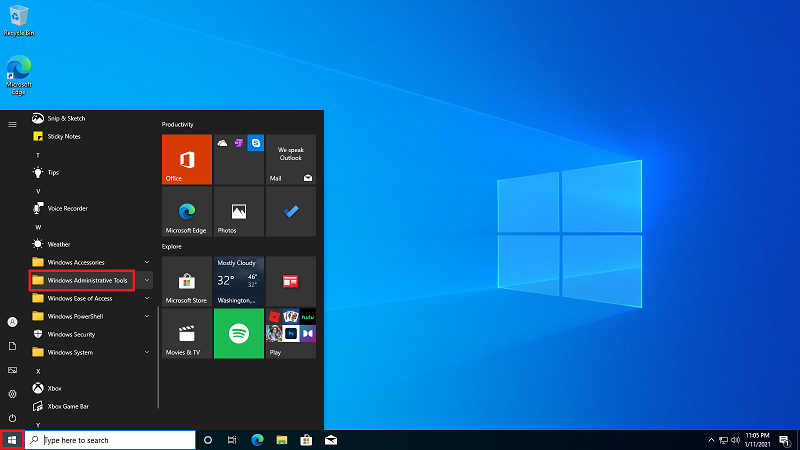
6. Click windows start menu and select [Windows Administrative Tools]
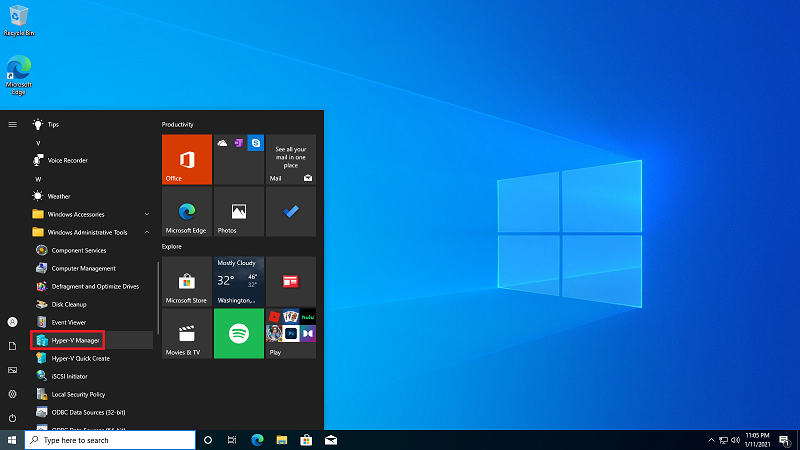
7. Click [Hyper-V Manager]
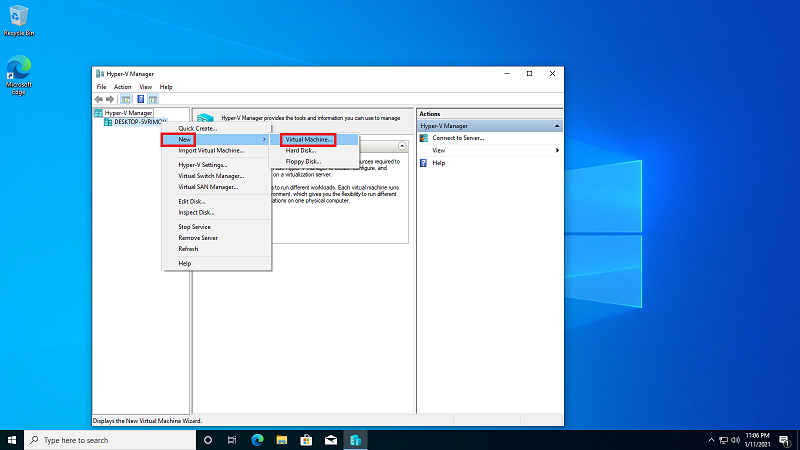
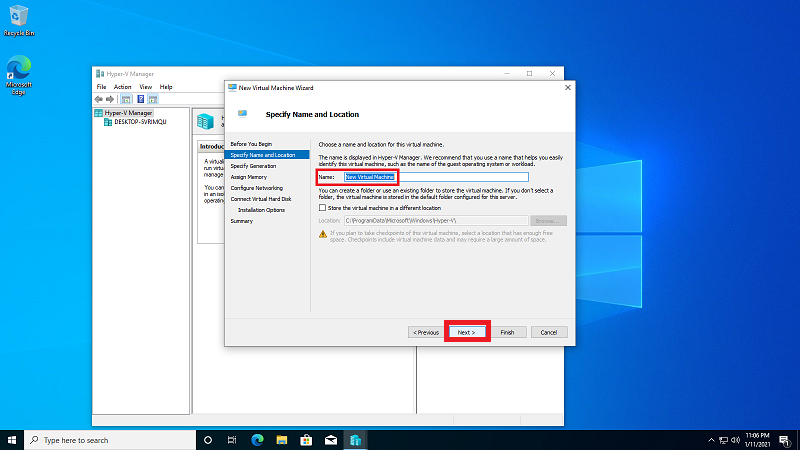
8. Right click and select [New] ,and select [Virtual Machine]
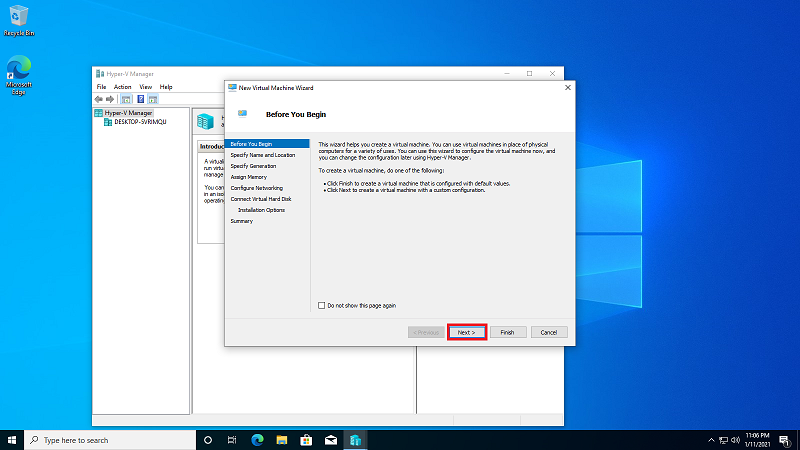
9. Click [Next]
10. Set [New Virtual Machine] name and click [Next]
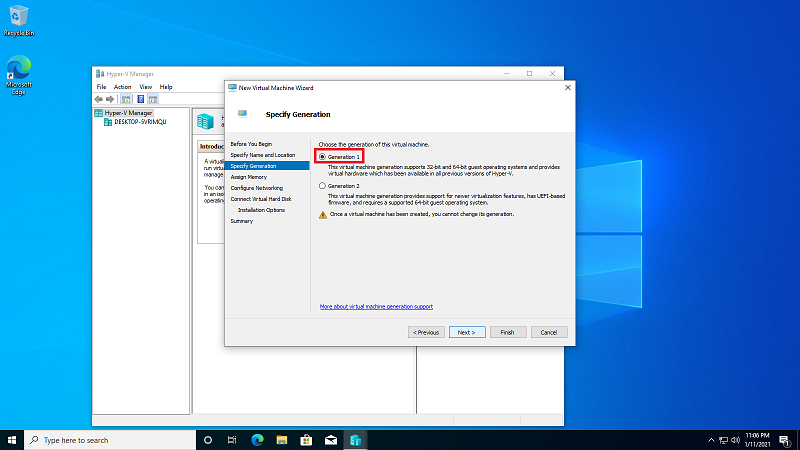
11. Choose the generation of this virtual machine ,for example [Generation 1]
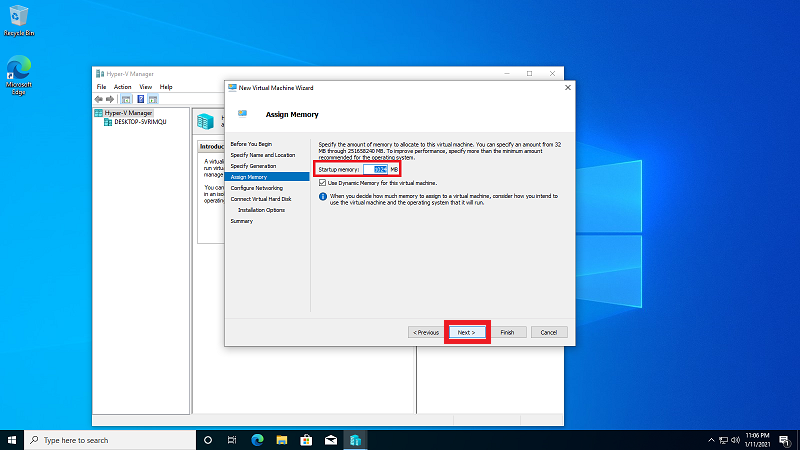
12. Set [Startup memory] size and click [Next]
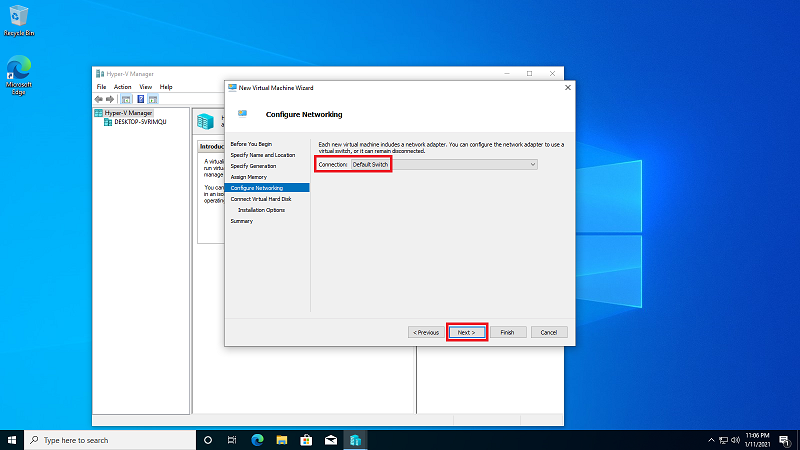
13. Set network connection to [Default Switch] and click [Next]
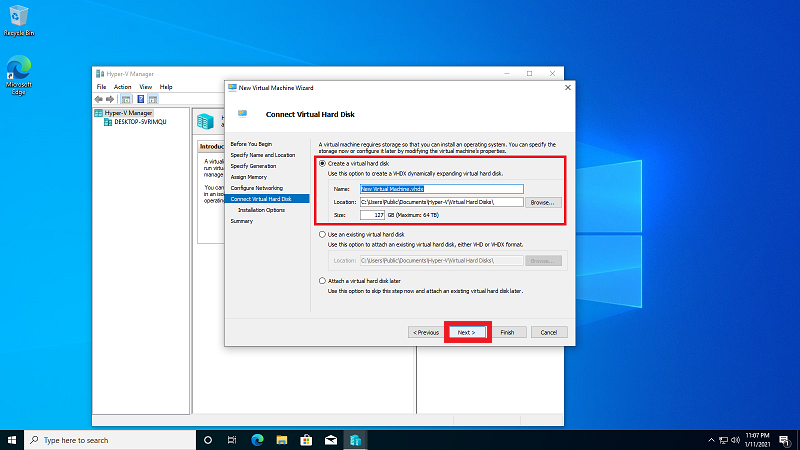
14. Set Virtual Machine [Name] [Location] [Size] and Click [Next]
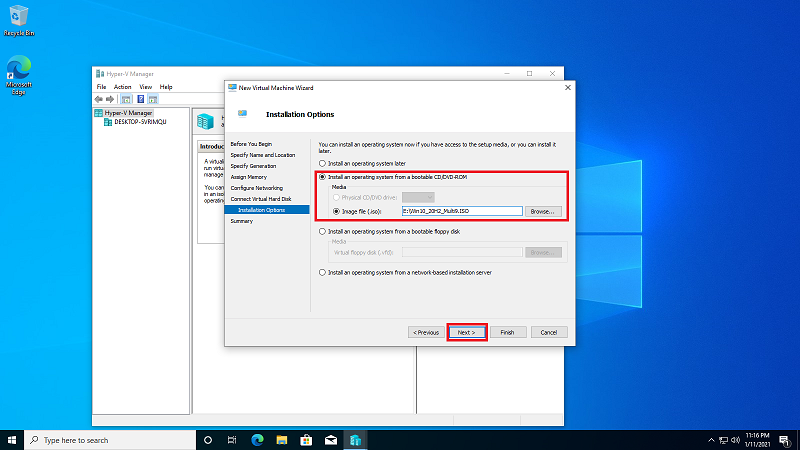
15.Set Boot Image file and click [Next]
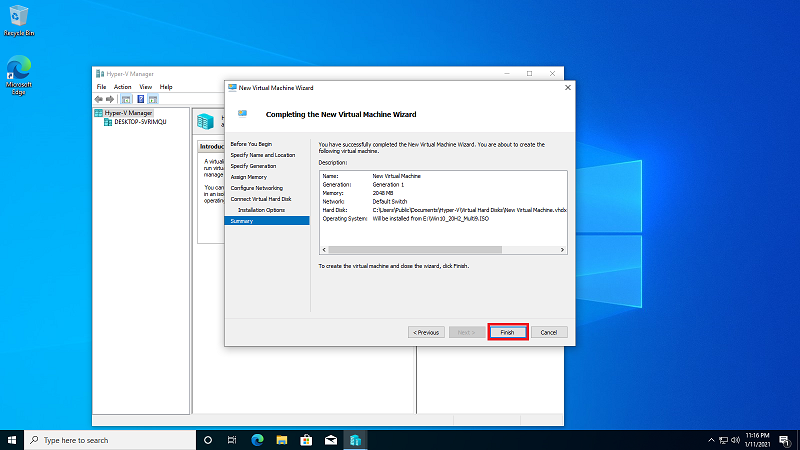
16. Click [Finish]
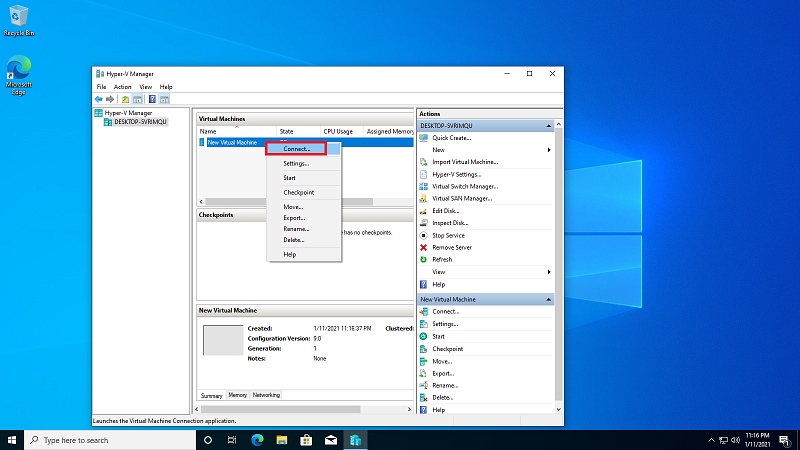
17. right click [New Virtual Machine] and select [Connect]
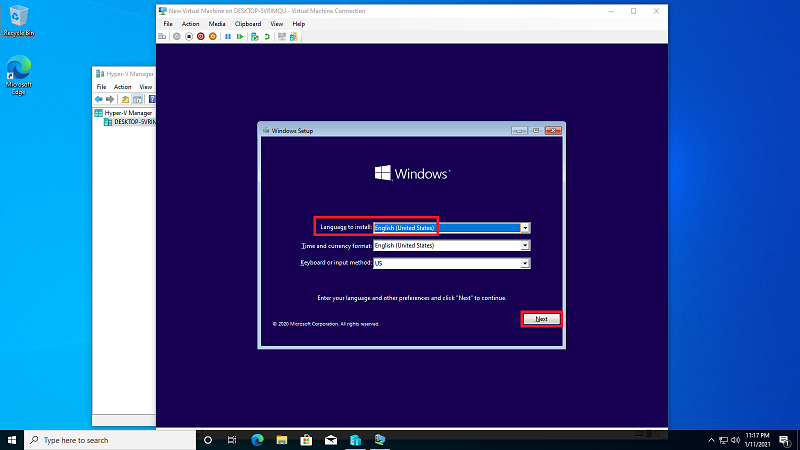
18. Select install language and click [Next]
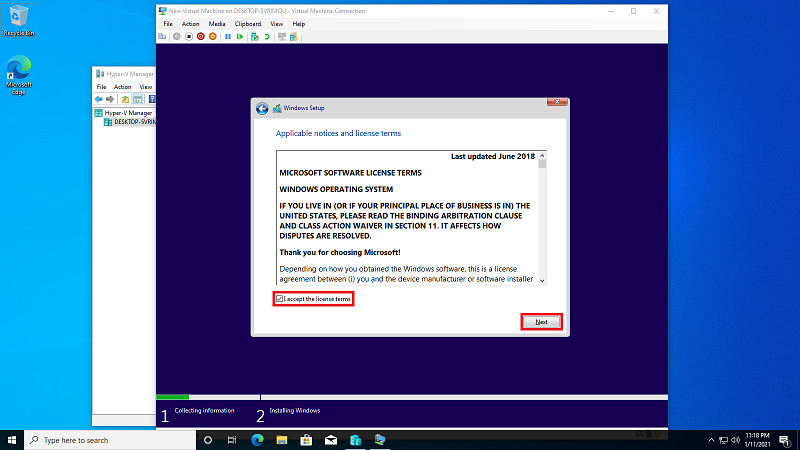
19. Mark [I accept the license terms] and click [Next]
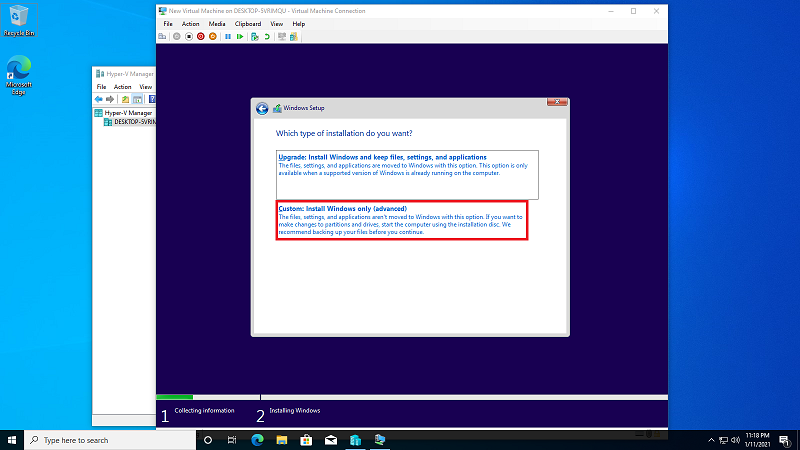
20. Select [Custom: Install Windows only(advanced)]
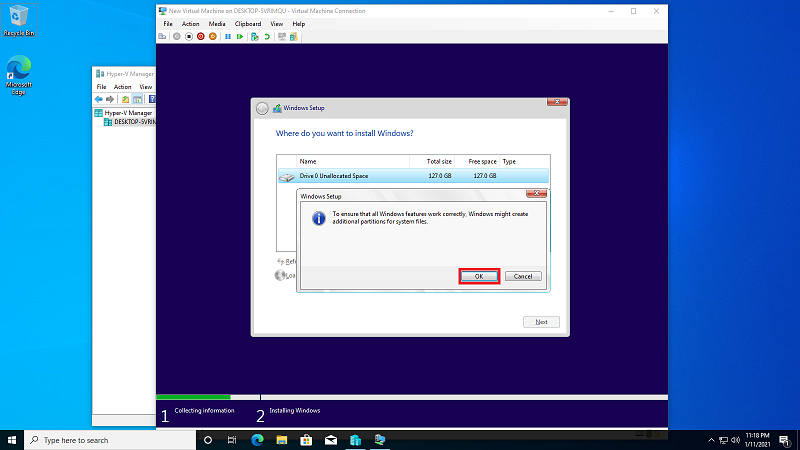
21. Set the [Size] and click [Apply]
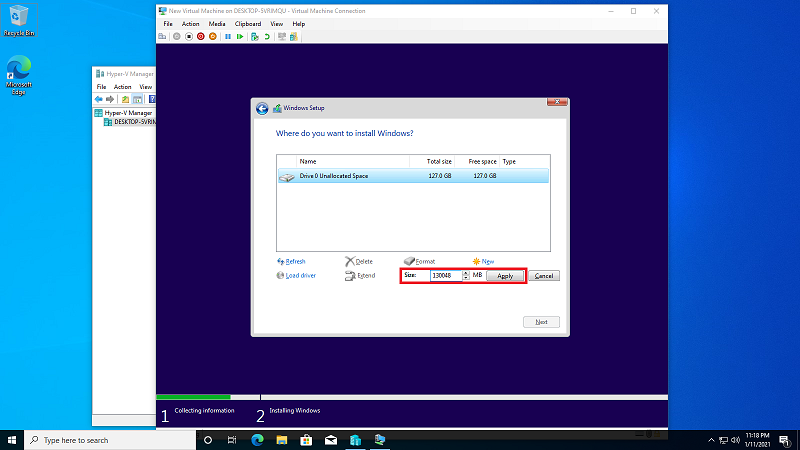
22. Click [OK]
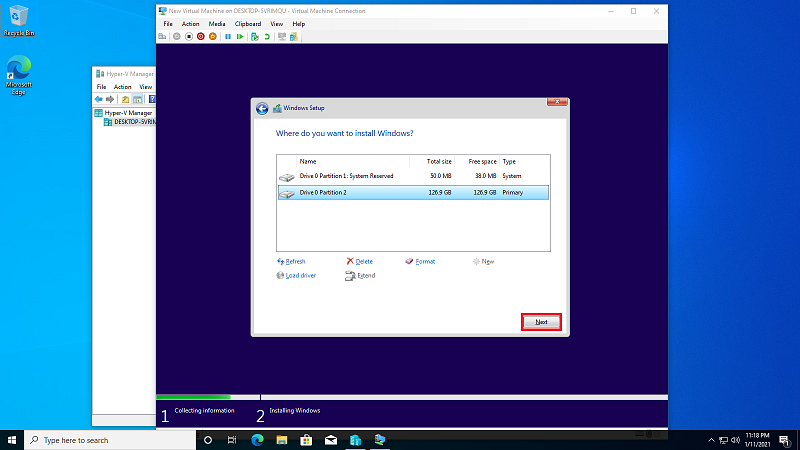
23. Click [Next]
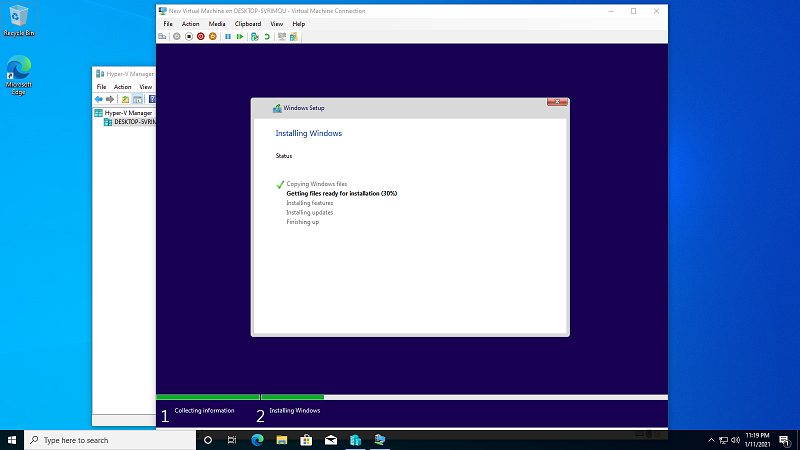
24. wait installing
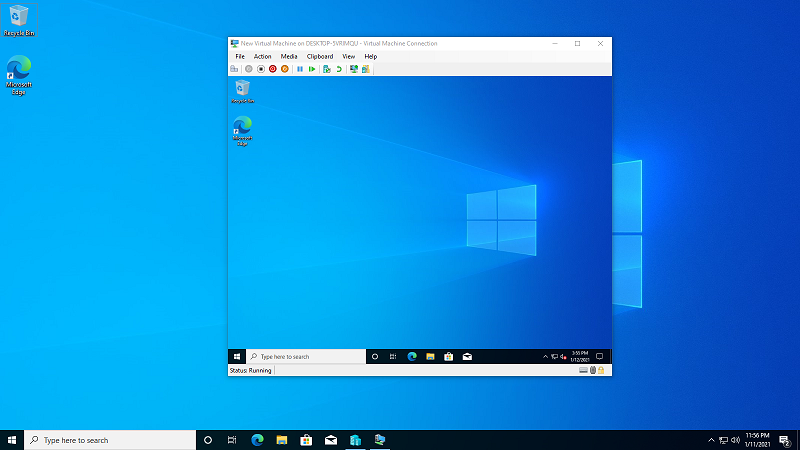
25. Open Virtual Machine after installation
Was this information helpful?
Yes
No
- Above information might be partly or entirely quoted from exterior websites or sources. please refer to the information based on the source that we noted. Please directly contact or inquire the sources if there is any further question and note that ASUS is neither relevant nor responsible for its content/service
- This information may not suitable for all the products from the same category/series. Some of the screen shots and operations could be different from the software versions.
- ASUS provides the above information for reference only. If you have any questions about the content, please contact the above product vendor directly. Please note that ASUS is not responsible for the content or service provided by the above product vendor.
- Brand and product names mentioned are trademarks of their respective companies.
1. Перезагрузите компьютер или ноутбук, при включении постоянно нажмите кнопку подсказки, чтобы попасть в BIOS. Если подсказки нету, нажмите «F2» или «F8» или «Del», на ноутбуке — «FN + F1» или «Del».
Внимание: если эти кнопки не работают, попробуйте эти — ESC, F8, F9, F10, F11, F12 (на ноутбуке в сочетании с клавишей FN)

2. После появления этой страницы выберите «Enter Setup», затем подтвердите.

3. В этой странице нажмите кнопку «F7» или с помощью мыши щелкните «Advanced Mode» и войдите на страницу настроек после подтверждения.

4. Найдите «Advanced» — «CPU Configuration» — «Intel(R) Virtualization Technology/SVM Mode», там выберите «Enabled». Сохраните изменения и выйдите из BIOS с помощью клавиши F10.


PS: Если у вас процессор AMD, после входа на страницу BIOS найдите «CPU Configuration» — «Secure Virtual Machine/SVM mode», там выберите «Enabled», затем нажмите «F10», сохраните изменения и выйдите из BIOS.

Способ включения VT на других марках материнских плат и ноутбуков
Как включить VT на компьютере или ноутбуке Lenovo (Леново)?
Как включить VT на компьютере или ноутбуке DELL?
Как включить VT на компьютере или ноутбуке HP?
Как включить VT на материнских платах MSI?
Как включить VT на материнских платах GIGABYTE?

ВКонтакте: https://vk.com/ldplayer
Эл. почта: support_ru@ldplayer.net
Home
Hardware
By
Bhishu Acharya
You possibly won’t be able to run Hyper-V or third-party virtual machines like VMware Workstation/VirtualBox on your ASUS system without configuring the related settings on BIOS.
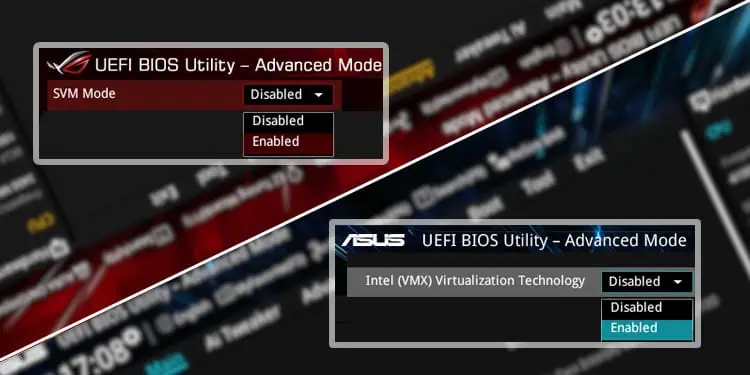
To enable virtualization, navigate to CPU Configuration in the Advanced tab. Intel users can look for Intel Virtualization Technology or VMX option while those with AMD processors should find SVM Mode. Just expand the drop-down, set it to Enabled, and save the settings.
Recalling my first attempt to use Ubuntu on VMWare, I couldn’t start the virtual machine even after properly setting it up. I got the “This host supports AMD-V, but AMD-V is disabled” error and to solve this, all I had to do was tweak a simple setting on BIOS. Since then, I have been able to emulate multiple operating systems on my ROG STRIX B450-F GAMING PC without further issues.
Check Processor Virtualization Support
Even though most modern motherboards include the virtualization setting within the BIOS settings, it might not work if your processor is incompatible.
Here, at our TechNewsToday workplace, all of our Intel and AMD processors support this feature. We have had no complaints from any authors and editors when using virtualization on their ASUS laptops or PCs.
But this might not be the same case for everyone. For that reason, it’s a good idea to first confirm whether your CPU supports it or not.
For Intel Users

If you’re a Team Blue, you can directly check your processor’s specifications. Identify whether Intel Virtualization Technology, VT-x, VT-d, VT-c, or similar terminologies are included there.
Another way is to download and install their Processor Identification Utility. Launch it and verify if the related option has a checkmark.
For AMD Users

On the flip side, Team Red users do not require digging around their online specifications page as AMD hasn’t included anything related to virtualization, SVM Mode, or AMD-V there. Instead, I suggest downloading their AMD-V Technology and Microsoft Hyper-V System Compatibility Check utility.
All you have to do is extract the zipped folder and run the amdhyperv.exe file. It will automatically show whether your system supports Virtualization and Hyper-V, as demonstrated in the above snap.
Access ASUS BIOS Utility
After confirming compatibility, it’s time to enter UEFI/BIOS screen on your ASUS PC. Just start/restart the computer and spam the Del key as soon as you press the power button.

However, some ASUS models use F2. So, if Del doesn’t work, reboot the computer, and this time, press F2 as soon as you encounter the first ROG/ASUS/TUF logo.
Navigate to CPU Configuration in Advanced Mode
In most systems, you enter the ASUS EZ Utility after using the dedicated BIOS key. But since you can’t make changes to the Virtualization settings here, you need to switch to Advanced Mode. Follow the below instructions on what to do next:
- From the bottom of the screen, select the Advanced mode option. As indicated in the small brackets, you may even use F7.

- Next, go to the Advanced Tab.
- Then, select CPU Configuration. This is where the virtualization settings in your BIOS lie.


Enable Virtualization
In order for your hypervisor or VMM to utilize the additional hardware capabilities offered by Vanderpool Technology, you need to now enable the related settings.
While the walk-through on both Intel and AMD ASUS motherboards are similar, they use their own terminologies that might confuse you. Don’t worry–I’ll be guiding you with my experience on how to configure them on both systems.
On Intel Motherboards
In some Intel ASUS boards, you can only find VT-x, as the demonstration below on my PRIME B660M-K D4 motherboard:
- Once you’re inside the CPU Configuration page, scroll down to locate Intel (VMX) Virtualization Technology.
- Expand the option and set it to Enabled.
- Now, press F10 to save changes and exit from ASUS BIOS.


Some ASUS laptops and motherboards might provide you with additional virtualization features like VT-d ((Virtualization Technology for Directed I/O) and VT-c (Virtualization Technology for Connectivity).
For instance, my NX580VD doesn’t integrate the exact VT-x option but instead comes with just Intel Virtualization Technology, which is basically the same thing. But along with that, I can enable/disable VT-d as well.

The two are not related by any chance. While the VT/VT-x option allows me to enable CPU virtualization on my ASUS computer, VT-d lets me access my I/O devices directly, including storage controllers, network adapters, add-on graphics, etc.
On AMD Motherboards
Just like Intel, AMD has its own virtualization feature called AMD-V, which can be enabled through SVM (Secure Virtual Machine) on ASUS BIOS. Here’s a quick demonstration of how I have done it on my ROG STRIX B450-F GAMING motherboard:
- From the CPU Configuration section, find and expand the SVM Mode drop-down.
- Pick Enabled.
- Now, press F10 to apply and save the changes. Your ASUS system should now reboot.


Verify and Use Virtualization Features
Finally, you can confirm whether the Virtualization option shows up on Windows:
- Once your OS boots up, use Ctrl + Shift + Esc hotkey to open Task Manager.
- Get to the Performance tab and select CPU.
- From the right, find the Virtualization option. It should indicate ‘Enabled’.

While this is normal on systems supporting just VT-x or SVM Mode, you might also find Hyper-V Support here. That was the case with my NX580VD laptop when I disabled the Intel Virtualization Technology option but kept the VT-d option enabled.

Indeed, I was able to use Microsoft Hyper-V without a hitch. But when I started a virtual machine on my VMWare Workstation Pro 16, I met with the ‘The host supports Intel VT-x, but Intel VT-x is disabled’ error (a similar instance on my AMD ASUS PC as stated earlier).
From here, I came to know that the VT-d option offers Hyper-V support. However, if you wish to run third-party virtualization programs, you must enable the Intel VT-x or SVM mode.
Moving on, you can now start using different hardware virtualization features on your OS. Here’s a list of guides prepared by our TNT team that should help you master virtualization in no time:
- Using Virtualization in Windows 11
- Installing Windows 11 on VMWare Workstation
- Installing Windows 11 on VirtualBox
- A complete guide to using VMWare
- Installing VMWare on Linux