
Often a software update might end up messing up your display settings on a Windows 10 PC. The typical reaction would be to look for a reset display settings button. However, there is no such button or keyboard shortcut to reset or revert to previous display settings in Windows 10. You will have to set each setting individually, as shown in this post.
It’s not always the software update that changes display settings. Sometimes, while fiddling around with settings or a child might have accidentally changed various display settings. One isn’t sure what setting has been actually changed. Here we have covered how to change most of the display settings on the Windows 10 computer to make things easier for you. Those range from colors, text size, contrast, etc.
Let’s get rolling.
Note: Most of the following steps require you to open Windows 10 Settings. You can open it from the Start Menu or Action Center. Alternatively, use the Windows key + I keyboard shortcut to open Settings.
How to Restore Default Windows 10 Theme
Many times, simply reverting to the default Windows 10 theme solves all the display woes. To do so, follow these steps:
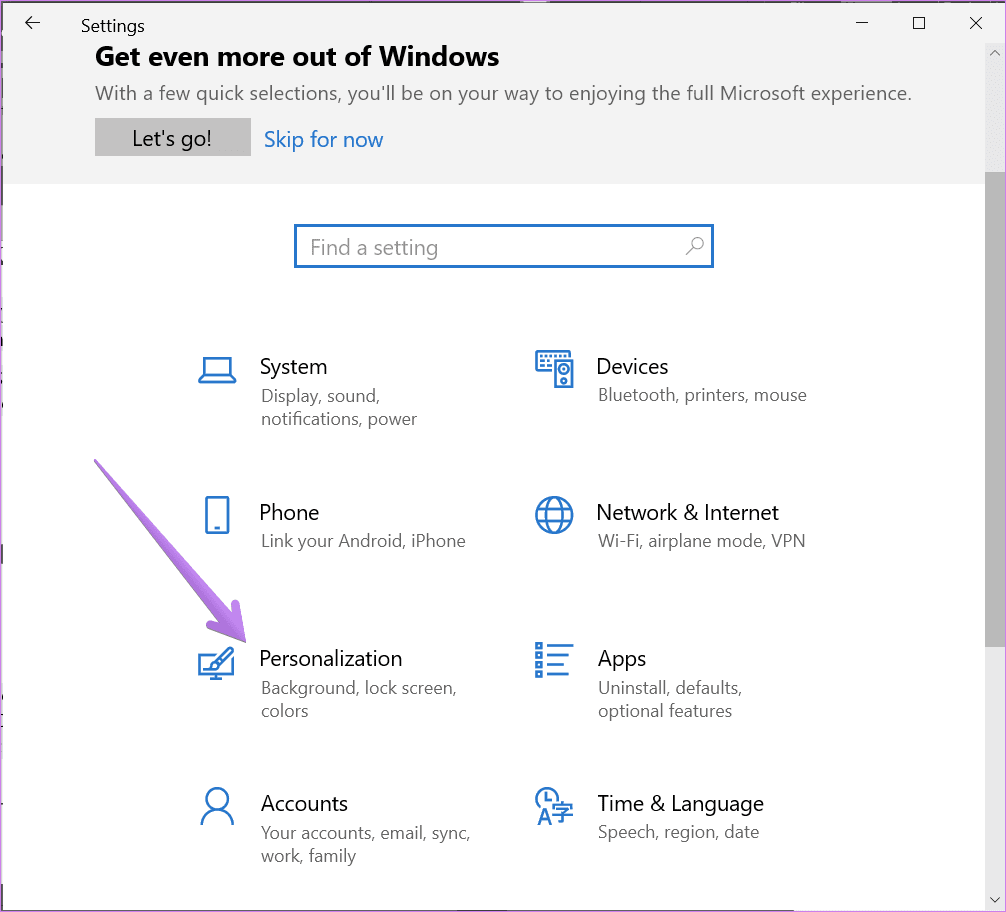
Step 1: Open Settings on your PC. Go to Personalization.
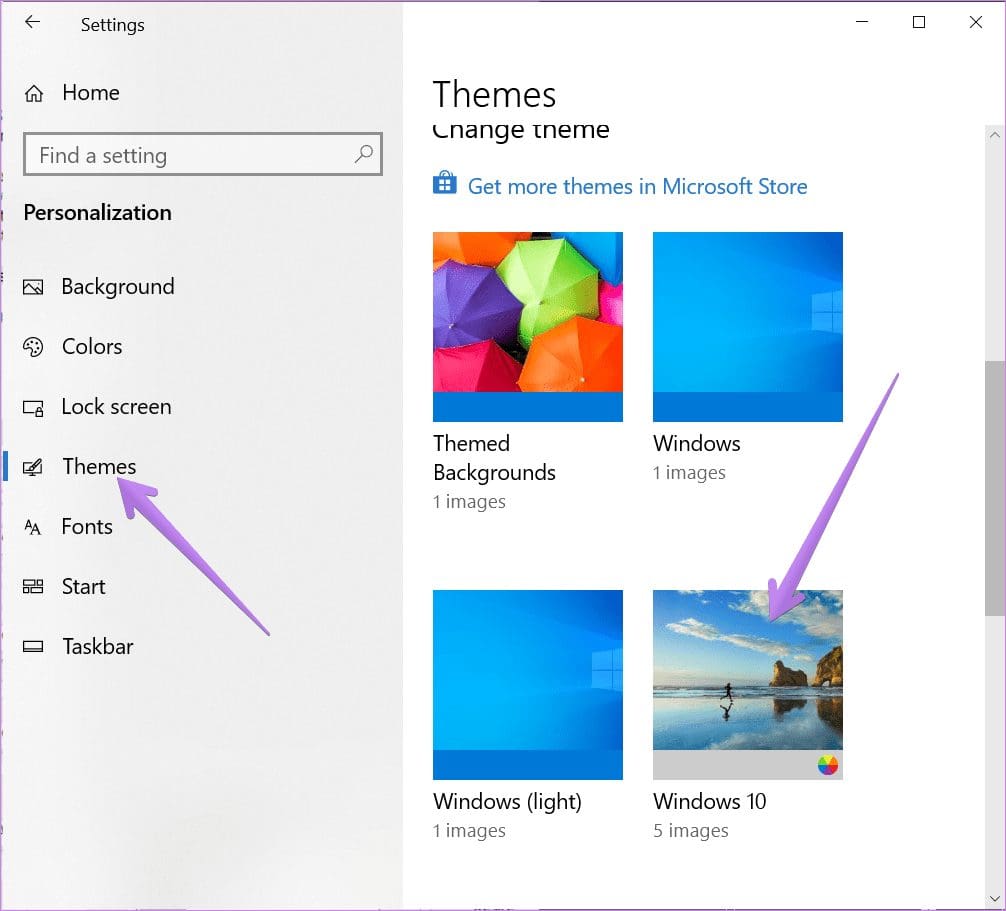
Step 2: Inside Personalization, go to Themes. Scroll down in Themes, and click on Windows 10 theme to apply it.
How to Change Theme Color
You should also try changing the theme color on your PC. You can choose between light and dark or use a combination of both with the help of a Custom color setting.
To change Windows 10 colors, go to Settings > Personalization > Colors. Under the Choose your color drop-down box, select Light or Dark. If you want to use a different color for apps and taskbar, select Custom. Also, select the blue color under the Choose your accent color if you want to use the default Windows 10 color.

Tip: Check out 4 ways to fix if Windows 10 taskbar color doesn’t change.
How to Change App and Display Size
How the content is shown to you depends on the display and scaling settings. If you see a large or small text layout than usual, you should change scaling settings.
To do so, follow these steps:
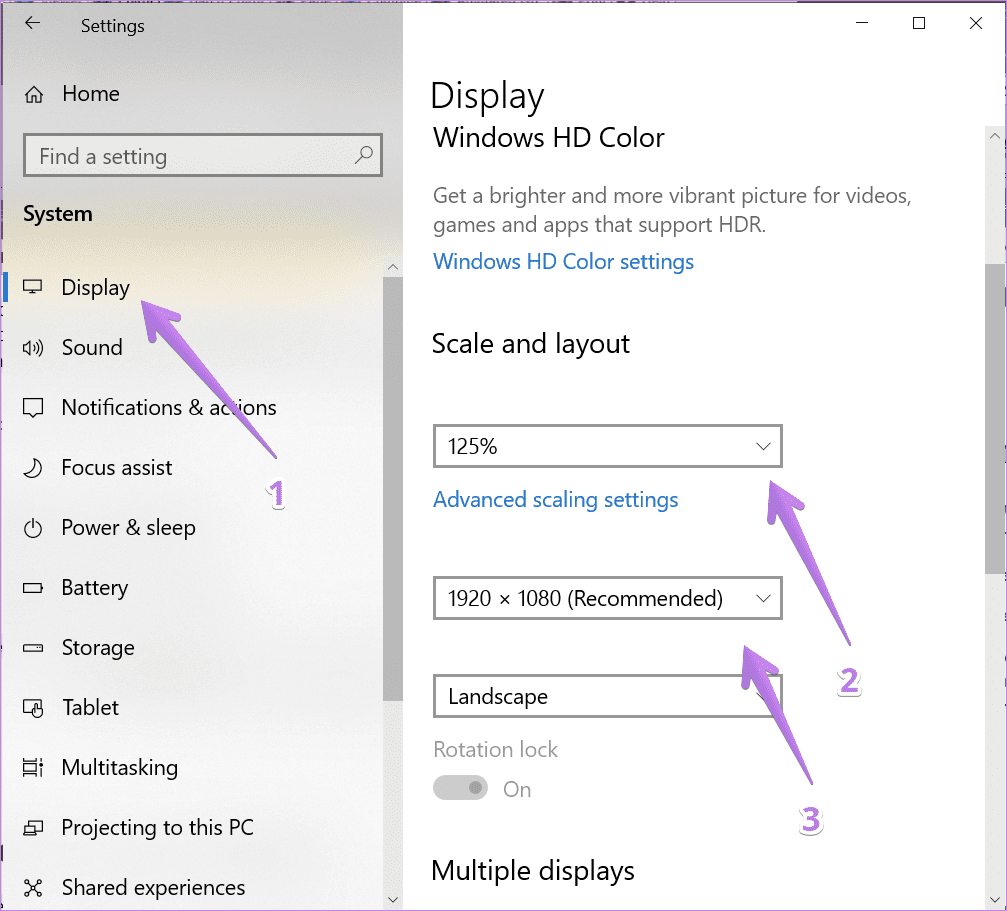
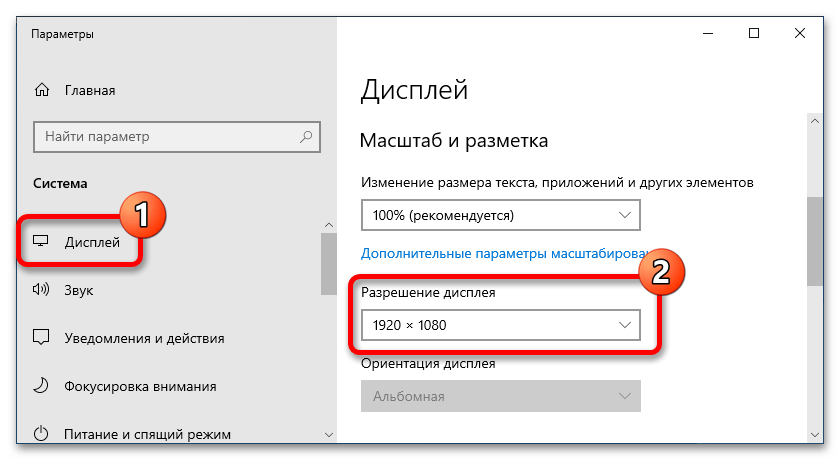
Step 1: Open Settings and go to System.
Step 2: Under Display (from the left sidebar), select an appropriate scaling percentage under Scale and layout. Do try all the available options and see which one suits you. You should also experiment with display resolution.
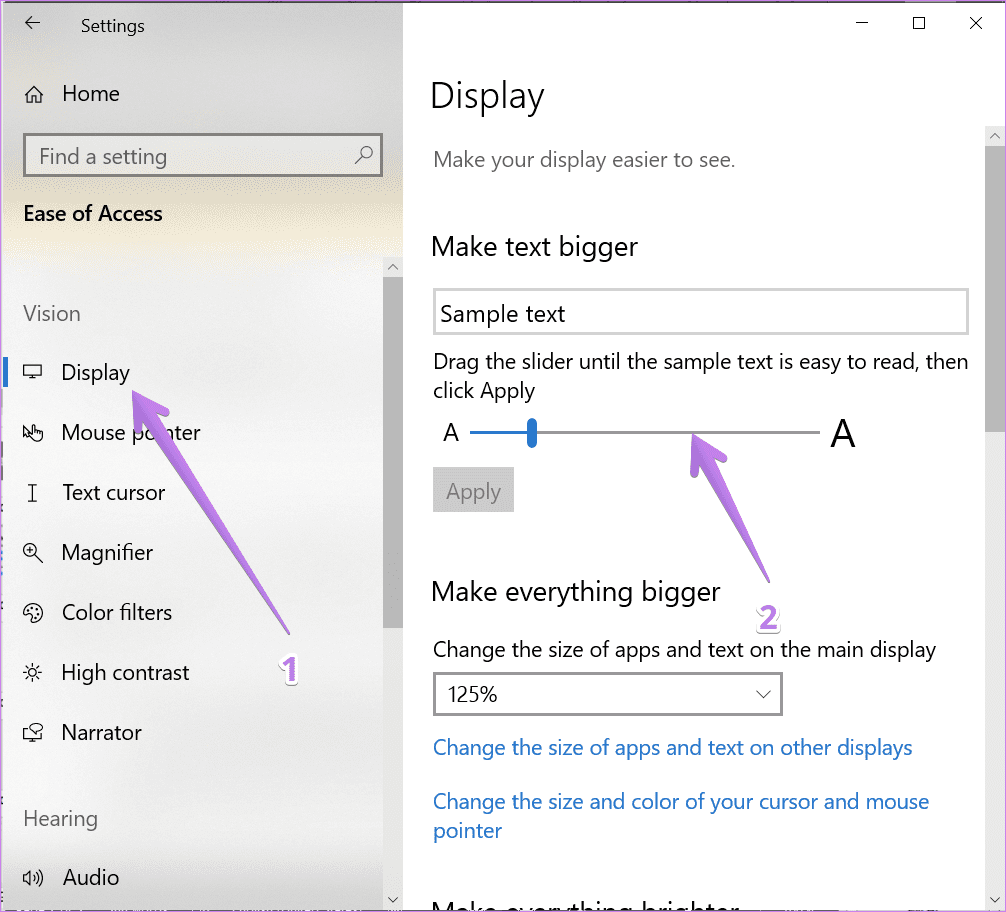
How to Change Text Size
Besides the above setting, you can change text size at another place in Windows 10. Go to Settings > Ease of Access > Display. Adjust the slider under Make text bigger.
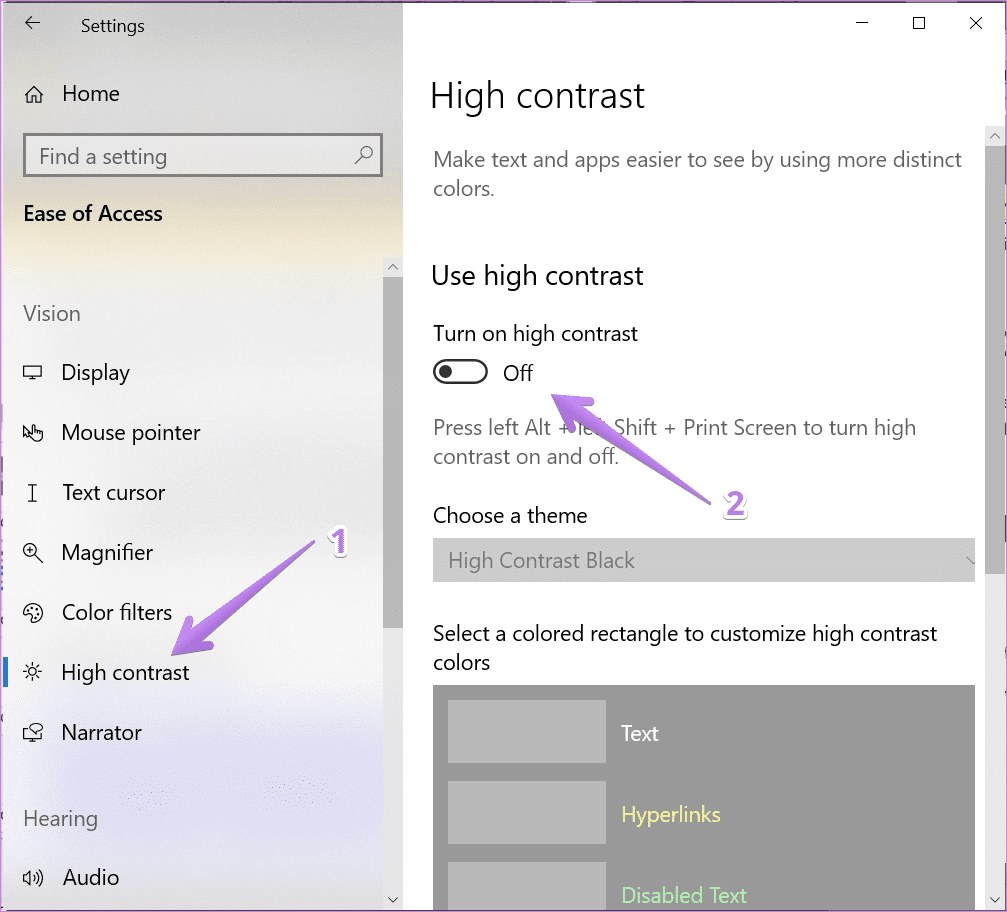
How to Disable High Contrast Mode
If you see distinct or dark colors on your Windows 10 PC, you might have accidentally enabled high contrast setting. So you need to turn it off, as shown below.
Step 1: Open Settings on your computer and go to Ease of Access.
Step 2: Click on High contrast. Turn off the toggle next to ‘Turn on high contrast.’
Tip: Check out 9 ways to fix the inverted colors issue on Windows 10.
How to Turn off Custom Scaling
If you are using custom scaling settings on your Windows 10 PC, then some text, apps, or other items might appear irregularly sized. You will need to disable custom scaling, as shown below.
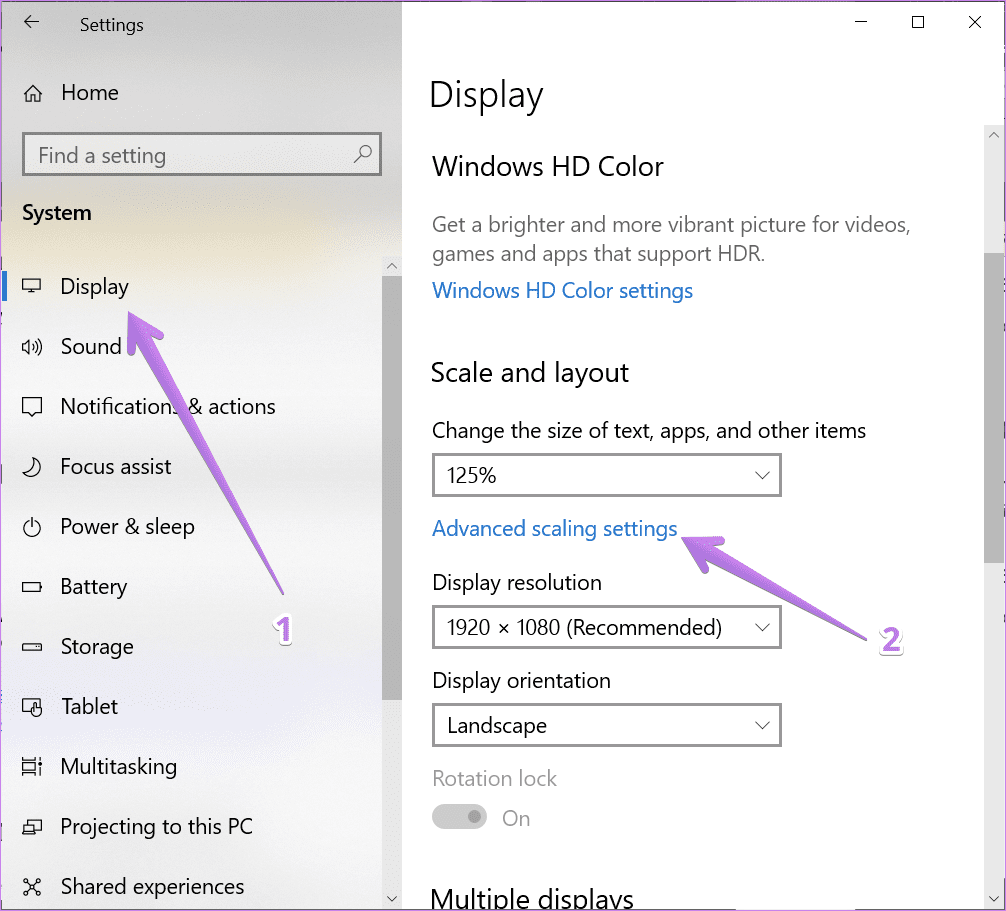
Step 1: Open Settings and go to System.
Step 2: Click on Display from the sidebar. Then click on Advanced Scaling settings.
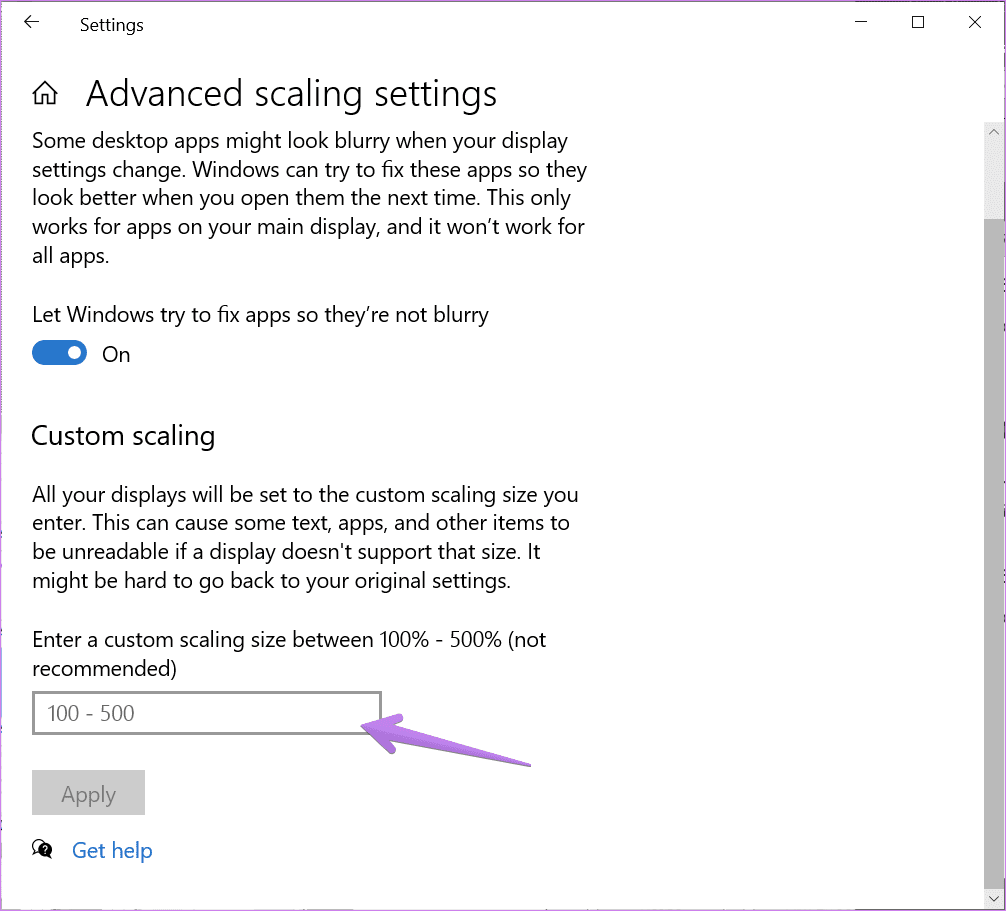
Step 3: Remove any number added in the Custom scaling box and hit Apply.
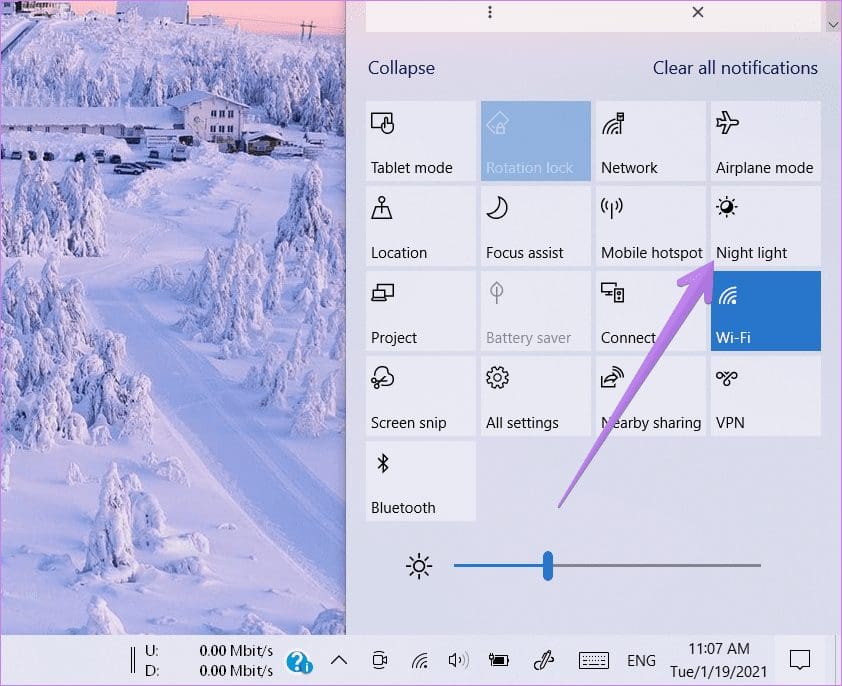
How to Turn off Night Light
If you see an orange or reddish tint on your screen, that means the night light is activated on your computer. You can disable it in two ways.
Firstly, open Action Center from the taskbar. Click on the Night light option to disable it if it is enabled.
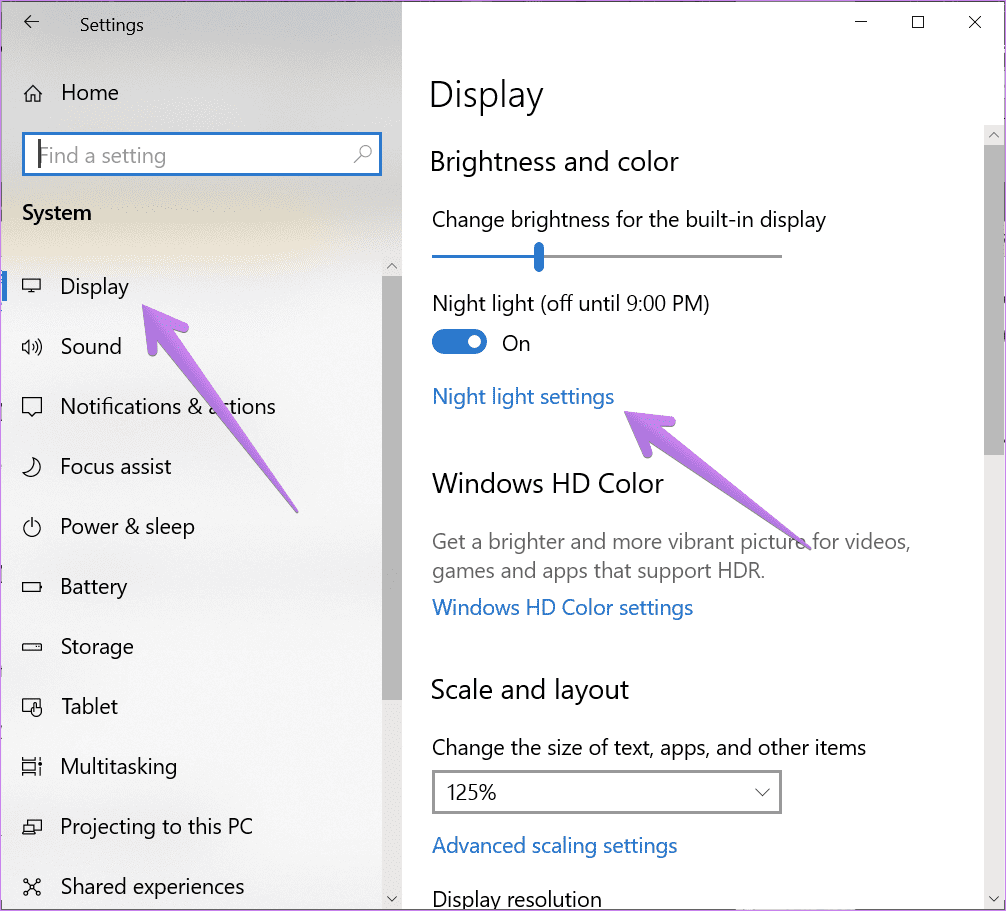
Alternatively, go to Settings > System > Display. Turn off the toggle next to Night light. Also, click on the Night light settings and disable Schedule night light.
Tip: Disable Color filters under Settings > Ease of access > Turn on color filters.
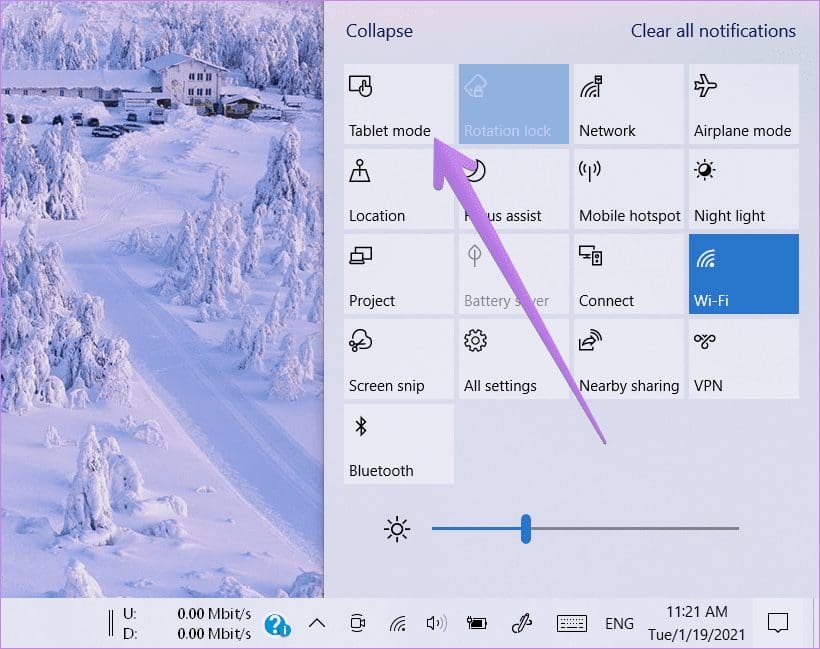
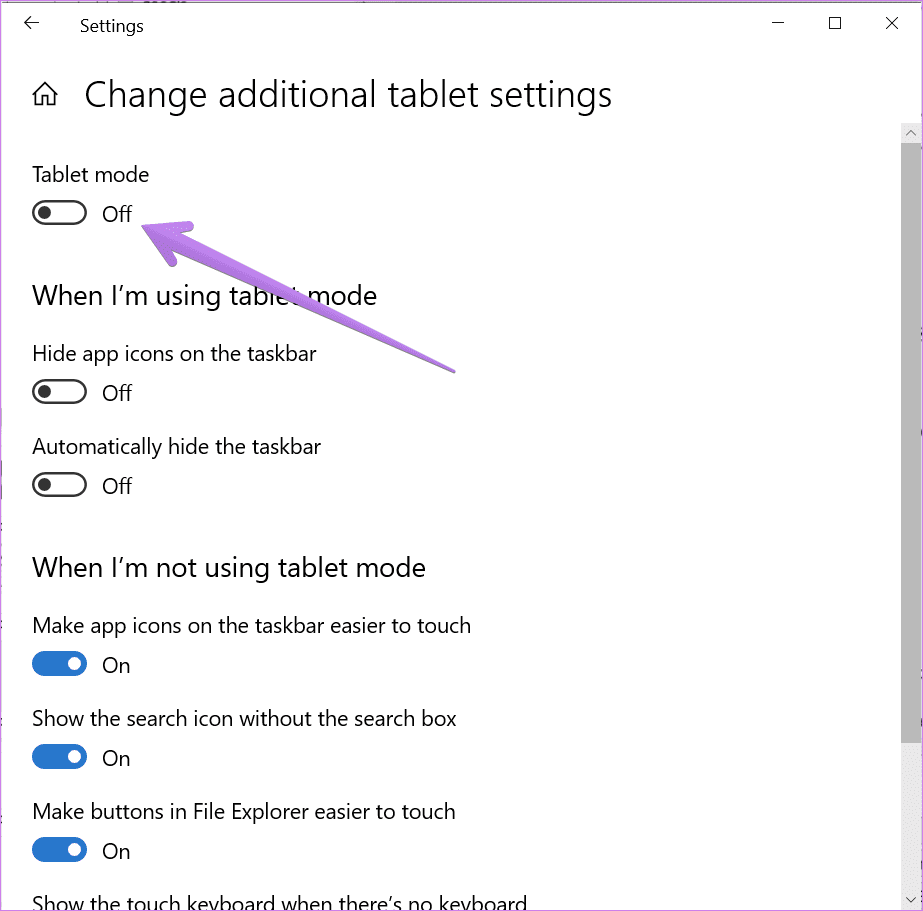
How to Turn off Tablet Mode
When Tablet mode is enabled, your computer is optimized for touch. So your apps will open in full-screen mode, including a full-screen Start Menu. You will notice changes in the taskbar and desktop icons too. If that is happening, you should disable Tablet mode.
For that, open Action Center and click on Tablet mode to disable it.
Alternatively, go to Settings > System > Tablet. Click on Change additional tablet settings.
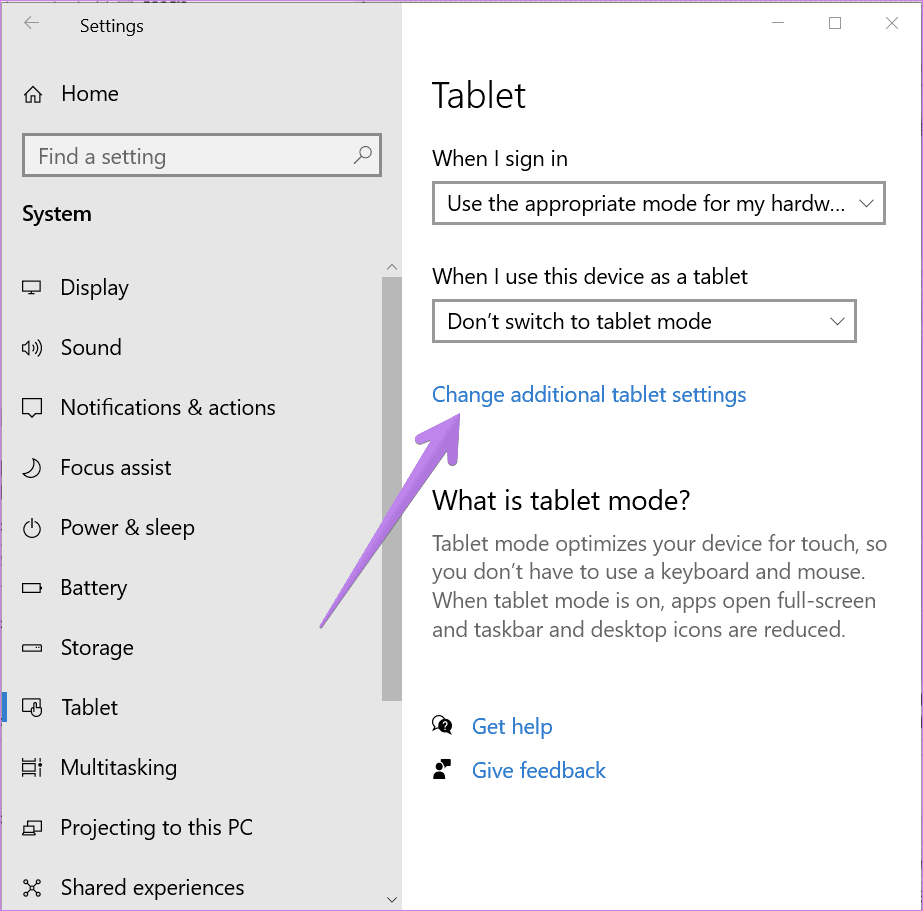
Turn off the toggle next to Tablet mode. Also, verify other settings related to Tablet mode and see if they are interfering with display settings.
Tip: If you decide on using Tablet mode, check out 15 tips and tricks to use Windows 10 in tablet mode.
How to Turn off Magnifier
When Magnifier is enabled, you will see everything as zoomed on your computer. To disable it, go to Settings > Ease of access > Magnifier. Disable the toggle next to Turn on Magnifier.

Use Multiple Display Settings
If you are using multiple monitors for your PC, you must set up dual monitors properly. Then you can use and customize each display separately. So do check if you are changing the above settings for the right display.
Was this helpful?
Thanks for your feedback!
The article above may contain affiliate links which help support Guiding Tech. The content remains unbiased and authentic and will never affect our editorial integrity.
Все способы:
- Вариант 1: Сброс разрешения монитора
- Вариант 2: Возврат заводским настройкам отображения
- Способ 1: Штатные «Параметры»
- Способ 2: Меню монитора
- Вариант 2: Удаление кеша настроек из реестра
- Вопросы и ответы: 0
Вариант 1: Сброс разрешения монитора
Если нужно сбросить настройки разрешения монитора на компьютере с Windows 10, можно воспользоваться как разделом с параметрами экрана штатных «Параметров», так и выполнить полный сброс, удалив и переустановив программное обеспечение графического адаптера в «Безопасном режиме». Во втором случае сбросятся все настройки графики, которые были ранее выставлены пользователем. О том, как это правильно сделать, мы писали ранее в отдельном материале.
Подробнее: Сброс параметров разрешения экрана в Windows 10
Вариант 2: Возврат заводским настройкам отображения
Что касается настроек цвета, насыщенности и других параметров отображения содержимого на экране, есть возможность выполнить сброс на уровне самой системы или с помощью встроенных настроек монитора.
Способ 1: Штатные «Параметры»
Данный вариант довольно трудоемкий, поскольку придется менять настройки отображения вручную. По сути, вы вернете цветовую тему, размер шрифта и другие параметры к значениям по умолчанию. Если нужно сделать именно это, тогда придется обратиться к предустановленным возможностям операционной системы.
Когда нужно сбросить не системные настройки, а именно параметры, сразу переходите к следующему варианту решения ситуации – в этом случае взаимодействовать придется непосредственно с монитором. Однако это актуально только для персональных компьютеров, поскольку все настройки дисплея на ноутбуках в большинстве случаев происходят только через системные «Параметры».
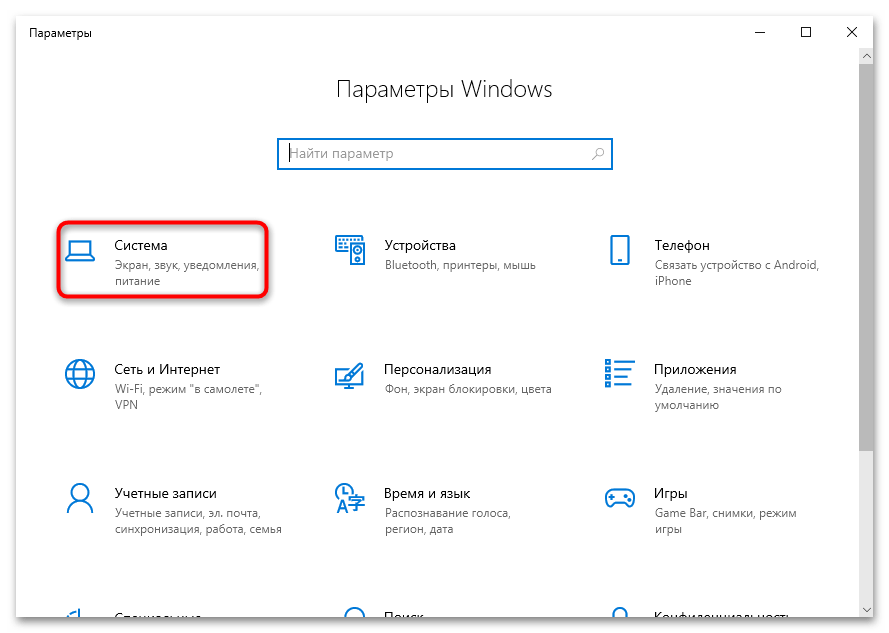
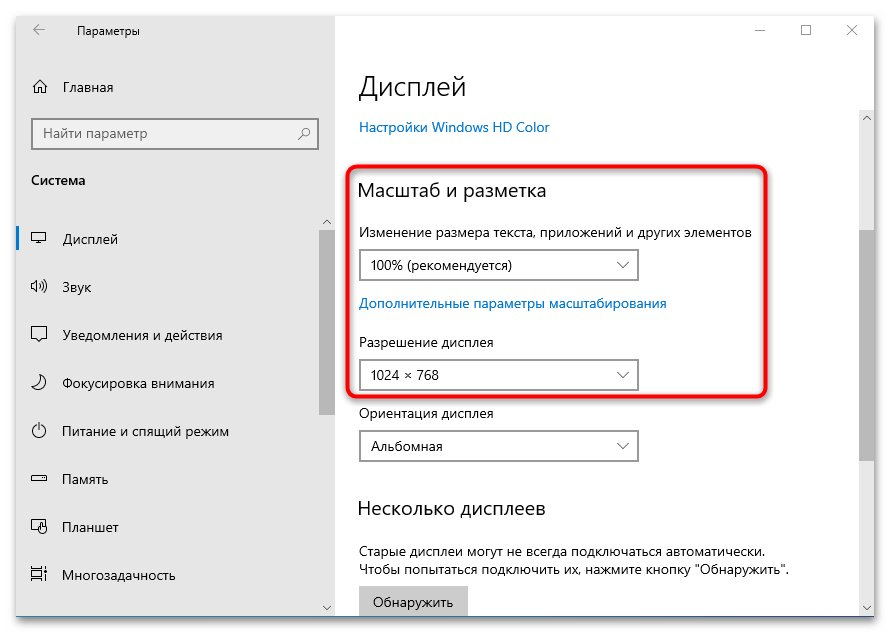
- Для начала перейдите в подраздел «Параметры экрана» штатных «Параметров». Для этого можно запустить соответствующее приложение и выбрать раздел «Система».

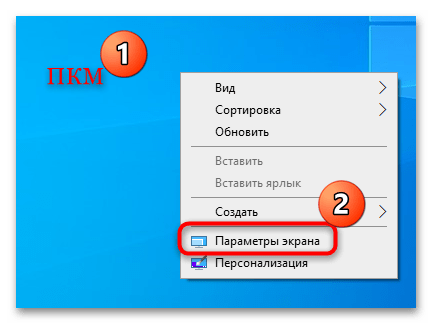
Также можете кликнуть правой кнопкой мышки по свободной области рабочего стола и выбрать нужный пункт из контекстного меню.
- Для начала стоит разобраться в таких параметрах, как масштаб и разметка. Как правило, в меню «Изменение размера текста, приложений и других элементов» и «Разрешение дисплея» можно найти пункт «Рекомендуется» — обычно такие параметры наиболее подходящие и выбираются системой автоматически по умолчанию до тех пор, пока пользователь самостоятельно их не изменит.
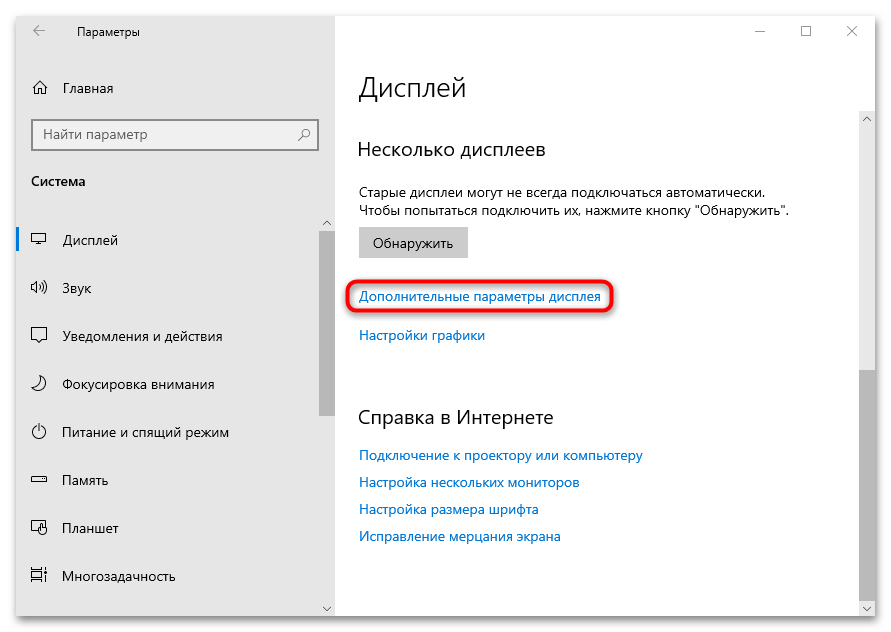
- Что касается цвета и цветовых режимов, вернуть оригинальные настройки можно также через данный раздел. Для этого кликните по строке «Дополнительные параметры дисплея» в блоке «Несколько дисплеев».
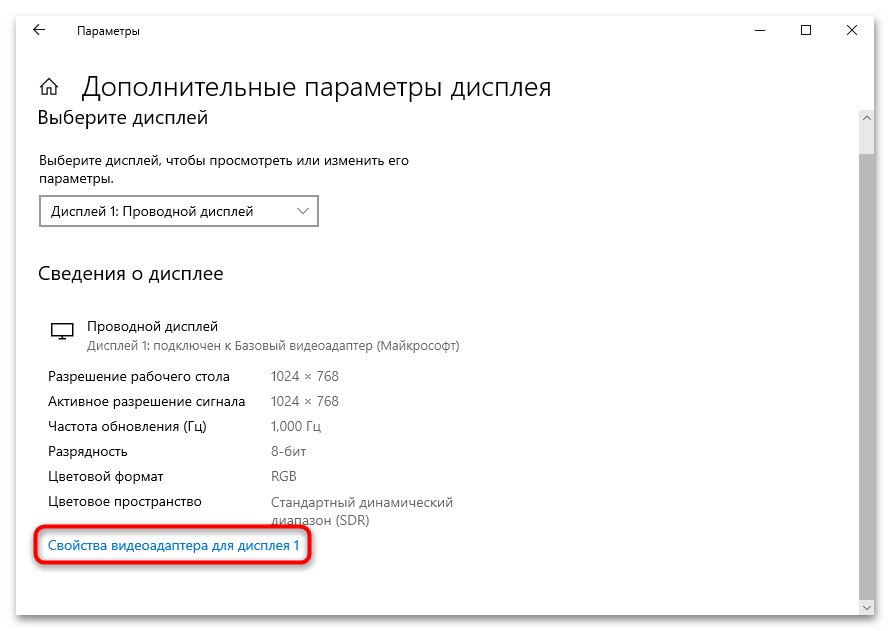
- Затем щелкните по ссылке «Свойства видеоадаптера».
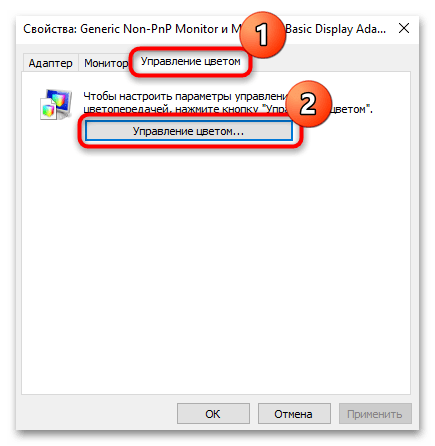
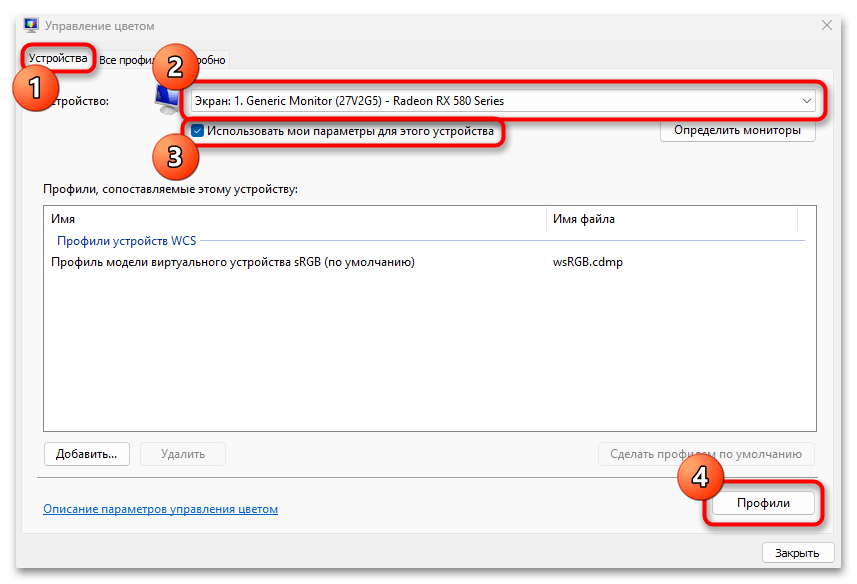
- В новом окне переключитесь на вкладку «Управление цветом» и выберите одноименную кнопку.
- Из меню «Устройства» выберите ваш монитор, затем нажмите на кнопку «Профили».
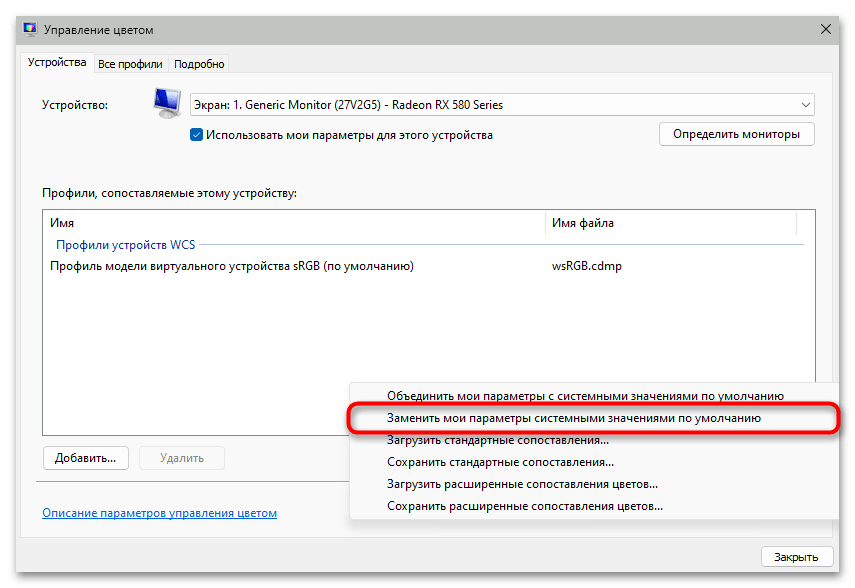
- В появившемся списке нажмите на пункт «Заменить мои параметры системными значениями по умолчанию».
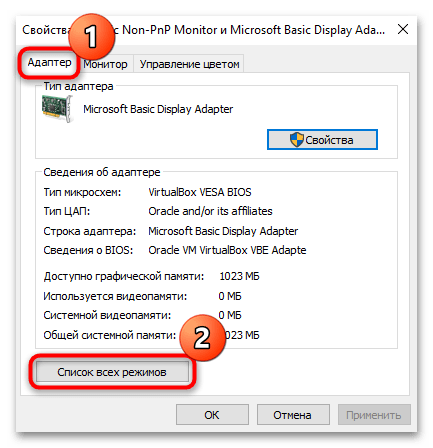
К слову, в окне со свойствами видеоадаптера вы сможете выбрать частоту обновления экрана, если такая возможность поддерживается монитором, а также определиться с режимами (вкладка «Адаптер», кнопка «Список всех режимов»). Стандартная частота отображения — 60 Гц, но обычно чем это значение выше, тем лучше.
Как уже говорилось, мы разобрали основные параметры отображения на уровне системы и настроек ее интерфейса. В некоторых, более радикальных случаях прибегают к сбросу настроек операционной системы до заводских – таким образом, вернутся все параметры, которые были изначально, в том числе внешний вид интерфейса, элементов, цветового решения. Но при этом установленные приложения будут удалены, хотя пользовательские файлы можно сохранить. Этот вариант подойдет для решения различных серьезных проблем в работе Windows 10.
Читайте также: Возвращаем Windows 10 к заводскому состоянию
Способ 2: Меню монитора
Когда нужно сбросить настройки монитора, можно воспользоваться встроенным меню от производителя и аппаратными клавишами, с помощью которых регулируются его параметры. Алгоритм зависит от модели устройства, но, как правило, в любом встроенном меню предусматривается пункт «Сброс» — с его помощью и происходит возврат настроек к изначальным.
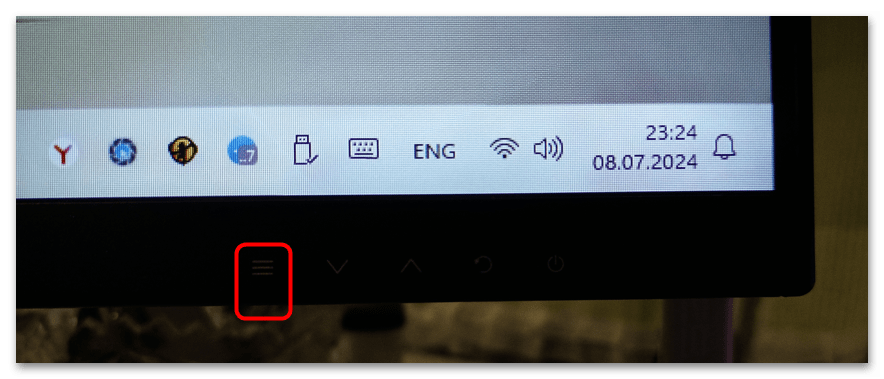
- Нажмите на клавишу для вызова меню монитора. Она может располагаться на нижней или боковой части корпуса.
- С помощью кнопок для навигации перейдите в тот раздел, где находится функция. В нашем случае раздел так и называется – «Сброс».
- Выберите функцию «Сброс» — после этого экран может моргнуть, а все настройки восстановятся.
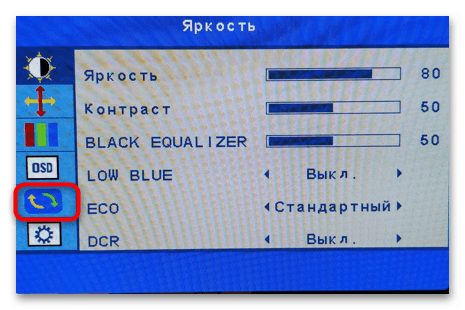

Сброс произойдет только тех параметров, которые были ранее изменены через меню монитора, например яркость, контрастность, цвет, язык меню, выравнивание, выбор источника сигнала и др.
Вариант 2: Удаление кеша настроек из реестра
Также стоит упомянуть вариант, когда требуется очистить системный реестр от записей, которые связаны с настройками монитора. Если ключи по каким-то причинам оказались повреждены или остались от ранее подключенного устройства, могут возникать различные проблемы и ошибки, связанные с работой внешнего дисплея, вплоть до прекращения функционирования выходного сигнала. Попробуйте очистить кеш настроек не только для того, чтобы устранить сбои, но и сбросить параметры дисплея.
Имейте в виду, что редактирование системного реестра возможно только после входа в систему под учетной записью администратора.
Читайте также: Авторизация в учетной записи Администратора в Windows 10
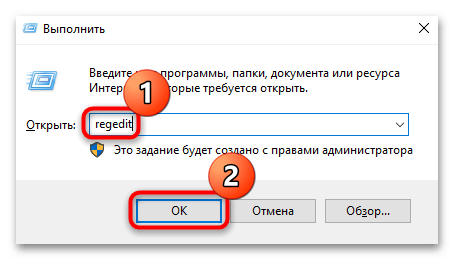
- Одновременно нажмите на клавиши «Win + R», в поле окна «Выполнить» введите команду
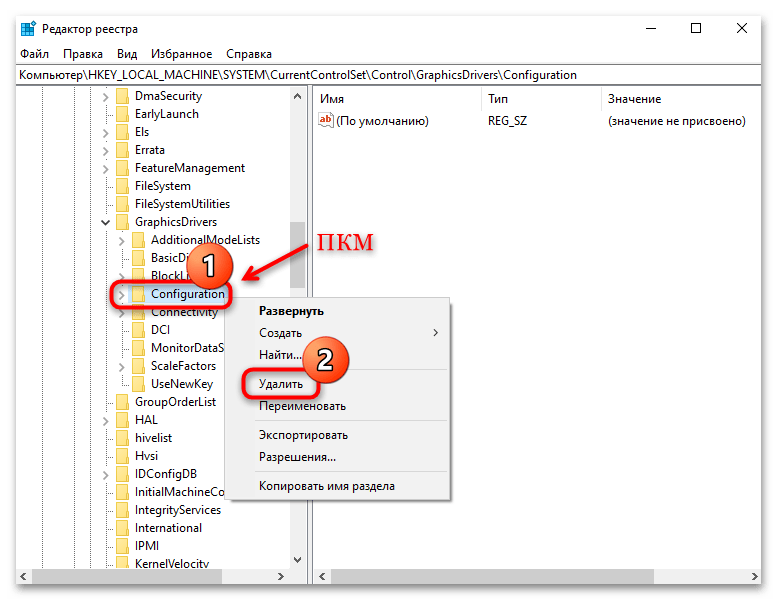
regeditи нажмите на кнопку «ОК» или клавишу «Enter». - Разверните ветку
HKEY_LOCAL_MACHINE\SYSTEM\CurrentControlSet\Control\GraphicsDrivers\или скопируйте и вставьте путь в адресную строку, расположенную вверху, затем нажмите на клавишу ввода. - На панели слева найдите подраздел «Configuration», щелкните по нему правой кнопкой мыши и выберите из меню пункт «Удалить».
- Подтвердите действие.

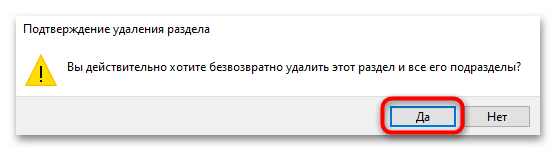
Аналогичным образом сотрите еще два подраздела: «Connectivity» и «ScaleFactors».
После выполненных действий обязательно перезагрузите компьютер, чтобы новые параметры вступили в силу.
Наша группа в TelegramПолезные советы и помощь
-
Home
-
News
- Full Guide – How to Reset Display Settings Windows 10
By Tina |
Last Updated
How to reset Display settings Windows 10? Have you ever encountered this error? This post from MiniTool will show you how to reset display settings Windows 10. Besides, you can visit MiniTool to find more Windows tips and solutions.
Once after updating Windows, you may find your desktop on Windows desktop is messing up. This would be an annoying thing. But, if your desktop is messing up, you can choose to reset display settings Windows 10.
However, there is no such button or keyboard shortcut to reset or revert to previous display settings in Windows 10. You have to set each setting manually.
So, in this post, we will show you how to reset display settings to default Windows 10.
How to Reset Display Settings Windows 10?
This post will show you how to reset display settings to default Windows 10.
How to Reset Display Settings Windows 10 – Themes
First of all, we will show you how to reset display settings Windows 10 – themes.
Now, here is the tutorial.
- Press the Windows and I keys together to open Windows Settings.
- Then click Personalization.
- In the Personalization window, go to the Themes tab.
- Then click on Windows 10 theme to apply it.

After that, you have reset the Themes in display settings Windows 10.
How to Reset Display Settings Windows 10 – Colors
In order to reset display settings Windows 10, you also need to change the colors of the display.
Now, here is the tutorial.
- Open Windows Settings.
- Choose Personalization > Colors.
- On the right pane, go to the Choose your color
- Then select Light or Dark to continue.
- If you want to use a different color for Apps and Taskbar, select Custom.
- Select the blue color under the Choose your accent color section if you want to use the default Windows 10 color.
After that, you have reset the display settings of Color to default Windows 10.
How to Reset Display Settings Windows 10 – Display Size
Here is the tutorial.
- Open Windows Settings.
- Go to System.
- Select Display, and select an appropriate scaling percentage under Scale and layout.
How to Reset Display Settings Windows 10 – Text Size
Here is the tutorial.
- Go to Windows Settings.
- Choose Ease of Access > Display.
- Adjust the slider to change the size of text Windows 10.
How to Reset Display Settings Windows 10 – Turn Off Custom Scaling
In order to reset display settings Windows 10, you can choose to turn off custom scaling.
Now, here is the tutorial.
- Open Windows Settings.
- Then choose System.
- Click Display from the sidebar, and then click Advanced Scaling settings.
- Clear previous settings and choose Apply.
After that, you have reset display settings Windows 10 successfully.
Apart from the above settings, to reset display settings Windows 10, you also need to do other settings, such as turning off Night Light, turning off Tablet Mode, turning off Magnifier, and so on.
To sum up, this post has shown how to reset display settings Windows 10. If you need to reset display settings to default Windows 10, you can try these solutions. If you have any better ideas to reset display settings Windows 10, you can share them in the comment zone.
About The Author
Position: Columnist
Tina is a technology enthusiast and joined MiniTool in 2018. As an editor of MiniTool, she is keeping on sharing computer tips and providing reliable solutions, especially specializing in Windows and files backup and restore. Besides, she is expanding her knowledge and skills in data recovery, disk space optimizations, etc. On her spare time, Tina likes to watch movies, go shopping or chat with friends and enjoy her life.
Download Windows Speedup Tool to fix errors and make PC run faster
Windows 11/10 offers many customization options, including display settings. Sometimes, changing display settings can lead to unexpected results. In this case, you need to reset them. In this article, I will show you how to reset the Graphics or Display settings to default in Windows 11/10.

To reset Graphics or Display settings to default in Windows 11, you have to reset the following display settings to their default values.
- Display resolution and scale
- Display calibration for HDR video
- Night light preferences
- Color settings
- Contrast theme and color filters
- Mouse pointer settings
Let’s start.
1] Display resolution and scale
To restore the default display resolution and scale, follow these steps:

- Open Windows 11 Settings.
- Go to System > Display.
- Select the Recommended display resolution and scale settings under the Scale & layout section.
2] Display calibration for HDR video
If you have messed up the display calibration for HDR video, you can reset it to the default values by following these steps:

- Open Windows 11 Settings.
- Go to System > Display > HDR.
- Expand the Display calibration for HDR video tab.
- Click Restore default.
Read: How to clear the Display cache in Windows
3] Night light preferences
In Windows 11, Night Light remains off by default. Since you are restoring all the display settings to their default values, you have to turn off Night Light and set its strength to the default.

Here is how to do that:
- In Windows 11 Settings, go to System > Display.
- Turn off the Night Light if it is turned on.

Now, click on the Night light tab to open its settings. If you have set any schedule for the Night light, turn it off. Move the Strength slider to 48, as 48 is the default value of Night Light’s strength.
4] Color settings

Now, restore the color settings to default. In Windows 11 Settings, go to Personalization > Colors. Select Light in the “Choose your mode” option and turn on the Transparency effects.

If you have also changed the color management settings, use the Color Management app to restore the default display color settings.
5] Contrast theme and color filters

Check if you have activated the Contrast theme. If so, disable it.

To disable Color Filters, go to Accessibility > Color filters. If the Color filters switch is on, click Reset to reset the intensity, then turn off the switch.
It is best to go to Personalization > Themes and select the default Windows theme to reset colors and backgrounds.
6] Mouse pointer settings
The last step is to reset your mouse pointer style. Follow these steps:

- Open Windows 11 Settings.
- Select Accessibility > Mouse pointer and touch.
- Expand the Mouse pointer style tab and select the white mouse cursor.
- Now, move the mouse pointer size slider to the left.
This is all about what you can do to restore default display settings in Windows 11. However, if you experience any display or screen issues, you can either roll back the display driver or perform its clean installation by completely removing and reinstalling it.
How do I go back to normal mode in Windows 11?
If you are in a Clean Boot state, use MSConfig to enable all the disabled services and restart your computer. After restarting your device, you will be in normal mode. To get out of Safe Mode, open MSConfig and uncheck the Safe Boot checkbox under the Boot tab. Click OK and restart your computer.
How do I change my Windows 11 theme back to normal?
To change your Windows 11 theme back to normal, apply the default theme to your system. Open Windows 11 Settings and go to Personalization > Themes. Now, select the Windows 11 default light theme. If it is already active, switch to another theme, then switch back to the light theme.
Read next: Accidentally deleted Graphics card driver in Windows.
Anand Khanse is the Admin of TheWindowsClub.com, a 10-year Microsoft MVP (2006-16) & a Windows Insider MVP (2016-2022). Please read the entire post & the comments first, create a System Restore Point before making any changes to your system & be careful about any 3rd-party offers while installing freeware.
Reader Interactions
The color settings in a Windows computer certainly matter a lot especially when it comes to printing pictures. Users who are found or edit photos for a living change their computer’s color settings in order to ensure that the printout looks like the actual colors. However, those settings might not be appropriate for computer display and you can really tell right away that there something’s not right in the display. You might also notice some weird tint which isn’t easy to get rid of. You can’t actually tell the difference at first, not until you look at some other computers and then wonder what’s wrong with yours so, in this guide, you will know how to restore the display color settings back to their default state on your Windows 10 PC.
Make sure to follow each one of the steps laid out below carefully to restore the default Display Color settings.
Step 1: Set the Color Management Settings to default.
- In the Start search box, type in “color management”. Once you see it in the search results, open it.
- Once you’ve pulled up the Color Management window, go to the Advanced tab. From there, make sure that every single option is set to default – from all the options in both the “Windows Color System” and “ICC rendering intent to WCS gamut mapping”.
Note: You also have the option to reset it for everyone by simply clicking on the “Change system defaults” button.
- Finally, you can also try to calibrate your display.
Step 2: Set the Graphics Properties to default.
After making changes in the Color Management settings, you need to also set the Graphics Properties to default.
- Start by right-clicking on any empty space on your desktop.
- Then select the Graphics properties from the context menu. From the Graphics properties window, you will see that most sections have to restore defaults.
Step 3: Try using Nvidia Color Settings for Desktop
The next thing you can try is using the Nvidia Color Settings if you have Nvidia graphics installed on your Windows 10 PC. Just the Control Panel to reset the color settings.
- From the system tray, launch the Nvidia control panel.
- Next, go to Display > adjust desktop color settings.
- From there, select the display and then select the Nvidia Settings.
- After that, change the options accordingly in order to get the correct combination though you can always leave them to default.
Do You Need Help with Your Device?
Our Team of Experts May Help
Troubleshoot.Tech Experts are There for You!
GET HELP
Troubleshoot.Tech experts work with all versions of Microsoft Windows including Windows 11, with Android, Mac, and more.
Share this article:
You might also like
If you have just installed the latest Cumulative Update on your Windows 10 computer and you find that since then, the Windows 10 Start Search is not displaying any results when you try to use it to search for something in your computer, then this post might help as it will give you some suggestions to fix the problem.
This problem might be caused by some bugs brought in by the new cumulative update you’ve installed. It is also possible that Cortana is having some issues or that the Windows Search service hasn’t been initialized. Whatever the cause is, here are some suggestions you need to follow to fix this issue. You can try running the Search and Indexing troubleshooter or configure the
- Run Search and Indexing Troubleshooter
- Configure the Windows Firewall
- Reinstall Cortana.
Option 1 – Try to run the Search and Indexing troubleshooter
The first thing you can do is to run the Search and Indexing troubleshooter in Windows 10 as it checks whether the settings for Cortana are in place and automatically corrects any issues if the update or software installation has changed the settings. To run it just click on the Start button and select Settings > Updates and Security > Troubleshoot. From there, select the Search and Indexing Troubleshooter.
Option 2 – Restart Cortana’s process in the Task Manager
Restarting Cortana’s process in the Task Manager could also help you resolve the problem. Refer to the steps given below to do so.
- Tap the Ctrl + Alt + Del keys to open the Security options window.
- From there, look for the Task Manager in the given list and open it.
- Next, look for the process of Cortana and right-click on it, and then select the End Task option to end its process.
- After that, the Cortana process will restart by itself and re-initialize.
Option 3 – Try resetting Cortana
- Open Cortana and go to the Settings section where you’ll see the “Turning off Cortana clears what Cortana knows on this device, but won’t delete anything from the Notebook. After Cortana is off, you can decide what you’d like to do with anything still stored in the cloud” option. Turn this option off.
- Restart your PC.
- After your computer boots, launch Cortana again and check.
Option 4 – Try to configure the Windows Firewall
- Tap the Win + Fn + Shift (Pause) keys to open Control Panel.
- From there, open the Windows Defender Firewall applet and click on the Advanced Settings to open the Windows Firewall with the Advanced Security panel.
- Next, click on the Outbound Rules section and look for Cortana and then double click on it to open its Properties.
- After that, make sure that the “Allow the connection” is selected although this is the default working setting.
Option 5 – Try to reinstall Cortana
If none of the options given above works, you must consider reinstalling Cortana.
- First, right-click on the Taskbar and select the Task Manager.
- Next, select File menu > Run new task and type “Powershell” in the field and then select the “Create this task with administrative privileges” option.
- Click on OK to open the PowerShell console.
- After that, type the following command and hit Enter to execute it:
Get-AppXPackage -Name Microsoft.Windows.Cortana | Foreach {Add-AppxPackage -DisableDevelopmentMode -Register «$($_.InstallLocation)AppXManifest.xml»}
- Restart your computer and check if the Windows Start Search is now working.
Read More
Chedot is a Chromium-based Browser that replaces your default System Internet Browser. This browser offers users tools for downloading videos, faster browsing, and custom searches.
From the publisher: A feature of our browser is a high speed on slow computers, high speed download on a poor internet, support resuming file download when connection is broken and the download in multiple threads, the ability to go on blocked websites and downloading videos from video sites.
While this may seem interesting and good at start, this browser has been marked as a Potentially Unwanted Program. It monitors user activity, collects web traffic data, and user information. While using Chedot you may see additional ads throughout your browsing sessions.
About Potentially Unwanted Applications
Exactly what is a Potentially Unwanted Program (PUP)?
People have encountered it – you download a free software, you then discover some unwanted applications on your computer system or discover a strange toolbar has been included with your browser. You didn’t have them installed, so how did they appear? These unwanted applications, which are called Potentially Unwanted Programs, or PUP in short, usually tag along as a software bundle when downloading the application and could cause serious problems for computer users.
PUP does not involve malware in the traditional sense. What normally makes a PUP different from malicious software is the fact that when you download one, you’re doing it with your consent – although in most cases unintentionally and reluctantly. But, there is no doubt that PUPs remain bad news for computer users as it can be incredibly damaging to the PC in many ways.
How do unwanted programs affect you?
Unwanted programs come in many forms. More commonly, they will be found in adware bundlers which are known to utilize aggressive and misleading advertising. The majority of bundlers install many adware applications from a number of vendors, each of which features its own EULA policy. Safebytes Anti-malware completely removes this threat and safeguards your PC against PUP or malware infection. PUPS also appear in the form of undesirable toolbars or internet browser plug-ins. Not just they needlessly use up space on your screen, toolbars can also manipulate search results, track your web browsing activities, decrease your internet browser’s performance, and slow down your web connection to a crawl.
They could seem harmless but PUPs are generally spyware. They may include dialers, keyloggers, and also other software built inside them that could monitor you or send out your sensitive information to 3rd parties. Because of this unwanted program, your application may freeze, your security protections can get disabled that could leave your computer susceptible, your system could get ruined, and this list goes on and on.
Tips for preventing PUPs
• Study cautiously prior to agreeing to the license agreement as it could have a clause about PUPs.
• Always opt for the custom if you are given an option between Recommended and Custom Installations – never click Next, Next, Next thoughtlessly.
• Install an advert blocker/pop-up blocker; Deploy anti-malware products such as Safebytes Anti-malware. These software programs will establish a wall between the computer and online criminals.
• Be alert when you download and install freeware, open-source software, or shareware. Avoid downloading and installing browser extensions and applications you are not knowledgeable about.
• Always download software from reliable sources like official sites as opposed to untrustworthy sharing space. Avoid torrents and peer-to-peer clients.
What To Do If You Cannot Download Safebytes Anti-Malware?
All malware is bad, but certain types of malware do much more damage to your PC than others. Some malware sits in between your computer and the net connection and blocks some or all internet sites that you really want to check out. It will also block you from installing anything on your PC, especially anti-malware applications. So what to do when malicious software keeps you from downloading or installing Safebytes Anti-Malware? Although this type of issue will be tougher to get around, there are some actions you can take.
Install the antivirus in Safe Mode
In Safe Mode, you can adjust Windows settings, un-install or install some software, and get rid of hard-to-delete viruses. In the event the virus is set to load immediately when PC starts, shifting into this mode may well prevent it from doing so. In order to get into Safe Mode or Safe Mode with Networking, press the F8 key while the PC is booting up or run MSConfig and look for the “Safe Boot” options under the “Boot” tab. Once you’re in Safe Mode, you can try to install your antivirus program without the hindrance of the virus. Now, you can run the anti-malware scan to eliminate computer viruses and malware without any hindrance from another malicious application.
Download the antivirus software using a different browser
Some viruses might target vulnerabilities of a specific browser that block the downloading process. If you suspect that your Internet Explorer happens to be hijacked by a virus or otherwise compromised by cybercriminals, the best approach is to switch over to an alternate web browser like Chrome, Firefox, or Safari to download your chosen security software – Safebytes Anti-Malware.
Make a bootable USB anti-virus drive
Here’s another solution which is creating a portable USB anti-virus software that can scan your system for malware without the need for installation. Follow these steps to run the anti-virus on the affected PC.
1) Download Safebytes Anti-Malware or Windows Defender Offline onto a clean computer.
2) Plug the USB drive into the uninfected PC.
3) Double-click on the downloaded file to open the installation wizard.
4) Choose the drive letter of the flash drive as the place when the wizard asks you exactly where you would like to install the anti-virus. Follow the on-screen instructions to complete the installation process.
5) Now, transfer the pen drive to the infected PC.
6) Double-click the EXE file to run the Safebytes tool from the flash drive.
7) Press the “Scan Now” button to start the virus scan.
SafeBytes Anti-Malware — More Protection For You
These days, an anti-malware tool can protect the computer from different forms of online threats. But wait, how to choose the right one amongst various malware protection software that is available on the market? Perhaps you might be aware, there are lots of anti-malware companies and products for you to consider. Some of them are good, some are decent, while some will affect your computer themselves! You must be careful not to pick the wrong product, especially if you purchase premium software. When it comes to commercial anti-malware software options, many people opt for popular brands, like SafeBytes, and they are very happy with it.
Safebytes is among the well-established computer solutions firms, which provide this all-inclusive anti-malware software. Using its cutting edge technology, this application can help you eradicate multiples types of malware which includes computer viruses, worms, PUPs, trojans, adware, ransomware and browser hijackers.
SafeBytes has outstanding features when compared with various other anti-malware programs. Below are a few of the great ones:
Real-time Protection: Malware programs aiming to enter the computer are discovered and stopped as and when detected by the SafeBytes active protection shields. It’ll examine your computer system for suspicious activity regularly and shields your personal computer from unauthorized access.
Optimum AntiMalware Protection: Safebytes is built on the best virus engine within the industry. These engines can find and remove threats even during the initial stages of a malware outbreak.
“Fast Scan” Features: SafeBytes’s high speed malware scanning engine lessens scan times and extends battery life. Simultaneously, it’ll effectively identify and remove infected files or any online threat.
Web Filtering: SafeBytes provides instant safety rating to the webpages you are about to check out, automatically blocking harmful sites and to ensure that you’re certain of your online safety while browsing the internet.
Lightweight: SafeBytes is really a lightweight tool. It use up an extremely small amount of processing power as it operates in the background therefore you will not observe any system performance difficulties.
Premium Support: For any technical concerns or product support, you can obtain 24/7 professional assistance via chat and e-mail.
Technical Details and Manual Removal (Advanced Users)
If you don’t wish to use malware removal software and prefer to get rid of Chedot manually, you could possibly do so by going to the Windows Add/Remove Programs menu in the Control Panel and deleting the offending program; in cases of browser extensions, you may uninstall it by visiting the browsers Add-on/Extension manager. It’s also highly recommended to factory reset your browser to its default state to fix corrupt settings.
To make sure of complete removal, find the following registry entries on your computer and delete it or reset the values accordingly. Please keep in mind that only advanced users should try to manually edit the system files mainly because deleting any single critical registry entry results in a major problem or even a system crash. Furthermore, certain malware keeps replicating which makes it tough to get rid of. You’re encouraged to do this procedure in Safe Mode.
Files:
%APPDATA%\Microsoft\Windows\Start Menu\Programs\Chedot
%PROGRAMFILES%\Chedot
%USERPROFILE%\Documents\chedot.reg
Registry:
HKEY_LOCAL_MACHINE\
HKEY_LOCAL_MACHINE\SOFTWARE\Wow6432Node\Microsoft\Windows\CurrentVersion\App Paths\chedot.exe
HKEY_LOCAL_MACHINE\SOFTWARE\Wow6432Node\Microsoft\Windows\CurrentVersion\Run value: Chedot
HKEY_LOCAL_MACHINE\SOFTWARE\Microsoft\Windows\CurrentVersion\Run value: Chedot
HKEY_LOCAL_MACHINE\SOFTWARE\Wow6432Node\RegisteredApplications value: Chedot.NSJA6BHDA3NCFCFMXW3QSCUYUQ
HKEY_LOCAL_MACHINE\Software\Chedot
HKEY_LOCAL_MACHINE\SOFTWARE\Classes\.htm\OpenWithProgIds value: ChedotHTML.NSJA6BHDA3NCFCFMXW3QSCUYUQ
HKEY_LOCAL_MACHINE\SOFTWARE\Classes\.html\OpenWithProgIds value: ChedotHTML.NSJA6BHDA3NCFCFMXW3QSCUYUQ
HKEY_LOCAL_MACHINE\SOFTWARE\Classes\.xhtml\OpenWithProgIds value: ChedotHTML.NSJA6BHDA3NCFCFMXW3QSCUYUQ
HKEY_LOCAL_MACHINE\SOFTWARE\Classes\ChedotHTML.NSJA6BHDA3NCFCFMXW3QSCUYUQ
HKEY_LOCAL_MACHINE\SOFTWARE\Clients\StartMenuInternet\Chedot.NSJA6BHDA3NCFCFMXW3QSCUYUQ
HKEY_LOCAL_MACHINE\SOFTWARE\Microsoft\Windows\CurrentVersion\App Paths\chedot.exe
HKEY_LOCAL_MACHINE\SOFTWARE\RegisteredApplications value: Chedot.NSJA6BHDA3NCFCFMXW3QSCUYUQ
HKEY_CURRENT_USER\Software\Microsoft\Windows\CurrentVersion\Explorer\FileExts\.html\OpenWithProgids value: ChedotHTML.NSJA6BHDA3NCFCFMXW3QSCUYUQ
HKEY_CURRENT_USER\Software\Microsoft\Windows\CurrentVersion\Explorer\FileExts\.htm\OpenWithProgids value: ChedotHTML.NSJA6BHDA3NCFCFMXW3QSCUYUQ
HKEY_LOCAL_MACHINE\SOFTWARE\Wow6432Node\Chedot
HKEY_LOCAL_MACHINE\SOFTWARE\Microsoft\MediaPlayer\ShimInclusionList\chedot.exe
HKEY_LOCAL_MACHINE\Software\Chedot\Microsoft\Windows\CurrentVersion\Uninstall..Uninstaller
Chedot
Read More
2021 is nearing toward the end and with just a couple of days remaining in this year, we are happy to look forward to the next year. So in large anticipation of what will next year bring us, we are taking a good design look at this one and making a list for you of what graphic design software you should learn and use in the upcoming 2022.

Before we dive into it in more detail and predictions please be aware that this article is based upon my personal opinion drawn from the research of current trends and standards. That being said let’s dive right into details.
Adobe Photoshop
Whether you like it or not, Adobe has cemented itself with its flagship application Photoshop and how things are looking this situation will not change any time soon. Photoshop is an extraordinary pixel manipulation software that has the ability to work with both animations and vector graphics as well making it a great single application for all-around design needs. It has been industry-standard design software for the web, print, and all other kinds of design all over the globe and this will not change in near future. With its constant updates and expansion of its abilities, this is a must-have tool in your design tool belt. If you are looking to find work as a designer you will have to know how to work with photoshop.
Adobe illustrator
Many will tell you that is photoshop for raster graphics, the illustrator is for vectors. First started as illustrator 88 on Mac right away it took first place for vector graphics from FreeHand and it continued on its path of vector dominance. After some time and more integration with photoshop Adobe managed to overthrow Corel Draw as well winning the title for best vector editing software with illustrator. Same as with photoshop, if you are planning to work in a serious industry you will need to know the illustrator.
Adobe InDesign
We are still in Adobe train and it is moving hard, InDesign is graphic design software aimed for paper publications. If you need to create and prepare any kind of professional publication for printing InDesign is the application to go to. With its specific print aimed features it is a must-have for any graphic designer.
Corel Draw Graphic Suite
Once the king of vector and print design but dethroned by Adobe Corel Draw still has some punches to stay relevant in the field. With some cool features like symmetry and long shadows, it stands out from its competitors for its ease of use. Corel was always focused on easy to learn, and difficult to master and it is still following that kind of thinking. Granted not many employers will require you to be a master of Corel Draw but some of them will request that you are familiar with the application. One of perhaps the greatest advantages of Corel over Adobe is not locking you into a subscription making Draw suit a great choice for freelancers and designers that want to own software, not rent it.
Affinity Designer
The first software from Affinity was Photo, made as a cheap version one-time purchase competitor for photoshop. Later it has released Designer, also a one-time purchase competitor for illustrators. If we are going to take a good look into a feature for feature comparison, both Adobe and Corel will win over Affinity but if we take a look at a price that is a one-time purchase Affinity will win over easily. Priced only at $54.99 it is a steal, and taking into account that many designers will not require any very advanced features found in Corel or Adobe applications Affinity is the way to go.
Inkscape & GIMP
Speaking of price, nothing beats free, and both Inkscape and GIMP are completely free. offering very decent and competitive features applications will require you to get used to their own specific UI and workflow, but once you get a grasp of them, you will be able to do most design work in them. One of the downsides of using these free open source apps is their limited export options but if all that is required from you is to deliver a typical SVG, JPG, EPS, PNG, or PDF file you are good to go.
Colorcinch
Free with basic functionality with the option to purchase more advanced features Colorcinch is a great application if you are on quickly developing and creating graphics for social media posts. Add quickly text or filters, quickly do the color adjustment and save for social apps. The application also within its basic boundaries can work directly on the website without you requiring to even install it making it one of a kind. Go try it at the official site and enjoy yourself.
Conclusion
If you have followed the graphic design scene you will notice that nothing has changed and it will not change in near future. This just speaks about how much industry is defined and how little change is there over time. I advise if you can to get and learn adobe suite since it is industry standard and is required from almost every employer today. Rest applications on the list are great alternatives and can bring you income and offer you a way to finish your project.
Read More
As you know, Microsoft’s Windows Media Creation Tool is a useful tool that helps you download and install the latest version of the Windows 10 operating system. However, there are times when it could encounter some problems during the update process. One of these programs is the following error message:
“0x8007001F-0x20006, The installation failed in the SAFE_OS phase with an error during REPLICATE_OC operation.”
The error pointed out the “Safe OS phase”. It is the phase that’s initiated to install all the required Windows Updates. Thus, the possible cause for this error could have something to do with an interrupted download, internet connection, and many more. Although this error could be caused by a lot of factors, fixing it shouldn’t be that hard. You can try to reset the Windows Update Components or delete the Windows Update cache. You could also disable both the Firewall and your antivirus program temporarily or run the Windows Update in a Clean Boot state, as well as run the Windows Update troubleshooter. To get started troubleshooting the error, follow each one of the suggestions provided below.
Option 1 – Try to reset the Windows Update components
Resetting the Windows Update components could help you resolve the Windows Update error 0x8007001f – 0x20006. How? Refer to the following steps:
- Open Command Prompt with admin privileges.
- After that, type each one of the following commands and hit Enter after you key in one after the other.
- net stop wuauserv
- net stop cryptsvc
- net stop bits
- net stop msiserver
Note: The commands you entered will stop the Windows Update components such as Windows Update service, Cryptographic services, BITS, and MSI Installer.
- After disabling WU components, you need to rename both the SoftwareDistribution and Catroot2 folders. To do that, type each one of the following commands below, and don’t forget to hit Enter after you type one command after the other.
- ren C:WindowsSoftwareDistribution SoftwareDistribution.old
- ren C:WindowsSystem32catroot2 Catroot2.old
- Now, restart the services you’ve stopped by entering another series of commands. Don’t forget to hit Enter after you key in one command after the other.
- net start wuauserv
- net start cryptsvc
- net start bits
- net start msiserver
- Exit Command Prompt and then restart your computer.
Option 2 – Try to delete the Windows Update Cache
You might also want to delete the Windows Update cache since there are times when existing corrupt or incomplete Windows Update files can cause some problems in downloading and installing Windows Updates. To achieve this, simply delete the “$Windows.~BT” & “$Windows.~WS” folders in your computer. Once you’re done, try to run Windows Update again and see if the error is now fixed.
Option 3 – Try to temporarily disable anti-virus and Windows Defender Firewall
As mentioned, the error could be due to the antivirus program or the Windows Defender Firewall installed on your computer. Thus, disabling them or any security software installed in your computer is always a good idea you can try when you’re not able to access the shared drive on your computer. There are times when you encounter problems like error 0x8007001f – 0x20006 due to interference of antivirus or security programs. Thus, you have to disable both your antivirus program and Windows Defender Firewall for the meantime and check if it fixes the error or not
Option 4 – Run the Windows Update in a Clean Boot State
It is possible that some third-party application is the one that’s causing the problem so it’s best if you put your computer in a Clean Boot state. During this state, you can start the system with a minimum number of drivers and startup programs that will surely help you in isolating the root cause of the issue.
- Log onto your PC as an administrator.
- Type in MSConfig in the Start Search to open the System Configuration utility.
- From there, go to the General tab and click “Selective startup”.
- Clear the “Load Startup items” check box and make sure that the “Load System Services” and “Use Original boot configuration” options are checked.
- Next, click the Services tab and select the “Hide All Microsoft Services” check box.
- Click Disable all.
- Click on Apply/OK and restart your PC. (This will put your PC into a Clean Boot State. And configure Windows to use the usual startup, just simply undo the changes.)
- After that, try to run Windows Update again.
Note: If you are able to install the app without any trouble at all then it means that the error is caused by some third-party application on your computer. You need to look for the culprit and uninstall it once you found it.
Option 5 – Run the Windows Update Troubleshooter
You might also want to run the Windows Update Troubleshooter as it could also help in fixing error 0x8007001f – 0x20006. To run it, go to Settings and then select Troubleshoot from the options. From there, click on Windows Update and then click the “Run the troubleshooter” button. After that, follow the next on-screen instructions and you should be good to go.
Read More
One of the most sophisticated Artificial Intelligence or AI assistants there is in the market is Cortana. However, no matter how sophisticated this AI assistant may be, there are still times when you encounter issues with it. So if your Cortana is not connecting to the internet, worry not for this post will guide you in fixing the problem.
This connection issue in Cortana might have something to do with the settings, network connectivity, or your Microsoft account. In addition, it could also be that the Firewall or antivirus program interferes with its connection. Whichever the case is, here are some possible solutions that could help you resolve the problem.
Option 1 – Try to power cycle the modem, router, and computer
- Connect the modem, router, and the PC hard-wired and then switch all of these three devices off.
- Turn on the modem and wait for 30 seconds.
- Turn on the router and wait for 30 seconds as well.
- Finally, turn on the computer and check if you can now successfully connect to the internet.
Option 2 – Check if your router or ISP is properly working
Since the basis for this issue is that Cortana is not connecting to the internet even though you are able to access websites using your browser, you might want to check your router or ISP (Internet Service Provider) and see if they’re functioning properly.
Option 3 – Try changing your internet connection
You can also try changing your internet connection and see if it fixes the problem. If you are using Ethernet, you can try connecting to a Wi-Fi connection and see if Cortana is able to connect or not.
Option 4 – Try to run the Search and Indexing troubleshooter
You might also want to run the Search and Indexing troubleshooter in Windows 10 as it checks whether the settings for Cortana are in place and automatically corrects any issues if the update or software installation has changed the settings. To run it just click on the Start button and select Settings > Updates and Security > Troubleshoot. From there, select the Search and Indexing Troubleshooter.
Note: You can also run the Network Troubleshooter as it can also help in resolving the issue especially if the problem is in the network.
Option 5 – Try to remove Proxy
Removing the Proxy might also help you in fixing the connection issue in Cortana. Here’s how you can do it:
- Tap the Win + R keys to open the Run dialog box.
- Then type “inetcpl.cpl” in the field and hit Enter to pull up the Internet Properties.
- After that, go to the Connections tab and select the LAN settings.
- From there. Uncheck the “Use a Proxy Server” option for your LAN and then make sure that the “Automatically detect settings” option is checked.
- Now click the OK and the Apply buttons.
- Restart your PC.
Note: If you are using a third-party proxy service, you have to disable it.
Option 6 – Verify your Microsoft account
In some cases, Cortana might not be able to connect to the internet because your Microsoft account is no longer verified. This usually happens when you use a two-step authentication system with your Microsoft account. To verify it, just open Settings and click on Accounts. After that, check if you have a Verify hyperlink under your Microsoft account or not then click on Verify. Afterward, follow the next on-screen prompts to verify your Microsoft account. Once your account is verified, restart your computer.
Option 7 – Try resetting Cortana
- Open Cortana and go to the Settings section where you’ll see the “Turning off Cortana clears what Cortana knows on this device, but won’t delete anything from the Notebook. After Cortana is off, you can decide what you’d like to do with anything still stored in the cloud” option. Turn this option off.
- Restart your PC.
- After your computer boots, launch Cortana again and check.
Option 8 – Try to reinstall Cortana
If none of the options given above works, you must consider reinstalling Cortana.
- First, right-click on the Start button and click on the Windows Powershell (Admin) option from the list.
- Next, type the following command and hit Enter to execute it:
Get-AppXPackage -Name Microsoft.Windows.Cortana | Foreach {Add-AppxPackage -DisableDevelopmentMode -Register «$($_.InstallLocation)AppXManifest.xml»}
- Restart your computer and check if Cortana is now able to connect.
Read More
PriceGong is a browser add-in for Internet Explorer, Chrome and Firefox that analyzes web sites your browser visits and attempts to find coupons and other deals associated with the merchant’s product offerings or services. If PriceGoing sees a corresponding deal, it will attempt to inject an affiliate ‘code’ in order to collect various affiliate based commissions if a purchase is made while trying to offer you the best price of that particular product, or, in many cases try and show you an alternative product that is similar even if it is sold by a different merchant. Upon further inspection it was found that PriceGong failed to function in our testing.
While installed, this extension might display additional ads, inject sponsored content into webpages, even if the sponsored content is of lower quality than the original ones.
About Browser Hijackers
Browser hijackers (sometimes known as hijackware) are a kind of malicious software that alters web browser settings without the computer owner’s knowledge or consent. These types of hijacks are increasing at an alarming rate around the globe, and it could be really nefarious and often dangerous too. They’re created to disrupt browser programs for various purposes. In most cases, hijackers are designed for the benefit of online hackers usually through income generation from forced advert mouse clicks and site visits. Though it might seem naive, all browser hijackers are damaging and thus always regarded as security risks. In a much worst case, your browser could be hi-jacked to download malware that will do a great deal of damage to your computer or laptop.
Major symptoms that an internet browser has been hijacked
Signs that an internet browser is hijacked include:
1. home page is changed
2. bookmark and the new tab are also modified
3. the essential web browser settings are modified and unwanted or insecure sites are put into the trusted websites list
4. discover new toolbars that you didn’t add
5. never-ending pop-up ads appear and/or your web browser popup blocker is disabled
6. your web browser has become unstable or starts running sluggishly
7. you’re disallowed access to specific web pages, for example, the website of an antivirus software manufacturer like SafeBytes.
Precisely how browser hijacker infects computers
A browser hijacker can be installed on your computer if you visit an infected website, click an email attachment, or download something from a file-sharing site. They are usually included with toolbars, add-ons, BHO, plug-ins or browser extensions. Other times you may have accidentally accepted a browser hijacker as part of a software program bundle (usually freeware or shareware). An example of some well-known browser hijacker includes Anyprotect, Conduit, Babylon, SweetPage, DefaultTab, RocketTab, and Delta Search, but the names are regularly changing.
The existence of any browser hijacker on your computer can substantially diminish the web browsing experience, record your internet activities that result in troublesome privacy issues, create system stability problems and finally cause your computer to slow down or to a practically unusable state.
Browser Hijacker Malware – Removal
Some hijackers can be removed by uninstalling the freeware they were included with or by removing any extension you have recently added to your system. However, most browser hijackers are hard to get rid of manually. No matter how much you try to eliminate it, it might come back over and over. You should think about performing manual repairs only if you are a tech-savvy individual, as there are potential risks associated with messing around with the system registry and HOSTS file.
Installing and running antivirus application on the affected computer could automatically erase browser hijackers and other malicious programs. SafeBytes Anti-Malware discovers all kinds of hijackers – including PriceGong – and eliminates every trace quickly and efficiently. Use a system optimizer along with your antivirus software to solve various computer registry issues, remove system vulnerabilities, and improve your computer’s overall performance.
Tips on How to Remove Malware that is Blocking Websites or Preventing Downloads
Practically all malware is bad, but certain kinds of malware do much more damage to your PC than others. Some malware variants alter browser settings by including a proxy server or modify the PC’s DNS configuration settings. In these cases, you’ll be unable to visit some or all of the websites, and therefore unable to download or install the required security software to eliminate the infection. If you are reading this now, you may have perhaps recognized that a virus infection is the real cause of your blocked web traffic. So how to proceed if you want to install an anti-malware application like Safebytes? There are a few fixes you can attempt to get around with this particular issue.
Use Safe Mode to resolve the problem
Safe Mode is actually a unique, simplified version of Windows where just bare minimum services are loaded to counteract viruses as well as other troublesome programs from loading. In case the malware is set to load automatically when computer boots, switching into this particular mode could prevent it from doing so. To boot into Safe Mode, hit “F8” key on the keyboard right before Windows boot screen shows up; Or after normal Windows boot up, run MSCONFIG, look over “Safe Boot” under Boot tab, and click Apply. Once you’re in Safe Mode, you can attempt to download and install your antivirus program without the hindrance of the virus. At this point, you could run the antivirus scan to eliminate viruses and malware without any hindrance from another malicious application.
Download the anti-malware program in an alternate web browser
Malicious program code may exploit vulnerabilities in a specific internet browser and block access to all anti-malware software websites. If you appear to have a virus attached to Internet Explorer, then switch to an alternate web browser with built-in security features, such as Firefox or Chrome, to download your favorite anti-malware program – Safebytes.
Create a bootable USB antivirus drive
Another option is to save and operate an anti-malware software program entirely from a Flash drive. Follow these steps to use a flash drive to clean your infected PC.
1) On a virus-free computer, install Safebytes Anti-Malware.
2) Plug in the USB drive to a USB port on the uninfected computer.
3) Double-click on the downloaded file to open the installation wizard.
4) Choose the flash drive as the location for saving the software file. Follow activation instructions.
5) Transfer the flash drive from the clean computer to the infected PC.
6) Double-click the anti-malware software EXE file on the pen drive.
7) Run Full System Scan to detect and clean-up up all sorts of malware.
SafeBytes Anti-Malware: Light-weight Malware Protection for Windows Computer
If you’re looking to buy anti-malware for your laptop or computer, there are lots of brands and packages for you to consider. A few of them do a great job in eliminating threats while some will harm your computer by themselves. You should select a company that builds industry-best anti-malware and has earned a reputation as trustworthy. On the list of highly recommended application by industry analysts is SafeBytes Anti-Malware, a popular security application for Microsoft Windows.
SafeBytes antimalware is a very effective and easy to use protection tool which is ideal for users of all levels of IT literacy. This software could easily detect, eliminate, and protect your computer from the most advanced malware intrusions such as spyware, adware, trojan horses, ransomware, PUPs, worms, parasites as well as other potentially harmful software applications.
SafeBytes possesses a plethora of wonderful features that can help you protect your computer from malware attack and damage. Let’s check out some of them below:
Robust, Anti-malware Protection: Using a critically acclaimed malware engine, SafeBytes provides multilayered protection which is designed to find and remove threats which are hidden deep inside your computer’s operating system.
Real-time Threat Response: SafeBytes provides a totally hands-free live protection that is set to observe, block, and remove all threats at its very first encounter. It will constantly monitor your laptop or computer for hacker activity and also provides users with advanced firewall protection.
Web Filtering: SafeBytes inspects the hyperlinks present on a webpage for possible threats and notifies you if the website is safe to browse or not, through its unique safety ranking system.
Fast Scan: Safebytes Anti-Malware, with its enhanced scanning engine, offers ultra-fast scanning which will immediately target any active on-line threat.
Lightweight: SafeBytes is a light-weight and user friendly anti-virus and antimalware solution. Since it utilizes very little computer resources, this application leaves the computer’s power exactly where it belongs: with you.
24/7 Guidance: Support service is readily available for 24 x 7 x 365 days through chat and email to answer your queries.
SafeBytes can keep your PC protected from most advanced malware threats automatically, thus keeping your internet experience secure and safe. You can rest assured that your computer will be protected in real-time as soon as you put this software to use. So if you are looking for the best anti-malware subscription for your Windows-based PC, we highly recommend SafeBytes Anti-Malware program.
Technical Details and Manual Removal (Advanced Users)
To eliminate PriceGong manually, navigate to the Add/Remove programs list in the Control Panel and choose the offending program you want to remove. For web browser extensions, go to your web browser’s Addon/Extension manager and choose the add-on you want to disable or remove. You might even want to reset your home page and search engine providers, and also clear your web browser cache and cookies.
Finally, check your hard disk for all of the following and clean your registry manually to remove leftover application entries following uninstalls. However, editing the Windows registry is actually a complicated job that only advanced computer users and professionals should attempt to fix the problem. In addition to that, certain malware is capable of replicating or preventing deletion. You’re advised to do this procedure in Windows Safe Mode.
Folders:
C:\Documents and Settings\Lynn\Application Data\PriceGong
C:\Documents and Settings\Lynn\Application Data\PriceGong\Data
Files:
C:\Documents and Settings\Lynn\Application Data\PriceGong\Data.xml
C:\Documents and Settings\Lynn\Application Data\PriceGong\Data\a.xml
C:\Documents and Settings\Lynn\Application Data\PriceGong\Data\b.xml
C:\Documents and Settings\Lynn\Application Data\PriceGong\Data\c.xml
C:\Documents and Settings\Lynn\Application Data\PriceGong\Data\d.xml
C:\Documents and Settings\Lynn\Application Data\PriceGong\Data\e.xml
C:\Documents and Settings\Lynn\Application Data\PriceGong\Data\f.xml
C:\Documents and Settings\Lynn\Application Data\PriceGong\Data\g.xml
C:\Documents and Settings\Lynn\Application Data\PriceGong\Data\h.xml
C:\Documents and Settings\Lynn\Application Data\PriceGong\Data\i.xml
C:\Documents and Settings\Lynn\Application Data\PriceGong\Data\J.xml
C:\Documents and Settings\Lynn\Application Data\PriceGong\Data\k.xml
C:\Documents and Settings\Lynn\Application Data\PriceGong\Data\l.xml
C:\Documents and Settings\Lynn\Application Data\PriceGong\Data\m.xml
C:\Documents and Settings\Lynn\Application Data\PriceGong\Data\mru.xml
C:\Documents and Settings\Lynn\Application Data\PriceGong\Data\n.xml
C:\Documents and Settings\Lynn\Application Data\PriceGong\Data\o.xml
C:\Documents and Settings\Lynn\Application Data\PriceGong\Data\p.xml
C:\Documents and Settings\Lynn\Application Data\PriceGong\Data\q.xml
C:\Documents and Settings\Lynn\Application Data\PriceGong\Data\r.xml
C:\Documents and Settings\Lynn\Application Data\PriceGong\Data\s.xml
C:\Documents and Settings\Lynn\Application Data\PriceGong\Data\t.xml
C:\Documents and Settings\Lynn\Application Data\PriceGong\Data\u.xml
C:\Documents and Settings\Lynn\Application Data\PriceGong\Data\v.xml
C:\Documents and Settings\Lynn\Application Data\PriceGong\Data\w.xml
C:\Documents and Settings\Lynn\Application Data\PriceGong\Data\x.xml
C:\Documents and Settings\Lynn\Application Data\PriceGong\Data\y.xml
C:\Documents and Settings\Lynn\Application Data\PriceGong\Data\z.xml
Registry:
HKEY_CURRENT_USER\Software\PriceGong
Read More
As you know, the Videos folder can be found under “This PC” by default on your Windows 10 computer. However, as per the reports of some users, there are a few occasions where it somehow gets replaced by the Documents folder. In other words, the Videos folders are replaced by a duplicated copy of the Documents folder. Out of the two Documents folder, one Document folder will contain all the usual files and subfolders while the second one is empty. Although when you click the Documents icon on your Desktop (if you have a shortcut), it will still take you to the right Documents folder.
To fix this particular issue and get the Videos folder back in the File Explorer, here are some potential fixes that should help.
Option 1 – Run System Restore
The first thing you can try to do to resolve the problem is to run System Restore. This can help you go back to the previous state of your computer before the issue with the Videos and Documents folder.
- Tap the Win + R keys to open the Run dialog box.
- After that, type in “sysdm.cpl” in the field and tap Enter.
- Next, go to the System Protection tab then click the System Restore button. This will open a new window where you have to select your preferred System Restore point.
- After that, follow the on-screen instructions to finish the process and then restart your computer and check if the problem is fixed or not.
Option 2 – Try to restore Defaults
The next thing you can do is to restore Defaults. How? Refer to these steps:
- Open File Explorer and then right-click on any of the two Documents folders.
- After that, select the Properties option from the context menu and switch to the Location tab and click on Find target.
- Next, copy the address and paste it in the field above the “Find target” option, and then click the “Restore Default” button.
Option 3 – Try to change the Registry Path
- Tap the Win + R keys to open the Run dialog box.
- Then type “Regedit” in the field and tap Enter to open the Registry Editor.
- Next, navigate to this registry path: HKEY_CURRENT_USERSoftwareMicrosoftWindowsCurrentVersionExplorerUser Shell Folders
- After that, edit the path for {35286A68-3C57-41A1-BBB1-0EAE73d76C95} under the “User Shell Folders” key to match the path shown for My Videos: %USERPROFILE%Videos.
- Once you’re done, open the folder under “This PC” that has the Documents icon and tap Shift + right-click in the folder background, and then select the “Open PowerShell window here” option to fix the naming of the Documents folder. The path should read: “C:users<UserName>Documents.
- Next, execute this command: ri desktop.ini –force
- The command you entered will delete the files and folders and so when added for Documents, it will get rid of the empty Documents folder.
- Now all you that’s left to do is to find where the target location is going to be for both folders and check if anyone foes to the user name location.
- Then delete the one which goes to the incorrect location.
Read More
A number of users reported that they encountered an error that says, “Windows doesn’t have a network profile for this device” while they tried to connect Network devices such as printers and speakers to their Windows 10 computers. On the other hand, this kind of issue is reported for non-network devices as well. This kind of error might be due to incompatibility between the device and your operating system or it could be that the network drivers in your computer need to be updated in order to recognize the new device. Whatever the cause is here are a couple of suggestions you can try to resolve the “Windows doesn’t have a network profile for this device” error.
Option 1 – Check if the network device is compatible with your operating system
As mentioned, the error could be due to incompatibility between the device and the system. To verify, just go to the website of the device’s manufacturer since you can find all the information about the device there.
Option 2 – Make sure that your computer is discoverable
- Click on the Start button.
- Then click on the gear-like icon to open Settings.
- After that, select Network & Internet >> Wi-Fi.
- Next, change the Network Profile to Private.
- Now restart your computer and then connect the device again and see if the error is gone or not.
Option 3 – Try to update or rollback or uninstall the Network drivers
You might also want to update or roll back or disable your Network drivers to fix the “This operation failed as no adapter is in the state permissible for this operation” error.
- Tap the Win + R keys to launch the Run window and then type in the “devmgmt.msc” command and hit Enter to open the Device Manager window.
- Under the Device Manager, you will see a list of drivers. From there, look for the Network Adapters and expand it.
- Then right-click on each one of the Network drivers and depending on your preference, you can either select “Update driver”, “Disable device” or “Uninstall device”.
- After that, restart your PC and see if it helped in fixing the “Windows doesn’t have a network profile for this device” error.
Option 4 – Try to check the SNMP status
- Tap the Win + R keys to open the Run dialog box and type “services.msc” in the field and tap Enter to open the Service Manager window.
- After opening the Service Manager, look for the SNMP Service from the list of services.
- Once you’ve found the SNMP Service, make sure that its Service Status is set to “Running”. If the service is not running, just right-click on it and select Properties.
- From there, change the Service Status to Automatic and then click on the Apply and OK buttons.
- After that, click on the Start button again and check if the error is now fixed.
Note: If your printer is the one that triggers the error, refer to these steps:
- You have to go to Control Panel > Devices & Printers.
- From there, right-click on the printer which is the one that causes the error, and then select Printer Properties.
- Next, click the Configure Port button under the Ports tab and select SNMP Status Enabled.
- Now click the OK button and check if it fixes the error or not.
Option 5 – Run the Hardware and Devices Troubleshooters
You could also run this troubleshooter to fix the “Windows doesn’t have a network profile for this device” error.
- The first thing you need to do is click on Start and then on the gear-like icon to pull up the window for Settings.
- After opening Settings, look for the Update and Security option and select it.
- From there, go to the Troubleshoot option located on the left-hand side of the list.
- Next, select Hardware and Devices from the list and open the Troubleshooter and run it. Once it is doing its job, wait for it to complete the process and then restart the system.
- After the system restarts, check if the problem’s now fixed. If not, refer to the advanced guide given below.
Read More
When you try to open your Google Chrome browser and it starts to connect to the internet but suddenly, your Windows 10 computer crashes along with a Blue Screen error that says, “MEMORY_MANAGEMENT”, then read on as this post will guide you in fixing the problem.
This kind of BSOD error occurs when Google Chrome requests more memory or when it tries to access the network and demand is raised for more memory, the memory management program fails. To fix the problem, here are some possible solutions you might want to try. Follow them thoroughly.
Option 1 – Use the Driver Verifier Manager
The Driver Verifier Manager is another tool in Windows that could help you fix driver-related issues. And since the MEMORY_MANAGEMENT Blue Screen error concerns Google Chrome and an internet connection, the root cause of the problem might have something to do with the Network driver and to verify that, you can use the Driver Verifier Manager:
- Type in the keyword “Verifier” in the Cortana search box to search for Verifier in Windows 10.
- After that, select the option “Create custom settings”.
- Make sure that you have checked everything except the options “DDI compliance checking” and “Randomized low resources simulation”.
- Next, select the option “Select driver names from a list” option.
- Afterward, you have to select all the drivers from any unofficial or third-party provider. To simply put it, you have to select all the drivers that are not supplied by Microsoft.
- Then click on the Finish button.
- Open Command Prompt as administrator and execute this command – verifier /querysettings
- The command you just executed will display the Driver Verifier settings so if you see any of the flags enabled boot your Windows 10 PC into Safe Mode.
- Open the Command Prompt as admin again and run this command – verifier /reset
- The command will reset the Driver Verifier. Once the process is done, restart your PC and check.
Option 2 – Try updating the Network drivers
- Tap the Win + R keys to launch the Run window and then type in the “devmgmt.msc” command and hit Enter to open the Device Manager window.
- Under the Device Manager, you will see a list of drivers. From there, look for the Network Adapters and expand it.
- Then right-click on each one of the Network drivers and update them all.
- Restart your PC and see if it helped in fixing the MEMORY_MANAGEMENT BSOD error.
Option 3 – Try disabling Hardware Acceleration
You might want to disable Hardware Acceleration system-wide or for a particular program like Google Chrome and see if it resolves the MEMORY_MANAGEMENT error
Option 4 – Run the Memory Diagnostic Tool to check for Memory leaks
- Tap the Win + R keys to open Run and type exe and hit Enter to open the Windows Memory Diagnostic Tool.
- After that, it will give two options such as:
- Restart now and check for problems (Recommended)
- Check for problems the next time I start my computer
- Once your computer has restarted, perform a basic scan or you could also go for the “Advanced” options such as “Test mix” or “Pass count”. Simply tap the F10 key to start the test.
Note: After you select the option, your PC will restart and check for memory-based issues. If it finds any issues, it will automatically fix them and if there’s no issue found, then it’s most likely not a memory-based issue so you should try the other options given below.
Option 5 – Perform a System Restore
Performing System Restore might help you in fixing the SYNTP.SYS Blue Screen error. You can do this option either by booting into Safe Mode or in System Restore. If you are already in the Advanced Startup Options, just directly select System Restore and proceed with the next steps. And if you have just booted your PC into Safe Mode, refer to the steps below.
- Tap the Win + R keys to open the Run dialog box.
- After that, type in “sysdm.cpl” in the field and tap Enter.
- Next, go to the System Protection tab then click the System Restore button. This will open a new window where you have to select your preferred System Restore point.
- After that, follow the on-screen instructions to finish the process and then restart your computer and check if the problem is fixed or not.
Option 6 – Run the Blue Screen Troubleshooter
The Blue Screen troubleshooter is a built-in tool in Windows 10 that helps users in fixing BSOD errors like MEMORY_MANAGEMENT. It can be found in the Settings Troubleshooters page. To use it, refer to these steps:
- Tap the Win + I keys to open the Settings panel.
- Then go to Update & Security > Troubleshoot.
- From there, look for the option called “Blue Screen” on your right-hand side and then click the “Run the troubleshooter” button to run the Blue Screen Troubleshooter and then follow the next on-screen options. Note that you might have to boot your PC into Safe Mode.
Read More
New malware with extensive spyware capabilities steals data from infected Android devices and is designed to automatically trigger whenever new info is read to be exfiltrated. The spyware can only be installed as a ‘System Update’ app available via third-party Android app stores as it was never available on Google’s Play Store. This drastically limits the number of devices it can infect, given that most experienced users will most likely avoid installing it in the first place. The malware also lacks a method to infect other Android devices on its own, adding to its limited spreading capabilities.
However, when it comes to stealing your data, this remote access trojan (RAT) can collect and exfiltrate an extensive array of information to its command-and-control server. Zimperium researchers who spotted it observed it while «stealing data, messages, images and taking control of Android phones.»
What happens when malicious software is installed
«Once in control, hackers can record audio and phone calls, take photos, review browser history, access WhatsApp messages, and more,» they added. Zimperium said its extensive range of data theft capabilities includes:
- Stealing instant messenger messages;
- Stealing instant messenger database files (if the root is available);
- Inspecting the default browser’s bookmarks and searches;
- Inspecting the bookmark and search history from Google Chrome, Mozilla Firefox, and Samsung Internet Browser;
- Searching for files with specific extensions (including .pdf, .doc, .docx, and .xls, .xlsx);
- Inspecting the clipboard data;
- Inspecting the content of the notifications;
- Recording audio;
- Recording phone calls;
- Periodically take pictures (either through the front or back cameras);
- Listing of the installed applications;
- Stealing images and videos;
- Monitoring the GPS location;
- Stealing SMS messages;
- Stealing phone contacts;
- Stealing call logs;
- Exfiltrating device information (e.g., installed applications, device name, storage stats).
How does it work?
Once installed on an Android device, the malware will send several pieces of info to its Firebase command-and-control (C2) server, including storage stats, the internet connection type, and the presence of various apps such as WhatsApp. The spyware harvests data directly if it has root access or will use Accessibility Services after tricking the victims into enabling the feature on the compromised device. It will also scan the external storage for any stored or cached data, harvest it, and deliver it to the C2 servers when the user connects to a Wi-Fi network. Unlike other malware designed to steal data, this one will get triggered using Android’s contentObserver and Broadcast receivers only when some conditions are met, like the addition of a new contact, new text messages, or new apps being installed.
«Commands received through the Firebase messaging service initiate actions such as recording of audio from the microphone and exfiltration of data such as SMS messages,» Zimperium said.
«The Firebase communication is only used to issue the commands, and a dedicated C&C server is used to collect the stolen data by using a POST request.»
Camouflage
The malware will also display fake «Searching for the update..» system update notifications when it receives new commands from its masters to camouflage its malicious activity. The spyware also conceals its presence on infected Android devices by hiding the icon from the drawer/menu. To further evade detection, it will only steal thumbnails of videos and images it finds, thus reducing the victims’ bandwidth consumption to avoid drawing their attention to the background data exfiltration activity. Unlike other malware that harvests data in bulk, this one will also make sure that it exfiltrates only the most recent data, collecting location data created and photos taken within the last few minutes.
If you would like to read more helpful articles and tips about various software and hardware visit errortools.com daily.
Read More
Copyright © 2023, ErrorTools. All Rights Reserved
Trademark: Microsoft Windows logos are registered trademarks of Microsoft. Disclaimer: ErrorTools.com is not affiliated with Microsoft, nor claims direct affiliation.
The information on this page is provided for information purposes only.