
If you’re looking for a way to check or view the serial number of your hard disk or SSD on your computer or laptop, perhaps for inventory management purposes, this guide will help. While it’s easy to view the serial number of a hard disk or SSD that’s not fitted to your PC by simply looking at the sticker, it’s not as straightforward if you’ve purchased a branded PC or notebook. Unscrewing your computer to find the serial number on the sticker of the hard disk is not recommended, as it may void your warranty. However, there’s a way to find out the serial number of your PC without having to unscrew the device.
So what exactly is a serial number? Manufacturers use serial numbers to identify devices for warranty and replacement purposes. In this guide, we’ll show you how to find the serial number of your hard disk or SSD on your computer or laptop without voiding your warranty.
In this post, we will guide you with at least four ways through which you can find out the serial number of your hard disk or SSD fitted on your computer or notebook. These are the following:-
- Check the hard disk sticker label to find out the serial number.
- Find out the HDD (Hard Disk Drives) or SSD (Solid State Drives) serial number using Command Prompt.
- Get the Hard Disk Drives or Solid State Drives’ serial numbers using PowerShell.
- Check out the hard disk serial number using Third-Party Software.
How to check the hard disk sticker label to find out the serial number?
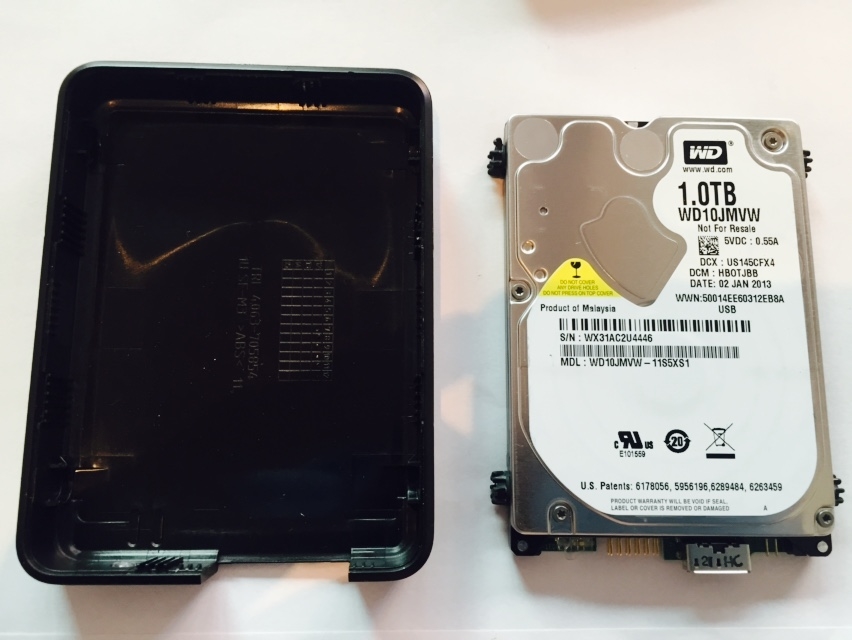
If you have purchased the hard disk separately, you can see the serial number on the hard disk case, or even it will be written on the hard disk sticker. On the sticker or case of the hard disk, look for a serial number listed after the word “Serial No,” “S/N,” or “SN.”
In some of the hard drives, you will find a QR code printed on the label. Just scan the QR code, and you can find the unique serial number associated with your drive. Further, you can use the serial number to see the warranty status from its manufacturer’s website.

How to find out the Hard Disk Drive (HDD) or Solid State Drive (SSD) serial number using Command Prompt on Windows 11/10?
This is the best way to find out the SSD or hard drive serial number using Command Prompt. Perform the following steps:-
Step 1. Open an elevated Command Prompt.
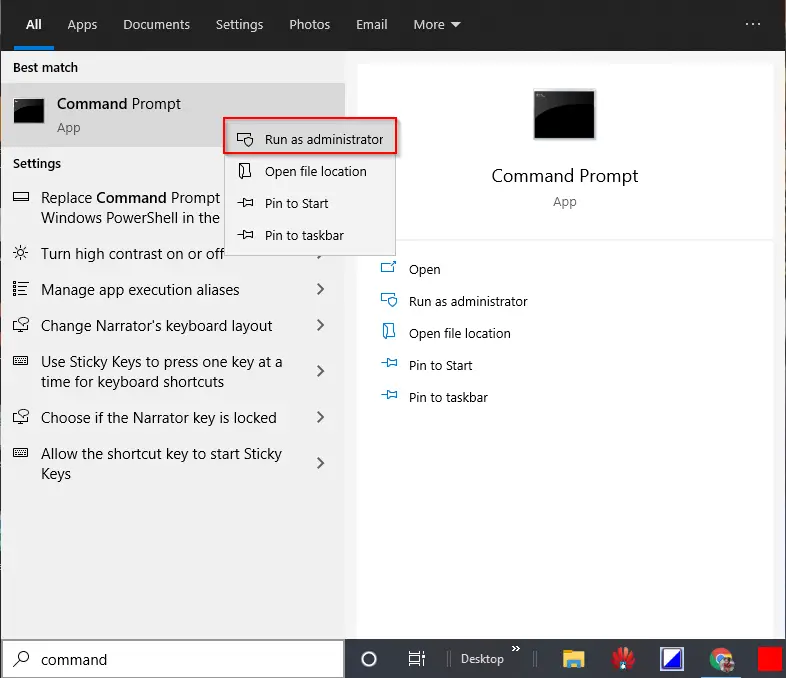
To open the Command Prompt with an administrative privilege, click the Start button on Windows 11/10 and type “command.”

In the available search results, right-click on the “Command Prompt” and choose the “Run as administrator” option.
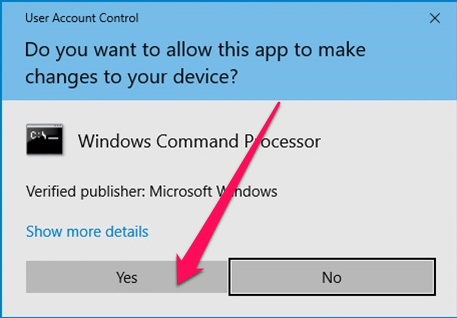
If the “User Account Control” window requests permission to continue, click Yes.
Step 2. In the administrative Command Prompt window, type the following and press Enter from the keyboard:-
wmic diskdrive get model,name,serialnumber

or,

wmic diskdrive get serialnumber
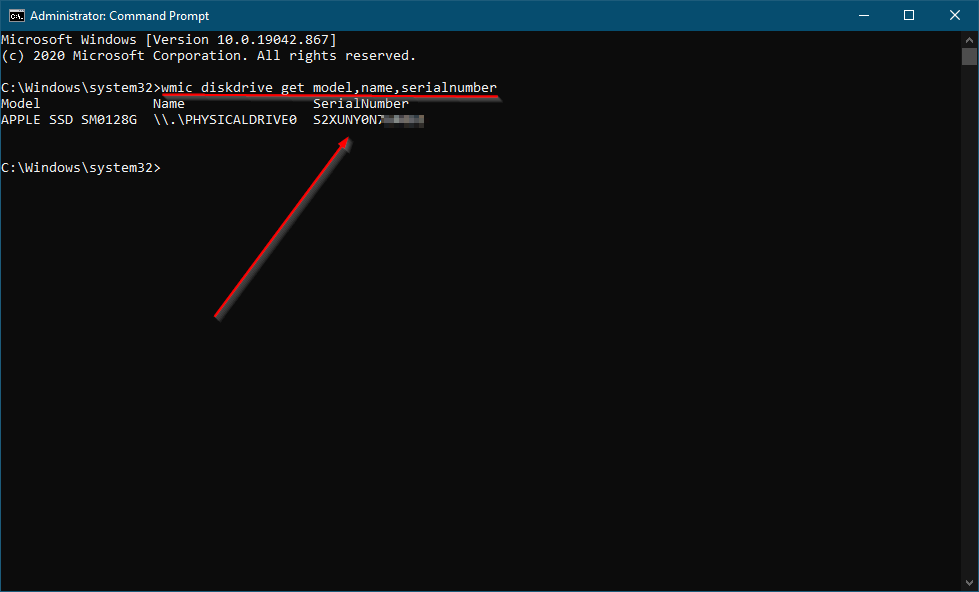
Step 3. Once you execute the above command, it will show the Model Number of the HDD/SSD and the Serial Number.
If more than one hard disk drive is fitted on your computer or laptop, you will have more than one entry after executing the command.
How to Obtain the HDD (Hard Disk Drive) or SSD (Solid State Drives) serial number using PowerShell?
This is another method to find the HDD (Hard Disk Drive) or SSD (Solid State Drives) serial number using PowerShell. To get the serial number, do the following steps:-
Step 1. Click on the Start button/menu of Windows 11/10 and type PowerShell.

Step 2. On the top search result, right-click on the Windows PowerShell entry and select “Run as administrator.”
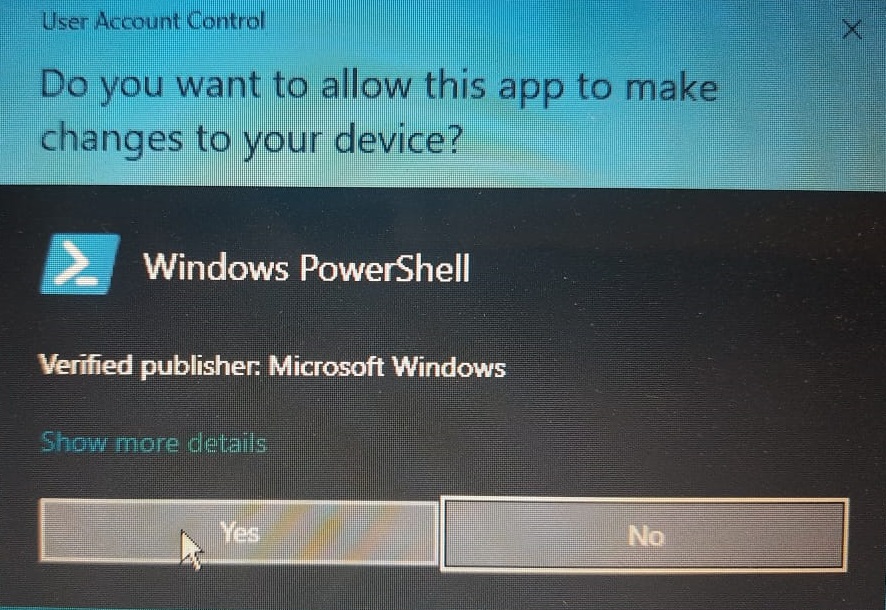
Step 3. If User Account Control (UAC) prompts, click the Yes button to continue.
Step 4. On the Windows PowerShell, copy and paste the following command and then press Enter from the keyboard to execute it:-
Get-PhysicalDisk | Select-Object FriendlyName,SerialNumber

or,

Get-PhysicalDisk | Select-Object MediaType, SerialNumber
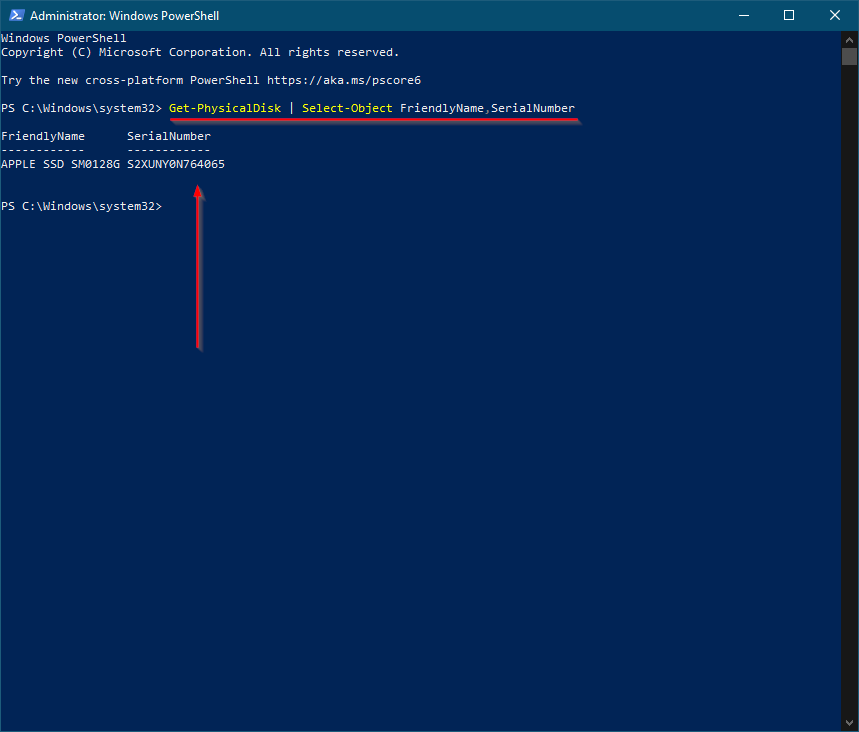
Once you complete the above steps, you will see the Model Number (Friendly Name) and Serial Number of the HDD or SSD. If your PC is fitted with more than one HDD or SSD, you will have more than one entry in the PowerShell output.
The above-mentioned command also works with NVMe storage devices.
How to check out the Hard Disk Drives (HDD) or Solid State Drives (SSD) serial number using a Third-Party Tool?
This may be your preferred method if you want to check the serial number of the HDD or SSD using a third-party tool. Seagate, the hard disk manufacturer, has created a straightforward tool called Seagate Drive Detect, which lets you check the serial number and the model number of all Seagate, Samsung, Maxtor, and Apple brands drives connected to your computer or laptop.
Step 1. To check the serial number of the HDD or SSD, download the portable freeware tool Seagate Drive Detect from this link.
Step 2. Double-click on the downloaded executable file DriveDetect to launch it.
Step 3. Once you run this utility, it will show the serial number and the model number of the attached HDD or SSD to your PC.
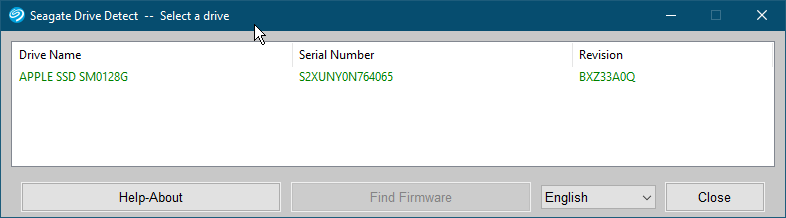
The Drive Detect utility also helps you to find out the firmware of your HDD or SSD. Just select the hard disk entry and click on “Find Firmware.” It will open the manufacturer’s webpage, where you can download the firmware of your HDD or SSD.
Conclusion
In conclusion, finding the serial number of a hard disk or SSD on your computer or laptop can be a daunting task, especially if you’ve purchased a branded PC or notebook. However, there are several ways to obtain the serial number without voiding your warranty, such as checking the sticker label, using Command Prompt, PowerShell, or third-party software like Seagate Drive Detect. By following the steps outlined in this guide, you can easily find the serial number of your hard disk or SSD and use it for warranty and replacement purposes. Remember to exercise caution and avoid unscrewing your device, which may void your warranty.
Некоторые начинающие пользователи задают вопрос: как определить, оснащен ли компьютер обычным жестким диском HDD или же твердотельным накопителем SSD, не вскрывая компьютер. Сделать это сравнительно просто, но для начинающих пользователей методы могут быть неочевидными.
В этой инструкции подробно о способах узнать какой диск: SSD или HDD установлен на вашем ПК или ноутбуке. Рассматриваются методы для Windows 10 и Windows 11, но большинство из них будут работоспособны и в предыдущих версиях системы.
Окно «Оптимизация дисков»
Первый из способов посмотреть, жесткий диск или твердотельный накопитель установлен на вашем компьютере — полагаться на то, как сама Windows определила тип диска и посмотреть «выводы» системы в окне оптимизации дисков. Плюсы подхода — он простой и быстрый. Минусы: иногда SSD может быть ошибочно определен как жесткий диск. Для просмотра типа дисков достаточно использовать следующие шаги:
- В проводнике откройте свойства диска: нажмите правой кнопкой мыши по диску и выберите соответствующий пункт контекстного меню.
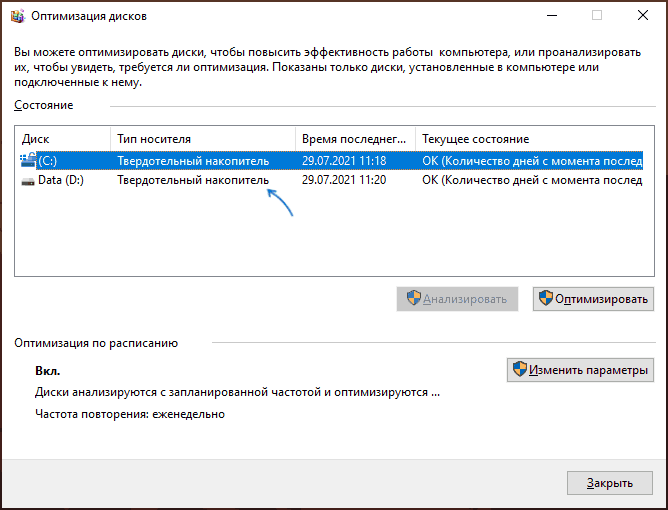
- Перейдите на вкладку «Сервис» и нажмите кнопку «Оптимизировать». Еще один способ быстро попасть в нужное расположение — нажать сочетание клавиш Win+R, после чего ввести dfrgui и нажать Enter.
- В окне оптимизации накопителей вы увидите список дисков, а также столбец «Тип носителя». Если в нём мы видим «Твердотельный накопитель» — это SSD.

При определении типа диска в указанном расположении система опирается на проводимый автоматически тест производительности системы и, если он не проводился или по какой-то причине скорость накопителя оказалась низкой, то тип может быть определён неверно.
В случае, если оценка производительности не производилась, вы можете запустить её вручную: в командной строке, запущенной от имени администратора введите команду
winsat formal -restart clean
и нажмите Enter. Дождитесь завершения выполнения оценки производительности, перезагрузите компьютер и проверьте, обновилась ли информация о типе установленных накопителей.
Определение типа диска по модели
Следующий способ — использование имени устройства и поиска в Интернете. Почти абсолютно надёжный, при условии, что ваш диск достаточно не является слишком уникальным. Это можно сделать и с помощью диспетчера устройство, но я рекомендую окно «Сведения о системе», поскольку оно позволяет копировать нужные данные:
- Откройте сведения о системе, для этого нажмите клавиши Win+R на клавиатуре, введите msinfo32 и нажмите Enter.
- Перейдите в раздел «Компоненты» — «Запоминающие устройства» — «Диски» (второй из двух повторяющихся пунктов).
- Выберите строку «Модель» и нажмите клавиши Ctrl+C для копирования модели.
- В поиске в интернете введите модель диска (само слово «Модель», которое также скопируется, удалите из запроса) и с большой вероятностью результаты поиска позволят вам определить, SSD или HDD установлен на вашем ПК или ноутбуке.


В выдаче поискового сервиса вы сможете найти информацию о конкретном накопителе, его типе и характеристиках.
Команда PowerShell
Существует возможность определения типа диска с помощью PowerShell, но недостатки метода те же, что и в первом случае. Достаточно запустить Windows PowerShell и ввести команду:
Get-PhysicalDisk

Если в столбце MediaType будет указано SSD — это именно он и есть.
Сторонние программы
Многие программы, предназначенные для просмотра аппаратных характеристик компьютера (даже самые простые наподобие Speccy), а также утилиты для проверки дисков, такие как CrystalDiskInfo отображают, помимо прочего, и тип диска, а также его точную модель.

Про CrystalDiskInfo (именно её я рекомендую для рассматриваемой задачи) вы можете прочесть в обзоре Программы для SSD.
Надеюсь, предложенных способов будет достаточно для ваших задач. Если же остаются вопросы или необходимость уточнения информации, вы можете использовать комментарии ниже, я постараюсь помочь.
(Image credit: Windows Central)
On Windows 10, there could be a lot of reasons you may need to determine specific details (such as serial number, model, firmware version, etc.) about the hard drive on your computer. For instance, when you need to contact technical support to troubleshoot issues or start the process to get a replacement. You’re planning to build an array and want to make sure the new drives are the same make and model. Or you’re building a detailed inventory of your devices, need to update its firmware, and more.
Of course, a lot of this information you can find it on the label attached to the drive. When the drive is already installed on your computer, you can save a lot of steps and hassles by querying the details you need using the Windows Management Interface Command (wmic) tool with Command Prompt available on Windows 10.
In this Windows 10 guide, we’ll walk you through the steps to get information about the hard drives (and removable drives) connected to your device. Additionally, we’ll also show you the steps to export the details to text files that you can keep for personal records or send to technical support.
- How to check hard drive information using Command Prompt
- How to export hard drive information to text file using Command Prompt
How to check hard drive information using Command Prompt
If you need to find out the hard drive serial number, model, firmware version, and other information, you can use the wmic with Command Prompt.
Basic hard drive info
To determine some basic information about the hard drive installed on your device, use these steps:
- Open Start.
- Search for Command Prompt and click the top result to open the app.
- Type the following command to check the name, brand, model, and serial number information and press Enter:
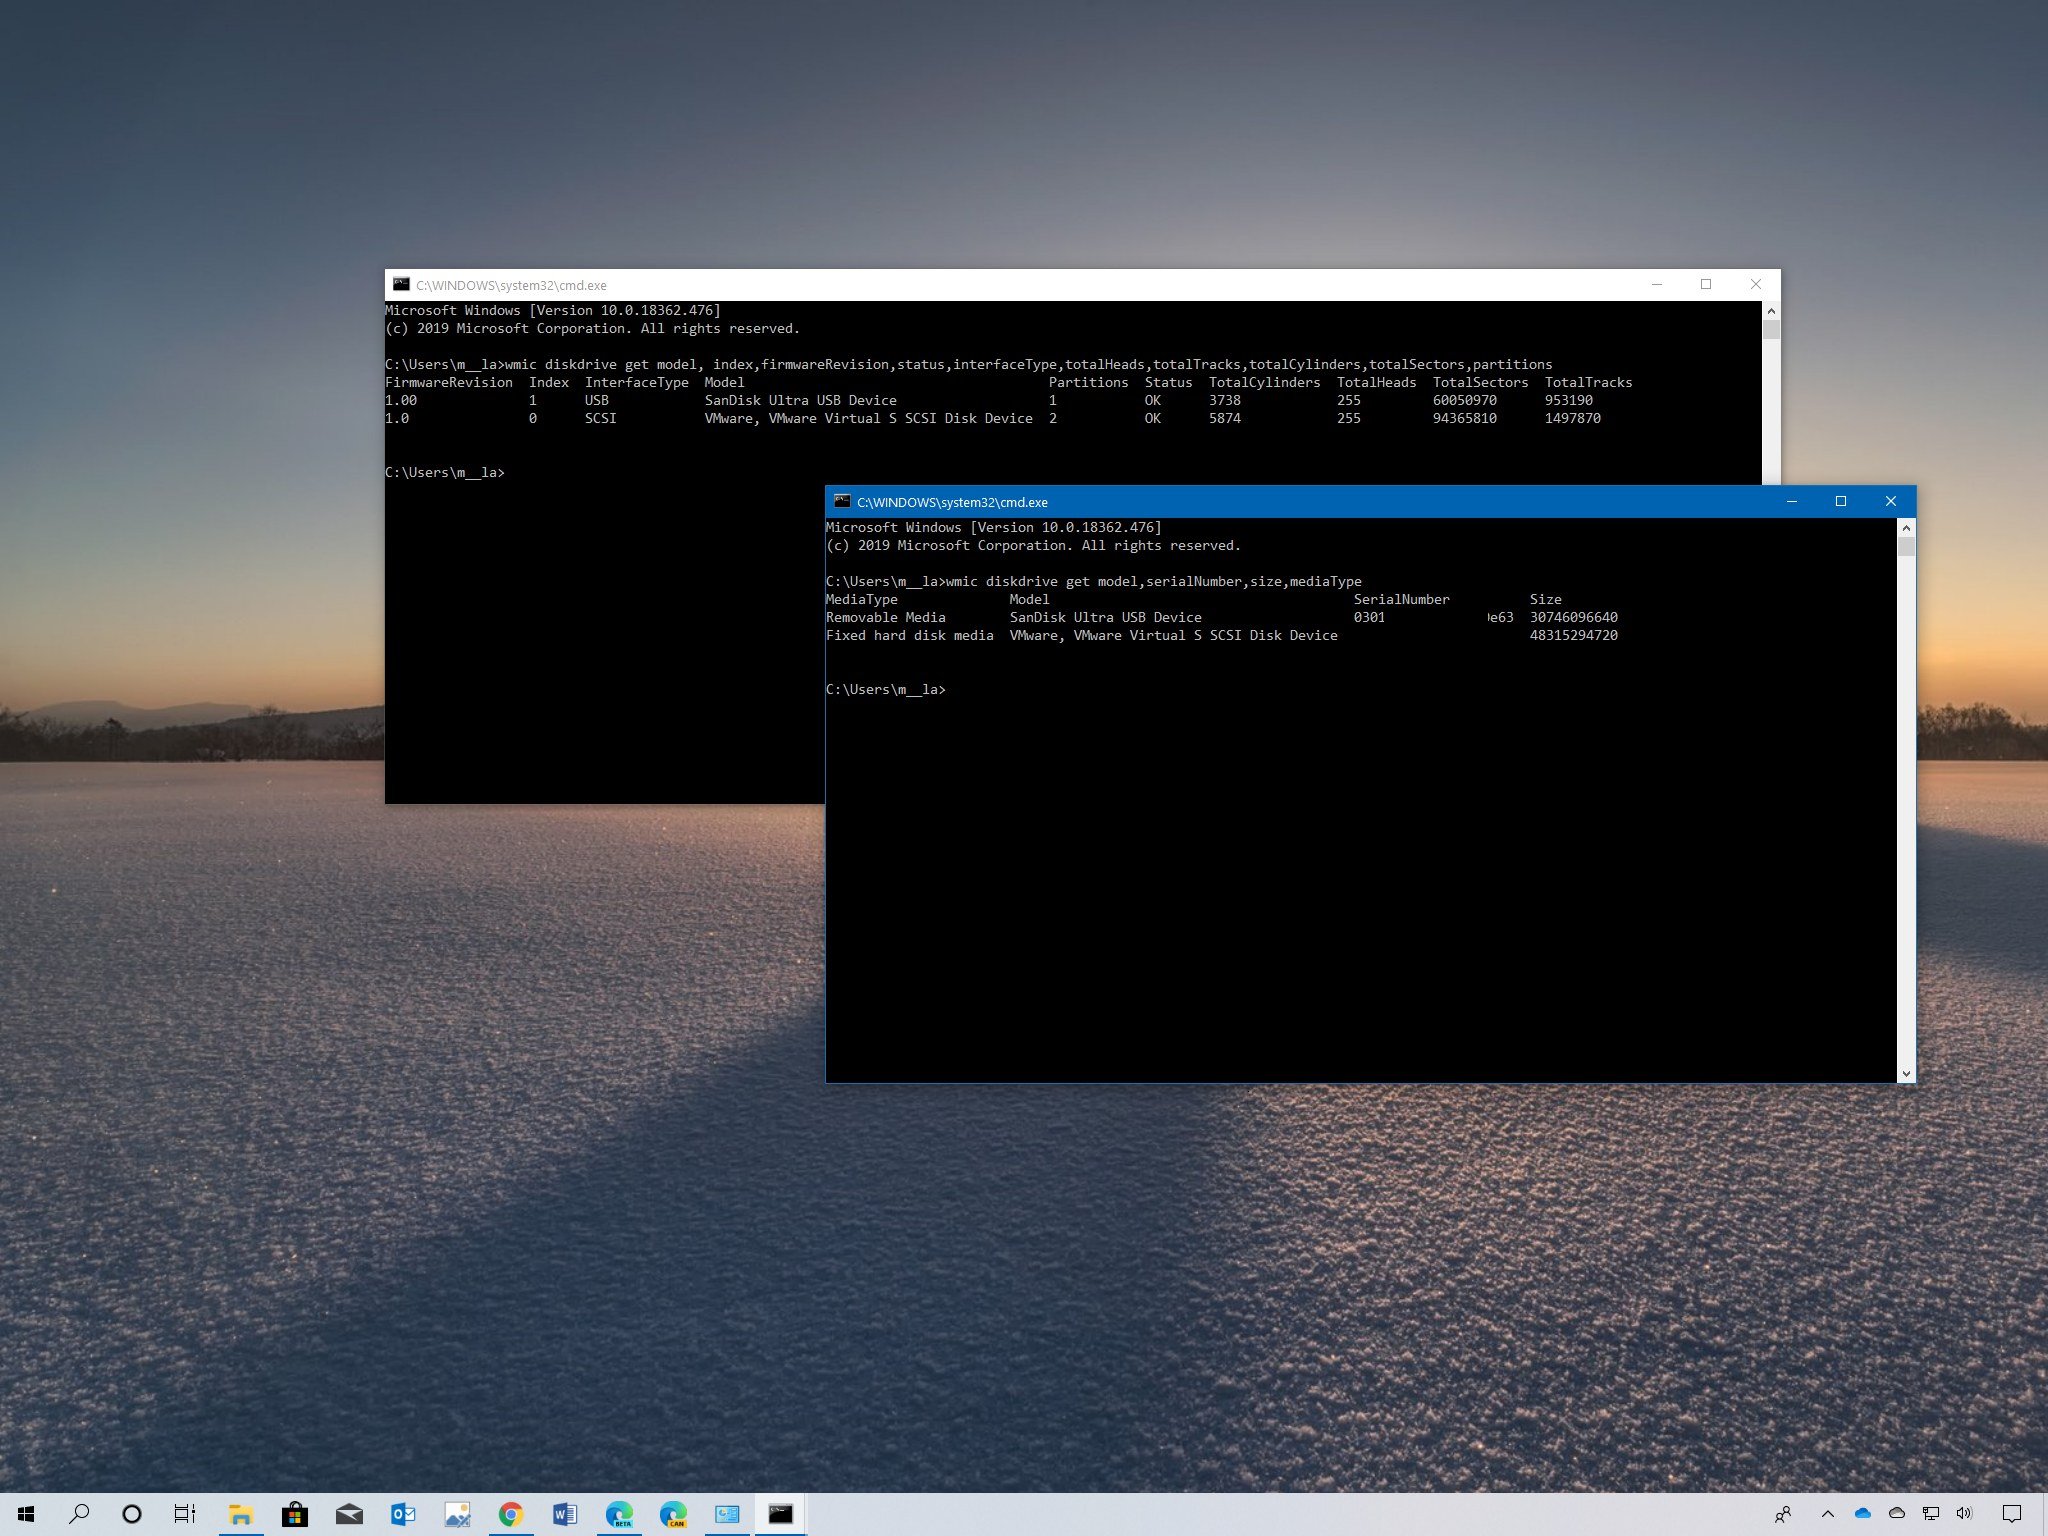
wmic diskdrive get model,serialNumber,size,mediaType
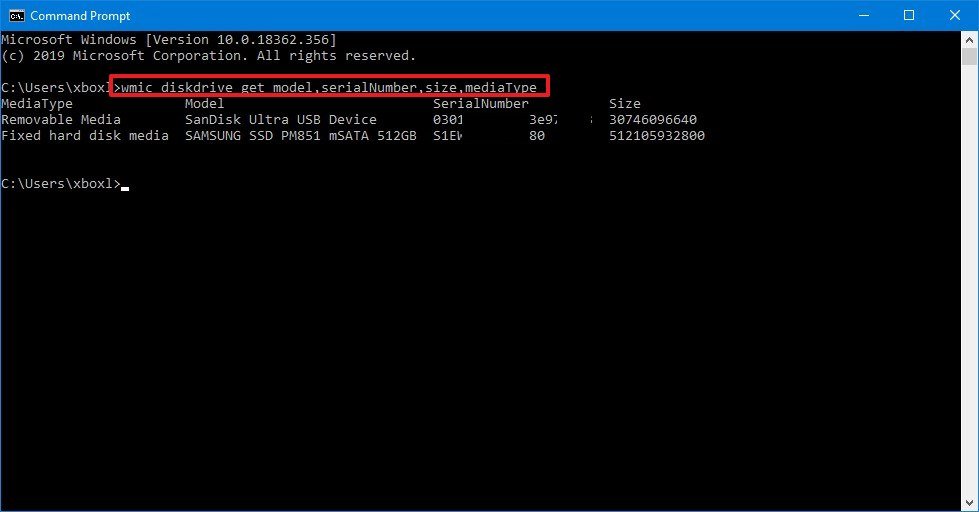
Once you complete the steps, the command will return the manufacturer, model, serial number, size (bytes), including removable drives like external hard drives and USB flash drives.
You could also add the «manufacturer» and «name» options, but they usually don’t return any additional information already available with the option specified in the above command.
All the latest news, reviews, and guides for Windows and Xbox diehards.
Advanced hard drive info
If you need more advanced information about the hard drive, use these steps:
- Open Start.
- Search for Command Prompt and click the top result to open the app.
- Type the following command to name, brand, model, and serial number information and press Enter:
wmic diskdrive get model,index,firmwareRevision,status,interfaceType,totalHeads,totalTracks,totalCylinders,totalSectors,partitions
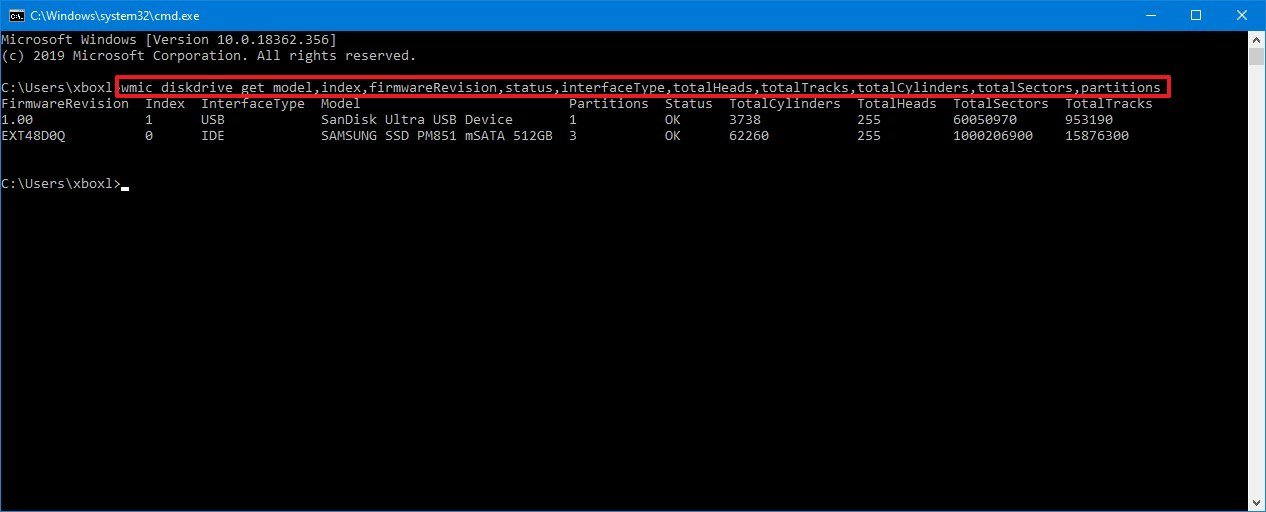
After you complete the steps, the command will output all the information requested formatted in an easy to digest table, including manufacturer, model, serial number, and physical location (port) of all the drives connected to your computer.
Also, you’ll be able to determine if any hard drives are reporting hardware problems. The version of the firmware that controls the drive. The type of interface the device is using to connect to the motherboard, as well as the number of partitions and the number of heads, tracks, cylinders, and sectors.
If you’re looking to upgrade the storage on your device, we recommend the 860 EVO 500GB Solid-State Drive (SSD) from Samsung because of its reliability, fast read and write speeds and price.
Our pick
Samsung 860 EVO 500GB
This hard drive is reliable and has a proven track record of quality. Its 550MB/s read and 520MB/s write speeds are enough for the majority of users. The price listed here is for the 500GB model, but you can get up to 4TB. $70 at Amazon
Although we’re showing you the steps to query specific hard drive information, you can edit the command to find out only the details you need.
Here’s the full list of available options:
- Availability.
- BytesPerSector.
- Capabilities.
- CapabilityDescriptions.
- Caption.
- CompressionMethod.
- ConfigManagerErrorCode.
- ConfigManagerUserConfig.
- CreationClassName.
- DefaultBlockSize.
- Description.
- DeviceID.
- ErrorCleared.
- ErrorDescription.
- ErrorMethodology.
- FirmwareRevision.
- Index.
- InstallDate.
- InterfaceType.
- LastErrorCode.
- Manufacturer.
- MaxBlockSize.
- MaxMediaSize.
- MediaLoaded.
- MediaType.
- MinBlockSize.
- Model.
- Name.
- NeedsCleaning.
- NumberOfMediaSupported.
- Partitions.
- PNPDeviceID.
- PowerManagementCapabilities.
- PowerManagementSupported.
- SCSIBus.
- SCSILogicalUnit.
- SCSIPort.
- SCSITargetId.
- SectorsPerTrack.
- SerialNumber.
- Signature.
- Size.
- Status.
- StatusInfo.
- SystemCreationClassName.
- SystemName.
- TotalCylinders.
- TotalHeads.
- TotalSectors.
- TotalTracks.
- TracksPerCylinder.
How to export hard drive information to text file using Command Prompt
If you want to export the hard drive details to a text file that you can share easily, use these steps:
- Open Start.
- Search for Command Prompt and click the top result to open the app.
- Type the following command to name, brand, model, and serial number information and press Enter:
wmic diskdrive get model,serialNumber,index,mediaType > C:\PATH\TO\TEXT.TXTThis example exports the hard drive details to the current user’s folder:wmic diskdrive get model,serialNumber,index,mediaType > C:\Users\user1\Documents\hdd-info.txt
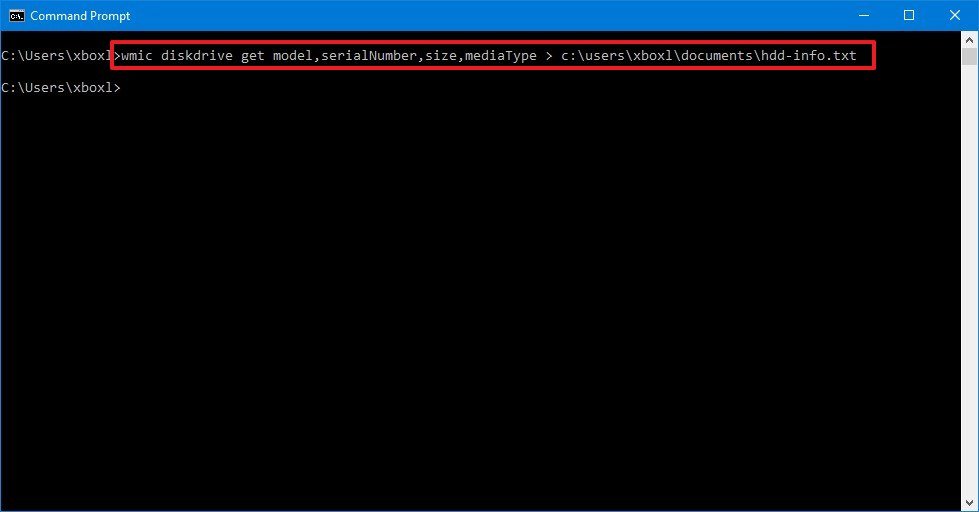
Once you complete the steps, the information you specified will export to a text file that you can then send to technical support or keep for your records.
We’re focusing this guide on Command Prompt, but you can also use these commands with PowerShell.
Mauro Huculak has been a Windows How-To Expert contributor for WindowsCentral.com for nearly a decade and has over 15 years of experience writing comprehensive guides. He also has an IT background and has achieved different professional certifications from Microsoft, Cisco, VMware, and CompTIA. He has been recognized as a Microsoft MVP for many years.
You may find the need to look for the “Serial Number” of the Hard Drive installed on your Windows computer for warranty purposes and to find a replacement part.
The Serial Number of Hard Drive and other computer parts exists in the form of a unique set of numbers, which helps the manufacturers and suppliers to identify the part for warranty, replacement and monitoring purposes.
When it comes to the end Users, Serial Number of computer parts can be used to look up for information about those parts and find out their eligibility for warranty and replacement.
You can find the Serial Number of the Hard Drive installed on your Windows 11/10 computer using any of the following methods.
Advertisement
1. Find Serial Number Using WMIC Command
You can follow the steps below to find the Serial Number of Hard Drive on your Windows Laptop or Desktop Computer using WMIC command.
1. Type CMD in the search bar > Right-click on Command Prompt in the sarch results and click on Command Prompt (Admin).
2. On the Command Prompt screen, type wmic diskdrive get serialnumber and press the Enter key on the keyboard of your computer.

In addition to Serial Number, you can get the Model Number and Manufacturers Name of the Hard Drive by typing wmic diskdrive get model, name, serialnumber and pressing the enter key.
3. Once the Command is executed, you will find the Serial Numbers of Hard Drives attached to your computer.
If running the WMIC command does not display the Serial Number, it is likely that the manufacturer of your computer has not saved the Serial Number to BIOS/UEFI Firmware.
2. Find Serial Number Using PowerShell
If you can easily access the PowerShell on your computer by right-clicking on the Start button, you can follow the steps below to Find the Serial Number of the Hard Disk on your computer.
1. Right-click on the Start button and Click on PowerShell (Admin).
2. On the PowerShell screen, type Get-WMIObject win32_physicalmedia | Format-List Tag, SerialNumber and press the Enter Key.

Advertisement
3. Once the Command is executed, you will see both the Tag (Name) and Serial Number listed for the Internal Hard Drive on your computer.
Note: Tag Number is also visible on the Disk Management screen and it identifies the physical drive number.
3. Find Serial Number on Label Attached to Hard Drive
This option requires you to open the computer case or the back panel of your laptop and take a look at the Label attached to the physical Hard Drive.
The Serial Number should be right below the QR Code written as S/N: XXXXXXXX-XXXXXXX.
4. Scan QR Code
If the Serial Number on the label attached to the Hard Drive is not readable, you can scan the QR code printed on the label.
The QR Code usually contains all the information required to check the warranty of the Hard Drive, including its Serial Number.
Как узнать какие жесткие диски стоят в компьютере
Обычным пользователям ПК необязательно знать комплектующие, главное, чтобы все работало. Если же с компьютером начались проблемы, пропали данные или стало не хватать места, то вопрос какой жесткий диск стоит в компьютере становится актуальным. Если это ваш случай или просто хотите узнать, насколько ваш компьютер хорош, в данной статье рассмотрим, как узнать модель жесткого диска в компьютере или ноутбуке.
Виды дисков
На данный момент существуют три основных вида дисковых накопителей: HDD, SSD и внешние жесткие диски.
- HDD диски распространены почти в каждом компьютере цеховой сборки, их нельзя ни с чем спутать.
- SSD диски – современная и хороша альтернатива HDD, так как в них нет никакой механики. Бесшумные, быстрые и, соответственно, дорогие.
- Внешние жесткие диски также распространены, их не надо размещать внутри корпуса, и легко подключать к компьютеру.
Как все узнать о жестком диске
Рассмотрим несколько способов как узнать информацию о вашем жестком диске
Вытащить жесткий диск из корпуса
У классических стационарных десктопов проще всего открыть корпус и посмотреть, что за диски у вас установлены. На ноутбуках, в зависимости от модели, может быть достаточно только отвертки, чтобы добраться до диска, а иногда нужно разобрать весь корпус ноутбука.
Важно! Если обратитесь к такому способу – будьте аккуратны так как жесткий диск повредить очень легко, достаточно уронить его.
Внешние диски – это просто коробка и жесткий диск внутри. Поэтому несмотря на то, что производителей жестких дисков сейчас осталось всего четыре, внешние диски выпускают намного больше компаний. Например, внешний накопитель может быть фирмы Transcend, а внутри окажется диск Samsung.
В итоге, если вам удалось достать диск, то на самом жестком диске всегда написана доскональная информация такая, как объем, модель, производитель и прочее.
Для пользователей ОС Windows
Через «Мой Компьютер». Такой способ подходит для ОС Windows. Это самый легкий способ и не требует наличия сторонних программ или вытаскивания самого жесткого диска. Достаточно произвести следующие действия:
- кликните правой кнопкой мышки по ярлыку «Мой Компьютер»;
- щелкните на пункт «Управление»;
- перейдите во вкладку «Запоминающие устройства» – «Управление дисками»;
- также во вкладке «Диспетчер устройств» выберите «Дисковые устройства», там вы увидите модель диска.
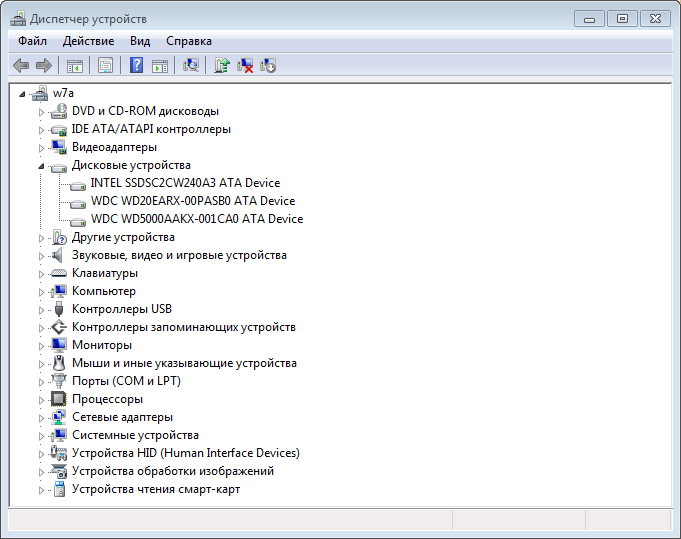
Порядок действий может немного отличаться в зависимости от версии Windows. В любом случае в диспетчере устройств в разделе “Дисковые устройства” вы увидите все модели SSD и HDD, которые видит ваша операционная система. Если вы точно знаете, что у вас есть жесткий диск и на нем ценные данные, а компьютер его не видит, это повод обратиться к специалистам.
Для пользователей ОС Linux
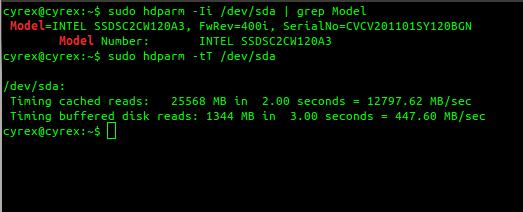
Через hdparm. Такой способ подходит для ОС Linux. Данная программа автоматически установлена в каждой современной версии Linux.
Для доступа необходимо открыть терминал и запустить в консоли hdparmс параметром –i /dev/hda. Вы увидите основные параметры вашего жесткого диска
С помощью программ
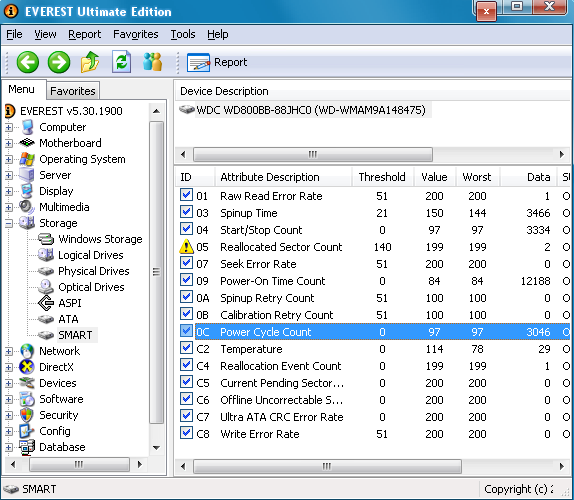
Все программы для проверки и диагностики жесткого диска покажут какое именно устройство у вас установлено. Также эта функция есть во всех приложениях для тестирования и анализа конфигурации компьютера. Например, в EVERSET достаточно выбрать вкладку «Хранение данных» и вы увидите каждую характеристику вашего Жесткого диска.
Не удивляйтесь, если вы увидите общий объем меньше заявленного, он всегда ниже заявленного из-за особенностей производителей. Разница всегда равно ~ 7%, так для диска с заявленным объемом 500 GB мы получим 465 GB свободного места. Если вам важен каждый гигабайт – выбирайте всегда с большим объемом.