
Все способы:
- Способ 1: «Диспетчер задач»
- Способ 2: «PowerShell»
- Способ 3: «Командная строка»
- Способ 4: Сторонние приложения
- Вопросы и ответы: 0
Способ 1: «Диспетчер задач»
Для просмотра процессов и управления ими в Windows 10 предусмотрено штатное приложение «Диспетчер задач». Его использование является самым простым, удобным и наглядным способом получения сведений о запущенных в системе системных и сторонних процессов.
- Откройте «Диспетчер задач» из контекстного меню «Панели задач» или любым другим удобным вам способом.
Подробнее: Способы открыть «Диспетчер задач» в Windows 10
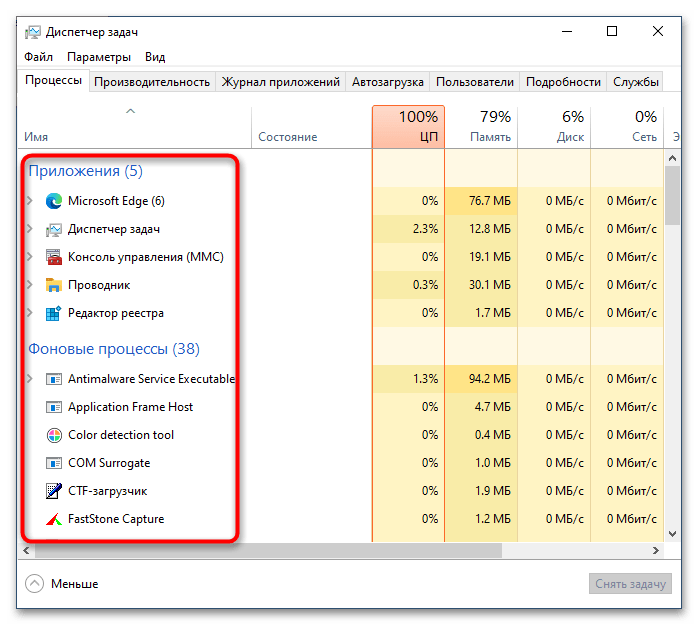
- Список процессов, а если точнее, их названий, доступен для просмотра в одноименной вкладке: в ней будет указан уровень загрузки ЦП, ОЗУ, диска и сети для каждого процесса.
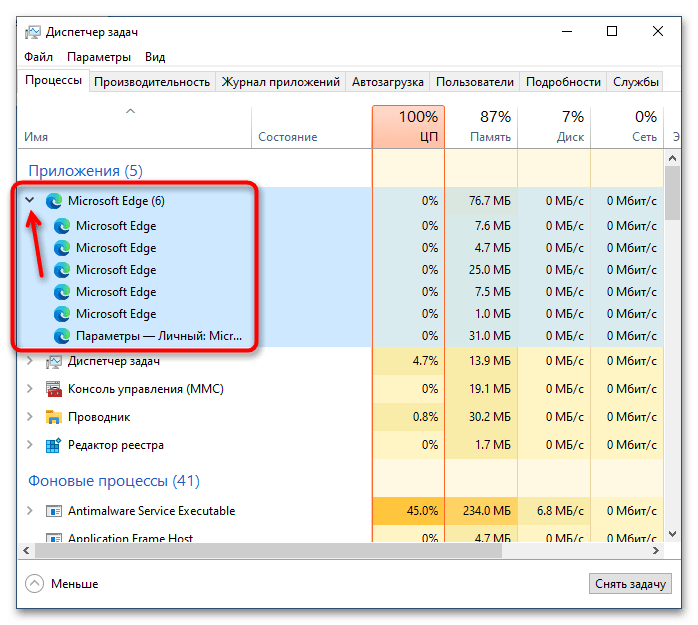
- Если слева от имени процесса располагается импровизированная стрелка, значит, процесс содержит один и более подпроцессов. Кликните по стрелке, чтобы просмотреть подпроцессы.

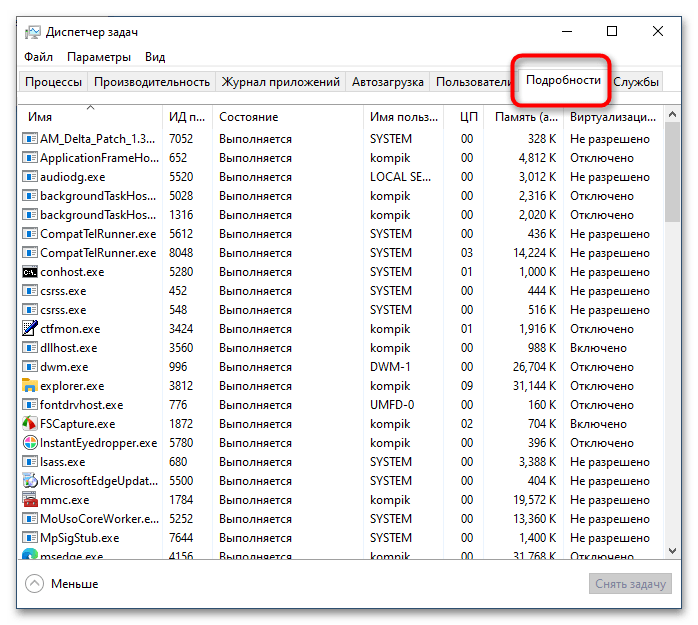
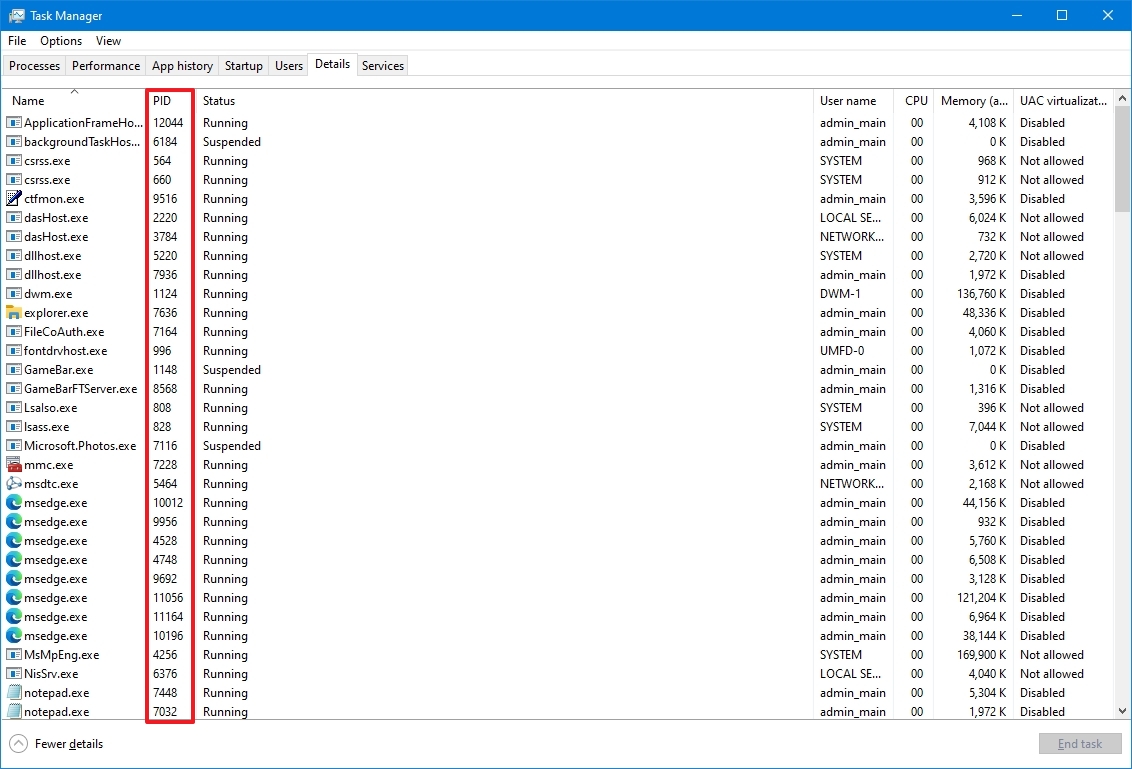
Просмотреть процессы в «Диспетчере задач» можно также на вкладке «Подробности». Здесь, помимо исполняемого файла процесса, для просмотра доступны такие данные, как его идентификатор, состояние, владелец, используемый объем памяти и название.
Способ 2: «PowerShell»
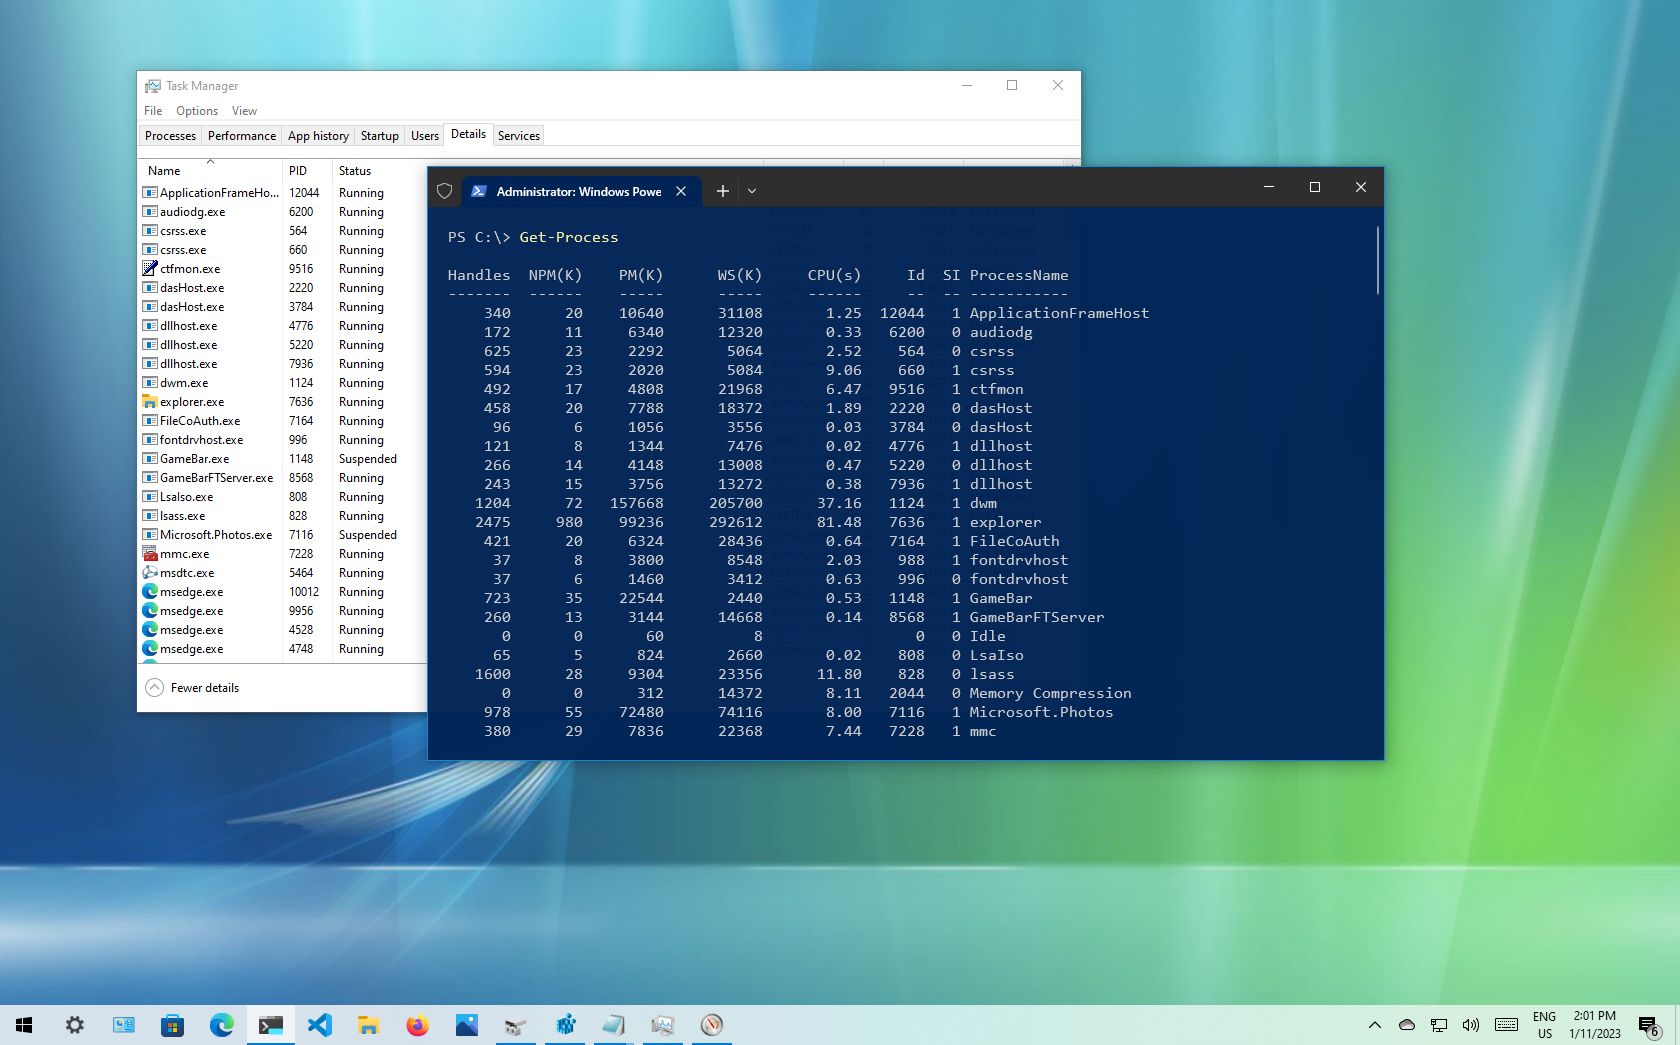
Вывести список запущенных процессов можно также с помощью консоли «PowerShell». Способ хорош тем, что позволяет получать дополнительные данные о процессах и гибко сортировать их при необходимости.
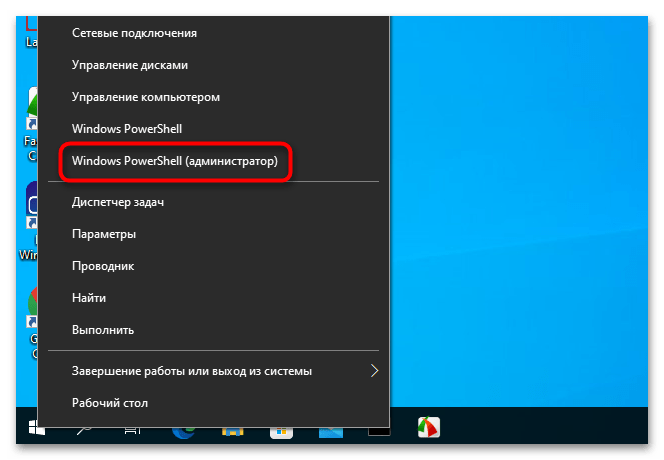
- Откройте консоль «PowerShell» от имени администратора из контекстного меню кнопки «Пуск».
- Введите в консоли команду
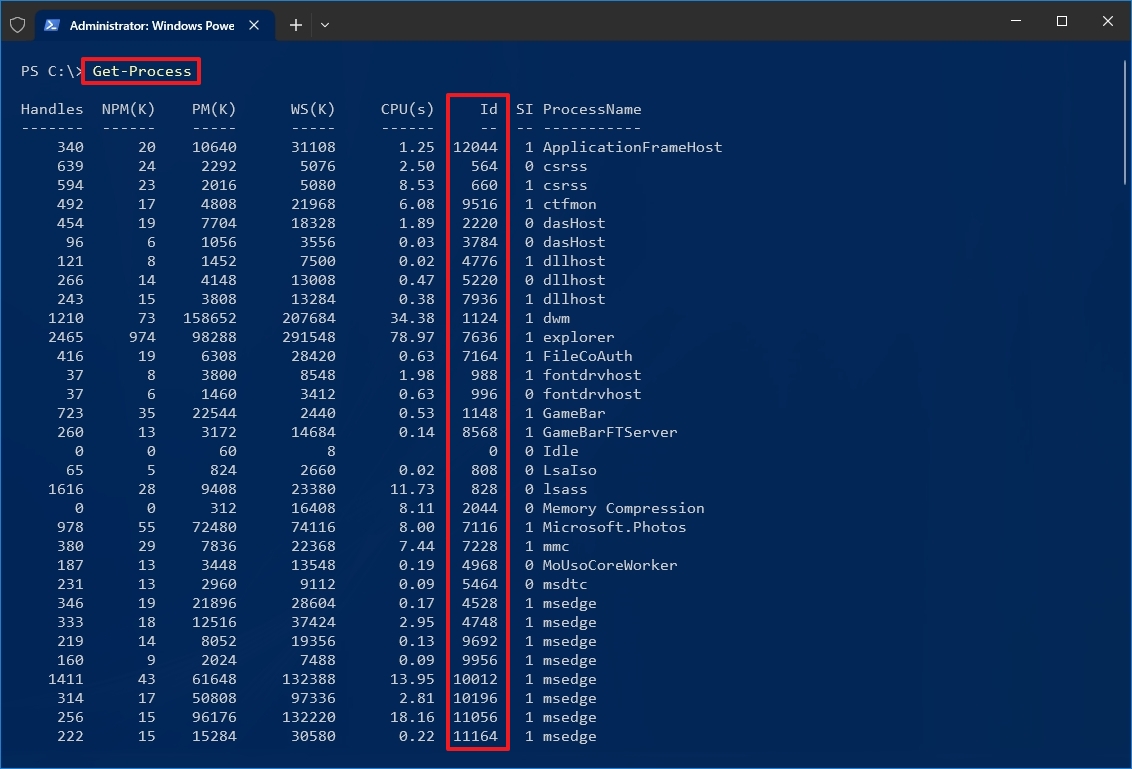
Get-Processи нажмите клавишу ввода.
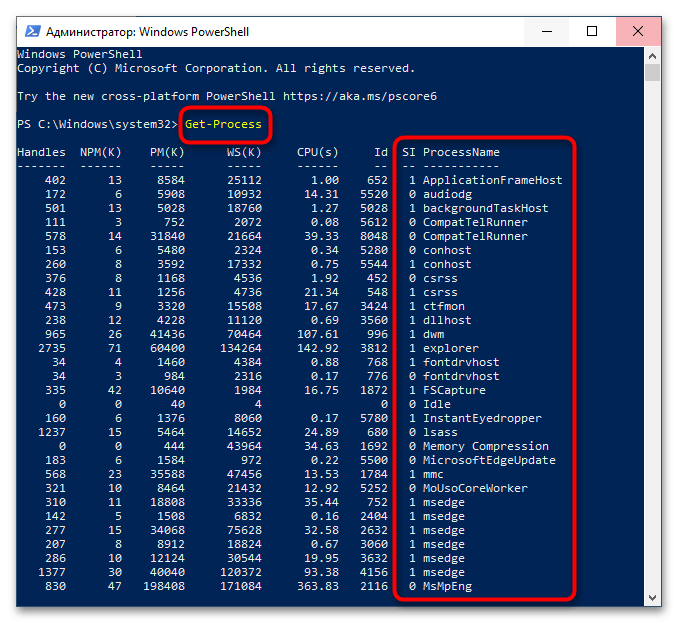
В результате вы получите список процессов с указанием таких свойств, как количество дескрипторов ввода («Handles»), выгружаемый и невыгружаемый размер данных процесса «(PM(K) и NPM(K))», объем используемой процессом памяти («WS(K)»), процессорное время («CPU(s)») и идентификатор («ID»). Имя процесса будет указано в столбце «ProcessName».
Способ 3: «Командная строка»
Для получения списка процессов сгодится и классическая «Командная строка», однако в этом случае вы получите несколько меньший объем свойств процессов.
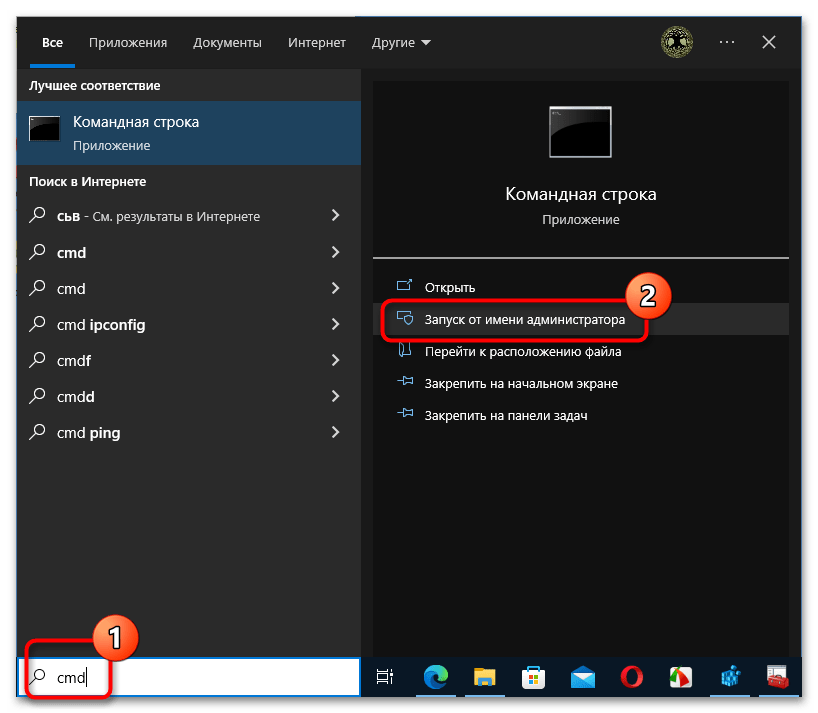
- Откройте «Командную строку» от имени администратора через поиск или другим известным вам методом.
Подробнее: Открытие «Командной строки» в Windows 10
- Выполните команду
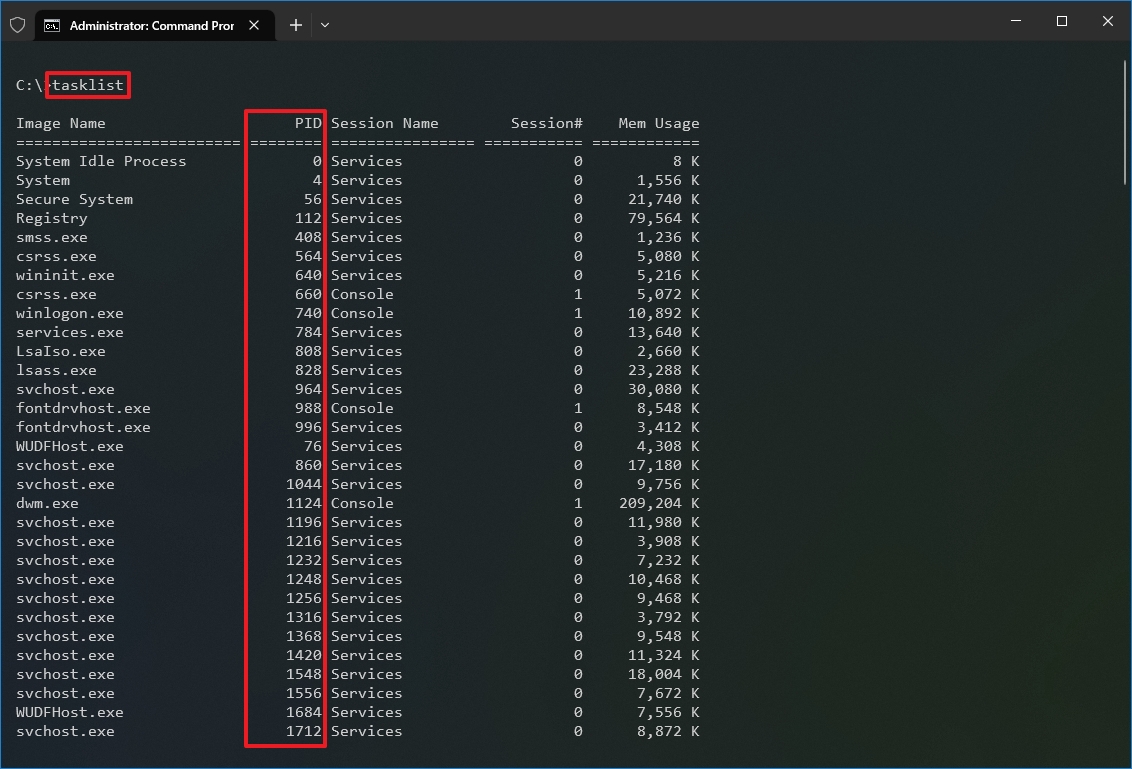
tasklist.

В результате, помимо названий процессов, вы получите следующие сведения: идентификаторы, имя сессии, номер сеанса и объем ОЗУ, потребляемый каждым процессом.
Способ 4: Сторонние приложения
Если вы хотите получить о запущенных процессах максимум деталей, лучше использовать специализированные сторонние программы, например Process Explorer — мощный бесплатный инструмент управления процессами.
Скачать Process Explorer с официального сайта
- Скачайте исполняемый файл утилиты procexp.exe или procexp64.exe и запустите.
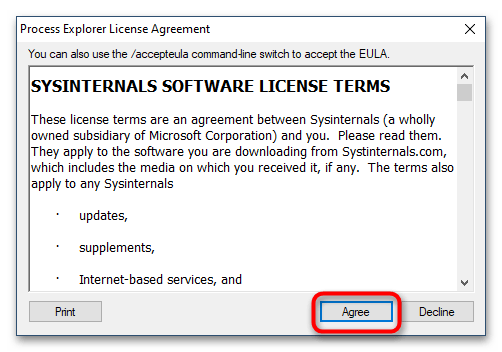
- Если до этого программа никогда не запускалась, вам будет предложено принять лицензионное соглашение.
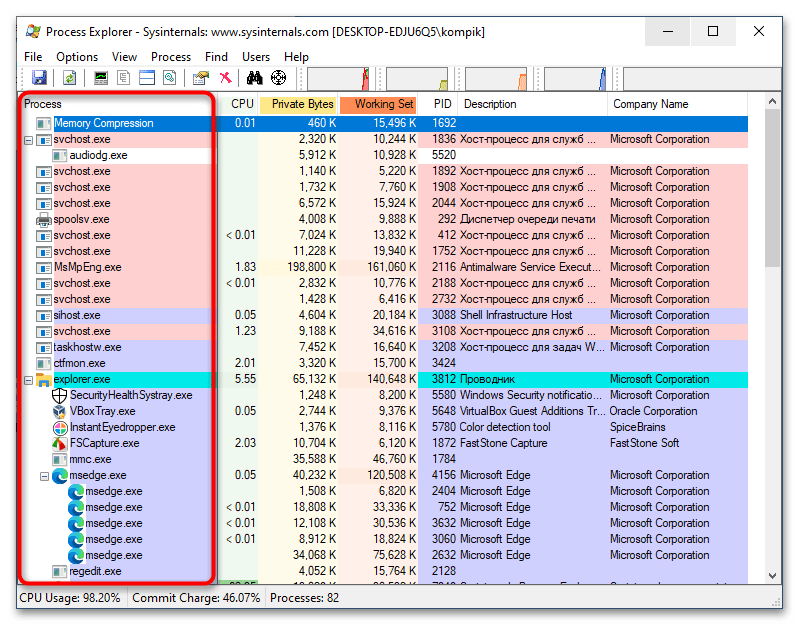
- В результате в левой колонке приложения будет выведен список всех запущенных на компьютере процессов. Если нужно просмотреть свойства процесса, кликните по нему два раза мышкой.
Одним лишь просмотром процессов и их свойств возможности Process Explorer не ограничиваются. С помощью этой небольшой портативной программы вы можете принудительно завершать работу процессов, изменять их приоритет, создавать дампы памяти, выявлять связанные динамические библиотеки, а также выполнять другие операции.
Наша группа в TelegramПолезные советы и помощь
(Image credit: Future)
On Windows 10, every process from an app or a service has an identification number known as a Process ID (PID). The PID has various uses, but mainly, it exists to identify each process across the system and programs running multiple instances (such as when editing two text files with Notepad).
Although users do not have to worry about the system processes, the ability to determine their specific system number can come in handy in many scenarios. For instance, when you need to debug an app. A program is stuck, and you must terminate the process manually. Or you need to check the system resources that a particular process is using.
Regardless of the reason, Windows 10 includes at least four ways to check the PID for any process running in the system using Task Manager, Resource Monitor, Command Prompt, and PowerShell.
This guide will walk you through the steps to identify the process identification number for an app or service on Windows 10.
How to determine Process ID from Task Manager
To check the Process ID for an app on Windows 10, use these steps:
- Open Start.
- Search for Task Manager and click the top result to open the app.
- Quick tip: You can also open the app by right-clicking the Taskbar and selecting the Task Manager option, right-clicking the Start button and selecting the Task Manager option, or using the «Ctrl + Shift + Esc» keyboard shortcut.
- Click the Details tab.
- Confirm the app’s Process ID in the PID column.
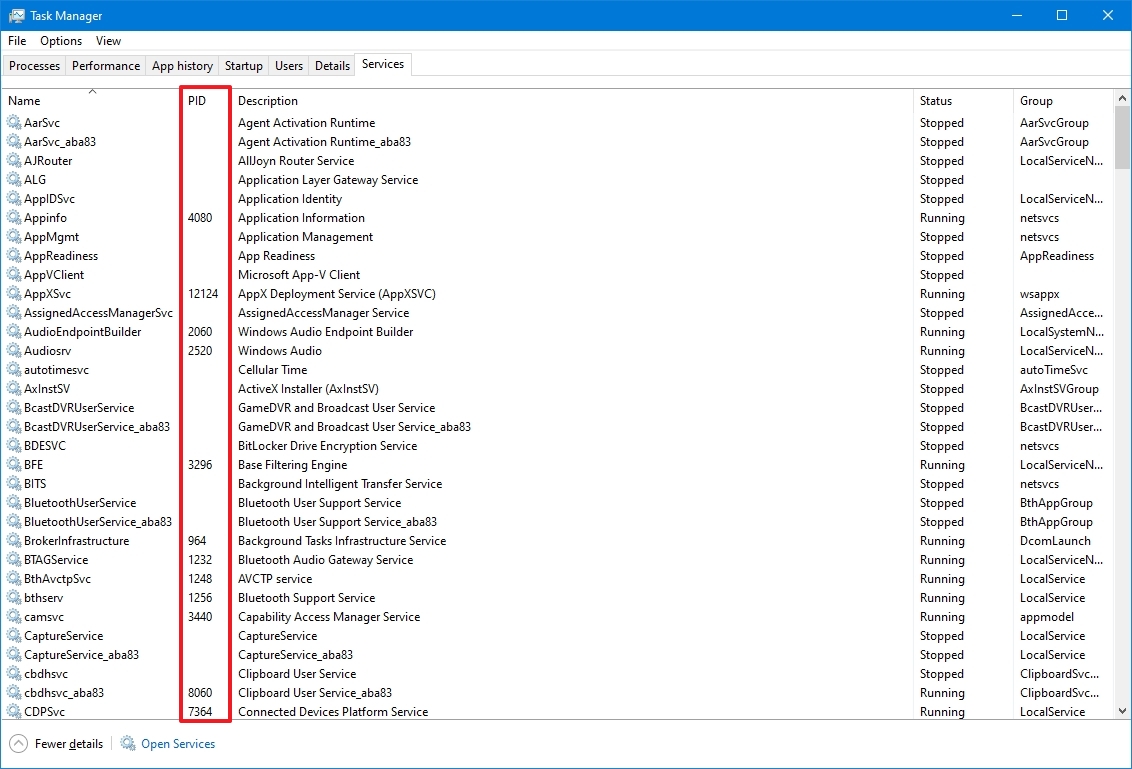
- Click the Services tab.
- Confirm the app’s Process ID in the PID column.
Once you complete the steps, you will know the process identification number for services and applications running and suspended on Windows 10.
How to determine Process ID from Resource Monitor
To find the Process ID for an app with the Resource Monitor console on Windows 10, use these steps:
All the latest news, reviews, and guides for Windows and Xbox diehards.
- Open Start.
- Search for Resource Monitor and click the top result to open the app.
- Click the Overview tab.
- Confirm the Process ID of apps and services in the PID column.
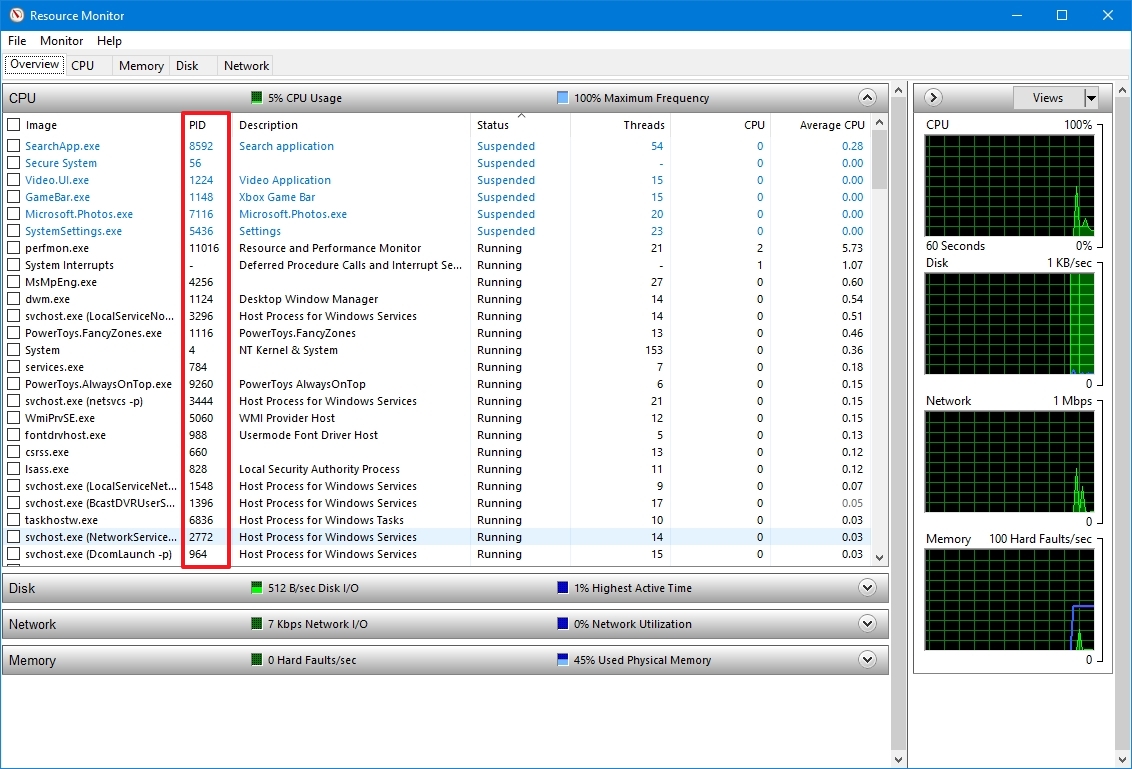
After you complete the steps, you will have an overview of the ID for the running and suspended processes.
How to determine Process ID from Command Prompt
To find out the ID of a process with commands on Windows 10, use these steps:
- Open Start.
- Search for Command Prompt and click the top result to open the terminal.
- Type the following command to view the Process ID list and press Enter: tasklist
- Type the following command to view a list of Process IDs for Microsoft Store apps and press Enter: tasklist /apps

- Type the following command to get the ID from the process name and press Enter: tasklist /svc /FI «ImageName eq PROCESS-NAME*»
In the command, make sure to replace PROCESS-NAME with the «.exe» name of the process. The * is a wildcard to match part of the name without having to type the exact name of the process. This example shows the processes for Notepad: tasklist /svc /FI «ImageName eq notepad*»

Once you complete the steps, the output will display the IDs for the processes running on the device.
How to determine Process ID from PowerShell
To determine the Process ID of an app or service with PowerShell, use these steps:
- Open Start.
- Search for PowerShell and click the top result to open the terminal.
- Type the following command to view the Process ID list and press Enter: Get-Process
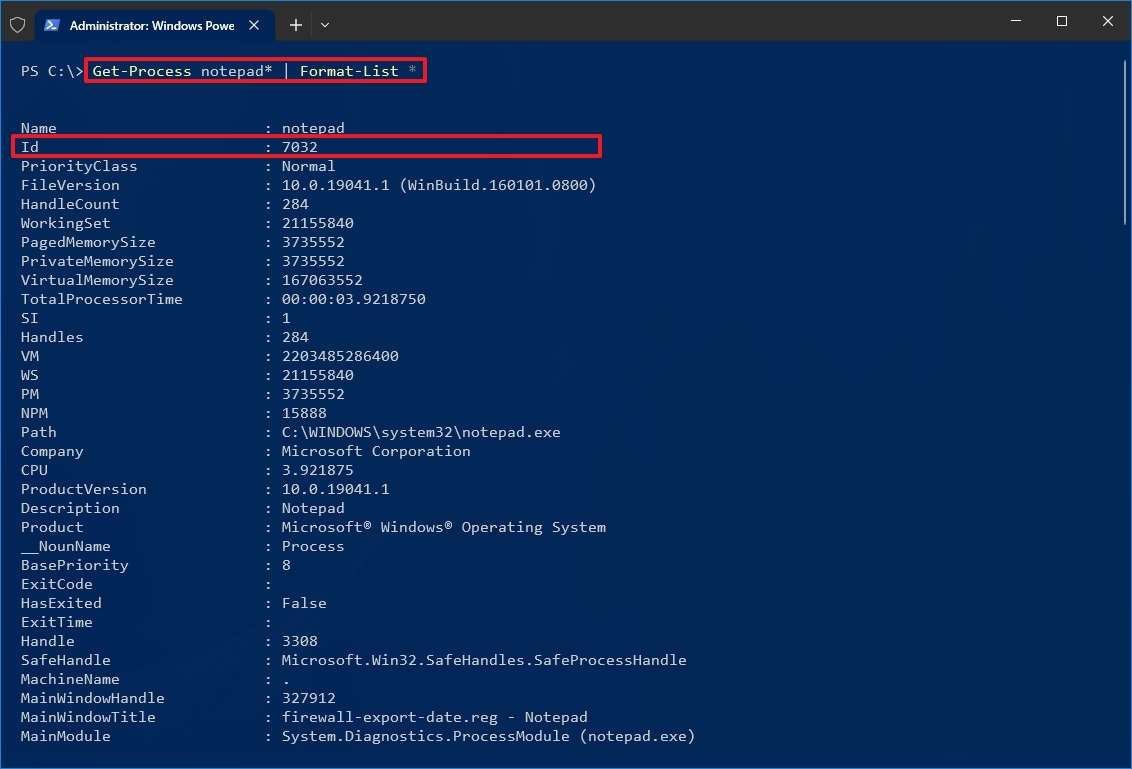
- Type the following command to view information (including ID) about a process and press Enter: Get-Process PROCESS-NAME* | Format-List *
In the command, make sure to replace PROCESS-NAME with the «.exe» name of the process. The * is a wildcard to match part of the name without having to type the exact name of the process. This example shows the Notepad Process ID and all the available information about the process: Get-Process notepad* | Format-List *
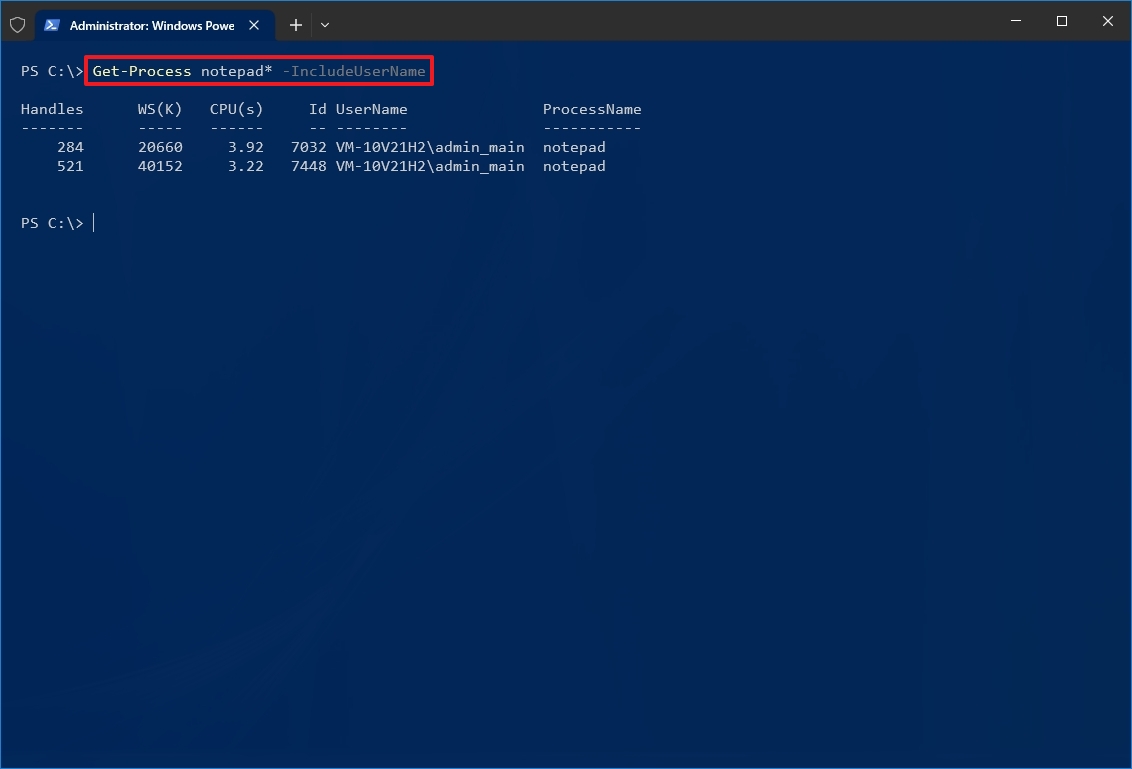
- Type the following command to determine the ID and owner of the process and press Enter: Get-Process PROCESS-NAME* -IncludeUserName
In the command, make sure to replace PROCESS-NAME with the «.exe» name of the process. The * is a wildcard to match part of the name without having to type the exact name of the process. This example shows the processes for Notepad: Get-Process notepad* -IncludeUserName
After you complete the steps, the PowerShell output will list the Process ID along with other information about the app or service.
More resources
For more helpful articles, coverage, and answers to common questions about Windows 10, visit the following resources:
- Windows 11 on Windows Central — All you need to know
- Windows 10 on Windows Central — All you need to know

Cutting-edge operating system
A refreshed design in Windows 11 enables you to do what you want effortlessly and safely, with biometric logins for encrypted authentication and advanced antivirus defenses.
Mauro Huculak has been a Windows How-To Expert contributor for WindowsCentral.com for nearly a decade and has over 15 years of experience writing comprehensive guides. He also has an IT background and has achieved different professional certifications from Microsoft, Cisco, VMware, and CompTIA. He has been recognized as a Microsoft MVP for many years.
Каждый запущенный процесс в Windows имеет свой числовой идентификатор — PID или ИД процесса, который может использоваться для обращения к конкретному процессу, например, для получения информации о нём или принудительного закрытия.
В этой инструкции несколько способов узнать PID процесса в Windows 11 или Windows 10, большинство из которых подойдут и для предыдущих версий системы.
ИД процесса в диспетчере задач
Быстрый и простой способ посмотреть PID процесса в графическом интерфейсе — использовать диспетчер задач Windows, для этого:
- Откройте диспетчер задач: вы можете использовать контекстное меню кнопки «Пуск», нажать клавиши Ctrl+Shift+Esc или использовать меню Ctrl+Alt+Delete для этого.
- В диспетчере задач переключитесь на вкладку «Сведения» (в Windows 11, переключение выполняется в меню) или «Подробности» (в Windows 10).

- Обратите внимание на столбец «ИД процесса» — это и есть нужный PID. Если столбец не отображается, нажмите по заголовку таблицы с процессами правой кнопкой мыши и используйте пункт «Выбрать столбцы», чтобы включить показ нужного столбца.


Для большинства пользователей этого метода будет достаточно для получения нужной информации.
Однако, если узнать PID запущенного процесса требуется при выполнении какого-либо пользовательского скрипта, могут пригодиться описанные в последней части инструкции методы его получения без использования графического интерфейса — в командной строке или PowerShell.
PID процесса в Мониторе ресурсов
Ещё один метод, очень похожий на предыдущий — использование встроенного инструмента «Монитор ресурсов»:
- Нажмите клавиши Win+R на клавиатуре, либо нажмите правой кнопкой мыши по кнопке «Пуск» и выберите пункт «Выполнить».
- Введите resmon в диалоговое окно «Выполнить» и нажмите Enter.
- Откроется окно «Монитор ресурсов» в нем, на вкладке «Обзор» вы увидите список процессов, распределенных по группам (использование ЦП, Диска, Сети и Памяти) с указанием их ИД в соответствующем столбце.


Process Explorer
Process Explorer — «продвинутый» диспетчер задач из Microsoft Sysinternals, скачать его можно как в комплекте с другими утилитами, так и отдельно с официального сайта.

После запуска утилиты, информацию о PID процесса вы сможете найти в одноименном столбце.
Командная строка
Получить PID процесса можно с помощью команд командной строки. Шаги будут следующими:
- Запустите командную строку, лучше — от имени администратора (как это сделать).
- Чтобы получить список всех процессов, включая информацию об их PID, введите команду
tasklist
и нажмите Enter.

- Для отображения только процессов с заданными именами файлов (в имени допустимы wildcard-символы, например, *) можно использовать следующую команду:
tasklist /FI "IMAGENAME eq имя_файла.exe"

- Вы можете вывести результат выполнения команды в текстовый файл, пример:
tasklist > C:\pid.txt


С помощью tasklist можно отфильтровать процессы и по другим свойствам, например, получить список только зависших программ, подробнее на тему получения списка не отвечающих программ — в этой статье.
Windows PowerShell или Терминал Windows
И ещё одна возможность для получения PID процессов — использование терминала Windows или PowerShell:
- Запустите Windows PowerShell или Терминал Windows, для этого можно использовать меню по правому клику на кнопке «Пуск».
- Базовый вариант команды:
Get-Process
выдаст список всех процессов, PID будет отображен в столбце Id

- Если в выводе требуется оставить информацию только об имени процесса и его ИД, используйте следующий синтаксис:
Get-Process | Format-Table -Property ProcessName,Id
- Команда для получения информации о PID процессов с указанным именем:
Get-Process | Where {$_.ProcessName -Like "Имя процесса"} | Format-Table -Property ProcessName,Id


На этом всё: надеюсь, подходящий для себя способ получить нужную информацию вы нашли. Знаете другие методы получения PID процессов в Windows? — буду рад вашему комментарию ниже.
Как узнать идентификатор процесса (PID или ИД…
Статья обновлена: 31 октября 2023
ID: 6325
Вы можете узнать идентификатор процесса (PID или ИД процесса) с помощью Диспетчера задач или командной строки.
Как узнать PID c помощью Диспетчера задач
Как узнать PID c помощью командной строки
Спасибо за ваш отзыв, вы помогаете нам становиться лучше!
Спасибо за ваш отзыв, вы помогаете нам становиться лучше!
Sign in to your MUO account
In Windows 10, every app, service, or process has an assigned number known as the Process ID. The Process ID (or PID) is mostly used to identify each running or suspended process within a system.
Knowing an app’s PID helps you identify programs running multiple instances, such as when editing two different files using the same app. Also, the PID helps you when you need to terminate a process manually or if you want to check system resources consumed by a certain process.
1. Use the Command Prompt
While you might use Command Prompt to troubleshoot Windows 10 issues, you can also use it to find an app Process ID. Here is how you can do it:
- In the Start menu search bar, search for command prompt and select Run as administrator.
- Type tasklist. Press Enter.
- Command Prompt will now display the PID for the running processes.
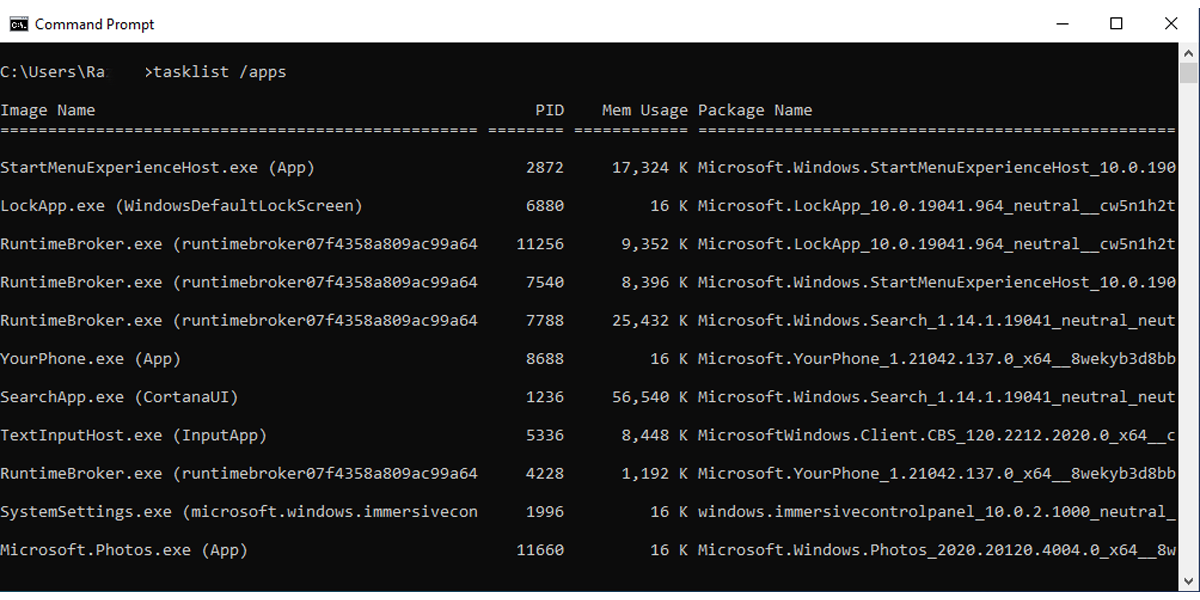
If you want to find out the Process ID for Microsoft Store apps, type tasklist /apps.
2. Use the Task Manager
Follow these steps to check the Process ID using Task Manager:
- Input task manager in the Start menu search bar, right-click the Best match, and select Run as Administrator. Or use the Ctrl + Shift + Esc keyboard shortcut.
- Select the Details tab.
- Check the number next to the app in the PID column.
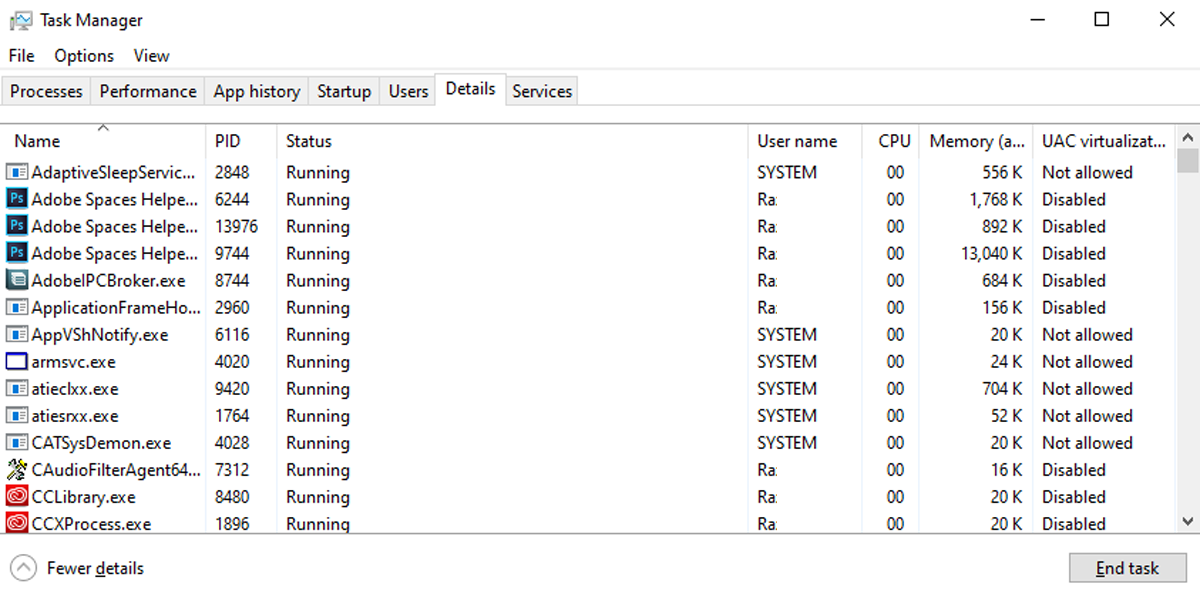
You can also find the PID is displayed within the Services tab.
3. Use PowerShell
Here is how you can check an app’s Process ID using PowerShell:
- In the Start menu search bar, search for powershell and select the Best match.
- Type Get-Process.
- Press Enter.
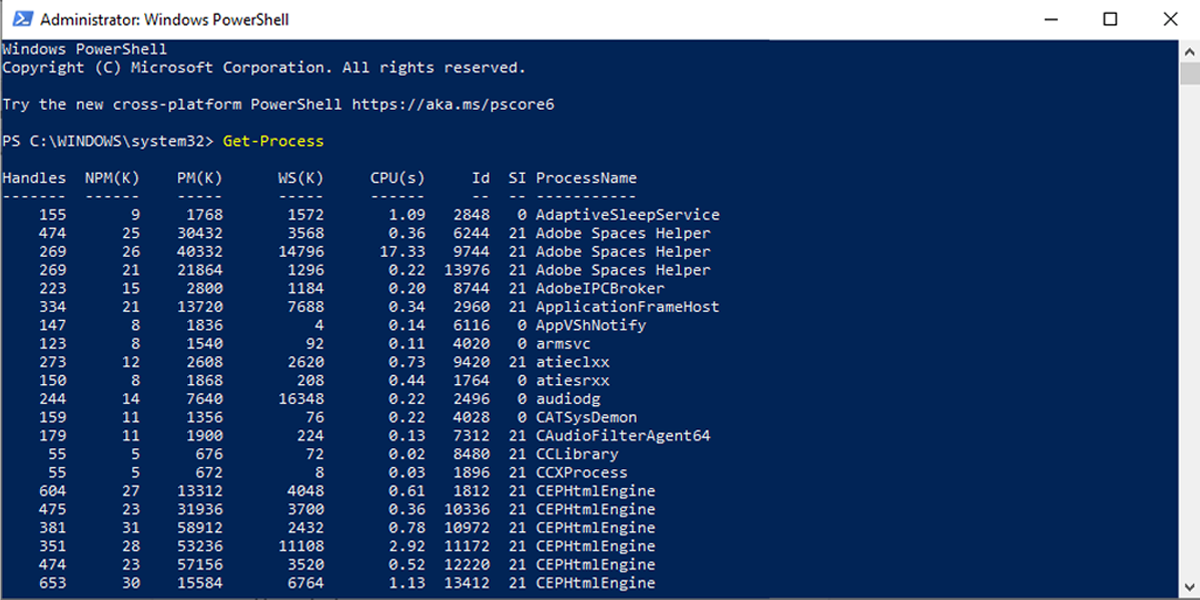
PowerShell will display a list of the app Process IDs together with more information about the apps.
4. Use the Resource Monitor
Resource Monitor is a Windows 10 feature that allows you to check information about hardware and software on your device. Also, you can use it to check an app Process ID easily. Here is how you can do it:
- Input resource monitor in the Start menu search bar. Right-click the Best match and select Run as Administrator.
- Select the CPU tab.
- Check the number next to the app in the PID column.
The Resource Monitor also displays if an app is running or is suspended through the Status column.
If you need to check an app’s Process ID, Windows 10 has at least four ways you can do that. You can use Command Prompt, Task Manager, PowerShell, or Resource Monitor—thankfully, they’re all easy to use.